

Page 1
QUICK REFERENCE
Fast MicroSEQ™ 500 16S rDNA Identification
Catalog Numbers 4370489 (PCR kit) and 4346480 (Sequencing kit)
Pub. No. 4393012 Rev. D
Note: For safety and biohazard guidelines, see the “Safety” appendix in the Fast MicroSEQ™ 500 16S rDNA Identification User Guide
(Pub. No. 4393007). Read the Safety Data Sheets (SDSs) and follow the handling instructions. Wear appropriate protective eyewear,
clothing, and gloves.
Procedures
Isolate genomic DNA from
1
samples
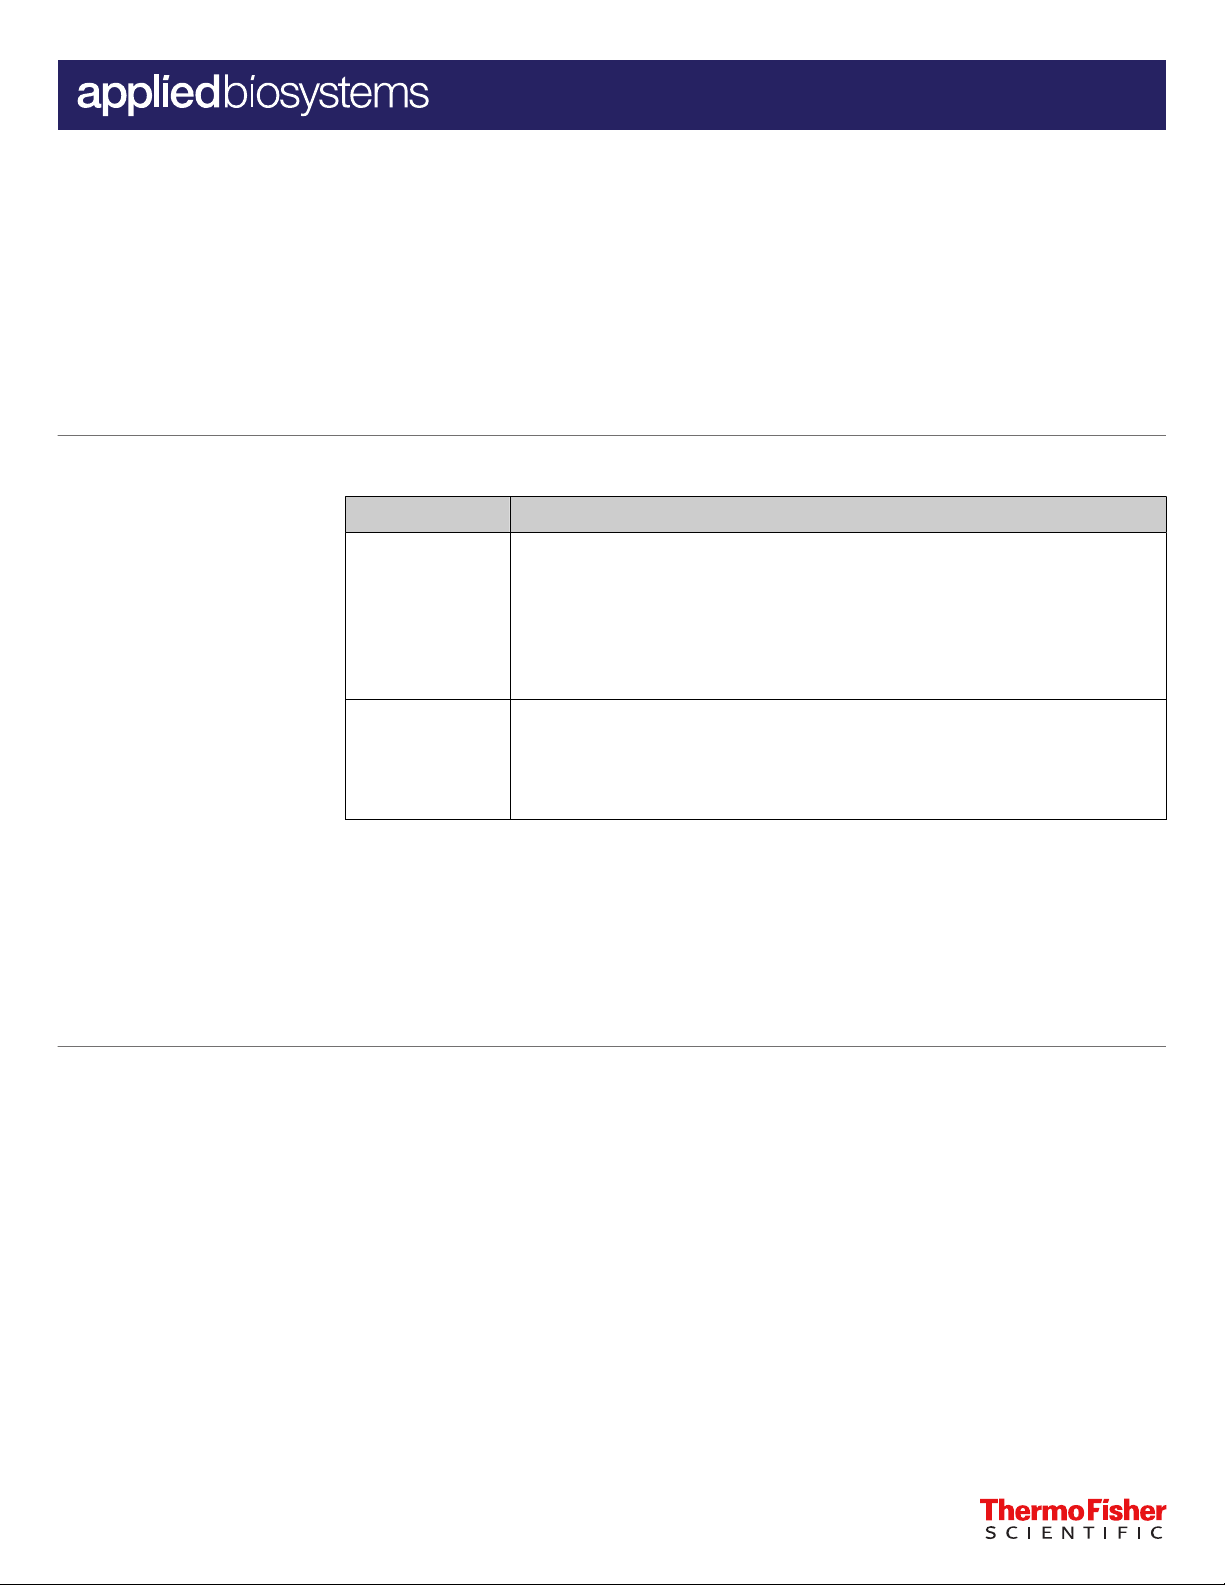
a. Obtain the sample, then add PrepMan™ Ultra Sample Preparation Reagent:
If starting from a ... Follow this procedure ...
Culture broth
Culture plate
b. Vortex the sample for 10 to 30 seconds.
c. Heat the sample for 10 minutes at 100°C in a heat block, then cool the sample to room
temperature for 2 minutes.
d. Centrifuge the sample for 2 minutes in a microcentrifuge at maximum speed.
e. Transfer 50 µL of the supernatant into a new microcentrifuge tube.
1. Pipet 1 mL of culture broth (containing less than 107 cfu/mL of bacteria) into a
new 2-mL screw-cap microcentrifuge tube or any other microcentrifuge tube that
can be tightly closed.
2. Centrifuge the sample for 2 minutes in a microcentrifuge at maximum speed.
Aspirate and discard the supernatant.
3. Add 100 µL of PrepMan™ Ultra Sample Preparation Reagent, then close the cap
tightly.
1. Select a small sample amount (2–3 mm) from an isolated colony by using a 1 µL
loop or the straight end of a 1 µL loop.
2. Suspend the cells in 100 µL of PrepMan™ Ultra Sample Preparation Reagent in a
2-mL screw-cap microcentrifuge tube or any other microcentrifuge tube that can
be tightly closed.
Dilute genomic DNA for
2
PCR
a. Pipet 495 μL of nuclease‐free water into a 1.5‐mL microcentrifuge tube.
b. Add 5 μL of the PrepMan™ Ultra supernatant to obtain a 1:100 dilution.
Note: If the PrepMan™ Ultra supernatant is colored (typically a shade of black or green), see
“Troubleshooting” in the Fast MicroSEQ™ 500 16S rDNA Identification User Guide.
For Research Use Only. Not for use in diagnostic procedures.
Page 2
Prepare the PCR reactions
3
a. Vortex the diluted supernatant to mix the tube contents.
b. Using the volumes that are shown in the table, prepare samples and controls in MicroAmp
reaction tubes or 96‐well plates.
Reaction type Volume for one reaction
Negative controls
• 15 μL FAST PCR Master Mix
• 15 μL negative control (provided with kit)
™
Perform the amplification
4
run
Samples
Positive controls
c. Use strip caps and the capping tool, or adhesive film and the sealing tool, to cap the tubes or
plate. Vortex, centrifuge briefly, then place the tubes or the plate in the thermal cycler.
a. Set the appropriate ramp mode for your thermal cycler:
• Veriti™ 96‑Well Thermal Cycler—Default
• (3500/3500xL only) 9800 Fast Thermal Cycler—Fast (F96)
• (3500/3500xL only) GeneAmp™ PCR System 9700—Maximum (Max)
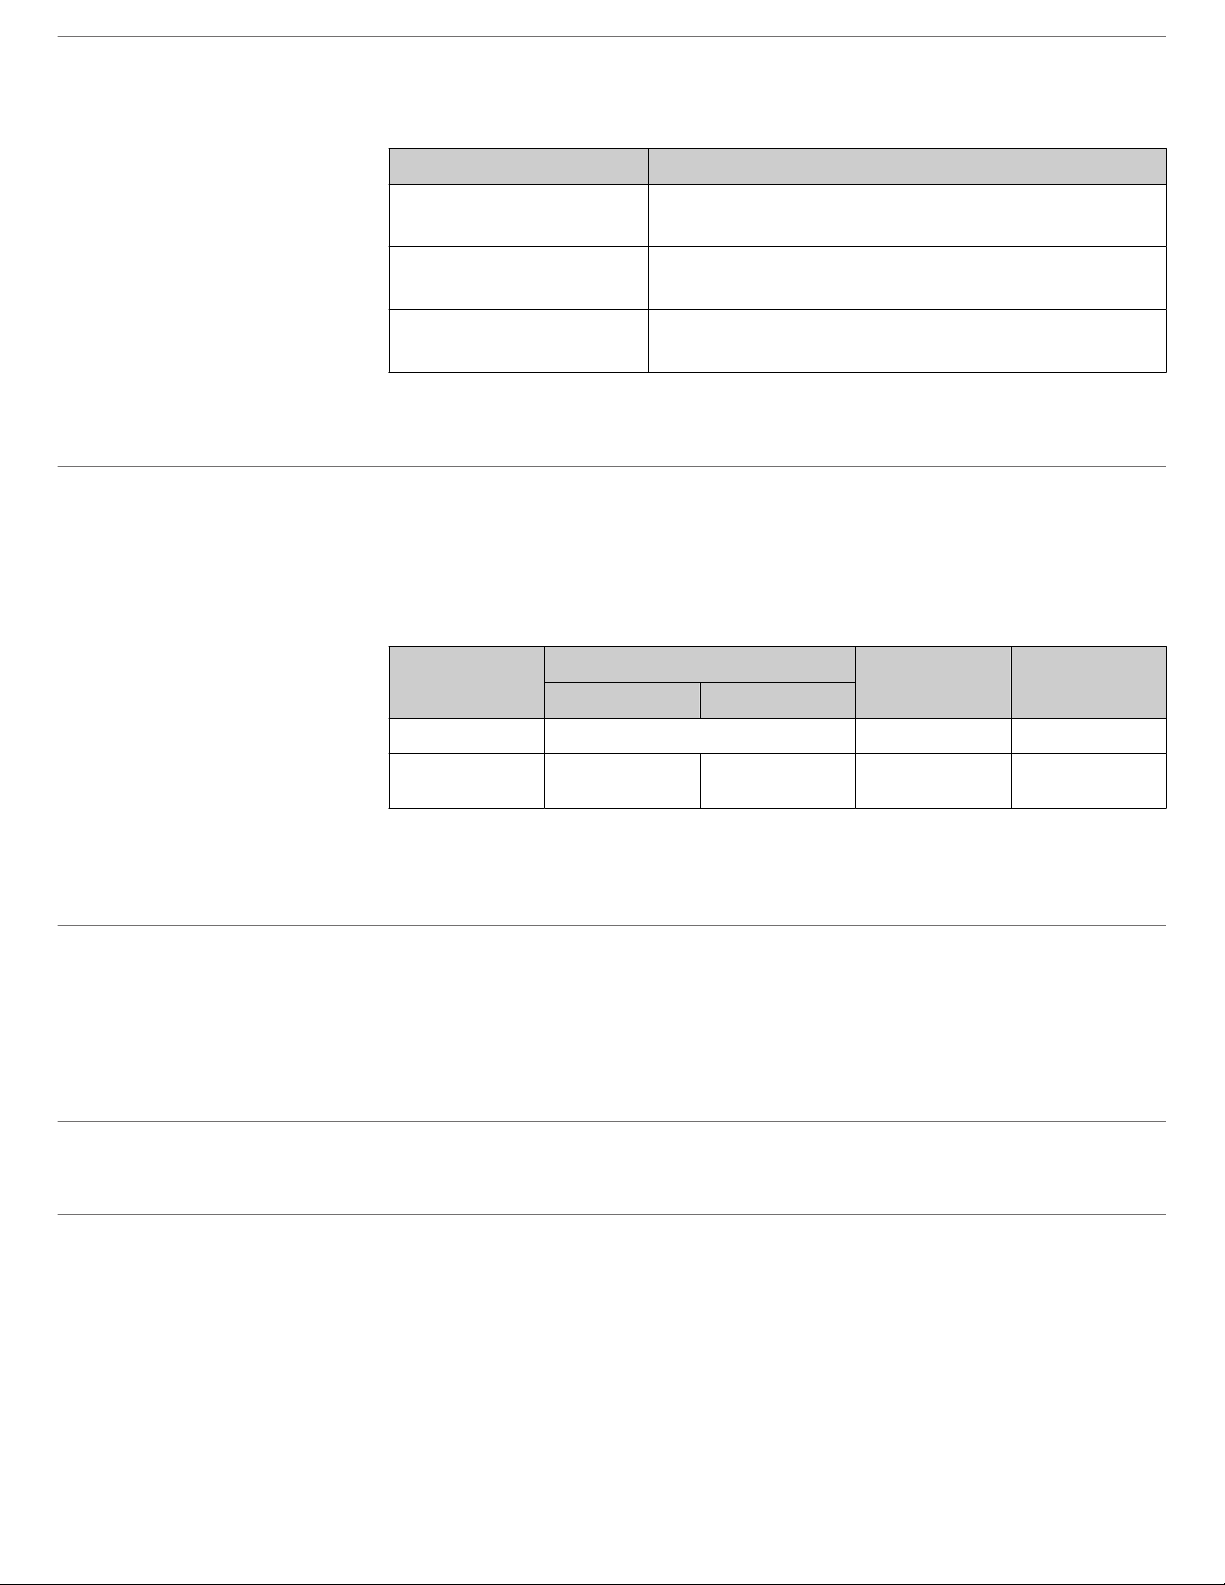
b. Set the thermal cycling conditions:
Initial step
HOLD CYCLE HOLD HOLD
95°C
10 seconds
c. Set the reaction volume to 30 μL, then start the run.
Melt Anneal
95°C
0 seconds
• 15 μL FAST PCR Master Mix
• 15 μL of 1:100 dilution of PrepMan® Ultra supernatant
• 15 μL FAST PCR Master Mix
• 15 μL positive-control DNA (provided with kit)
Each of 30 cycles
64°C
15 seconds
Final extension Final step
72°C
1 minute
4°C
∞
(Optional) Analyze PCR
5
products
Purify PCR products for
6
cycle sequencing
Prepare cycle sequencing
7
reactions
d. Before removing the caps or adhesive film, briefly centrifuge the tubes or plate.
a. Load 5 μL of PCR product per lane on a 2% agarose gel separation (such as E‑Gel™ available
from thermofisher.com), or prepare your own gel.
b. Use the Mass Standard Ladder to estimate the PCR product yield. In a positive control or
sample, a single fragment ranging from 460 to 560 bp in size should be detected on a gel. Actual
fragment size depends on the bacterial species. No product should be visible in a negative
control reaction.
Remove unused dNTPs and primers from each PCR product with ExoSAP-IT™ Express PCR Product
Cleanup Reagent (Cat. No. 75001).
a. Before you remove the tube or plate caps, briefly centrifuge the purified PCR products.
b. In reaction tubes or a 96‐well plate, prepare separate forward‐ and reverse-sequencing reactions
for each PCR product and control:
• Forward‐sequencing reaction—Combine 7 μL of purified PCR product or control with 13
μL forward sequence mix.
• Reverse‐sequencing reaction—Combine 7 μL of purified PCR product or control with 13
μL reverse sequence mix.
2 Fast MicroSEQ
™
500 16S rDNA Identification Quick Reference
Page 3

Perform the cycle
8
sequencing run
a. Cap the tubes or the plate, then place the tubes or the plate in the thermal cycler.
b. Set the appropriate ramp mode for your thermal cycler:
• Veriti™ 96‑Well Thermal Cycler—Default
• (3500/3500xL only) 9800 Fast Thermal Cycler—Fast (F96)
• (3500/3500xL only) GeneAmp™ PCR System 9700—Maximum (Max)
c. Set the thermal cycling conditions:
Purify extension products
9
Initial step
HOLD CYCLE HOLD
96°C
1 minute
Melt Anneal Extend
96°C
10 seconds
Each of 25 cycles
50°C
5 seconds
60°C 1 minute
15 seconds
Final step
4°C
∞
d. Set the reaction volume to 20 μL, then start the run.
e. Before removing the tube or plate caps, briefly centrifuge the extension products.
After cycle sequencing, use one of the following products to remove excess dye terminators,
non‑incorporated nucleotides, and primers from the extension products. Select an appropriate
purification product depending on whether you performed cycle sequencing in tubes or a plate.
Follow the guidelines and procedures that are supplied with the kits.
For cycle sequencing
8-strips kit
96-well plates
[1]
Contact your local MicroSEQ™ ID representative for additional options.
in ...
• MicroSEQ™ ID Purification Combo Kit v2.0 8-strips Kit (includes ExoSAP-IT
Express PCR Product Cleanup Reagent) , Cat. No. A35854
or
• MicroSEQ™ ID Ultra Sequencing 8-strips Kit, Cat. No. A33246
• MicroSEQ™ ID Purification Combo Kit v2.0 (includes ExoSAP-IT™ Express
PCR Product Cleanup Reagent) , Cat. No. A35852
or
• MicroSEQ™ ID Ultra Sequencing Cleanup Plates Kit, Cat. No. A33245
Purify using ...
[1]
™
Configure the instrument
10
for electrophoresis
Prepare samples and
11
perform electrophoresis
Configure the instrument as described in the following table:
Instrument Procedure
SeqStudio
3500/3500xL
IMPORTANT! If the electrophoresis run time is longer than 12 hours on the SeqStudio
1. Create a run in the MicroSEQ™ ID Software For SeqStudio™ Genetic Analyzer by
clicking Create MicroSEQ ID Run or Open MicroSEQ ID Template on the home
screen.
2. Export the plate to the network drive.
3. Import the plate to the SeqStudio™ Genetic Analyzer.
1. Create a run in the MicroSEQ™ ID software v3.0 (or later) by clicking Create
MicroSEQ ID Run or Open MicroSEQ ID Template on the home screen.
2. Save the run.
™
Genetic
Analyzer or 48 hours on the 3500/3500xL Genetic Analyzer (for example, if you are injecting more than
48 wells on the SeqStudio™ Genetic Analyzer or more than 192 wells on the 3500/3500xL Genetic
Analyzer), see "Prevent evaporation during electrophoresis" in the Fast MicroSEQ™ 500 16S rDNA
Identification User Guide.
Fast MicroSEQ™ 500 16S rDNA Identification Quick Reference 3
Page 4

Prepare samples
11
and perform
electrophoresis
(continued)
a. Before removing the tube caps or plate cover, briefly centrifuge the extension products.
b. Prepare reactions using a 1:1 ratio of purified extension product and formamide:
1. In a 96-well plate, pipette 10 µL Hi‑Di™ Formamide into each well to which you add purified
extension products or controls.
2. Pipette 10 µL Hi‑Di™ Formamide into each blank well that is injected together with the
samples.
3. Add 10 µL of purified extension product or control to each well filled in step 2a, then mix by
pipetting up and down.
c. Cover the plate, centrifuge, then load the plate into your instrument. Start the run.
d. When the run is complete, review the data using the MicroSEQ™ ID software (3500/3500xL) or
MicroSEQ™ ID Software For SeqStudio™ Genetic Analyzer.
Limited product warranty
Life Technologies Corporation and/or its aliate(s) warrant their products as set forth in the Life Technologies' General Terms and
Conditions of Sale at www.thermofisher.com/us/en/home/global/terms-and-conditions.html. If you have any questions, please
contact Life Technologies at www.thermofisher.com/support.
Life Technologies Ltd | 7 Kingsland Grange | Woolston, Warrington WA1 4SR | United Kingdom
For descriptions of symbols on product labels or product documents, go to thermofisher.com/symbols-definition.
The information in this guide is subject to change without notice.
DISCLAIMER: TO THE EXTENT ALLOWED BY LAW, THERMO FISHER SCIENTIFIC INC. AND/OR ITS AFFILIATE(S) WILL NOT BE LIABLE FOR SPECIAL, INCIDENTAL, INDIRECT,
PUNITIVE, MULTIPLE, OR CONSEQUENTIAL DAMAGES IN CONNECTION WITH OR ARISING FROM THIS DOCUMENT, INCLUDING YOUR USE OF IT.
Revision history: Pub. No. 4393012
Revision Date Description
D 11 January 2021 Update for the launch of MicroSEQ™ ID Software For SeqStudio™ Genetic Analyzer v1.0
C 13 December 2018 Update template and legal information.
Important Licensing Information: These products may be covered by one or more Limited Use Label Licenses. By use of these products, you accept the terms and conditions of all
applicable Limited Use Label Licenses.
©2021 Thermo Fisher Scientific Inc. All rights reserved. All trademarks are the property of Thermo Fisher Scientific and its subsidiaries unless otherwise specified.
(Cat. No. A49382).
Update the list of purification products in “Purify extension products” on page 3.
Correct PRC kit catalog number.
thermofisher.com/support | thermofisher.com/askaquestion
thermofisher.com
11 January 2021
 Loading...