

Page 1
Care and Use Manual
5
4
6
PANEL
LOCK
3
7
PAN
ZONE
2
8
SIZE
SMART™
1
9
POWER
KEEP
WARM
CEP304 CEP365
5
4
6
PANEL
LOCK
3
7
ZONE
PAN
2
8
SMART™
SIZE
1
9
POWER
KEEP
WARM
5
4
6
PANEL
LOCK
3
7
PAN
ZONE
2
8
SIZE
SMART™
1
9
POWER
KEEP
WARM
CEP456
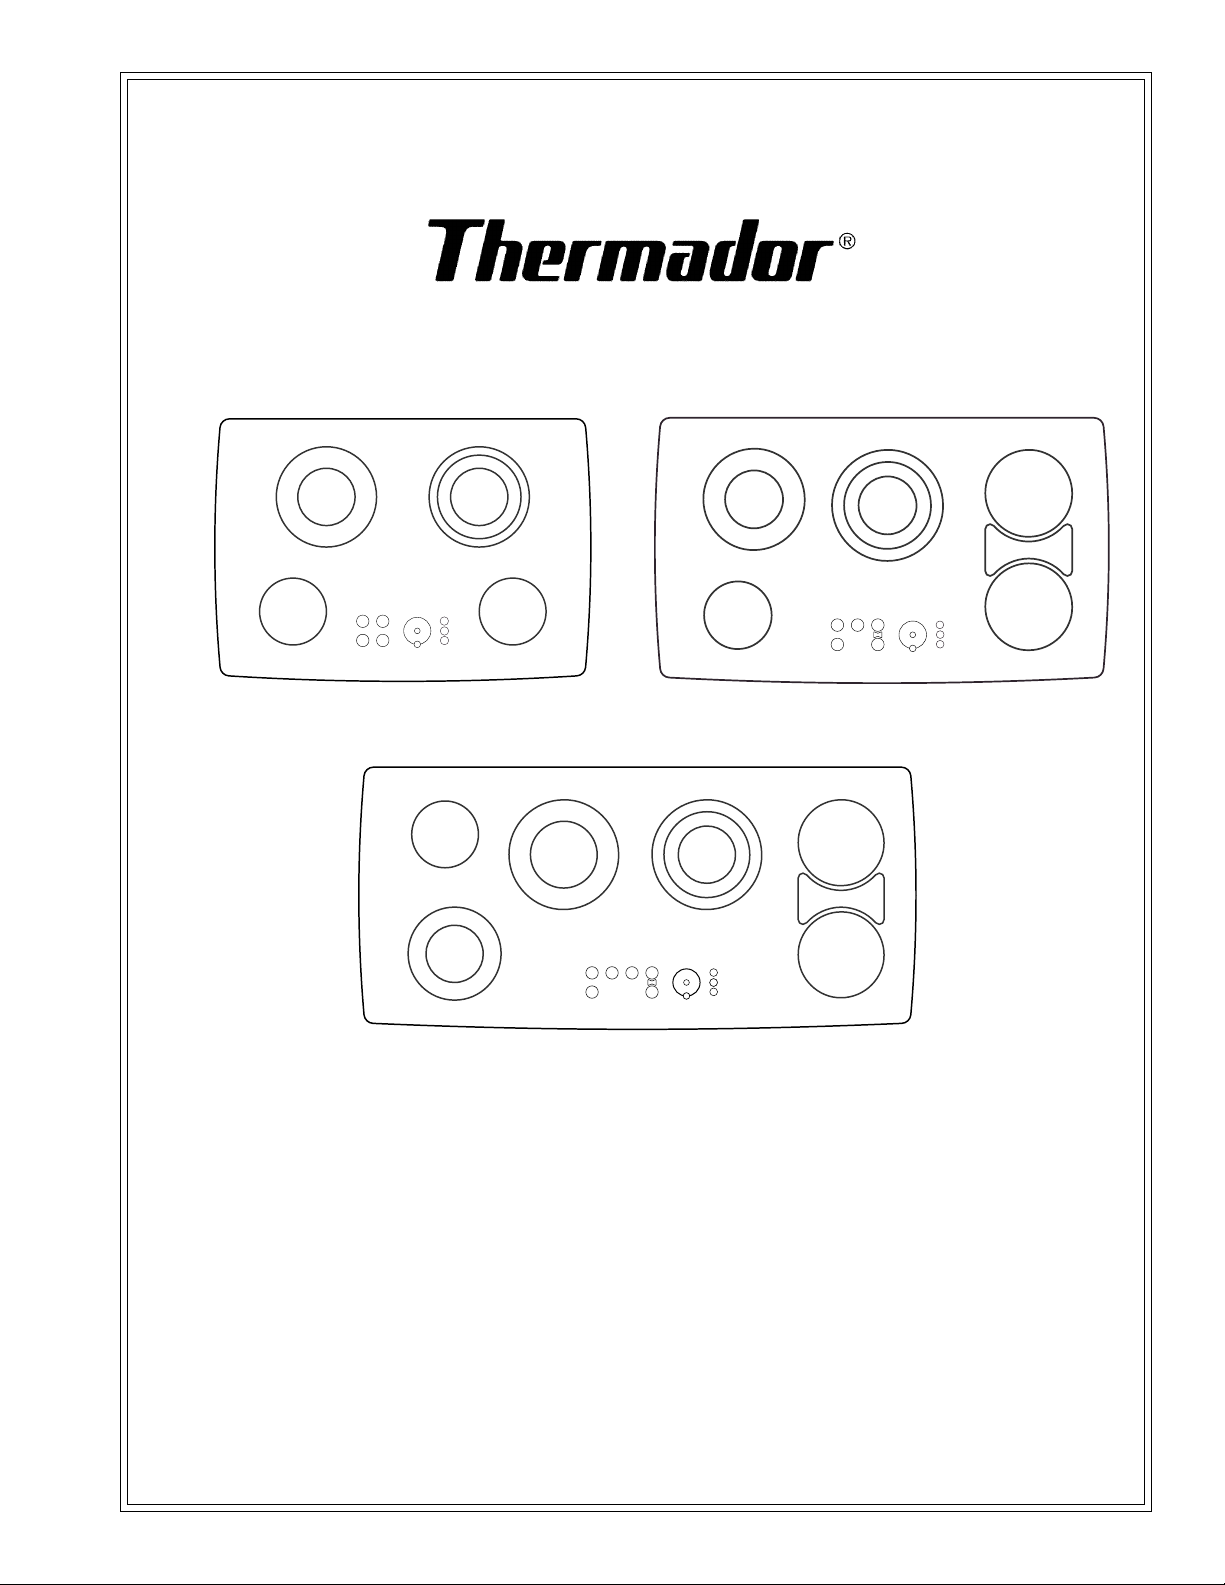
Thermador Glass Ceramic Cooktops
Models: CET304, CET365,
CEP304, CEP365, CEP456
Page 2

A Special Message
to Our Customers
Thank you for selecting the Thermador Glass Ceramic
Touch Control Cooktop. We recommend that you take time
to read this manual prior to using your cooktop for the first
time.
This booklet contains suggestions that will be helpful as well as
directions for using all the features on your cooktop. Keep it
handy, as it has answers to the questions that may occur when
you start to cook.
The information in this manual will help you easily operate and
care for your cooktop for years of satisfaction.
If you have any questions, please contact us at 1-800-735-4328.
For additional information, visit our website at
www.thermador.com or write to us at:
Thermador
Customer Support Call Center
5551 McFadden Avenue
Huntington Beach, CA 92649
Sincerely,
Test Kitchen Consumer Scientists
Page 3

CET/CEP Cooktop Care and Use Manual
Table of Contents
Important Safety Instructions ...... 2-3
Safety Precautions in French........ 4-5
Cooktop Models ................................. 6
Cooktop Controls .............................. 7
Cooktop Operating Instructions ...... 8
Before Using Cooktop for First Time......... 8
Precautions for Long Life and
Good Appearance of the Surface: ................ 8
Indicator Lights ................................................. 8
Retained Heat ................................................... 8
Locking the Cooktop ...................................... 8
The Elements .....................................9
Radiant Elements ..............................................9
Dual Element ..................................................... 9
Triple Element................................................... 9
Setting the Controls - CET Models .. 11
Using Proper Cookware .................12
Cookware Characteristics ...........................12
To test the flatness of your pans:............... 12
Specialty pans ..................................................12
Custom Accessory Griddle .........................12
Using Proper Cookware ..............................12
Heat Settings for Radiant and
Bridge Elements............................... 13
Cleaning Guide.................................14
Before Use Care............................................. 14
Recommended Cleaners ..............................14
Avoid These Cleaners ...................................14
Daily Cleaning Techniques ........................... 14
How to use a Razor Blade Scraper............ 14
®
Use Cooktop Cleaning Creme
Daily.......14
Bridge Element .................................................. 9
Bridge Operation ............................................. 9
Keep Warm ....................................................... 9
Keep Warm Guidelines .................................. 9
Temperature Limiters ..................................... 9
Setting the Controls - Z
Pan Sensing and Sizing Guidelines ..............10
Using a single element................................... 10
Using a dual or triple element..................... 10
To change cook settings when cooking:... 11
To turn off the Zone Smart™ feature: ......11
ONE SMART
™...10
Special Care Chart ........................15
Troubleshooting............................... 16
Thermador Cooktop Warranty ..... 17
Packaged with Cooktop
Care and Use Manual
Installation Instructions
Cooktop Cleaning Creme
®
Razor Blade Scraper
Mounting Brackets
Registration Card
Foam Tape Seal
PAGE 1
Page 4
CET/CEP Cooktop Care and Use Manual
IMPORTANT SAFETY INSTRUCTIONS
!
READ ALL INSTRUCTIONS BEFORE USING YOUR COOKTOP
!
WARNING
IF THE INFORMATION IN THIS
MANUAL IS NOT FOLLOWED
EXACTLY, A FIRE OR EXPLOSION MAY
RESULT CAUSING PROPERTY
DAMAGE, PERSONAL INJURY OR
DEATH.
!
WARNING
TO REDUCE THE RISK OF INJURY TO
PERSONS, IN THE EVENT OF A
COOKTOP GREASE FIRE, OBSERVE
THE FOLLOWING:
• DO NOT USE WATER, including wet dishcloths
or towels, on grease fires. A violent steam
explosion may result.
• SMOTHER FLAMES from a grease fire with a
close-fitting lid, cookie sheet, or other metal tray.
Turn off the electric element. BE CAREFUL TO
PREVENT BURNS. If the flames do not go out
immediately, EVACUATE AND CALL THE
FIRE DEPARTMENT.
• SMOTHER FLAMES from other types of food
fires with baking soda. Never use water on cooking
fires.
• NEVER PICK UP A FLAMING PAN. You may
be burned.
• LEAVE
when flambéing food.
• ALWAYS
DETECTOR NEAR THE KITCHEN.
• USE
1. You have a Class ABC extinguisher and know how
to operate it.
2. The fire is small and contained in the area where
it started.
3. The fire department is being called.
4. You can fight the fire with your back to an exit.
THE HOOD VENTILATOR ON
HAVE A WORKING SMOKE
AN
EXTINGUISHER ONLY IF:
!
WARNING
!
TO REDUCE THE RISK OF FIRE,
ELECTRIC
PERSONS,
• Use this unit only in the manner intended by the
manufacturer. If you have any questions, contact
the manufacturer.
• Before servicing unit, switch power OFF at service
panel and lock service panel to prevent power from
being switched on accidentally.
• Do not cook on a cooktop in which the glass top
has broken. If the cooktop glass should break, do
not use it or attempt to clean or fix it. Cleaning
solutions and spill overs may penetrate the broken
cooktop and create a risk of electric shock. Turn
off electric circuit to the cooktop and call an
authorized service agency immediately.
DO NOT STORE ITEMS OF INTEREST
TO CHILDREN ABOVE THE COOKTOP
OR AT THE BACK OF IT. IF CHILDREN
CLIMB ONTO THE COOKTOP TO
REACH THESE ITEMS, THEY COULD
BE SERIOUSLY INJURED.
• Children and pets should not be left alone or
unattended in an area where appliances are in use.
They should never be allowed to sit or stand on
any part of appliance.
Do not store flammable materials on or
near the cooktop.
• When using the cooktop, DO NOT TOUCH
THE HOT COOKING AREA OR THE
IMMEDIATE
though dark in color, these areas may be hot. Areas
adjacent to the elements may become hot enough
to cause burns. Never let clothing, pot holders, or
other flammable materials come in contact with a
cooking area until it has cooled.
• For personal safety wear proper apparel. Loose
fitting garments or those with long, loose sleeves
should never be worn while cooking. Tie long hair
so that it doesn't hang loose.
SHOCK, OR INJURY TO
OBSERVE THE FOLLOWING:
!
WARNING
!
WARNING
SURROUNDING AREA. Even
PAGE 2
Page 5
CET/CEP Cooktop Care and Use Manual
IMPORTANT SAFETY INSTRUCTIONS
! !
READ ALL INSTRUCTIONS BEFORE USING YOUR COOKTOP
• Use only dry pot holders. Moist or damp pot
holders on hot surfaces may cause burns from
steam. Do not use a towel or other bulky cloth in
place of pot holders. Do not let pot holders touch
hot cooking areas.
• This appliance is equipped with one or more
surface units of different sizes. Always use utensils
that have flat bottoms and that are large enough
to cover the whole cooking area. The use of a
utensil smaller than the size of the cooking area
will expose a portion of the heated area to direct
contact with the user which could result in burns.
Proper relationship of utensil to burner will also
improve efficiency.
• Turn handles of utensils inward so that they do
not extend over adjacent work areas, cooking
areas, or the edge of the cooktop. This will help
prevent hot food spills, risk of burns and ignition
of flammable materials.
• Use high heat settings on the cooktop only when
necessary. Use low to medium settings to heat oil
slowly.
• Never move a pan of hot oil, especially a deep fat
fryer. Wait until it is cool.
• Never leave the cooktop unattended when using
high heat settings. Boil-overs can cause smoke and
possibly damage the cooktop.
• Hold the handle of the pan to prevent movement
of the utensil when stirring or turning food.
• Other than the use of metal pans, only certain types
of glass, heatproof glass ceramic, ceramic,
earthenware, or other glazed utensils are suitable
for cooktop use. These types of utensils may break
with sudden temperature changes. Use only on low
or medium heat settings according to the utensil
manufacturer’s directions.
CAUTION
!
The cooktop is for cooking. Never use
it to warm or heat a room.
Be sure your appliance is properly installed
and grounded by a qualified servicer in
accordance with the Installation
Instructions provided with the cooktop.
Do not repair or replace any part of the
appliance unless specifically recommended
in this manual.
referred to a qualified servicer.
• Always use cookware and utensils appropriate for
the type and amount of food being prepared.
• Do not place any hot cookware on the control
panel area,
All other servicing should be
• Clean the cooktop with caution. If the soil must
be removed while the cooktop is hot, clean the
hot top with the metal razor blade scraper only.
Do not use a wet sponge or cloth while it is hot.
Some cleaners produce noxious fumes if applied
to a hot surface.
• Clean the ventilation system above or behind the
cooktop frequently, so that grease from the cooking
vapors does not accumulate on the filters, fan,
intake, or hood.
• To prevent elements from accidentally being
turrned on, lock the cooktop when it is not in use
and before cleaning. (See
8.)
Locking the Cooktop, Page
SAVE THESE INSTRUCTIONS
PAGE 3
Page 6

CET/CEP Cooktop Care and Use Manual
Précautions d’Emploi et Avertissements
LES PRÉCAUTIONS D’EMPLOI
!
Supplément pour le Canada
Pour Le Manuel de Soin et D’utilisation et
Les Instructions D’installation Pour
LA TABLE DE CUISSON ÉLECTRIQUE
VEUILLEZ LIRE LES INSTRUCTIONS
ENTIERES AVANT DE CONTINUER.
IMPORTANT: L’INSTALLATION
CONFORMER AUX TOUS LES CODES LOCAUX.
IMPORTANT: Garder ces instructions pour l’emploi
de l’Inspecteur Électrique Local.
L’INSTALLATEUR:
avec cet appareil pour la propriètaire.
LE PROPRIÈTAIRE:
pour l’référence future.
ADVERTISSEMENT: Debrancher l’alimentation
avant d’installer. Avant de mettre l’appareil EN
MARCHE, soyez certain que toutes les commandes
vent á la position ARRÉT.
Veuillez laisser ces Instructions
Veuillez retenir ces instructions
DOIT
GARDER CES INSTRUCTIONS
Votre sécurité nous concerne.
Ce manuel contient des remarques concernant votre
sécurité. Ces remarques seront précédées des mots
AVERTISSEMENT ou PRECAUTIONS D’EMPLOI.
Lisez-les attentivement et suivez les consignee.
!
AVERTISSEMENT:
attire votre attention sur des situations qui pourraient
occasionner des dommages corporals, des brûlures ou
des électrocutions.
PRECAUTIONS D’EMPLOI:
décrivent ce qui pourrait endommager l’appareil (le
rayer, le bosseler, etc...) ou votre mobilier.
AVANT LA PREMIÈRE UTILISATION DE
VOTRE TABLE DE CUISSON
Enlevez toutes les etiquettes et l’emballage
1. Verifiez que vous avez les pieces suivantes:
• Plaque et Grille (lèchefrite, couvercle, plaque,
grille, élément amovible)
• Cuvettes d’égouttement -
• Plateau d’égouttement -
• Consignes d’ installation
• Carte de service après-vente
2. Lisez le manuel de mode d’emploi qui accompagne
cette table de cuisson.
!
LES INSTRUCTIONS DE
SÉCURITÉ IMPORTANTES
AVERTISSEMENT- POUR REDUIRE LE RISQUE
D’INCENDIE, DE CHOC ÉLECTRIQUE, OU DE LA BLESSURE
AUX PERSONNES, OBSERVER LE SUIVANT:
A. Utiliser cet appareil seulement dans la maniere
destinee par le fabricant. Si vous avez de questions,
contacter le Fabricant.
B. Avant l’lnstaller, l’Entretien ou le Nettoyage de
l’Appareil, Couper le Courant au Tableau de Service, et
Fermer à Clef le Tableau de Service Pour Empêcher
l’Alimentation d’Être Allumée Par Hasard.
PRÉCAUTIONS D’EMPLOI SEULEMENT POUR
L’UTILISATION D’AÉRATION. NE PAS
L’UTILISER POUR ÉPUISER LA VAPEUR OU
LES MATIÉRES EXPLOSIVES OU
DANGEREUSES.
A. Utiliser les hautes positionnements du cuisinière
seulement quand c’est nécessaire. Chauffer l’huile
lentement sur un positionnement teas à moyen.
B. Ne jamais laisser le table de cussion sans surveillance
en utilisant les réglages des haute flammes. Les
surbouillants peuvent causer le fumage et les débordés
graisseux qui peuvant s’allumer.
C. Utiliser toujours les batteries de cuisine et les
ustensiles appropriés pour le type et la quantité de la
nourriture ayant préparée.
!
AVERTISSEMENT: - POUR RÉDUIRE LE
RISQUE DE BLESSURE AUX PERSONNES DANS
L’
ÉVÉNEMENT D’UN FEU DE GRAISSE DU SOMMET
DE LA TABLE DE CUISSON OBSERVER LES SUIVANTS:
A. ÉTOUFFER LES FLAMMES avec un couvercle
ajusté, une tole du biscuit ou un plateau metallique, puis
fermer le bec l’élément électrique. SOYEZ CERTAIN
D’EMPECHER LES BRÛLURES. Si les llammes ne
s’éteindront pas immediatement, ÉVACUER ET APPELER
LE SERVICE DES INCENDIES.
B. NE PAS UTILISER DE L’EAU SUR LE FEU DE
CUISSON, y compris les layettes mouillés ou les
serviettes - une explosion à vapeur resultera. Étouffer
les llames avec du bicarbonate de soude.
C. NE JAMAIS RAMASSER UNE CASSEROLE
EN FLAMMES Vous pouvez être brule.
D. En case un fue quand intenffonnelmente”flamber” la
liqueur ou des autre esprits sur le Cooktop, METTRE
le venfflateur à L’ARRET.
E. Dans l’événement que l’habillement personnel prend
feu, TOMBER ET ROULER IMMÉDIATEMENT
pour eteindre les flammes.
PAGE 4
Page 7

CET/CEP Cooktop Care and Use Manual
Les Pratiques De Sécurité
!
F. Uffliser un extincteur SEULEMENT si:
1) Vous savez que vous avez un extincteur de Classe
ABC et vous savez déja comment le faire
foncffonner.
2) Le feu est pefft et est contenu dans la region ou il a
commence.
3) Le service des incendies est appelé.
4) Vous pouvez combattre le feu avec votre dos à une
sortie.
Avec le soin correct, votre nouveau table de cuisson
Thermador
et sûr. En utilisant les appareils de la cuisine, les
précautions de sécurité de base doivent être suivies:
Le travail d’installation, et de cablage electrique doit
être fait par les personne(s) qualifiés conformément è
tous les codes & nor mes applicables, y compris la
construction calculée à feu.
Ne pas répar er ou remplacer aucune partie de
l’appar eil à moins que recommande specifiquement
dans ce manuel. Tout autre entreffen doit être rapporté
à un
technician qualifie.
Les enfants ne doivent pas être laisses seuls où
sans surveillance dans un endroit où les appareils vent
en marche. Il ne doit jamais être permis a laisser s’assoir
ou poser le pied sur aucune partie de l’appareil.
!
AVERTISSEMENT: Ne pas emmagasiner
des articles d’intérét aux enfants au-dessus de la tablr de
cuisson ou au dos de lui. Si les enfants grimperaient sur
l’appar eil d’atteindr e ces articles, ils peuvent être
sérieusement blessés.
!
AVERTISSEMENT: Ne jamais utiliser
aucune partie de la table de cuisson pour l’emmagasinage,
Les matiéres inflammables peuvent s’allumer et les articles
plastiques peuvent fondre ou s’allumer,
Ne jamais laisser les habillements, les poignées,
ou des autr es matieres inflammables de
contacter d’aucun élément chaud.
!
AVERTISSEMENT: Utiliser seulement
les poignées sèches: les poignées mouillées ou humides
sur les surfaces chaudes peuvent causer les bees du
vapeur. Ne pas utiliser une serviette ou d’autre tissu
volumineux au lieu des poignées. Ne pas permettre les
poignees de toucher les éléments chauds.
Nettoyer la table de cuisson avec attention. Éviter
les bruleurs de la vapeur; ne pas utiliser une éponge
ou un tissu mouillé de nettoyer la table de cuisson
pendant qu’il est chaude Quelques nettoyeurs produisent
les vapeurs nocifs se appliqués a une surface chaude.
!
ATTENTION: Pour la securité
personnelle, porterle vetement adequat. Les
vêtements amples ou suspendus ne doivent jamais être
portés pendant l’utilisation de cet appareil.
Ne pas utiliser le papier alu de border aucune
partie de la table de cuisson. L’emploi impropre de
ces revetements peut résulter a un choc électrique ou
D’éviter La Blessure Personnelle
®
a été dessiné pour être un appareil fiable
LES PRÉCAUTIONS D’EMPLOI
!
un feu. Le feuille est un isolant de la chaleur excellent et
la chaleur sera attrapée en teas d’elle. Ce bouleversera
la performance de la cuisine et peut endommager le find
de la léchefrites.
!
AVERTISSEMENT: L’appareil est pour la
cuisson. Basé sur les considerations de sécurité, ne jamais
utiliser la table de cuisson pour chauffer une chamber.
Tel emploi peut endommager la table de cuisson.
Ne pas chauffer les récipients de la nourriture non ouvert;
une intensification de pression peut causer le recipient
d’éclater.
!
AVERTISSEMENT: Lorsque user la table
de cuisson: NE PAS TOUCHER LES ÉLÉMENTS
DE CHAUFFAGE ou CE QUI SE TROUVE A
PROXIMITÉ IMMEDIATE. Les éléments de chauffage
peuvent être chauds bien qu’ils vent fonces en couleur.
Les endroits pres de la cuisinière peuvent
assez de causer les brûlures.
Seulement certains types de verre, verrecéramique, résistant à la chaleur, ceramique, la
faience, ou des autres ustensiles vibes vent
convenables pour l’utilisation de la table de
cuisson. Ce type d’ustensile peut casser avec les
changements de la température soudains. Utiliser
seulement les réglages de base ou montures de chaleur
selon les directions du fabricant de l’ustensile.
!
AVERTISSEMENT: Pour minimiser les
brûleurs d’ignition des matiéres inflammables et les
débordés involontaires, mettre les poignées
d’ustensiles vers l’intérieur pour qu’ils n’étendent pas
sur les endroits de travaille adjacents, les endroits de
cuisson, ou le bord de la table de cuisson.
Tenir le manche de la casserole de prevenir le mouvement
de l’ustensile en melangeant ou en tournant la nourriture.
Les éléments chauffants ne doivent pas être
trempes ou plonges dans l’eau. Allumez les éléments
et ils s’autonettoieront. Restez à proximite du four
lorsque les éléments se nettoient par pyrolyse. Suivez
les consignee d’entretien.
Nettoyer le capot d’aération et les filtres audessus
de la table de cuisson fréquemment pour que la
graisse des vapeurs de la cuisson n’accumule pas sur eux.
!
PRECAUTIONS D’EMPLOI:
Assurez-vous que les léchefrites vent en place avant
d’utiliser la table de cuisson. Si ce n’est pas le cas,
I’installation électrique et les pieces situées sous la surface
de cuisson peuvent être endommagees.
!
AVERTISSEMENT:
equipé avec les éléments de dimensions differents. Choisir
les ustensiles qui ont des fonds plats assez grands de couvrir
l’élément de chauffage de l‘unité de surface. L’emploi d’un
ustensile plus petit que la dimension de l’éléments exposera
une portion de l’éléments au contact direct avec l’utilisateur
qui peut résulter aux brûlures.
s’échauffer
Cet appareil est
PAGE 5
Page 8

CET/CEP Cooktop Care and Use Manual
Cooktop Models
2
3
2
4
5
6
5
4
6
PANEL
LOCK
3
7
PAN
ZONE
2
8
SIZE
SMART™
1
9
POWER
KEEP
1
WARM
CET304
CEP304
1
1
1
CET365
CEP365
8
4
5
5
5
4
6
PANEL
LOCK
3
7
ZONE
PAN
2
8
SMART™
SIZE
1
9
POWER
KEEP
WARM
6
5
4
6
3
7
PAN
2
SIZE
1
9
7
KEEP
WARM
5
PANEL
LOCK
ZONE
8
SMART™
POWER
CEP456
NO. TYPE SIZE WATTAGE
1 Single 6" (140 mm) 1200 W
2. Double 5"/8" (120/210 mm) 750 / 2200 W
3 Triple 5"/7"/8"(120/175/210 mm) 800 / 1600 / 2300 W
4 Triple 5"/7"/9" (120/180/230 mm) 800 / 1600 / 2500 W
5 Single 7" (180 mm) 1800 W
6 Bridge 7"x16" (180 x 415 mm) 4000 W
7 Double 5"/8" (120/195 mm) 800 / 1900 W
8 Double 6"/9" (140/230 mm) 1100 / 2500 W
Models CET 304 and CET365 do not have the ZONE SMART™‘ Pad.
PAGE 6
Page 9

CET/CEP Cooktop Care and Use Manual
Getting to Know Your Cooktop Controls
CEP304
1. Single Surface Unit Touch Pad
2. Panel Lock Pad
3. Power Pad;
4. Pan Size Selector Pad
5. Keep Warm Pad
6. Element Heat Settings
7. Zone Smart™ Pad
(not on CET)
8. On Indicator Light
5
4
6
3
2
1
4
1
PAN
SIZE
KEEP
WARM
6
5
2
PANE L
7
9
LOCK
ZONE
8
SMART™
7
R
POWE
3
8
CEP365
5
4
6
3
4
2
1
9
1
PAN
SIZE
KEEP
WARM
6
7
9
5
2
PANEL
LOCK
ZONE
8
SMART™
7
POWER
8
3
1. Single Surface Unit Touch Pad
2. Panel Lock Pad
3. Power Pad;
1. Single Surface Unit Touch Pad
2. Panel Lock Pad
3. Power Pad;
4. Pan Size Selector Pad
5. Keep Warm Pad
6. Element Heat Settings
CEP456
1
4. Pan Size Selector Pad
5. Keep Warm Pad
6. Element Heat Settings
PAGE 7
7. Zone Smart™ Pad
(not on CET)
8. On Indicator Light
9. Bridge Surface Unit Touch Pad
6 2
3
9
2
1
5
4
4
5
PAN
SIZE
KEEP
WARM
6
7
9
8
PANEL
LOCK
ZONE
8
SMART™
7
POWER
3
7. Zone Smart™ Pad
(not on CET)
8. On Indicator Light
9. Bridge Surface Unit Touch Pad
Page 10

CET/CEP Cooktop Care and Use Manual
Cooktop Operating Instructions
Cooktop Operating Instructions
BEFORE USING THE COOKTOP
FOR THE FIRST TIME
• Remove all packing materials and literature from
the cooktop surface.
• While cool, wipe with a clean, damp sponge and
dry.
®
• Apply the Cooktop Cleaning Creme
packaged
with the cooktop. Buff with a clean cloth. (See Page
14 for daily care instructions.)
• There may be a slight odor during the first several
uses; this is normal and will disappear.
• Optimum cooking results depend on the proper
cookware being selected and used. (See Page 12.)
• The cooking surface will hold the heat and remain
hot up to 25 or 30 minutes after the elements
have been turned off.
• Read all safety precautions and Care & Use Manual
information prior to operating.
PRECAUTIONS FOR LONG LIFE AND
GOOD APPEARANCE OF THE SURFACE:
• Regular, daily care using the Cooktop Cleaning
Creme® will protect the surface and make it easier
to remove food soil and water spots.
• The glass ceramic cooking surface is a durable
material resistant to impact but not unbreakable
if a pan or other object is dropped on it.
• Do not use aluminum foil directly on the glass; it
will melt and damage the glass surface.
INDICATOR LIGHTS
5
H
H
H
Hot indicator lights
4
3
2
1
The element “ON” indicator light
PAN
SIZE
KEEP
WARM
6
PANEL
LOCK
7
8
9
POWE
R
Element “ON” Indicator Light
The element “ON” indicator light glows whenever any
element is turned on. The light remains lit until all of
the elements are turned off.
The “ON” light is located to the left of the Power Pad.
Hot Surface Indicator Light
Each element features a hot indicator light to show
when the cooking surface is too hot to touch. After
the element is turned off, an “H” will appear in the
element display. The H remains on until the cooking
area has cooled to a safe-to-touch temperature.
If an H is lit inside the element display, use caution
when working or cleaning around the cooktop as the
cooktop is still hot.
RETAINED HEAT
The glass cooking surface retains heat and stays hot
after the element(s) have been turned off. The retained
heat may be used to hold foods at serving temperatures
for a short time.
• Do not allow plastic, paper, or cloth to come in
contact with the hot glass surface; these items can
melt or burn and damage the glass surface.
• Do not allow pans to boil dry. This can damage
the pan, element and/or the cooktop.
• Never cook food directly on the glass.
• Avoid placing a wok support ring, trivet or other
metal stand on the glass surface.
• Do not use the glass surface as a cutting board.
• Do not slide cookware across the cooking surface;
it may scratch the glass.
• Do not place wet pans on the glass surface.
PAGE 8
LOCKING THE COOKTOP
The Panel Lock is selected to prevent the control pads
from being turned on. Touch PANEL LOCK Pad, light
flashes and beep sounds. Hold for 3 seconds to activate.
A beep will sound and the panel lock light stays lit
indicating that the cooktop is locked.
To unlock, touch PANEL LOCK Pad and hold for 3
seconds. A beep will sound and the light will go out
indicating the cooktop is unlocked.
The cooktop cannot be locked when a surface element
is operating.
It is recommended to lock the cooktop when not in
use and for cleaning.
Page 11

CET/CEP Cooktop Care and Use Manual
The Elements
Cooktop Operating Instructions
RADIANT ELEMENTS
This type of electric element uses a wire ribbon located
under the glass-ceramic surface to provide the heat
for cooking. Radiant elements will cycle on and off by
design. (See Temperature Limiters, below.)
There are ten heat settings ranging from 9 (high) to
keep warm (L).
DUAL ELEMENT
The dual element consists of two radiant ribbon
elements within the same heating area. Either the small
inner element or both the inner and outer elements
may be selected for use.
TRIPLE ELEMENT (Select Models)
The triple element consists of three radiant ribbon
elements within the the same heating area. Either the
small
inner element, the inner and middle elements or
the inner, middle and outer elements may be selected.
BRIDGE ELEMENT
(36" and 45" Models Only)
The Bridge element consists of 3 separate elements
that can be operated in 2 different ways:
• Use of either one or both of the circular elements
independently.
• Use of both circular elements plus the Bridge element
simultaneously with a single control.
When all 3 elements are used, it creates an oblong
heating area. This oblong shape is ideal for griddles,
open roasters and poachers. Pans should have a flat
bottom and match the bridge cooking area as closely
as possible.
BRIDGE OPERATION
To use the Bridge elements, touch center area
between the two elements in the control panel area.
Touch cook setting indicator.
To use single elements separately;
• Touch the element display for appropriate element.
• Touch cook setting indicator.
KEEP WARM
Each element has a Keep Warm setting. The main
function of the Warming feature is to keep hot, cooked
foods at serving temperatures. Keep Warm is not for
cooking foods.
To use the Keep Warm feature:
• Touch desired element display.
• Touch PAN SIZE pad, if needed,
• Touch Keep Warm Pad
•“
L
” will appear in element display.
The lower power of the element makes it practical to
warm a serving platter before adding the hot food, or
to keep a casserole hot for second helpings.
Keep Warm Guidelines
• Use pans/utensils with flat bases. Plates, platters,
and casseroles with a shallow ridge around the
base can be used provided they are made of heatsafe material.
• Keep dish covered to keep foods hot.
• Choose pans and utensils that may be safely used
on a hot surface. Example: Use CorningWare
“safe for rangetop” rather than Pyrex® “not
recommended for cooktop use”.
• Use a trivet or steamer basket
necessary to raise food off bottom of the pan. Use
a small amount of water to steam tortillas. Do not
use a trivet directly on the cooktop.
inside a pan when
TEMPERATURE LIMITERS
Each radiant heating element has its own sensor to
protect the glass cooking surface from extreme high
temperatures. The limiters will operate automatically
by cycling the element off regardless of the cook
setting.
Although cycling is normal, any one of the following
conditions can activate the limiter and cause it to cycle
on and off more than usual:
• The base of the pan is not making full contact with
the heating surface (due to a warped or uneven
base).
• The pan is too small for the size of the element.
• The pan has boiled dry.
• The material or shape of the pan is slow to transfer
the heat.
• No pan has been placed on the element. (CET
Model only or Z
models.)
ONE SMART turned off on CEP
®
PAGE 9
Page 12

CET/CEP Cooktop Care and Use Manual Cooktop Operating Instructions
Setting the Controls – ZONE SMART™
ZONE SMART™ Pan sensing and Sizing
(CEP models only)
Pan Sensing
Each element has sensors under the glass ceramic panel
which detect if there is a metallic pan (saucepan, skillet,
stockpot, etc.) sitting on the element. The element
will heat up when it is turned on and the sensor detects
the presence of a pan. This feature is either on or off
for all elements and works together with the Pan sizing
feature.
The element will not heat if it is turned on without a
pan present or if the pan is removed from the element
when it is operating. If no pan is present on the element,
a beep will sound at 60 seconds. After 10 minutes, the
cooktop beeps and shuts down if no pan is placed on
the element.
Pan Sizing
On the double and triple elements, a sensor under
the cooktop can choose the size pan being used and
turn on the appropriate element. This feature is either
on or off for all elements and works together with the
Pan Sensing feature.
Pan Sensing and Sizing Guidelines
• A cooking Pan must be sitting on the element for
the element to heat-up.
• Only pans with flat metal bases can be detected.
• The bottom diameter of the pan must be at least
as large as the diameter of the element. (Cookware
diameter indicated by manufacturers is measured
across the top and is usually greater than the
bottom.)
• Only metal cookware can be used with the Pan
sensing and Pan sizing features. Glass or stoneware
will not work.
• Center the cookware over the element.
• A large pan cannot extend beyond 1" over the
sides of the largest element.
ZONE SMART™ Pad
This pad turns off both the Zone Smart features,
Pan Sensing and Sizing.
The placement of the element control corresponds
to the placement of the heating element on the
cooktop. On CEP models, Z
be activated when an element is turned on. To turn
off ZONE SMART, see Page 11.
ONE SMART™ will always
Using a single element
(with Z
1. Place pan on the center of the element.
2. Touch the center of the control pad that
3. Touch desired heat setting number. The display
4. To turn off surface element, touch the element
The element heats up when it has been turned on and
the sensors detect the presence of a pan.
ONE SMART, Pan Sensing Only)
corresponds to the element desired. The display
flashes 0 and two lights to the left and right of the
display. The ZONE SMART indicator light turns on.
shows the heat setting and the element starts
heating.
display.
Using a dual or triple element
(with ZONE SMART Pan Sensing and Sizing)
1. Place pan on the center of the element.
2. Touch the center of the control pad that
corresponds to the chosen element. The Z
SMART indicator light turns on.
3. Touch desired heat setting. The display shows the
heat setting.
4. The small, medium, or large cooking areas on the
selected dual or triple element will be activated
automatically depending on the size of the pan.
5. To turn off surface element, touch the element
display area twice OR
To turn off all elements at the same time, touch
the POWER Pad.
When the pan is lifted off the element, the
heating is interrupted. The number of the selected
cook setting and the pan missing symbol (
in the display. If no pan is placed on the element, a
beep will sound at 60 seconds and after 10 minutes
the cooktop beeps and will shut down. Either place
the pan back on the element or turn off the
element.
UU
U
) flashes
UU
ONE
NOTE: When the Power pad is touched, all
elements that are on will be turned off.
PAGE 10
Page 13

CET/CEP Cooktop Care and Use Manual
Setting the Controls – ZONE SMART™
Cooktop Operating Instructions
To change cook settings when cooking:
1. Touch element display once. The display flashes 0.
2. Touch desired cook setting.
If a selection is not made within 5 seconds, the
element will shut off.
To turn off the ZONE SMART™ feature
If you want to use glass ceramic or ceramic cookware,
have a pan smaller than 4 inches, or do not want to
/
use the pan detection
the Z
ONE SMART system.
Glass ceramic and metal pans smaller than
4 inches:
1. Place pan on center of element.
2. Touch control pad for element desired.
3. Touch Zone Smart pad. Light goes off.
sizing feature, you can turn off
4. For single elements, omit this step. For dual
elements, touch Pan Size until desired pan size is
displayed. See Step 3 below, Setting the Controls
– CET Models.
5. Touch desired heat setting.
6. Element starts heating.
Metal pans larger than 4 inches:
1. Place pan on center of element.
2. Touch control pad for element desired.
3. Touch desired setting.
4. Touch Zone Smart pad. Light goes off.
5. Pan size and heat setting are kept in memory.
6. The element starts heating.
Setting the Controls – CET Models
SETTING THE CONTROLS
1. Place pan on center of element.
2. Touch the center of the control pad that
corresponds to the element desired. The display
flashes “0” and two lights to the left and right of
the display.
3. For dual and triple elements, touch the Pan Size
pad until desired element size is displayed.
• One touch of the pad will select the largest
element. The display will stop flashing and the
outer circle stays on.
– CET MODELS
• A second touch of the pad will select the small
element and the inner circle stays lit.
• For the triple element, another touch of the
pad and the middle element is selected.
• Further touches of the pad will toggle through
the selection process.
4. Touch desired heat setting. The display shows the
heat setting selected and starts heating.
5. To turn off a surface element, touch the element
display area twice OR…
…To turn off all elements at the same time, touch
the Power Pad.
PAGE 11
Page 14

CET/CEP Cooktop Care and Use Manual
▲
!
Using Proper Cookware
COOKWARE
Characteristics
The choice of pans directly affects the cooking speed
and uniformity. For best results select pans with the
following features:
FLAT BASES - When a pan is hot, the base (pan
bottom) should rest evenly on the surface without
wobbling (rocking). Flat, medium to heavy pans are
best.
Cooktop Operating Instructions
Custom Accessory Griddle
An anodized aluminum griddle with a flat base and
sized to span the bridge elements is available. The
accessory griddle, Model AEGRIDDLE,
your local Thermador dealer.
is available from
To test the flatness of your pans:
Turn the pan upside down on the countertop and place
a ruler flat against the bottom of the pan. The bottom
of the pan and the straight edge of the ruler should be
flush against each other.
Another simple test to determine even heat
distribution across the cookware bottom is to place
1” water in the pan. Bring the water to a boil and
observe the location of the bubbles as the water starts
to boil. Good, flat cookware will have an even
distribution of bubbles over the bottom surface area.
DIAMETER – The base of the pan should cover or
match the diameter of the element being used. Pans
may overhang the element area by 1" all around.
TIGHT FITTING LID – A lid shortens cooking
time by holding the heat inside the pan.
SPECIALTY PANS
Specialty pans, such as griddles, roasters, pressure
cookers, woks, water bath canners and pressure
canners must have the same features as described
above. (Use only a flat-bottom wok.)
CAUTION
• Foods packaged in aluminum foil should not
be placed directly on the glass ceramic surface for
cooking; aluminum foil can melt and cause permanent damage.
!
▲
• Plastic, paper and cloth can melt or burn
when in contact with a hot surface. Do not let
these items come in contact with the hot glass
ceramic surface.
• Do not allow pans to boil dry. This can perma-
nently damage the pan, the element and the
cooktop glass.
CAUTION
PAGE 12
Page 15

CET/CEP Cooktop Care and Use Manual
Heat Settings for Radiant and Bridge Elements
All these settings are recommended without the element being preheated.
Cooktop Operating Instructions
TYPE OF FOOD HEAT SETTINGS
*These Suggested
settings do not apply to
the Keep Warm feature
Melting butter, chocolate 1 to 2
Delicate sauces
Finishing rice 2 to 3
Simmering sauces with
butter and egg yolk
Cooking vegetables, fish,
broths
Eggs, fried or scrambled
Finishing cereals, pasta 3 to 5
Milk
Pancakes
Pudding
Simmering meats
Steaming vegetables,
fish, broths
RADIANT
ELEMENTS
A range of heat settings are listed because the actual
setting depends on:
1) type and quality of pan;
2) type, quantity and temperature of the food
3) element used; and
4) the cook’s preferences.
208/240 Volt Connection: The Heat Settings
recommended on this page are based on a 240 volt
power source. If your cooktop is connected to 208
volts, the same heat settings apply but foods may take
a little longer to finish cooking.
Pan frying
Popcorn
Spaghetti sauces 3 to 6
Sauteed vegetables
Stewing meat, soups
Bacon
Braising meat 4 to 6
Pan frying meat, fish,
eggs
Stir frying
Quickly brown or 7 to 8
sear meats
Hold Rapid Boil
Boiling water for 9
vegetables, pasta,
rice, etc.
PAGE 13
Page 16

CET/CEP Cooktop Care and Use Manual Cooktop Care and Maintenance
Cleaning Guide
BEFORE USE CARE
Care is easy when preventative steps are taken. For
example, apply a small amount of Cooktop Cleaning
®
Creme
This provides a protective film that makes it easy to
remove water spots or food spatters.
Use a clean cloth and apply Cooktop Cleaning Creme
before each use to remove dust or metal marks that
can occur on the counterlevel surface between uses.
The temperature of the cooking surface during use
reduces the protective qualities of the Cleaning Creme®,
so it must be re-applied regularly to maintain the
appearance of the cooktop.
RECOMMENDED CLEANERS
• Cooktop Cleaning Crème® (packaged with
• BonAmi
• Soft Scrub
• Vinegar: rinse and dry.
• Razor blade scraper (packaged with cooktop)
* The recommended cleaners indicate a type of
AVOID THESE CLEANERS
• GLASS CLEANERS which contain ammonia
• CAUSTIC CLEANERS
• ABRASIVE CLEANERS
on a daily basis.
cooktop) – This removes soil and provides a
protective film that makes it easy to remove water
spots or food spatters. The temperature of the
cooking surface reduces the protective qualities of
this cleaner. It must be reapplied before each
use to prevent spatter and small food particles from
baking on the surface.
Use only a small amount; apply to a clean
paper towel or cloth. Wipe on the surface and
buff with a clean dry towel. Use on a DAILY
basis.
®
: rinse and dry.
®
(without bleach): rinse and dry.
cleaner and do not constitute an endorsement.
or chlorine bleach. These ingredients may
permanently etch or stain the cooktop.
Oven cleaners such as Easy Off
cooktop surface.
Metal scouring pads and scrub sponges such as
Scotch Brite
Soap-filled scouring pads such as SOS
scratch the surface.
Powdery cleaners containing chlorine bleach
can permanently stain the cooktop.
Flammable cleaners such as lighter fluid or
WD-40.
®
can scratch and / or leave metal marks.
®
may etch the
®
can
DAILY CLEANING TECHNIQUES
1. Clean the surface when it is completely cool
with the following exception.
2. Remove these soils IMMEDIATELY with the
razor blade scraper:
®
Dry Sugar, Sugar Syrup, Tomato Products, Milk
How to use a Razor Blade Scraper
!
CAUTION:
Do not use any kind of cleaner on the glass while the
surface is hot; use only the razor blade scraper. The
resulting fumes can be hazardous to your health.
Heating the cleaner can chemically attack and damage
the surface.
3. Wipe off spatters with a clean, damp sponge
or paper towel. Rinse and dry. Use vinegar if
smudge remains; rinse.
Use Daily
4. Apply a small amount of the Cooktop
Cleaning Crème
a clean paper towel or cloth.
®
. When dry, buff surface with
PAGE 14
Page 17

CET/CEP Cooktop Care and Use Manual
Special Care Chart
Cooktop Care and Maintenance
TYPE OF SOIL
Dry sugar, sugar syrup, milk or tomato spills.
Melted plastic film or foil. All these items
REQUIRE IMMEDIATE REMOVAL.
Remove only these types of spills while the
surface is hot using the razor blade scraper. See
illustration on Page 14.
Be sure to use a new, sharp razor in your scraper.
Burned-on food soil, dark streaks, and specks
Greasy spatters
Metal marks: Iridescent stain
POSSIBLE SOLUTION
Failure to remove these soils immediately can
permanently damage the surface.
• Remove pan and turn off the element.
• Wearing an oven mitt, angle the scraper slightly,
using care not to gouge or scratch the glass. Push
soil off the heated area.
• After the surface has cooled, remove the residue
and apply the Cooktop Cleaning Creme
®
.
• Soften by laying a damp paper towel or sponge on
top of soil for about 30 minutes.
• Use a plastic scrubber and Cooktop Cleaning
Creme
®
or use the razor blade scraper. Rinse and
dry.
• Use a soapy sponge or cloth to remove grease;
rinse thoroughly and dry. Apply Cooktop Cleaning
®
Creme
.
• Pans with aluminum, copper or stainless steel bases
may leave marks. Treat immediately, after surface
has cooled, with the Cooktop Cleaning Creme. If this
does not remove the metal marks, try a mild abrasive
(Bon Ami®, Soft Scrub® without bleach) with a
dampened paper towel; rinse; and reapply creme.
Failure to remove metal marks before the
next heating makes removal very difficult.
Hard Water Spots
Hot cooking liquids dripped on surface
Surface scratches:
Small scratches are to be expected on the glass surface,
but do not affect cooking. In time, small scratches will
become smoother and much less noticeable with daily
use of the Cooktop Cleaning Creme.
PAGE 15
• The minerals in some water can be transferred
onto the surface and cause stains. Use undiluted
white vinegar, rinse and dry. Recondition with
Cooktop Cleaning Creme.
Remove boil overs and stains, before using the
cooktop again.
• Apply cleaning creme before using to remove sandlike grains and grit such as salt and seasoning.
• Can be reduced by using pans with bases that are
smooth, clean, and dry before use. Use
recommended Cooktop Cleaning Creme daily on
the cooktop.
BE CAREFUL: Diamond
(and other gemstone)
rings will scratch the surface.
Page 18

CET/CEP Cooktop Care and Use Manual
Cooktop Care and Maintenance
Troubleshooting
Before calling for service, check these suggestions to avoid unnecessary service charges.
QUESTION SUGGESTED SOLUTIONS
Element cycles on the highest setting
Element cycles more than usual
A slight odor is noticeable when an
element is turned on
Flashing control lights
Cooktop controls will not turn on
• This is normal. The temperature limiter operates
automatically to protect the glass ceramic surface
from extreme high temperature damage.
• Pan base is warped and not making full contact with
the heating surface.
• Base diameter of pan is too small for the size of the
element.
• Pan ingredients have boiled dry.
• Material of pan is a poor heat conductor; heat
transfers too slowly
• Element turned on without a pan in place.
(CET Models or CEP with Z
• It is normal and will disappear after several uses.
• Signals an incomplete setting; requires another
action.
For example, the flashing light rings require touching
a numbered heat setting.
• Control panel is LOCKED. Touch and hold Panel
Lock until the light turns off.
• Check the power source to see if a fuse has blown
or if the circuit breaker tripped.
ONE SMART turned off.))
The cooktop has switched itself off
Replacement razor blades for the
scraper
• The Power Pad or Element Pad was unintentionally
touched. Reset the control.
• The scraper is packaged with single edge, stainless
steel blades. Use a standard single-edge blade for
replacement.
HOW TO OBTAIN SERVICE
For authorized service or parts information, call 800/735-4328. We want you to remain a satisfied customer. If a
problem does come up that cannot be resolved in your satisfaction, please let us know.
Write: Thermador Customer Call Center, 5551 McFadden Avenue, Huntington Beach CA 92649 or call 800/
735-4328. Whether you write or call, please provide us with the Model Number, Serial Number and Date of
Original Purchase or Installation.
PAGE 16
Page 19

CET/CEP Cooktop Care and Use Manual
Thermador Cooktop Warranty
Models CET304, CET365, CEP304, CEP365 and CEP456
Thermador Cooktop Warranty
WHAT IS COVERED*
FULL ONE- YEAR WARRANTY
For one year from the date of installation, or date of
occupancy for a new previously unoccupied dwelling,
any part which fails in normal home use will be repaired
or replaced free of charge. Save your dated receipt or
other evidence of the installation/occupancy date.
Thermador® will pay for all repair, labor, and
replacement parts found to be defective due to
materials and workmanship. Service must be provided
by a Factory Authorized Service Agency during normal
working hours.
LIMITED THREE-YEAR WARRANTY
Covers the second through the fourth years from the
date of installation. Thermador® will replace the glass
ceramic cooktop surface when breakage is due to
thermal shock (sudden temperature change) for a
period of three years following the expiration of the
full warranty.
WARRANTY APPLICATION
This warranty applies to appliances used in normal
family households; it does not cover their use in
commercial situations.
This warranty is for products purchased and retained
in the 50 states of the U.S.A., the District of Columbia
and Canada. The warranty applies even if you should
move during the warranty period. Should the appliance
be sold by the original purchaser during the warranty
period, the new owner continues to be protected until
the expiration date of the original purchaser’s warranty
period.
THERMADOR® DOES NOT ASSUME ANY
RESPONSIBILITY FOR INCIDENTAL OR
CONSEQUENTIAL DAMAGES. Some states do
not allow the exclusion or limitation of incidental or
consequential damages, so the above limitation or
exclusion may not apply to you. This warranty gives
you specific legal rights and you may also have other
rights which may vary from state to state or province
to province.
WHAT IS NOT COVERED
1. Service by an unauthorized agency. Damage or
repairs due to service by an unauthorized agency
or the use of unauthorized parts.
2. Service visits to:
Teach you how to use the appliance.
Correct the installation. You are responsible for
providing electrical wiring and/or other connecting
facilities.
Reset circuit breakers or replace home fuses.
3. Damage resulting from accident, alteration, misuse,
abuse, improper installation or installation not in
accordance with local electrical codes or plumbing
codes, or improper storage of the appliance.
4. Repairs due to other than normal home use.
5. Any service visits and labor costs during the limited
warranty.
* See Page 16 to learn how to obtain service.
PAGE 17
Page 20

Model Number _____________
Serial Number _____________
Specifications are for planning purposes only. Refer to installation instructions and consult your countertop supplier
prior to making counter opening. Consult with a heating and ventilating engineer for your specific ventilation requirements. For the most detailed information, refer to installation instructions accompanying product or write
Thermador indicating model number.
We reserve the right to change specifications or design without notice. Some models are certified for use in Canada.
Thermador is not responsible for products which are transported from the United States for use in Canada. Check
with your local Canadian distributor or dealer.
For the most up to date critical installation dimensions by fax, use your fax handset and call 702/833-3600. Use code #8030.
5551 McFadden Avenue, Huntington Beach, CA 92649 • 800/735-4328
RO 8595 • Lit. No. 50 60 00 19 79B (8106)• © 2001 BSH Home Appliances Corp. • Litho in USA • 6/01
 Loading...