

Page 1

iris LiveView
userguide
Page 2
INTRODUCTION AND FURTHER HELP
CONTENTS
INTRODUCTION AND FURTHER HELP 1
LOGGING IN FOR THE FIRST TIME 2
SAY HELLO TO IRIS LIVEVIEW 3
CONNECTING CAMERA TO NETWORK 4
CAMERA PLACEMENT 5
WIRELESS MICROPHONES 6
TEST OBSERVATION 8
LIVE OBSERVATION 10
AUTOMATIC UPLOADING 13
MANUAL UPLOAD 14
SHARING 15
OBSERVATION LIBRARY 16
DATA COLLECTION TOOLS 17
REVIEWING YOUR OBSERVATION 18
GROUP AND LOCATION ADMINISTRATOR 19
Introduction
thereNow is a tool for sharing good practice and supporting all
sta to develop vital skills within a secure online community. We
understand how adults learn new skills. thereNow has been built
from the ground up with this in mind. The system provides you
with a compelling learning experience that will enable you to
develop as a professional throughout your career.
thereNow is a powerful tool that allows you to
reflect on your own practice, makes it easy to
create cost-eective mentoring relationships
and builds a learning community through the
innovative use of video cameras and a secure
web-based application.
The system is designed to put individuals in
control of observations. Each user has their
own account from which they can schedule
observations, control the permissions
associated with the process and, if they wish,
share their practice with their peers.
Further help
This user guide has been designed to give users a brief overview
of how to use the iris LiveView camera as well as the basics of
the thereNow web application. If you require further help, then
please use one of the following resources:
• Live Chat
• Page specific help files are available under the
green question mark symbol
• Email us at: [email protected]
• Call us at: 877-525-4747
1
Page 3
LOGGING IN FOR THE FIRST TIME
Once you have been issued a thereNow
account you will receive an e-mail from
[email protected]. Click on the
activation link and enter the username and
password contained within the e-mail.
If you can’t see it, please check your junk mail,
just in case it was mistaken for something else.
The first time that you log in you will be asked
to agree to the license agreement. Once you
have confirmed, you will be taken to the account
tab where you should change your password to
something more memorable.
If this is the first time your
computer has been used with thereNow
you should download and run the
software from the ‘Getting Started’
area of the dashboard tab. This will
install software that enables you to
connect to the cameras; it will also
install the thereNow Video Uploader.
The thereNow Video Uploader
manages the uploading of your
video files to thereNow’s secure web
application.
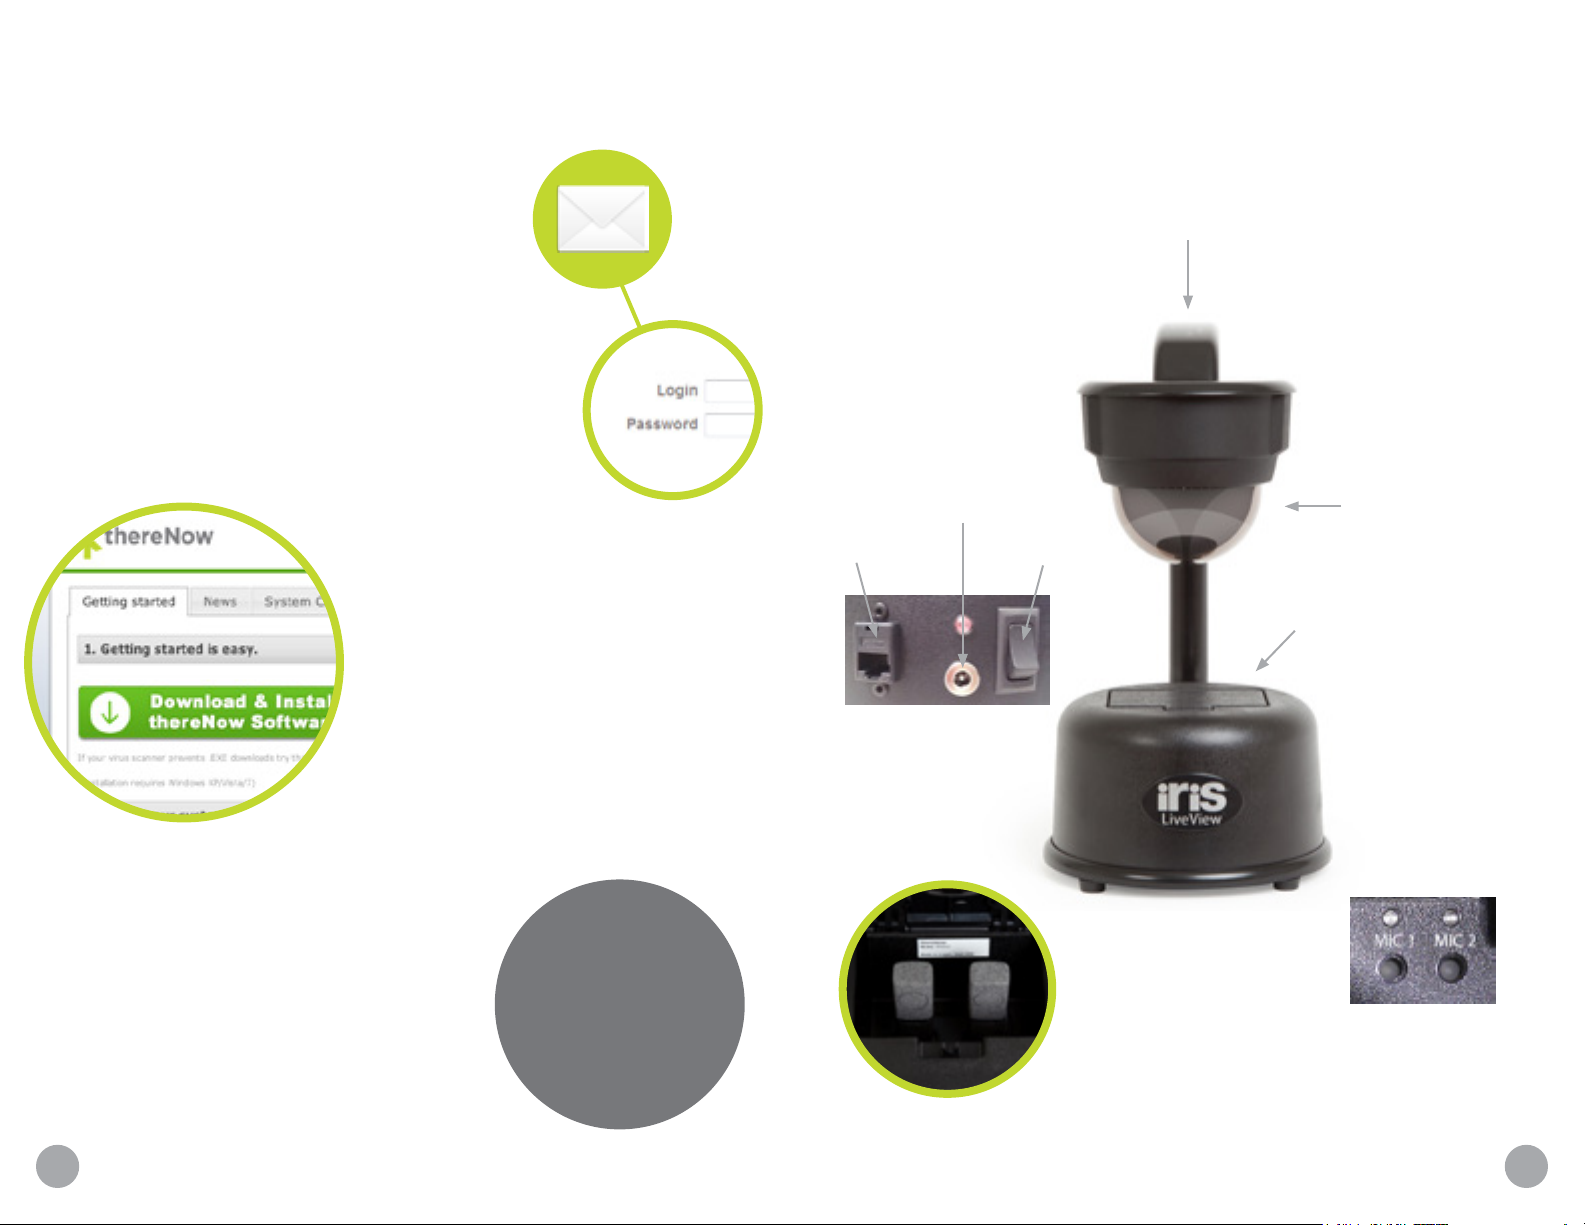
SAY HELLO TO IRIS LIVEVIEW
Durable aluminum frame
Power jack
Ethernet jack
(on back of unit)
Power switch
PTZ camera
Wireless Microphone
charging compartment
The ‘Getting Started’ area also has a ‘System
Check’ tool that tests your computer and makes sure
that it is set up correctly.
In the future, to log into the thereNow web
application, click on the icon that the
software has placed on your desktop or
browse to https://app.therenow.net.
If you upload a photo
make your interactions
on the system more
TIP...
of yourself in the
account tab it will
Microphone
pairing buttons
personal.
HD wireless
2 3
microphones
Page 4
CONNECTING CAMERA TO NETWORK
CAMERA PLACEMENT
Assign the camera to a DHCP reservation
In order for the thereNow web application to reliably
find the camera, the camera must use an IP address
that does not change - a DHCP reservation is the
recommended method. Use the camera’s MAC
address (below) to make a DHCP reservation in
each location (school building) where the camera
will be used . You will also need to allow emails from
therenow.net through your firewall.
MAC address for your camera
The MAC address can be found on a sticker in the
microphone charging compartment on the base of the camera.
Static IP Assignment on Camera
If you prefer to assign a static IP address directly to the camera,
you will need to contact thereNow. A thereNow technical support
representative will need to log into the camera to assign the
static IP address you have chosen. Note: Keep in mind that with
this method, each time the camera moves to a new subnet, the
assigned IP address will need to be manually changed on the
camera.
External Access (optional)
For external access (outside consultants, coaches, etc.), you
will need to configure your firewall settings for the iris LiveView
camera. Create inbound and outbound openings on ports 80
and 443 for the IP address you have assigned to the iris LiveView
camera. thereNow cameras are protected by various levels of
authentication and permissions with 256-bit AES encryption.
To observe a teacher using an iris LiveView camera, authorized
users must schedule an observation through thereNow’s
web application. The teacher to be observed must accept all
invitations to be observed through the camera.
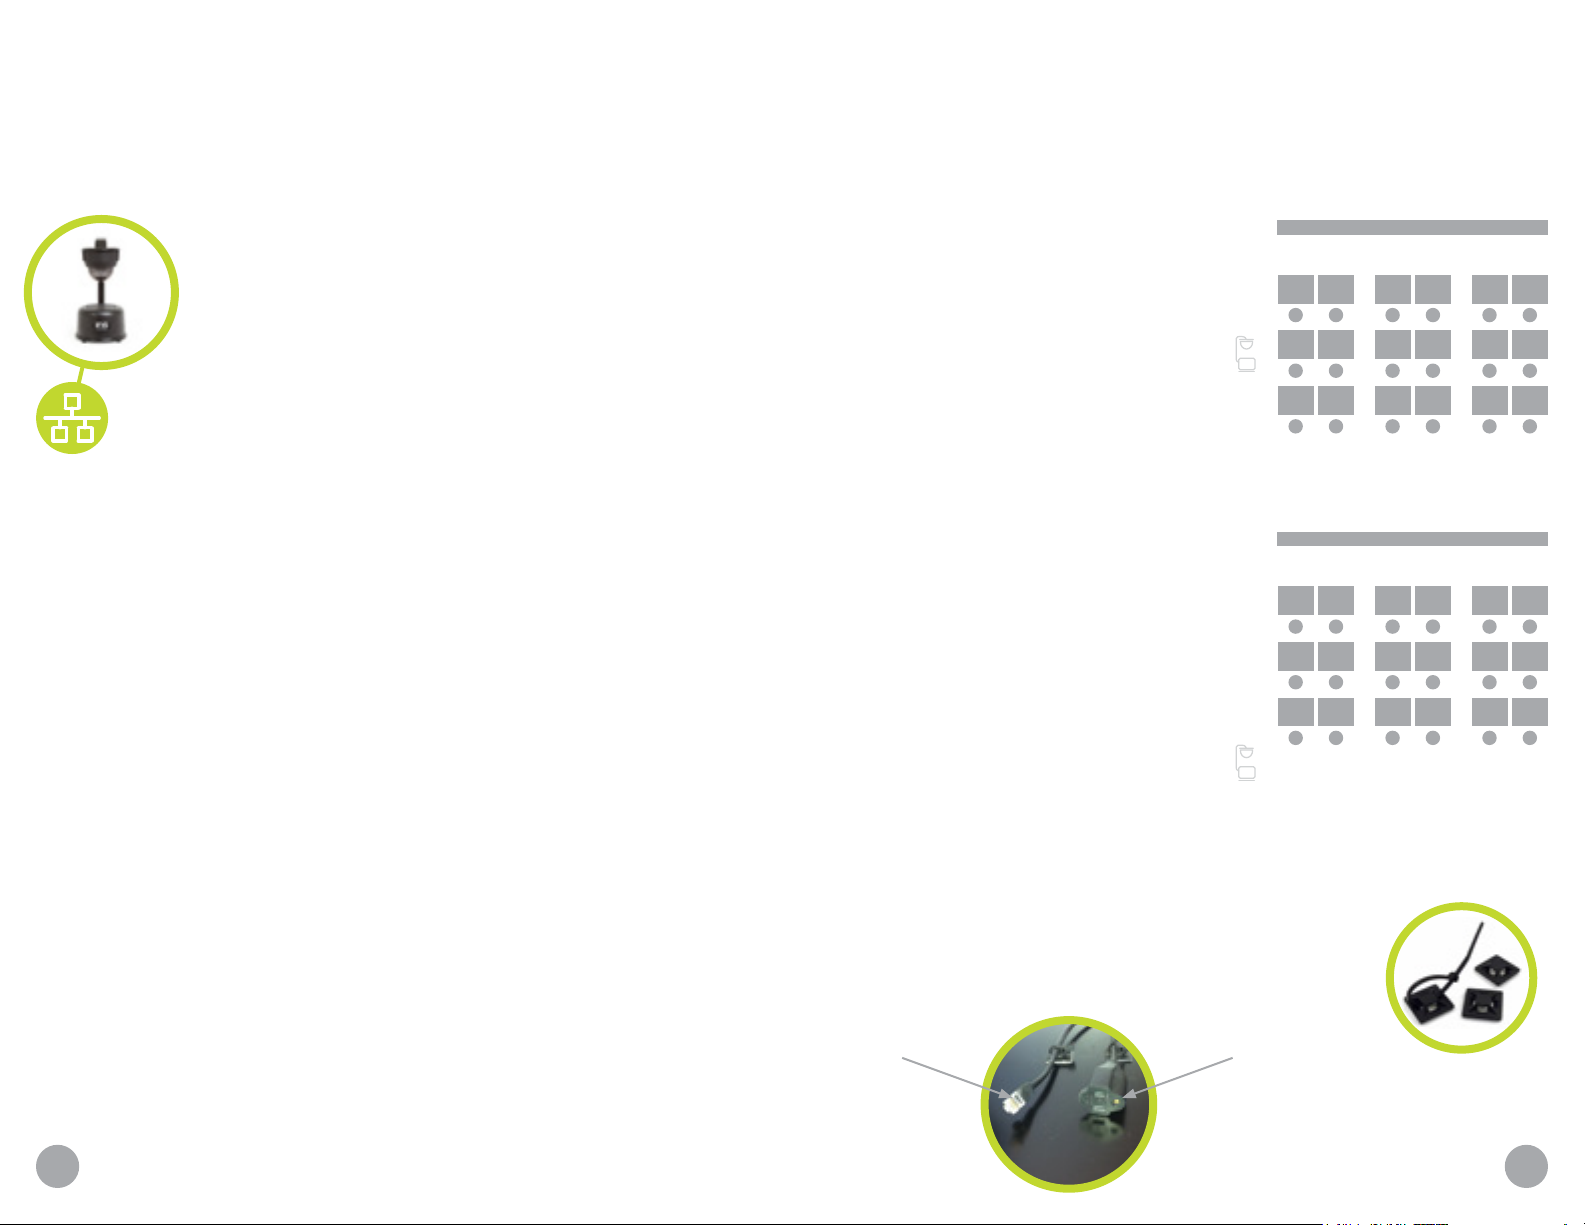
Place the iris LiveView camera on top of a surface that is at
least 5 feet high and within 25 feet of an Ethernet drop. If such
a surface does not exist, a special
stand can be purchased from
thereNow.
If possible, it’s a good idea to place
the camera on the side of the room
that has the most windows so that
the sunlight does not washout
the picture; although the camera
automatically adjusts for focus and
lighting.
Connect the camera to power and
your network by plugging in the
power cord and Ethernet cable to
the relevant ports on the back of
the camera. Please check that the
connecting cables are not a trip
hazard.
Connecting cables
It is recommended that an Ethernet
cable be connected to an active
Ethernet drop, led to the ‘camera’s
spot’ for that room, e.g., on top of
a bookshelf or cabinet, and left in that room. This will eliminate
the need to unplug the Ethernet cable each time the camera is
moved to a new room. If a power outlet is not in reach of the
iris LiveView power cable, an extension cable should
also be left in the room. Use network tie downs to
secure cables on top of surface where the camera
is placed.
Front Position
Back Position
Ethernet Cable Extension cable
Board
Board
4 5
Page 5
WIRELESS MICROPHONES
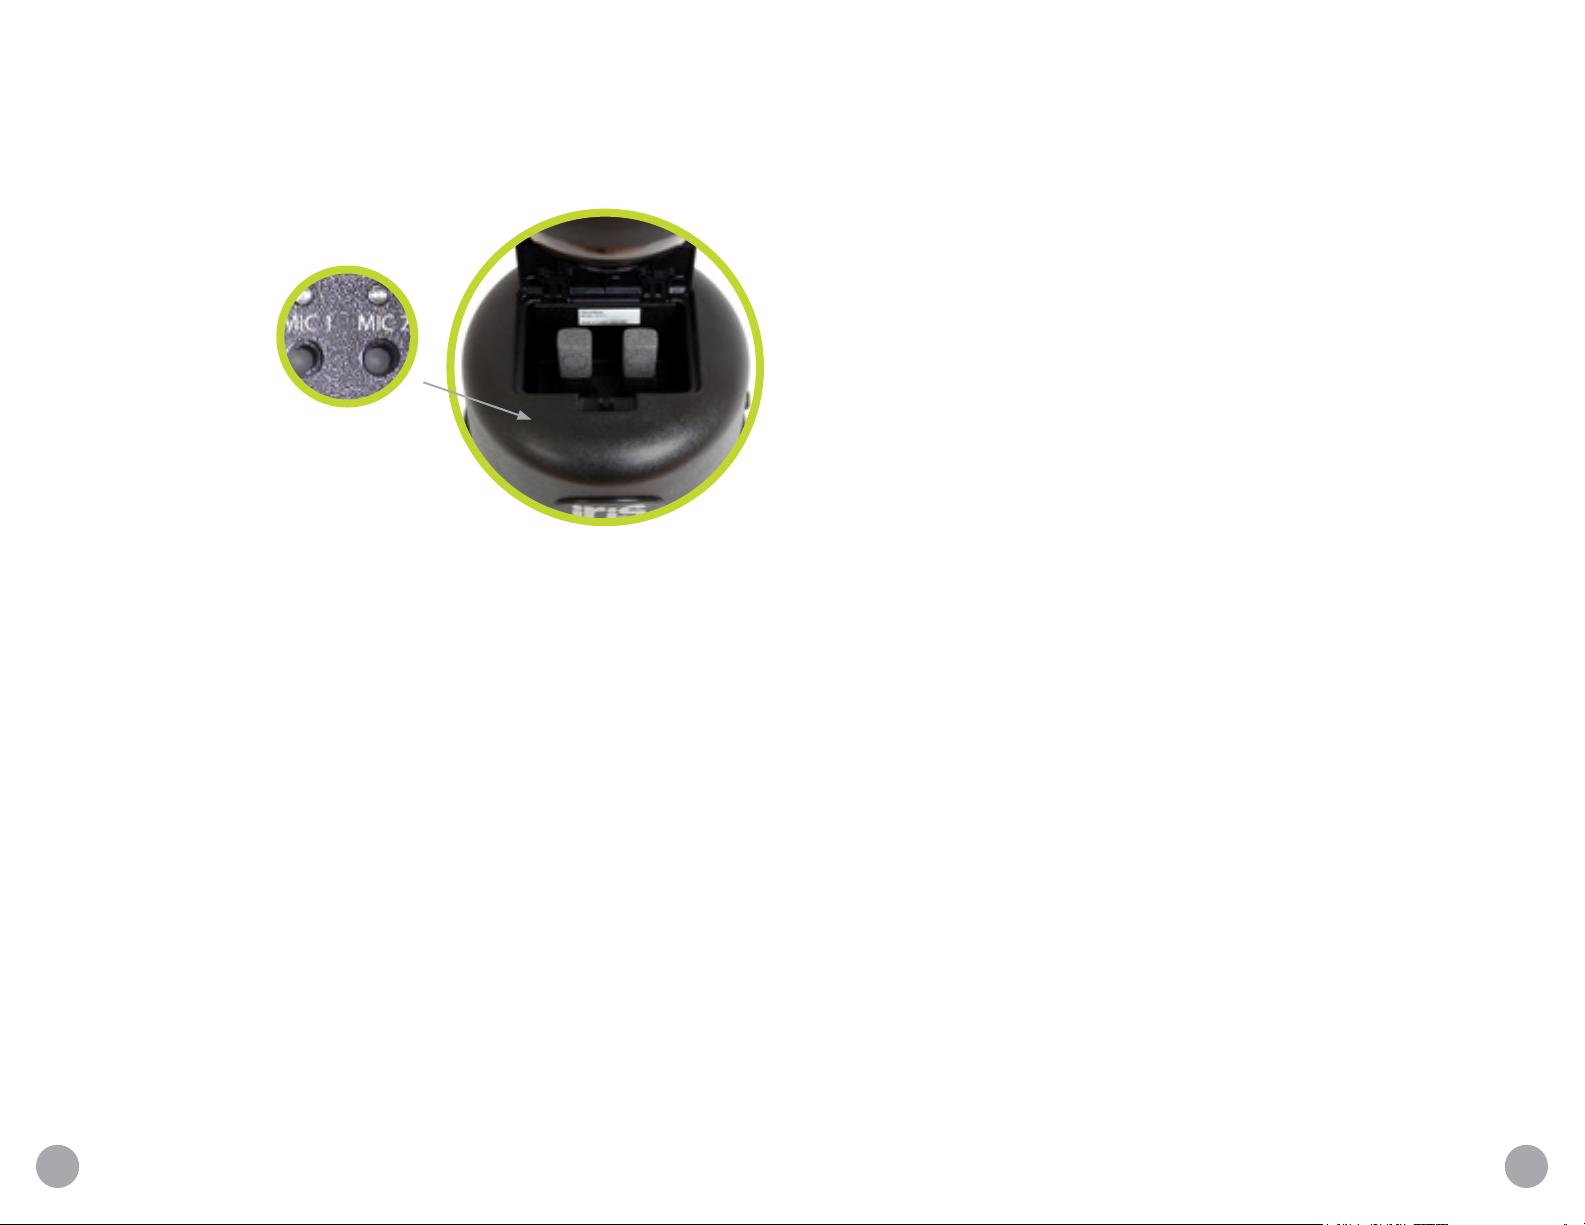
The iris LiveView captures teacher and student audio using
two HD wireless microphones. To capture audio, remove
the microphones from the charging
compartment.
Charging Time
The two wireless
microphones can
be charged by
docking them
into the wireless
microphone
compartment on
the base of the
iris LiveView camera. The mics can be used
for 6 to 8 hours on a full charge. Recharging a
fully depleted mic will take about 4 hours.
Microphone Placement
Microphone
pairing buttons
Microphone Pairing Instructions
The wireless mics are paired to the camera upon shipment from
thereNow. Should they become unpaired with the iris LiveView
camera, please follow the instructions below to re-pair.
Note: If mics flash green and yellow, continually, the batteries are
low and should be charged before repairing. If mics continually
flash red, yellow, green (in sequence) they are not paired and the
instructions below should be followed. If mics flash green they are
working and do not require re-pairing.
To repair the microphones with the iris LiveView camera:
1. Turn MIC o. To turn MIC o, hold down button on MIC until
MIC light turns solid red then let go. MIC light should now be
o. If MIC light is still on, repeat this step until the MIC light is
completely o.
2. Use pairing buttons on top (or side) of camera base to pair
MIC. Hold down corresponding MIC pairing button (1 or 2)
until light turns solid red, then let go.
The teacher mic (usually mic 1) should be worn on a lanyard or
clipped to a shirt and should be no more than 8 inches from the
teacher’s chin. The student mic can be deployed in the middle or
perimeter of the room to capture student audio. Ideal placement
of the student mic will depend on your needs. However, as a
general rule, the closer the microphone is to your subjects, the
clearer the audio will be. Placing the student mic in the center of
your student group will likely yield the best results.
Two-way Audio (real-time coaching)
Use the earpiece provided by thereNow, or another compatible
earpiece (2.5mm), by plugging it into the bottom of the teacher
mic. This will allow the remote observer to speak directly to the
teacher.
3. Hold down button on MIC until the MIC light turns solid red
then let go. MIC light will start flashing red, yellow, green.
4. Wait about 30 seconds while the MIC pairs with it’s
corresponding channel. When the pairing is complete, the
MIC light and pairing light on the camera should be flashing
green together. This means that the MIC is paired and on. If
MIC light is ever flashing red, the MIC is muted. Push the MIC
button to un-mute.
5. Repeat steps for second MIC if needed.
Note: Two-way audio will only work through the MIC 1 channel.
Accordingly, the teacher should typically use MIC 1.
6 7
Page 6
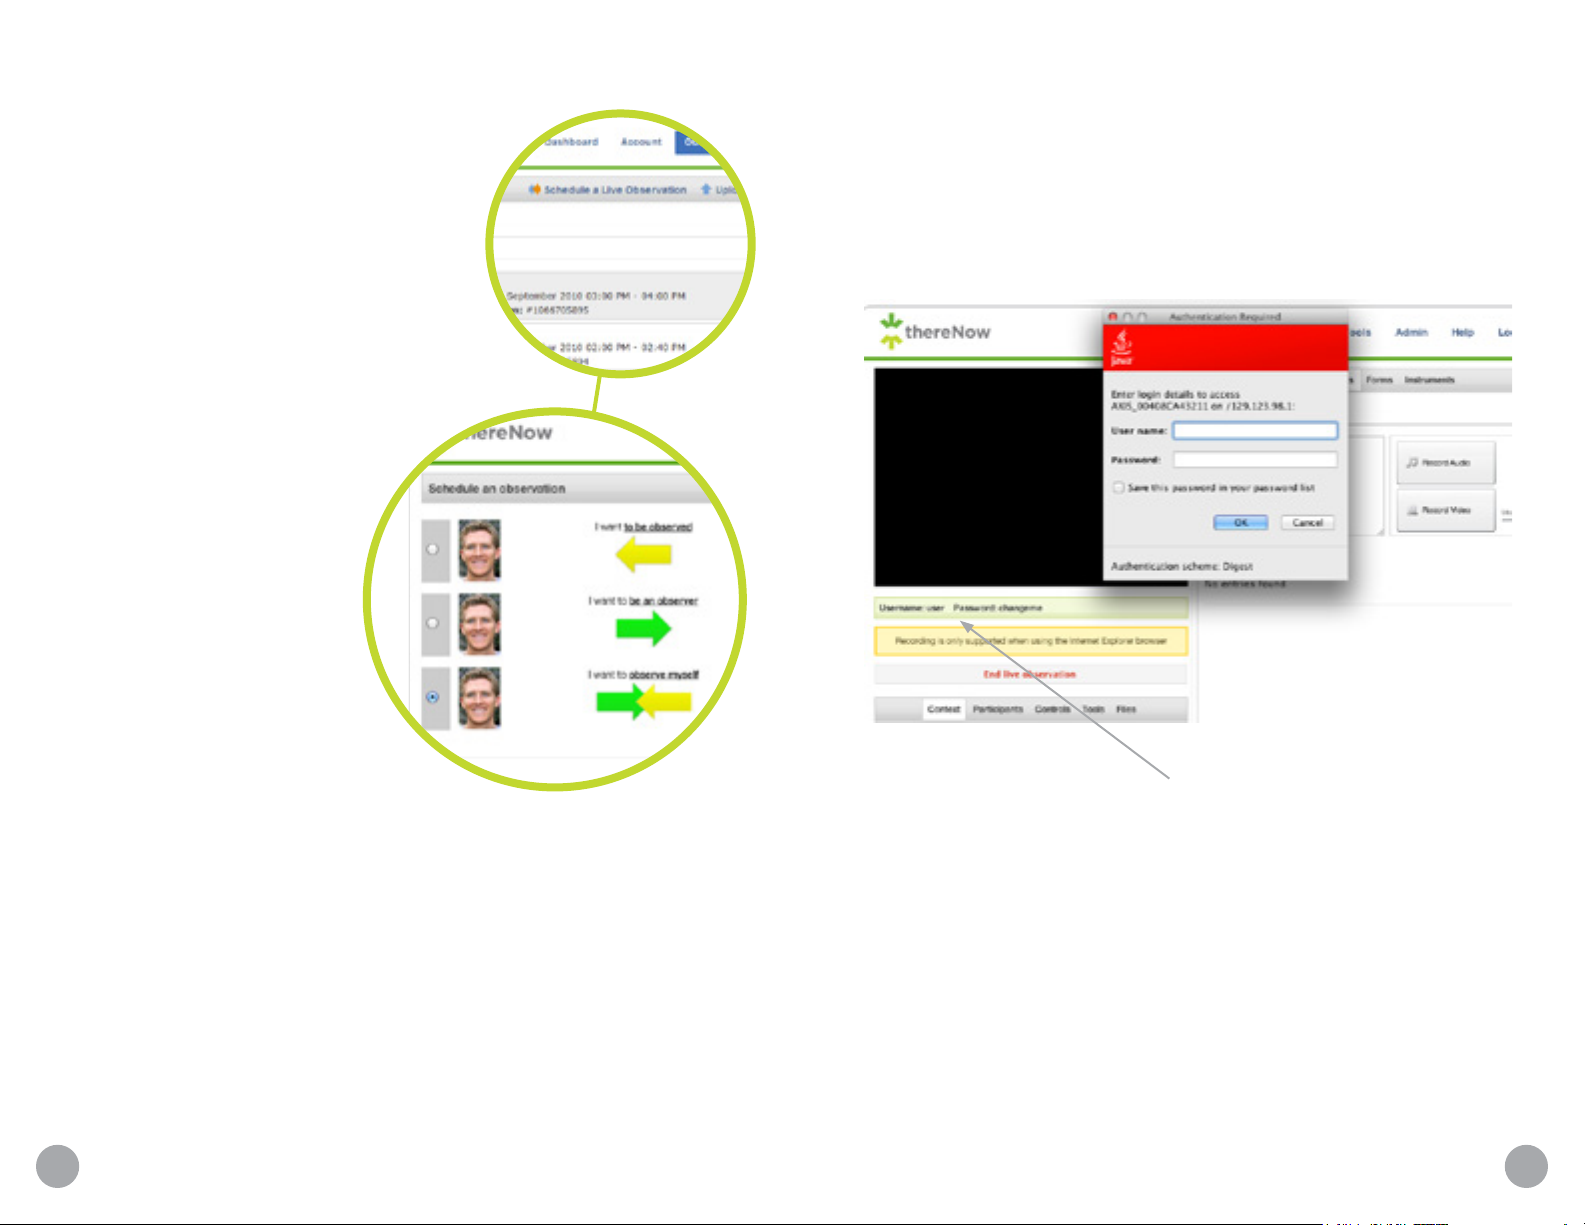
SCHEDULE AN OBSERVATION
It’s a good idea to set up a test
observation when first implementing an
iris LiveView camera at a new location.
To set up a test observation, make
sure you are a member of the location
where you’re testing. Your thereNow
group admin may need to add you to the
location. Log into your thereNow account
(app.thereNow.net). Go Observations >
Schedule a Live Observation > I want
to observe myself > Title (test) > Next
> Select current day and time (30
minute time frame) > Select
hardware (i.e., camera being
used. This will only be an
option when the location
has more than one camera)
> Schedule self observation
> Start.
You may be presented
with an authentication box
(picture on page 9). The
username and password are
displayed below the video
player.
4. Run the thereNow Camera Utility (available as an admin. Go:
Admin>Software Downloads>thereNow Camera Utility) to
search for the camera. If it is found and shows a dierent IP
address, then inform your network admin that the camera
is pulling a dierent IP address. The IP address found by
the thereNow Camera Utility can be used as a temporary
address. Enter the IP address in the IP address field for the
camera (Admin Tab > Hardware > click edit for the camera
that needs to be updated).
Troubleshooting Tips:
Enter this username
and password in the
If the video does not stream to the player, here are a few tips:
1. Refresh your browser a few times.
2. Run the System Check on the Dashboard and make sure all
checks show “Passed.”
3. Copy and paste the camera’s IP address into a new browser
window. If an Authentication window is presented then the
camera is typically networked correctly. If an Authentication
window is not presented then the network is not seeing the
camera.
authentication prompt.
8 9
Page 7
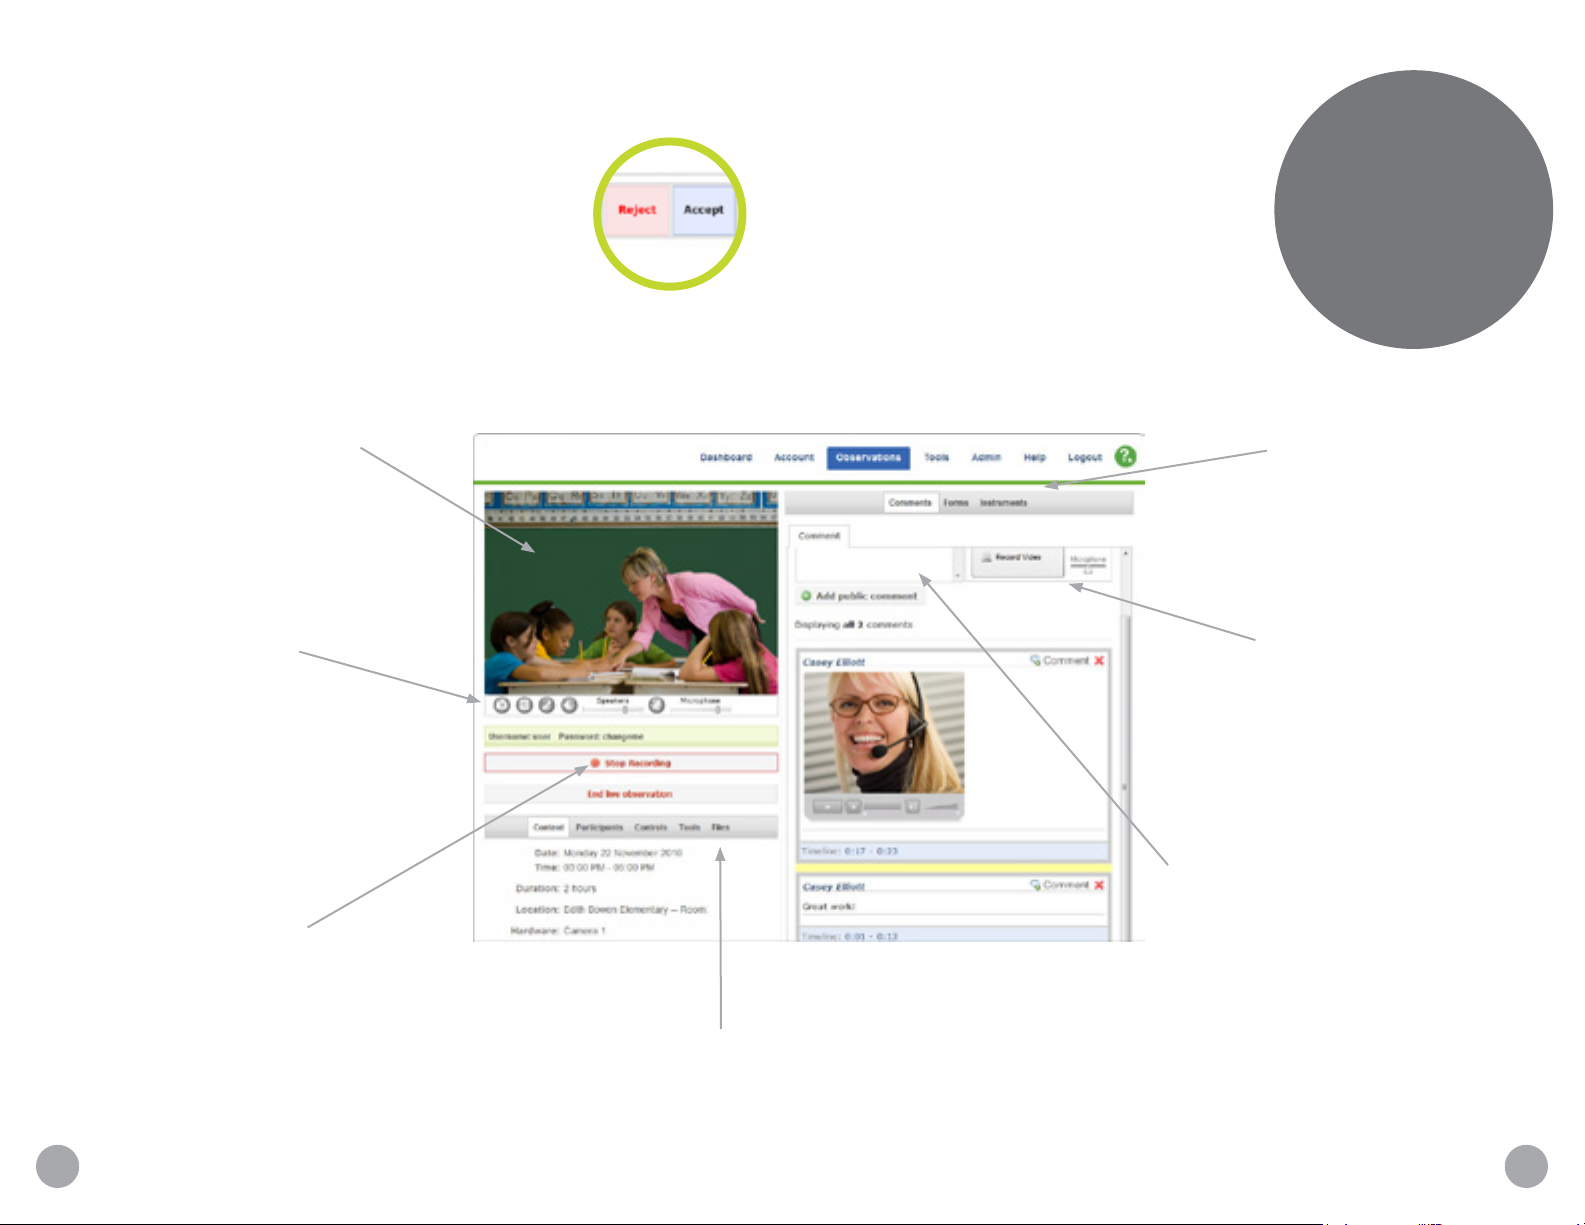
LIVE OBSERVATION
Observation requests can be accepted or rejected
in the invitations area located on your account tab.
Live Video Stream
Click on the screen
where you want to
center the camera
and use your mouse
scroll wheel to zoom.
Controls
Use the controls
to take snapshots,
expand to full
screen, change
control method, and
talk directly to the
teacher.
Once set up, and the time for the observation
has arrived, you can log in to a live
observation in the ‘upcoming’ section
of your observation library which is
located under the ‘Observations’ tab.
If an observation has been correctly
scheduled and the time to start has
arrived, it will appear in the upcoming
section of your observation library and
be highlighted in green. Simply click the
‘Start’ button to log in.
Data Collection Tools
Page 17 has more
create and use these
Video and Audio Notes
Make video and audio
notes by clicking these
buttons. Each video
and audio note will
be timestamped and
linked to the video.
TIP...
Try to make a single
recording in your
observation —this will
mean that you have just
one file to upload and
all of your time linked
comments will display
correctly.
info on how to
Text Comments
Record Button
Use this button to
start and stop the
recording of the
observation.
Observation Settings
Observation details,
settings and adding
Create live time linked
comments. Type
your note in the box,
then ‘Add Comment’.
The note will then
be added to the
commentary time line
below.
supporting les.
10 11
Page 8
Audio and camera controls
AUTOMATIC UPLOADING
To control the camera, simply left click with your mouse in the
video window where you would like the camera to center. Use
the scroll wheel on your mouse to zoom in and out.
The video recordings that are created during an observation
are initially stored on your computer’s hard drive (C:/therenow/
recordings). The videos must be uploaded from your computer
The following is a description of the icons on the bottom of the
LiveView player from left to right.
to your secure account on the thereNow web application. This
will allow you to review the recordings in the context of the
data you have collected or to collect further data and share the
Take a snapshot. Use the ‘camera’ icon to take still shots. (pics
observation with other users if you wish.
saved under C:/therenow/snapshots).
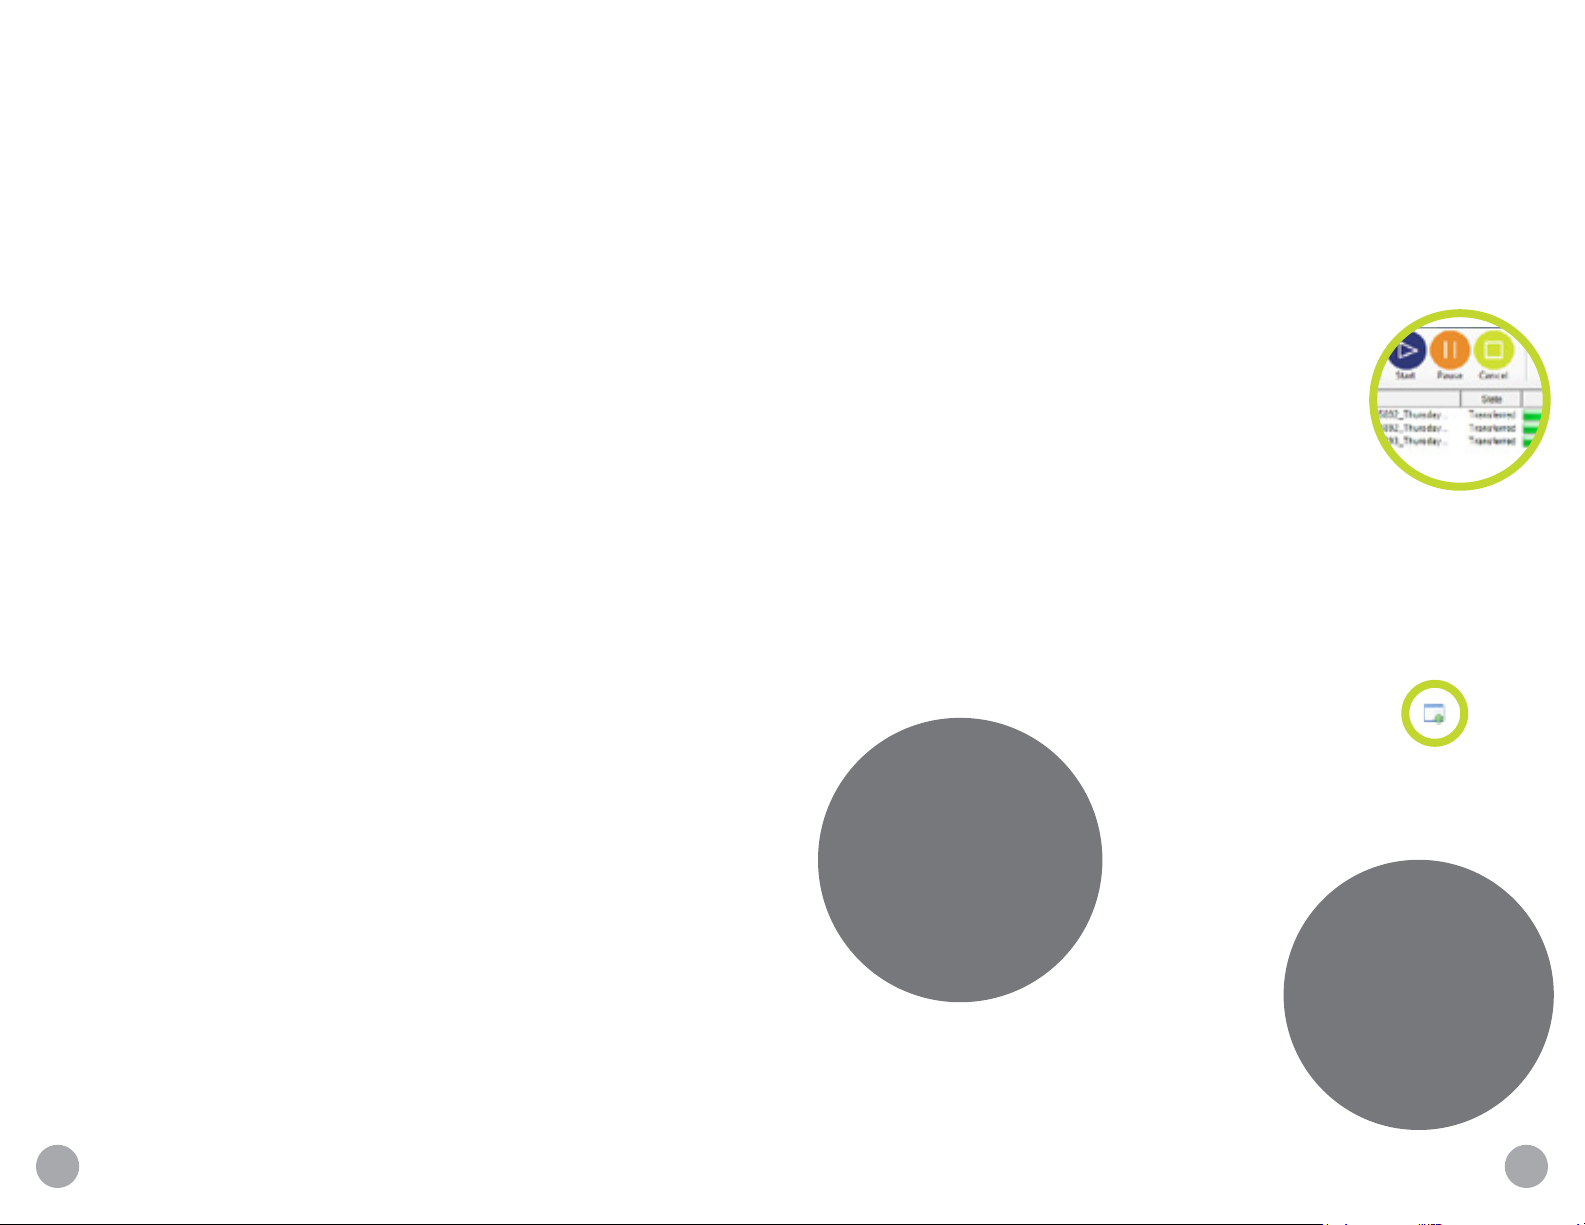
This process will be managed for you using the
Full screen video mode. Use this button to expand the video to
thereNow Video Uploader.
a larger player - ideal for a duel computer monitor set up.
Joy stick mode. This is another mechanism to control the
Automatic Upload using the thereNow Video
Uploader
camera. The arrow on the screen indicates the direction of
camera travel. When you depress the left mouse button, the
distance from the center of the video image indicates the speed
of camera travel. This control mechanism is more precise but
requires practice.
The thereNow Video Uploader is installed on your
computer automatically when you download and run the
software from the ‘Getting Started’ area of your Dashboard tab.
Upon first launch, the Uploader will prompt you to log in. Use
your thereNow credentials to log in. If open, the thereNow Video
Mute and un-mute. This mutes the sound from the microphones
in the classroom.
Uploader will automatically detect when you have made a video
recording during an observation and upload it to your account.
The thereNow Video Uploader will run automatically
Talk back button. Click this button to communicate to the
teacher through the earpiece. Be sure to use headphones when
doing this. Not using headphones will result in the teacher
hearing the classroom audio from your computer’s speakers.
Click again to mute the talk back button.
Video and audio comments
In addition to text comments, you can create video and audio
comments using your computer’s microphone and webcam by
clicking on the ‘Record Audio’ or ‘Record Video’ buttons.
Adding files
You can add files to support your observation by clicking on the
‘Files’ button underneath the video window. If the file is of a type
that can’t be opened by your browser then right click on the file,
select ‘Save Target As’ from the menu and save the file to your
computer so that it can be opened with the appropriate program.
from start up. You can check the status of any
upload or change the settings by
double clicking on the
TIP...
Uploader icon in the bottom
right hand corner of your screen (icons
If the computer you
are using is shared with
other thereNow users
then make sure that the
thereNow Video Uploader
is logged into your
account by clicking on
the settings tab.
tray).
Be sure that the
thereNow Video
Uploader is
activated before
starting the
recording. This
will ensure that the
video gets uploaded.
Once uploaded, the web application will
associate the video file with the relevant
observation and optimize the video for
TIP...
Don’t worry if you
disconnect from the
Internet while uploading
a file - the next time that
you have a connection
the software will pick up
from where it left o.
viewing on the Internet.
12 13
Page 9
MANUAL UPLOAD
Browser
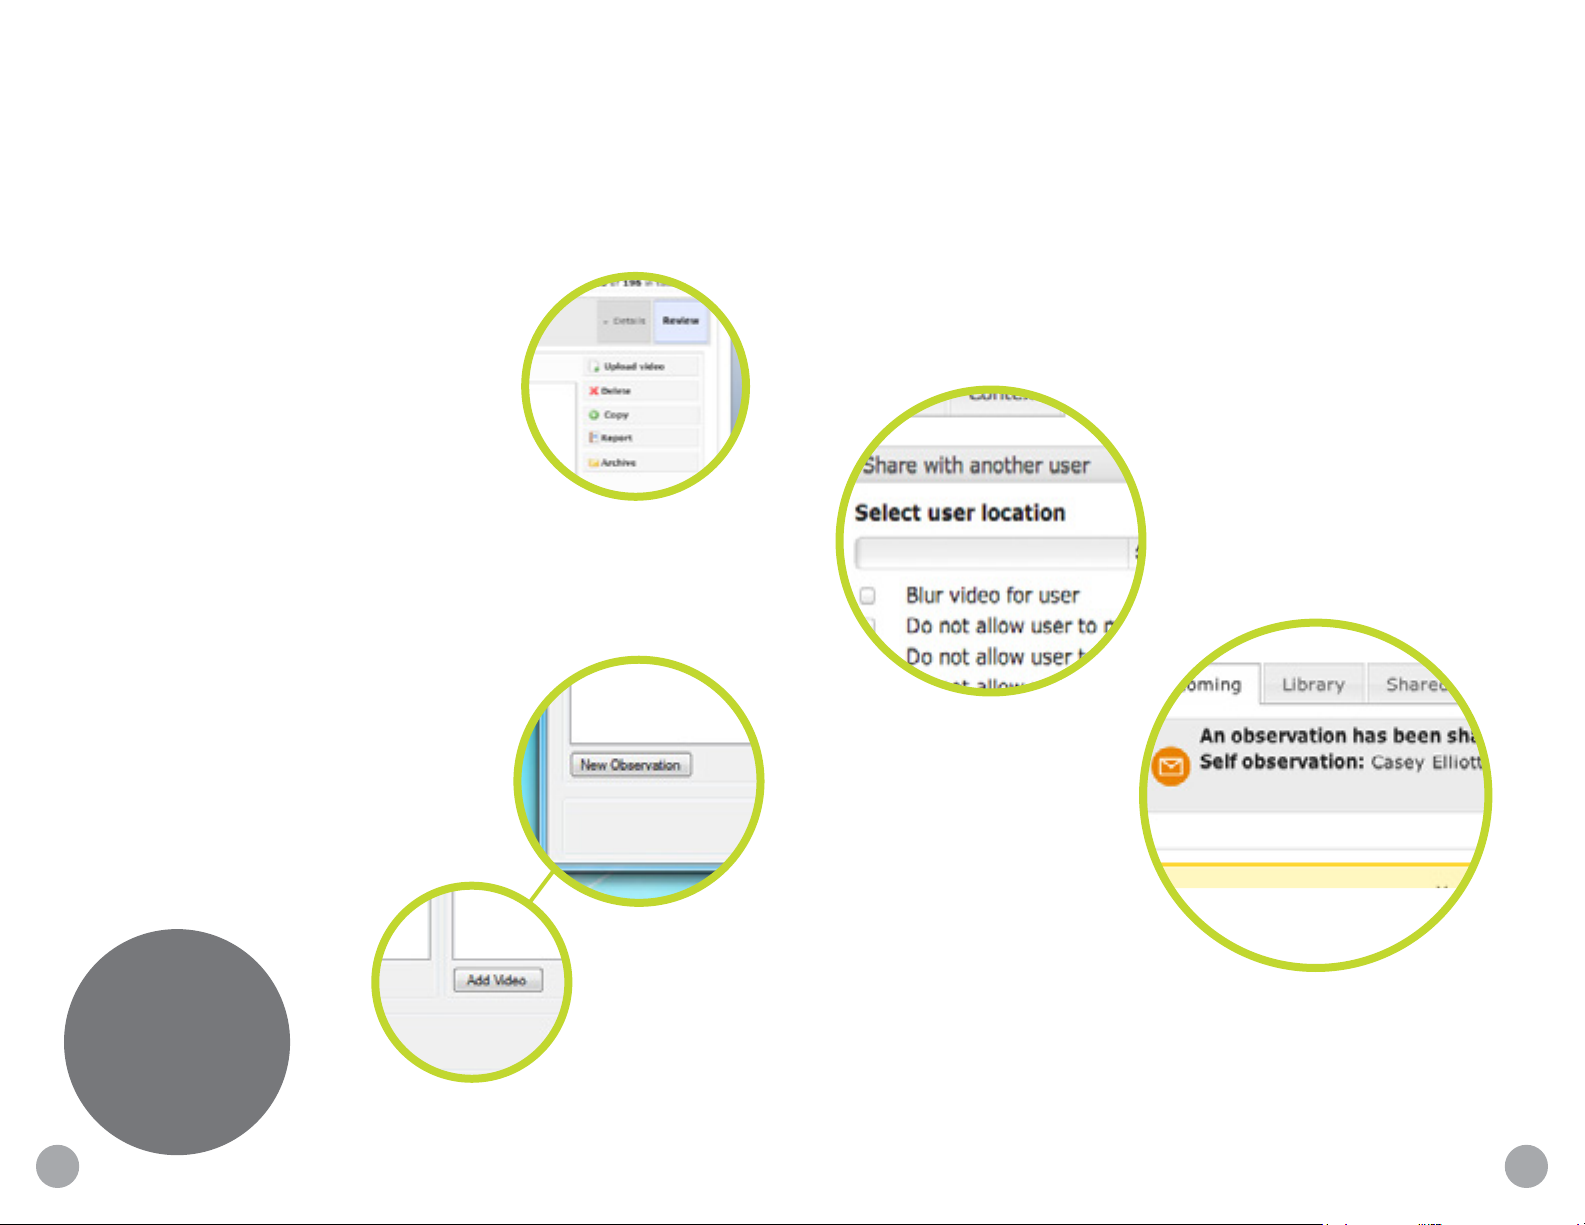
To manually upload a video file, find the relevant observation in
your library. Click on the ‘Details’ button and then on the ‘Upload
video’ button displayed on the right hand side.
This will open a window that prompts you to
browse to the location where your video
is stored (it will likely be C:/therenow/
recordings, unless your network
administrator advises you otherwise).
Highlight the video, and click on ‘Upload’.
Please be patient as this may take a little
while.
You can continue working on your PC while the
video uploads. Just ensure you leave this dialogue box open until
it has finished.
Manual upload using the thereNow Video Uploader
Open the thereNow Video Uploader > New
Observation. After creating the observation
entry (or select an existing observation from
the list) click Add Video > add applicable
file(s) > click Start Upload.
SHARING
It’s important to remember that other users cannot access your
observations unless you have shared it with them. Sharing is
simple: locate the relevant observation in your library and update
the ‘Sharing’ tab under the ‘Details’ button. To share with an
individual user, use the ‘Share with another user’ section to select
the right person using the drop down box and click on the share
button. If you would like to share your observation with all other
users at your location or another location then simply use the
‘Location Sharing’ button at the bottom of the sharing tab.
When a video is shared with another
user, they must accept the invitation to
participate in the observation. This is
done through the ‘Observation’ tab
> Upcoming > Accept.
Once uploaded the video will be
processed by thereNow. Once processed,
the video will be available to view
within your Observation Library.
TIP...
Upload times will
vary depending on
your video length
and Internet
connection
speeds.
14 15
Page 10
OBSERVATION LIBRARY
DATA COLLECTION TOOLS
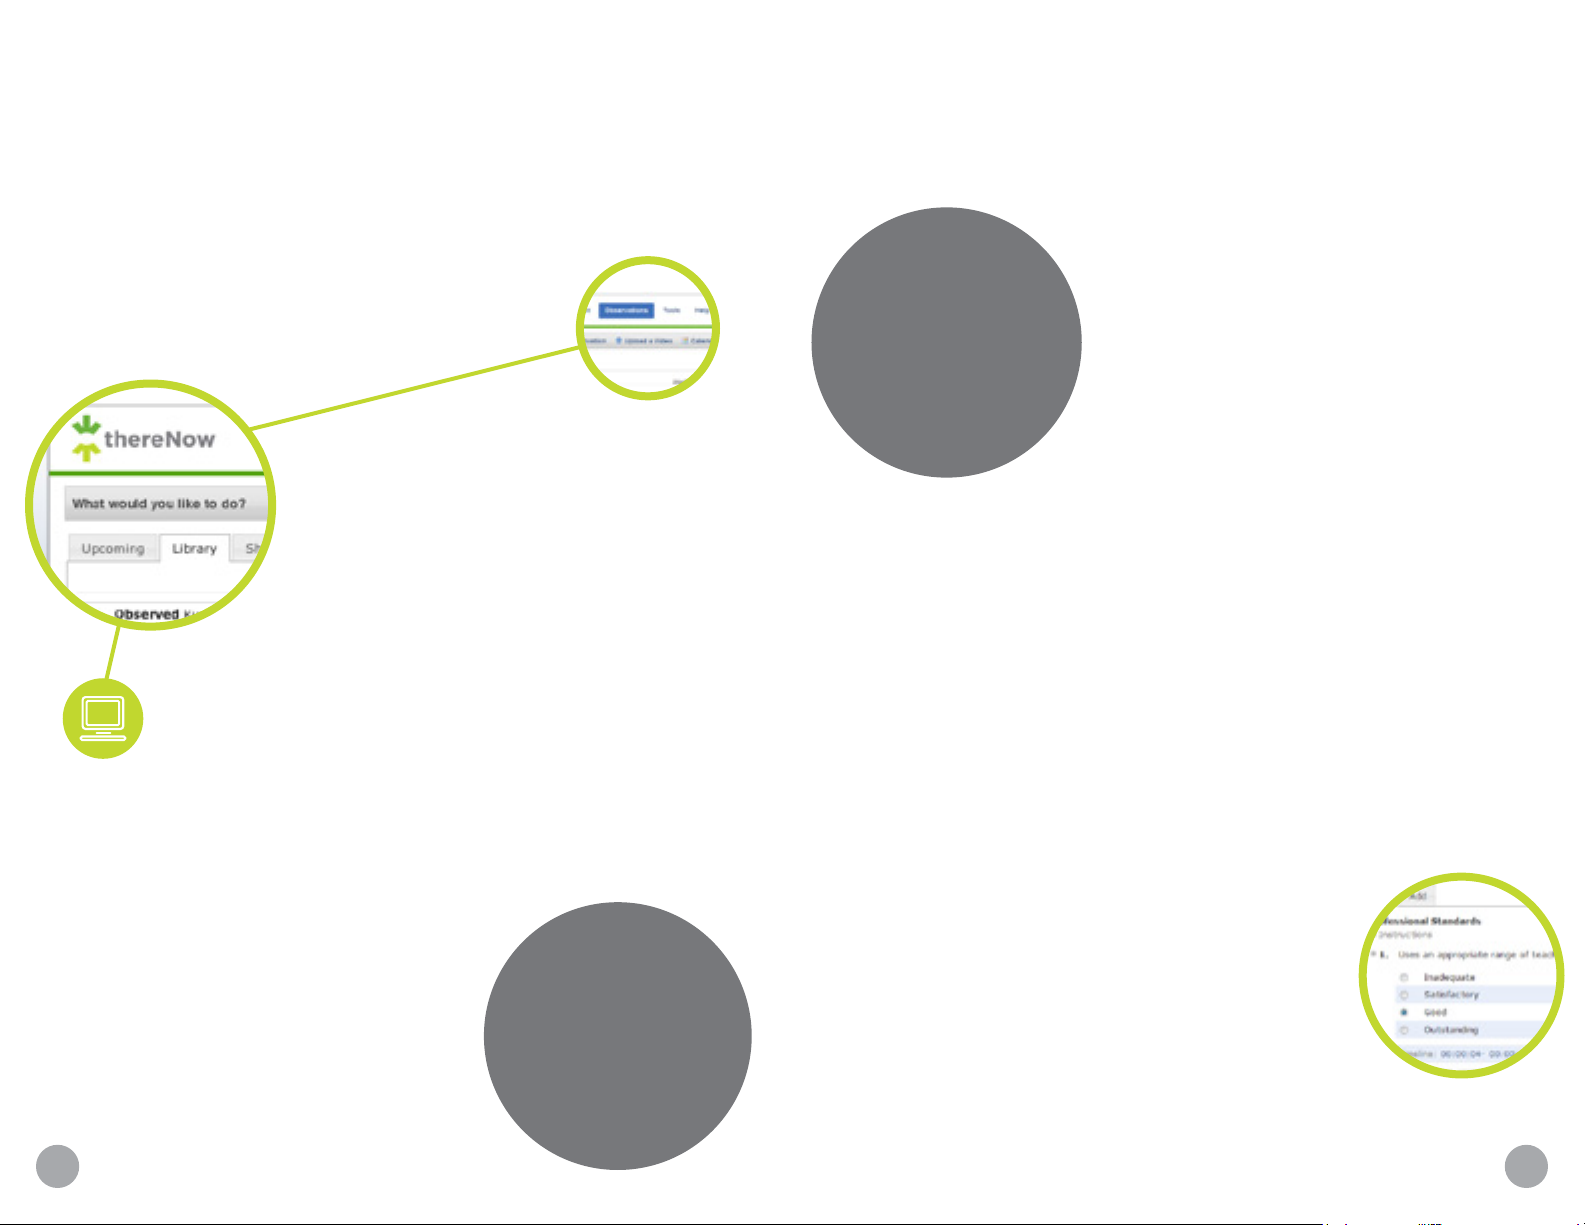
Your Observation Library is located under the ‘Observations’ tab
on the top menu bar. This area is where you can:
• Set up new observations (page 8)
• Log into scheduled observations (page 10,11)
• Review your own observations (page 18)
• Share them with others (page 15)
• Review the observations that others have
shared with you
The Observation Library is split up into
three sections:
Upcoming
This is where all of the observations that
are scheduled to happen in the future, or are
available for you to log into now, are displayed.
If an observation is available to log into now it will
be highlighted in green. All you have to do is click on the
start button.
Library
This is where all of the previous observations that you have
participated in are available to review or share. Observations that
have been shared only with you are also displayed here. For more
information about the observation click on the details button. To
review the observation click on ‘Review’.
Shared Library
TIP...
This is where observations that have
been shared with everyone at your
location are displayed for you to review.
You can use the flag
box that appears
under the details
tab to report an
observation to your
local administrator
for review.
Forms and instruments are a powerful way to gather useful data
about what you observe. These tools can be used in a
live observation or later when reviewing.
TIP...
Adding forms and instruments to your
If you are going to use
a data collection tool in
a live observation, you
should create it before
you start, and add it
to the observation
before you click on the
‘Record’ button.
observation
To use a form or instrument in your
observation click on the appropriate tab
on the right hand side of the observation
screen and then on the ‘Add’ button.
Check the box next to the tool or tools that
you wish to use and then on the ‘Add Form(s)’
button.
You can add multiple data collection tools to observations; just
switch between them by clicking on the tabs.
Filling in forms
To complete a form, fill in the data by selecting from multiple
choice lists, selecting points on rating scales, or filling in text
boxes. If you click on ‘Start tag’ and ‘End tag’ you can associate
your responses to each question with specific points on the
video timeline. When reviewing the observation, a time stamp
will appear next to the answers that enable you to skip the video
to the exact point in time that you decided best demonstrates
your response. Please, remember to click on ‘Save’ after you have
finished filling it in.
Creating forms and instruments
To create a form or instrument click on the
‘Tools’ tab on the top navigation bar and then
click on the type of tool that you wish to create
in the menu bar to the left. You can also click on
the ‘Add’ button next to the relevant tool in the
observation screen and then the ‘Create’ button.
16 17
Page 11
REVIEWING YOUR OBSERVATION
GROUP AND LOCATION ADMINISTRATOR
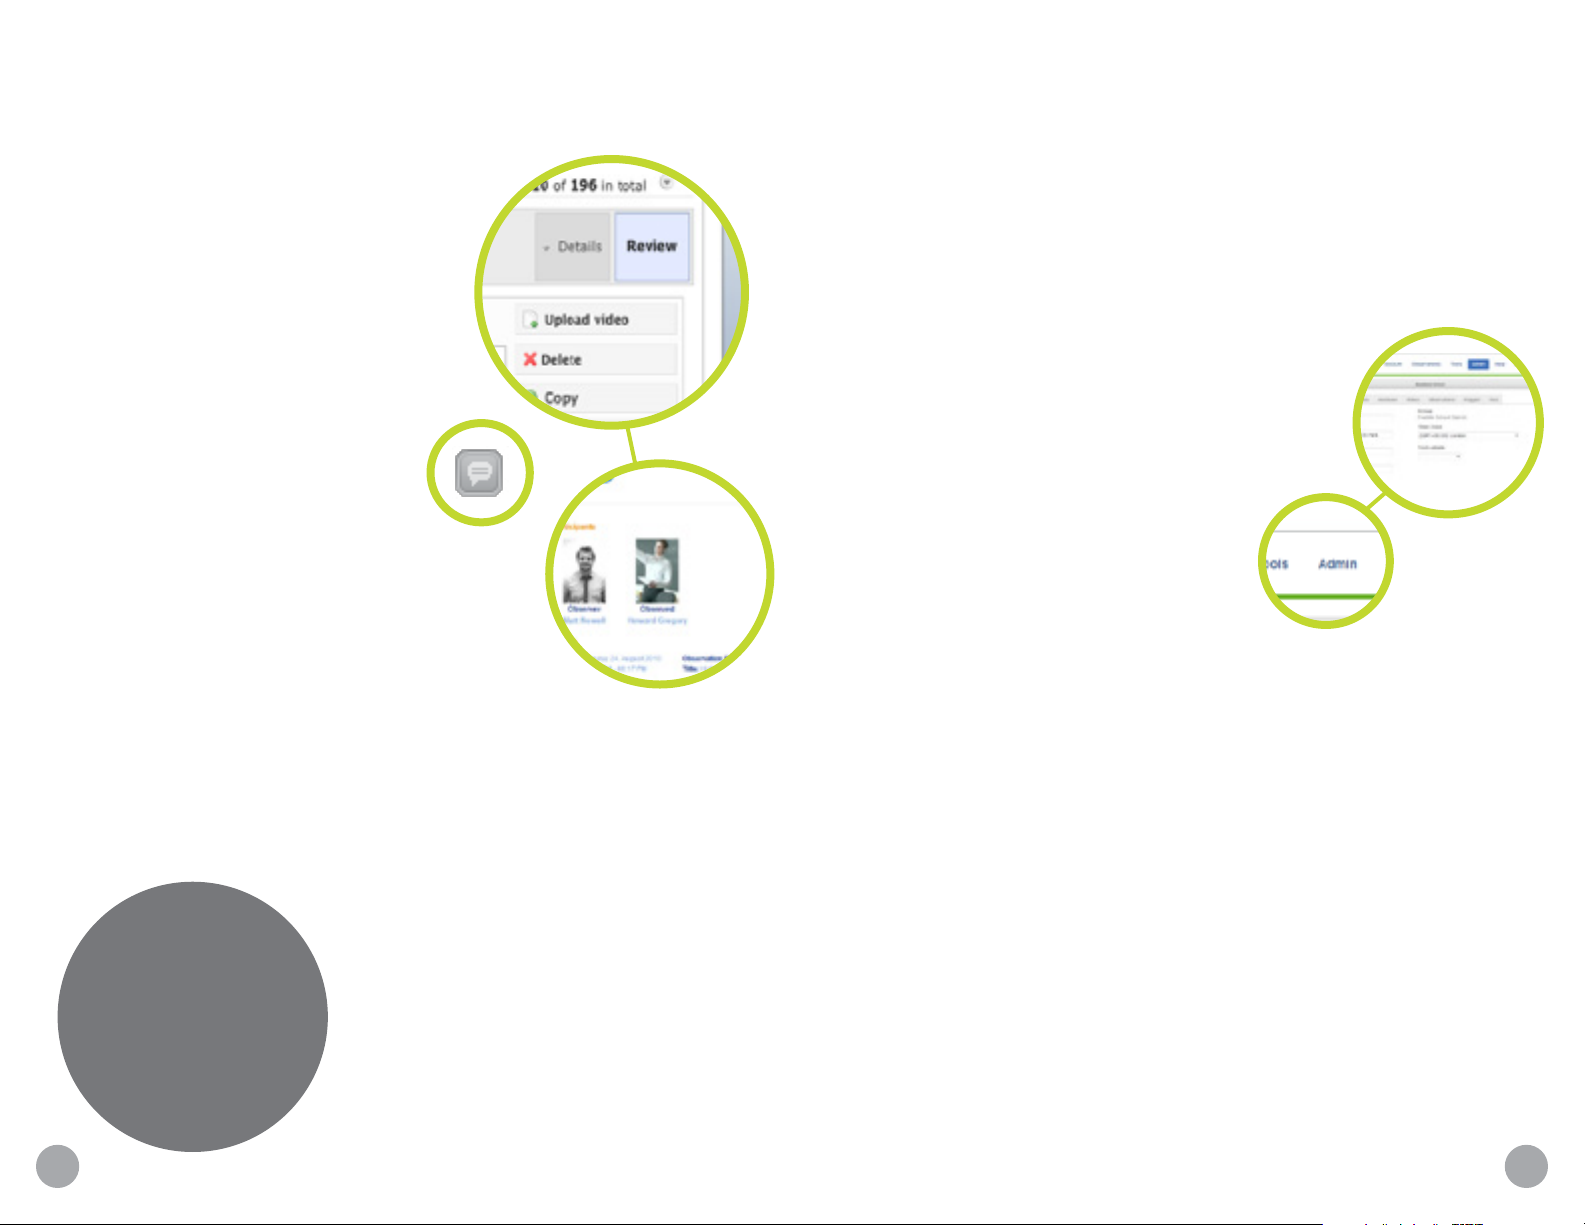
To review an observation go to your
observation library and click on the
‘Details’ button next to the relevant
observation and then on the ‘Review’
button to open it.
The reviewing interface is almost
exactly the same as the live
observation interface, except that
you now have a video of your lesson
streaming in the top left hand corner
instead of the live view from the
classroom.
As you watch the video, the
comments on the time line will be
displayed on the right. If you click
on the speech bubble button under the video
window the text from the comments will also
appear over the top of the video.
You can add additional comments and use all of
the data collection tools over the recorded video in
exactly the same way as you do in a live observation.
Observation Report
If you click on the ‘Report’ button you will be presented with a
report that includes a summary of all of the data that has been
collected in forms and instruments.
There are options to download the report
TIP..
You can save time
when reviewing the
lesson by navigating
around the video using
the time stamps next to
the comments on the
time line.
as a PDF if you would like to print it out
or as a CSV if you would like to import
the data into a spreadsheet.
Your thereNow account is organized as follows: Group (usually
your district), Locations (usually school buildings), and Users
(each user is assigned to one location). thereNow application
admins are defined as follows:
Group Admin
Can view/edit locations, cameras, and users in the
group.
Group Technical Admin
Can view/edit all cameras in the group.
Location Admin
Can view/edit cameras and users for
their location.
Location Technical Admin
Can view/edit cameras in their location. If you are the location
administrator you have extra functions on your account that help
you to set up the system at your location, manage its use and
moderate / delete content if a user has complained about any
aspect of an observation. These functions can all be accessed
under the ‘Admin’ tab.
Edit Location
This area allows you to edit the details of your location on the
system. It also allows you to change settings that control how
users at your location interact.
Skip invitation acceptance: When turned on, the application
is set to automatically accept observation invitations. These
observations can be rejected by the user at any time under the
‘Invitations’ area of their ‘Account’ tab.
Disable e-mail invitations: When turned on this will disable the
e-mail invitations that the system generates when a user invites
participants to an observation.
18 19
Page 12
Users can schedule / share with all group members: This function
allows your users to interact with users at locations that are in
the same group (e.g., other locations in your district). When
scheduling observations or creating a shared observation from
their library this will add a drop down list of locations to select
from before selecting individual users.
Observations
Here you can see a list of observations
that have been set up.
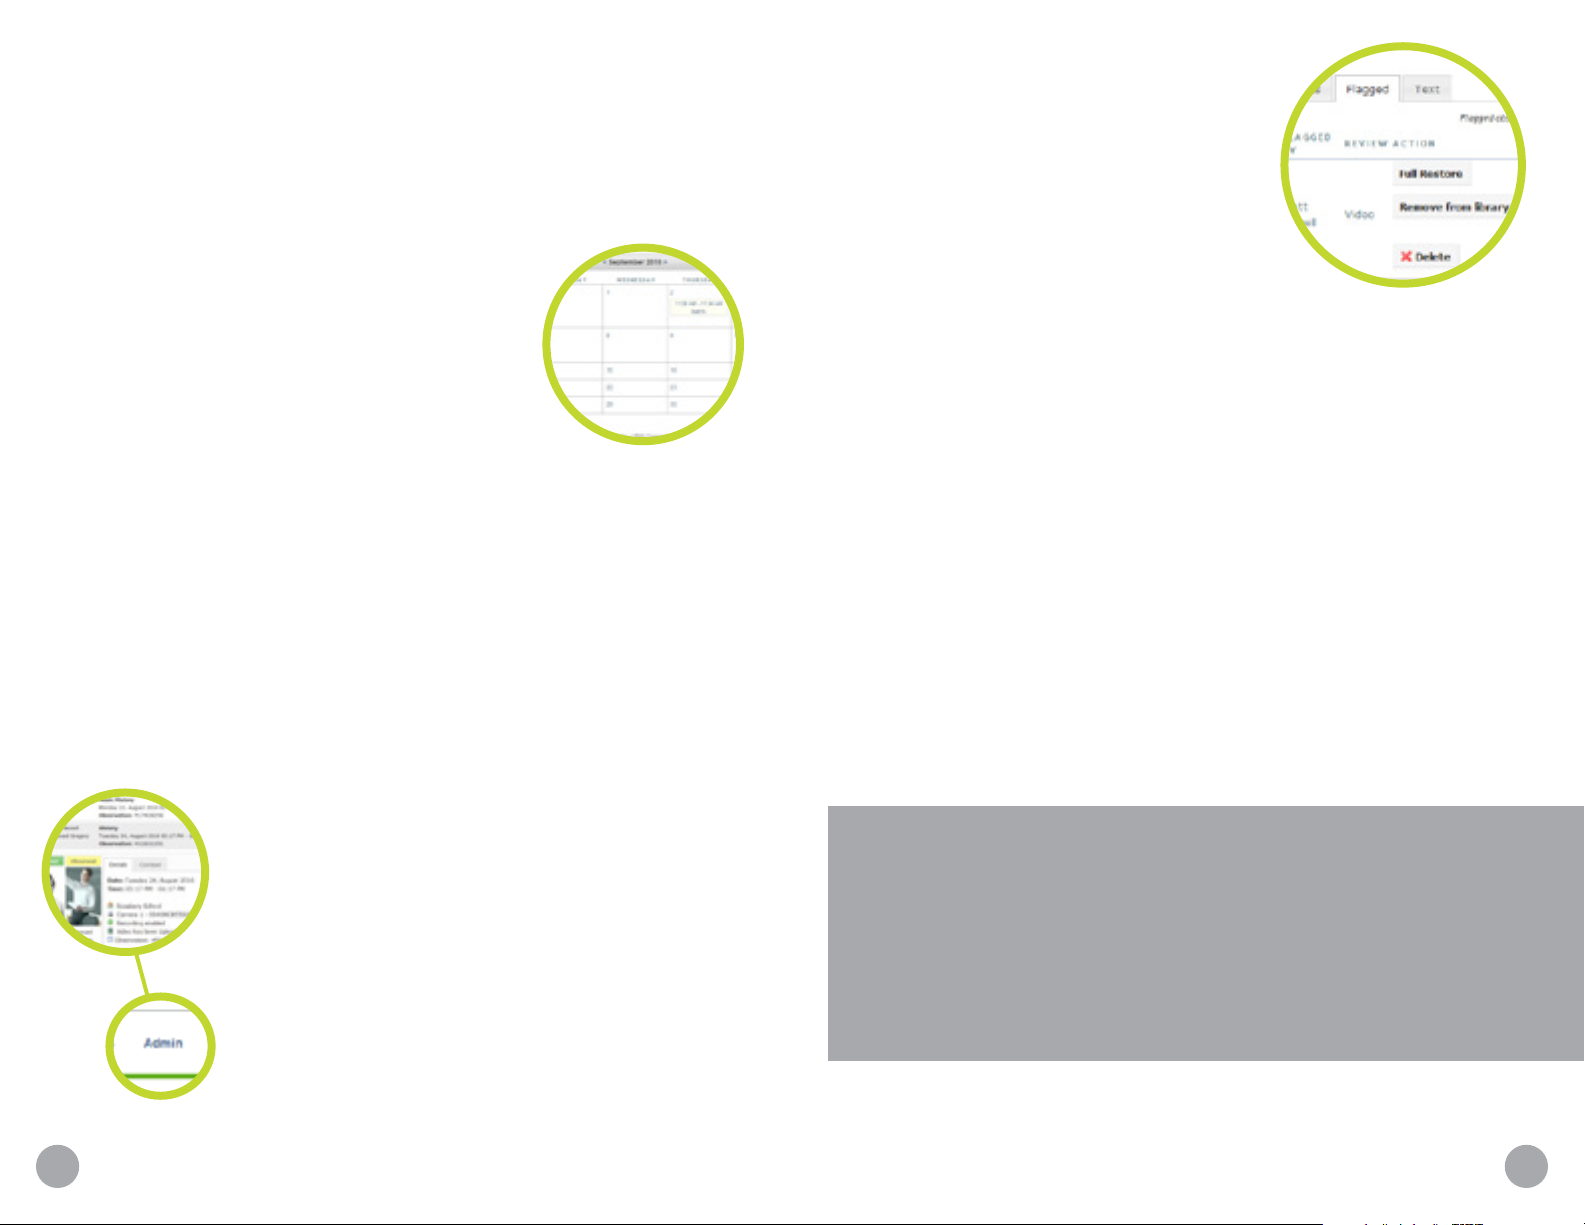
Flagged
Calendar
An easy way to plan for upcoming
observations is to open the calendar in your
observation library. As group or location
administrator you have the ability to see the
names of participants, times, and details of
observations scheduled.
Users
Here you are presented with a list of users at your location.
By clicking on ‘Edit’ you can change their details or enter user
specific news that will appear on their dashboard. To create a new
user click on ‘Add user’, enter their details and they will be sent
an activation e-mail.
If they have not activated their account or lost their previous
e-mail then you can click re-send and the system will issue them
with a new activation e-mail.
Hardware
In this area you can see the details of the thereNow
cameras at your location. If you click on ‘Edit’ then
you can change the camera’s name, IP address,
and connection method. Note: the passwords are
set and should not be changed.
Videos
This tab allows you to keep track of how many
videos have been uploaded, how large they are
and which users uploaded them. You do not have
access to view any video on the system unless it
has been shared with you.
Under this tab you have the ability to
moderate flagged observations. If an
observation has been flagged then it will have
been automatically removed from all libraries until you have dealt
with it.
If you do not already have permission to view the video through
your own library or location library, then you have a ‘Request to
view’ button that will notify the owner by e-mail that you have
requested to view the video and place an entry in their invitations
list to accept or reject. They have the option to delete the video
themselves at this point.
As location administrator you have the option to delete the video,
restore it to its previous state or remove it from the location
library.
Text
In this tab you can create news items that will be displayed on
the dashboard of all users at your group or location.
Need more help?
You can schedule a webinar training session with thereNow, or
just reach out to ask a quick question.
Email us at: [email protected]
Call us at: 1-877-525-4747
20 21
Page 13

Made in the USA
Manufactured by thereNow, LLC
877-525-4747
www.thereNow.net
© thereNow, LLC 2012 | All rights reserved
 Loading...