

Page 1
Bedienungsanleitung de
Instruction manual en
Mode d’emploi fr
Manual de instrucciones es
Manuale di istruzioni it
Manual de instruções pt
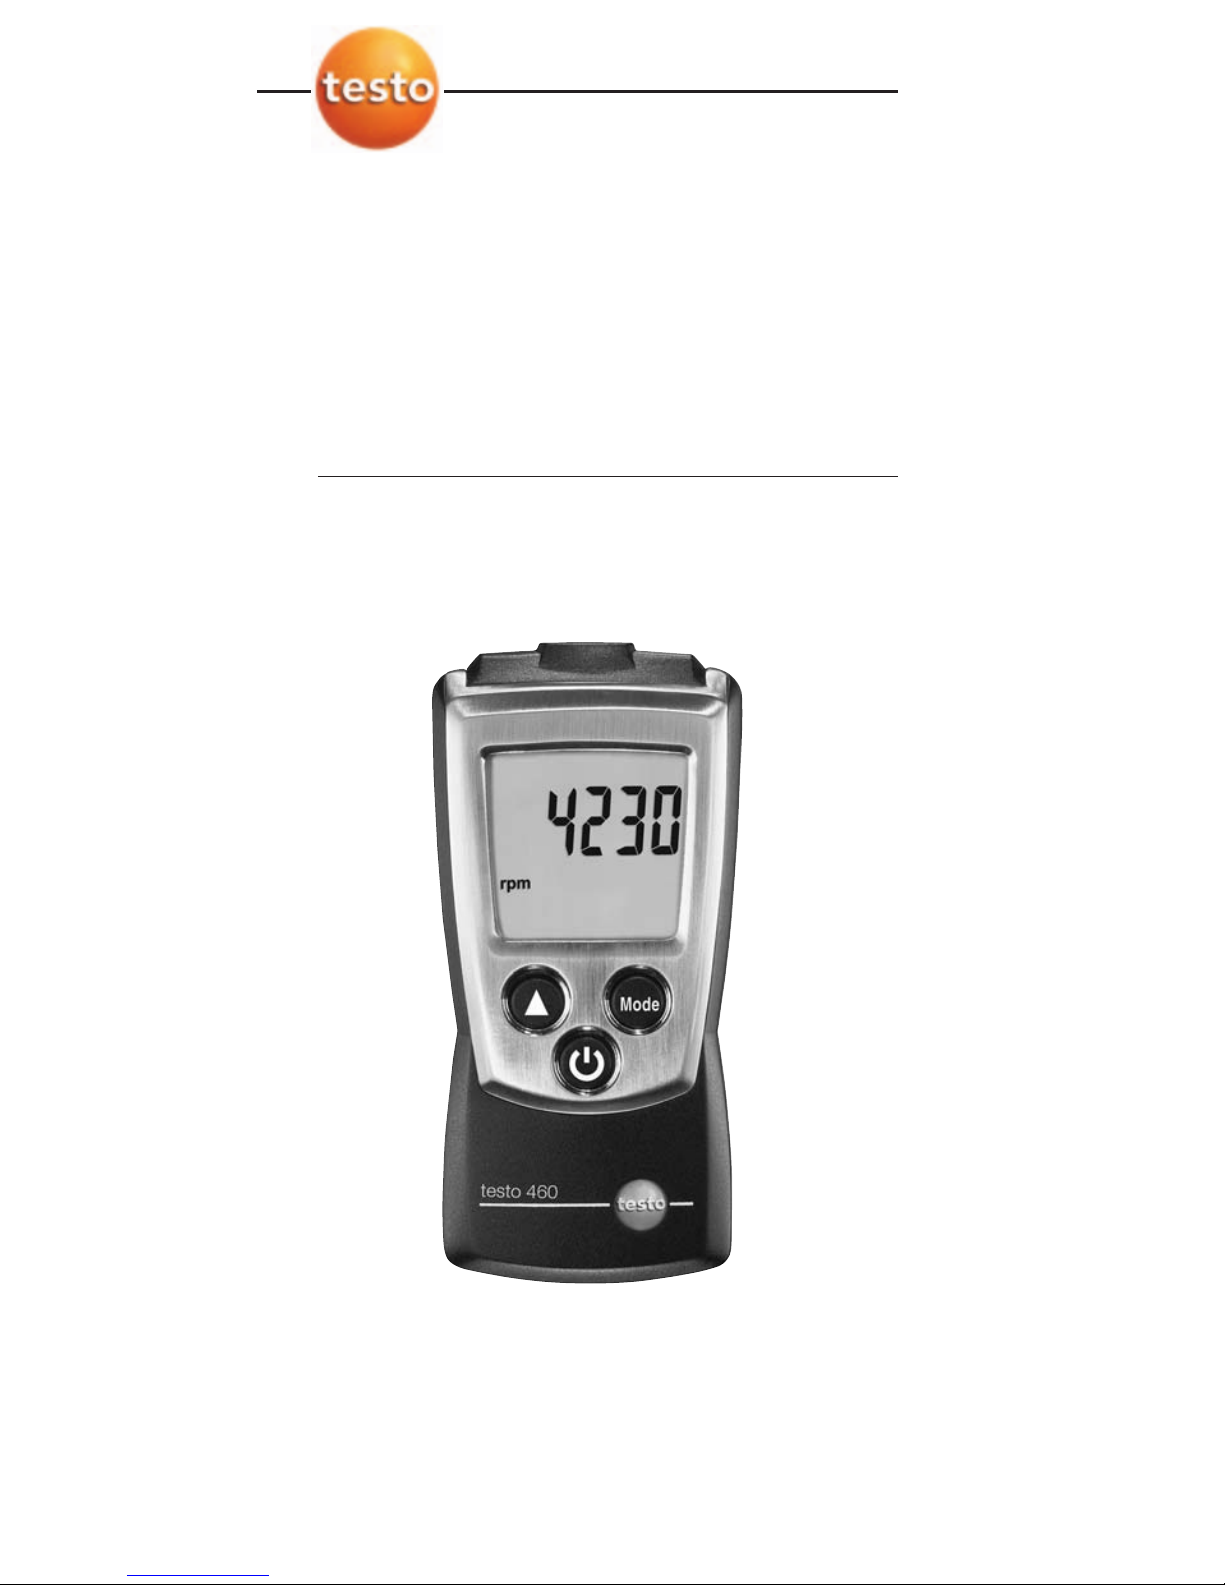
testo 460
Page 2
Short manual testo 460 11
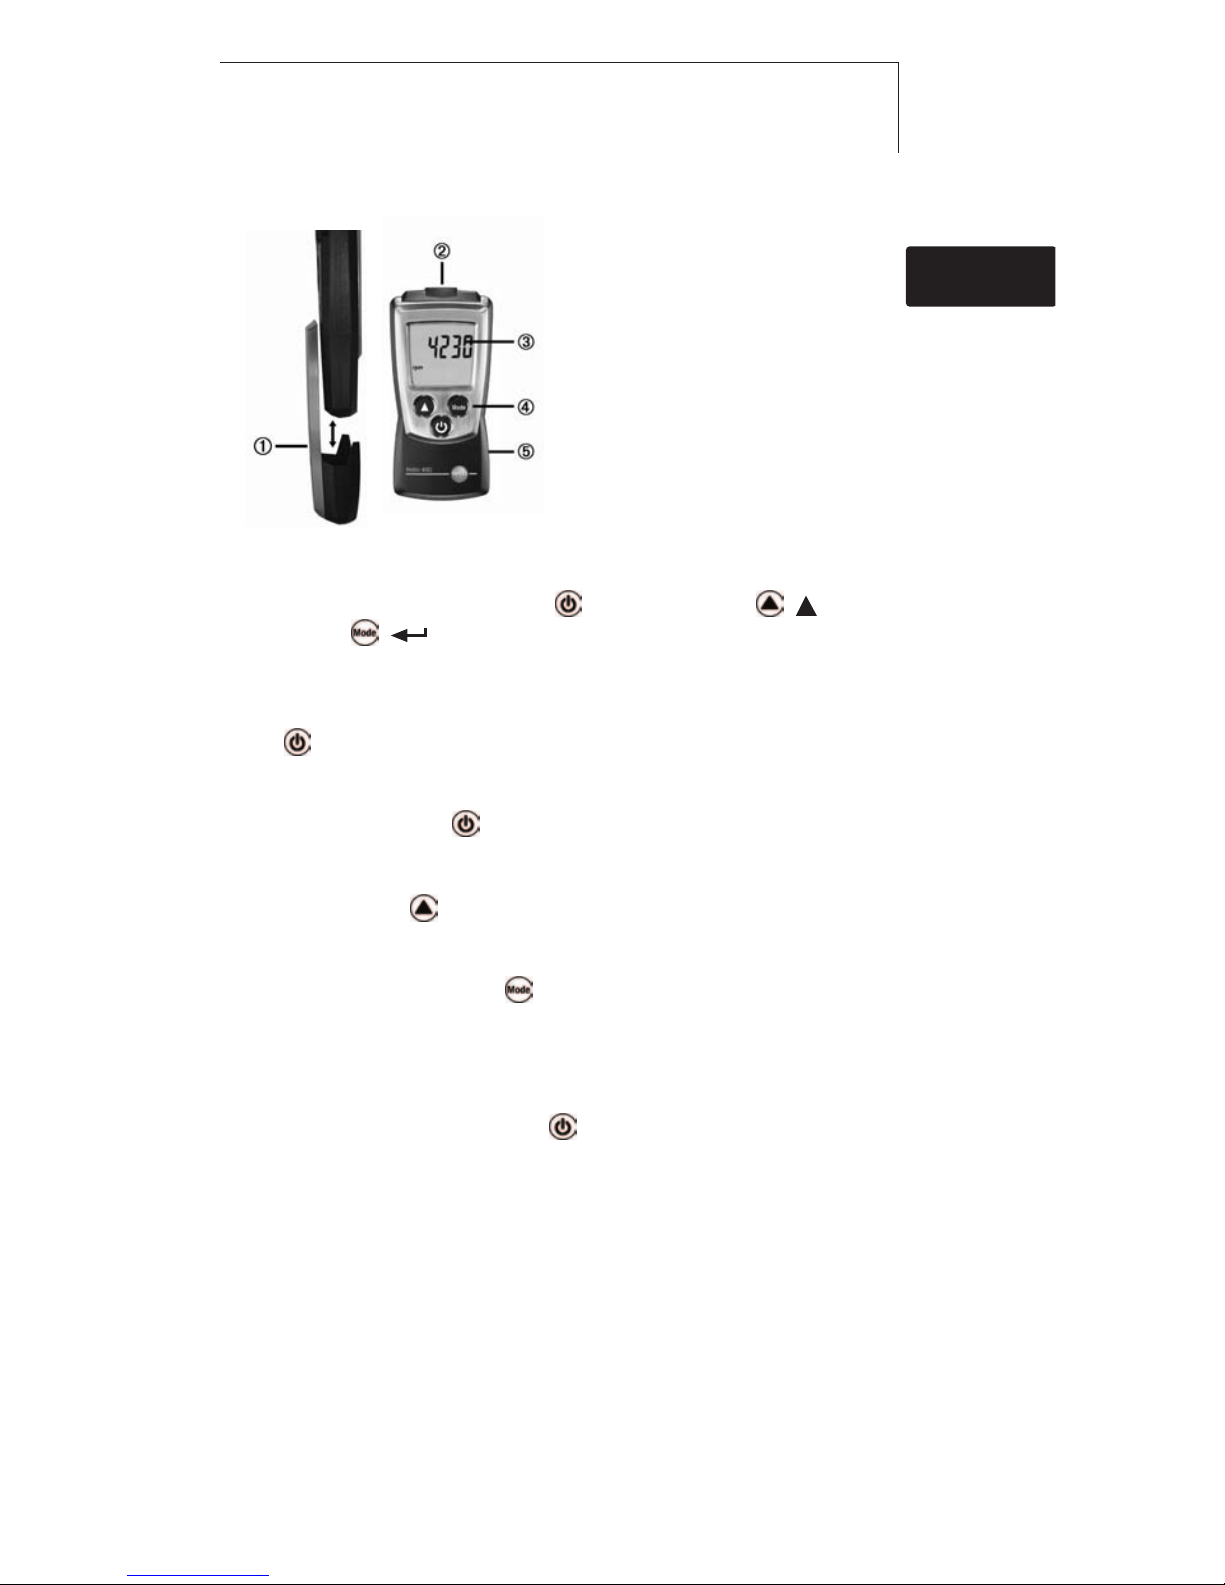
Short manual testo 460
Protection cap: Park position
Photo transistor
Display
Control keys
Battery compartment (on rear)
Basic ssettings
Instrument off > press and hold 2s > select with ( ),
confirm with ( ):
Unit of rotational speed: rpm, rps, Auto off function: OFF, ON
Switching tthe iinstrument oon
Press .
Switching tthe ddisplay llight oon ((for 110s)
Instrument on > press
Measuring
i Press and hold .
Select ddisplay mmode
Instrument on > select with :
Hold: Readings are held > Max: Maximum values > Min: Minimum values > NO.: Set
the number of blades.
Switching tthe iinstrument ooff:
Instrument on >press and hold 2s.
de
en
fresitptsvnl????
Page 3
Safety and the enviroment12
Safety and the environment
About this document
i Please read this documentation through carefully and
familiarise yourself with the product before putting it to use.
Keep this document to hand so that you can refer to it when
necessary. Hand this documentation on to any subsequent
users of the product.
i Pay particular attention to information emphasised by the
following symbols:
With the signal word Warning!:
Warns against hazards which could result in serious physical
injury if the precautionary measures indicated are not taken.
Important.
Avoid personal injury/damage to equipment
i Only operate the measuring instrument properly, for its
intended purpose and within the parameters specified in the
technical data. Do not use force.
i Never store the product together with solvents, acids or other
aggressive substances.
i Only carry out the maintenance and repair work that is
described in the documentation. Follow the prescribed steps
when doing so. Use only OEM spare parts from Testo.
Protecting the environment
i Take faulty rechargeable batteries as well as spent batteries to
the collection points provided for them.
i Send the product back to Testo at the end of its useful life. We
will ensure that it is disposed of in an environmentally friendly
manner.
Page 4

Specification 13
Specifications
Functions and use
The testo 460 is a rotational speed measuring instrument. It is
normally used to measure rotational speed, e.g. of impellers,
drums and spindles.
Technical data
Measurement data
· Sensor:
Optical LED
· Parameters:
rpm, rps
· Measuring ranges:
100...30000 rpm, 1.7...500.0 rps
· Resolutions:
0.1 rpm (100.0...999.9 rpm),
0.1 rps (1.7...17.0 rps),
1 rpm (1000...30000 rpm)
1 rps (17.0...500.0 rps)
· Accuracies
(Nominal temperatue 22 °C, ±1 Digit):
±0.02 % of reading
· Measuring rate:
0.5 s
Further instrument data
· Protection class: IP40
· Ambient conditions:
0...50 °C, 32...122 °F
· Storage/transport conditions:
-40...70 °C, -40...158 °F
· Voltage supply:
2x 1.5 V type AAA
· Battery life:
20 h (without display light)
· Dimensions:
119x46x25 mm (inc. protection cap)
· Weight: 85 g (inc. batteries and
protection cap)
Directives, standards and tests
· EC Directive: 89/336/EEC
Warranty
· Duration: 2 years
· Warranty conditions: see guarantee
card
de
en
fresitptsvnl????
Page 5

Product description14
Product description
At a glance
Protection cap: Park position
Photo transistor
Display
Control keys
Battery compartment (on rear)
First steps
²
Inserting bbatteries:
1 To open the battery compartment, push the battery cover
down.
2 Insert batteries (2x 1.5 V type AAA). Observe the polarity!
3 To close the battery compartment, push the battery cover
back on.
²
Basic ssettings ((configuration mmode):
Adjustable functions
· Unit of rotational speed: rpm, rps
· Auto off function: OFF, ON (instrument switches off automatically if no key is
pressed for 10 minutes)
1 When switching the instrument on, press and hold until
and appear on the display (configuration mode).
- The adjustable function is displayed. The current setting
flashes.
2 Press ( ) several times until the desired setting flashes.
3 Press ( ) to confirm the input.
4 Repeat steps 2 and 3 for all functions.
- The instrument changes to measuring mode.
Page 6

15
Using the product
For reliable measurements it is necessary to use reflective
markers. To apply the reflective marker, wait until the object to
be measured has come to a standstill.
The ideal distance to the measurement object is between 10
and 40 cm. During the measurement, always aim at the
reflective marker from an angle of approx.30°. This avoids
multiple reflections from the surface.
If no reflective marker can be attached, it must be checked
whether the reflective properties of a reflective point on the
measurement object are sufficient for rpm measurement. In
this case, aim at the measurement object from the vertical, and
check whether a value is displayed. If the measurement object
displays several reflections per revolution, (e.g. reflective
ventilator with 5 vanes), the number of the impulses per
revolution (e.g. number of ventilator vanes) must be entered
into the instrument (see below) in order to obtain correct rpm
measurements.
²
Switching tthe iinstrument oon:
i Press .
- Measuring mode is opened.
²
Switching tthe ddisplay llight oon:
The instrument is switched on.
i Press .
- The display light goes out automatically if no key is
pressed for 10 seconds.
²
Changing tthe ddisplay vvie
w/setting tthe nnumber oof bblades:
As an alternative to entering the impulses per revolution,
the setting NO.1 can be selected and the rpm calculated
manually from the measurement value (measurement value
divided by impulse/number of vanes)
Adjustable views/setting the number of blades
· Hold: Readings are held.
· Max: Maximum values since the start of the last measurement.
· Min: Minimum values since the start of the last measurement.
· NO.: Set the number of blades. Change the value with .
i Press several times until the desired view appears.
de
en
fresitptsvnl????
Using the product
Page 7

Using the product16
²
Measuring
Warning! Danger of injury from rotating parts!
i Keep to the safe distances and comply with the
protective measures stipulated by the manufacturer.
i Press and hold .
-
rpm or rps flashes in the display as soon as useful
measuring signals are available. The light spot marks the
centre of the measuring surface.
- When measurement has been completed (release ),
the instrument changes to the
Hold display view and the
reading is held.
²
Switching tthe iinstrument ooff:
i Press and hold until the display goes out.
Page 8

Maintaining the product
17
Maintaining the product
±
Changing bbatteries:
1 To open the battery compartment, push the battery cover
down.
2 Remove used batteries and insert new batteries
(2x 1.5 V type AAA). Observe the polarity!
3 To close the battery compartment, push the battery cover
back on.
±
Cleaning tthe hhousing:
i Clean the housing with a moist cloth (soap suds) if it is dirty.
Do not use aggressive cleaning agents or solvents!
Tips and assistance
Questions and answers
Question Possible causes/solutions
Hi or Lo · Readings outside the measuring range (too high, too
low): Keep to the permitted measuring range.
· Residual capacity <10 min: Change batteries.
If we could not answer your question, please contact your dealer
or Testo Customer Service. Contact details can be found on the
guarantee card or on the Internet at: www.testo.com
de
en
fresitptsvnl????
Page 9

Notes18
Page 10

testo AG
Postfach 1140, 79849 Lenzkirch
Testo-Straße 1, 79853 Lenzkirch
Telefon: (07653) 681-0
Fax: (07653) 681-100
E-Mail: info@testo.de
Internet: http://www.testo.com
0973.4600/02/Sh/dr/28.03.2007
www.testo.com
 Loading...