

Page 1

testo 270 · Deep-frying Oil Tester
Instruction manual
Find Quality Products Online at: [email protected]
www.GlobalTestSupply.com
Page 2

Pos: 1 /TD/Produktbeschreibung/Grundlegende Eigen schaften/testo 275/Inbetriebnahmehinweise Kalibr i erung testo 275 @ 15\mod_1407391938938_79.docx @ 194097 @ @ 1
1 Contents
tical tips before commissioning your new testo 270
Prac
Dear Customer,
Congratulations on purchasing your new testo 270 cooking oil tester.
All our measuring instruments are factory tested by us before delivery and
adjusted to their own specific level of accuracy. To ensure a consistently high
level of accuracy, we recommend the instrument is regularly checked.
You have the following options with the testo 270 cooking oil tester:
1 Testo factory calibration according to ISO (accuracy +/- 2% TPM
1
):
You can order an ISO calibration from Testo's calibration subsidiary, Test o
Industrial Services in Kirchzarten, using order number 0520 0028. This
means your testo 270 will be calibrated at two points (at approx. 3% and at
approx. 24% TPM) under precise labor atory conditions.
Furthermore, you have the following options for checking your testo 270 yourself
at any time:
2 with Testo reference oil (accuracy +/- 2.5% TPM
1
):
With the Testo reference oil (o rder no. 0554 2650), you can check the
measuring instrument precisel y and, i f necessary, readjust it (please pay
attention to the description in the instruction manual for this).
3 with the simple function test in cooking oil (accuracy +/- 3% TPM
1
):
For a simple function test without adjustment, we recommend you carry out
a measurement during the commissioning of your new instrument in unused
cooking oil at 150 to 180 °C.
You should ideally carry out this measurement several times in succession
and note the respective readings. The mean value of these readings
represents your specific reference value for subsequent instrument
checking. To use the determined reference value as a comparative value for
a check, always carry out the measur em ent for instrument checking in
unused cooking oil at 150 to 180 °C.
Please make sure that the referenc e value is recalculated if the type of oil or
oil supplier changes.
Your specific reference value:
___________________________
1
typically, based on Testo in-house r eference, at an ambient temperature of
25 °C.
3
Find Quality Products Online at: [email protected]
www.GlobalTestSupply.com
Page 3

1 Contents
Pos: 2 /TD/Überschriften/1. Inhalt @ 0\mod_117758781707 0_79.docx @ 1243 @ 1 @ 1
1 Contents
1 Contents .................................................................................................. 4
2 Safety and the environment ................................................................... 5
2.1. About this document ....................................................................... 5
2.2. Ensure safety .................................................................................. 6
2.3. Protecting the environment ............................................................. 7
3 Specifications .......................................................................................... 8
3.1. Use ................................................................................................. 8
3.2. Technical data ................................................................................. 8
4 Product description .............................................................................. 10
4.1. Overview ....................................................................................... 10
4.2. Basic properties ............................................................................ 12
5 First steps .............................................................................................. 13
5.1. Commissioning ............................................................................. 13
5.2. Getting to know the product .......................................................... 15
5.2.1. Switching the instrument on/off ...................................................................... 15
5.2.2. Description of important functions and displays ............................................. 16
5.2.2.1. Alarm indicator ................................................................................ 16
5.2.2.2. Setting the TPM limit values ............................................................ 16
5.2.2.3. Hold function ................................................................................... 17
5.2.2.4. Auto-Hold function ........................................................................... 17
5.2.2.5. Auto-off function .............................................................................. 17
5.2.2.6. Battery capacity ............................................................................... 18
5.2.3. Configuring the instrument ............................................................................. 18
5.2.4. Locking / unlocking configurations ................................................................. 20
6 Using the product ................................................................................. 22
6.1. General measurement information ................................................ 22
6.2. Carrying out measurements .......................................................... 23
6.3. Function test ................................................................................. 25
7 Maintaining the product ....................................................................... 26
7.1. Changing batteries ........................................................................ 26
7.2. Cleaning the sensor ...................................................................... 26
7.3. Cleaning the housing .................................................................... 27
7.4. Cleaning the plastic case .............................................................. 27
7.5. Calibrating/adjusting the inst rument .............................................. 28
8 Tips and assistance .............................................................................. 32
8.1. Questions and answers ................................................................ 32
8.2. Accessories and spare parts ......................................................... 33
Pos: 3 /TD/--- Seitenwechsel --- @ 0\mod_1173774430601_0.docx @ 283 @ @ 1
Find Quality Products Online at: [email protected]
www.GlobalTestSupply.com
Page 4
2 Safety and the environment
Pos: 4 /TD/Überschriften/2. Sicherheit und Umwelt @ 0\mod_1 173774719351_79.docx @ 292 @ 1 @ 1
2 Safety and the environment
Pos: 5 /TD/Überschriften/2.1 Zu diesem Dokument @ 0\mod_1173775252351_79.docx @ 346 @ 2 @ 1
2.1. About this document
Pos: 6 /TD/Sicherheit und Umwelt/Zu diesem Dokument/Ver wendung/Verwendung (Standard) @ 0\mod_1173775068554_79.doc x @ 337 @ 5 @ 1
Use
> Please read this documentation t hrough carefully and
familiarize yourself with the product before putting it to use. Pay
particular attention to the safety instructions and warning advice
in order to prevent injuries and damage to the products.
> Keep this document to hand so that you can refer to it when
necessary.
> Hand this documentation on to any subsequent users of the
Pos: 7 /TD/Sicherheit und Umwelt/Zu diesem Dokument/Sy mb ol e und Schreibkonventionen/Tabellenkopf Warnhinweise @ 2\ mod_1207645198296_79.docx @ 14334 @ 5 @ 1
product.
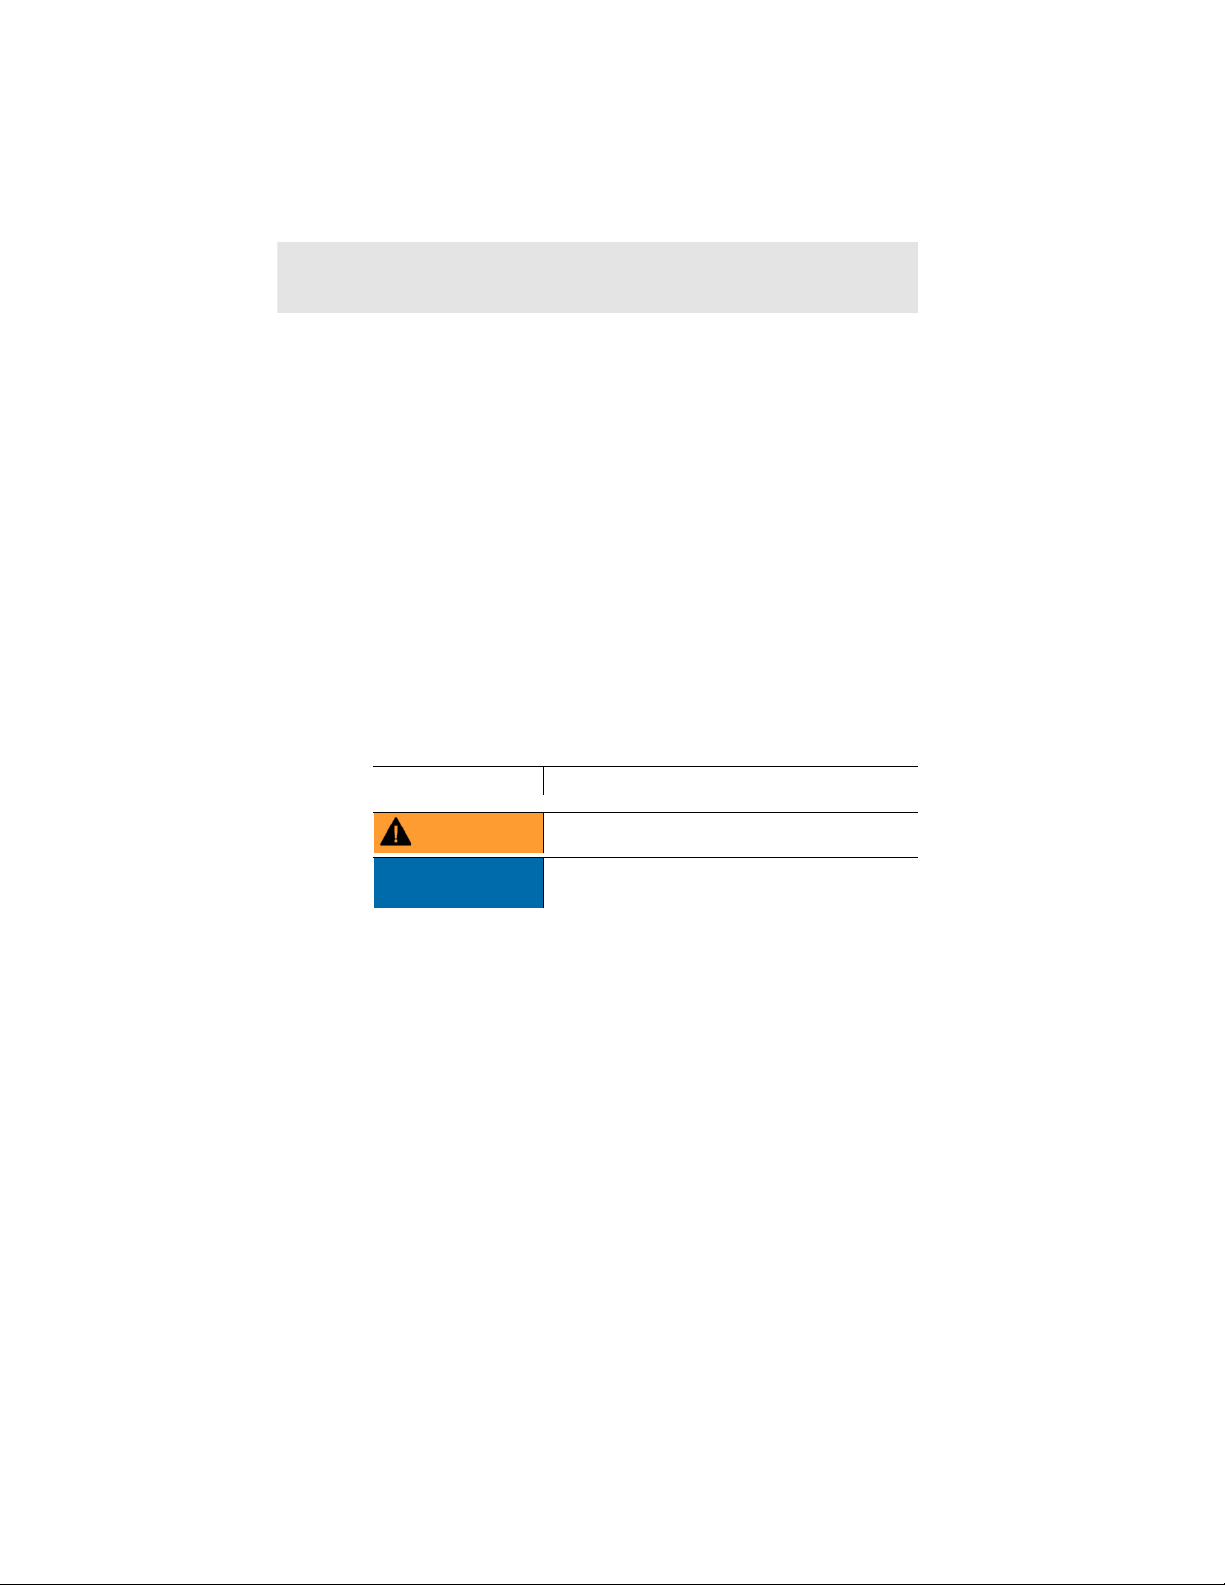
Warnings
Always pay attention to informati on that is marked by the following
warnings with warning pictograms. Implement the specified
precautionary measures.
Representation Explanation
Pos: 8 /TD/Sicherheit und Umwelt/Zu diesem Dokument/Sy mb ol e und Schreibkonventionen/Warnhinweis WARNUNG @ 2\mod_1207646 966234_79.docx @ 14398 @ @ 1
Pos: 9 /TD/Sicherheit und Umwelt/Zu diesem Dokument/Sy mb ol e und Schreibkonventionen/Warnhinweis ACHTUNG (Produktschad en) @ 2\mod_1207651536812_79.docx @ 14434 @ @ 1
WARNING
NOTICE
Pos: 10 /TD/Sicherheit und Umwelt/Zu diesem Dokument/Sy m bo le und Schreibkonventionen/Tabellenkopf Symbole und Schr eibkonv. @ 2\mod_1207652481703_79.docx @ 14452 @ 5 @ 1
Indicates potential serious inju ries
indicates circumstances that may lea d to
damage to the products
Find Quality Products Online at: [email protected]
www.GlobalTestSupply.com
Page 5

2 Safety and the environment
Symbols and writing standards
Represen-
Pos: 11 /TD/Sicherheit und Umwelt/Zu diesem Dokument/Sy m bo le und Schreibkonventionen/Symbole und Schreibkonv. [Stand ar d_klein] @ 2\mod_1207652632140_79.docx @ 14470 @ @ 1
tation
Explanation
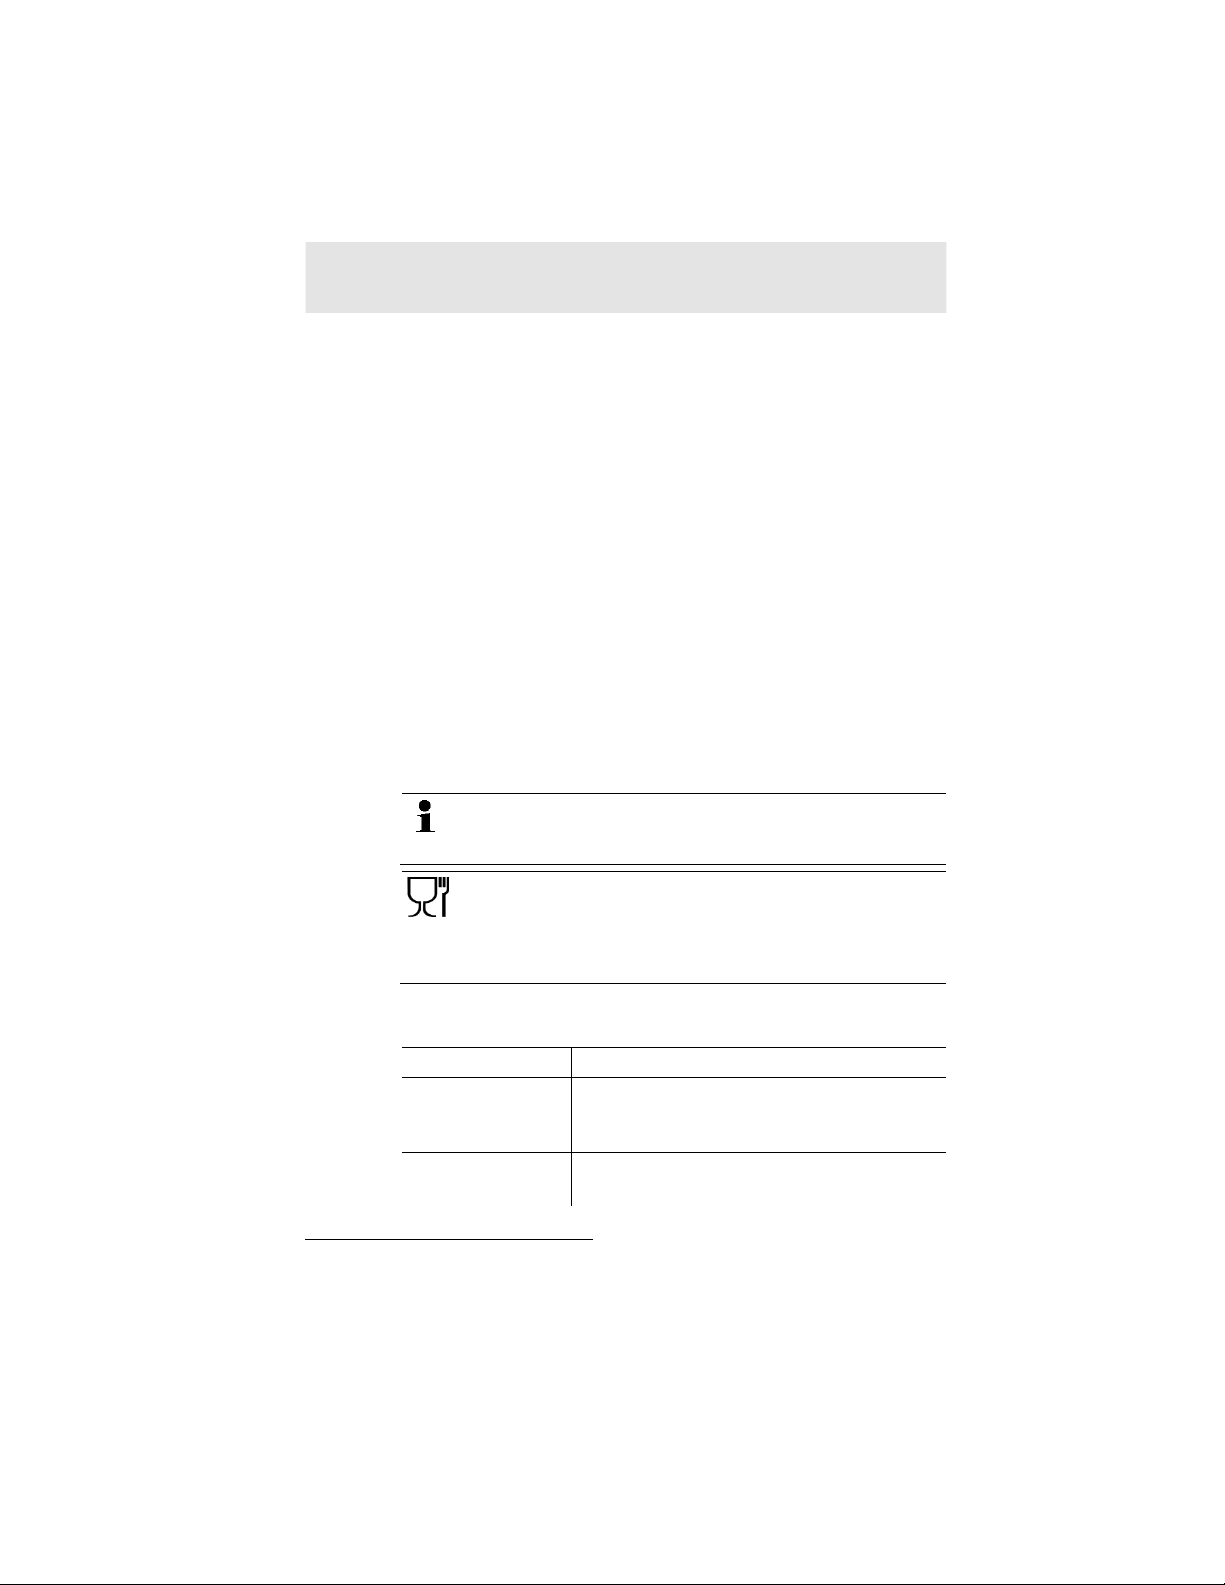
Note: Basic or further information.
1. ...
Action: more steps, the sequence must be followed.
2. ...
> ... Action: a step or an optional step.
Pos: 12 /TD/Sicherheit und Umwelt/Zu diesem Dokument/Sy m bo le und Schreibkonventionen/Schreibkonv. Menü @ 2\mod_120765 5303 453_79.docx @ 14488 @ @ 1
- ... Result of an action.
Menu Elements of the instrument, the instrument displays
Pos: 13 /TD/Sicherheit und Umwelt/Zu diesem Dokument/Sy m bo le und Schreibkonventionen/Schreibkonv. [OK] @ 2\mod_12076554 89218_79.docx @ 14506 @ @ 1
or the program interface.
[OK] Control keys of the instrument or buttons of the
Pos: 14 /TD/Sicherheit und Umwelt/Zu diesem Dokument/Sy mbole und Schreibkonventionen/Schreibkonv. Funktionen/ Pfade (...|...) @ 2\mod_1207655781390_79.docx @ 14524 @ @ 1
Pos: 15 /TD/Sicherheit und Umwelt/Zu diesem Dokument/Sy m bo le und Schreibkonventionen/Schreibkonv. Beispielangaben ( "...") @ 2\mod_1207656016281_79.docx @ 14542 @ @ 1
Pos: 16 /TD/Überschriften/2.2 Sicherheit gewährl eisten @ 0\mod_1173780783960_79.docx @ 366 @ 2 @ 1
2.2. Ensure safety
Pos: 17 /TD/Sicherheit und Umwelt/Sicherheit gewähr lei sten/Produkt bestimmungsgemäß verwenden @ 0\mod_117378126184 8_79.docx @ 386 @ @ 1
... | ... Functions/paths within a menu.
“...” Example entries
program interface.
> Only operate the product properly, f or i ts intended purpose and
within the parameters specified in the technical data. Do not
Pos: 18 /TD/Sicherheit und Umwelt/Sicherheit gewährlei s ten/Gerät bei Beschädigungen nicht in Betrieb nehmen @ 0\mod_11869 85945375_79.docx @ 2252 @ @ 1
use any force.
> Do not operate the instrument if there are signs of damage at
Pos: 19 /TD/Sicherheit und Umwelt/Sicherheit gewährlei s ten/vor Ort gültige Sicherheitsbestimmungen beachten @ 0\mod_1 186997107328_79.docx @ 2298 @ @ 1
the housing, mains unit or feed lines .
> The objects to be measured or the measur ement environment
may also pose risks: Note the safety regulations valid in your
Pos: 20 /TD/Sicherheit und Umwelt/Sicherheit gewähr lei s ten/Temperaturangaben auf Sonden/Fühlern @ 0\mod_117569329 3070_79.docx @ 610 @ @ 1
area when performing the measurements.
> Temperatures given on probes/sensors relate only to the
measuring range of the sensors. Do not expose handles and
feed lines to any temperatures in excess of 70 °C unless they
Pos: 21 /TD/Sicherheit und Umwelt/Sicherheit gewähr lei s ten/Keine Messung an spannungsführenden Teilen @ 0\mod_11756925 64164_79.docx @ 592 @ @ 1
are expressly permitted for higher temperatures.
> Do not perform contact measurements on non-insulated, live
Pos: 22 /TD/Sicherheit und Umwelt/Sicherheit gewähr lei s ten/testo 270/Transport und Lagerung @ 2\mod_1206696880578_79. docx @ 13401 @ @ 1
parts.
Find Quality Products Online at: [email protected]
www.GlobalTestSupply.com
Page 6

> Transport and store the instrument e xclusively in the aluminium
Pos: 23 /TD/Sicherheit und Umwelt/Sicherheit gewähr lei s ten/Nicht mit Lösungsmitteln lagern @ 0\mod_1175692375179_7 9.docx @ 583 @ @ 1
case provided in order to avoid damage to the sensor.
> Do not store the product together with solvents. Do not use any
Pos: 24 /TD/Sicherheit und Umwelt/Sicherheit gewähr lei s ten/Nur beschriebene Wartungsarbeiten durchführen @ 0\ mod_1175692705195_79.docx @ 601 @ @ 1
desiccants.
> Carry out only the maintenance and re pair work on this
instrument that is described in the documentation. Follow the
prescribed steps exactly. Use only original spare parts from
Pos: 25 /TD/Überschriften/2.3 Umwelt schützen @ 0\mod_11 73780843645_79.docx @ 375 @ 2 @ 1
2.3. Protecting the environment
Pos: 26.1 /TD/Sicherheit und Umwelt/Umwelt schützen/ Akkus/Batterien entsorgen @ 0\mod_1175693637007_79.doc x @ 619 @ @ 1
Testo.
> Dispose of faulty rechargeable batt eries/spent batteries in
Pos: 26.2 /TD/Sicherheit und Umwelt/Umwelt schützen/ Produkt entsorgen @ 0\mod_1173780307072_79.docx @ 357 @ @ 1
accordance with the valid legal specifications.
> At the end of its useful life, send the produc t to the separate
collection for electric and elect r oni c devices (observe local
Pos: 27 /TD/--- Seitenwechsel --- @ 0\mod_1173774430601_0.docx @ 283 @ @ 1
regulations) or return the product to Testo for disposal.
2 Safety and the environment
Find Quality Products Online at: [email protected]
www.GlobalTestSupply.com
Page 7
3 Specifications
Pos: 28 /TD/Überschriften/3. Leistungsbeschrei bung @ 0\mod_1173774791554_79.docx @ 301 @ 1 @ 1
3 Specifications
Pos: 29 /TD/Überschriften/3.1 Verwendung @ 0\mod_1176211 016437_79.docx @ 695 @ 2 @ 1
3.1. Use
Pos: 30 /TD/Leistungsbeschreibung/Verwendung/ testo 2xx/Verwendung (testo275) @ 15\mod_1407394154990_79.doc x @ 194132 @ @ 1
The testo 270 is a handy measuring instrument for fast testing of
cooking oils.
The TPM value (total polar materials) enables a statement on the
ageing of cooking oils due to the effec ts of heat.
The following measuring tasks can be performed with the testo
270:
• Displaying the temperature of the cooking oil:
Indicator for correct setting of the deep fat fryer, checking of
integrated temperature displays.
• Displaying the TPM value:
Indicator for the ageing of the cookin g oi l.
The sensor works on a capacitive basis and determines as the
reading the total polar materials as a %.
The free fatty acids, which are deter m i ned above all for the
evaluation of unloaded oils (rancidity), cannot be detected with the
testo 270.
The temperature of the cooking oil to be measured must be
at least 40 °C. The maximum operating temperature is
200 °C.
The sensor and the probe tube are desig ned to come into
contact with oil used in deep fat fr yers for the typical
duration of a spot check measurement . The materials used
in these components meet the relevant requirements in the
Pos: 31 /TD/Überschriften/3.2 Technische Daten @ 0\mod_ 1176 211088437_79.docx @ 704 @ 2 @ 1
3.2. Technical data
Pos: 32 /TD/Leistungsbeschreibung/Technische Dat en/Technische Daten (testo275) @ 15\mod_1407394378201_79.doc x @ 194167 @ @ 1
Regulation (EC)1935/2004.
Feature Values
Measuring range
Temperature: 40.0 to 200.0 °C /
104.0 to 392.0°F
TPM: 0 to 40%
Accuracy Temperature: ± 1.5 °C
2
typically, based on Testo in-house r eference, at an ambient temperature of
2
TPM
: ±2% (40.0 to 190.0 °C / 104 to 374 °F)
25 °C.
8
Find Quality Products Online at: [email protected]
www.GlobalTestSupply.com
Page 8

3 Specifications
Feature Values
Resolution Temperature: 0.1 °C / 0.1 °F
TPM: 0.5%
Power supply Batteries: 2x micro (type AAA)
Battery (micro AAA) Designation according to IEC: LR03
Chem. composition: Zn-MnO2 (alkaline)
Battery life at 20 °C
Approx. 25 hrs continuous operation
(corresponds to 500 measurements) without
display illumination
Temperature
PTC
sensor
TPM sensor Capacitive sensor (Testo)
Operating
0 to 50 °C / 32 to 122 °F
temperature
Ambient humidity 0 to 90%RH
Storage/transport
-20 to 70 °C / -4 to 158 °F
temperature
Display LCD, 2-line, display illumination
Weight 255 g
Housing material
Top part: ABS
Lower part: ABS-PC glass fibre 10%
Dimensions
Approx. 50 mm x 170 mm x 300 mm
(WxHxD)
TPM response time Approx. 30 secs
Protection class IP65
Warranty 24 months
EC Directive 2014/30/EC
Pos: 33 /TD/--- Seitenwechsel --- @ 0\mod_1173774430601_0.docx @ 283 @ @ 1
Find Quality Products Online at: [email protected]
www.GlobalTestSupply.com
Page 9

4 Product description
Pos: 34 /TD/Überschriften/4. Produktbeschreibung @ 0\ mod_1173774846679_79.docx @ 310 @ 1 @ 1
4 Product description
Pos: 35 /TD/Überschriften/4.1 Übersicht @ 0\mod_11763799 46003_79.docx @ 733 @ 2 @ 1
4.1. Overview
Pos: 36 /TD/Produktbeschreibung/Übersicht/tes to 275/Übersicht (testo275) @ 15\mod_1407396818539_79.doc x @ 194203 @ @ 1
1 Display
2 Control keys
3 Battery compartment
4 Probe shaft
5 Oil quality (%TPM) and temperature sensor
6 Min. immersion depth
7 Max. immersion depth
Find Quality Products Online at: [email protected]
www.GlobalTestSupply.com
Page 10
Pos: 37 /TD/Produktbeschreibung/Übersicht/tes to 275/Display (testo 275) @ 15\mod_1407397717503_79.docx @ 194238 @ 5 @ 1
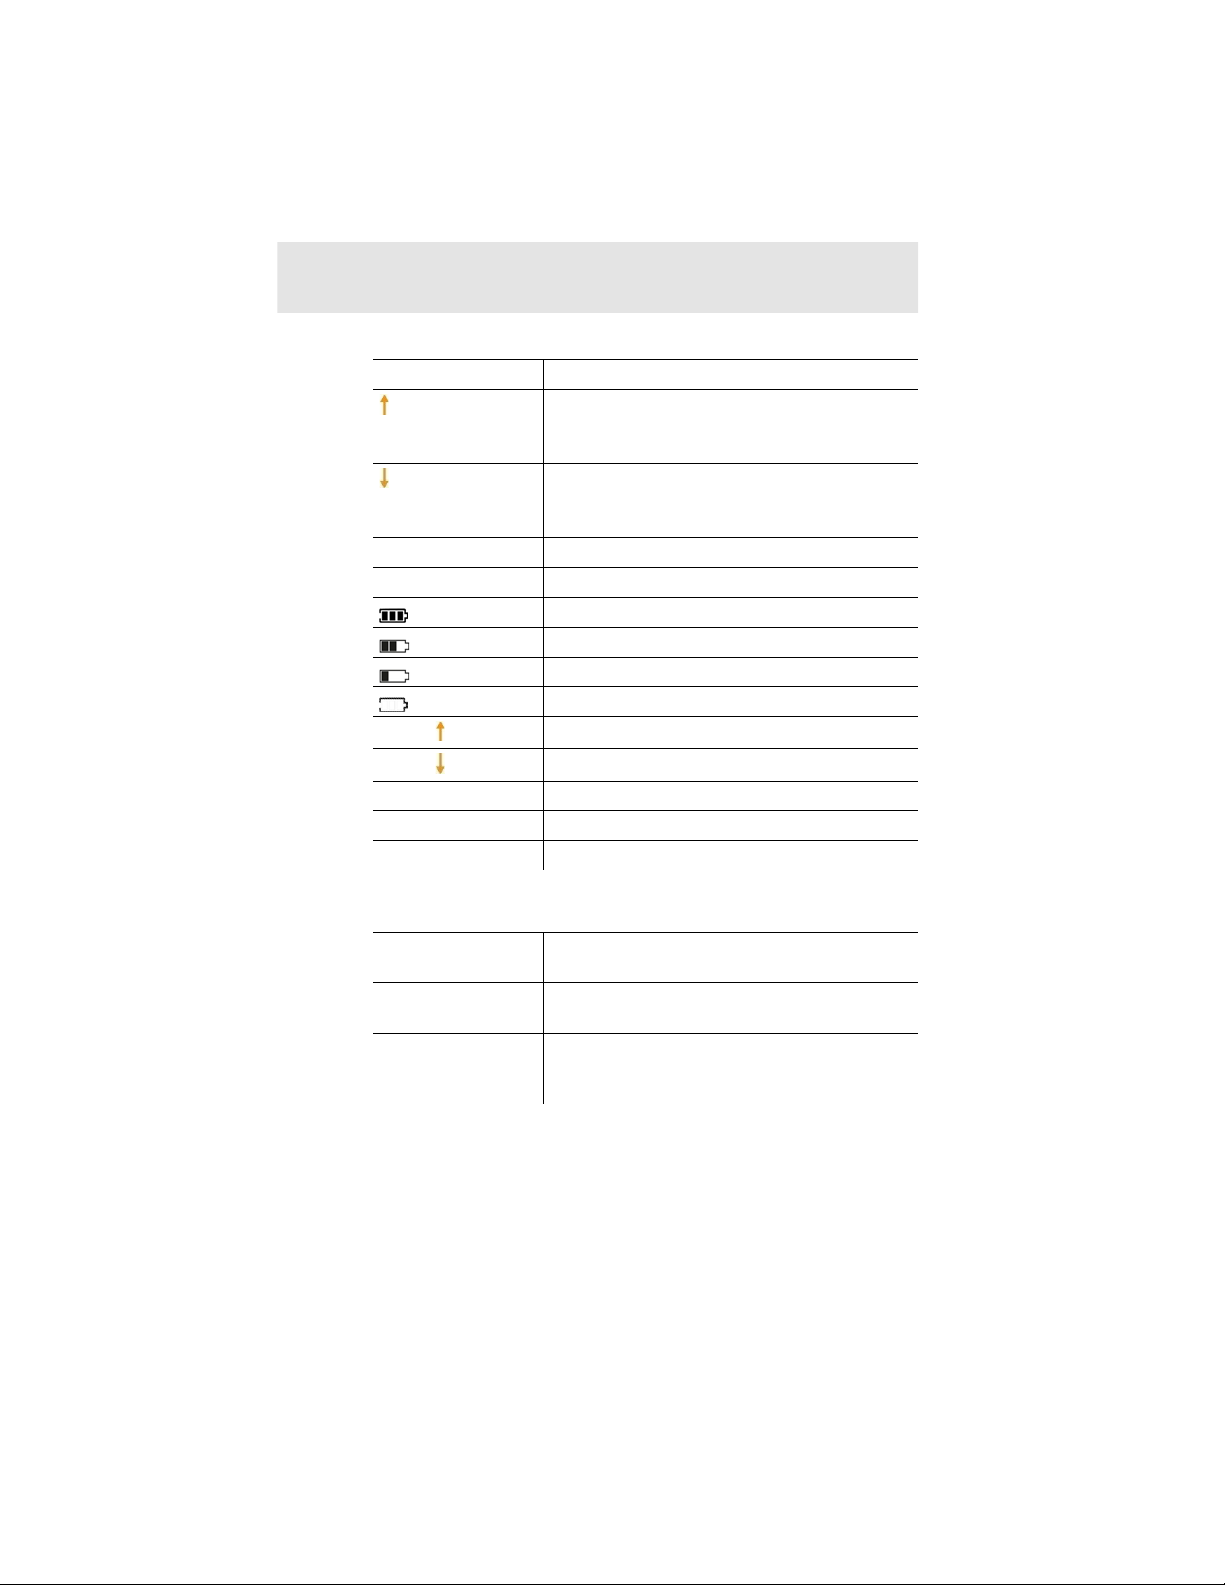
Items shown on the display:
Items shown Function/property
200 (flashing
temperature value
> 200 °C)
40 (flashing
temperature value
< 40 °C)
Alarm
PIN
Alarm
Alarm
Hold
Auto-Hold
°C / °F
Pos: 38 /TD/Produktbeschreibung/Übersicht/tes to 275/wichtige Displaymeldungen (testo 275) @ 15\mod_14074011 35429_79.docx @ 194273 @ 5 @ 1
4 Product description
Temperature measuring range exceeded
Temperature measuring range undershot
Alarm indicator activated
Configuration mode locked
Battery capacity 100 %
Battery capacity 66 %
Battery capacity 33 %
Battery capacity < 10 %
Upper TPM limit value exceeded
Lower TPM limit value exceeded
Readings held (manually)
Readings held (automatically)
Temperature in °C or °F
Important display messages
Item shown on the
display
000 lights up Instrument is ready to measu r e, sensor is not
Reading >190
flashes
Pos: 39 /TD/Produktbeschreibung/Übersicht/tes to 275/Bedientasten (testo 275) @ 15\mod_1407401539747_79.doc x @ 194308 @ 5 @ 1
Explanation
in oil.
Measured temperature is above 190 °C
(374 °F). The reading flashes in the range
from 190.1 °C (374 °F) to 200 °C (392 °F).
Find Quality Products Online at: [email protected]
www.GlobalTestSupply.com
Page 11

4 Product description
Control keys
Buttons Function/property
[ ]
[Hold]
[ ] • on/off; yes/no - Configure instrument
[ ] • on/off; yes/no - Configure instrument
Pos: 40 /TD/Produktbeschreibung/Übersicht/tes to 275/Batteriefach (testo 275) @ 15\mod_1407401830742_79. doc x @ 194343 @ 5 @ 1
Battery compartment
• Switc h i ns trument on/off
• Configure instrument
• Hold m eas uring values manually
• Switc h to the measuring mode
• Configure instrument
Pos: 41 /TD/Überschriften/4.2 Grundlegende Eigensc haf ten @ 0\mod_1176380399692_79.docx @ 742 @ 2 @ 1
4.2. Basic properties
Pos: 42 /TD/Produktbeschreibung/Grundlegende Eige nschaften/testo 270/Stromversorgung @ 2\mod_120670135495 3_79.docx @ 13477 @ 5 @ 1
Power supply
The power is supplied to the instrument via two micro batteries
Pos: 43 /TD/--- Seitenwechsel --- @ 0\mod_1173774430601_0.docx @ 283 @ @ 1
(type AAA). The batteries are included in the delivery.
Find Quality Products Online at: [email protected]
www.GlobalTestSupply.com
Page 12
Pos: 44 /TD/Überschriften/5. Erste Schritte @ 0\mod_117 377 4895039_79.docx @ 319 @ 1 @ 1
5 First steps
Pos: 45 /TD/Überschriften/5.1 Inbetriebnahme @ 0\mod_11 85342823812_79.docx @ 1885 @ 2 @ 1
5.1. Commissioning
Pos: 46 /TD/Erste Schritte/testo 275/Batterien ein legen (testo 275) @ 15\mod_1407402146449_79.docx @ 194379 @ 5 @ 1
Inserting batteries
CAUTION
Incorrectly inserted batteries can damage the instrument!
> Adhere to the polarity when inserting the batteries.
1. Undo the screw on the battery compartm ent.
5 First steps
2. Remove the battery holder.
Find Quality Products Online at: [email protected]
www.GlobalTestSupply.com
Page 13

5 First steps
3. Insert batteries. Adhere to the polarity.
4. Insert the battery holder into the bat tery compartment.
5. Secure battery compartment with sc r ew.
6. Switch instrument on: Press [ ].
- Di s play test is carried out: all segments light up.
- The instrument switches to the measuring mode.
- 000 lights up on the display, the instrument is ready for use.
7. If necessary, switch instrument off.
Pos: 47 /TD/Erste Schritte/testo 275/Aufbewahrung @ 15\ mod_1407407083273_79.docx @ 194414 @ 5 @ 1
Find Quality Products Online at: [email protected]
www.GlobalTestSupply.com
Page 14

Pos: 48 /TD/Überschriften/5.3 Produkt kennenlernen @ 0\ mod_1185342901015_79.docx @ 1894 @ 2 @ 1
5 First steps
For storage of the instrument
Suspension attachment
> The integrated suspension attachment can be used to hang the
instrument on a hook.
Plastic case
- The instrument is securely stored in a plastic case for protection
against contamination and for transport.
5.2. Getting to know the product
Pos: 49 /TD/Erste Schritte/testo 275/Gerät ein-/ aussc halten (testo 275) @ 16\mod_1408009443923_79.docx @ 196896 @ 355 @ 1
5.2.1. Switching the instrument on/off
To switch on
> Press [ ] until the indicator elements appear in the display.
- Di s play test is carried out: all segments light up.
- The instrument switches to the measuring mode and i s ready
for operation.
To switch off
> Press and hold [ ] for approx. 2 secs.
Pos: 50 /TD/Erste Schritte/testo 275/Überschri ft Beschreibung wichtiger Funktionen @ 16\mod_1408002615627_79.d ocx @ 196757 @ 3 @ 1
- Display goes off, instrument switches off.
Find Quality Products Online at: [email protected]
www.GlobalTestSupply.com
Page 15

5 First steps
5.2.2. Description of important functions and dis pl ays
Pos: 51 /TD/Erste Schritte/testo 275/Alarm Backlig ht @ 15\ mod_1407407343094_79.docx @ 194449 @ 3 @ 1
5.2.2.1. Alarm indicator
The alarm indicator uses the following display colours to show what
range the measured TPM value is in:
Green TPM value < lower limit value
Orange TPM value is between the lower and the upper limit value
Red TPM value > upper limit value
The alarm indicator is switched on when the instrument is
delivered. The TPM limit values are s et as follows (only for the
standard set, order no. 0563 2750):
Lower limit value 20%
Upper limit value 24%
To activate/deactivate the alarm indicator, see Configuring the
instrument, page 18.
To set the TPM limit values, see Setting the TPM limit values, page
Pos: 52 /TD/Erste Schritte/testo 275/TPM-Grenzwerte ei n stellen (testo 275) @ 15\mod_1407409482149_79.docx @ 194519 @ 355 @ 1
16.
5.2.2.2. Setting the TPM limit values
The TPM limit values can be between 0 and 40%. The
upper limit value (Alarm ) must be at least 1% higher than
the lower limit value (Alarm ).
In order to apply the settings of the lower and upper TPM
limit value, you must make sure you confir m the input of the
upper TPM limit value with [Hold].
Setting the lower TPM limit value
Requirement: Instrument is in conf i guration mode, See also
Carrying out the configuration, page 19.
1. Alarm and the set lower limit value appear on the display.
- When al ar m indicator is activated: the display lights up orange.
2. Set the lower limi t value with [ ] or [ ].
3. Confirm with [Hold].
- New lower limit value is applied.
- The instrument switches to the upper TPM limit value (Alarm ).
16
www.Testo-Direct.ca
Find Quality Products Online at: [email protected]
www.GlobalTestSupply.com
1.800.561.8187 [email protected]
Page 16

Setting the upper TPM limit value
Requirement: Instrument is in conf i guration mode,
lower TPM limit value has been set and conf irm ed with [Hold] .
1. Alarm and the set upper li mit value appear on the display.
- When alarm indicator is activated: the display lights up red.
2. Set the upper limit value with [ ] or [ ].
3. Confirm with [Hold].
- New upper limit value is applied.
> Carry out further settings in the configur ation menu or quit the
Pos: 53 /TD/Erste Schritte/testo 275/Hold-Funktion ( testo 275) @ 15\mod_1407409349521_79.docx @ 194484 @ 4 @ 1
configuration menu with [ ].
5.2.2.3. Hold function
Measured values can be held manually.
Requirement: Sensor is in the oil.
1. Briefly press [Hold] (< 1 sec).
- Hold appears in the display.
- Readings are held.
2. To switch to the measuring mode: Briefly press [Hold] (<
1 sec).
- Hol d function is deactivated.
Pos: 54 /TD/Erste Schritte/testo 275/Auto-Hold Funk ti on ( testo 275) @ 16\mod_1408003188527_79.docx @ 196826 @ 4 @ 1
- Current readings are displayed.
5 First steps
5.2.2.4. Auto-Hold function
When the Auto-Hold function is activated, the measured values
are automatically held by the inst r ument after the equalization
period.
To activate/deactivate the Auto-Hold function, see Carrying out the
Pos: 55 /TD/Erste Schritte/testo 275/Auto off Funktion ( testo 275) @ 16\mod_1408003278359_79.docx @ 196861 @ 4 @ 1
configuration, page 19
5.2.2.5. Auto-off function
When the Auto-off function is activated, the i ns trument
automatically switches off after a c ertain time
• If the ins trument is in measuring mode: automatic s witch-off
after 2 mins.
• If the ins trument is in hold or configuration mode: autom atic
switch-off after 10 mins.
To activate/deactivate the Auto-off function, see Configuring the
instrument, page 18
Find Quality Products Online at: [email protected]
www.GlobalTestSupply.com
Page 17
5 First steps
Pos: 56 /TD/Erste Schritte/testo 275/Batteriekapazi tät (testo 275) @ 16\mod_1408002874610_79.docx @ 196791 @ 4 @ 1
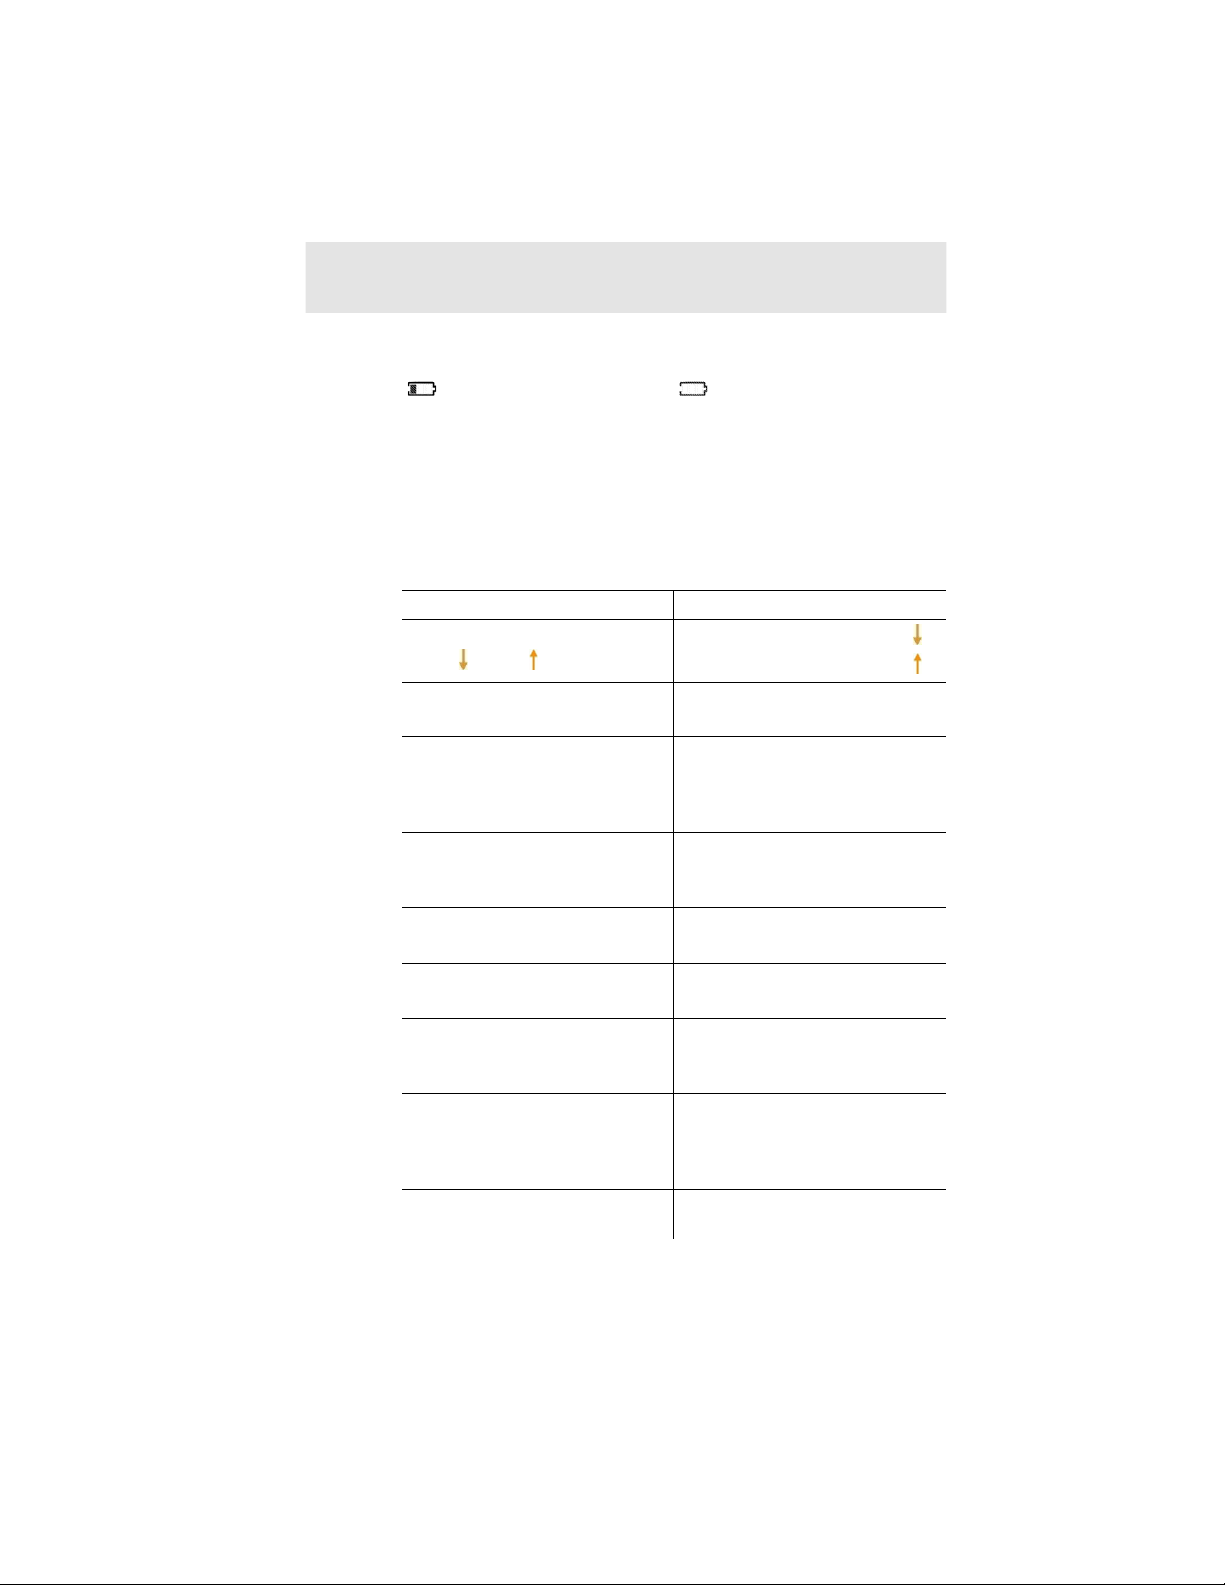
5.2.2.6. Battery capacity
With decreasing battery capacity, a symbol lights up in the display (
). If the empty battery symbol ( ) flashes in the display, the
remaining capacity is only approx. 30 min.
If the battery voltage is too low, the instrument automatically
switches off.
Pos: 57 /TD/Erste Schritte/testo 275/Gerät konfi gur ieren (testo 275) @ 15\mod_1407410840205_79.docx @ 194589 @ 35 @ 1
> Change batteries, see Changing bat teries, page 26
5.2.3. Configuring the instrument
Setting options in the configuration mode
Configurations Setting options
Setting the TPM limit values
Alarm , Alarm
Carry out calibration
CAL
Automatically hold readings
Auto-Hold
Automatically switch off the
instrument Auto-off
Set alarm indicator
Alarm
Set temperature unit
°C, °F
Lock configuration, including
TPM limit values
PIN
Carry out reset
rst
Firmware version
Lower TPM limit value Alarm
Upper TPM limit value Alarm
no: Do not carry out calibration.
yes: Carry out calibration.
on: Readings are automatically
held by the instrument.
off: Readings are not
automatically held.
on: Instrument switches off
automatically after 2 or 10 mins.
off: No automatic switch-off.
on: Alarm indicator activated
off: Alarm indicator deactivated
°C or °F
no: Do not lock configuration.
yes: Lock configuration
no: Do not reset the adjustment
value to the factory setting.
yes: Reset the adjustment value
to the factory settings.
Firmware versions of the product
components are shown.
Find Quality Products Online at: [email protected]
www.GlobalTestSupply.com
Page 18

Pos: 58 /TD/Erste Schritte/testo 275/Konfiguratio n durchführen (testo 275) @ 15\mod_1407413778547_79.docx @ 194694 @ 5 @ 1
5 First steps
Carrying out the configuration
Requirement: The instrument is switched off.
1. Switch the instrument on.
> Switch the instrument on, press [Hold] during t he display
test and hold down for approx. 2 secs.
- When the configuration menu is locked, PIN lights up.
> To unlock, set the last two figures of the serial number with [
] or [ ].
If an incorrect PIN is entered, the inst r ument switches into
measuring mode.
- When the configuration menu is not locked, you can gain
access by setting the limit values.
2. Set the alarm limit values.
- Alarm lights up in the display.
> Set lower limit value (Alarm ): [ ] or [ ] and confirm with
[Hold].
- Alarm lights up in the display.
> Set upper limit value (Alarm ): [ ] or [ ] and confirm with
[Hold].
3. Carry out / do not carry out calibration.
- CAL and no or yes light up in the display.
> Activate / deactivate calibration / adjustment function (no is
the standard setting): [ ] or [ ] and confirm with [Hold].
- S el ec tion of yes: The instrument can be calibrated /
adjusted, see Calibrating/adjusting the instrument, page 28
- S el ec tion of no: No calibration / adjustment possible
4. Automatically hold readings.
- Auto-Hold and on or off light up i n the display.
> Switch Auto-Hold on or off: [ ] or [ ] and confirm with
[Hold].
5. Automatically switch the instrument off.
- Auto-off and on or off light up in the display.
> Switch Auto-off on or off : [ ] or [ ] and confirm with
[Hold].
Find Quality Products Online at: [email protected]
www.GlobalTestSupply.com
Page 19

5 First steps
Pos: 59 /TD/Erste Schritte/testo 275/Konfiguratio n verlassen / speichern @ 15\mod_1407412864655_79.docx @ 194659 @ 5 @ 1
6. Set alarm indicator
- Alarm and on or off light up in the display.
> Switch alarm indicator on or off: [ ] or [ ] and confirm with
[Hold].
7. Set the temperature unit.
- °C or °F lights up in the display.
> Set the temperature unit (°C/°F): [ ] or [ ] and confirm
with [Hold].
8. Enable / disable PIN.
- PIN and yes or no light up in the display.
> Activate PIN (yes) or deactivate it (no is the standard
setting).
9. Carry out reset.
- rst and yes or no light up.
> Activate or deactivate rst: [ ] or [ ].
- S el ec tion of yes: Delete adjustment value, is reset to the
factory setting.)
- S el ec tion of no: no reset, adjustment value is retained).
Quitting configuration mode early and saving
You can quit the configuration mode early.
The configuration mode cannot be stopped in the
adjustment / calibration process .
> Quit configuration mode early: P ress and hold [ ] for approx.
1 sec.
- Configuration mode is stopped.
- The values which have so far been set and confirmed with
[Hold] are applied.
Pos: 60 /TD/Erste Schritte/testo 275/Konfiguratio nsmodus sperren/entsperren (testo 275) @ 15\mod_1407488193105 _79.docx @ 194737 @ 3 @ 1
- The instrument switches to the measuring mode.
5.2.4. Locking / unlocking configurations
You can lock/unlock the set values, including TPM limit values,
from the configuration mode. T he instrument is delivered with the
configuration mode unlocked (P IN is deactivated, no).
Requirements: Instrument is in configuration mode.
> Go through the configuration mode with [Hold], until PIN
and yes or no light up in the display.
Lock configuration mode
> Activate PIN: Select yes with [ ] or [ ].
- PIN is activated and the configuration mode is l oc ked.
Find Quality Products Online at: [email protected]
www.GlobalTestSupply.com
Page 20

Pos: 61 /TD/--- Seitenwechsel --- @ 0\mod_1173774430601_0.docx @ 283 @ @ 1
5 First steps
The last two figures of the instrument's serial number are
automatically set as the PIN (see st icker on the instrument).
Unlock configuration mode
Requirement: PIN is activated and the instrument is in configuration
mode.
Enter PIN:
> Select first figure: [ ] or [ ] and confirm with [Hold].
> Select second figure: [ ] or [ ] and confirm with [Hold].
If an incorrect PIN is entered, the inst r ument switches into
measuring mode.
- The configuration mode is enabled for the durat ion of the
settings being carried out.
Deactivate PIN:
> Go through the configuration mode with [Hold], until PIN
and yes or no light up in the display.
> Deactivate PIN: Select no with [ ] or [ ].
- S ettings can be carried out without entering the PIN.
Find Quality Products Online at: [email protected]
www.GlobalTestSupply.com
Page 21

6 Using the product
Pos: 62 /TD/Überschriften/6. Produkt verwenden @ 0\mod_ 1173 774928554_79.docx @ 328 @ 1 @ 1
6 Using the product
Pos: 63 /TD/Produkt verwenden/testo 275/Allgemein e Messhinweise (testo 275) @ 15\mod_1407491032301_79.docx @ 194774 @ 2555 5 @ 1
6.1. General measurement information
The testo 270 enables several meas urements to be carried out one
immediately after the other without any waiting times.
Which oils/cooking fats can be measu red?
In principle, all oils and fats intended for deep fat frying can be
measured.
This includes, for example, rapese ed, soya bean, sesame, palm,
olive, cotton seed or groundnut oil. Fats from animal sources can
also be measured. There may be a variation of several percentage
points in the % TPM value for fresh cooking oils, depending on the
type.
The maximum service life for the cooking oil cannot be derived
from this.
Example: Fresh palm oil has a higher % TPM value than other
cooking oils, but ages considerably more slowly.
Use of additives
The testo 270 is designed for the use of pure fats/oils. If additives
are used, deviations may occur.
Comparison of laboratory methods / testo 270
Cooking oil is a mixture of substances with a wide variety of
polarities. During ageing, the proportion of more highly polar
components increases. The labor atory method of column
chromatography separates the fat into a polar and a non-polar
group. The proportion of the polar group compared to the total
amount of cooking oil being investigated is described as the
% TPM value (total polar materials).
The % TPM value established by colum n chromatography may
vary slightly depending on the s etting of the separation limit
between the polar and the non-polar gro up.
Depending on the type of fat, slight variations of the polarity in both
groups (polar/non-polar) may occur which are not however
identified by the chromatography.
On the other hand, the testo 270 records the entire polarity of the
cooking oil and thus the actual polarity of both groups (polar/nonpolar). This means the reading of the testo 270 may be higher or
lower than that of the column chromatography in individual cases.
Find Quality Products Online at: [email protected]
www.GlobalTestSupply.com
Page 22
An example of this is coconut oil, for which the testo 270 shows
WARNING
higher TPM values than column chromat ography. However, this fat
is unsuitable for deep fat frying and is therefore primarily used for
roasting.
Free fatty acids
The testo 270 measures the total amount of polar materials in the
cooking fat (% TPM) which makes it very possible to evaluate the
load of the oil as a result of deep fat frying. On the other hand, free
fatty acids (FFAs) are used for the evaluation of the age of the fat
during storage. FFAs are not suitabl e for identifying the thermal
loads of the oil. FFAs cannot be measur ed with the testo 270.
Polymeric triglycerides (PTGs)
Polymeric triglycerides are als o being used for the evaluation of
cooking oils with increasing fr equency. The results of this method
are in most cases comparable with th e % TPM value.
Pos: 64 /TD/Produkt verwenden/testo 275/Messungen durc hführen (testo 275) @ 15\mod_1407494268340_79.docx @ 194919 @ 255 @ 1
PTG ≈ % TPM/2
6.2. Carrying out measurements
Risk of burns due to hot instrument parts (sensor and probe
shaft)!
> Do not touch hot instrument parts with your hands.
> In the event of burns, immediatel y cool the relevant spot with
cold water and see a doctor if necessary.
6 Using the product
Please take note of the following infor mation in order to
obtain correct measurement results :
• T ak e the product being deep fried out of the oil and wait
5 mins until there are no more bubbles rising before
measuring.
• If you sus pect a measurement error due to water being
contained: Repeat the measurement after 5 mins (do
not deep fry during this time, keep o il /fat at a high
temperature). If the new reading is lower, measure
again after 5 mins until the reading s tabilises if
necessary.
• Keep the sensor away from metallic parts (e.g. deepfrying basket, pan walls), as these may affect the
measurement result. Minimum distance from metal
parts: 1 cm on each side.
Find Quality Products Online at: [email protected]
www.GlobalTestSupply.com
Page 23

6 Using the product
With activated Auto Hold function
1. Immerse the sensor in cooking oil. Adhere to the immersion
- If the temperature is within the permissibl e m easuring range (40
2. Wait until Auto Hold is shown in the display.
- Readings are automatically held by the instrument, with the
3. Read the measurement values.
4. To switch to the measuring mode: Briefly press [Hold] (<
With deactivated Auto Hold function
1. Immerse the sensor in cooking oil. Adhere to the immersion
2. If the temperature is within the permissible measuring range (40
- Readings are displayed.
- M easurement is finished when the temperature display no
3. To hold readings: Briefly press [Hold] (< 1 sec).
- Hold appears in the display.
- Readings are held.
4. Read the measurement values.
5. To switch to the measuring mode: Briefly press [Hold]
• Measurement in hot oil min. 40 °C, max. 200 °C.
• Adher e to min. and max. marking when immersing in
oil.
• "T emperature striations" in the oil may cause
measurement errors. Move instrum ent in the deep fat
fryer.
• Cleaning of the sensor is recommended before every
measurement or when changing from one deep fat fryer
pan to the next, see Cleaning the sensor, page 26.
• Switc h off induction deep fat fryers during the
measurement or take a cooking oil sample, as the
electromagnetic field can lead to incorrect readings.
• Change cooking oil as from approx. 24% TPM. A
different limit value applies in s ome countries. If the
measured values are above the country-specific limit
value, the cooking oil should be changed!
depth!
to 200 °C): Auto flashes, along with the reading an d the alarm
indicator (display colour).
alarm indicator activated, the display colour lights up.
1 sec).
depth!
to 200 °C): Wait for the end of the equalization period (approx.
30 secs).
longer changes.
(< 1 sec).
Find Quality Products Online at: [email protected]
www.GlobalTestSupply.com
Page 24

Pos: 65 /TD/Produkt verwenden/testo 270/Funktions te st @ 4\mod_1248176181060_79.docx @ 46233 @ 2 @ 1
6.3. Function test
For a simple function test without adjustment (accuracy
+/- 3 % TPM
commissioning of your new instrument in unused deep-frying oil at
150 to 180 °C.
We recommend performing the function test every time after
refilling the deep fryer with fresh oil.
1. Perform measurement in unused deep-frying oil at 150 to
180 °C, see Carrying out measurem ents, page 23.
2. Note reading.
3. Repeat steps 1 and 2 several times.
- The average of the readings is your specific reference value for
subsequent instrument testing.
Your specific reference value:
3
), we recommend a measurement during t he
When changing the type of oil or the oil supplier, the
reference value must be determined anew.
With implausible readings, we recommend the calibration or
adjustment in the testo reference oil, see
Calibrating/adjusting the inst rument, page 28.
6 Using the product
Pos: 66 /TD/--- Seitenwechsel --- @ 0\mod_1173774430601_0.docx @ 283 @ @ 1
3
typical, referred to testo internal reference, at an ambient temperature of 25 °C
___________________________
25
Find Quality Products Online at: [email protected]
www.GlobalTestSupply.com
Page 25
7 Maintaining the product
WARNING
Pos: 67 /TD/Überschriften/7. Produkt instand halte n @ 0\mod_1173789831362_79.docx @ 397 @ 1 @ 1
7 Maintaining the product
Pos: 68 /TD/Produkt instand halten/testo 275/Batter i en wechseln (testo 275) @ 15\mod_1407494908084_79.docx @ 194985 @ 2 @ 1
7.1. Changing batteries
CAUTION
Incorrectly inserted batteries can damage the instrument!
> Adhere to the polarity when inserting the batteries.
Requirement: The instrument is switched off.
1. Undo the screw on the battery compartment cover and open the
battery compartment.
2. Remove the empty batteries from the holder and insert new
batteries (type AAA).
Pos: 69 /TD/Produkt instand halten/testo 270/Sensor reinigen @ 2\mod_1206628000890_79.docx @ 13273 @ 25 @ 1
3. Close battery compartment and secure with screw.
7.2. Cleaning the sensor
Risk of burns due to hot instrument parts (sensor and probe
shaft)!
> Do not touch hot instrument parts with your hands.
> Allow instrument to cool sufficiently before cleaning.
> In the event of burns, immediatel y cool corresponding spot with
cold water and see a doctor if necessary.
CAUTION
Possible damage to the sensor!
> Do not remove cold oil residues from the sensor.
> Do not use any sharp-edged objects.
> Do not use aggressive cleaning age nts and solvents.
> Use weak household cleaning agents, standard household
rinsing agents, water or soap suds.
> Gently clean sensor with a soft paper towel, or rinse under
running water.
> Carefully dry sensor with a soft paper towel.
Find Quality Products Online at: [email protected]
www.GlobalTestSupply.com
Page 26

With cold oil residues on the sensor
1. Immerse sensor in hot oil.
2. Allow sensor and probe shaft to cool unti l there is no longer a
risk of burns.
Pos: 70 /TD/Produkt instand halten/testo 275/Gehäuse r einigen (testo 275) @ 16\mod_1408017834842_79.docx @ 196931 @ 2 @ 1
3. Clean sensor before the oil residues cool down.
7.3. Cleaning the housing
Requirement: The instrument is switched off.
CAUTION
Possible damage to housing!
> Do not use sharp-edged objects.
> Do not use any aggressive cleaning agents or solvents.
> Use mild household cleaning agents , standard household
washing-up liquids, water or soap suds.
> Clean housing with a damp cloth.
Pos: 71 /TD/Produkt instand halten/testo 275/Koff er reinigen (testo 275) @ 16\mod_1413438648965_79.docx @ 202997 @ 2 @ 1
> Dry housing.
7.4. Cleaning the plastic case
7 Maintaining the product
CAUTION
Possible damage on and in the plastic case!
> Do not use sharp-edged objects.
> Do not use any aggressive cleaning agents or solvents.
> Use mild household cleaning agents, standard household
> Clean plastic case with a damp cloth.
Pos: 72 /TD/Produkt instand halten/testo 275/Insta ndh altung Gerät kalibrieren/justieren (testo275) @ 15\mod_14 07495334611_79.docx @ 195020 @ 255 @ 1
> Wipe plastic case with a dry cloth.
washing-up liquids, water or soap suds.
Find Quality Products Online at: [email protected]
www.GlobalTestSupply.com
Page 27

7 Maintaining the product
7.5. Calibrating/adjusting the instrument
You can check the accuracy of your inst rument by carrying out a
comparative measurement with t he Testo reference oil (calibrating).
If there is too great a difference between the reading and the
reference value, future instrument readings can be adjusted to the
reference value (adjusting).
• The testo 270 should be checked with the Testo
reference oil on a regular basis and adjusted if
necessary (accuracy +/- 2.5% TPM)
a monthly check as part of quality assurance.
• We rec om mend you always use the Testo reference oil
for calibration/adjustment of the sensor (order no.
0554 2650, 1 piece).
• T he s ensor is exposed to large temperature jumps and
pollutants while in measuring mode. We therefore
recommend having an annual test carri ed out by Testo
Customer Service. For more information go to:
www.testo.com.
For measurements as part of a quality-assurance concept
(e.g. ISO 9001), we recommend the annual renewal of
a calibration certificate (accuracy +/- 2% TPM
more information go to: www.test o.com
Prepare calibration / adjustment
1. Clean sensor before the calibration/adjustment, see Cleaning
the sensor, page 26.
When heating the reference oil, m ake sure that no water
gets into the reference oil or onto the sensor.
The reference oil must be heated to approx. 50 °C for
calibration and adjustment.
4
). We recommend
4
). For
4
typically, based on Testo in-house r eference, at an ambient temperature of
25 °C.
28
Find Quality Products Online at: [email protected]
www.GlobalTestSupply.com
Page 28

7 Maintaining the product
2. Heat water in a container (e.g. a cup) to approx. 50 °C. Place
closed reference oil bottle in the water bath for approx. 10 min
(maximum water level to lower edge of sealing cap). Then
briefly shake the closed reference oil bottle, for better heat
distribution in the bottle.
Carry out calibration / adjustment
1. Switch the instrument on, press and hold down [Hold] during
the display test for approx. 2 secs.
- When the PIN is deactivated, Alarm lights up in the
display.
> when the PIN is activated: Enter PIN.
2. Go through the configuration mode with [Hold], until CAL and
yes or no light up in the display.
3. Switch on the calibration/adjustment function with [ ] or [ ]
(yes).
4. Confirm with [Hold].
- OIL and CAL light up in the display.
There is a negative effect on the accuracy of the
calibration/adjustment when the reference oil bottle is held
by hand.
Find Quality Products Online at: [email protected]
www.GlobalTestSupply.com
Page 29

7 Maintaining the product
5. Immerse sensor in reference oil. Adher e to the immersion
depth!
- When alarm indicator is activated: the display lights up orange.
6. Start calibration/adjustment pr ocess with [Hold]. For faster
recording of readings: move sensor in oil.
- The display lights up red.
- M easured TPM value and temperature are displayed.
- With a stable reading: Control keys are enabled, display lights
up green.
7. Compare the value shown in the display with the target value
indicated on the label of the reference oil bottle.
> If there is a deviation of > 1%, adjustment s hould be carried
> If there is a deviation of </= 1%, no adjustment is required.
8. With [ ] or [ ] set the TPM value to the value that is indicated
on the label of the reference oil bottle.
out. Continue with step 8.
Continue with step 9.
Adjustment with reference oil impairs the accuracy by
0.5% TPM compared to the factory calibration.
A maximum correction of +/-3% TPM is possible. If the
TPM value displayed deviates by more than 3% TPM from
the target value of the reference oil, a technical check of
the instrument by Testo Service is r ecommended.
9. Save with [Hold] and carry out further settings in the
configuration mode. Use [ ] to quit the c onfiguration mode.
30
Find Quality Products Online at: [email protected]
www.GlobalTestSupply.com
Page 30

Pos: 73 /TD/--- Seitenwechsel --- @ 0\mod_1173774430601_0.docx @ 283 @ @ 1
7 Maintaining the product
Carry out reset (delete adjustment and reset to factory setting)
1. Switch the instrument on, press and hold down [Hold] during
the display test for approx. 2 secs.
- When the PIN is deactivated, Alarm lights up in the
display.
2. Go through the configuration mode with [Hold], until rst and
yes or no light up in the display.
3. Select yes (=delete adjust ment value and reset to factory
setting) or no (=no resetting of the adjustment value) with [ ]
or [ ].
4. Confirm with [Hold].
Find Quality Products Online at: [email protected]
www.GlobalTestSupply.com
Page 31

8 Tips and assistance
Pos: 74 /TD/Überschriften/8. Tipps und Hilfe @ 0\mod_117378 9887985_79.docx @ 406 @ 1 @ 1
8 Tips and assistance
Pos: 75 /TD/Überschriften/8.1 Fragen und Antworten @ 0\mo d_11 77402017078_79.docx @ 1093 @ 2 @ 1
8.1. Questions and answers
Pos: 76 /TD/Tipps und Hilfe/Fragen und Antworten/Frage n und Antworten (testo275) @ 15\mod_1407496446093_79.docx @ 195065 @ @ 1
Items shown on the
Possible causes / solution
display:
lights up and flashing
temperature value <40 °C
appears in the display
lights up and flashing
temperature value >
200 °C appears in the
Permissible measuring range
undershot
> Increase oil temperature.
Permissible measuring range
exceeded
> Reduce oil temperature.
display
Battery symbol lights
up
Battery charge level low (approx. 7 hrs
remaining life)
> Change batteries if necessary, see
Changing batteries, page 26
Battery symbol flashes
Batteries empty
(approx. 30 min remaining life )
> Change batteries, see Changing
batteries, page 26
000 lights up
Sensor not in oil
> Instrument is ready for
measurement. Immerse sensor in
oil.
PIN lights up
Configuration mode locked.
> Unlock configuration mode. see
Locking / unlocking configurations,
page 20
Err 1 lights up
TPM sensor faulty
> Contact Testo Customer Service
or your dealer.
Err 2 lights up
Temperature sensor faulty
> Contact Testo Customer Service
or your dealer.
Err 3 lights up TPM sensor and temperature sensor
faulty
> Contact Testo Customer Service
or your dealer.
32
Find Quality Products Online at: [email protected]
www.GlobalTestSupply.com
Page 32

8 Tips and assistance
Items sh
display:
Err 4 lights up
ser lights up When entering the adjustment value, a
If we have not been able to answer your question: please contact
your local dealer or the Testo Customer Service. For contact
details, see the back of this document or visit the website
Pos: 77 /TD/Überschriften/8.3 Zubehör und Ersatztei le @ 0\mod_1177402058734_79.docx @ 1102 @ 2 @ 1
8.2.
Pos: 78 /TD/Tipps und Hilfe/Zubehör und Ersatzteile/ Zubehör und Ersatzteile (testo275) @ 15\mod_1407497041658_79.doc x @ 195100 @ @ 1
Accessories and spare parts
Description Item no.
testo 270 In the plastic case, Testo
reference oil
Plastic case for testo 270 (spare part) 0516 7301
ISO calibration certificate for testo 270,
calibration points 3% and 24% TPM 0520 0028
Testo reference oil (1 x) 0554 2650
own on the
Possible causes / solution
Other fault
> Contact Testo Customer Service
or your dealer.
TPM value discrepancy of more than
10% TPM. occurs.
> We recommend a technical check
of the instrument by Testo
Customer Service.
0563 2750
=== Ende der Liste für Textmarke Inhalt ===
For further accessories and spare parts, pl e ase refer to the product
catalogues and brochures or look up on the Internet at
Find Quality Products Online at: [email protected]
www.GlobalTestSupply.com
 Loading...