

Page 1

testo 6321 · differential pressure transmitter
P2A software · Parameterizing, adjusting
and analyzing software
Instruction manual
Find Quality Products Online at: [email protected]
www.GlobalTestSupply.com
Page 2

1 Safety and the environment
Pos: 1 /TD/Ü berschrift en/MUF/Sicher heit und Um welt @ 3\mod_1234793958627_79.doc @ 26223 @ 1
1 Safety and the environment
Pos: 2 /TD/S icherheit un d Umwelt/Sic herheit gew ährleisten/MU F 63xx/Elek trische Gef ahren vermei den @ 3\mod_1234794609299_79.doc @ 26280 @ 5
Avoiding electrical hazards
> Never use the instrument and connected probe s to measur e on
or near live parts!
> Damaged mains cables must only be replaced by authorized
personnel.
> Only have the transmitter wired and connected by authorized
personnel with the voltage disconnected.
> You must always comply with the regulations applicable in your
Pos: 3 /TD/S icherheit un d Umwelt/Sic herheit gew ährleisten/MU F 63xx/Pers onen- und Sac hschäden verm eiden @ 3\mod_1234794744768_79.doc @ 26299 @ 5
Pos: 4 /TD/S icherheit un d Umwelt/Sic herheit gew ährleisten/N icht mit Lösu ngsmitteln l agern @ 0\mod_1175692375179_79.doc @ 583 @
Pos: 5 /TD/S icherheit un d Umwelt/Sic herheit gew ährleisten/MU F 63xx/Bei W artung MUF nicht zur R egelung verwe nden @ 3\mod _1234794852377_79.doc @ 26318 @
Pos: 6 /TD/Sic h er h ei t un d Umwelt/Sic her heit gewährl ei s t en/ Produkt bestim m ungsgemäß v er w enden @ 0\mod_1173781261848_79.doc @ 386 @
Pos: 7 /TD/S icherheit un d Umwelt/Sic herheit gew ährleisten/N ur beschrieb ene Wartungs arbeiten dur chführen @ 0\mod_1175692705195_79.doc @ 601 @
Pos: 8 /TD/S icherheit un d Umwelt/Sic herheit gew ährleisten/MU F 63xx/Fach personal @ 3\m od_1234794940409_79.doc @ 26337 @
country for opening and repairing electrical equipment.
Avoiding personal injury and damage to equipment
> Installation, setting and calibra t ion work mus t only be carrie d
out by qualified and authorized personnel!
> Only open the instrument when this is expressly described in
the instruction manual for installation, maintenance or repair
purposes.
> Observe the permissible storage, transport and operating
temperature.
> Do not store the product together with solvents. Do not use any
desiccants.
> Do not use the instrument for control purposes at the same time
as operating or servicing the transmitter.
> Only operate the product properly, for its intended purpose and
within the parameters specifie d in the techni cal data . Do not
use any force.
> Carry out only the maintenance and repair work on this
instrument that is described in the documentation. Follow the
prescribed steps exactly. Use only original spare parts from
Testo.
Any additional work must only be carried out by authorized
personnel. Otherwise testo will not accept any responsibility for the
proper functioning of the instru ment after repa ir and for the valid ity
of certifications.
3
Find Quality Products Online at: [email protected]
www.GlobalTestSupply.com
Page 3

2 About this document
tion
Menu
Elements of the program interface.
[OK]
Pos: 9 /TD/Ü berschrift en/MUF/Umwel t schützen @ 3\mod_1234858757571_79.doc @ 26363 @ 5
Pos: 10 /TD/ Sicherheit u nd Umwelt/Um welt schütz en/Produkt e ntsorgen @ 0\mod_1173780307072_79.doc @ 357 @
Protecting the environment
> At the end of its useful life, send the product to the separate
collection for electric and electronic devices (observe local
Pos: 11 /TD/Ü berschrift en/MUF/Zu di esem Dokumen t @ 3\mod_1234793991331_79.doc @ 26242 @ 1
2 About this document
Pos: 12 /TD/ Sicherheit u nd Umwelt/Z u diesem Dok ument/Verwe ndung (Stand ard) @ 0\mod_1173775068554_79.doc @ 337 @ 5
regulations) or return the product to Testo for disposal.
Use
> Please read this documentation through carefully and
familiarize yourself with the product before putting it to use. Pay
particular attention to the safety instructions and warning advice
in order to prevent injuries and damage to the products.
> Keep this document to hand so that you can refer to it when
necessary.
> Hand this documentation on to any subsequent users of the
Pos: 13 /TD/ Sicherheit u nd Umwelt/Z u diesem Dok ument/Symbol e und Schrei bkonvention en/Warnhinw eis WARNUN G @ 2\mod_1207646966234_79.doc @ 14398 @
Pos: 14 /TD/ Sicherheit u nd Umwelt/Z u diesem Dok ument/Symbol e und Schrei bkonvention en/Warnhinw eis VORSICH T @ 2\mod_1207651416515_79.doc @ 14416 @
Pos: 15 /TD/ Sicherheit u nd Umwelt/Z u diesem Dok ument/Symbol e u nd Schreibkonv . Software [St andard] @ 0 \mod_1190203332543_79.doc @ 4883 @ 5
product.
WARNING Indicates potential serious injuries
CAUTION
indicates potential minor injuries
Symbols and writing standards
Representa-
Explanation
Pos: 16 /TD/--- Seit enwechsel --- @ 0\mod_1173774430601_0.doc @ 283 @
4
Note: Basic or further information.
1. ...
2. ...
Action: more steps, the sequence must be
followed.
> ... Action: a step or an optional step.
- ... Result of an action.
Buttons of the program interface.
... | ... Functions/paths within a menu.
“...” Example entries
Find Quality Products Online at: [email protected]
www.GlobalTestSupply.com
Page 4

3 Contents
Pos: 17 /TD/Üb er s chr i f ten/MUF/I nh al t @ 3\m od_1234794019831_79.doc @ 26261 @ 1
3 Contents
1 Safety and the environment ........................................................ 3
2 About this document .................................................................... 4
3 Contents ........................................................................................ 5
4 Transmitter .................................................................................... 7
4.1. Specifications .................................................................................. 7
4.1.1. F unctions and use ............................................................................ 7
4.1.2. Scope of delivery ............................................................................. 7
4.1.3. Dimensions ...................................................................................... 7
4.1.4. T echnical data ................................................................................. 8
4.2. Product description ........................................................................ 11
4.2.1. At a glance ..................................................................................... 11
4.2.2. Scaling ........................................................................................... 12
4.3. Commissioning .............................................................................. 13
4.3.1. Assembling the instrument ............................................................. 13
4.3.1.1. Wall mounting .................................................................... 13
4.3.2. Wiring the instrument ..................................................................... 14
4.3.2.1. 4-wire system .................................................................... 16
4.3.2.2. 3-wire system .................................................................... 16
4.4. Maintenance and cleaning ............................................................. 17
4.4.1. Cl eani ng housing ........................................................................... 17
4.4.2. Namur fault conditions ................................................................... 17
5 Parameterizing, adjusting and ana lyzing software (P2A
software) ...................................................................................... 18
5.1. Specifications ................................................................................ 18
5.1.1. F unctions and use .......................................................................... 18
5.1.2. System requirements ..................................................................... 19
5
Find Quality Products Online at: [email protected]
www.GlobalTestSupply.com
Page 5

3 Contents
5.2. First steps ..................................................................................... 20
5.2.1. Installing the software/driver .......................................................... 20
5.2.1.1. Installing P2A software ...................................................... 20
5.2.1.2. Installing USB driver .......................................................... 20
5.2.1.3. P2A software upgrade ....................................................... 20
5.2.2. Starting the software ...................................................................... 21
5.2.2.1. Starting the program .......................................................... 21
5.2.2.2. Establishing a connection with the instrument ................... 21
5.2.2.3. Activating the connection with the instrument .................... 21
5.3. Using the software ........................................................................ 22
5.3.1. User interface ................................................................................ 22
5.3.2. Editing instrument/parameter file .................................................... 24
5.3.2.1. Changing instrument/parameter file ................................... 24
5.3.2.2. Creating a new instrument file ........................................... 26
5.3.2.3. Saving parameters ............................................................ 26
5.3.2.4. Opening the parameter file ................................................ 27
5.3.2.5. Copying and pasting parameters ....................................... 27
5.3.2.6. Deleting instrument/parameter file ..................................... 27
5.3.3. Analyzing/testing the transmitter .................................................... 28
5.3.3.1. Analyzing/testing the instrument ........................................ 28
5.3.3.2. Carrying out factory reset .................................................. 28
5.3.3.3. Testing analog output ........................................................ 29
5.3.3.4. Displaying min./max. values .............................................. 30
5.3.4. Adjusting the transmitter ................................................................ 32
5.3.4.1. n-point adjustment ............................................................. 32
5.3.4.2. Adjusting the analog output ............................................... 33
5.3.5. T ransmitter history ......................................................................... 35
6 Tips and assistance ................................................................... 37
6.1. Questions and answers ................................................................ 37
6.2. Accessories and spare parts ......................................................... 37
6.2.1. Orderi ng options for testo 6321 transmitter (0555 6321) ................ 38
Pos: 18 /TD/--- Seitenwechsel --- @ 0\mod_1173774430601_0.doc @ 283 @
6
Find Quality Products Online at: [email protected]
www.GlobalTestSupply.com
Page 6

Pos: 19 /TD/Üb er s chr i f ten/MUF/1 Mes s um f ormer @ 3\mod_1234258401060_79.doc @ 23894 @ 1
4 Transmitter
Pos: 20 /TD/Üb er s chr i f ten/MUF/1. 1/ 2. 1/3.1 Leistung s beschreibung @ 3\mod_1234258595211_79.doc @ 23951 @ 2
4.1. Specifications
Pos: 21 /TD/ Leistungsbes chreibung/ Verwendung/ MUF63xx/MUF 6321 @ 3\mod_1241608910962_79.doc @ 32625 @ 3
4.1.1. Functions and use
The testo 6321 transmitter is suitable for the following applications,
amongst others:
• Air conditioning and ventilat i on technol ogy
◦ Monitoring ventilation and filtra t ion syste ms
◦ Monitoring fans
Pos: 22 /TD/ Leistungsbes chreibung/ Lieferumfang /MUF 63xx/M UF 6781 @ 3\mod_1238162497483_79.doc @ 30275 @ 3
◦ Monitoring exhaust air volumetric flow rates
4.1.2. Scope of delivery
The scope of delivery of the testo 6321 transmitter includes the
following:
• Assembly accessories
• Operating instructions
Pos: 23 /TD/ Leistungsbes chreibung/T echnische D aten/MUF 63 xx/MUF 6781 Abmessunge n @ 3\mod_1239806330094_79.doc @ 31183 @ 3
• Calibration report
4 Transmitter
4.1.3. Dimensions
Pos: 24 /TD/Lei s t ung sbeschreib ung /Technisch e Daten/MUF 63 xx /M U F 6 32 1 @ 3\m od_1241601145321_79.doc @ 32604 @ 35555555555555555555
7
Find Quality Products Online at: [email protected]
www.GlobalTestSupply.com
Page 7

4 Transmitter
version ordered
4.1.4. Technical data
Parameter
• Differential pressure
Accuracy1
The specifications are only valid if the positive pressure is
applied at the positive pressure connection.
• 1.2 % of measuring range, additional ±0.3 Pa intrinsic error 2
• T
K slope drift
= 0.05 % of measuring range per degree Kelvin of
deviation from nominal temperature 22 °C
• T
K zeroing drift
= 0 % (by means of automatic zeroing)
Measuring range, resolution and overload
Measuring range
depending on
0 to 100 Pa 0.1 Pa 20,000 Pa
0 to 10 hPa 0.01 hPa 200 hPa
0 to 20 hPa 0.01 hPa 200 hPa
0 to 50 hPa 0.01 hPa 750 hPa
0 to 100 hPa 0.1 hPa 750 hPa
0 to 500 hPa 0.1 hPa 2500 hPa
0 to 1000 hPa 1 hPa 2500 hPa
0 to 2000 hPa 1 hPa 2500 hPa
Resolution Overload
1
At 25 °C. A stabilization period of approx. 30 min must be taken into account upon commissioning the instrument.
2
Measuring uncertainty in accordance with GUM: ±1.2 % of measuring range final value ±0.3 Pa.
GUM (Guide to the Expression of Uncertainty in Measurement): ISO guideline for determining the
measuring uncertainty in order to render global measurement results comparable.
The following uncertainties are used during the inquiry:
• Hysteresis
• Linearity
• Reproducibility
• Long-term stability
• Adjustment area/factory calibration
• Test location
8
Find Quality Products Online at: [email protected]
www.GlobalTestSupply.com
Page 8
4 Transmitter
version ordered
-500 to 500 hPa
0.1 hPa
2500 hPa
Upon delivery and following a factory reset the readings are
Measuring range
Resolution Overload
depending on
-100 to 100 Pa 0.1 Pa 20,000 Pa
-10 to 10 hPa 0.01 hPa 200 hPa
-20 to 20 hPa 0.01 hPa 200 hPa
-50 to 50 hPa 0.01 hPa 750 hPa
-100 to 100 hPa 0.1 hPa 750 hPa
-1000 to 1000 hPa 1 hPa 2500 hPa
-2000 to 2000 hPa 1 hPa 2500 hPa
shown in the display in the unit that was ordered via the
KMAT option Fxx, see
Ordering options for test o 6321
transmitter (0555 6321) page 38.
Meas. cycle
• 1/sec
Zeroing cycle
• Set to 1 min at the factory
Interface
• Mini-DIN for P2A software (adjustment and parameteriz ation
software)
Voltage supply
• 3 or 4-wire (separate signal and supply lines): 20 to 30 V
AC/DC, 300 mA power consumption
9
Find Quality Products Online at: [email protected]
www.GlobalTestSupply.com
Page 9

4 Transmitter
Maximum load
• 4-wire: 500 Ω (power output)
Maximal load
• 10 kΩ (voltage output)
10
Analog output
• 0 to 1 V ± 2.5 mV (4-wire) or
• 0 to 5 V ± 12.5 mV (4-wire) or
• 0 to 10 V ± 25 mV (4-w ire) or
• 4 to 20 mA ± 0.05 mA (4-wire)
= 0.05 %K of measuring range per degree Kelvin of
• T
K
deviation from nominal temperature 22 °C
Resolution of analog output
• 12 bit
Display
• 2-line LCD (optional)
Operating temperature
• -5 to 50 °C
Find Quality Products Online at: [email protected]
www.GlobalTestSupply.com
Page 10

Storage temperature
2 Service interface (mini-DIN port)
• -20 to 60 °C
Application humidity
• 0 to 90 % RH
Housing, weight
• Plastic, approx. 160 g
Protection class
• IP 65 only if the transmitter is wired and/or se ali ng plugs are
inserted
Directives, standards and tests
Pos: 25 /TD/Üb er s chr i f ten/MUF/1. 2/ 2. 2 Produktbesc hr eibung @ 3\mod_1234258723551_79.d oc @ 24008 @ 2
4.2. Product descripti on
Pos: 26 /TD/ Produktbesc hreibung/Üb ersicht/MUF 63xx/Auf ein en Blick MUF 6321 @ 3\mod_1241599865646_79.doc @ 32583 @ 3
4.2.1. At a glance
• EC Directive: 2014/30/EC
1 Display for showing reading
(optional, cannot be retrofitted)
4 Transmitter
3 Wall bracket (on rear)
4 Negative pressure connection
5 Positive pressure connection
6 M 16 x 1.5 screw connection, e.g.
analog output
Pos: 27 /TD/ Produktbesc hreibung/Üb ersicht/MUF 63xx/Skalier ung 6321 @ 4\mod_1252938938948_79.doc @ 5028 3 @ 3
11
Find Quality Products Online at: [email protected]
www.GlobalTestSupply.com
Page 11
4 Transmitter
0 to 20 hPa
-10 to 30
4.2.2. Scaling
There are three types of min./max. values:
1 The measuring range: The maximum sensor performance is in
this range. Measuring range, see table (below).
2 Standard scaling: The output signal s are assigned to this
measuring range as standard:
◦ during delivery if no entries are made in the order code
◦ after exchanging the unit, the measuring range recorded in
Pos: 28 /TD/ Produktbesc hreibung/Üb ersicht/MUF 63xx/Tabell e Skalierung MUF 6321 @ 3\m od_1241617696391_79.doc @ 32646 @
the instrument is applied as standard.
The transmitter even retains its scaling with the voltage
disconnected.
Measuring range, see table (below).
3 The maximum settings for the manual scaling
◦ The maximum limits can be calculated as follows:
X = difference between MIN. and MAX. value of the
standard scaling
(Max . value of standard) + (50 % of X)
(Min. value of standard) - (50 % of X)
◦ It is thus possible to scale beyond the measuring range, e.g.
for the adjustment of the scaling limits to standard values of
a PLC.
With the alarm definition, however, the physical measuring
range limits are decisive.
Measuring range/
standard scaling
0 to 100 Pa -50 to 150
0 to 10 hPa -5 to 15
Maximum scaling
0 to 50 hPa -25 to 75
0 to 100 hPa -50 to 150
0 to 500 hPa -250 to 750
0 to 1000 hPa -500 to 1500
0 to 2000 hPa -1000 to 3000
-100 to 100 Pa -200 to 200
-10 to 10 hPa -20 to 20
12
Find Quality Products Online at: [email protected]
www.GlobalTestSupply.com
Page 12

4 Transmitter
standard scaling
-500 to 500 hPa
-1000 to 1000
Measuring range/
Maximum scaling
-20 to 20 hPa -30 to 30
-50 to 50 hPa -100 to 100
-100 to 100 hPa -200 to 200
-1000 to 1000 hPa -2000 to 2000
-2000 to 2000 hPa -4000 to 4000
Pos: 29 /TD/Üb er s chr i f ten/MUF/1. 3/ 2. 3 Inbetriebna hme @ 3\mod_1234258805768_79.doc @ 24027 @ 2
4.3. Commissioning
Pos: 30 /TD/Ers t e S chr i t te/MUF 63xx/W a n dmontage 635x _ 63 2 1 @ 3\mod_1236065568006_79.doc @ 27063 @ 3455
4.3.1. Assembling the instrument
4.3.1.1. Wall mounting
Attaching rear panel bracket
1. Remove locking screw (see item (4) of drawing below) and
detach rear panel bracket from plastic bracket (see item (2) of
drawing below).
2. Hold rear panel bracket in assembly position and mark the three
drill holes.
3. Drill three holes (Ø 5 mm) and insert dowels where necessary.
4. Screw on rear panel bracket.
Remember that the clamping brackets (1) must face the wall.
13
Find Quality Products Online at: [email protected]
www.GlobalTestSupply.com
Page 13

4 Transmitter
WARNING
WARNING
Fastening instrument to rear panel bracket
1. Slide plastic bracket (2) on the back of instrument onto rear
panel bracket until it engages (see arrows).
2. Insert screw (4) through hole (3) and screw into rear panel
Pos: 31 /TD/Ers t e S chr i t te/MUF 63xx/G er ä t verdrahten 6 32 1 @ 3\mod_1241618087115_79.doc @ 32667 @ 344
bracket.
4.3.2. Wiring the instrument
Electrical voltage!
> When routing cables, ensure that there is a space between the
signal line and the interfering external lines.
> If electromagnetic interference is likely, use a shielded and/or
twisted cable. Connect the shield to the earth on the side
facing away from the transmitter.
> If overvoltages are likely, install overvoltage protection devices.
Electrical voltage
Danger of injury!
> De-energize the mains connection before connecting the
transmitter.
14
Find Quality Products Online at: [email protected]
www.GlobalTestSupply.com
Page 14

4 Transmitter
CAUTION
Damage to electronic components!
> The terminal strip can be removed from the circuit board in
order to screw on the cable ends. After wiring, be sure to
completely attach the terminal strip on the cont act pin s as preassembled.
Only have the transmitter wired and connected by
authorized personnel with the voltage disconnected.
1. Loosen and remove housing screws (1).
2. Remove upper part of housing (2) from lower part of housing (3)
and place on a clean surface.
3. Wire instrument (see 3-w ire sy stem page 16, 4-wire system
page 16).
4 Place upper part of housing (2) on lower part of housing (3) and
tighten with housing screws (1).
5. On instruments with display: Remove protective film (4) from
the display cutout of the housing cover.
15
Find Quality Products Online at: [email protected]
www.GlobalTestSupply.com
Page 15

4 Transmitter
4.3.2.1. 4-wire system
Voltage output (4-wire, 0 to 1 V/0 to 5 V/0 to 10 V)/voltage output
(4-wire, 4 to 20 mA):
U = 20 to 30 V DC/AC
4.3.2.2. 3-wire system
All ground connections are connected to one another (= one
collective ground connection) .
CAUTION
Destruction of the instrument in the event of incorrect
polarity!
> When connecting the voltage supply, place collective ground
connection on PIN 2!
Pos: 32 /TD/Üb er s chr i f ten/MUF/1. 6 W ar t ung und Reinigung @ 3\mod_1234443039129_79.doc @ 24982 @ 2
16
Find Quality Products Online at: [email protected]
www.GlobalTestSupply.com
Page 16

4.4. Maintenance and cleaning
Status
Class
Display
value in the
Analog output
4 to 20 mA
1 V
5 V
10 V
Pressure too
Pos: 33 /TD/ Produkt inst and halten/ MUF 63xx/Ge häuse reinig en 6321 @ 3\mod_1241092795617_79.doc @ 32303 @ 3
4.4.1. Cleaning housing
• Only clean the housing carefully with a moist cloth.
• Do not use aggressive cleaning agents.
Pos: 34 /TD/Pro dukt verwende n/MUF 63xx/S tatus-Warnm eldungen/Nam ur Fehlerbedi ngungen 63 21 @ 4\mod_1253024846257_79.d oc @ 50363 @ 3
• Do not use any solvents.
4.4.2. Namur fault conditions
If the faults named in the following table occur, the analog outputs
output special values that enable a general fault warning in the
higher-level contr ol system. The values correspond to the "Namur"
message in
the display
Watchdog
error
Value below
min. scale
Value above
max. scale
high
Pos: 35 /TD/Ü berschrift en/MUF/3 Par ametrier-, Abg l ei ch und Analy sesoftware ( P2A-Software) @ 3\mod_1234258523 713_79.doc @ 23932 @ 1
industry standard.
display
Error Previous
3.8 mA 1.1 V 5.5 V 11 V
value stops
Underrange Reading 3.8 mA 0 V 0 V 0 V
Overrange Reading 20.5 mA 1.1 V 5.5 V 11 V
Overrange ooooo · 20.5 mA 1.1 V 5.5 V 11 V
4 Transmitter
17
Find Quality Products Online at: [email protected]
www.GlobalTestSupply.com
Page 17

5 Parameterizing, adjusting and analyzing software (P2A software)
5 Parameterizing, adjusting and
analyzing software (P2A
Pos: 36 /TD/Üb er s chr i f ten/MUF/1. 1/ 2. 1/3.1 Leistung s beschreibung @ 3\mod_1234258595211_79.doc @ 23951 @ 2
5.1. Specifications
Pos: 37 /TD/ Leistungsbes chreibung/ Verwendung/ MUF63xx/MUF 63xx P2A @ 3 \mod_1234258967326_79.doc @ 24065 @ 355
software)
The P2A software is used for the parameterization, adjustment and
analysis of Testo transmitters. The following applies:
• If a Testo transmitter is bought at a later stage (and is therefore
more recent than the existing P2A software version), a software
update is required.
The software therefore only needs to be bought once, even for
owners of several Testo transmitters.
5.1.1. Functions and use
In the P2A software, two different file types are used: The
instrument and the parameter file.
Instrument file
The parameters of a particular transmitter are stored in its so-called
instrument file. Using this file, the parameters can be edited and the
instrument can be tested and adjusted.
Instrument files also contain the respective histories in addition to
the parameter data, i.e. "log books" are kept for the previous
parameterizations, adjustments and messages (see 5.4.5
Transmitter history).
Instrument files are ".cfm" format files.
18
Find Quality Products Online at: [email protected]
www.GlobalTestSupply.com
Page 18

5 Parameterizing, adjusting and analyzing software (P2A software)
the PC. The administrator must ensure that the system time
Parameter file
Parameter files are not tied to a specific individual transmitter and
contain only parameter data/no history data.
If you use various instruments of the same type, you can create
parameter files once (e.g. by saving the appropriate instrument file
as the parameter file) and transmit these onto the other
instruments.
Parameter files are ".cfp" format files.
Pos: 38 /TD/Lei s t ung sbeschreib ung /Systemvor a us s etzungen/MU F 6 3x x @ 3\mod_1234260654399_79.doc @ 24084 @ 3555
5.1.2. System requirements
Operating system
• Windows® 7
®
8
Date and time settings are automatically transferred from
is regularly synchronized with a reliable time source and, if
necessary, adjusted to ensure the authenticity of the data.
Pos: 40 /TD/Über schriften/MUF/3.2 Er ste Schritte @ 3\mod_1234258633304_79.doc @ 23970 @ 2
• Windows
• Windows® 10
Computer
The computer must meet the requirements of the respe cti ve
operating system. In addition, the following requirements must be
met:
• Interface USB 1.1 or higher
• Graphics resolution min. 1024 x 768
19
Find Quality Products Online at: [email protected]
www.GlobalTestSupply.com
Page 19

5 Parameterizing, adjusting and analyzing software (P2A software)
5.2. First steps
Pos: 41 /TD/Ers t e S chr i t te/MUF 63xx/P 2 A/Software/Tr eiber inst allieren @ 3\mod_1234261192065_79.doc @ 24123 @ 3444
5.2.1. Installing the software/driver
Administrator rights are required.
5.2.1.1. Installing P2A software
Without the input of a licence key, the software will run only
as a demo version (time limit 30 days).
1. You can download the software
If the installation program does not start automatically:
> Open download folder and start P2A.exe.
2. Follow the instructions of the installation wizard.
3. Click on [Finish] to complete the software installation
5.2.1.2. Installing USB driver
1. You can download the software (Testo USB driver) If the
installation program does not start automatically:
> Open download folder and start USBDriver.exe.
2. Follow the instructions of the installation wizard.
3. Click on [Finish] to complete the software installation
5.2.1.3. P2A software upgrade
1. You can find the P2A software upgrade
2. Download and save P2A software upgrade.
3. Start P2A upgrade.exe file.
4. Follow the instructions of the installation wizard.
Pos: 42 /TD/Ers t e S chr i t te/MUF 63xx/P 2 A/Software star t en _6321 @ 3\mod_1242285508828_79.doc @ 32883 @ 3444
20
Find Quality Products Online at: [email protected]
www.GlobalTestSupply.com
Page 20

5 Parameterizing, adjusting and analyzing software (P2A software)
5.2.2. Starting the software
5.2.2.1. Starting the program
Windows program menu
Windows® 7
> Click on [Start] > All Programs > Testo > P2A Software
(double-click on left mouse button).
®
Windows
> Click on [Start] | right mouse button | Search | Enter the name
Windows® 10
> Click on [Start] | All Apps | Testo | P2A Software. (double-
5.2.2.2. Establishing a connection with the instrument
Multiple instruments can be attache d, howev er only one connection
is active at all times.
✓ USB driver is installed (see 5.2.1.2 Installing USB driver).
1. Start the P2A software.
2. Connect adapter (supplied with the P2A software) to the service
3. Connect instrument/adapter to the PC via the USB interface.
- The instrument file of the attached instrument is shown in the
8
of the application in the search field | P2A Software. (doubleclick on left mouse button).
click on left mouse button).
interface of the instrument (see 4.5.1 item 2, At a glance).
file list.
5.2.2.3. Activating the connection with the instrument
> Click on the desired instrument file.
- The selected file is marked in colour and the connection with
the instrument is activated.
If a connection with the instrument is established when the program
is started, the corresponding instrument file is marked
automatically.
21
Find Quality Products Online at: [email protected]
www.GlobalTestSupply.com
Page 21

5 Parameterizing, adjusting and analyzing software (P2A software)
Menu
Command
Explanation
Status bar
Pos: 43 /TD/Ü berschrift en/MUF/3.3 S oftware verw enden @ 3\mod_1234258679599_79.doc @ 23989 @ 2
5.3. Using the software
Pos: 44 /TD/ Produkt verw enden/MUF 6 3xx/P2A/Sof tware verwe nden @ 3\mod_1234262654547_79.doc @ 24162 @ 3
5.3.1. User interface
22
1. Menu bar:
File Open
Shows the Windows dialogue for
searching and opening files.
Save as
Saves the parameters of an
instrument or parameter file
under a new name.
Edit Copy Copies the parameters of the
marked instrument or parameter
file in the cache.
Paste Pastes the parameters from the
cache in the marked instrument
or parameter file.
View Toolbar
Activates/deactivates the toolbar
or status bar.
Find Quality Products Online at: [email protected]
www.GlobalTestSupply.com
Page 22
5 Parameterizing, adjusting and analyzing software (P2A software)
connected instrument without the
A text file with the most important
Display service data
sion number of the
Icon
File
Explanation
has
nstrument has
The name can be selected freely,
Menu Command Explanation
? Check instrument
connections
Service
Information Shows the ver
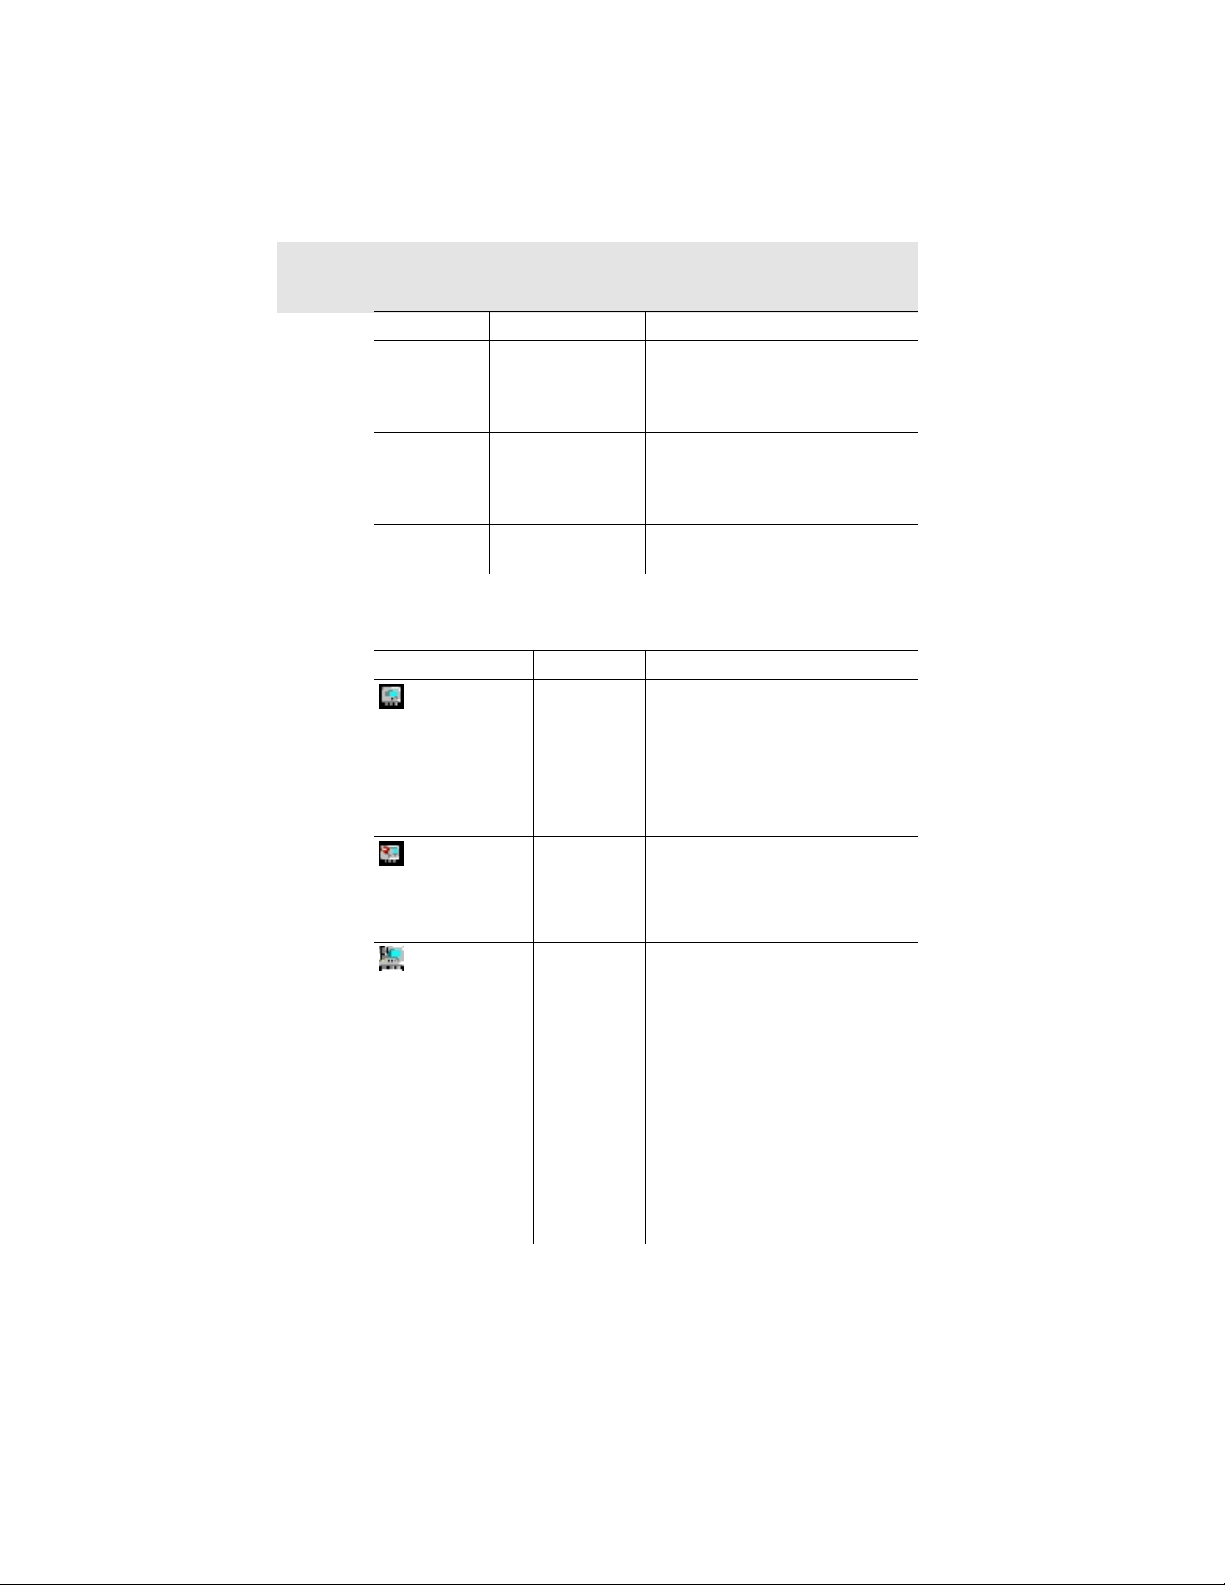
2. Toolbar: Shows the Windows-compliant icons for editing.
3. File:
Checks the connections to a
instrument having to be
activated.
information on the computer and
the software is opened via
.
P2A software.
Symbol shows a
transmitter
Symbol shows a
transmitter with a red
minus sign in the upper
left corner
Symbol shows a
transmitter with a white
P for parameter file in
the upper left corner
Instrument
file
Instrument
file
Parameter
file
Instrument file
Connection to the instrument
been established.
<Type> <Serial number>.cfm
File name should not be
changed.
Instrument file
Connection to the i
not been established.
<Type> <Serial number>
<Date> <Time>.cfp
File name can be changed.
but it is recommended that yo u
retain the reference to the
instrument.
Parameter files are always
marked red; the parameter
values they contain are only
forwarded to the instrument after
being transmitted to the
instrument file.
23
Find Quality Products Online at: [email protected]
www.GlobalTestSupply.com
Page 23
5 Parameterizing, adjusting and analyzing software (P2A software)
4. Function buttons: Dialogues on editing and testing the
instrument are opened by means of the buttons.
[Change parameterization] see 5.4.2.1 Changing
instrument/parameter fil e
[Test/analyze transmitter] see 5.4.3 Chapter Analyzing/testing the
transmitter
[Adjusting the transmitter] see 5.3.4 Chapter Adjusting the
transmitter
[Transmitter history] see 5.4.5 Transmitt er hi story
Pos: 45 /TD/ Produkt verw enden/MUF 6 3xx/P2A/Ger äte-/Paramet er datei bearbei te n @ 3\mod_1234358080444_79.doc @ 24303 @ 34
5. File information:
Status Shown in the window
An instrument file is
selected
A parameter file is
selected
Type, serial number, firmware version of the
instrument.
Type, serial number and firmware version of
instrument for which the parameter file was
created.
Connection status Green = connection is active
Red = connection is ina ctive
6. Status bar: Shows the current status when editi ng via the menu
bar.
5.3.2. Editing instrument/parameter file
5.3.2.1. Changing instrument/parameter file
✓ The desired instrument/parameter file is marked.
1. Click on [Change parameterization].
- The Properties of <Instrument type> <Serial number>
dialogue is opened with the Change parameterization register.
If the parameters were transmitted from other parameter files into
the instrument file, a message is shown with which you can
transmit the new parameters to the connected in strument using
[Yes].
> If the parameters should not be transmitted, clic k on [No].
24
Find Quality Products Online at: [email protected]
www.GlobalTestSupply.com
Page 24
5 Parameterizing, adjusting and analyzing software (P2A software)
Field
Explanation
Pos: 46 /TD/ Produkt verw enden/MUF 6 3xx/P2A/Ei nheit / Anal ogausgang ohn e Relais @ 4 \mod_1244205188941_79.doc @ 44503 @
2. Change or enter parameters in the corresponding fields.
Unit/
Analog output
Unit/analog output
(graphic)
Scale minimum/
maximum
Unit Selection of the physical unit.
Signal delay
(graphic)
All analog outputs are parameterized in this
mask.
Unit: 0 to 1 V/5 V/10 V or 4 to 20 mA.
Vertical: Current version of the analog output
(cannot be changed).
Horizontal: Min./max. scale end points of
selected unit.
The curve changes in accordance with the
entered value of scale minimum and
maximum.
The endpoints of the scaling can be selected
up to the stored scale minimum and
maximum. In the proce ss, scal ing can tak e
place beyond the measuring range in order
to adjust the analog output to the customer
system, see 4.5.2 Scaling.
When changing the unit, standard values are
set for scale minimum and maximum.
Curve changes according to the set signal
delay.
25
Find Quality Products Online at: [email protected]
www.GlobalTestSupply.com
Page 25

5 Parameterizing, adjusting and analyzing software (P2A software)
The signal delay is added to the reaction time
Field Explanation
Signal delay Tim e interval in stages 1 – 15:
1 = no delay
15 = longest delay.
of the sensor. The signal delay shows
averaging over the time interval of the
selected stage in seconds:
Example
Stage 10 = average of the readings from the
last 10 seconds.
The delay of the signal in relation to the change in the
process is also significantly influenced by the selection of
Pos: 47 /TD/ Produkt verw enden/MUF 6 3xx/P2A/Ger ätedatei erz eugen @ 3\mod_1237206865717_79.doc @ 29703 @ 4
the particle filter.
5.3.2.2. Creating a new instrument file
It is possible to create an instrument file without restarting the P2A
software.
✓ Transmitter must be connected.
1. Click on File > New connection in the menu bar.
Pos: 48 /TD/Pro dukt verwende n/M U F 63xx/P2A/P ar am eter speicher n @ 3\mod_1234358425697_79.doc @ 24322 @ 4
- Connection to the transmitter is established.
5.3.2.3. Saving parameters
Parameters can be saved in new parameter files.
1. Mark instrument/parameter file .
2. Click on File > Save as in the menu bar.
3. Select storage location and enter the file name.
4. Click on [Save].
- The new parameter file is shown in the file list.
Only the parameters are saved from an instrument file; the history
data are not adopted.
The original name (Instrument type, Serial number) is
suggested with the current date/time as standard, e.g.
"testo 6321 01234578 06112 0 1403. cfp ".
For a standard installation, the files are saved under
"C:\Documents and Settings\All Users\Shared
Documents\P2A Software". The path can differ depending
on the version of the operating system.
26
Find Quality Products Online at: [email protected]
www.GlobalTestSupply.com
Page 26

5 Parameterizing, adjusting and analyzing software (P2A software)
Pos: 49 /TD/Pro dukt verwende n/M U F 63xx/P2A/P ar am eterdatei öff n en @ 3\mod_1234358634164_79.doc @ 24341 @ 4
5.3.2.4. Opening the parameter file
All parameter files stored in the standard directory path are
automatically displayed in the file list when the software is started.
You can also open parameter files that are stored in other
directories.
1. Click on File > Open in the menu bar.
2. Select the storage location and click on the requisite file.
3. Click on [Open].
- The selected file is opened. This can be changed and saved
Pos: 50 /TD/ Produkt verw enden/MUF 6 3xx/P2A/Par ameter kopi eren/einfüg en @ 3\mod_1234358826054_79.doc @ 24360 @ 4
(see 5.4.2 Editing instrument/p arame ter file).
5.3.2.5. Copying and pasting parameters
The parameters of a parameter file can be transmitted to an
instrument file or another parameter file from the same instrument
type.
1. Select file from which parameters are to be copied.
2. Click on Edit > Copy in the menu bar.
3. Select the file which is to be modified.
4. Click on Edit > Paste in the menu bar.
Pos: 51 /TD/ Produkt verw enden/MUF 6 3xx/P2A/Geräte-/ Parameterd atei löschen @ 3\mod_1234359025194 _79.doc @ 24379 @ 4
- The parameters are transmitted to the file.
You can also use the common keyboard shortcuts for
copying (CTRL+C) and pasting (CTRL+V).
Parameters can also be transmitted using drag & drop,
where you drag the icon of the parameter file onto the icon
of the target instrument file.
5. Connect and select corresponding instrument.
6. Click on [Change parameterization].
7. Confirm confirmation request.
- Parameter data are transferred to the instrument.
5.3.2.6. Deleting instrument/parameter file
Instrument/parameter files can be deleted from the file list.
1. Click on the file that is to be deleted with the right mouse button.
2. Select the command Delete in the context menu.
- The instrument or parameter file is deleted from the list.
27
Find Quality Products Online at: [email protected]
www.GlobalTestSupply.com
Page 27

5 Parameterizing, adjusting and analyzing software (P2A software)
Action
Explanation
Pos: 52 /TD/Ü berschrift en/MUF/x.x. x Messumform er analysier e n / te st en @ 3\mod_1237380874787_79.doc @ 2998 @ 3
5.3.3. Analyzing/testing the transmitter
Pos: 53 /TD/ Produkt verw enden/MUF 6 3xx/P2A/Me ssumformer a nalysieren/t esten 632x @ 3\mod_1242139284458_79.doc @ 32824 @ 4
In this section, you can test the outputs of the connected
instrument, read off the limit values and reset the parameters to the
factory settings.
The function is only available for instrument files.
5.3.3.1. Analyzing/testing the instrument
✓ The required instrument file is marked.
1. Click on [Test/analyze tr ans mitt er] .
- The Properties of <Instrument type> <Serial number>
dialogue is opened with the Test/analyze transmitter register.
2. Perform action:
Carry out factory
reset
Reset the unit, limit value and hysteresis
parameters to factory settings (see below).
Test analog output Test channel 1 (see 5.3.3.3 Testing analog
output).
Display min./m ax.
values
Overview of the minimum and maximum
values measured since the last reset of the
transmitter (see 5.3.3.4 Displaying min./max.
values).
Pos: 54 /TD/Pro dukt verwende n/MUF 63xx/P 2A/Werksres et durchführ en @ 3\mod_1237379864072_79.d oc @ 29887 @ 4
3. Click on [OK] or [Cancel] to close the dialogue.
5.3.3.2. Carrying out factory reset
✓ The required instrument file is marked.
1. Click on [Test/analyze tr ans mitt er] .
- The Properties of <Instrument type> <Serial number>
dialogue is opened with the Test/analyze transmitter register.
2. Mark transmitter test.
- Current operating hours are shown.
3. Confirm control query to perform the reset.
- The values are reset to the customer-specific factory settings.
Pos: 55 /TD/ Produkt verw enden/MUF 6 3xx/P2A/An alogausgang t esten 6321 @ 4\mod_1244461179628_79.doc @ 44787 @ 4
4. Click on [OK] or [Cancel] to close the dialogue.
28
Find Quality Products Online at: [email protected]
www.GlobalTestSupply.com
Page 28

5 Parameterizing, adjusting and analyzing software (P2A software)
Field/button
Explanation
5.3.3.3. Testing analog output
✓ The required instrument file is marked.
1. Click on [Test/analyze tr ans mitt er] .
- The Properties of <Instrument type> <Serial number>
dialogue is opened with the Test/analyze transmitter register.
2. Mark channel and test values.
Transmitter test Monitoring of analog outputs
Current reading Readings are updated every second.
Unit Unit according to the type of analog
output.
Default value Freely definable output value for the
respective type of analog output (V or
mA), 1 decimal place.
29
Find Quality Products Online at: [email protected]
www.GlobalTestSupply.com
Page 29

5 Parameterizing, adjusting and analyzing software (P2A software)
Field/button Explanation
[Activate] The entered defined value is
forwarded to the analog output by
clicking. The current reading is frozen.
A warning informs that the value is
being transmitted to the connected
instrument in the event of existing
cabling.
Now check the analog output using a
precise multimeter.
[Deactivate] Finish entering the electrical variables
at the analog output.
The analog output returns to the
current reading again.
3. Click on [OK] or [Cancel] to close the dialogue.
Pos: 56 /TD/ Produkt verw enden/MUF 6 3xx/P2A/Min- /Max-Werte a nzeigen 635x @ 3\mod_1242135985269_79.doc @ 32803 @ 4
- The analog output returns to Measuring Mode again.
5.3.3.4. Displaying min./max. values
The transmitter saves the minimum or maximum value for each
channel (measured since the last voltage su ppl y or since the last
manual reset).
✓ The required instrument file is marked.
1. Click on [Test/analyze transmitter].
- The Properties of <Instrument type> <Serial number>
dialogue is opened with the Test/analyze transmitter register.
2. Mark Min./max. values.
Field/button Explanation
Min./max. values View the min./max. values of each channel.
Only the values within the measuring range
are shown.
30
Find Quality Products Online at: [email protected]
www.GlobalTestSupply.com
Page 30

Channel
Channel 1 min./max.
Unit/analog output
Pos: 57 /TD/Ü berschrift en/MUF/x.x. x Messumform er abgleich en @ 4\mod_1244530152797_79.doc @ 44885 @ 3
5 Parameterizing, adjusting and analyzing software (P2A software)
Field/button Explanation
Value Min. or max. value, 1 decimal place.
Unit Unit selected in
3. Reset Min./max. values.
4. Click on [Reset min./max. values].
5. Confirm control query to perform the reset.
- The values are reset to the factory settings.
6. Click on [OK] or [Cancel] to close the dialogue.
.
31
Find Quality Products Online at: [email protected]
www.GlobalTestSupply.com
Page 31

5 Parameterizing, adjusting and analyzing software (P2A software)
1 Negative pressure connection
5.3.4. Adjusting the transmitter
Pos: 58 /TD/Pro dukt verwende n/M U F 63xx/P2A/Me s s um former abglei c he n 6321 @ 4\mod_1244460546736_79 .doc @ 44755 @
This function is used to adjust an attached instrum ent. The
following adjustments may be carried out using the software:
• Analog adjustment (entry via assistant/wizard)
Pos: 59 /TD/ Produkt verw enden/MUF 6 3xx/P2A/n-Pu nkt-Abgleich _6321 @ 3\mod_1242221387590_79.doc @ 32853 @ 4
• n-point adjustment (entry via assistant/wizard)
5.3.4.1. n-point adjustment
With an n-point adjustment, the parameters at the 3-6
measurement points are adjusted to the reference value. The
reference conditions are obtained by using a precise pressure
sensor that should be 5-times more accurate than the transmitter.
✓ A precise pressure sensor (5-times more accurate than the
transmitter, e.g. DPC precision pressure sensor from testo
industrial services) is ava ila b le .
1. Connect positive output of the pressure sensor (3) to the
positive pressure connection of the transmitter (2) and the
negative output of the pressure sensor (3) to the negative
pressure connection of the transmitter (1).
2. Positive pressure connection
3. Pressure sensor
32
4. Connect transmitter to PC via service plug.
5. Mark the instrument file of the connected instrum ent in the P2A
software.
6. Click on [Adjusting the transmitter].
- The Properties of <Instrument type> <Serial number>
dialogue is opened with the Adjusting the transmitter register.
7. Mark n-point adjustment.
8. Click on [Start wizard …] and follow the instructions of the
wizard.
- The adjustment is performed when the wizard is clo sed .
Find Quality Products Online at: [email protected]
www.GlobalTestSupply.com
Page 32

5 Parameterizing, adjusting and analyzing software (P2A software)
Field
Explanation
be carried out to its full
How much pressure
is actually applied
Required field: Entry of the value read off at
the pressure sensor.
The n-point adjustment must always
extent and in good time at all selected adjustment points.
9. Disconnect connections between the pressure sensor and the
Pos: 60 /TD/ Produkt verw en de n/MUF 63xx/P 2A / A n al og ausgang abgl eic hen _6321 @ 4\mod_1244461217550_79.doc @ 44819 @ 4
pressure connections of the testo 6321.
5.3.4.2. Adjusting the analog output
1. Connect precision multimeter (see 4.6.2 Wiring the instrument).
2. Mark the instrument file of the connected instrum ent.
3. Click on [Adjusting the transmitter].
- The Properties of <Instrumen t type> <Serial number>
dialogue is opened with the Adjusting the transmitter register.
33
Find Quality Products Online at: [email protected]
www.GlobalTestSupply.com
Page 33

5 Parameterizing, adjusting and analyzing software (P2A software)
Field
Explanation
4. Click on [Start wizard …] and follow the instructions of the
wizard.
Pos: 61 /TD/Ü berschrift en/MUF/2.3. 5 Messumform er-Historie @ 3\mod_1237373806926_79.doc @ 29846 @ 3
- The adjustment is performed when the wizard is clo sed .
Default value The analog output value from the last
performed adjustment is given at the output.
Value of the factory adjustment:
• Lower adjustment point: approx. 10 % of
the max. value
• Centre adjustment point: approx. 50 % of
the max. value
• Upper adjustment point: approx. 90 % of
the max. value
Measured analog
value
Required field: Entry of the value read off at
the multimeter.
34
Find Quality Products Online at: [email protected]
www.GlobalTestSupply.com
Page 34

5 Parameterizing, adjusting and analyzing software (P2A software)
5.3.5. Transmitter history
Pos: 62 /TD/ Produkt verw enden/MUF 6 3xx/P2A/Me ssumformer-Historie 6321 @ 4\mod_1244458681753_79.doc @ 44723 @
Parameterizations and adjustment processes are registered in the
transmitter with an operating hours stamp.
In the history overviews (explained later in more detail), past
processes and events can be made visible.
For entries that are performed using the P2A software, the
name of the user logged into Windows appears in the User
field, while the date/time and operating hour are shown in
the Date/time field.
1. Mark the instrument file of the connected instrument.
2. Click on the [Transmitter history] button.
- The Properties of <Instrument type> <Serial number>
dialogue is opened with the Transmitter history register.
3. Click on the required entry in the list to change the display.
Field Explanation
Operating hours /
date/time
Operating hour/time stamp at which the
change at the instrument was performed.
User Name with which the user is logged into the
operating system.
Comments Type of parameter change, e.g. "Unit of
channel 1 from Pa to hPa".
35
Find Quality Products Online at: [email protected]
www.GlobalTestSupply.com
Page 35

5 Parameterizing, adjusting and analyzing software (P2A software)
Field Explanation
Selection of adjustment histories: n-point adjustments / Analog
adjustments.
Operating hours /
date/time
User
Channel Analog adjustment: Channel 1.
Specification Analog adjustment: Current reading.
Operating hour/time stamp at which the
change at the instrument was performed.
Name with which the user is logged into the
operating system.
36
Multimeter Analog adjustment: Value read off at
reference instrument.
Offset Analog adjustment: Deviation at time of
adjustment.
Pressure
specification
n-point adjustment: Value read off at
pressure sensor.
Unit Unit during the adjustment.
> To print out the history data, click on [Print].
The printing job is automatically sent to the default printer
for the operating system.
With [Set up printer …] a different printer can be selected
or the printout can be edited.
4. Click on [OK] or [Cancel] to close the dialogue.
Find Quality Products Online at: [email protected]
www.GlobalTestSupply.com
Page 36

6 Tips and assistance
transmitter
Description
Article no.
Supply
Calibration
Pos: 63 /TD/Üb er s chr i f ten/8. Tipps un d Hi lf e @ 0\mod_1173789887985_79.doc @ 406 @ 1
6 Tips and assistance
Pos: 64 /TD/Ü berschrift en/8.1 Frag en und Antwort en @ 0\mod_1177402017078_79.doc @ 1093 @ 2
6.1. Questions and ans w ers
Pos: 65 /TD/Ti p ps un d Hil f e/Fragen und An t w or t e n/ M U F 6 321 @ 3\mod_1241681063453_ 79.doc @ 32693 @
Question Possible causes/solution
Connection to instrument
cannot be established
Malfunction (with and
without display)
Adjustment is to be
reversed
When does a stable
current reading appear?
If we could not answer your question, please contact your dealer
or Customer Service.
Pos: 66 /TD/Ü berschrift en/8.2 Zube hör und Ersatz teile @ 0\mod_1177402058734_79.doc @ 1102 @ 2
6.2. Accessories and spare parts
Pos: 67 /TD/T ipps und Hil fe/Zubehör und Ersatztei le/MUF63xx /Zubehör Ersatzteile MUF 6321 @ 3\mod_1239975742627_79.doc @ 31715 @
Check connection cable/plug cont a cts
Analysis using the P2A software, see
Analyzing/testing the
5.3.3
Carry out factory reset (Test/analyze
transmitter).
After approx. 20 seconds
Interface and software
P2A software (parameterizing, adjusting,
0554 6020
analyzing) incl. USB adapter
Mains unit (desktop, wall-mounted) 0554 1748
Mains unit (top-hat rail mounti ng) 0554 1749
Standard ISO calibration certificate,
0520 1000
transmitter only
Standard DAkkS calibration certificate,
0520 1200
transmitter only
For a complete list of all accessories and spare parts, please
refer to the product catalogues and brochures
37
Find Quality Products Online at: [email protected]
www.GlobalTestSupply.com
Page 37

6 Tips and assistance
Order code
Characteristic
Axx Measuring range
output/supply
Cxx Display
Exx Housing colour
and logo
Pos: 68 /TD/T ipps und Hil fe/Zubehör und Ersatztei le/MUF63xx /Bestellopti onen MUF 63 21 @ 3\mod_1239975748830_79.doc @ 31736 @ 3
6.2.1. Ordering options for testo 6321 transmitter (0555 6321)
A03 0 to 100 Pa
A05 0 to 10 hPa
A06 0 to 20 hPa
A07 0 to 50 hPa
A08 0 to 100 hPa
A09 0 to 500 hPa
A10 0 to 1000 hPa
A11 0 to 2000 hPa
A23 -100 to 100 Pa
A25 -10 to 10 hPa
A26 -20 to 20 hPa
A27 -50 to 50 hPa
A28 -100 to 100 hPa
A29 -500 to 500 hPa
A30 -1000 to 1000 hPa
A31 -2000 to 2000 hPa
Bxx Analog
B02 0 to 1 V (4-wire, 24 V AC/DC)
B03 0 to 5 V (4-wire, 24 V AC/DC)
B04 0 to 10 V (4-wire, 24 V AC/DC)
B06 4 to 20 mA (4-wire, 24 V AC/DC)
C00 Without display
C01 With display
E01 Grey housing, testo logo in colour
38
Find Quality Products Online at: [email protected]
www.GlobalTestSupply.com
Page 38

F01
Pa/Min/Max
C
=== Ende der Liste für T extmarke Inh alt ===
6 Tips and assistance
Order code Characteristic
E02 White housing, without testo logo
E03 White housing, black-and-white testo logo
Fxx Differential
pressure unit
F02 hPa/Min/Max
F03 kPa/Min/Max
F04 mbar/Min/Max
F05 bar/Min/Max
F06 mm H2O /Min/Ma x
F07 inch H2O /Min/Max
F08 inch HG /Min/Max
F09 kg/cm2 /Min/Max
F10 PSI/Min/Max
39
Find Quality Products Online at: [email protected]
www.GlobalTestSupply.com
 Loading...