


Accessories
FireWire™ Front Connection
Quick Reference (English)
Installing the Cameo Connect front module
Before installing the Cameo Connect front module into your computer, please pay attention to
special features of your computer's configuration. Read the instruction manuals of your computer and other additional cards for information about settings.
If you follow the instructions, the installation should be easy.
If you are experiencing any problems, please carefully read the corresponding sections in the
manual once again.
First, check if the package is complete.
Minimum contents of package:
1 Cameo Connect, 5¼" Front module (with front panel)
1 additional front-panel for 3½" removable devices
1 IEEE-1394 FireWire™ connection cable 6 Pin to 6Pin
1 Y-cable for power supply
8 Mounting screws
1 Quick reference (that you are reading right now)
1 Service card
Safety note:
Disconnect the power cord from your computer’s power supply and the electric socket before
opening the enclosure!
A free 5 ¼"expansion slot is required for the installation.
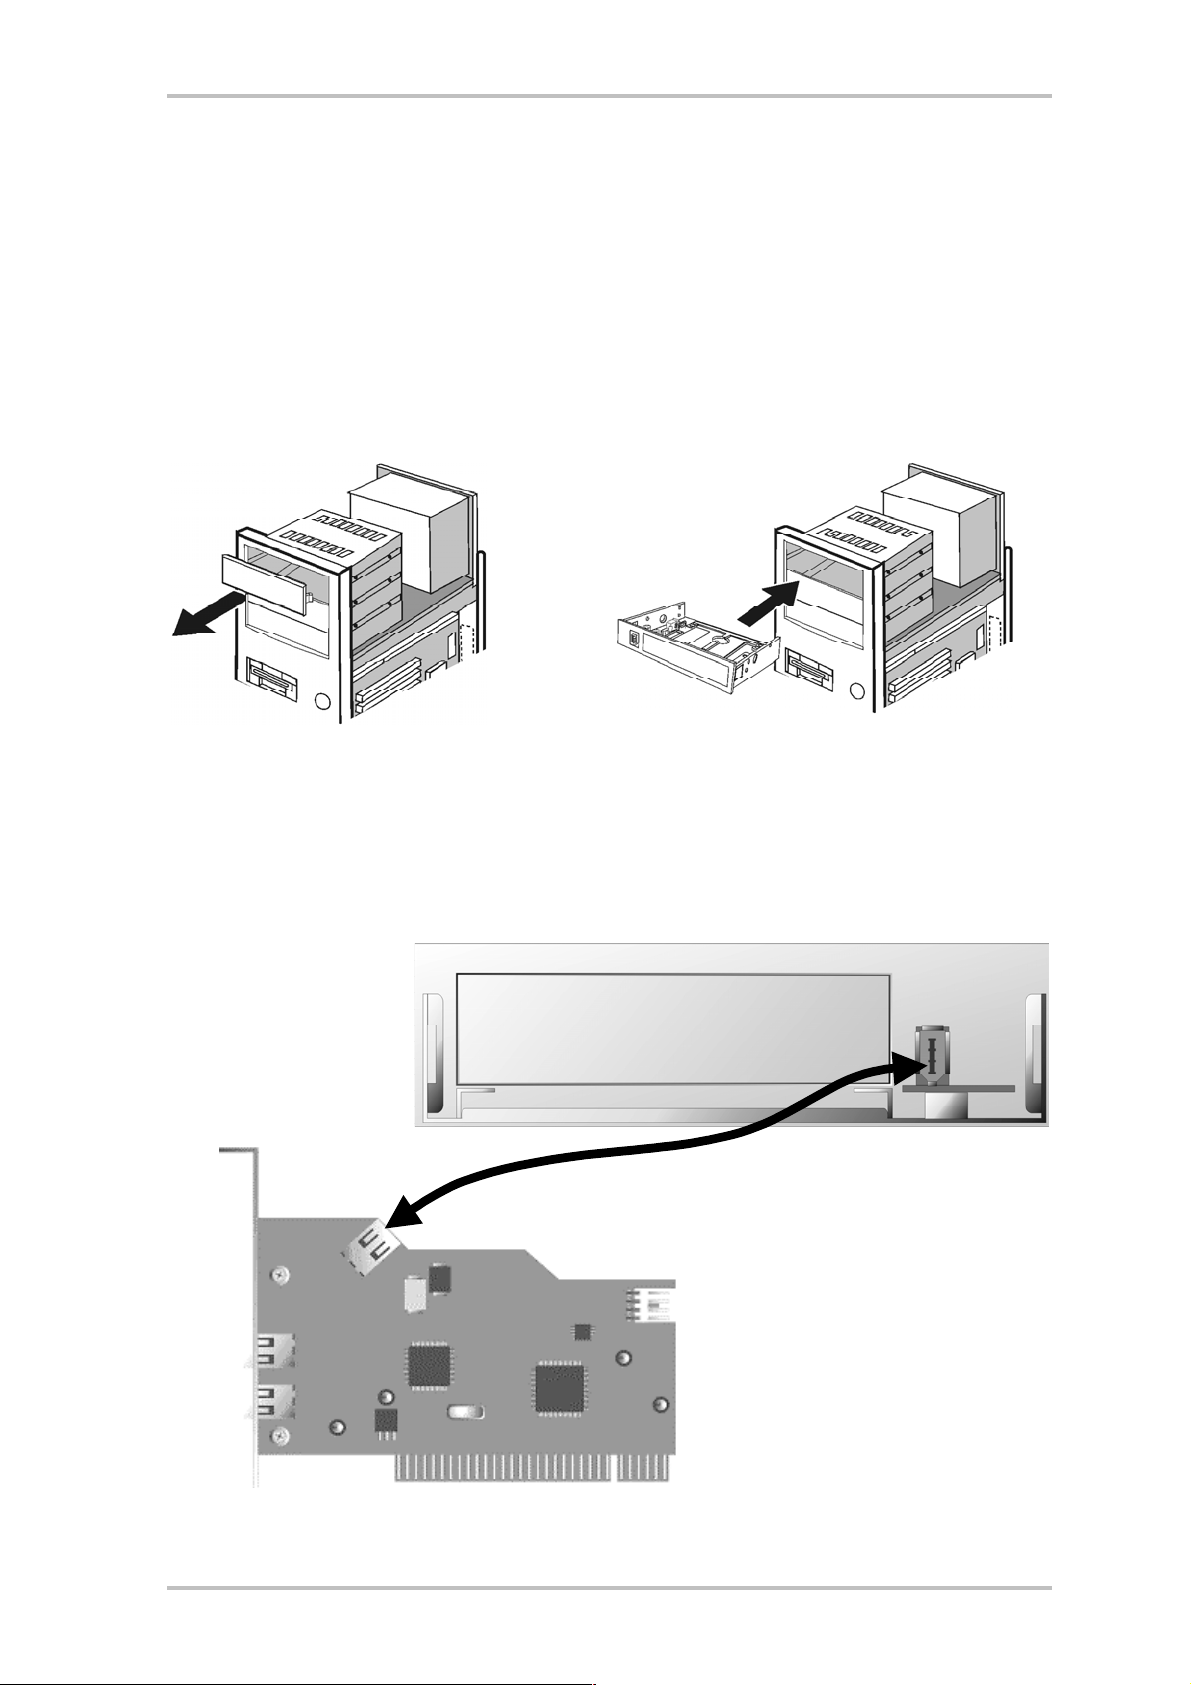
For installing the Cameo Connect, remove one of the 5,25" front brackets of your computer's
enclosure (A). Existing shielding sheet metal in the expansion slot must also be removed.
Push the Cameo Connect module into the free slot (B).
d
Attach the front module to the computer's enclosure, using the included screws.
Connect the internal FireWire™-connector of your Cameo DV PCI-card to the connector of the
Cameo Connect front module as shown in the illustration below, using the included (short)
FireWire™-cable.
e
2 Cameo Connect (english)

If you wish to connect IEEE-1394 devices, that do not have an independent power supply, we
recommend you to connect the computer's power supply to the Cameo Connect. This avoids
an overload caused by extensive power consumption of IEEE-1394 devices
The power supply MUST be connected correctly to the Cameo Connect front module,
otherwise the module and other components of your system may be damaged.
1. Apply a power connector of the computer's power supply to the female connector of the
included Y-cable (see Illustration), 2. Apply the small connector of the Y-cable to the corresponding connector of the Cameo Connect front module.
PC power supply connector Y-cable
Cameo Connect
Re-install the cover.
The installation is finished. We hope you will enjoy your Cameo Connect.
Cameo Connect (english) 3

CE - Statement
TerraTec Electronic GmbH · Herrenpfad 38 · D-41334 Nettetal
hereby declares, that the product:
Cameo Connect
to which this statement refers, complies with the following standards or standardizing documents:
1. EN 50081-1
2. EN 50082-1
The following are the stipulated operating and environmental conditions for the said compliance:
Residential, business and commercial environments and small-company environments.
This statement is based on:
Control report(s) of the EMV control laboratory
The information in this document is subject to change without notice and shall not be deemed as a warranty by the
seller. No warranties, express or implied, are made with regard to the quality, suitability or accuracy of this document. The manufacturer reserves the right to change the contents of this document and/or the associated products
at any time without the provision of prior notice to specific persons or organizations. The manufacturer shall not be
held liable for damages of any kind arising from the use, or the inability to use this product or its documentation,
even if the possibility of such damage is known. The information in this document is subject to copyright. All rights
are reserved. No part of this manual may be reproduced or transmitted in any form or for any purpose without the
express written permission of the copyright holders. Product and brand names contained in this document are used
for identification purposes only. All registered trademarks, product designations or brand names used in this
document are the registered property of their respective owners.
®
©TerraTec
Electronic GmbH, 1994 - 2004. All rights reserved (22.08.04).
*TT200174*
4 Cameo Connect (english)
 Loading...