

Page 1

MANUEL D’UTILISATION – INSTRUCTION MANUAL
EASY THERMO 2
Thermomètre infrarouge 2 en 1
www.terraillon.com
Notice Easy Thermo.indd 1 8/08/11 13:31:49
Page 2
EASY THERMO 2
Thermomètre infrarouge 2 en 1
Cher(e) client(e),
Vous venez d’acquérir ce thermomètre électronique infrarouge Terraillon et nous vous en remercions.
Nous vous en souhaitons un excellent usage et afin d’en obtenir entière satisfaction nous vous recommandons
de lire attentivement cette notice d’utilisation.
La sonde infrarouge de l’Easy Thermo 2 relève en quelques secondes la chaleur émise par le tympan (celui-ci
reflète la température du centre nerveux situé dans le cerveau qui règle la température du corps) ou émise
à la surface du front.
A LIRE AVANT UTILISATION
Remarques importantes
1. La température varie en fonction de la partie du corps où elle est relevée. C’est pourquoi, il ne faut pas comparer
les résultats de prises de température orale, axillaire, rectale, auriculaire ou frontale.
2. La température varie également d’une personne à l’autre, selon l’âge et le moment de la journée.
Conseil
Pour avoir une température de référence, prenez votre température lorsque vous êtes en pleine forme. Vous
pourrez ainsi la comparer avec celle relevée lorsque vous êtes souffrant.
Votre température est anormalement élevée ou anormalement basse par rapport à d’habitude ? N’hésitez pas à
consulter l’avis d’un médecin en cas de doute.
DESCRIPTION DU PRODUIT
Thermomètre infrarouge 2 en 1 .................................................................. 3
2 in 1 infrared thermometer ........................................................................ 9
2-in-1 infraroodthermometer .................................................................... 15
2-in-1 infrarotthermometer ....................................................................... 21
Termometro a raggi infrarossi 2 funzioni in 1 ............................................ 27
Termómetro de infrarrojos 2 en 1 .............................................................. 33
Termómetro de infravermelhos 2 em 1...................................................... 39
Notice Easy Thermo.indd 2 8/08/11 13:31:50
Page 3
3
Cher(e) client(e),
Vous venez d’acquérir ce thermomètre électronique infrarouge Terraillon et nous vous en remercions.
Nous vous en souhaitons un excellent usage et afin d’en obtenir entière satisfaction nous vous recommandons
de lire attentivement cette notice d’utilisation.
La sonde infrarouge de l’Easy Thermo 2 relève en quelques secondes la chaleur émise par le tympan (celui-ci
reflète la température du centre nerveux situé dans le cerveau qui règle la température du corps) ou émise
à la surface du front.
A LIRE AVANT UTILISATION
Remarques importantes
1. La température varie en fonction de la partie du corps où elle est relevée. C’est pourquoi, il ne faut pas comparer
les résultats de prises de température orale, axillaire, rectale, auriculaire ou frontale.
2. La température varie également d’une personne à l’autre, selon l’âge et le moment de la journée.
Conseil
Pour avoir une température de référence, prenez votre température lorsque vous êtes en pleine forme. Vous
pourrez ainsi la comparer avec celle relevée lorsque vous êtes souffrant.
Votre température est anormalement élevée ou anormalement basse par rapport à d’habitude ? N’hésitez pas à
consulter l’avis d’un médecin en cas de doute.
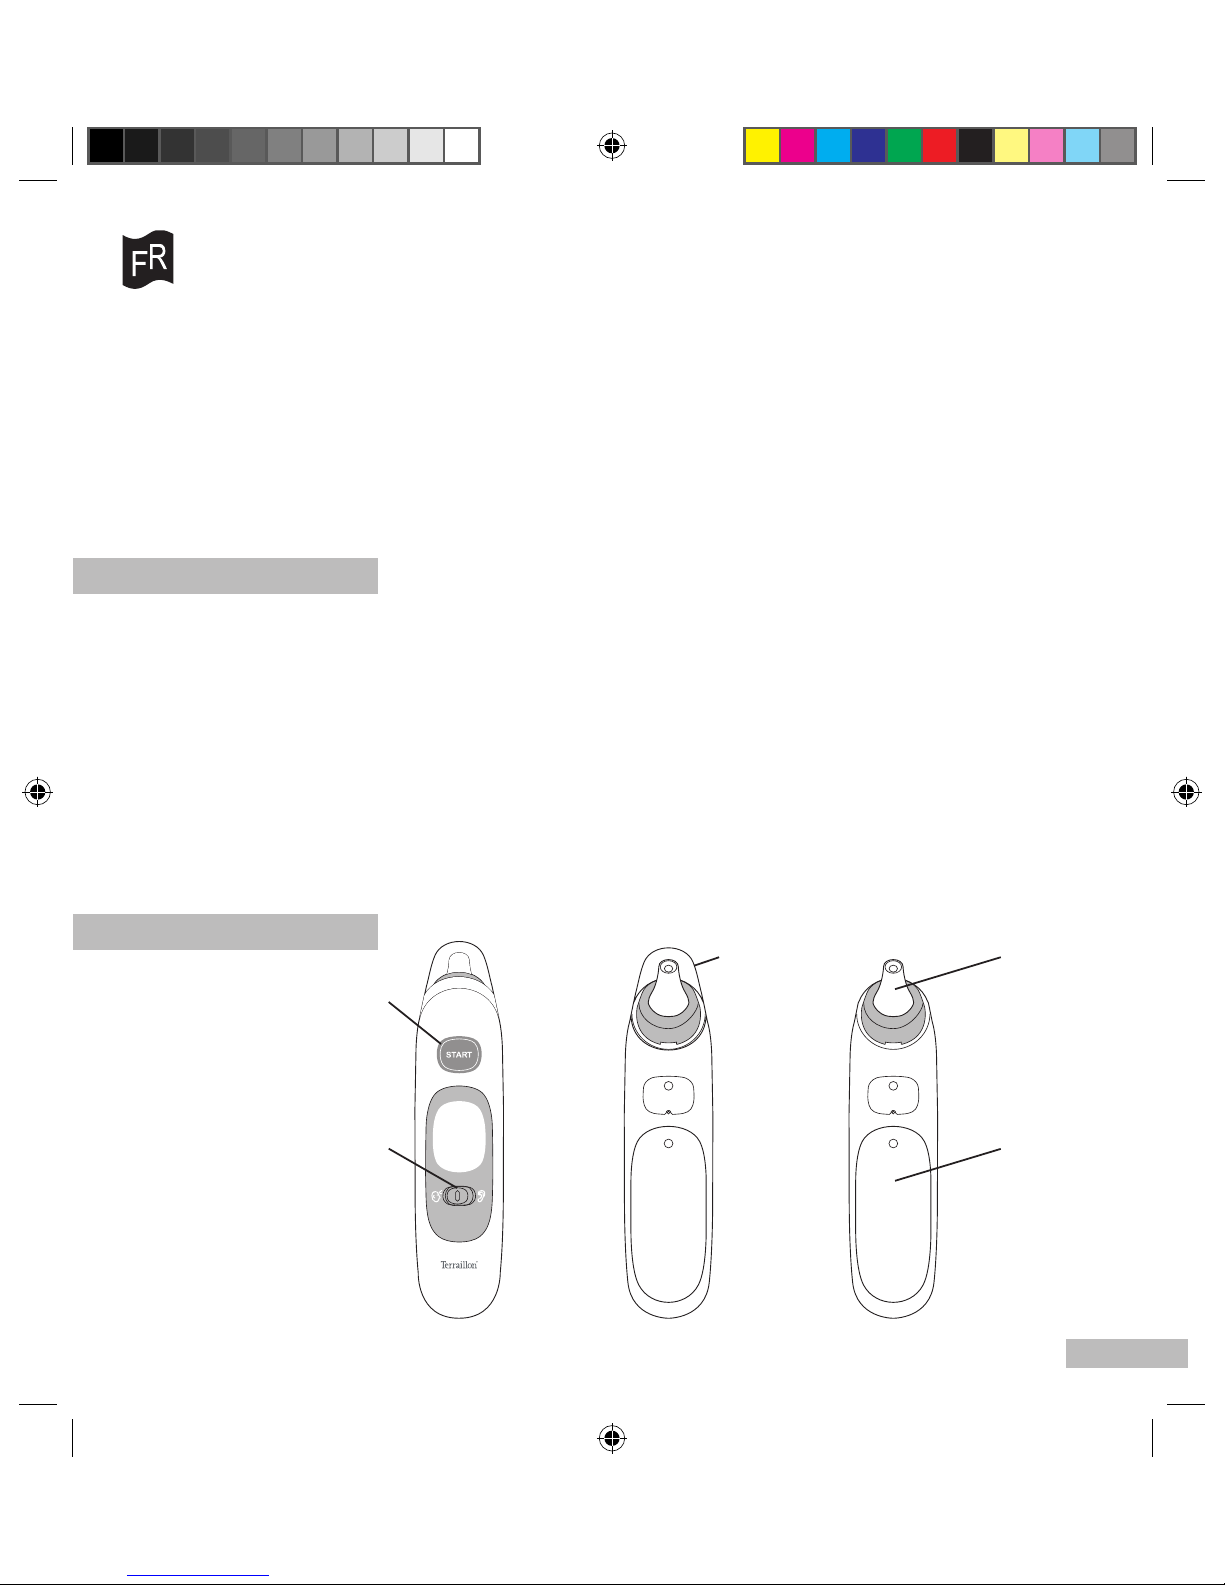
DESCRIPTION DU PRODUIT
Sonde
Compartiment
à piles
Capuchon
de la sonde
Bouton marche/arrêt
Prise de température
Bouton switch
Mode frontal ou auriculaire
VUE AVANT VUE ARRIÈRE
EASY THERMO 2
Thermomètre infrarouge 2 en 1
Notice Easy Thermo.indd 3 8/08/11 13:31:50
Page 4
3
1
2
4
PREMIÈRE MISE EN SERVICE
1. Insérer les piles
L’appareil fonctionne avec 2 piles AAA (non incluses).
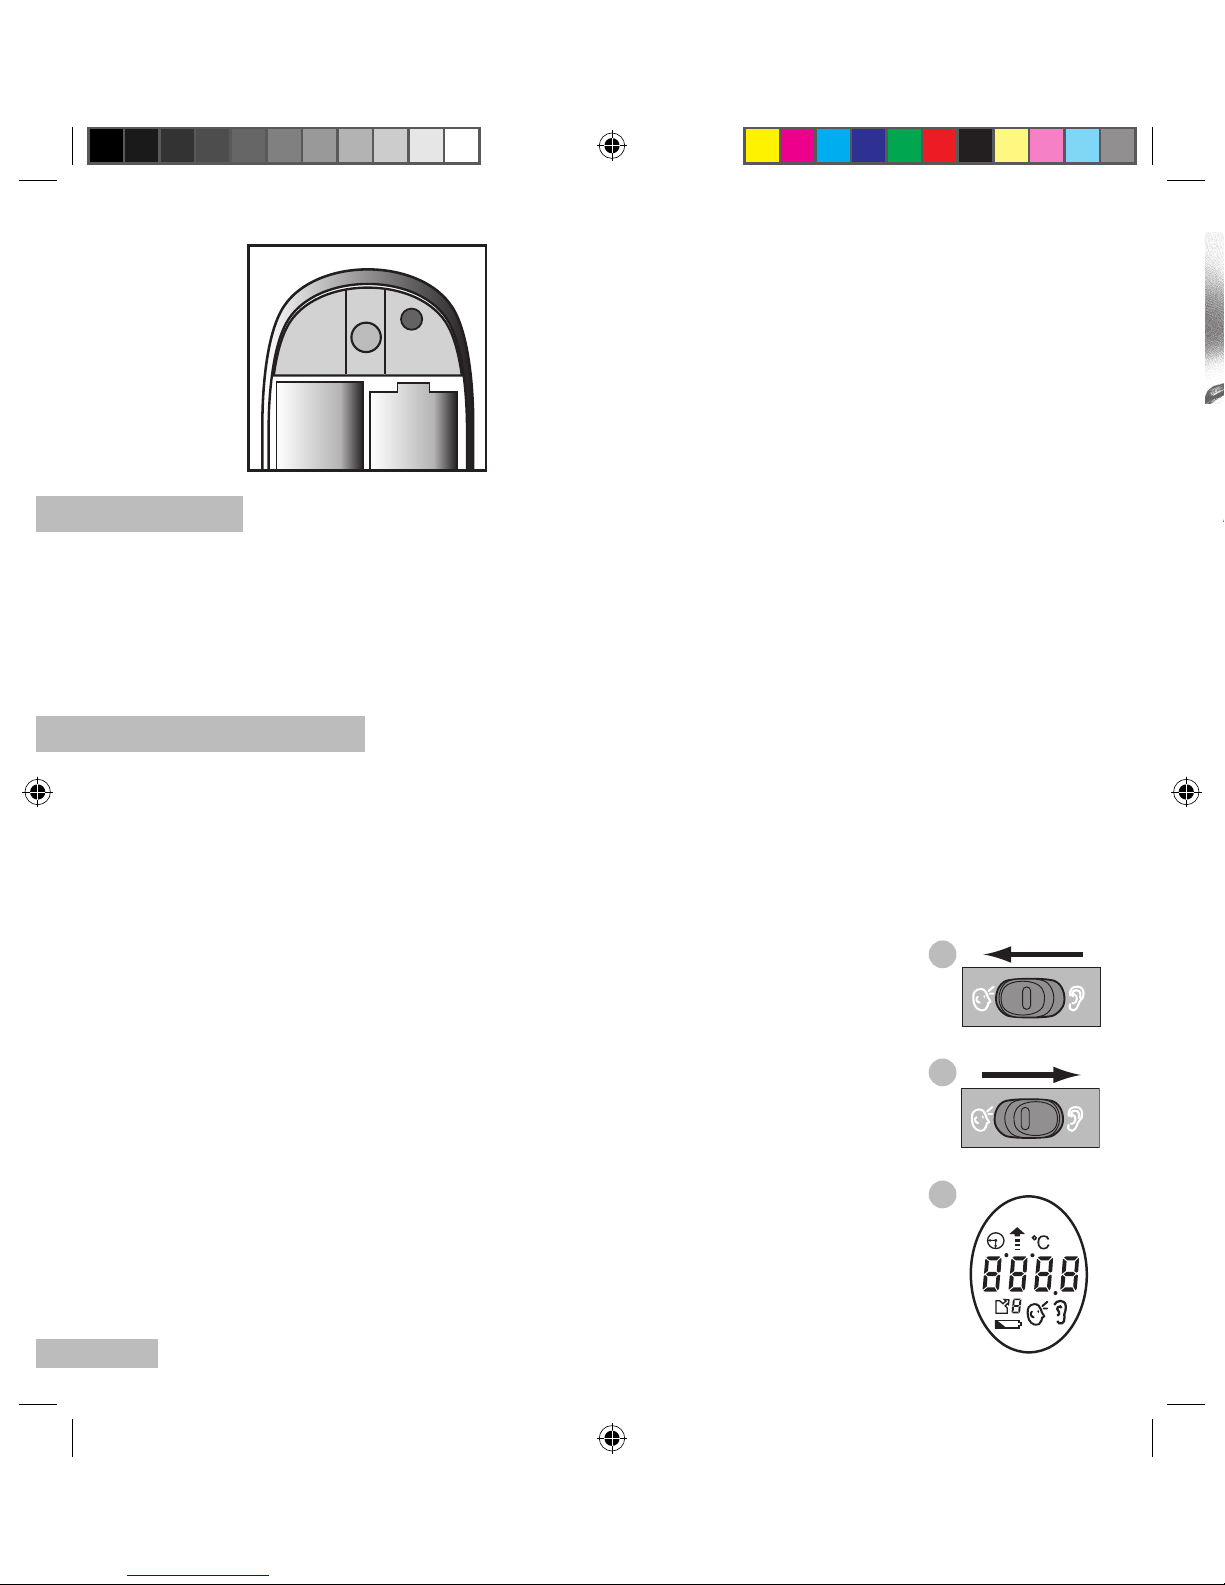
Ouvrez le couvercle du compartiment à piles situé à l’arrière de l’Easy Thermo 2 à l’aide d’un tournevis. Insérez les
piles en respectant les polarités (les polarités sont indiquées à l’intérieur du compartiment à piles). Si vous n’avez
pas l’intention d’utiliser cet appareil pendant une longue période, il est recommandé de retirer les piles avant de le
ranger.
PRISE DE LA TEMPÉRATURE
Retirez le capuchon de la sonde pour prendre la température, en mode frontal ou auriculaire.
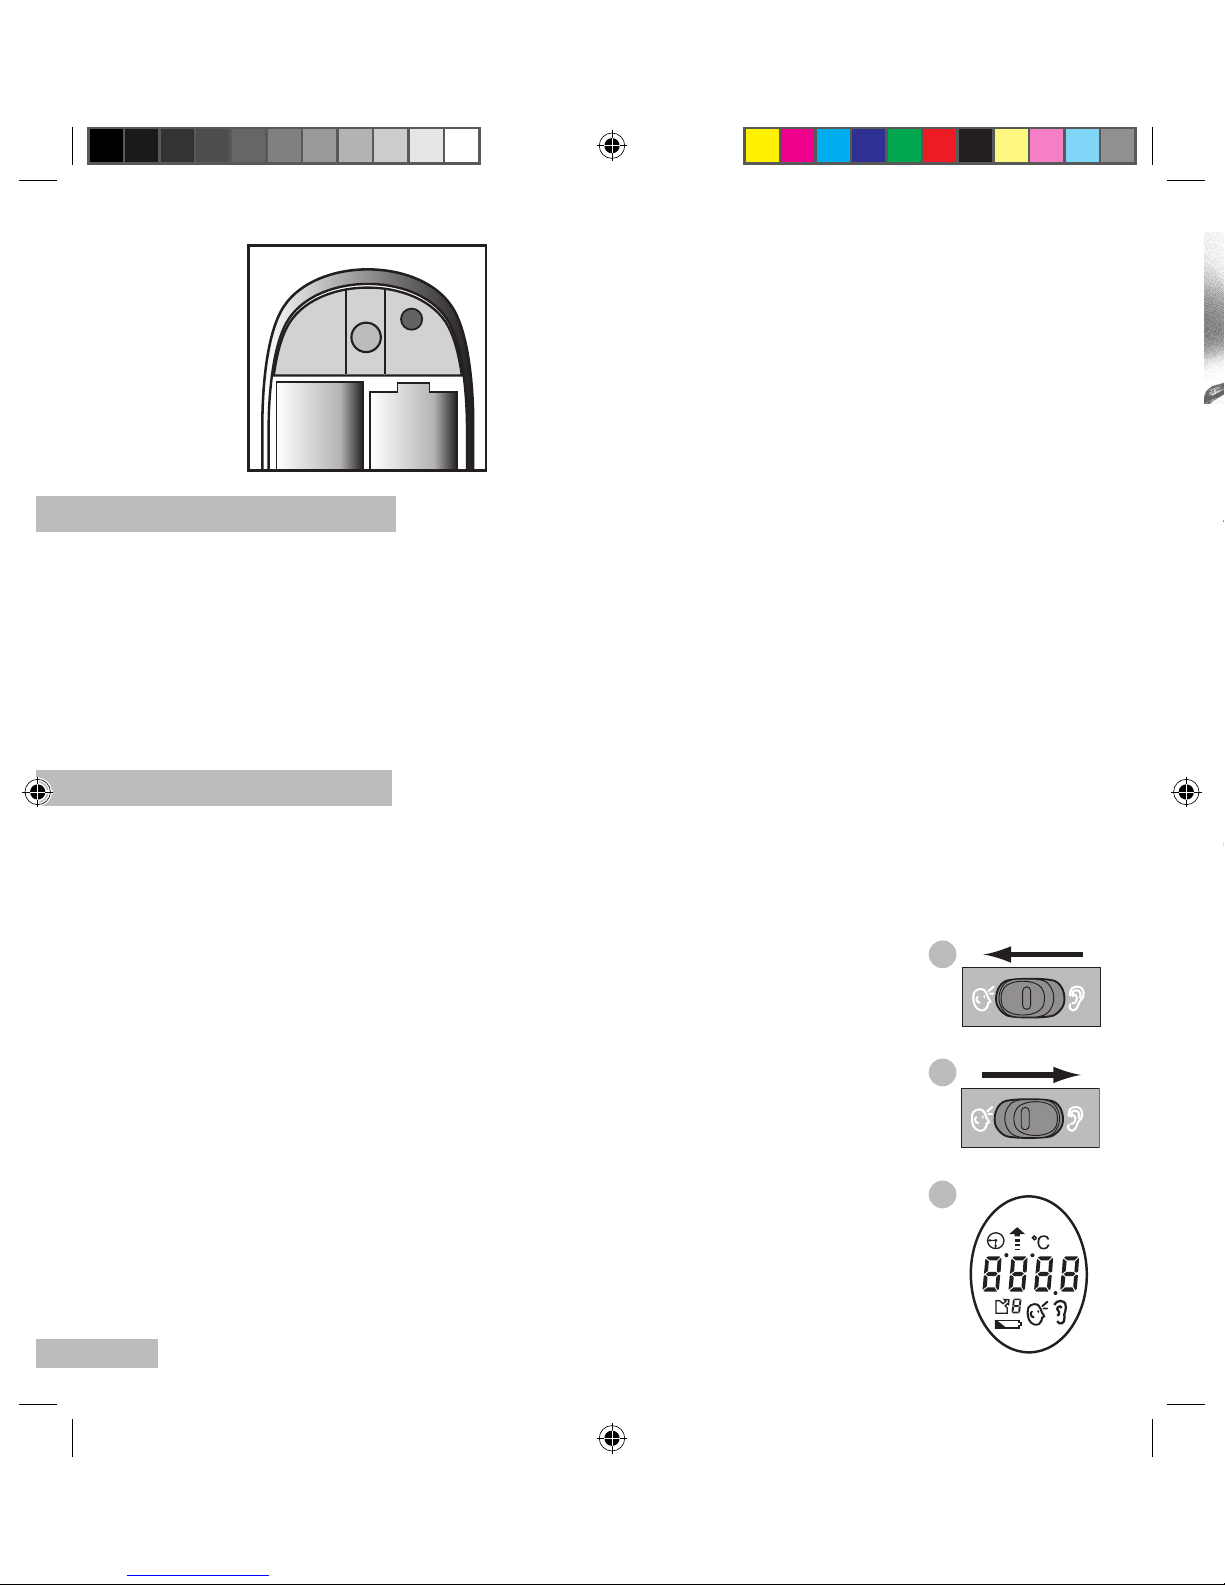
1. Prise de température frontale
• Retirez le capuchon de la sonde.
• Déplacer le bouton switch sur le mode frontal (g. 1)
• Appuyez sur le bouton de prise de température « START ».
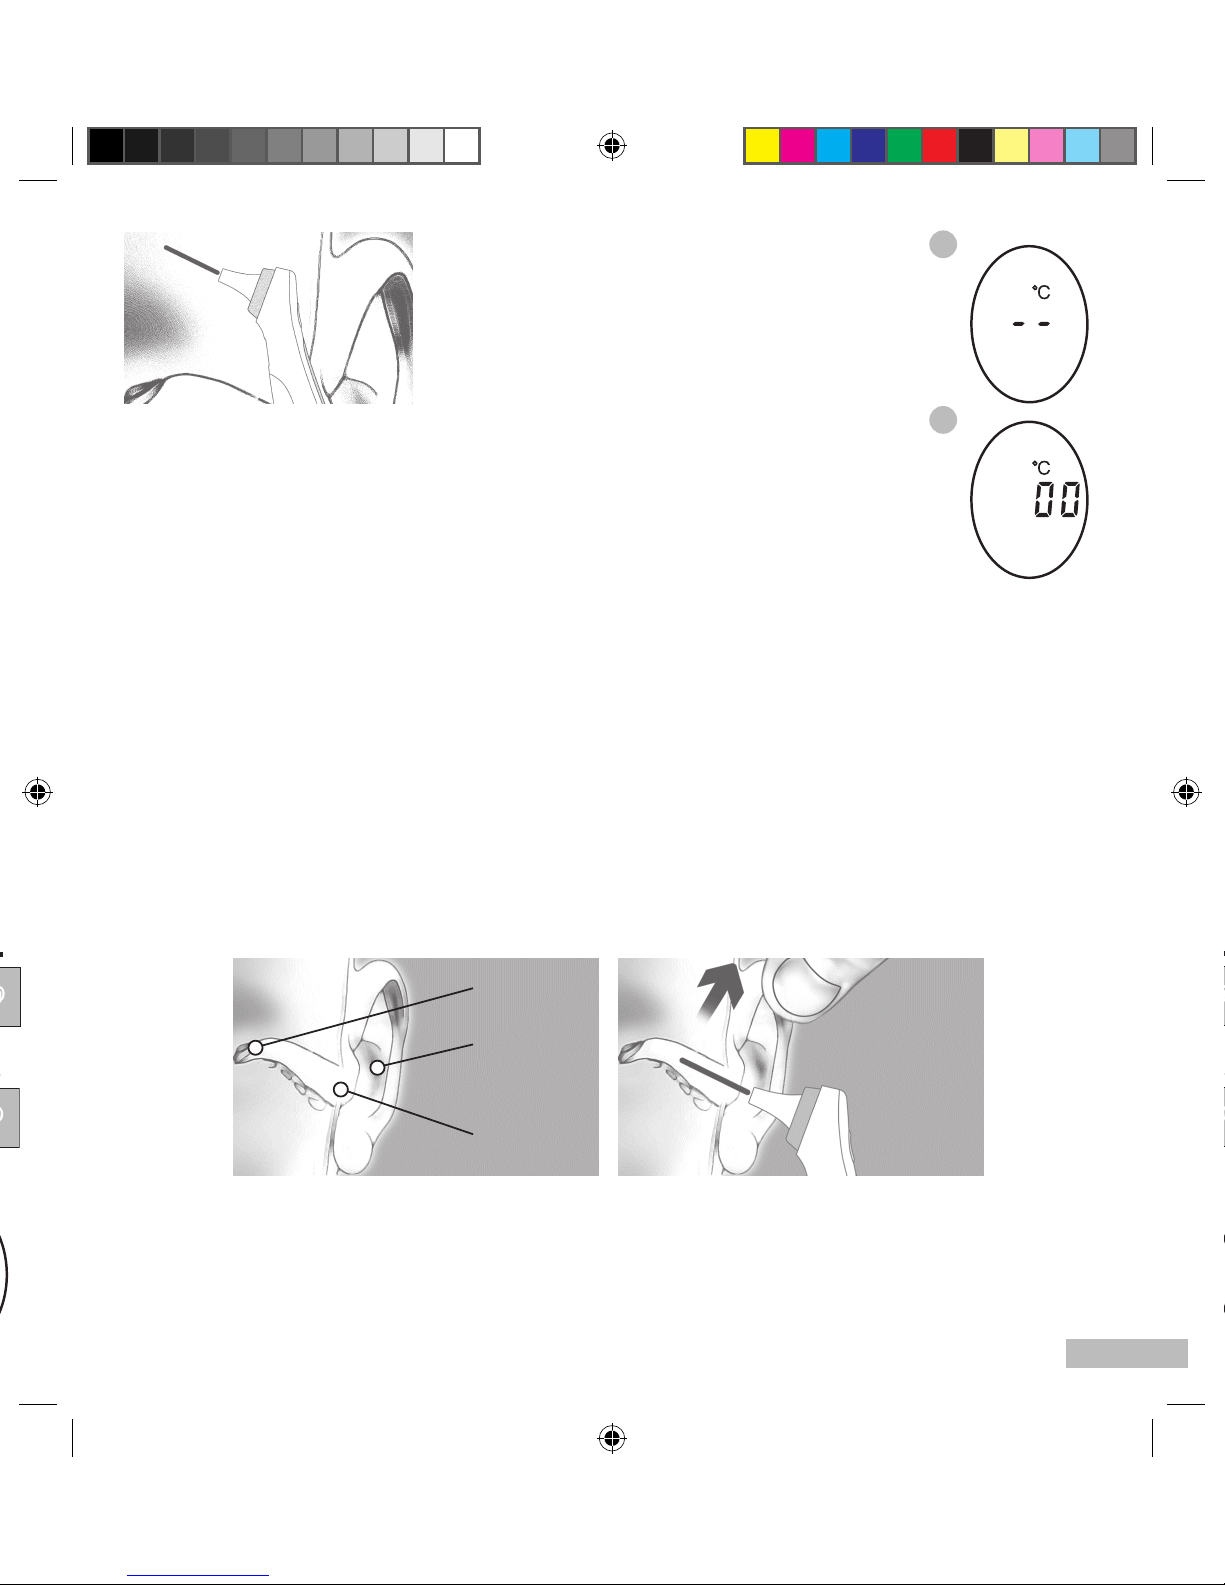
• Tous les éléments de l’écran (g. 3) s’afchent, suivi de « -- » (g. 4), d’un bip sonore et
de « 00 » (g. 5).
• Placez la sonde sur le haut de la tempe.
• Pressez et maintenez enfoncé le bouton de prise de température « START » pendant
environ 2 secondes.
• Relâchez le bouton « START » et retirez l’Easy Thermo 2 de la tempe.
• La température s’est afchée.
La température frontale peut subir l’influence des conditions climatiques extérieures, en
cas de doute n’hésitez pas à prendre la température auriculaire.
2. Auriculaire
• Retirez le capuchon de la sonde.
• Déplacez le bouton switch sur le mode auriculaire (g. 2).
• Appuyez sur le bouton de prise de température « START ».
• Tous les éléments de l’écran (g. 3) s’afchent, suivi de « -- » (g. 4), d’un bip sonore et
de « 00°C » (g. 5).
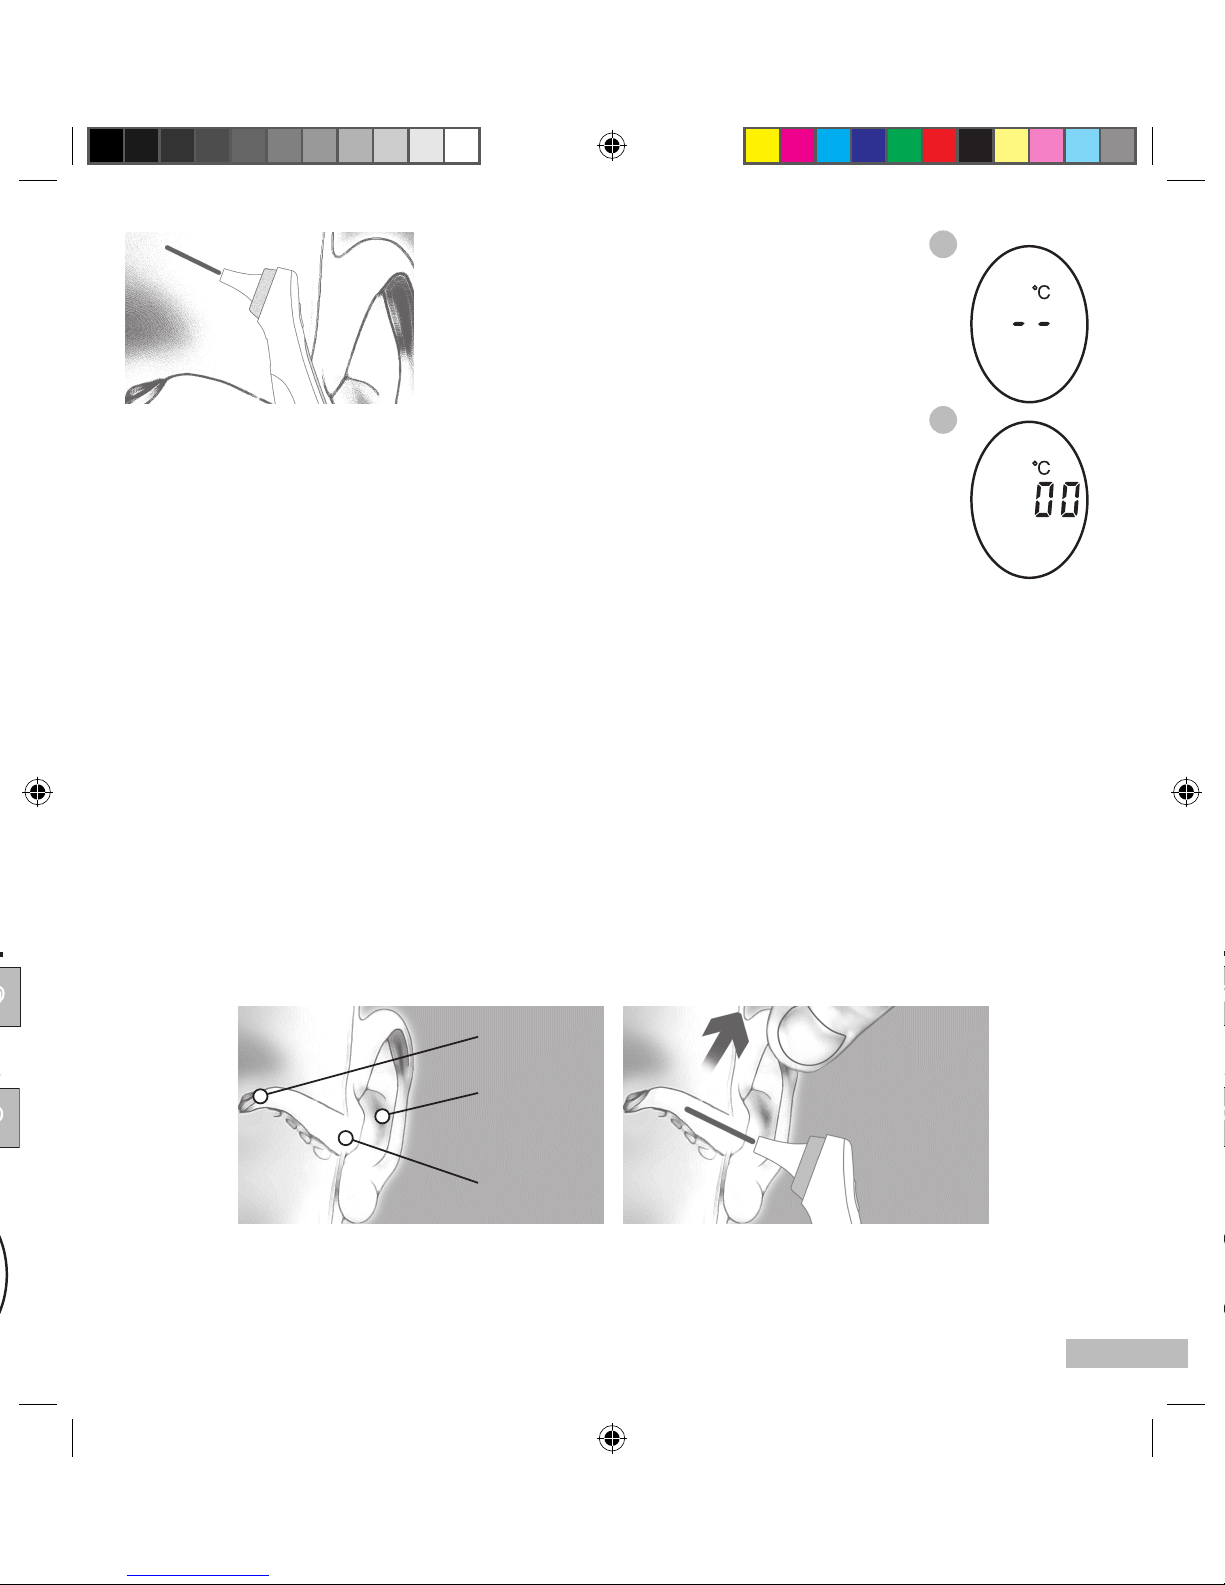
• Insérez la sonde dans le conduit auditif.
• Pressez et maintenez enfoncé le bouton de prise de température « START ».
• Quand le bip sonore retentit, vous pouvez relâcher le bouton « START ».
• Retirez la sonde du conduit auditif. La température s’est afchée.
Attention : An d’obtenir une mesure précise, assurez-vous de positionner correctement la sonde dans le conduit
auditif de façon à ce que l’embout de la sonde capte la chaleur émise par le tympan. Pour cela, vous pouvez tirer
l’oreille an de redresser le conduit et tourner légèrement la sonde à l’intérieur. (Il est recommandé de ne pas utiliser
la fonction auriculaire du thermomètre sur un bébé âgé de moins de 12 mois.).
VUE INTERIEURE DU COMPARTIMENT A PILES
Notice Easy Thermo.indd 4 8/08/11 13:31:50
Page 5
5
4
5
La température frontale peut subir l’influence des conditions climatiques extérieures, en
cas de doute n’hésitez pas à prendre la température auriculaire.
2. Auriculaire
• Retirez le capuchon de la sonde.
• Déplacez le bouton switch sur le mode auriculaire (g. 2).
• Appuyez sur le bouton de prise de température « START ».
• Tous les éléments de l’écran (g. 3) s’afchent, suivi de « -- » (g. 4), d’un bip sonore et
de « 00°C » (g. 5).
• Insérez la sonde dans le conduit auditif.
• Pressez et maintenez enfoncé le bouton de prise de température « START ».
• Quand le bip sonore retentit, vous pouvez relâcher le bouton « START ».
• Retirez la sonde du conduit auditif. La température s’est afchée.
Attention : An d’obtenir une mesure précise, assurez-vous de positionner correctement la sonde dans le conduit
auditif de façon à ce que l’embout de la sonde capte la chaleur émise par le tympan. Pour cela, vous pouvez tirer
l’oreille an de redresser le conduit et tourner légèrement la sonde à l’intérieur. (Il est recommandé de ne pas utiliser
la fonction auriculaire du thermomètre sur un bébé âgé de moins de 12 mois.).
Pavillon
Tympan
Conduit auditif
Notice Easy Thermo.indd 5 8/08/11 13:31:51
Page 6
6
CHANGEMENT DE PILES
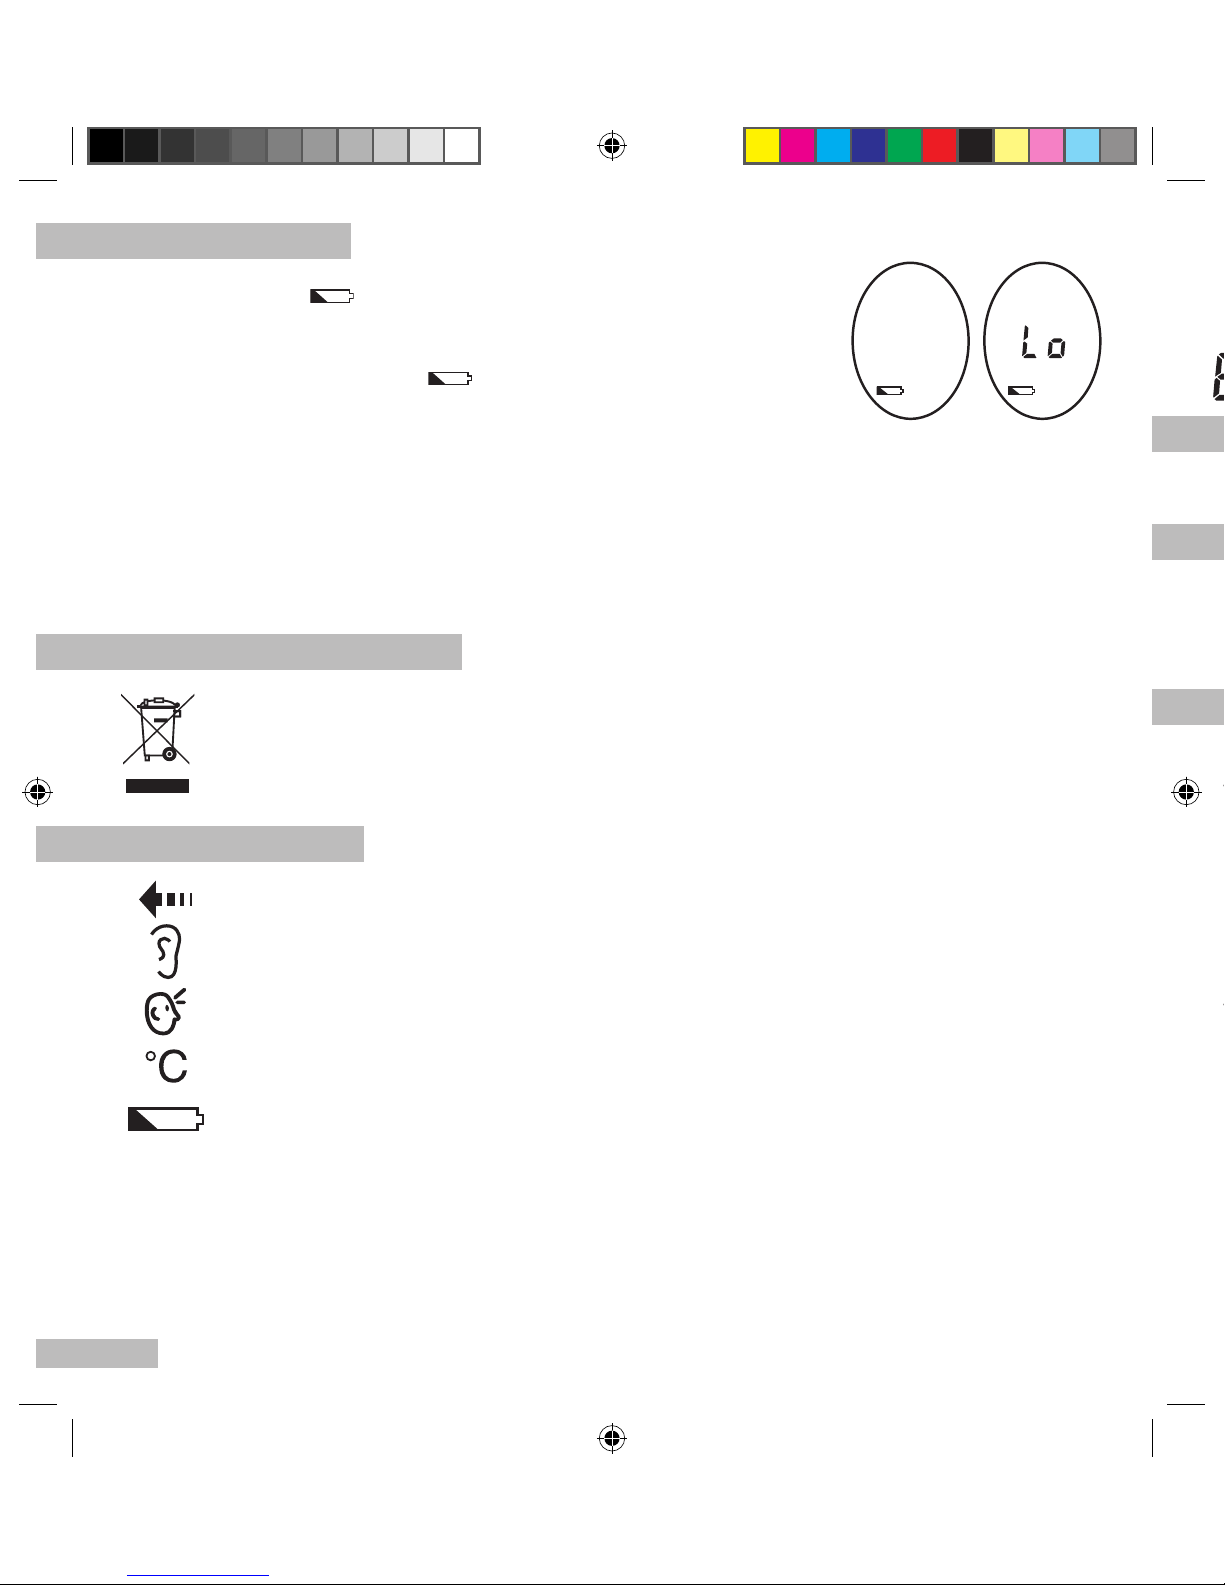
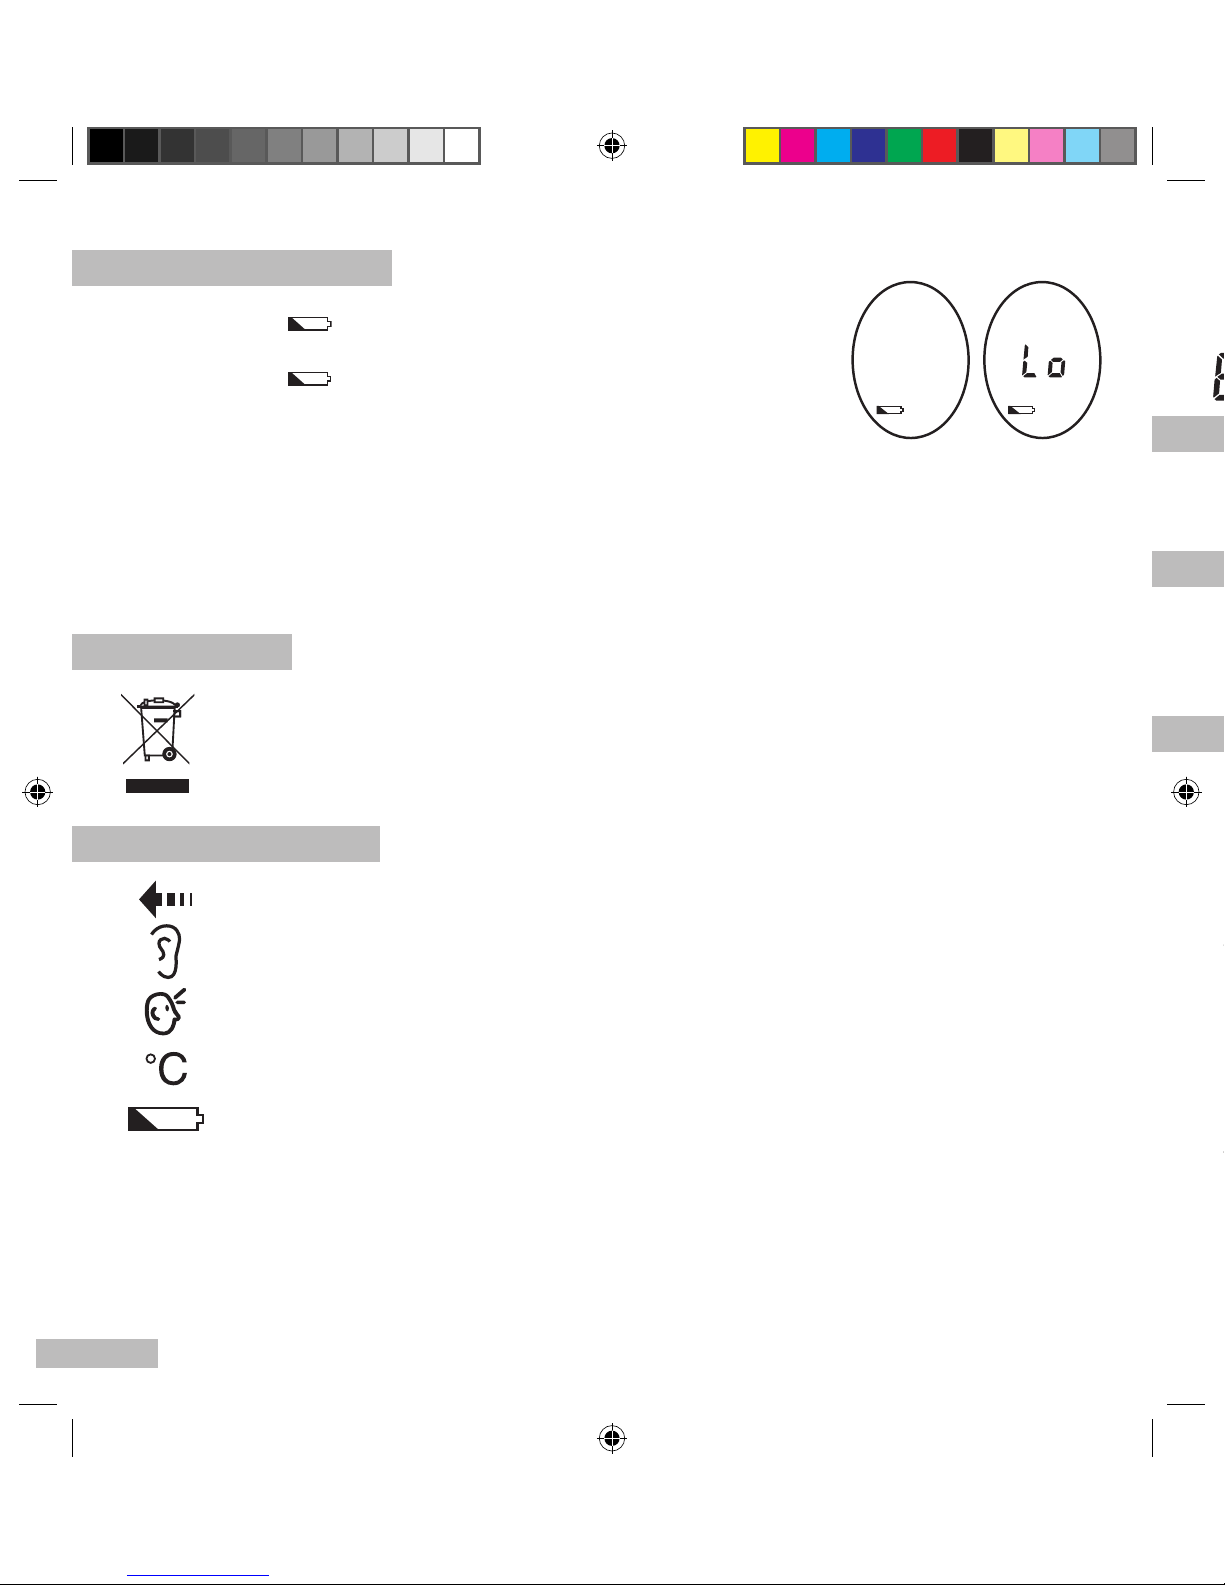
Lorsque le symbole « » apparaît sur l’écran cela signie que les piles arrivent
en n de vie.
Lorsque l’écran afche le symbole « » et « Lo », cela signie que la pile est usée
et qu’il faut la changer.
Pour changer les piles de l’Easy Thermo 2 :
- Ouvrez le couvercle du compartiment à piles situé à l’arrière du produit à l’aide d’un tournevis.
- Retirez les piles usées.
- Remplacez-les par 2 piles AAA en respectant les polarités (les polarités sont indiquées à l’intérieur du compartiment
à piles).
- Replacez le couvercle. L’appareil est prêt à l’emploi.
PROTECTION DE L’ENVIRONNEMENT
Déposer les piles usagées dans un container prévu à cet effet pour qu’elles soient collectées et recyclées.
Ne pas mélanger différents types de piles. Ne pas mélanger les piles usagées avec les piles neuves.
En fin de vie, confier ce produit à un point de collecte pour le recyclage des déchets d’équipements
électriques et électroniques.
LECTURE DES SYMBOLES
Prise de température en cours
Mode auriculaire
Mode frontal
Degré Celsius
Ce symbole apparaît quand la pile commence à s’user. Vous pouvez encore utiliser l’appareil, mais quand
l’indication « Lo» s’afche, il faut changer la pile car l’appareil n’est plus en état de fonctionner normalement.
ARRET
Le thermomètre s’éteindra automatiquement après 30 secondes.
ENTRETIEN
Nettoyer la sonde du thermomètre avec un coton imprégné d’alcool avant et après chaque utilisation. Ne pas utiliser
de substances abrasives. Ne plongez pas le thermomètre dans l’eau ou dans un liquide quelconque car seule la sonde
est imperméable.
PRECAUTIONS D’EMPLOI
1. Prendre la température équivaut à la contrôler, ce qui n’autorise pas à établir un diagnostic ou prescrire un
traitement. Une température anormalement élevée ou basse doit être communiquée au médecin traitant. Ne
modier en aucun cas les dosages des médicaments prescrits par le médecin.
2. Ne pas faire tomber ou casser le thermomètre.
3. Ne pas le laisser à la portée des enfants.
4. Ne pas exposer le thermomètre aux rayons du soleil et ne pas le ranger à proximité d’une source de chaleur mais
le conserver dans un endroit sec et propre.
5. Ne pas plonger le thermomètre dans l’eau ou dans un liquide quelconque.
6. L’Easy Thermo 2 ne sert qu’à prendre la température auriculaire et frontale. Ne pas l’utiliser pour prendre la
température par voie rectale, orale ou axillaire.
7. Ne pas toucher l’extrémité de la sonde avec le doigt.
8. Ne pas prendre la température moins de 30 minutes après avoir mangé, fait de l’exercice ou s’être baigné.
9. Espacer les prises de température d’une minute entre elles. Deux prises de températures successives peuvent
donner des résultats légèrement différents. Dans ce cas utiliser la moyenne des deux.
Notice Easy Thermo.indd 6 8/08/11 13:31:53
Page 7
7
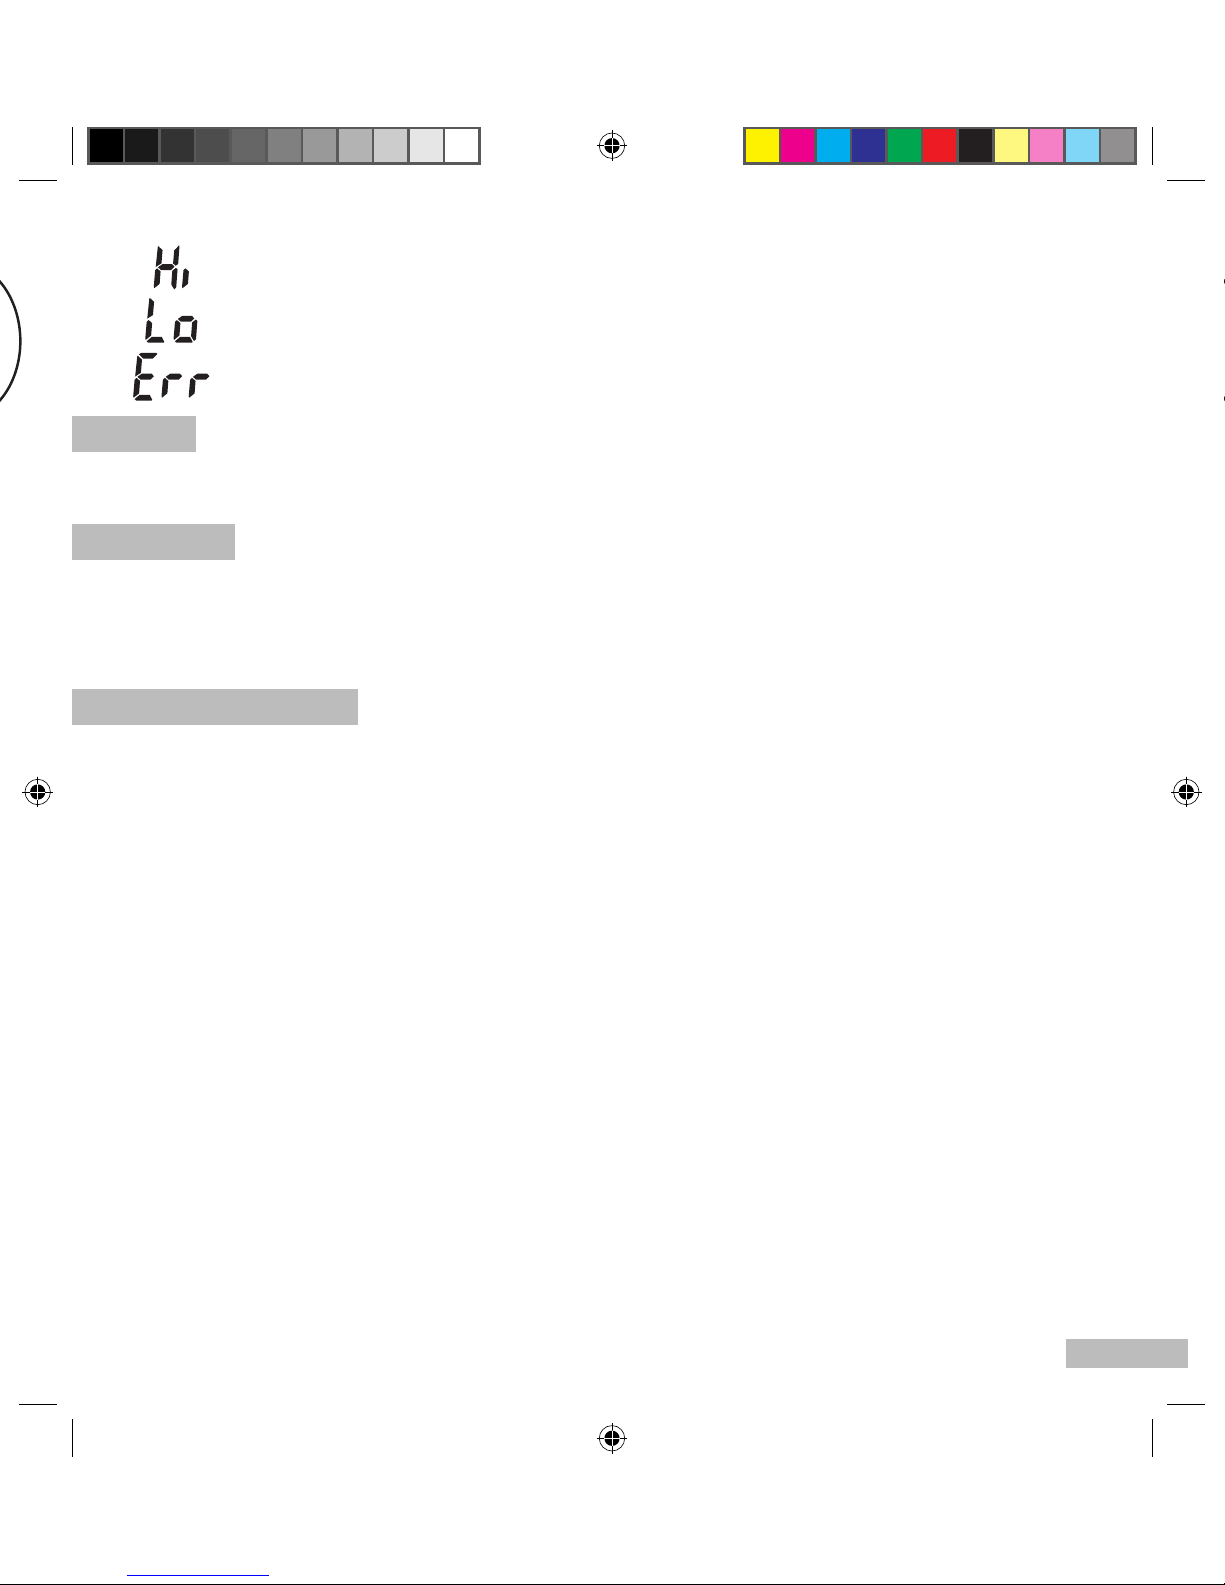
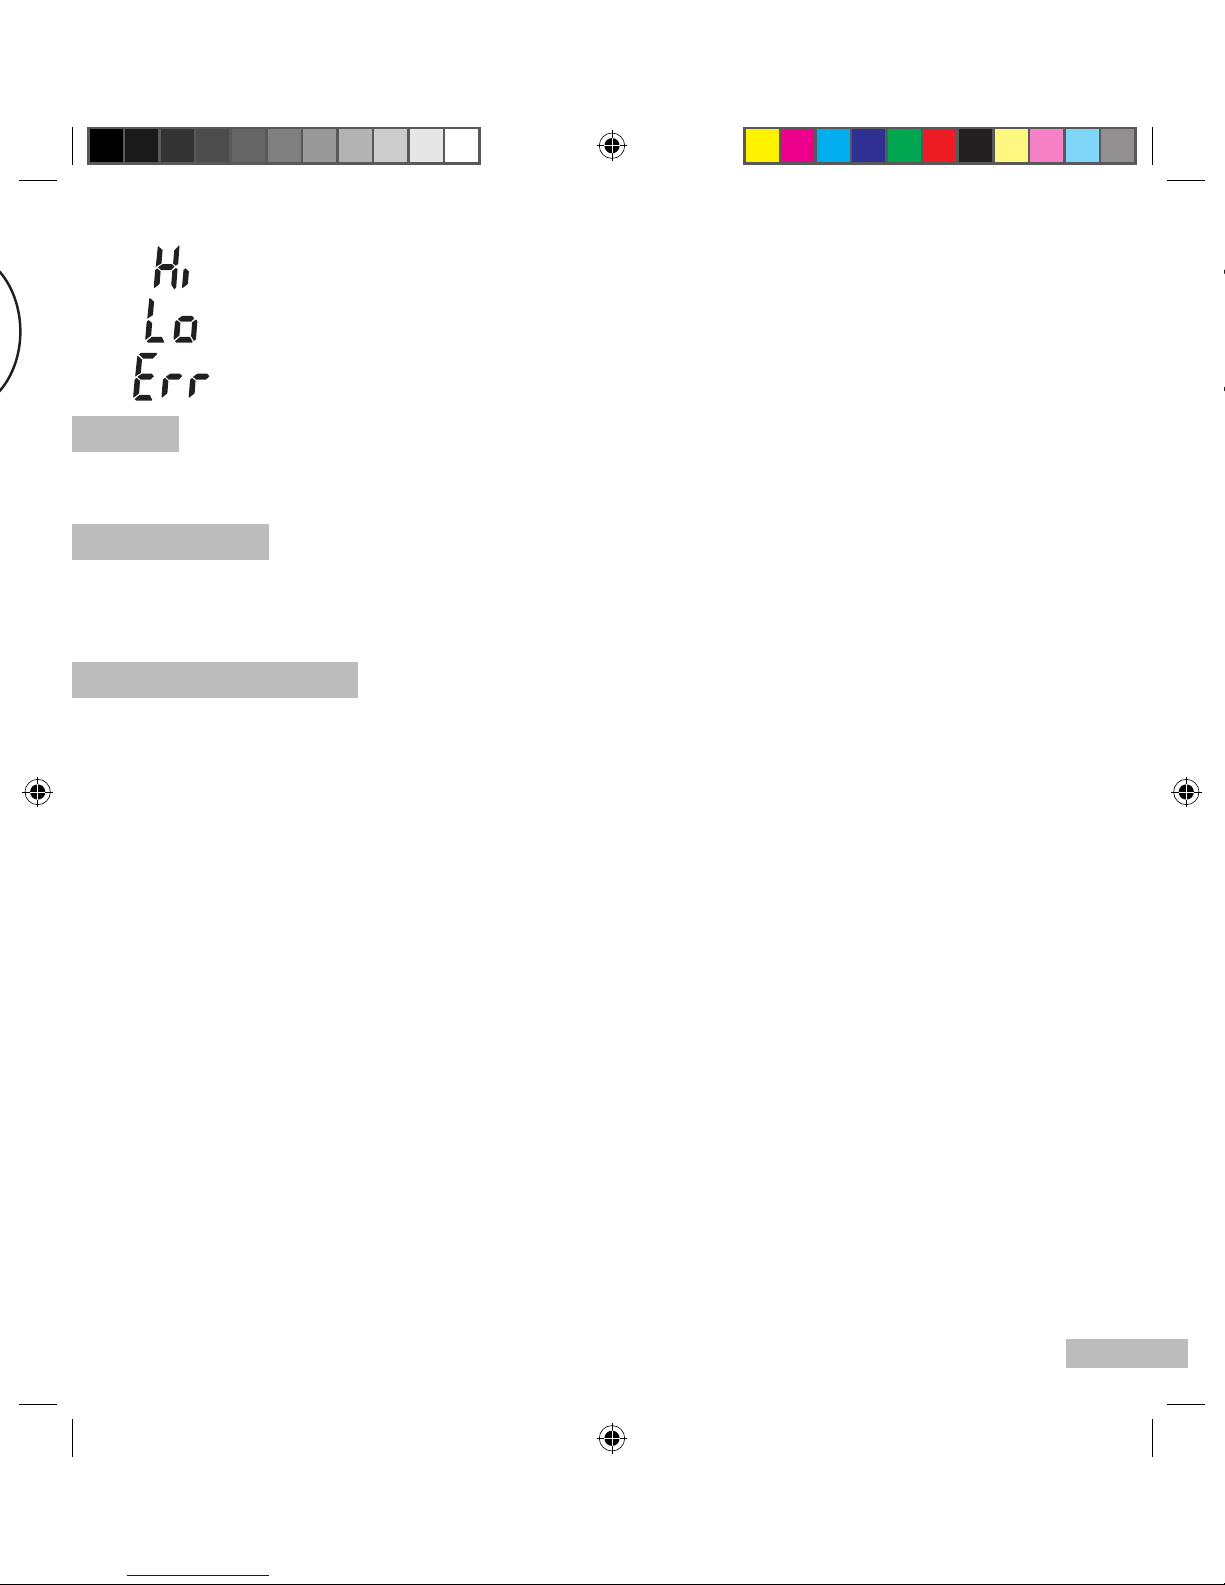
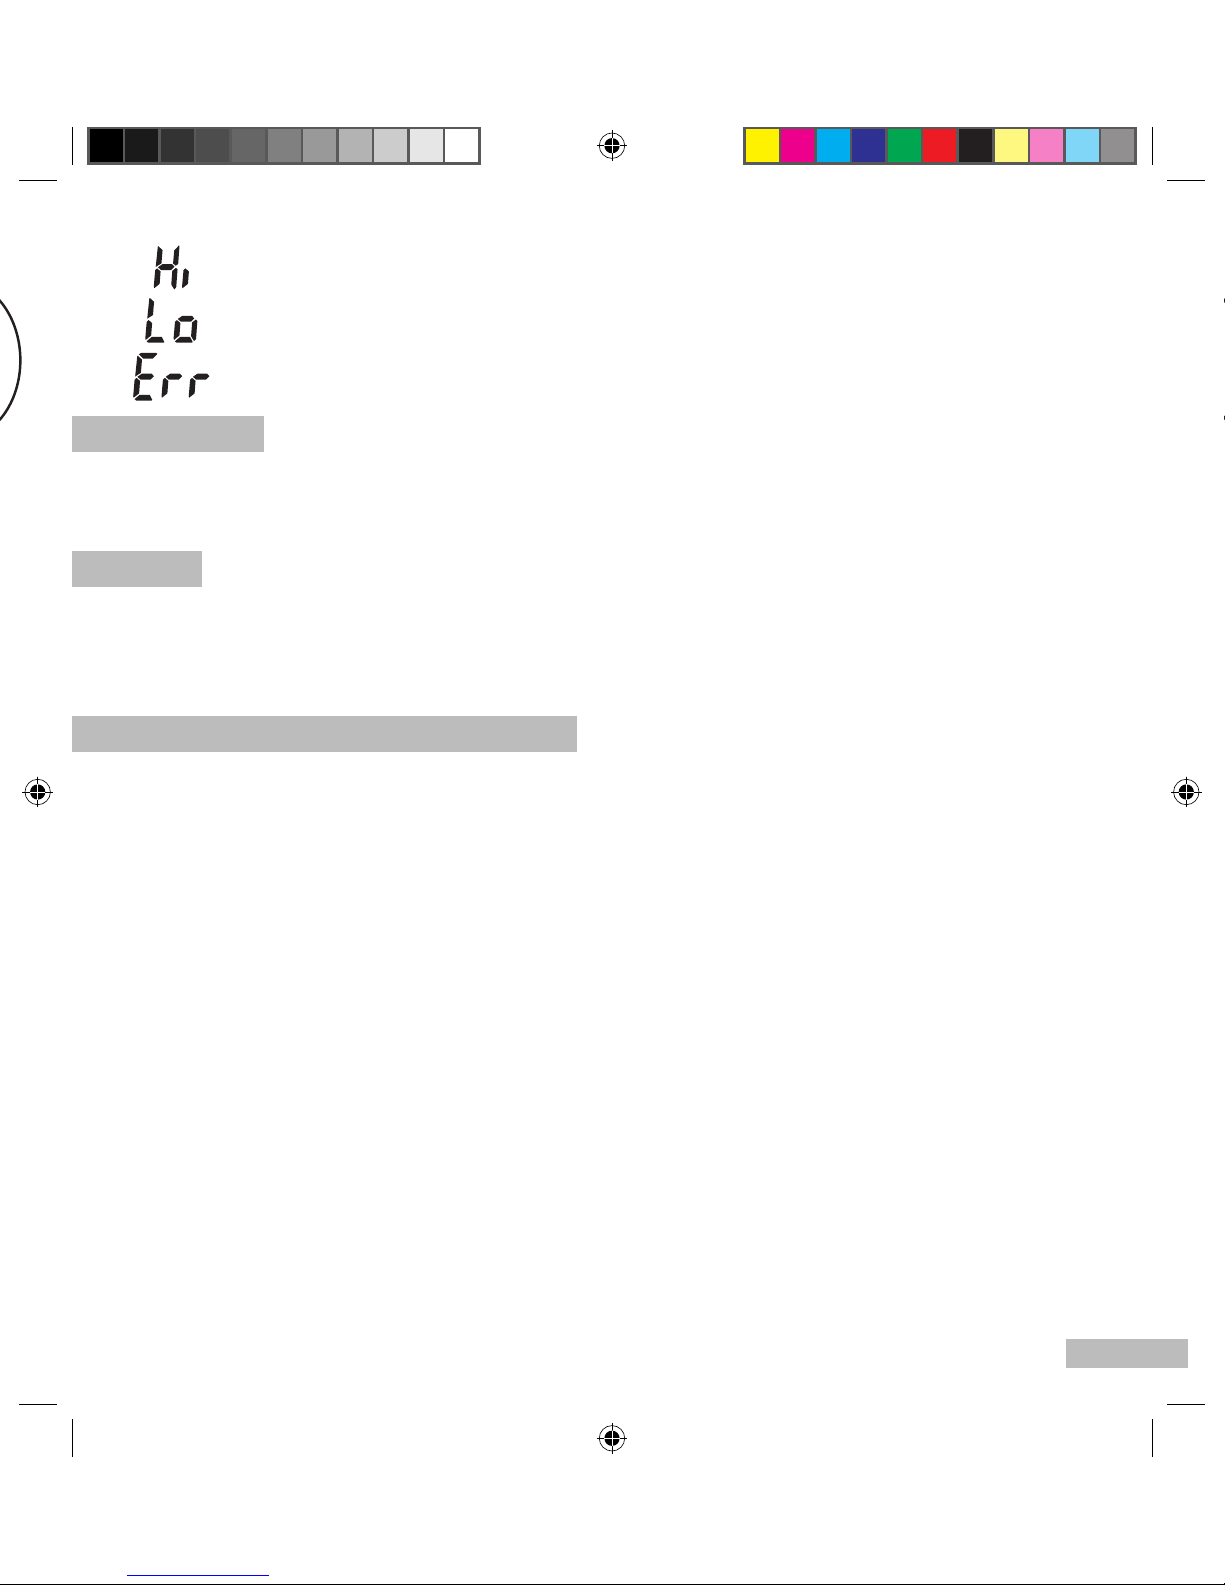
La température est supérieure à 50°C
La température est inférieure à 10°C
Température hors conditions de service (16-40°C)
ARRET
Le thermomètre s’éteindra automatiquement après 30 secondes.
ENTRETIEN
Nettoyer la sonde du thermomètre avec un coton imprégné d’alcool avant et après chaque utilisation. Ne pas utiliser
de substances abrasives. Ne plongez pas le thermomètre dans l’eau ou dans un liquide quelconque car seule la sonde
est imperméable.
PRECAUTIONS D’EMPLOI
1. Prendre la température équivaut à la contrôler, ce qui n’autorise pas à établir un diagnostic ou prescrire un
traitement. Une température anormalement élevée ou basse doit être communiquée au médecin traitant. Ne
modier en aucun cas les dosages des médicaments prescrits par le médecin.
2. Ne pas faire tomber ou casser le thermomètre.
3. Ne pas le laisser à la portée des enfants.
4. Ne pas exposer le thermomètre aux rayons du soleil et ne pas le ranger à proximité d’une source de chaleur mais
le conserver dans un endroit sec et propre.
5. Ne pas plonger le thermomètre dans l’eau ou dans un liquide quelconque.
6. L’Easy Thermo 2 ne sert qu’à prendre la température auriculaire et frontale. Ne pas l’utiliser pour prendre la
température par voie rectale, orale ou axillaire.
7. Ne pas toucher l’extrémité de la sonde avec le doigt.
8. Ne pas prendre la température moins de 30 minutes après avoir mangé, fait de l’exercice ou s’être baigné.
9. Espacer les prises de température d’une minute entre elles. Deux prises de températures successives peuvent
donner des résultats légèrement différents. Dans ce cas utiliser la moyenne des deux.
Notice Easy Thermo.indd 7 8/08/11 13:31:53
Page 8
8
CONSTRUCTEUR
AVITA CORPORATION
No.200.205 Provincial
Free way Song Ling Town,
Wu Jiang City,
Jiang Su, P.R.C. ZIP:215200
DONNEES TECHNIQUES
Gamme de mesure : 10°C - 50°C
Tolérance : Entre 36 et 39°C : +/-0,2°C
Au dessous de 36°C : +/- 0,3°C
Au-dessus de 39°C : +/- 0,3°C
Graduation : 0,1°C ou °F
Conditions de service : 16 à 40°C (60.8°F~104°F), 15-95% RH
Conditions de stockage: -20 à 50°C 15-95% RH
Piles : 2 x AAA (non fournies)
GARANTIE
Ce produit est garanti 2 ans contre les défauts de matériaux et de fabrication. Pendant cette période, de tels défauts
seront réparés gratuitement (la preuve d’achat devra être présentée en cas de réclamation sous garantie). Cette
garantie ne couvre pas les dommages résultant d’accidents, de mauvaise utilisation ou de négligence. En cas de
réclamation, veuillez contacter en premier lieu le magasin où vous avez effectué votre achat.
Applied Standard.
- IEC/EN 60601-1 (Safety)
- IEC/EN 60601-1-2 (EMC)
Conserver soigneusement ces instructions pour toute consultation ultérieure.
Dear Customer
You have just bought this Terraillon infrared electronic thermometer and we thank you for your purchase. We hope you
enjoy using the product. In order to be completely satisfied, we recommend you read these instructions carefully.
The infrared probe of the Easy Thermo 2 shows in a few seconds the heat emitted by the eardrum (this
reflects the temperature of the nervous system located in the brain, which regulates body temperature) or
emitted at the surface of the forehead.
READ BEFORE USE
Important notes
1. The temperature varies according to the part of the body where it is taken. Therefore, it is not necessary to compare
the oral, underarm, rectal, ear or forehead temperature results.
2. The temperature also varies from one person to another, according to age and the time of day.
Advice
Determine your normal temperature range by taking your temperature when healthy. These readings can be
used as a form of reference to compare with future readings when ill.
Is your temperature abnormally high or abnormally low compared to normal? Do not hesitate to consult a doctor in
case of doubt.
PRODUCT DESCRIPTION
Mode switch button - forehead or ear
Notice Easy Thermo.indd 8 8/08/11 13:31:53
Page 9
9
Dear Customer
You have just bought this Terraillon infrared electronic thermometer and we thank you for your purchase. We hope you
enjoy using the product. In order to be completely satisfied, we recommend you read these instructions carefully.
The infrared probe of the Easy Thermo 2 shows in a few seconds the heat emitted by the eardrum (this
reflects the temperature of the nervous system located in the brain, which regulates body temperature) or
emitted at the surface of the forehead.
READ BEFORE USE
Important notes
1. The temperature varies according to the part of the body where it is taken. Therefore, it is not necessary to compare
the oral, underarm, rectal, ear or forehead temperature results.
2. The temperature also varies from one person to another, according to age and the time of day.
Advice
Determine your normal temperature range by taking your temperature when healthy. These readings can be
used as a form of reference to compare with future readings when ill.
Is your temperature abnormally high or abnormally low compared to normal? Do not hesitate to consult a doctor in
case of doubt.
PRODUCT DESCRIPTION
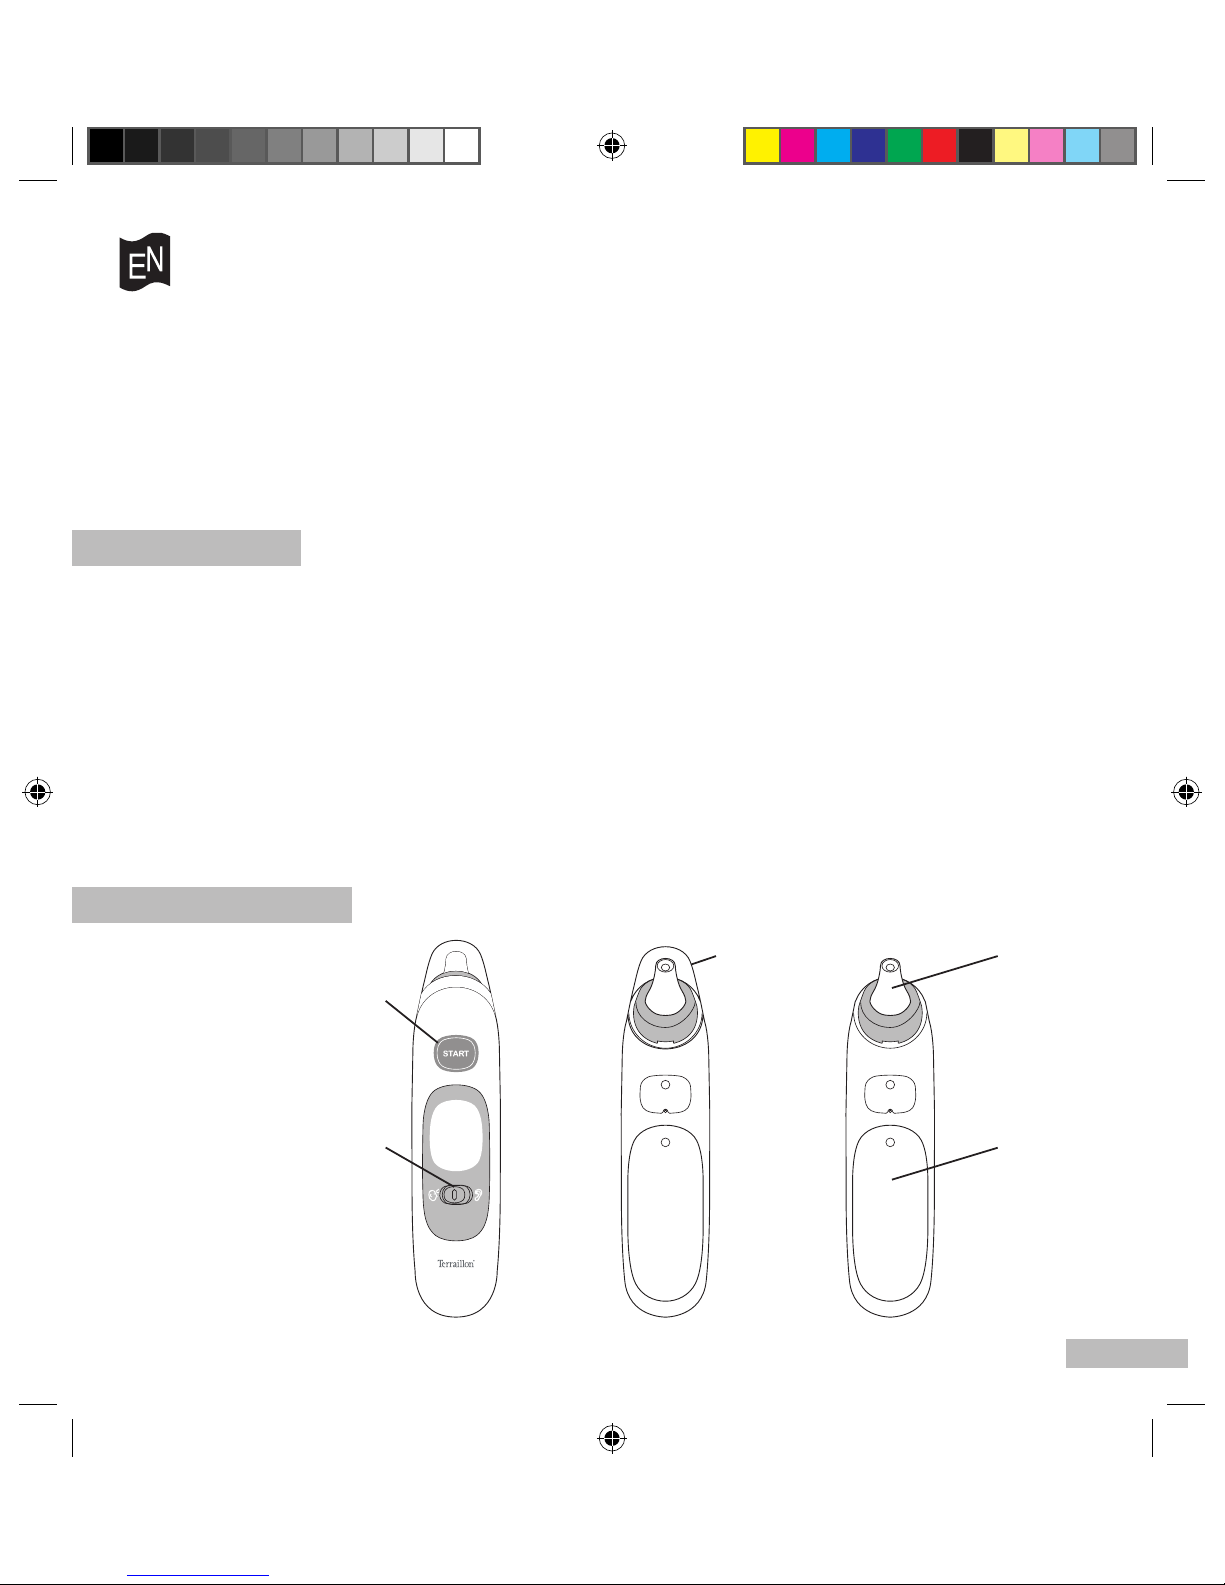
Probe
Battery
Compartment
Probe cap
Power On / Off /
temperature reading
button
Mode switch button - forehead or ear
FRONT VIEW BACK VIEW
EASY THERMO 2
2 in 1 infrared thermometer
Notice Easy Thermo.indd 9 8/08/11 13:31:53
Page 10
3
1
2
10
FIRST USE
1. Inserting batteries
The unit works with 2 AAA batteries (not included).
Open the battery cover on the back of the Easy Thermo 2 using a screwdriver. Insert the batteries, matching the
correct polarity (the polarities are shown on the inside of the battery compartment). If you do not intend to use this
unit for a prolonged period of time, it is advisable to remove the batteries before storage.
TAKING A TEMPERATURE
Remove the cap from the probe to take a temperature, in forehead or ear mode.
1. Forehead temperature measurement
• Remove the cap from the probe.
• Switch to forehead mode (Fig. 1).
• Press the temperature reading «START» button.
• All the elements on the screen (Fig. 3) are displayed, followed by «--» (Fig. 4), a beep and
«00°C» (Fig. 5).
• Place the probe on the top of the temple.- Press and hold the temperature reading
«START» button for approx. 2 seconds.
• You can release the «START» button and remove the Easy Thermo 2 from the temple.
The temperature is displayed.
VIEW INSIDE THE BATTERY COMPARTMENT
The forehead temperature may be affected by external climatic conditions so, in case of
doubt, do not hesitate to take the ear temperature.
2. Auricular
• Remove the cap from the probe.
• Set the switch to ear mode (Fig. 2).
• Press the temperature reading «START» button.
• All the elements on the screen (Fig. 3) are displayed, followed by «--» (Fig. 4), a beep and
«00°C» (g. 5).
• Insert the probe into the ear.
• Press and hold the temperature reading «START» button.
• When the unit beeps, you can release the «START» button.
• Remove the probe from the ear. The temperature is displayed.
Note: In order to obtain a precise measurement, ensure the correct positioning of the probe in the ear so that the
probe tip senses the heat from the eardrum. In order to do this, you can pull the ear to straighten the ear canal and
slightly rotate the probe inside. (It is not recommended to use the ear function of the thermometer on a baby under
12 months old.)
Notice Easy Thermo.indd 10 8/08/11 13:31:54
Page 11
5
4
11
The forehead temperature may be affected by external climatic conditions so, in case of
doubt, do not hesitate to take the ear temperature.
2. Auricular
• Remove the cap from the probe.
• Set the switch to ear mode (Fig. 2).
• Press the temperature reading «START» button.
• All the elements on the screen (Fig. 3) are displayed, followed by «--» (Fig. 4), a beep and
«00°C» (g. 5).
• Insert the probe into the ear.
• Press and hold the temperature reading «START» button.
• When the unit beeps, you can release the «START» button.
• Remove the probe from the ear. The temperature is displayed.
Note: In order to obtain a precise measurement, ensure the correct positioning of the probe in the ear so that the
probe tip senses the heat from the eardrum. In order to do this, you can pull the ear to straighten the ear canal and
slightly rotate the probe inside. (It is not recommended to use the ear function of the thermometer on a baby under
12 months old.)
Auricle
Eardrum
Ear canal
Notice Easy Thermo.indd 11 8/08/11 13:31:54
Page 12

12
REPLACING THE BATTERIES
When the symbol « »appears on the screen, this means that the batteries are
nearing the end of their life.
When the screen displays the symbol « » and «Lo», this means that the battery
is exhausted and should be replaced.
To change the batteries of the Easy Thermo 2:
- Open the battery compartment cover situated on the back of the unit using a screwdriver.
- Remove the exhausted batteries.
- Replace them with 2 AAA batteries, matching the correct polarity (the polarities are shown on the inside of the
battery compartment).
- Replace the cover. The unit is ready to use.
ENVIRONMENTAL PROTECTION
Deposit exhausted batteries in a container designed for this purpose so they may be collected and recycled.
Do not mix different battery types. Do not mix exhausted batteries with new batteries.
At the end of the product’s serviceable life, take it to an electrical and electronic equipment
recycling collection point.
DISPLAY SYMBOLS
Temperature measurement in progress
Ear mode
Forehead mode
Degrees Celsius
This symbol appears when the battery begins to wear out. You can continue to use the unit but when you see the
«Lo» symbol, the batteries should be changed because the unit can no longer function properly.
STOP
The thermometer will turn off automatically after around 30 seconds.
MAINTENANCE
Clean the thermometer probe with alcohol-soaked cotton wool before and after each use. Do not use abrasive
substances. Do not immerse the thermometer in water or in any liquid, because only the probe is waterproof.
SAFETY PRECAUTIONS
1. Use of this thermometer is for monitoring purposes only and is not intended to provide diagnosis or treatment.
Make sure that any abnormally high or low temperature readings are communicated to your doctor. Under no
circumstances should you change your prescribed medicine doses.
2. Do not drop or break the thermometer.
3. Keep out of reach of children.
4. Keep thermometer away from direct sunlight and store well away from any source of heat in a clean, dry
location.
5. Do not submerge the thermometer in water or any other liquid.
6. The Easy Thermo 2 only gives the forehead and ear temperature. Do not use it to take rectal, oral or underarm
temperatures.
7. Avoid direct nger contact with the tip of the probe.
8. Do not take temperature within 30 minutes of eating, exercising or taking a bath.
9. Wait one minute between each temperature reading. Two consecutive temperature readings may give slightly
different measurements. Should this occur, take the average of the two.
Notice Easy Thermo.indd 12 8/08/11 13:31:54
Page 13
13
The temperature is higher than 50°C
The temperature is lower than 10°C
Temperature outside of operating conditions (16-40°C)
STOP
The thermometer will turn off automatically after around 30 seconds.
MAINTENANCE
Clean the thermometer probe with alcohol-soaked cotton wool before and after each use. Do not use abrasive
substances. Do not immerse the thermometer in water or in any liquid, because only the probe is waterproof.
SAFETY PRECAUTIONS
1. Use of this thermometer is for monitoring purposes only and is not intended to provide diagnosis or treatment.
Make sure that any abnormally high or low temperature readings are communicated to your doctor. Under no
circumstances should you change your prescribed medicine doses.
2. Do not drop or break the thermometer.
3. Keep out of reach of children.
4. Keep thermometer away from direct sunlight and store well away from any source of heat in a clean, dry
location.
5. Do not submerge the thermometer in water or any other liquid.
6. The Easy Thermo 2 only gives the forehead and ear temperature. Do not use it to take rectal, oral or underarm
temperatures.
7. Avoid direct nger contact with the tip of the probe.
8. Do not take temperature within 30 minutes of eating, exercising or taking a bath.
9. Wait one minute between each temperature reading. Two consecutive temperature readings may give slightly
different measurements. Should this occur, take the average of the two.
Notice Easy Thermo.indd 13 8/08/11 13:31:54
Page 14

14
MANUFACTURER
AVITA CORPORATION
No. 200.205 Provincial
Free Way Song Ling Town,
Wu Jiang City,
Jiang Su, P.R.C. ZIP: 215200
TECHNICAL DATA
Operating temperature range: 10°C - 50°C
Tolerance: Between 36 and 39°C: +/-0.2°C
Below 36°C: +/- 0.3°C
Above 39°C: +/- 0.3°C
Increments: 0.1°C or °F
Operating conditions: 16°C to 40°C (60.8°F~104°F), 15-95% RH
Storage conditions: -20 to 50°C 15-95% RH
Battery: 2 x AAA (not supplied)
WARRANTY
This product is guaranteed for 2 years against material and manufacturing defects. During this period, such defects
will be repaired free of charge (proof of purchase must be presented if claim is under warranty). This warranty does
not cover damage resulting from accidents, improper use or negligence. In the event of a claim, please contact the
store where you bought the item rst.
Applied Standard.
- IEC/EN 60601-1 (Safety)
- IEC/EN 60601-1-2 (EMC)
Keep these instructions in a safe place for future consultation.
Geachte klant,
Wij danken u hartelijk voor de aankoop van deze elektronische infraroodthermometer van Terraillon. Wij hopen dat u
veel plezier zult hebben van dit product. Wij raden u aan om de gebruiksaanwijzing aandachtig te lezen, zodat u het
product naar volle tevredenheid kunt gebruiken.
De infrarode sonde van de Easy Thermo 2 meet in enkele seconden de warmte die het trommelvlies uitstraalt
(dat de temperatuur weergeeft van het zenuwcentrum in de hersenen dat de lichaamstemperatuur regelt) of
die aan het voorhoofdoppervlak wordt afgegeven.
LEES DEZE GEBRUIKSAANWIJZING VOOR GEBRUIK
Belangrijke opmerkingen
1. De temperatuur verschilt naargelang van het lichaamsdeel waar ze wordt opgenomen. Daarom mogen resultaten
van temperatuurmetingen in de mond, onder de oksels, in het rectum, in het oor of op het voorhoofd niet met elkaar
vergeleken worden.
2. De temperatuur verschilt ook van persoon tot persoon, volgens de leeftijd en het tijdstip van de dag.
Een goede raad
Neem uw temperatuur op als u in topvorm bent, dat is dan de referentietemperatuur. U kunt die dan vergelijken
met de temperatuur die u opneemt wanneer u ziek bent.
Is uw temperatuur abnormaal hoog of laag in vergelijking met uw gebruikelijke temperatuur? Indien u twijfelt, aarzel
dan niet om het advies van een arts in te winnen.
PRODUCTBESCHRIJVING
Notice Easy Thermo.indd 14 8/08/11 13:31:55
Page 15

15
Geachte klant,
Wij danken u hartelijk voor de aankoop van deze elektronische infraroodthermometer van Terraillon. Wij hopen dat u
veel plezier zult hebben van dit product. Wij raden u aan om de gebruiksaanwijzing aandachtig te lezen, zodat u het
product naar volle tevredenheid kunt gebruiken.
De infrarode sonde van de Easy Thermo 2 meet in enkele seconden de warmte die het trommelvlies uitstraalt
(dat de temperatuur weergeeft van het zenuwcentrum in de hersenen dat de lichaamstemperatuur regelt) of
die aan het voorhoofdoppervlak wordt afgegeven.
LEES DEZE GEBRUIKSAANWIJZING VOOR GEBRUIK
Belangrijke opmerkingen
1. De temperatuur verschilt naargelang van het lichaamsdeel waar ze wordt opgenomen. Daarom mogen resultaten
van temperatuurmetingen in de mond, onder de oksels, in het rectum, in het oor of op het voorhoofd niet met elkaar
vergeleken worden.
2. De temperatuur verschilt ook van persoon tot persoon, volgens de leeftijd en het tijdstip van de dag.
Een goede raad
Neem uw temperatuur op als u in topvorm bent, dat is dan de referentietemperatuur. U kunt die dan vergelijken
met de temperatuur die u opneemt wanneer u ziek bent.
Is uw temperatuur abnormaal hoog of laag in vergelijking met uw gebruikelijke temperatuur? Indien u twijfelt, aarzel
dan niet om het advies van een arts in te winnen.
PRODUCTBESCHRIJVING
Sonde
Batterijenvak
Sondedopje
Start-, stopknop /
temperatuuropnameknop
Bewaar deze instructies zorgvuldig
voor later gebruik.
VOOR EN ACHTERAANZICHT
EASY THERMO 2
Infraroodthermometer 2 in 1
Notice Easy Thermo.indd 15 8/08/11 13:31:55
Page 16

3
1
2
16
EERSTE INDIENSTSTELLING
1. De batterijen plaatsen
De thermometer werkt op 2 AAA-batterijen (niet inbegrepen).
Open het deksel van het batterijenvak aan de achterkant van de Easy Thermo 2 met een schroevendraaier. Plaats de
batterijen en let daarbij op de polariteit (de polariteit wordt in het batterijenvak aangegeven). Wanneer u van plan bent
om dit apparaat gedurende lange tijd niet te gebruiken, wordt er aangeraden om de batterij te verwijderen voordat
u het opbergt.
TEMPERATUURMETING
Verwijder het dopje van de sonde om de temperatuur te meten op het voorhoofd of in het oor.
1. Temperatuurmeting op het voorhoofd
• Verwijder het dopje van de sonde.
• Zet de knop in voorhoofdmodus (g. 1).
• Druk op de «START» -temperatuuropnameknop.
• Alle schermelelementen (g.3) worden weergegeven, gevolgd door «--» (g. 4), een
geluidssignaal en standaard «00 °C» (g. 5).
• Plaats de sonde bovenaan de slaap
• Druk de «START» -temperatuuropnameknop voor 2 seconden in en houd deze ingedrukt.
• Mag u de «START» -knop loslaten.
• Haal de Easy Thermo 2 van de slaap. De temperatuur en naargelang.
De voorhoofdtemperatuur kan beÔnvloed worden door externe weersomstandigheden, bij
twijfel neemt u best ook de oortemperatuur op.
2. Oor
• Haal het dopje van de sonde - Zet de knop in de oormodus (g. 2).
• Druk op de «START» -temperatuuropnameknop.
• Alle schermelelementen (g.3) worden weergegeven, gevolgd door «--» (g. 4), een
geluidssignaal en standaard «00 °C» (g. 5).
• Steek de sonde in het gehoorkanaal.
• Druk de «START» -temperatuuropnameknop in en houd deze ingedrukt.
• Wanneer u het geluidssignaal hoort, mag u de «START» -knop loslaten.
• Haal de sonde uit het gehoorkanaal. De temperatuur en naargelang.
Opgelet: om een nauwkeurige meting te verkrijgen, moet u de sonde correct in het gehoorkanaal inbrengen zodat het
uiteinde van de sonde de warmte opvangt die door het trommelvlies afgegeven wordt. Daarvoor kunt u aan het oor
trekken om het gehoorkanaal recht te trekken en de sonde lichtjes naar binnen toe te draaien. (we raden aan om de
oorfunctie van de thermometer niet te gebruiken bij een baby jonger dan 12 maanden.)
BINNENAANZICHT VAN HET BATTERIJENVAK
Notice Easy Thermo.indd 16 8/08/11 13:31:55
Page 17

5
4
17
De voorhoofdtemperatuur kan beÔnvloed worden door externe weersomstandigheden, bij
twijfel neemt u best ook de oortemperatuur op.
2. Oor
• Haal het dopje van de sonde - Zet de knop in de oormodus (g. 2).
• Druk op de «START» -temperatuuropnameknop.
• Alle schermelelementen (g.3) worden weergegeven, gevolgd door «--» (g. 4), een
geluidssignaal en standaard «00 °C» (g. 5).
• Steek de sonde in het gehoorkanaal.
• Druk de «START» -temperatuuropnameknop in en houd deze ingedrukt.
• Wanneer u het geluidssignaal hoort, mag u de «START» -knop loslaten.
• Haal de sonde uit het gehoorkanaal. De temperatuur en naargelang.
Opgelet: om een nauwkeurige meting te verkrijgen, moet u de sonde correct in het gehoorkanaal inbrengen zodat het
uiteinde van de sonde de warmte opvangt die door het trommelvlies afgegeven wordt. Daarvoor kunt u aan het oor
trekken om het gehoorkanaal recht te trekken en de sonde lichtjes naar binnen toe te draaien. (we raden aan om de
oorfunctie van de thermometer niet te gebruiken bij een baby jonger dan 12 maanden.)
Oorschelp
Trommelvlies
Gehoorkanaal
Notice Easy Thermo.indd 17 8/08/11 13:31:56
Page 18

18
BATTERIJEN VERVANGENS
Wanneer het symbool « » op het scherm verschijnt, betekent dit dat de batterijen
bijna leeg zijn.
Verschijnt bovendien het symbool « » en «Lo», betekent dit dat de batterijen
bijna leeg zijn en dat ze vervangen moet worden.
Om de batterijen van de Easy Thermo 2 te veranderen:
- open het deksel van het batterijenvak aan de achterkant van het product met een schroevendraaier;
- neem er de lege batterijen uit;
- vervang ze door 2 AAA-batterijen en let daarbij op de polariteit (de polariteit wordt in het batterijenvak
aangegeven);
- plaats het deksel terug. Het toestel is gebruiksklaar.
ZORG VOOR HET MILIEU
Lever lege batterijen bij een speciaal inzamelpunt in zodat ze ingezameld en gerecycleerd kunnen worden.
Gebruik geen verschillende soorten batterijen bij elkaar. Gebruik geen nieuwe en oude batterijen samen.
Lever dit product aan het einde van zijn levenscyclus in bij een inzamelpunt voor afgedankte
elektrische en elektronische apparatuur zodat het gerecycleerd kan worden.
BETEKENIS VAN DE SYMBOLEN
Temperatuuropname aan de gang
Oormodus
Voorhoofdmodus
Graden Celsius
Dit symbool verschijnt wanneer de batterijen leeg beginnen te raken. U kunt het apparaat nog gebruiken, maar
wanneer de aanduiding «Lo» verschijnt, moeten de batterijen vervangen worden omdat het apparaat niet meer
normaal kan werken.
UITSCHAKELING
De thermometer wordt na 30 seconden automatisch uitgeschakeld als er geen enkele toets geactiveerd wordt.
ONDERHOUD
Reinig de thermometersonde met een in alcohol gedrenkt watje voor en na elk gebruik. Geen schurende stoffen
gebruiken. De thermometer niet onderdompelen in water of in een willekeurige vloeistof aangezien enkel de sonde
waterdicht is.
GEBRUIKSVOORZORGEN
1. De temperatuur opnemen betekent uw temperatuur controleren. U mag geen diagnose stellen of een behandeling
voorschrijven. Raadpleeg uw arts bij een abnormaal hoge of lage temperatuur. Wijzig in geen geval de dosering van
de door de arts voorgeschreven geneesmiddelen.
2. Zorg ervoor dat de thermometer niet valt of breekt.
3. Buiten bereik van kinderen houden.
4. Bescherm de thermometer tegen zonnestralen en leg hem niet in de buurt van een warmtebron. Bewaar hem op
een schone, droge plaats.
5. Dompel de thermometer niet in water of in een andere vloeistof.
6. De Easy Thermo 2 dient enkel om de oor-, voorhoofdstemperatuur te meten. Gebruik deze niet om de temperatuur
op te nemen in het rectum, in de mond of onder de oksels.
7. Het uiteinde van de sonde met de vinger niet aanraken.
8. Neem de temperatuur pas op na een periode van 30 minuten na het eten, sporten of baden.
9. Laat ÈÈn minuut tussen de temperatuuropnames. Twee opeenvolgende temperatuuropnames kunnen lichtjes
verschillende resultaten geven. Neem in dat geval het gemiddelde van beide metingen.
Notice Easy Thermo.indd 18 8/08/11 13:31:56
Page 19

19
De temperatuur is hoger dan 50 °C
De temperatuur is lager dan 10 °C
Temperatuur buiten gebruiksomstandigheden (16-40 °C)
UITSCHAKELING
De thermometer wordt na 30 seconden automatisch uitgeschakeld als er geen enkele toets geactiveerd wordt.
ONDERHOUD
Reinig de thermometersonde met een in alcohol gedrenkt watje voor en na elk gebruik. Geen schurende stoffen
gebruiken. De thermometer niet onderdompelen in water of in een willekeurige vloeistof aangezien enkel de sonde
waterdicht is.
GEBRUIKSVOORZORGEN
1. De temperatuur opnemen betekent uw temperatuur controleren. U mag geen diagnose stellen of een behandeling
voorschrijven. Raadpleeg uw arts bij een abnormaal hoge of lage temperatuur. Wijzig in geen geval de dosering van
de door de arts voorgeschreven geneesmiddelen.
2. Zorg ervoor dat de thermometer niet valt of breekt.
3. Buiten bereik van kinderen houden.
4. Bescherm de thermometer tegen zonnestralen en leg hem niet in de buurt van een warmtebron. Bewaar hem op
een schone, droge plaats.
5. Dompel de thermometer niet in water of in een andere vloeistof.
6. De Easy Thermo 2 dient enkel om de oor-, voorhoofdstemperatuur te meten. Gebruik deze niet om de temperatuur
op te nemen in het rectum, in de mond of onder de oksels.
7. Het uiteinde van de sonde met de vinger niet aanraken.
8. Neem de temperatuur pas op na een periode van 30 minuten na het eten, sporten of baden.
9. Laat ÈÈn minuut tussen de temperatuuropnames. Twee opeenvolgende temperatuuropnames kunnen lichtjes
verschillende resultaten geven. Neem in dat geval het gemiddelde van beide metingen.
Notice Easy Thermo.indd 19 8/08/11 13:31:56
Page 20

20
FABRIKANT
AVITA CORPORATION
No.200.205 Provincial
Free way Song Ling Town,
Wu Jiang City,
Jiang Su, P.R.C. ZIP:215200
TECHNISCHE GEGEVENS
Meetschaal: 10 °C - 50 °C
Afwijking: Tussen 36 °C en 39 °C: +/- 0,2 °C
Onder 36 °C: +/- 0,3 °C
Boven 39 °C: +/- 0,3 °C
Schaalverdeling: 0,1 °C of °F
Gebruiksomstandigheden: 16 tot 40 ∞C (60.8 °F~104 °F), 15-95% RH
Opslagomstandigheden: -20 tot 50 °C 15-95% RH
Batterij: 2 x AAA (niet meegeleverd)
GARANTIE
Voor dit product geldt een garantie van 2 jaar voor materiaal- en productiefouten. Tijdens deze garantieperiode
worden dergelijke gebreken gratis gerepareerd (als u een beroep doet op de garantie, dient u het aankoopbewijs voor
te leggen). Schade door ongevallen, verkeerd gebruik of nalatigheid valt niet onder de garantie. Neem bij klachten
eerst contact op met de winkel waar u dit product hebt gekocht.
Toegepaste standaard.
- IEC/EN 60601-1 (Safety)
- IEC/EN 60601-1-2 (EMC)
Bewaar deze instructies zorgvuldig voor later gebruik.
Sehr geehrte Kundin, sehr geehrter Kunde,
wir danken Ihnen für das Vertrauen, das Sie uns mit dem Kauf dieses elektronischen Infrarot-Thermometers von
Terraillon entgegengebracht haben. Damit der Betrieb dieses Produkts zu Ihrer vollen Zufriedenheit erfolgt, empfehlen
wir Ihnen, diese Bedienungsanleitung aufmerksam zu lesen.
Die Infrarotsonde des Easy Thermo 2 misst innerhalb von Sekunden die Wärme, die vom Trommelfell (das
die Temperatur des im Gehirn befindlichen Nervenzentrums widerspiegelt, welches für die Regelung der
Körpertemperatur verantwortlich ist) bzw. von der Stirn abgegeben wird.
VOR GEBRAUCH LESEN
Wichtige Hinweise
1. Die Temperatur schwankt je nach dem Teil des Körpers, wo die Temperatur gemessen wird. Deshalb dürfen die Ergebnisse
der Messungen im Mund, in der Achselhöhle, im After, im Innenohr und an der Stirn nicht miteinander verglichen werden.
2. Die Temperatur schwankt auch von einer Person zur anderen, je nach Alter und Tageszeit.
Tipp
Um eine Referenztemperatur zu erhalten, messen Sie Ihre Temperatur, wenn Sie sich fit fühlen. Sie können sie
mit der gemessenen Temperatur vergleichen, wenn Sie sich nicht wohl fühlen.
Ist Ihre Körpertemperatur im Verhältnis zu Ihrer normalen Temperatur ungewöhnlich hoch oder niedrig? Wenden Sie
sich im Zweifelsfall an Ihren Arzt.
PRODUKTBESCHREIBUNG
Schalter zum Wechsel zwischen dem
Notice Easy Thermo.indd 20 8/08/11 13:31:56
Page 21

21
Sehr geehrte Kundin, sehr geehrter Kunde,
wir danken Ihnen für das Vertrauen, das Sie uns mit dem Kauf dieses elektronischen Infrarot-Thermometers von
Terraillon entgegengebracht haben. Damit der Betrieb dieses Produkts zu Ihrer vollen Zufriedenheit erfolgt, empfehlen
wir Ihnen, diese Bedienungsanleitung aufmerksam zu lesen.
Die Infrarotsonde des Easy Thermo 2 misst innerhalb von Sekunden die Wärme, die vom Trommelfell (das
die Temperatur des im Gehirn befindlichen Nervenzentrums widerspiegelt, welches für die Regelung der
Körpertemperatur verantwortlich ist) bzw. von der Stirn abgegeben wird.
VOR GEBRAUCH LESEN
Wichtige Hinweise
1. Die Temperatur schwankt je nach dem Teil des Körpers, wo die Temperatur gemessen wird. Deshalb dürfen die Ergebnisse
der Messungen im Mund, in der Achselhöhle, im After, im Innenohr und an der Stirn nicht miteinander verglichen werden.
2. Die Temperatur schwankt auch von einer Person zur anderen, je nach Alter und Tageszeit.
Tipp
Um eine Referenztemperatur zu erhalten, messen Sie Ihre Temperatur, wenn Sie sich fit fühlen. Sie können sie
mit der gemessenen Temperatur vergleichen, wenn Sie sich nicht wohl fühlen.
Ist Ihre Körpertemperatur im Verhältnis zu Ihrer normalen Temperatur ungewöhnlich hoch oder niedrig? Wenden Sie
sich im Zweifelsfall an Ihren Arzt.
PRODUKTBESCHREIBUNG
Sonde
Batteriefach
Kappe der
Sonde
Ein-/Aus-Taste /
Temperaturmessung
Schalter zum Wechsel zwischen dem
Messmodus auf der Stirn bzw.
im Innenohr
ANSICHT DER VORDER UND DER RÜCKSEITE
EASY THERMO 2
Infrarot-Thermometer 2 in 1
Notice Easy Thermo.indd 21 8/08/11 13:31:56
Page 22

22
ERSTE INBETRIEBNAHME
1. Batterien einlegen
Es werden 2 AAA-Batterien benötigt (nicht im Lieferumfang enthalten).
Öffnen Sie den Deckel des Batteriefachs auf der Rückseite des Easy Thermo 2 mithilfe eines Schraubenziehers.
Setzen Sie die Batterien ein und achten Sie dabei auf die Polarität (die Polarität ist im Inneren des Batteriefachs
angegeben). Wenn Sie beabsichtigen, das Gerät längere Zeit nicht zu benutzen, sollten Sie die Batterien entfernen.
TEMPERATURMESSUNG
Um die Temperatur auf der Stirn oder im Innenohr zu messen, entfernen Sie die Schutzkappe der Sonde.
1. Stirnmessung
• Entfernen Sie die Schutzkappe der Sonde.
• Stellen Sie den Schalter auf den Modus für die Stirnmessung (Abb. 1). Abb. 1
• Drücken Sie die Taste für die Temperaturmessung „START“.
• Alle Anzeigeelemente (abb.3) werden standardmässig, gefolgt von „--“ (Abb. 4), einem
Signalton und „00°C“ (Abb. 5).
• Die Taste für die Temperaturmessung „START“ drücken und gedrückt halten für 2 Sekunden.
• Können Sie die Taste „START“ wieder loslassen.
• Entfernen Sie das Thermometer Easy Thermo 2 von der Schläfe. Die Temperatur wird
angezeigt.
INNENANSICHT DES BATTERIEFACHS
Die Stirntemperatur kann durch externe Klimabedingungen beeinflusst werden. Messen Sie
deshalb im Zweifelsfall auch die Temperatur im Innenohr.
2. Innenohrmessung
• Entfernen Sie die Schutzkappe der Sonde.
• Stellen Sie den Schalter auf den Modus für die Innenohrmessung (Abb. 2). Abb. 2.
• Drücken Sie die Taste für die Temperaturmessung „START“. Taste zum Einstellen der Uhr
• Alle Anzeigeelemente( abb.3) werden standardmässig, gefolgt von „--“ (Abb. 4), einem
Signalton und „00°C“ (g. 5).
• Die Taste für die Temperaturmessung „START“ drücken und gedrückt halten.
• Wenn der Signalton zu hören ist, können Sie die Taste „START“ wieder loslassen.
• Entfernen Sie die Sonde wieder aus dem Gehörgang. Die Temperatur wird angezeigt.
Hinweis: Um ein genaues Messergebnis zu erhalten, ist darauf zu achten, dass die Sonde richtig im Gehörgang
positioniert wird, sodass die Spitze der Sonde die vom Trommelfell abgegebene Wärme misst. Ziehen Sie vorsichtig
am Ohr, um den Gehörgang zu erweitern und drehen Sie die Sonde anschließend vorsichtig in den Gehörgang. (Bei
Babys unter 12 Monaten sollte das Produkt nicht als Ohr-Thermometer verwendet werden.)
3
1
2
Notice Easy Thermo.indd 22 8/08/11 13:31:56
Page 23

23
Die Stirntemperatur kann durch externe Klimabedingungen beeinflusst werden. Messen Sie
deshalb im Zweifelsfall auch die Temperatur im Innenohr.
2. Innenohrmessung
• Entfernen Sie die Schutzkappe der Sonde.
• Stellen Sie den Schalter auf den Modus für die Innenohrmessung (Abb. 2). Abb. 2.
• Drücken Sie die Taste für die Temperaturmessung „START“. Taste zum Einstellen der Uhr
• Alle Anzeigeelemente( abb.3) werden standardmässig, gefolgt von „--“ (Abb. 4), einem
Signalton und „00°C“ (g. 5).
• Die Taste für die Temperaturmessung „START“ drücken und gedrückt halten.
• Wenn der Signalton zu hören ist, können Sie die Taste „START“ wieder loslassen.
• Entfernen Sie die Sonde wieder aus dem Gehörgang. Die Temperatur wird angezeigt.
Hinweis: Um ein genaues Messergebnis zu erhalten, ist darauf zu achten, dass die Sonde richtig im Gehörgang
positioniert wird, sodass die Spitze der Sonde die vom Trommelfell abgegebene Wärme misst. Ziehen Sie vorsichtig
am Ohr, um den Gehörgang zu erweitern und drehen Sie die Sonde anschließend vorsichtig in den Gehörgang. (Bei
Babys unter 12 Monaten sollte das Produkt nicht als Ohr-Thermometer verwendet werden.)
Ohrmuschel
Trommelfell
Gehörgang
5
4
Notice Easy Thermo.indd 23 8/08/11 13:31:57
Page 24
24
AUSTAUSCH DER BATTERIEN
Wenn das Symbol „ “ auf der Anzeige erscheint, sind die Batterien bald leer.
Wenn das Symbol „ “ und „Lo“ auf der Anzeige erscheint, sind die Batterien leer
und müssen ausgetauscht werden.
Austausch der Batterien des Thermometers Easy Thermo 2:
- Öffnen Sie das Batteriefach, das sich an der Geräterückseite bendet mithilfe eines Schraubenziehers.
- Entfernen Sie die leeren Batterien.
- Ersetzen Sie diese durch zwei AAA-Batterien und beachten Sie dabei die Polarität (die Polarität ist im Inneren des
Batteriefachs angegeben).
- Schließen Sie das Batteriefach. Das Gerät ist jetzt betriebsbereit.
UMWELTSCHUTZ
Entsorgen Sie gebrauchte Batterien an einer Sammelstelle für Recyclingzwecke. Verwenden Sie keine
unterschiedlichen Batterietypen. Verwenden Sie keine gebrauchten Batterien zusammen mit neuen Batterien.
Entsorgen Sie dieses Produkt am Ende des Lebenszyklus an einer Sammelstelle zum Recycling
elektrischer und elektronischer Altgeräte.
BEDEUTUNG DER SYMBOLE
Temperaturmessung läuft
Modus für die Innenohrmessung
Modus für die Stirnmessung
Grad Celsius
Dieses Symbol erscheint, wenn die Batterien bald leer sind. Sie können das Gerät noch weiter verwenden. Wenn
allerdings die Anzeige „Lo“ erscheint, müssen die Batterien ausgetauscht werden, da das Gerät sonst nicht
mehr einwandfrei funktioniert.
AUSSCHALTEN
Das Thermometer wechselt nach 30 Sekunden automatisch in den Bereitschaftsmodus, wenn keine Taste betätigt
wird.
PFLEGE
Die Thermometersonde nach jedem Gebrauch mit einem in Alkohol getränkten Baumwolltuch reinigen. Keine
Scheuermittel verwenden. Das Thermometer nicht in Wasser oder in irgendeine andere Flüssigkeit tauchen: Nur die
Sonde ist wasserundurchlässig!
VORSICHTSMASSNAHMEN BEI DER ANWENDUNG
1. Mit der Messung der Temperatur wird nur die Temperatur kontrolliert. Auf dieser Grundlage allein darf keine Diagnose
erstellt oder eine Behandlung verschrieben werden. Eine ungewöhnlich hohe oder niedrige Temperatur muss dem
behandelnden Arzt mitgeteilt werden. Ändern Sie keinesfalls die vom Arzt verschriebene Dosierung der Medikamente.
2. Lassen Sie das Thermometer nicht fallen und zerbrechen Sie es nicht.
3. Nicht in Reichweite von Kindern aufbewahren.
4. Setzen Sie das Thermometer nicht den Sonnenstrahlen aus und bewahren Sie es nicht in der Nähe einer
Wärmequelle auf, sondern an einem trockenen und sauberen Ort.
5. Das Thermometer weder in Wasser noch in eine andere Flüssigkeit tauchen.
6. Das Thermometer Easy Thermo 2 dient ausschließlich dazu, die Temperatur im Innenohr oder auf der Stirn zu messen. Es
darf nicht zur Temperaturmessung im After, im Mund oder unter den Achseln verwendet werden.
7. Die Spitze der Sonde nicht mit den Fingern berühren.
8. Nach dem Essen, nach körperlicher Betätigung oder nach dem Baden müssen bis zur Temperaturmessung
mindestens 30 Minuten vergehen.
9. Zwischen aufeinander folgenden Temperaturmessungen ist eine Wartezeit von einer Minute einzuhalten. Die
Ergebnisse zweier aufeinander folgender Messungen können leichte Unterschiede aufweisen. In diesem Fall ist
der Mittelwert der beiden Werte zugrunde zu legen.
Notice Easy Thermo.indd 24 8/08/11 13:31:57
Page 25
25
Die Temperatur liegt über 50°C
Die Temperatur liegt unter 10°C
Temperatur außerhalb der Betriebsbedingungen (16 - 40°C)
AUSSCHALTEN
Das Thermometer wechselt nach 30 Sekunden automatisch in den Bereitschaftsmodus, wenn keine Taste betätigt
wird.
PFLEGE
Die Thermometersonde nach jedem Gebrauch mit einem in Alkohol getränkten Baumwolltuch reinigen. Keine
Scheuermittel verwenden. Das Thermometer nicht in Wasser oder in irgendeine andere Flüssigkeit tauchen: Nur die
Sonde ist wasserundurchlässig!
VORSICHTSMASSNAHMEN BEI DER ANWENDUNG
1. Mit der Messung der Temperatur wird nur die Temperatur kontrolliert. Auf dieser Grundlage allein darf keine Diagnose
erstellt oder eine Behandlung verschrieben werden. Eine ungewöhnlich hohe oder niedrige Temperatur muss dem
behandelnden Arzt mitgeteilt werden. Ändern Sie keinesfalls die vom Arzt verschriebene Dosierung der Medikamente.
2. Lassen Sie das Thermometer nicht fallen und zerbrechen Sie es nicht.
3. Nicht in Reichweite von Kindern aufbewahren.
4. Setzen Sie das Thermometer nicht den Sonnenstrahlen aus und bewahren Sie es nicht in der Nähe einer
Wärmequelle auf, sondern an einem trockenen und sauberen Ort.
5. Das Thermometer weder in Wasser noch in eine andere Flüssigkeit tauchen.
6. Das Thermometer Easy Thermo 2 dient ausschließlich dazu, die Temperatur im Innenohr oder auf der Stirn zu messen. Es
darf nicht zur Temperaturmessung im After, im Mund oder unter den Achseln verwendet werden.
7. Die Spitze der Sonde nicht mit den Fingern berühren.
8. Nach dem Essen, nach körperlicher Betätigung oder nach dem Baden müssen bis zur Temperaturmessung
mindestens 30 Minuten vergehen.
9. Zwischen aufeinander folgenden Temperaturmessungen ist eine Wartezeit von einer Minute einzuhalten. Die
Ergebnisse zweier aufeinander folgender Messungen können leichte Unterschiede aufweisen. In diesem Fall ist
der Mittelwert der beiden Werte zugrunde zu legen.
Notice Easy Thermo.indd 25 8/08/11 13:31:57
Page 26

26
HERSTELLER
AVITA CORPORATION
No. 200.205 Provincial
Free Way Song Ling Town,
Wu Jiang City,
Jiang Su, P.R.C. ZIP: 215200
TECHNISCHE DATEN
Messbereich: 10°C - 50°C
Toleranzbereich: Zwischen 36 und 39°C: +/-0,2°C
Unter 36°C: +/- 0,3°C
Über 39°C: +/- 0,3°C
Einteilung: 0,1°C oder °F
Betriebsbedingungen: 16 bis 40°C (60,8°F~104°F), Feuchtigkeit: 15 bis 95 %
Lagerbedingungen: -20 bis 50°C, Feuchtigkeit 15 bis 95 %
Batterie: 2 x AAA (nicht enthalten)
GARANTIE
Für dieses Produkt wird eine Garantie von 2 Jahren auf Material- und Herstellungsfehler gewährt. In dieser Zeit
werden derartige Mängel kostenlos behoben (der Kaufbeleg muss bei einer Reklamation im Rahmen der Garantie
vorgelegt werden). Beschädigungen, die durch Unfälle, unsachgemäße Verwendung oder Nachlässigkeit verursacht
wurden, sind von dieser Garantie ausgeschlossen. Bei Reklamationen setzen Sie sich bitte zunächst mit dem Geschäft
in Verbindung, in dem Sie das Produkt gekauft haben.
Applied Standard.
- IEC/EN 60601-1 (Safety)
- IEC/EN 60601-1-2 (EMC)
Heben Sie diese Gebrauchsanleitung sorgfältig auf.
Gentile cliente,
Avete acquistato un termometro a raggi infrarossi Terraillon, e vi ringraziamo per la vostra scelta. Vi auguriamo
di trarne il massimo profitto e, per sfruttare al meglio questo strumento, vi preghiamo di leggere con attenzione il
presente manuale d’uso.
La sonda a raggi infrarossi Easy Thermo 2 rileva in pochi secondi il calore emesso dal timpano (quest’ultimo
misura la temperatura del centro nervoso situato nel cervello che regola la temperatura corporea) oppure
quello emesso sulla superficie della fronte.
DA LEGGERE PRIMA DELL’USO
Considerazioni importanti
1. La temperatura cambia secondo la parte del corpo dove è effettuata la misurazione. Per questo motivo non bisogna
paragonare tra loro i risultati delle misurazioni orali, ascellari, rettali, auricolari e frontali.
2. La temperatura varia anche da una persona all’altra, secondo l’età e l’ora della giornata.
Consiglio
Misurarsi la temperatura quando si è in piena forma in modo da avere una temperatura di riferimento. In
questo modo, la si potrà confrontare con la temperatura misurata quando si è ammalati.
La vostra temperatura è troppo alta o troppo bassa in maniera anomala rispetto alla norma? Non esitate a consultare
un medico in caso di dubbio.
DESCRIZIONE DEL PRODOTTO
Notice Easy Thermo.indd 26 8/08/11 13:31:57
Page 27

27
Gentile cliente,
Avete acquistato un termometro a raggi infrarossi Terraillon, e vi ringraziamo per la vostra scelta. Vi auguriamo
di trarne il massimo profitto e, per sfruttare al meglio questo strumento, vi preghiamo di leggere con attenzione il
presente manuale d’uso.
La sonda a raggi infrarossi Easy Thermo 2 rileva in pochi secondi il calore emesso dal timpano (quest’ultimo
misura la temperatura del centro nervoso situato nel cervello che regola la temperatura corporea) oppure
quello emesso sulla superficie della fronte.
DA LEGGERE PRIMA DELL’USO
Considerazioni importanti
1. La temperatura cambia secondo la parte del corpo dove è effettuata la misurazione. Per questo motivo non bisogna
paragonare tra loro i risultati delle misurazioni orali, ascellari, rettali, auricolari e frontali.
2. La temperatura varia anche da una persona all’altra, secondo l’età e l’ora della giornata.
Consiglio
Misurarsi la temperatura quando si è in piena forma in modo da avere una temperatura di riferimento. In
questo modo, la si potrà confrontare con la temperatura misurata quando si è ammalati.
La vostra temperatura è troppo alta o troppo bassa in maniera anomala rispetto alla norma? Non esitate a consultare
un medico in caso di dubbio.
DESCRIZIONE DEL PRODOTTO
Sonda
Scomparto pile
Cappuccio
della sonda
Tasto Accensione/spegnimento /
rilevazione della temperatura
Tasto switch modalità
frontale o auricolare
VISTA ANTERIORE VISTA POSTERIORE
EASY THERMO 2
Termometro a raggi infrarossi 2 funzioni in 1
Notice Easy Thermo.indd 27 8/08/11 13:31:57
Page 28

28
PRIMO UTILIZZO
1. Inserimento delle pile
L’apparecchio funziona con 2 pile AAA (non incluse).
Aprite il coperchio dello scomparto pile situato dietro al Easy Thermo 2 con l’aiuto di un cacciavite. Inserite le pile
rispettando le polarità (le polarità sono indicate all’interno dello scomparto pile). Se non intendete utilizzare questo
apparecchio per un lungo periodo si consiglia di rimuovere le pile prima di riporlo.
RILEVAZIONE DELLA TEMPERATURA
Togliete il cappuccio dalla sonda per rilevare la temperatura in modalità frontale o auricolare.
1. Rilevazione temperatura frontale
• Togliete il cappuccio dalla sonda.
• Spostate il tasto switch sulla modalità frontale (g. 1).
• Premete sul tasto «START» per la rilevazione della temperatura.
• Tutti gli elementi dello schermo (g.3) vengono visualizzati, seguiti da «--» (g. 4), da un
«bip» e da «00°C» (g. 5).
• Premete e tenete premuto il tasto «START» per la rilevazione della temperatura per 2 secondi.
• Rilasciare il tasto «START» e togliete il Easy Thermo 2 dalla tempia. Viene visualizzata la
temperatura.
VISTA INTERNO SCOMPARTO PILE
La temperatura frontale può essere influenzata dalle condizioni climatiche esterne, in caso
di dubbio rilevate la temperatura per via auricolare.
2. Auricolare
• Togliete il cappuccio dalla sonda.
• Spostate il tasto switch sulla modalità auricolare (g. 2).
• Premete sul tasto «START» per la rilevazione della temperatura. Tasto regolazione orologio
• Tutti gli elementi dello schermo (g.3) vengono visualizzati, seguiti da «--» (g. 4), da un «bip»
e da «00°C» (g. 5).
• Premete e tenete premuto il tasto «START» per la rilevazione della temperatura.
• Quando sentite il «bip» potete rilasciare il tasto «START».
• Togliete la sonda dal canale auricolare. Viene visualizzata la temperatura.
Attenzione: per ottenere una misurazione precisa, accertatevi di inserire la sonda nel canale auricolare in modo
corretto, in modo che la ghiera della sonda sia in grado di rilevare il calore emesso dal timpano. A tale scopo, tirate
leggermente l’orecchio in modo da raddrizzare il canale auricolare e girate leggermente la sonda all’interno. (Si
raccomanda di non utilizzare la funzione auricolare del termometro con neonati di età inferiore a 12 mesi.).
3
1
2
Notice Easy Thermo.indd 28 8/08/11 13:31:58
Page 29

29
La temperatura frontale può essere influenzata dalle condizioni climatiche esterne, in caso
di dubbio rilevate la temperatura per via auricolare.
2. Auricolare
• Togliete il cappuccio dalla sonda.
• Spostate il tasto switch sulla modalità auricolare (g. 2).
• Premete sul tasto «START» per la rilevazione della temperatura. Tasto regolazione orologio
• Tutti gli elementi dello schermo (g.3) vengono visualizzati, seguiti da «--» (g. 4), da un «bip»
e da «00°C» (g. 5).
• Premete e tenete premuto il tasto «START» per la rilevazione della temperatura.
• Quando sentite il «bip» potete rilasciare il tasto «START».
• Togliete la sonda dal canale auricolare. Viene visualizzata la temperatura.
Attenzione: per ottenere una misurazione precisa, accertatevi di inserire la sonda nel canale auricolare in modo
corretto, in modo che la ghiera della sonda sia in grado di rilevare il calore emesso dal timpano. A tale scopo, tirate
leggermente l’orecchio in modo da raddrizzare il canale auricolare e girate leggermente la sonda all’interno. (Si
raccomanda di non utilizzare la funzione auricolare del termometro con neonati di età inferiore a 12 mesi.).
Padiglione
Timpano
Condotto uditivo
5
4
Notice Easy Thermo.indd 29 8/08/11 13:31:58
Page 30

30
CAMBIO DELLE PILE
Quando sullo schermo compare il simbolo « » signica che le pile sono in
esaurimento.
Quando sullo schermo compare il simbolo « » insieme a «Lo», signica che la
pila è scarica e che bisogna sostituirla
Per sostituire le pile del Easy Thermo 2:
- Aprite il coperchio dello scomparto pile situato dietro al prodotto con l’aiuto di un cacciavite.
- Togliete le pile esaurite.
- Sostituitele con 2 pile AAA rispettando le polarità (le polarità sono indicate all’interno dello scomparto pile).
- Rimettete il coperchio a posto. L’apparecchio è ora pronto per l’uso.
TUTELA DELL’AMBIENTE
Depositate le pile esaurite nei contenitori previsti a tale scopo per permettere la raccolta e il riciclaggio.
Non mischiate tipi diversi di pile. Non mischiate le pile esaurite con quelle nuove.
Quando il prodotto non funziona più, affidatelo a un centro di raccolta autorizzato per il riciclo dei
rifiuti di apparecchiature elettriche ed elettroniche.
SPIEGAZIONE DEI SIMBOLI
Rilevazione temperatura in corso
Modalità rilevazione temperatura auricolare
Modalità rilevazione temperatura frontale
Grado Celsius
Questo simbolo compare quando la pila è in esaurimento. Potete ancora utilizzare l’apparecchio, ma quando
compare la scritta «Lo» bisogna cambiare la pila, poiché l’apparecchio non è più in grado di funzionare
normalmente.
SPEGNIMENTO
Il termometro passa automaticamente in modalità d’attesa se non viene premuto alcun tasto per oltre 30 secondi.
MANUTENZIONE
Pulite la sonda del termometro con un batuffolo di cotone bagnato nell’alcol prima e dopo ogni utilizzo. Non
utilizzate sostanze abrasive. Non immergete il termometro in acqua o in qualsiasi altro liquido poiché solo la sonda
è impermeabile.
CAUTELE D’USO
1. La rilevazione della temperatura equivale a un controllo della stessa, e ciò non può costituire una diagnosi o
comportare la prescrizione di un trattamento. Valori anormali devono sempre essere comunicati al proprio medico
curante. Non modicate in alcun caso i dosaggi dei medicinali che il vostro medico curante vi ha prescritto.
2. Non far cadere o rompere il termometro.
3. Non lasciatelo alla portata dei bimbi.
4. Non esporre il termometro ai raggi del sole e non metterlo vicino a una fonte di calore, ma riponetelo in un luogo
asciutto e pulito.
5. Non immergete il termometro in acqua o in qualsiasi altro liquido.
6. Il Easy Thermo 2 serve solo per rilevare la temperatura auricolare e frontale. Non utilizzatelo per la rilevazione della
temperatura per via rettale, orale o ascellare.
7. Non toccate l’estremità della sonda con le dita.
8. Fate passare almeno 30 minuti dopo aver mangiato, fatto esercizio sico o aver fatto il bagno prima di misurare
la temperatura.
9. Attendete un minuto tra due rilevazioni di temperatura. Due rilevazioni di temperatura successive possono
comportare risultati leggermente diversi. In questo caso fate la media tra i due valori.
Notice Easy Thermo.indd 30 8/08/11 13:31:58
Page 31

31
La temperatura è superiore a 50 °C
La temperatura è inferiore a 10 °C
Temperatura al di fuori della scala d’utilizzo (16 - 40 °C)
SPEGNIMENTO
Il termometro passa automaticamente in modalità d’attesa se non viene premuto alcun tasto per oltre 30 secondi.
MANUTENZIONE
Pulite la sonda del termometro con un batuffolo di cotone bagnato nell’alcol prima e dopo ogni utilizzo. Non
utilizzate sostanze abrasive. Non immergete il termometro in acqua o in qualsiasi altro liquido poiché solo la sonda
è impermeabile.
CAUTELE D’USO
1. La rilevazione della temperatura equivale a un controllo della stessa, e ciò non può costituire una diagnosi o
comportare la prescrizione di un trattamento. Valori anormali devono sempre essere comunicati al proprio medico
curante. Non modicate in alcun caso i dosaggi dei medicinali che il vostro medico curante vi ha prescritto.
2. Non far cadere o rompere il termometro.
3. Non lasciatelo alla portata dei bimbi.
4. Non esporre il termometro ai raggi del sole e non metterlo vicino a una fonte di calore, ma riponetelo in un luogo
asciutto e pulito.
5. Non immergete il termometro in acqua o in qualsiasi altro liquido.
6. Il Easy Thermo 2 serve solo per rilevare la temperatura auricolare e frontale. Non utilizzatelo per la rilevazione della
temperatura per via rettale, orale o ascellare.
7. Non toccate l’estremità della sonda con le dita.
8. Fate passare almeno 30 minuti dopo aver mangiato, fatto esercizio sico o aver fatto il bagno prima di misurare
la temperatura.
9. Attendete un minuto tra due rilevazioni di temperatura. Due rilevazioni di temperatura successive possono
comportare risultati leggermente diversi. In questo caso fate la media tra i due valori.
Notice Easy Thermo.indd 31 8/08/11 13:31:58
Page 32

32
DITTA PRODUTTRICE
AVITA CORPORATION
No.200.205 Provincial
Free way Song Ling Town,
Wu Jiang City,
Jiang Su, P.R.C. ZIP:215200
DATI TECNICI
Gamma di misurazione: 10 °C - 50 °C
Tolleranza: Tra 36 e 39 °C: +/- 0,2 °C
Al di sotto di 36 °C: +/- 0,3 °C
Al di sopra di 39 °C: +/- 0,3 °C
Scala graduata: 0,1 °C o °F
Condizioni d’utilizzo: da 16 a 40 °C (da 60,8 °F a 104 °F), 15 - 95% RH
Condizioni di conservazione: da -20 a 50 °C 15 - 95% RH
Pile: 2 x AAA (non in dotazione)
GARANZIA
Questo prodotto è garantito 2 anni contro difetti dei materiali e di fabbricazione. Durante questo periodo, i difetti del
tipo sopra descritto saranno riparati gratuitamente (in caso d’intervento richiesto in garanzia, bisogna presentare
lo scontrino comprovante l’acquisto). La garanzia non copre i danni derivanti da incidenti, dall’utilizzo improprio o
da negligenza. In caso di reclamo, siete pregati di mettervi in contatto preliminarmente con il negozio dove avete
acquistato il prodotto.
Applied Standard.
- IEC/EN 60601-1 (Safety)
- IEC/EN 60601-1-2 (EMC)
Conservare con cura queste istruzioni per future consultazioni.
Estimado/a cliente:
Gracias por adquirir este termómetro electrónico de infrarrojos de Terraillon. Esperamos que haga un excelente uso
de este producto y, para garantizarle una plena satisfacción, le aconsejamos que lea atentamente estas instrucciones
de uso.
La sonda de infrarrojos de Easy Thermo 2 mide en segundos el calor emitido por el tímpano (este refleja la
temperatura del centro nervioso que se encuentra en el cerebro y que regula la temperatura corporal) o por
la superficie de la frente.
LEA ESTAS INSTRUCCIONES ANTES DE SU USO
Notas importantes
1. La temperatura varía en función de la parte del cuerpo en que se tome. Por esta razón, no se deben comparar los
resultados de la temperatura tomada en la boca, las axilas, el recto, los oídos o la frente.
2. De la misma manera, la temperatura varía de una persona a otra, según la edad y el momento del día.
Consejo
Tómese la temperatura cuando se encuentre en plena forma para disponer de una temperatura de referencia.
De esta manera, podrá compararla con la temperatura medida cuando se encuentre enfermo.
¿Su temperatura es anormalmente alta o baja en comparación con la habitual? Consulte con un médico en caso de
duda.
DESCRIPCIÓN DEL PRODUCTO
Notice Easy Thermo.indd 32 8/08/11 13:31:59
Page 33

33
Estimado/a cliente:
Gracias por adquirir este termómetro electrónico de infrarrojos de Terraillon. Esperamos que haga un excelente uso
de este producto y, para garantizarle una plena satisfacción, le aconsejamos que lea atentamente estas instrucciones
de uso.
La sonda de infrarrojos de Easy Thermo 2 mide en segundos el calor emitido por el tímpano (este refleja la
temperatura del centro nervioso que se encuentra en el cerebro y que regula la temperatura corporal) o por
la superficie de la frente.
LEA ESTAS INSTRUCCIONES ANTES DE SU USO
Notas importantes
1. La temperatura varía en función de la parte del cuerpo en que se tome. Por esta razón, no se deben comparar los
resultados de la temperatura tomada en la boca, las axilas, el recto, los oídos o la frente.
2. De la misma manera, la temperatura varía de una persona a otra, según la edad y el momento del día.
Consejo
Tómese la temperatura cuando se encuentre en plena forma para disponer de una temperatura de referencia.
De esta manera, podrá compararla con la temperatura medida cuando se encuentre enfermo.
¿Su temperatura es anormalmente alta o baja en comparación con la habitual? Consulte con un médico en caso de
duda.
DESCRIPCIÓN DEL PRODUCTO
Sonda
Compartimiento
de las pilas
Capuchón
de la sonda
Botón de encendido
/ apagado de la toma
de temperatura
Botón del modo frontal o auricular
VISTA FRONTAL VISTA POSTERIOR
EASY THERMO 2
Termómetro de infrarrojos 2 en 1
Notice Easy Thermo.indd 33 8/08/11 13:31:59
Page 34

34
PRIMERA PUESTA EN MARCHA
1. Introducción de las pilas
El aparato funciona con 2 pilas AAA (no incluidas).
Abra la tapa del compartimiento de las pilas situado en la parte posterior del Easy Thermo 2 con un destornillador.
Introduzca las pilas respetando la polaridad (la polaridad está indicada en el interior del compartimiento de las pilas).
Si no tiene pensado utilizar el aparato durante un periodo largo, se recomienda retirar las pilas antes de guardarlo.
MEDICIÓN DE LA TEMPERATURA
Retire el capuchón de la sonda para tomar la temperatura en el modo frontal o auricular.
1. Modo de medición de la temperatura frontal
• Retire el capuchón de la sonda.
• Desplace el botón al modo frontal (g. 1).
• Pulse el botón de la toma de temperatura «START».
• Todos los elementos de la pantalla (g. 3) se visualizan, a continuación «--» (g. 4), un
pitido y de «00°C» (g. 5).
• Coloque la sonda en la parte alta de la sien.
• Pulse y mantenga pulsado el botón de la toma de temperatura «START» durante 2 segundos.
• Deje de pulsar el botón «START» y retire el Easy Thermo 2 de la sien. La temperatura
aparece en la pantalla.
VISTA DEL INTERIOR DEL COMPARTIMIENTO DE LAS PILAS
3
1
2
Las condiciones climáticas pueden influir en la temperatura frontal, en caso de duda tome
la temperatura auricular.
2. Auricular
• Retire el capuchón de la sonda. - Desplace el botón al modo auricular (g. 2).
• Pulse el botón de la toma de temperatura «START».
• Todos los elementos de la pantalla (g. 3) se visualizan, a continuación «--» (g. 4), un
pitido y de «00°C» (g. 5).
• Pulse y mantenga pulsado el botón de la toma de temperatura «START».
• Cuando suene un pitido, deje de pulsar el botón «START».
• Retire la sonda del conducto auditivo. La temperatura aparece en la pantalla.
Atención: para obtener una medición precisa, asegúrese de colocar correctamente la sonda en el conducto auditivo
de manera que la punta de la sonda pueda captar el calor emitido por el tímpano. Para ello, puede tirar de la oreja
con el n de enderezar el conducto y girar ligeramente la sonda en el interior. (Se recomienda no utilizar la función
auricular del termómetro en bebés de menos de 12 meses de edad.)
Notice Easy Thermo.indd 34 8/08/11 13:31:59
Page 35

35
5
4
Las condiciones climáticas pueden influir en la temperatura frontal, en caso de duda tome
la temperatura auricular.
2. Auricular
• Retire el capuchón de la sonda. - Desplace el botón al modo auricular (g. 2).
• Pulse el botón de la toma de temperatura «START».
• Todos los elementos de la pantalla (g. 3) se visualizan, a continuación «--» (g. 4), un
pitido y de «00°C» (g. 5).
• Pulse y mantenga pulsado el botón de la toma de temperatura «START».
• Cuando suene un pitido, deje de pulsar el botón «START».
• Retire la sonda del conducto auditivo. La temperatura aparece en la pantalla.
Atención: para obtener una medición precisa, asegúrese de colocar correctamente la sonda en el conducto auditivo
de manera que la punta de la sonda pueda captar el calor emitido por el tímpano. Para ello, puede tirar de la oreja
con el n de enderezar el conducto y girar ligeramente la sonda en el interior. (Se recomienda no utilizar la función
auricular del termómetro en bebés de menos de 12 meses de edad.)
Pabellón
auditivo
Tímpano
Conducto
auditivo
Notice Easy Thermo.indd 35 8/08/11 13:32:00
Page 36

36
CAMBIO DE LAS PILAS
El símbolo « » en la pantalla indica que las pilas están a punto de descargarse.
Cuando aparece en la pantalla el símbolo « » y «Lo», signica que las pilas están
descargadas y que hay que cambiarlas.
Para cambiar las pilas del Easy Thermo 2:
- Abra la tapa del compartimiento de las pilas situado en la parte posterior del producto con un destornillador.
- Retire las pilas usadas.
- Cámbielas por 2 pilas AAA respetando la polaridad (la polaridad está indicada en el interior del compartimiento de
las pilas).
- Vuelva a colocar la tapa. El aparato está listo para su uso.
PROTECCIÓN DEL MEDIO AMBIENTE
Deposite las pilas descargadas en los contenedores adecuados para que puedan recogerlas y reciclarlas. No
utilice diferentes tipos de pilas en un mismo aparato. No mezcle las pilas usadas con las pilas nuevas.
Cuando se agote la vida útil del aparato, deposítelo en un punto de recogida para el reciclaje de
equipos eléctricos y electrónicos.
LECTURA DE LOS SÍMBOLOS
Medición de temperatura en curso
Modo auricular
Modo frontal
Grados Celsius
Este símbolo aparece cuando la pila empieza a descargarse. Puede seguir utilizando el aparato, pero cuando
aparezca la indicación «Lo», es necesario cambiar las pilas debido a que el aparato dejará de funcionar con
normalidad.
PARADA
Si al cabo de 30 segundos no se pulsa ningún botón, el termómetro activa el modo de espera automáticamente.
MANTENIMIENTO
Limpie la sonda del termómetro con un algodón mojado en alcohol antes y después de cada uso. Nunca utilice
sustancias abrasivas. No sumerja el termómetro en agua o cualquier otro líquido debido a que solamente la sonda
es impermeable.
PRECAUCIONES DE USO
1. El hecho de tomar la temperatura equivale a controlarla, pero esto no le autoriza a establecer un diagnóstico
o prescribir un tratamiento. Si la temperatura es anormalmente alta o baja, comuníqueselo a su médico. No
modique en ningún caso las dosis de los medicamentos prescritos por su médico.
2. No deje que el termómetro se caiga o se rompa.
3. No lo deje al alcance de los niños.
4. No exponga el termómetro a los rayos del sol ni lo guarde cerca de una fuente de calor, sino en un lugar seco y
limpio.
5. No sumerja el termómetro en agua ni en cualquier otro líquido.
6. Easy Thermo 2 solamente sirve para tomar la temperatura auricular o frontal. No lo utilice para tomar la temperatura
por vía rectal, oral ni axilar.
7. No toque el extremo de la sonda con los dedos.
8. No tome la temperatura de una persona hasta que hayan transcurrido 30 minutos después de que haya comido,
hecho ejercicio o se haya bañado.
9. Deje pasar un minuto entre cada medición de la temperatura. Dos mediciones de temperatura sucesivas pueden
dar resultados ligeramente diferentes. En este caso, haga la media de las dos temperaturas.
Notice Easy Thermo.indd 36 8/08/11 13:32:00
Page 37

37
La temperatura es superior a 50 ºC
La temperatura es inferior a 10 ºC
Temperatura fuera de las condiciones de funcionamiento (16-40 ºC)
PARADA
Si al cabo de 30 segundos no se pulsa ningún botón, el termómetro activa el modo de espera automáticamente.
MANTENIMIENTO
Limpie la sonda del termómetro con un algodón mojado en alcohol antes y después de cada uso. Nunca utilice
sustancias abrasivas. No sumerja el termómetro en agua o cualquier otro líquido debido a que solamente la sonda
es impermeable.
PRECAUCIONES DE USO
1. El hecho de tomar la temperatura equivale a controlarla, pero esto no le autoriza a establecer un diagnóstico
o prescribir un tratamiento. Si la temperatura es anormalmente alta o baja, comuníqueselo a su médico. No
modique en ningún caso las dosis de los medicamentos prescritos por su médico.
2. No deje que el termómetro se caiga o se rompa.
3. No lo deje al alcance de los niños.
4. No exponga el termómetro a los rayos del sol ni lo guarde cerca de una fuente de calor, sino en un lugar seco y
limpio.
5. No sumerja el termómetro en agua ni en cualquier otro líquido.
6. Easy Thermo 2 solamente sirve para tomar la temperatura auricular o frontal. No lo utilice para tomar la temperatura
por vía rectal, oral ni axilar.
7. No toque el extremo de la sonda con los dedos.
8. No tome la temperatura de una persona hasta que hayan transcurrido 30 minutos después de que haya comido,
hecho ejercicio o se haya bañado.
9. Deje pasar un minuto entre cada medición de la temperatura. Dos mediciones de temperatura sucesivas pueden
dar resultados ligeramente diferentes. En este caso, haga la media de las dos temperaturas.
Notice Easy Thermo.indd 37 8/08/11 13:32:00
Page 38

38
FABRICANTE
AVITA CORPORATION
No. 200.205 Provincial
Free Way Song Ling Town,
Wu Jiang City,
Jiang Su, P.R.C. ZIP: 215200
INFORMACIÓN TÉCNICA
Intervalo de medición: 10 ºC-50 ºC
Tolerancia: entre 36 y 39 ºC: +/–0,2 ºC
Por debajo de 36 ºC: +/–0,3 ºC
Por encima de 39 ºC: +/–0,3 ºC
Graduación: 0,1 ºC o ºF
Condiciones de funcionamiento: 16 a 40 ºC (60,8 ºF~104 °F), 15-95 % HR
Condiciones de almacenaje: –20 a 50 ºC 15-95 % HR
Pilas: 2 pilas AAA (no incluidas)
GARANTÍA
Este producto tiene una garantía de 2 años en defectos de materiales y de fabricación. Durante este periodo, este tipo
de defectos se repararán gratuitamente (deberá presentar el comprobante de compra en caso de reclamación dentro
del plazo de la garantía). La garantía no cubre los daños ocasionados de manera accidental, por un uso indebido o por
negligencia. En caso de reclamación, primero diríjase al punto de venta donde lo haya comprado.
Applied Standard.
- IEC/EN 60601-1 (Safety)
- IEC/EN 60601-1-2 (EMC)
Conserve cuidadosamente estas instrucciones para futuras consultas.
Estimado(a) cliente,
Obrigado por ter adquirido este termómetro electrónico por infravermelhos Terraillon. Desejamos-lhe uma excelente
utilização e, para o aproveitar ao máximo, recomendamos que leia atentamente estas instruções de utilização.
A sonda de infravermelhos do Easy Thermo 2 detecta em poucos segundos o calor emitido pelo tímpano (que
reflecte a temperatura do centro nervoso situado no cérebro, o qual regula a temperatura do corpo) ou o calor
emitido à superfície da testa.
A LER ANTES DA UTILIZAÇÃO
Notas importantes
1. A temperatura varia de acordo com a parte do corpo em que é medida. Por isso, não é possível comparar os
resultados de medições de temperatura oral, axilar, rectal, auricular ou frontal.
2. A temperatura varia igualmente de pessoa para pessoa, com a idade e a hora do dia.
Conselho
Para ter uma temperatura de referência, meça a sua temperatura quando estiver em forma. Assim, poderá
compará-la com a temperatura medida quando está doente.
A sua temperatura está anormalmente alta ou baixa em relação à temperatura habitual? Em caso de dúvida, não
hesite em consultar um médico.
DESCRIÇÃO DO PRODUTO
Notice Easy Thermo.indd 38 8/08/11 13:32:00
Page 39

39
Estimado(a) cliente,
Obrigado por ter adquirido este termómetro electrónico por infravermelhos Terraillon. Desejamos-lhe uma excelente
utilização e, para o aproveitar ao máximo, recomendamos que leia atentamente estas instruções de utilização.
A sonda de infravermelhos do Easy Thermo 2 detecta em poucos segundos o calor emitido pelo tímpano (que
reflecte a temperatura do centro nervoso situado no cérebro, o qual regula a temperatura do corpo) ou o calor
emitido à superfície da testa.
A LER ANTES DA UTILIZAÇÃO
Notas importantes
1. A temperatura varia de acordo com a parte do corpo em que é medida. Por isso, não é possível comparar os
resultados de medições de temperatura oral, axilar, rectal, auricular ou frontal.
2. A temperatura varia igualmente de pessoa para pessoa, com a idade e a hora do dia.
Conselho
Para ter uma temperatura de referência, meça a sua temperatura quando estiver em forma. Assim, poderá
compará-la com a temperatura medida quando está doente.
A sua temperatura está anormalmente alta ou baixa em relação à temperatura habitual? Em caso de dúvida, não
hesite em consultar um médico.
DESCRIÇÃO DO PRODUTO
Sonda
Compartimento
das pilhas
Cobertura
da sonda
Botão Ligar/Desligar /
tomada de temperatura
Botão comutador modo
frontal ou auricular
VISTA DE FRENTE VISTA DE TRÁS
EASY THERMO 2
Termómetro de infravermelhos 2 em 1
Notice Easy Thermo.indd 39 8/08/11 13:32:00
Page 40

40
PRIMEIRA COLOCAÇÃO EM SERVIÇO
1. Colocação das pilhas
O aparelho funciona com 2 pilhas AAA (não incluídas).
Abra o compartimento das pilhas localizado na parte traseira do Easy Thermo 2, usando para isso uma chave de
fendas. Coloque as pilhas respeitando as polaridades (as polaridades são indicadas no interior do compartimento das
pilhas). Caso não preveja vir a utilizar o aparelho durante períodos de tempo prolongados, recomendamos que retire
as pilhas antes de o armazenar.
MEDIÇÃO DA TEMPERATURA
Retire a cobertura da sonda para medir a temperatura auricular em modo frontal ou auricular.
1. Medição da temperatura frontal
• Retire a cobertura da sonda.
• Desloque o botão comutador para o modo frontal (g. 1).
• Prima o botão de medição da temperatura «START».
• Todos os elementos do ecrã (g. 3) são apresentados seguidos por «--» (g. 4), um bip
sonoro e o valor «00°C» (g. 5).
• Coloque a sonda sobre a parte superior da fonte.- Prima e mantenha premido o botão de
medição da temperatura «START» durante 2 segundos.
• Pode largar o botão «START» e afaste o Easy Thermo 2 da têmpora. A temperatura é
apresentada.
VISTA DO INTERIOR DO COMPARTIMENTO DAS PILHAS
3
1
2
A temperatura frontal pode ser influenciada pelas condições climáticas externas. Em caso
de dúvida, não hesite em medir a temperatura auricular.
2. Temperatura auricular
• Retire a cobertura da sonda. - Desloque o botão comutador para o modo auricular (g. 2).
• Prima o botão de medição da temperatura «START». Botão de acerto do relógio
• Todos os elementos do ecrã (g. 3) são apresentados seguidos por «--» (g. 4), um bip
sonoro e o valor «00°C» (g. 5).
• Prima e mantenha premido o botão de medição da temperatura «START».
• Quando se ouve um bip sonoro, pode largar o botão «START».
• Retire a sonda do canal auditivo. A temperatura é apresentada.
Cuidado: Para obter uma medição precisa, assegure-se de que posiciona correctamente a sonda no canal auditivo, de
forma a que a ponta da sonda possa captar o calor emitido pelo tímpano. Para tal, pode puxar a orelha para orientar
o canal e rodar ligeiramente a sonda no interior. (Recomenda-se que não utilize a função auricular do termómetro em
crianças com idade inferior a 12 meses.)
Notice Easy Thermo.indd 40 8/08/11 13:32:00
Page 41

41
5
4
A temperatura frontal pode ser influenciada pelas condições climáticas externas. Em caso
de dúvida, não hesite em medir a temperatura auricular.
2. Temperatura auricular
• Retire a cobertura da sonda. - Desloque o botão comutador para o modo auricular (g. 2).
• Prima o botão de medição da temperatura «START». Botão de acerto do relógio
• Todos os elementos do ecrã (g. 3) são apresentados seguidos por «--» (g. 4), um bip
sonoro e o valor «00°C» (g. 5).
• Prima e mantenha premido o botão de medição da temperatura «START».
• Quando se ouve um bip sonoro, pode largar o botão «START».
• Retire a sonda do canal auditivo. A temperatura é apresentada.
Cuidado: Para obter uma medição precisa, assegure-se de que posiciona correctamente a sonda no canal auditivo, de
forma a que a ponta da sonda possa captar o calor emitido pelo tímpano. Para tal, pode puxar a orelha para orientar
o canal e rodar ligeiramente a sonda no interior. (Recomenda-se que não utilize a função auricular do termómetro em
crianças com idade inferior a 12 meses.)
Pavilhão
Tímpano
Canal auditivo
Notice Easy Thermo.indd 41 8/08/11 13:32:01
Page 42

42
SUBSTITUIÇÃO DAS PILHAS
Quando o símbolo « » aparece no ecrã, isso signica que as pilhas estão a
chegar ao m da sua vida útil.
Quando o ecrã apresenta o símbolo « » e «Lo», isso signica que a pilha está
gasta e que é necessário substituí-la.
Para substituir as pilhas do Easy Thermo 2:
- Abra a tampa do compartimento das pilhas localizada na traseira do produto com a ajuda de uma chave de
fendas.
- Retire as pilhas usadas.
- Substitua-as por 2 pilhas AAA respeitando as polaridades (as polaridades encontram-se indicadas no interior do
compartimento das pilhas).
- Reponha a tampa do compartimento das pilhas. O aparelho está pronto a ser utilizado.
PROTECÇÃO DO AMBIENTE
Coloque as pilhas usadas num contentor apropriado para que sejam recolhidas e recicladas. Não misture
tipos de pilhas diferentes. Não misture as pilhas usadas com pilhas novas.
No final da respectiva vida útil, entregue o produto num ponto de recolha para reciclagem de
restos de equipamentos eléctricos e electrónicos.
LEITURA DOS SÍMBOLOS
Medição da temperatura em curso
Modo auricular
Modo frontal
Graus Celsius
Este símbolo aparece quando a pilha começa a car gasta. Ainda poderá utilizar o aparelho, mas quando a
indicação «Lo» é apresentada, é necessário substituir a pilha porque o aparelho já não está em condições de
funcionar normalmente.
DESLIGAR
O termómetro entra automaticamente em modo de espera ao m de 30 segundos, caso nenhum botão seja
premido.
MANUTENÇÃO
Limpe a sonda do termómetro com um algodão embebido em álcool após cada utilização. Não utilize substâncias
abrasivas. Não mergulhe o termómetro em água ou qualquer outro líquido, dado que apenas a sonda é
impermeável.
PRECAUÇÕES DE UTILIZAÇÃO
1. Medir a temperatura é equivalente a controlá-la. Este facto não autoriza a estabelecer um diagnóstico nem a
prescrever um tratamento. Uma temperatura anormalmente elevada ou baixa deve ser comunicada ao médico
assistente. Não alterar, em caso algum, as dosagens dos medicamentos prescritos pelo médico.
2. Não deixar cair nem partir o termómetro.
3. Não deixar ao alcance das crianças.
4. Não expor o termómetro à luz solar directa nem colocar perto de uma fonte de calor. Conservar o termómetro num
local seco e limpo.
5. Não mergulhar o termómetro em água ou qualquer outro líquido.
6. O Easy Thermo 2 apenas foi concebido para medir a temperatura auricular e frontal. Não utilizar para medir a
temperatura rectal, oral ou axilar.
7. Não tocar na extremidade da sonda com o dedo.
8. Não medir a temperatura a menos de 30 minutos depois de ter comido, feito exercício ou tomado banho.
9. Espaçar as medições de temperatura pelo menos em um minuto. Duas medições de temperatura sucessivas
podem originar resultados ligeiramente diferentes. Nesse caso, utilize a média das duas.
Notice Easy Thermo.indd 42 8/08/11 13:32:01
Page 43

43
A temperatura é superior a 50°C
A temperatura é inferior a 10°C
Temperatura fora das condições de operação (16-40°C)
DESLIGAR
O termómetro entra automaticamente em modo de espera ao m de 30 segundos, caso nenhum botão seja
premido.
MANUTENÇÃO
Limpe a sonda do termómetro com um algodão embebido em álcool após cada utilização. Não utilize substâncias
abrasivas. Não mergulhe o termómetro em água ou qualquer outro líquido, dado que apenas a sonda é
impermeável.
PRECAUÇÕES DE UTILIZAÇÃO
1. Medir a temperatura é equivalente a controlá-la. Este facto não autoriza a estabelecer um diagnóstico nem a
prescrever um tratamento. Uma temperatura anormalmente elevada ou baixa deve ser comunicada ao médico
assistente. Não alterar, em caso algum, as dosagens dos medicamentos prescritos pelo médico.
2. Não deixar cair nem partir o termómetro.
3. Não deixar ao alcance das crianças.
4. Não expor o termómetro à luz solar directa nem colocar perto de uma fonte de calor. Conservar o termómetro num
local seco e limpo.
5. Não mergulhar o termómetro em água ou qualquer outro líquido.
6. O Easy Thermo 2 apenas foi concebido para medir a temperatura auricular e frontal. Não utilizar para medir a
temperatura rectal, oral ou axilar.
7. Não tocar na extremidade da sonda com o dedo.
8. Não medir a temperatura a menos de 30 minutos depois de ter comido, feito exercício ou tomado banho.
9. Espaçar as medições de temperatura pelo menos em um minuto. Duas medições de temperatura sucessivas
podem originar resultados ligeiramente diferentes. Nesse caso, utilize a média das duas.
Notice Easy Thermo.indd 43 8/08/11 13:32:01
Page 44

44
FABRICANTE
AVITA CORPORATION
No.200.205 Provincial
Free way Song Ling Town,
Wu Jiang City,
Jiang Su, P.R.C. ZIP:215200
ESPECIFICAÇÕES TÉCNICAS
Intervalo de medição: 10°C - 50°C
Tolerância: Entre 36 e 39°C: +/-0,2°C
Abaixo de 36°C: +/- 0,3°C
Abaixo de 39°C: +/- 0,3°C
Graduação: 0,1°C ou °F
Condições de funcionamento: 16 a 40°C (60,8°F~104°F), 15-95% HR
Condições de armazenamento: -20 a 50°C 15-95% HR
Pilhas: 2 x AAA (não incluídas)
GARANTIA
Este produto está garantido durante 2 anos contra defeitos de material e de fabrico. Durante este período, estes
defeitos serão reparados gratuitamente (é obrigatória a apresentação da prova de compra em caso de reclamação
abrangida pela garantia). Esta garantia não cobre danos resultantes de acidentes, utilização incorrecta ou negligência.
Em caso de reclamação, queira contactar primeiro a loja onde comprou o dispositivo.
Applied Standard.
- IEC/EN 60601-1 (Safety)
- IEC/EN 60601-1-2 (EMC)
Conserve cuidadosamente estas instruções, para consultas posteriores.
Notice Easy Thermo.indd 44 8/08/11 13:32:01
Page 45

Notice Easy Thermo.indd 45 8/08/11 13:32:01
Page 46

Terraillon SAS France & Headquarters
1 rue Ernest Gouin
78290 Croissy sur Seine
Service consommateurs : 0 826 88 1789
serviceconsommateurs@terraillon.fr
Service Après Vente :
Te rraillon chez MGF logistique
ZI d’Epluches - Rue des Préaux
95310 St-Ouen l’Aumône
Terraillon UK Ltd
2 The Waterhouse
Waterhouse Street - Hemel Hempstead
Herts HP1 1ES - UK
Te l: +44(0)1442 270444 - sales@terraillon.co.uk
Terraillon Deutschland GmbH
sales@terraillon.co.uk
Terraillon SRL
Via Ercole Oldofredi, 39
Milano - Italia
Te l: +39 (0)2 66114199
Terraillon Asia Pacific Ltd
4/F, Eastern Centre
1065 King’s Road
Quarry Bay - Hong Kong
Te l : +852 (0)2960 7200
customerservice@terraillon-asia.com
Terraillon Corp
303 Windsor Falls Drive
Canton, GA 30114
Te l : 678-591-3048
customerserviceusa@tcorpusa.com
www.terraillon.com
Notice Easy Thermo.indd 46 8/08/11 13:32:01
 Loading...