

Page 1

January 2014
IIPP PPhhoonnee 44110011
UUsseerr GGuuiiddee
Software Version 07.04.16, Document #14-280208 Rev. J
Page 2

C
o
n
t
e
n
t
s
C
o
n
t
e
C
o
n
n
t
e
n
t
s
t
s
Introduction ............................................................................ 3
Using This Manual ................................................................... 3
Controls and Indicators ........................................................... 4
Display ...................................................................................... 5
Operation ............................................................................... 6
Placing Calls ............................................................................. 6
Answering Calls ....................................................................... 7
Holding Calls ............................................................................ 7
Transferring Calls ..................................................................... 7
Conferencing Calls ................................................................... 8
Call Forwarding ........................................................................ 8
Do Not Disturb ......................................................................... 9
Presence Status ........................................................................ 9
Using Network Features ........................................................ 10
Using the Call Log .................................................................. 11
Using the Call Directory ......................................................... 13
Using the Speakerphone ....................................................... 14
Setting Up the Voice Mail Key ............................................... 20
Setting Up the Call Directory ................................................. 21
Personal Ringing Options ...................................................... 22
Handset/Headset Configuration ............................................. 23
Configuring Auto Answer ...................................................... 24
Setting a Call Log PIN ............................................................. 25
User Options Menu Tree ...................................................... 26
Warranty ............................................................................... 27
Regulatory Statements ......................................................... 28
Using Call Monitoring ............................................................ 14
Muting the Handset or Headset Microphone ....................... 14
Using a Headset ..................................................................... 15
Adjusting the Receive Volume .............................................. 15
Adjusting the Ringer Volume ................................................ 15
Using Voice Mail .................................................................... 15
Customizing Your Phone ..................................................... 16
User Options Menu ................................................................ 16
Entering Alphanumeric Characters ....................................... 17
Setting the Time and Date ..................................................... 18
Setting Up Speed Dial Keys .................................................. 18
Teo IP Phone 4101 User Guide 2
Page 3

•
•
I
n
t
r
o
d
u
c
t
i
o
n
I
n
t
r
o
d
u
c
t
I
n
t
r
o
d
u
c
i
t
o
n
o
n
i
The Teo IP Phone 4101 is a single-line voice terminal that
provides sophisticated services over managed IP networks
running Session Initiation Protocol (SIP). The telephone
includes a built-in 10/100BaseT Ethernet switch to allow daisychain connection of a PC workstation without additional
equipment.
Features of the 4101 include:
100-entry Call Log for
Unanswered, Answered,
and Outgoing Calls
• Call Timer
• Last Number Redial
• Speed Dial
• Pre-Dialing
• 12-entry Call Directory
• Voice Mail Access Key
• Message Waiting
Indication
• Backlit LCD Display
Flexible Ringing Options
• Desktop or Wall Mounting
• Integrated Speakerphone
• Call Monitoring
• Handset or Headset
Operation
• Headset Activation Key
• Dedicated Headset Jack
• Integrated 10/100BaseT
Ethernet Switch
• 802.3af Power over
Ethernet or Local Power
UUssiinngg TThhiiss MMaannuuaal
A brief description of all controls and indicators is presented on
the following three pages.
Instructions for using your telephone are in the Operation
chapter (page 6).
Many telephone features can be customized – see the
Customizing Your Phone chapter (page 16).
l
Various features may not be available
with some SIP services.
Teo IP Phone 4101 User Guide 3
Page 4

CCoonnttrroollss aanndd IInnddiiccaattoorrs
s
5) LOG Key – displays Call Log options (page 11).
6) TRANS Key – transfers a call (page 7).
7) DIR Key – displays the Call Directory (page 13).
8) CONF Key – adds other parties to a conference call (page 8).
9) REDIAL Key – redials the last outgoing number (page 6).
10) DROP Key – removes the last party added to a conference
call, and disconnects you from a call and returns new dial
tone when not in conference mode (page
11) SEND Key – initiates dialing after entering digits (page 6).
12) HOLD Key – places a call on hold (page 7), and enters a
pause in a Speed Dial or Voice Mail dialing string.
13) Dial Pad – dials telephone numbers, and sends DTMF tones
to external equipment such as voice mail systems. The dial
pad is also used for text and number entry during setup.
14) Multifunction Keys – programmable for use as Speed Dial
keys or feature activators (page
15) FWD Key – forwards incoming calls to another phone (page
8), or may be used to set Presence (page 9).
7).
8).
16) DND Key – Do Not Disturb; makes the phone appear busy to
incoming callers (page
1) Display – shows the line ID, call state, caller ID, dialed digits,
network call control messages, elapsed time during calls,
the date and time of day, and setup options.
2) MENU Key – enters and exits Setup Mode (page 16).
3)
ENTER Key – selects menu options, saves option changes,
and can be used to initiate dialing.
4) Navigation (Arrow) Keys –
menus. In editing modes, the
position to the right and the
position to the left and deletes characters.
Teo IP Phone 4101 User Guide 4
and keys navigate within
key moves the cursor one
key moves the cursor one
17) VOICE MAIL Key – accesses voice mail services (page 15).
18) HEADSET Key – activates the headset (page 15).
19) MUTE Key – mutes the microphone when using the
speakerphone or handset/headset (page
20) SPEAKER Key – activates the speakerphone or Call
Monitoring (if enabled by your installer) (page
21) VOLUME Key – adjusts the receiver/speaker volume when on
a call; adjusts the ringer volume when on-hook (page
22) Message Waiting Indicator – a bright red indicator is lit
when messages are waiting.
23) Microphone – used for hands-free (speakerphone) calling;
located under the right front of the telephone.
9).
14).
14).
15).
Page 5
24) Handset Jack – a jack on the left side of the telephone
connects to the included handset.
25) Headset Jack – a jack on the right side of the telephone
connects to an optional standard headset.
DDiissppllaay
Call information, date and time, and other information are
shown on the 4101 display. The example below is a typical
display of call activity.
The display backlight is activated by pressing a key or lifting the
handset. It will automatically turn off after two minutes.
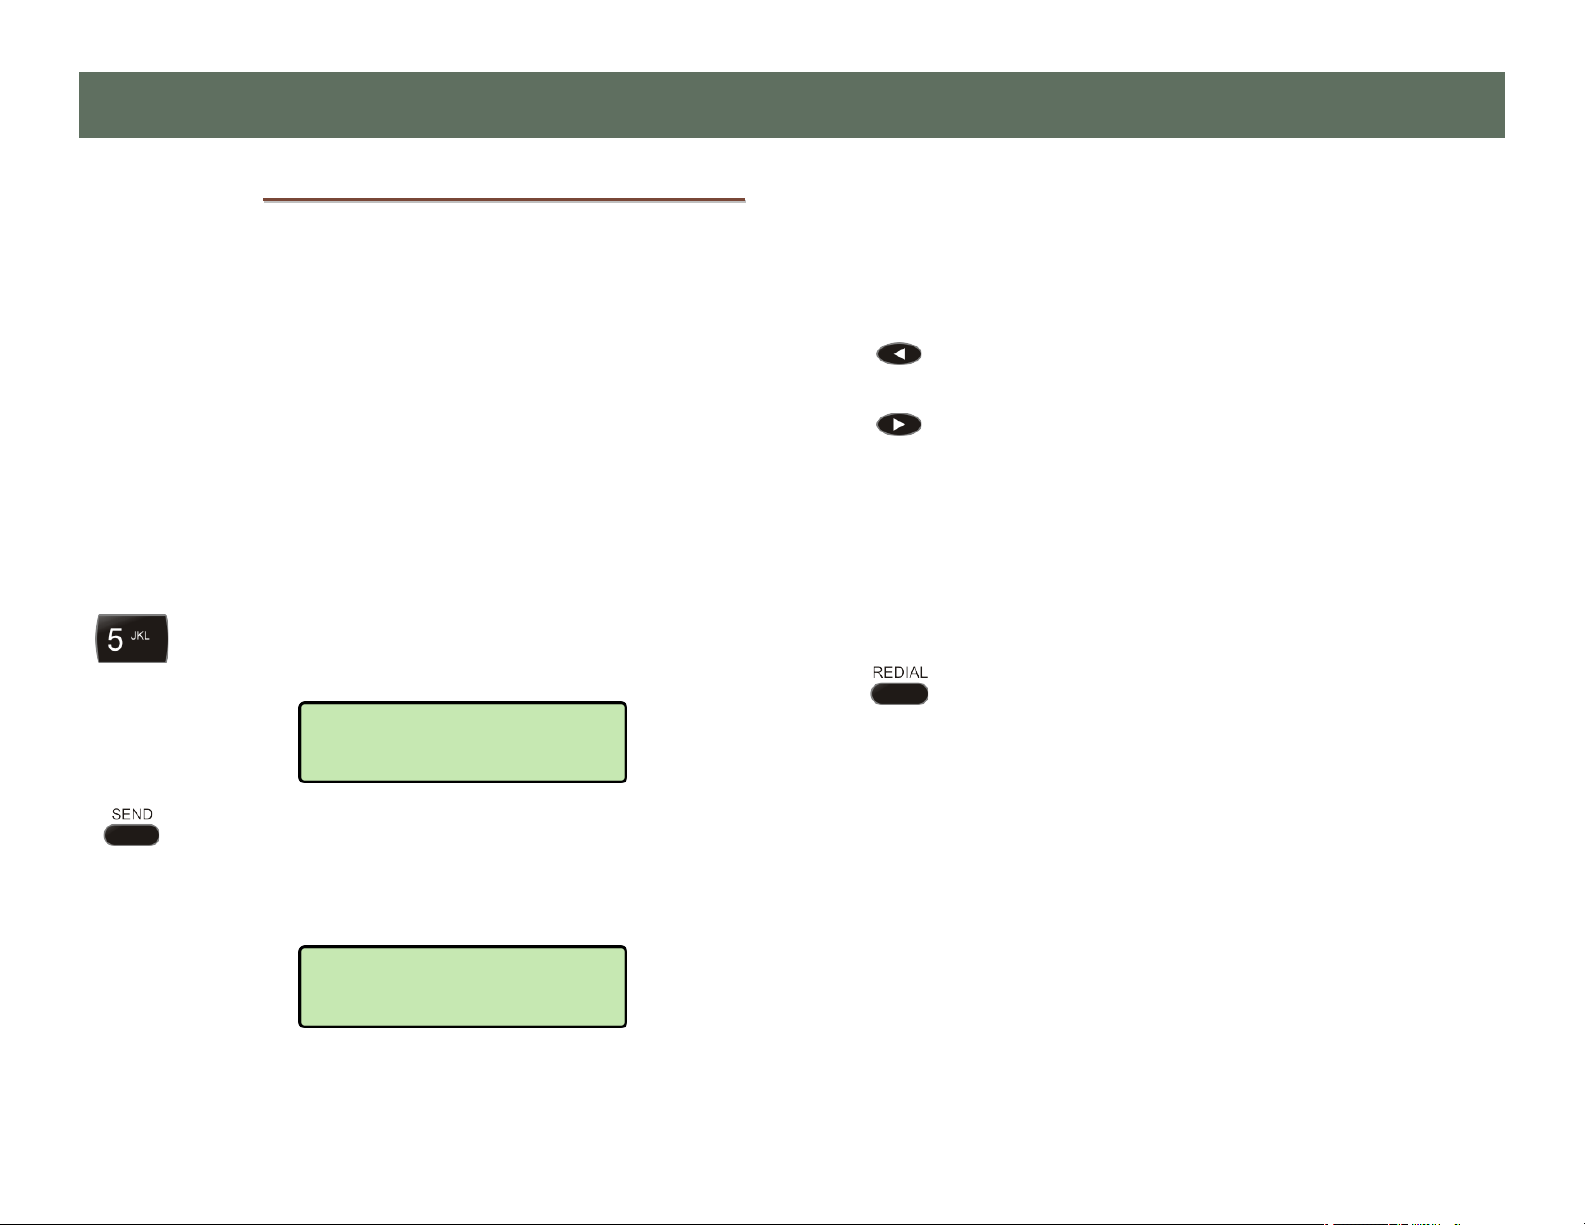
IIddllee DDiissppllaayy
1) Line ID – identifies this phone; shown when the phone can
y
receive calls. This area may also display the extension
presence state, such as "Do Not Disturb" or "Call Forward".
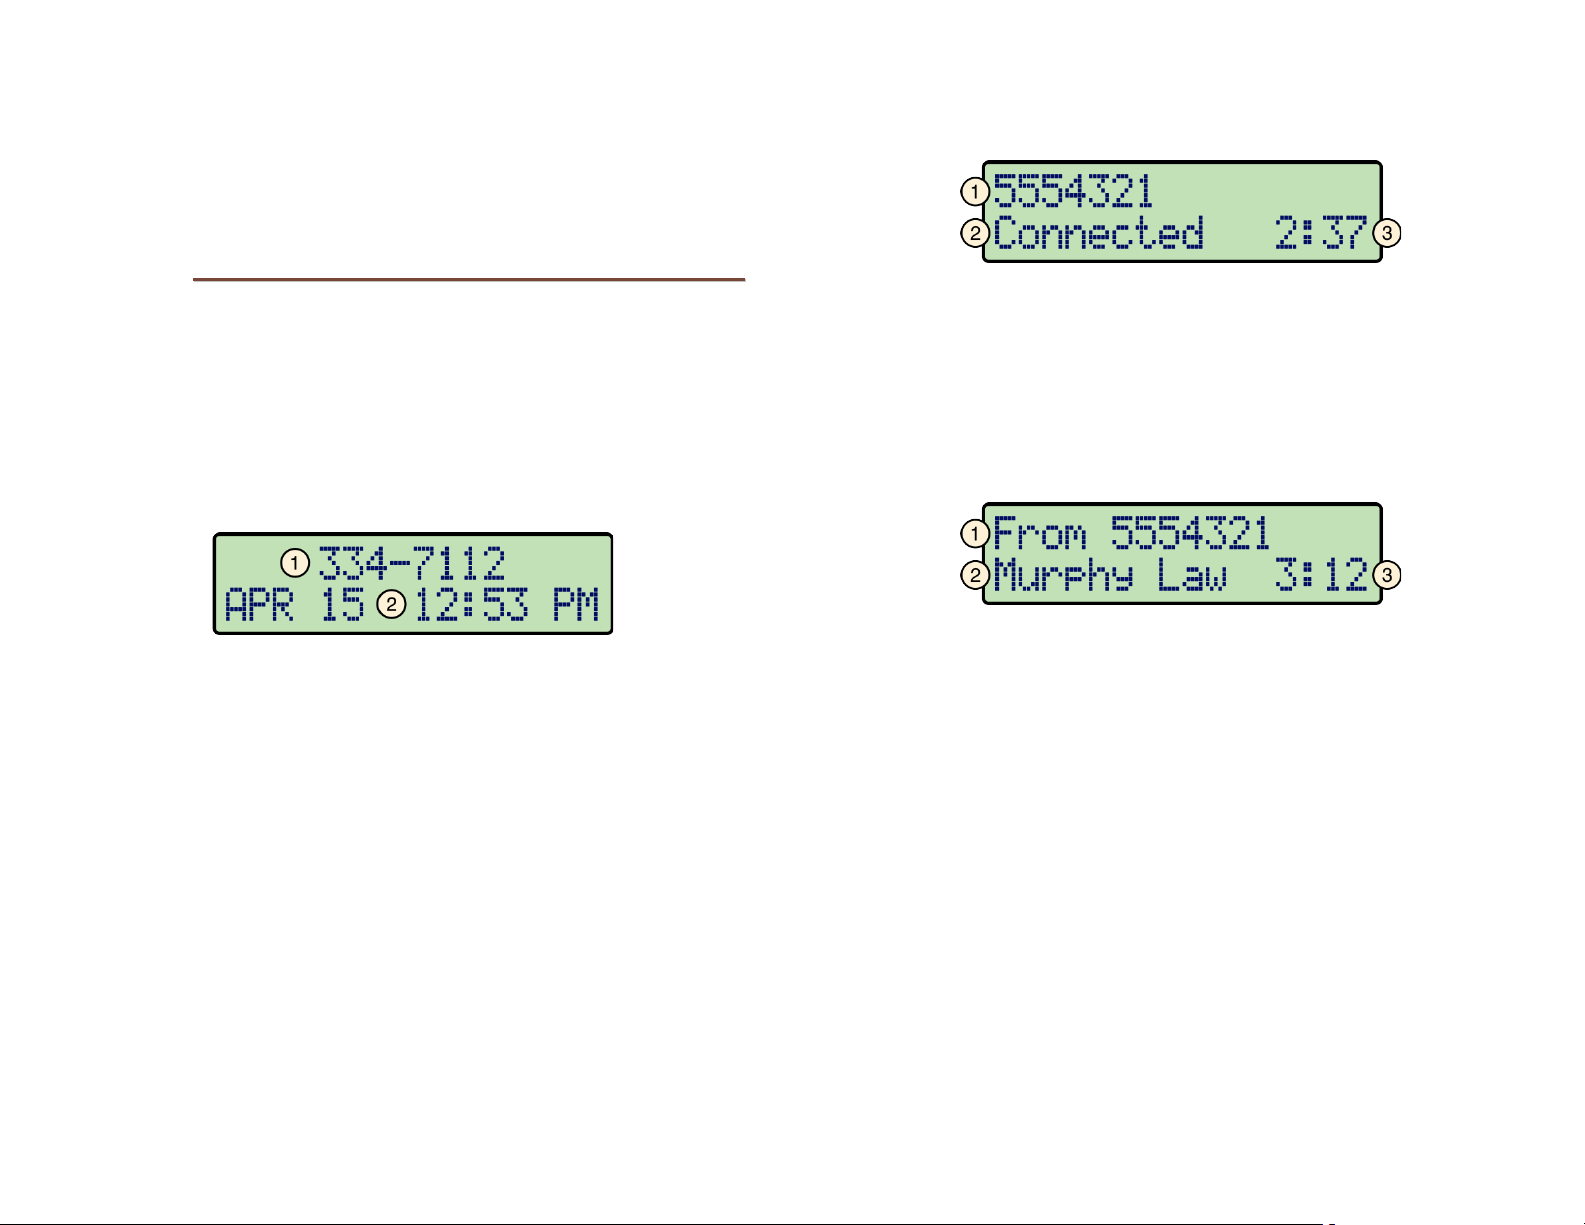
DDiissppllaayy dduurriinngg CCaallll AAccttiivviittyy
OOuuttggooiinngg CCaallll
1) Call Information – the called number, with caller ID when
available.
2) Call State – the current state of the call, such as "Connected,
"Dialing…", or "Call Held".
3) Call Timer – the total connected time for the call.
CCoonnnneecctteedd IInnccoommiinngg CCaallll
1) Call Information – the calling number.
2) Caller ID – shown when available.
3) Call Timer – the total connected time for the call.
2) Current Date and Time
OOtthheerr IInnffoorrmmaattiioonn
Other information, shown throughout this manual, is displayed
when using the Call Directory, the Call Log, and when viewing
or changing various setup options.
Teo IP Phone 4101 User Guide 5
Page 6
O
p
e
r
a
t
i
o
n
O
p
e
r
a
t
O
p
e
PPllaacciinngg CCaalllls
You can go off-hook and then dial a number, pre-dial a number
before you go off-hook, dial from the Call Log, or dial from the
Call Directory.
i
r
a
t
s
i
o
o
n
n
EEddiittiinngg DDiiaall SSttrriinnggss bbeeffoorree SSeennddiinngg
If you pre-dialed while on-hook without selecting SEND
or going off-hook, the number you entered will be
automatically cleared after 30 seconds.
PPrree--ddiiaalliinngg
While on-hook, enter a number as explained below. The
number you enter will be dialed when you go off-hook or press
SEND key.
the
To clear the number you entered without dialing, select press
the
DROP key.
DDiiaalliinngg
Enter the number to dial with the dial pad. The
flashing cursor will immediately advance to the next
character position after each keypress.
DIALING...
5551111
When all digits have been entered, press the SEND
ENTER key to complete the call. If you pre-dialed
or
before going off-hook, you can also lift the handset,
press the
to complete the call.
SPEAKER key, or press the HEADSET key
Press the Left Arrow key to delete the character to
the left of the cursor.
Press the Right Arrow key to move the cursor to the
right.
LLaasstt NNuummbbeerr RReeddiiaall
The Redial feature dials the last number that was dialed with
the dial pad or a Speed Dial key. This works for both off-hook
dialing and hot key dialing. Digits dialed after a call is
connected and cancelled numbers are not saved.
Press the
dialed.
DDiiaalliinngg ffrroomm tthhee CCaallll LLoogg ––
DDiiaalliinngg ffrroomm tthhee CCaallll DDiirreeccttoorryy ––
REDIAL key to redial the last number
rreeffeerr ttoo ppaaggee 1122..
rreeffeerr ttoo ppaaggee 1133..
5551111
Connecting
Note: If you dialed a number after going off-hook, the call will
be automatically completed after a preset timeout
(typically 10 seconds) without selecting SEND.
Teo IP Phone 4101 User Guide 6
Page 7
UUssiinngg SSppeeeedd DDiiaall KKeeyyss
Speed Dial keys automatically dial a preprogrammed number
when pressed. If you are already on a call, the digits will be
dialed using DTMF tones on that call. Use Speed Dial keys to
dial frequently-called numbers, to activate network features that
include a directory number, and to speed up dialing of access
numbers for voice mail, auto attendant, and similar systems.
Any unused multifunction key (keys labeled
configured as a Speed Dial key (page 18).
Press a Speed Dial key to dial a number.
The dialed digits will be shown in the display.
If the key has not been programmed for immediate
dialing, enter any additional digits as needed, and
then press the
AAnnsswweerriinngg CCaalllls
When a call is ringing, the display will show the calling number
(if available).
Lift the handset, press the
the
s
HEADSET key to answer the ringing call.
M1-M7) can be
SEND or ENTER key.
SPEAKER key, or press
When an auto answer call is received, you and the caller will
hear an alerting tone.
Single burst tone – 2-way call
Double burst tone – muted privacy call
If the microphone is muted and you want to speak to
the caller, press the
microphone. You can also switch to the handset or
headset.
Refer to Configuring Auto Answer (page 24) to
enable/disable Auto Answer or select the answering
mode.
HHoollddiinngg CCaalllls
TTrraannssffeerrrriinngg CCaalllls
Use this feature to transfer an active call to another party.
s
Press the HOLD key to place the currently connected
call on hold.
Press the
HOLD key again to return to the held call.
s
MUTE key to enable the
AAuuttoo AAnnsswweerr
Your phone can be configured to automatically answer certain
types of incoming calls. Intercom, ACD, and CRM click-to-dial
calls are examples of calls that can be auto answered.
You can configure your phone to answer with the
speakerphone enabled for 2-way conversations, or with the
microphone muted for privacy. The phone must be idle when
an auto answer call is received, otherwise the call will ring
normally.
Teo IP Phone 4101 User Guide 7
Press the
The current call is placed on hold, and you will hear a
new dial tone.
Dial the party you want to transfer the call to with
the dial pad or a Speed Dial key, and then press the
SEND or ENTER key.
Wait until the called party answers to announce the
call, or transfer it immediately.
Press the
TRANS key while on an active call.
TRANS key again to complete the transfer.
Page 8
CCoonnffeerreenncciinngg CCaalllls
You can initiate multi-party conference calls. Conferences are
limited to 3 parties in most cases.
CCoonnffeerreenncciinngg aa NNeeww CCaallll
Press the CONF key while on a call.
The current call is placed on hold, and you will hear a
new dial tone.
Dial the party you wish to add to the conference, and
then press the
After the added party answers, press the
to conference all parties together.
DDrrooppppiinngg tthhee LLaasstt PPaarrttyy
Press the DROP key to remove the last party added.
DDiissccoonnnneeccttiinngg ffrroomm aa CCoonnffeerreennccee
s
SEND or ENTER key.
CONF key
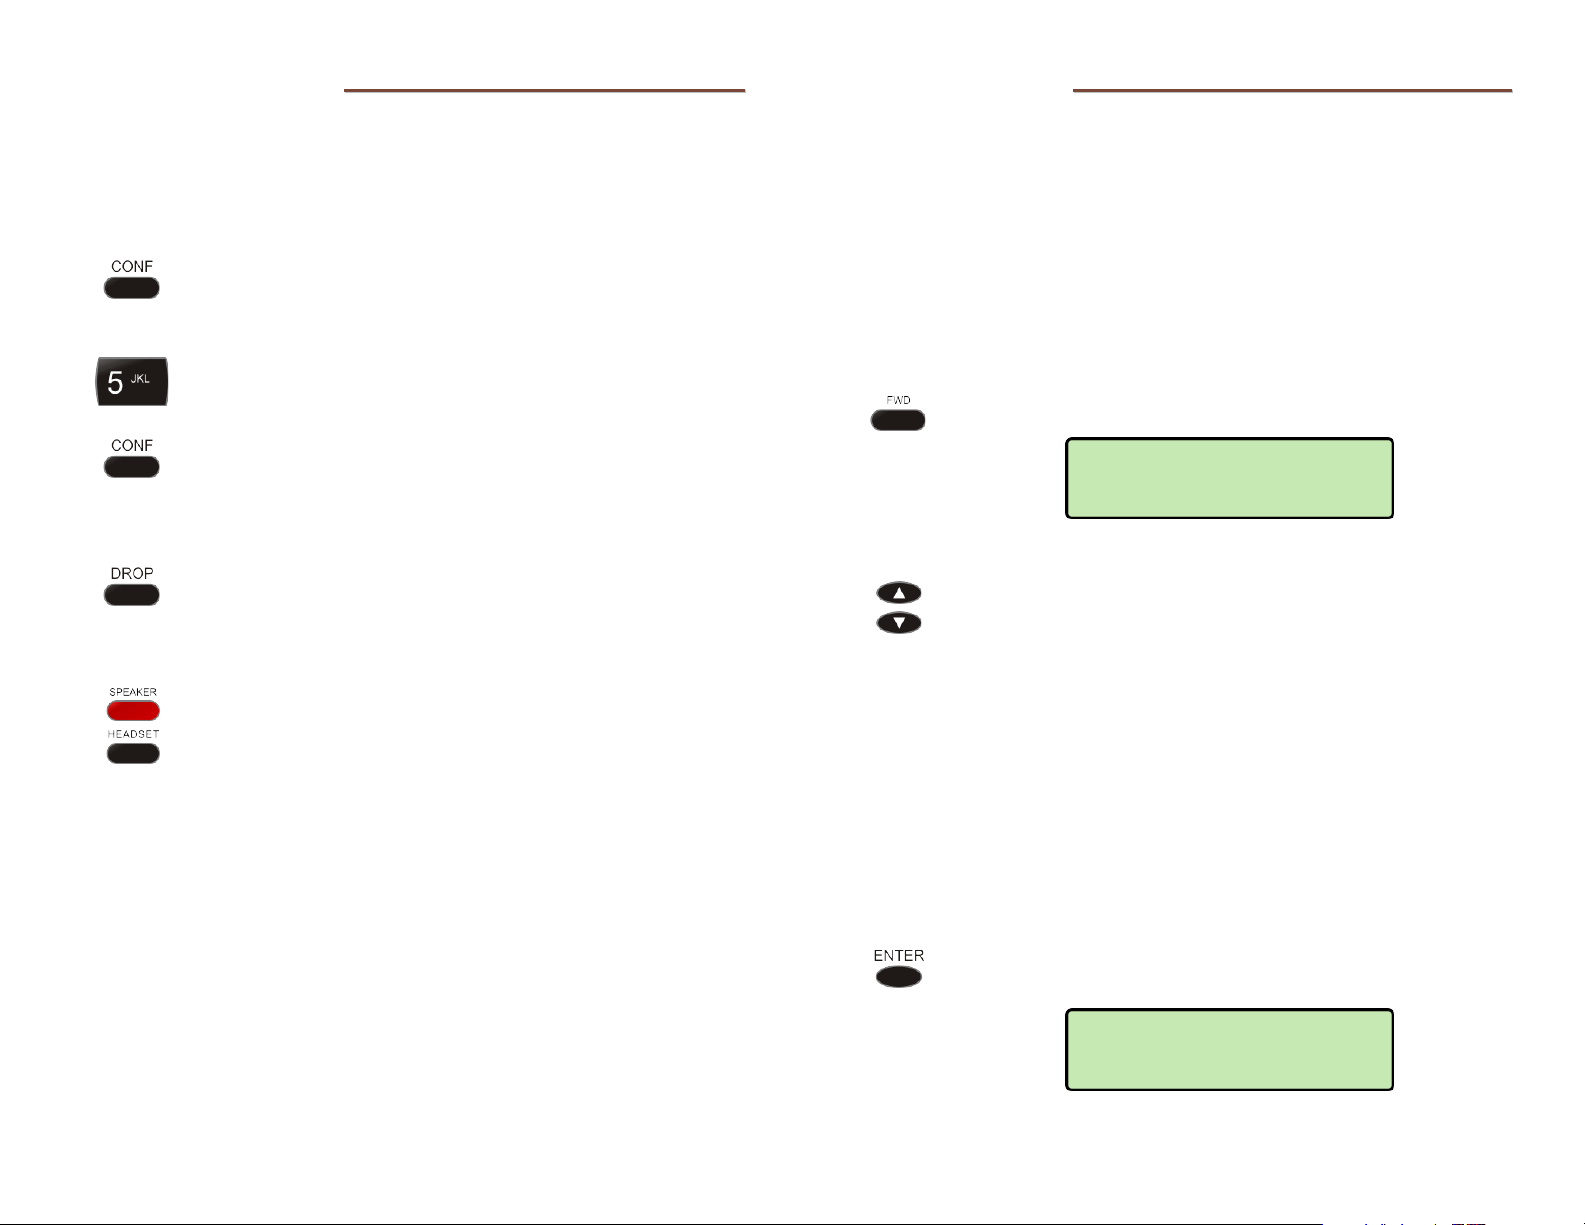
CCaallll FFoorrwwaarrddiinng
Call Forwarding forwards ringing calls to another number.
Notes: Call Forward and Presence keys are mutually exclusive;
your phone's FWD key can be configured for only one of
these options.
If your phone is connected to a Teo UC System, it will have
a Presence key. Call forwarding will be based on your
presence status.
Ringing must be enabl when using Call Forwarding.
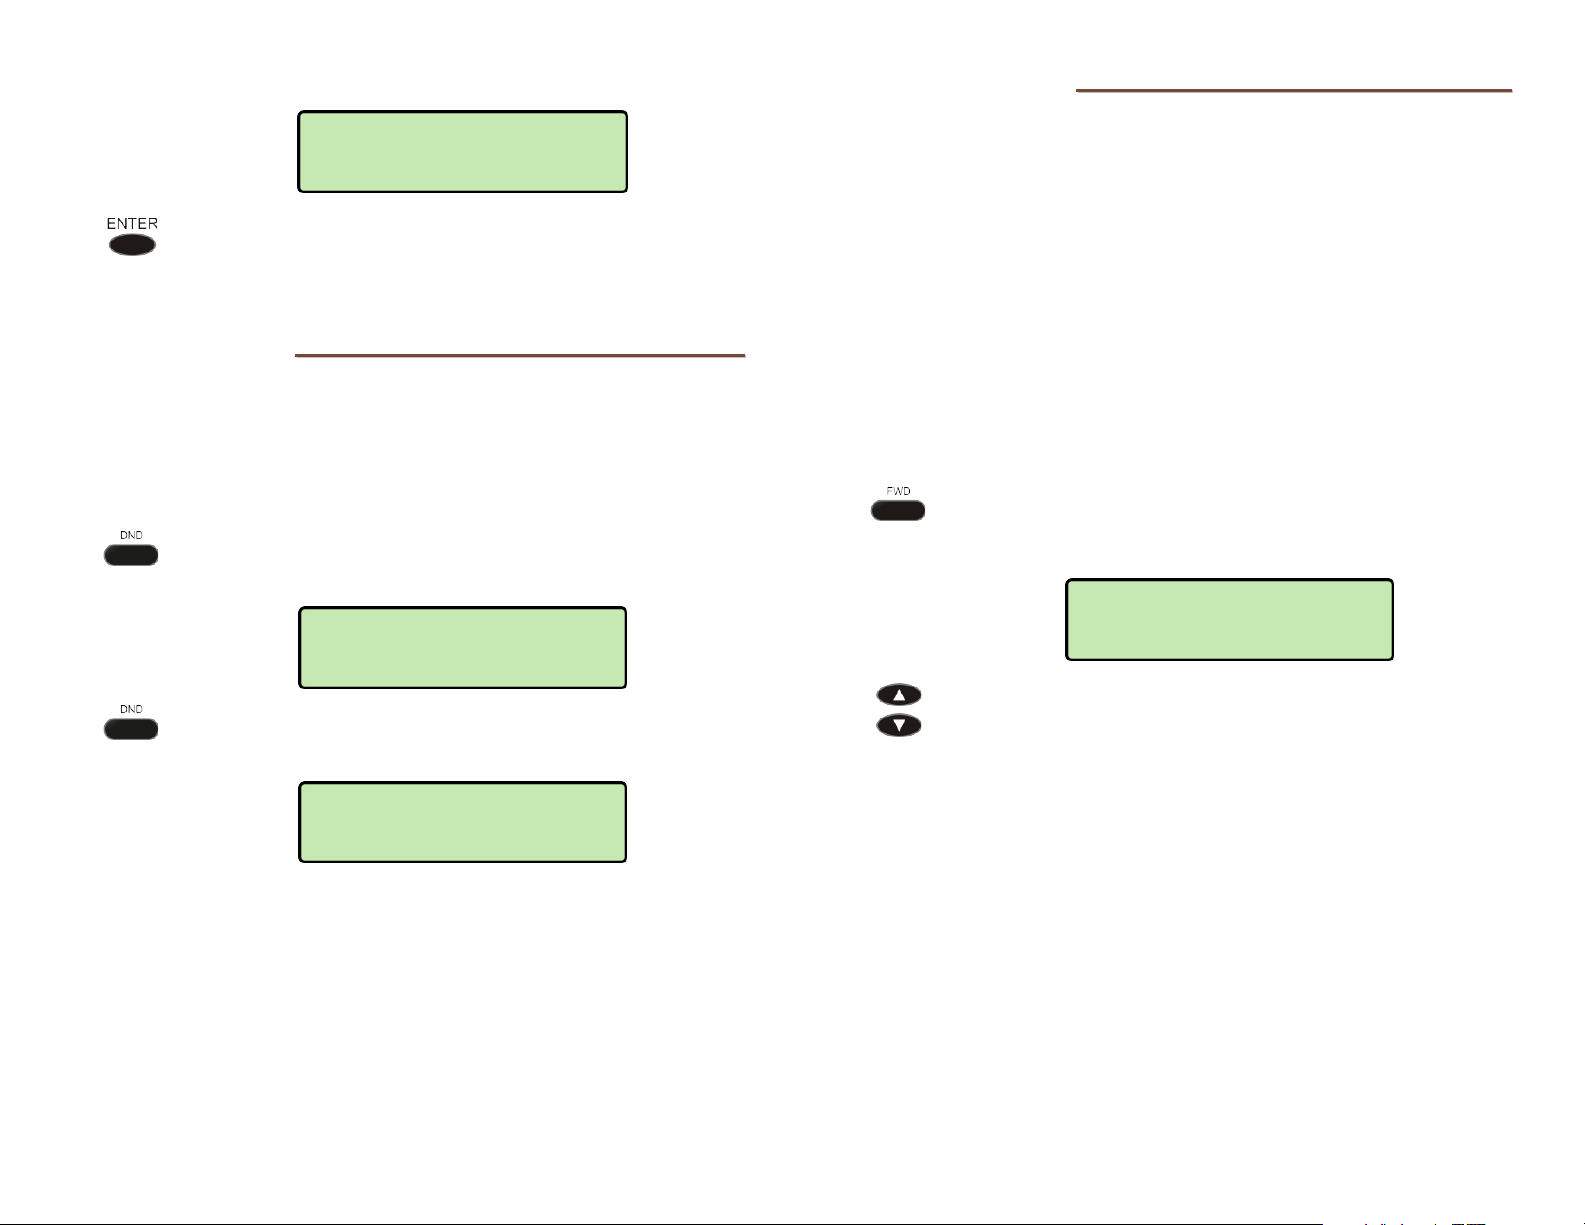
Press the
g
FWD key.
CALL FORWARD
*OFF
The ∗ indicates the current state of the feature.
Press the Up Arrow or Down Arrow key to select
which calls will be forwarded:
• ALL forwards all calls.
Replace the handset, press the SPEAKER key when
using the speakerphone, or press the
when using a headset to remove yourself from a
conference.
Other parties in the conference may or may not remain
connected, depending on system configuration.
HEADSET key
• BUSY forwards calls that ring while your
phone is busy (you are on a call).
• NO ANSWER forwards calls that are not
answered within a preset time (12 seconds).
• BUSY NO ANSWER forwards calls that ring
while your phone is busy and calls that are not
answered within a preset time.
• OFF disables call forwarding.
When the desired selection is shown, press the
ENTER key.
FORWARD TO:
Teo IP Phone 4101 User Guide 8
Page 9
Enter the number that calls will be forwarded to.
FORWARD TO:
5551233
Press the ENTER key. The display will show that Call
Forwarding is active.
DDoo NNoott DDiissttuurrb
This feature disables incoming calls. All callers will receive a
busy signal or will be routed to voice mail.
Note: If your phone is connected to a Teo UC System, calls may
be forwarded to another number, or to voice mail.
Press the
The display will show that Do Not Disturb is active.
b
DND key.
DO NOT DISTURB
APR 15 7:23 PM
To disable, press the DND key again.
PPrreesseennccee SSttaattuus
The Presence feature allows you to set your presence status in
a Teo UC System. Your status may be viewed by other users in
the system and may be used to determine routing of calls to
your extension.
Note: This feature is only available if your phone is connected to a
Teo UC System.
The
SSeettttiinngg YYoouurr PPrreesseennccee SSttaattuuss
FWD key can be configured for either Call Forward or
Presence; the Teo Presence feature includes a Call Forward
option.
Press the PRESENCE (FWD) key.
Your current presence status will be shown in the
display with an asterisk.
s
PRESENCE STATE=
*AVAILABLE
Press the Up Arrow or Down Arrow key to select a
different presence status.
The display will briefly show that Do Not Disturb is off.
DO NOT DSTRB OFF
Teo IP Phone 4101 User Guide 9
The following presence states can be selected:
• Available
• Busy
• Away
• Not Available
• Do Not Disturb
• On Holiday
• On Vacation
• After Hours
• Call Forward
Page 10

Press the ENTER key or the PRESENCE (FWD) key to
save the selected presence status.
Your presence status will be shown in the phone’s
idle display, unless your status is set to “Available”.
ON VACATION
OCT 12 11:29 AM
If you selected “CALL FORWARD”, enter the number
that calls will be forwarded to, and then press the
ENTER key.
FORWARD TO:
5551234
CALL FORWARD
OCT 12 11:29 AM
You can also set your presence status from other telephone
devices on the Teo UC System that share your line
configuration, such as the Teo Softphone, from the Teo UCM
User Portal, or through the Teo UC Mobile Client.
UUssiinngg NNeettwwoorrkk FFeeaattuurrees
In some systems, multifunction keys can be programmed to
access features provided by the telephone network, such as
Directed Call Pickup. A feature is active when the key’s red
indicator is on.
Note: Call Forwarding and Do Not Disturb are controlled locally by
the phone.
s
The presence status displayed on your phone is your “system”
presence status that can be viewed by other users.
Note: The “On The Phone” and “Offline” presence states are set
automatically by the Teo UC System, and cannot be set
manually.
Teo IP Phone 4101 User Guide 10
Page 11

1034
UUssiinngg tthhee CCaallll LLoog
WWhhaatt ddooeess tthhee CCaallll LLoogg DDoo??
The call log maintains a running list of the last 100 incoming or
outgoing calls from your telephone. You can view the caller ID
number (if available), the date and time of the call, and elapsed
time for connected calls. The call log may be protected by a
PIN.
TTyyppeess ooff CCaallllss iinn tthhee CCaallll LLoogg
Unanswered Incoming Calls – calls that rang at your telephone,
but were not answered. Forwarded calls are not logged.
Answered Incoming Calls – calls that were answered at your
telephone.
Outgoing Calls – calls originating from your telephone.
VViieewwiinngg tthhee CCaallll LLoogg
g
Press the Up Arrow or Down Arrow key to select the
type of calls that you want to view – UNANSWERED
CALLS, ANSWERED CALLS, or OUTGOING CALLS,
and then press the
The time and date of the call, and the up to 12 digits of
the calling number (incoming) or called number
(outgoing) number are shown.
ENTER key.
1034
05/18/13 09:36AM
To view a previous (older) call in the log, press the
Down Arrow key.
To return to the last displayed (newer) call in the log,
press the Up Arrow key.
VViieewwiinngg tthhee CCaallll DDuurraattiioonn
You can view the call duration for any call in the log.
Teo IP Phone 4101 User Guide 11
Press the LOG key to view or exit the Call Log.
CALL LOG:
UNANSWERED CALLS
A PIN may be set to prevent unauthorized
access to your call log. When prompted for a
PIN, enter your PIN with the dial pad. Press the
ENTER
To change or remove the PIN, please refer to
page 25.
key after entering the PIN.
After selecting the log entry, press the Right Arrow
key to display the call duration.
LENGTH=00:03:12
Page 12

ADD DIAL DIGITS:
DDiiaalliinngg aa CCaallll LLoogg EEnnttrryy
Select the call that you want to dial.
1034
05/18/10 09:36AM
TToo DDiiaall IImmmmeeddiiaatteellyy
Press the SEND key.
TToo AAdddd AAddddiittiioonnaall DDiiggiittss bbeeffoorree DDiiaalliinngg
Press the ENTER key.
1034
The cursor will be at the left end of the dial string.
Add any required additional digits, such as outside
line or long distance access codes, with the dial pad.
DDeelleettiinngg aa CCaallll LLoogg EEnnttrryy
Press the Left Arrow key.
1034
DELETE LOG ENTRY
Press the ENTER key to confirm the deletion of the
call from the log.
If you need to add digits to the end of the dial string,
press the Right Arrow key to move the cursor to the
right.
When all digits have been entered, press the
ENTER key.
or
Note: Calls are automatically dialed after a preset
timeout that has been set by your installer.
Teo IP Phone 4101 User Guide 12
SEND
Page 13

UUssiinngg tthhee CCaallll DDiirreeccttoorry
WWhhaatt iiss tthhee CCaallll DDiirreeccttoorryy??
The Call Directory is a speed dialing system that can store up to
12 entries. A name display identifies each entry. Use the
directory to store frequently-dialed numbers when additional
Speed Dial keys are not available.
DDiiaalliinngg ffrroomm tthhee CCaallll DDiirreeccttoorryy
Press the DIR key.
The first directory entry will be displayed. A # character
at the end of the phone number inidcates that the call
will be dialed immediately after the entry is selected.
y
Mike
10238#
To display a different entry, press the Up Arrow or
Down Arrow key, or press the dial pad key
corresponding to the entry.
To add or change directory entries, see page 21.
When all digits have been entered, press the
ENTER key to dial the displayed number.
or
Note: Calls are automatically dialed after a preset
timeout that has been set by your installer.
To exit the Call Directory without dialing or deleting
an entry, press the
DIR key
SEND
Jill Morton
5554321
5554321
Connecting
Press the SEND or ENTER key to select the entry for
dialing.
If the entry is not set up for immediate dialing, you
can add additional digits before dialing, such as
extension numbers or PIN codes.
Teo IP Phone 4101 User Guide 13
Page 14

UUssiinngg tthhee SSppeeaakkeerrpphhoonne
The speakerphone feature allows two-way hands-free
conversation and on-hook dialing.
Note: Your installer may disable the microphone (see Call
Monitoring), or completely disable the speakerphone.
PPllaacciinngg CCaallllss
AAnnsswweerriinngg CCaallllss
When the phone is on-hook, the speakerphone can
be activated by pressing the
pad key, a Speed Dial key, the
dialing from the Call Log or Call Directory.
Press the SPEAKER key to answer a ringing call.
e
SPEAKER key, a dial
REDIAL key, or by
SSwwiittcchhiinngg BBeettwweeeenn tthhee HHaannddsseett aanndd SSppeeaakkeerrpphhoonnee
Press the SPEAKER key to switch between the
handset and speakerphone during a call.
UUssiinngg CCaallll MMoonniittoorriinngg
Call Monitoring allows on-hook dialing and a call listen-only
mode while on hook.
Note: Your installer must enable this feature. Call Monitoring
disables the speakerphone microphone.
When Call Monitoring is active, call progress tones, dialed
digits, and the remote party can be heard through the built-in
speaker, but you can only talk to the remote party with the
handset or headset.
Press the
activate Call Monitoring. Hot key dialing and the
REDIAL key also activate Call Monitoring.
Lift the handset or press the
the remote party (and end Call Monitoring).
Press the
Monitoring.
If you are on an active call, the call will be disconnected
if the handset is on-hook.
SPEAKER key at any time during a call to
SPEAKER key to deactivate Call
HEADSET key to talk to
Lift the handset to switch from the speakerphone to
the handset.
MMuuttiinngg tthhee HHaannddsseett oorr HHeeaaddsseett MMiiccrroopphhoonne
MMuuttiinngg tthhee MMiiccrroopphhoonnee
You can mute the microphone for privacy. The other party will
not be able to hear you, but you can still hear the other party.
Press the
microphone.
Teo IP Phone 4101 User Guide 14
MUTE key to disable or enable the
You can mute the handset or headset microphone for privacy.
The other party will not be able to hear you, but you can still
hear the other party.
Press the
or headset microphone.
MUTE key to disable or enable the handset
e
Page 15

UUssiinngg aa HHeeaaddsseet
HHeeaaddsseett MMooddee OOppeerraattiioonn
With a headset, the HEADSET key is used as the hookswitch.
You can switch between the headset, handset, and
speakerphone at any time.
Your telephone can be set to use the handset/speakerphone or
headset by default (page 23). All dialing that automatically
selects a line will connect to the default device.
OOppttiimmiizziinngg tthhee PPhhoonnee ttoo MMaattcchh YYoouurr HHeeaaddsseett
Headset models may vary in their microphone sensitivities and
receive levels. Your telephone provides adjustments for
transmit and receive levels to accommodate most headsets
(page 23).
AAddjjuussttiinngg tthhee RReecceeiivvee VVoolluumme
The VOLUME key adjusts the receive volume level for the
handset, headset, or speakerphone while you are on a call.
t
e
AAddjjuussttiinngg tthhee RRiinnggeerr VVoolluumme
The VOLUME key adjusts the ringer volume when you are not
on a call.
Press the top of VOLUME key repeatedly to increase
the ringer volume, or press the bottom of the key to
reduce the ringer volume.
The telephone will ring once with the new ringer volume
setting, and the new setting will be shown briefly in the display.
When the volume is at the lowest setting, the phone will display
"RINGER OFF" when idle.
e
RINGER OFF
(VOL^ = ON)
Press the top of the VOLUME key while you are not
on a call to enable the ringer.
Press the top of the
increase the volume, or press the bottom of the key
to reduce the volume.
The telephone stores individual preset volume settings for the
handset and headset. Handset and headset volume settings
return to the programmed preset levels after a call is
completed; the speakerphone volume setting is retained
between calls. See page 23 to change the preset values.
Teo IP Phone 4101 User Guide 15
VOLUME key repeatedly to
UUssiinngg VVooiiccee MMaaiil
Voice mail services are provided by your telephone system.
Note: You must first program your voice mail access number
before this feature will work (page 20).
The Message Waiting indicator on your phone is lit bright red
when you have messages waiting.
Press the
mail system.
When finished, terminate the voice mail call by
going on-hook.
l
VOICE MAIL key to connect to your voice
Page 16

C
u
s
t
o
m
i
z
i
n
g
Y
o
u
r
P
h
o
n
e
C
u
s
t
o
m
i
z
i
n
g
Y
o
u
r
P
h
C
u
s
t
o
m
i
z
i
n
g
Y
o
u
r
UUsseerr OOppttiioonnss MMeennuu
The following personal preference options can be changed
from the User Options menu:
P
h
o
o
n
n
e
e
SETUP>USER
CLOCK
• Time and Date
• Speed Dial Keys
• Voice Mail Key
• Call Directory
• Ringing Tone
You can enter the User Options menu when the phone is idle or
during an active call.
AAcccceessssiinngg MMeennuuss
Press the MENU key.
Note: If needed, press the Up Arrow or Down Arrow
Press the
menu.
SETUP MENU:
USER
key until USER is shown.
ENTER key to select the User Options
• Off-hook Ringing
• Handset/Headset Mode
• Preset Volume Levels
• Call Log PIN
SETUP>USER
KEYS
SSeelleeccttiinngg aa MMeennuu IItteemm
If the item shown is a configuration option, the current setting
will be shown, preceded by an asterisk.
Scroll through the available items, and then press
ENTER key to select the displayed item.
the
RReettuurrnniinngg ttoo tthhee PPrreevviioouuss MMeennuu
Press the MENU key to back up one menu level. To
exit the menus without saving any changes, lift the
handset.
VOICE>MODE
*HANDSET
USER>VOICE
VViieewwiinngg AAvvaaiillaabbllee MMeennuu IItteemmss
Press the Up Arrow or Down Arrow key to scroll
through the items available in the current menu. The
current menu name is shown in the upper line of the
display, and menu items are shown in the lower line
of the display. Menu items may be selectable
options or additional menus.
Teo IP Phone 4101 User Guide 16
For a list of all selections available from the User Options
menu, see the User Options Menu Tree (page 26).
MODE
Page 17
EEnntteerriinngg AAllpphhaannuummeerriicc CChhaarraacctteerrs
Character strings are entered with the dial pad. New characters
can only be added to the right end of a text string.
Dialing strings are numeric only. Some entries, such as Call
Directory name identifiers, can include upper and lower case
characters and punctuation.
NNuummeerriicc CChhaarraacctteerr EEnnttrryy
Press a dial pad key to enter a digit. The flashing
cursor will immediately advance to the next
character position.
To enter a
until the desired character appears. After a short
delay, the cursor will advance to the next character
position. You can also immediately press a dial pad
key to enter the next character without waiting for
the delay.
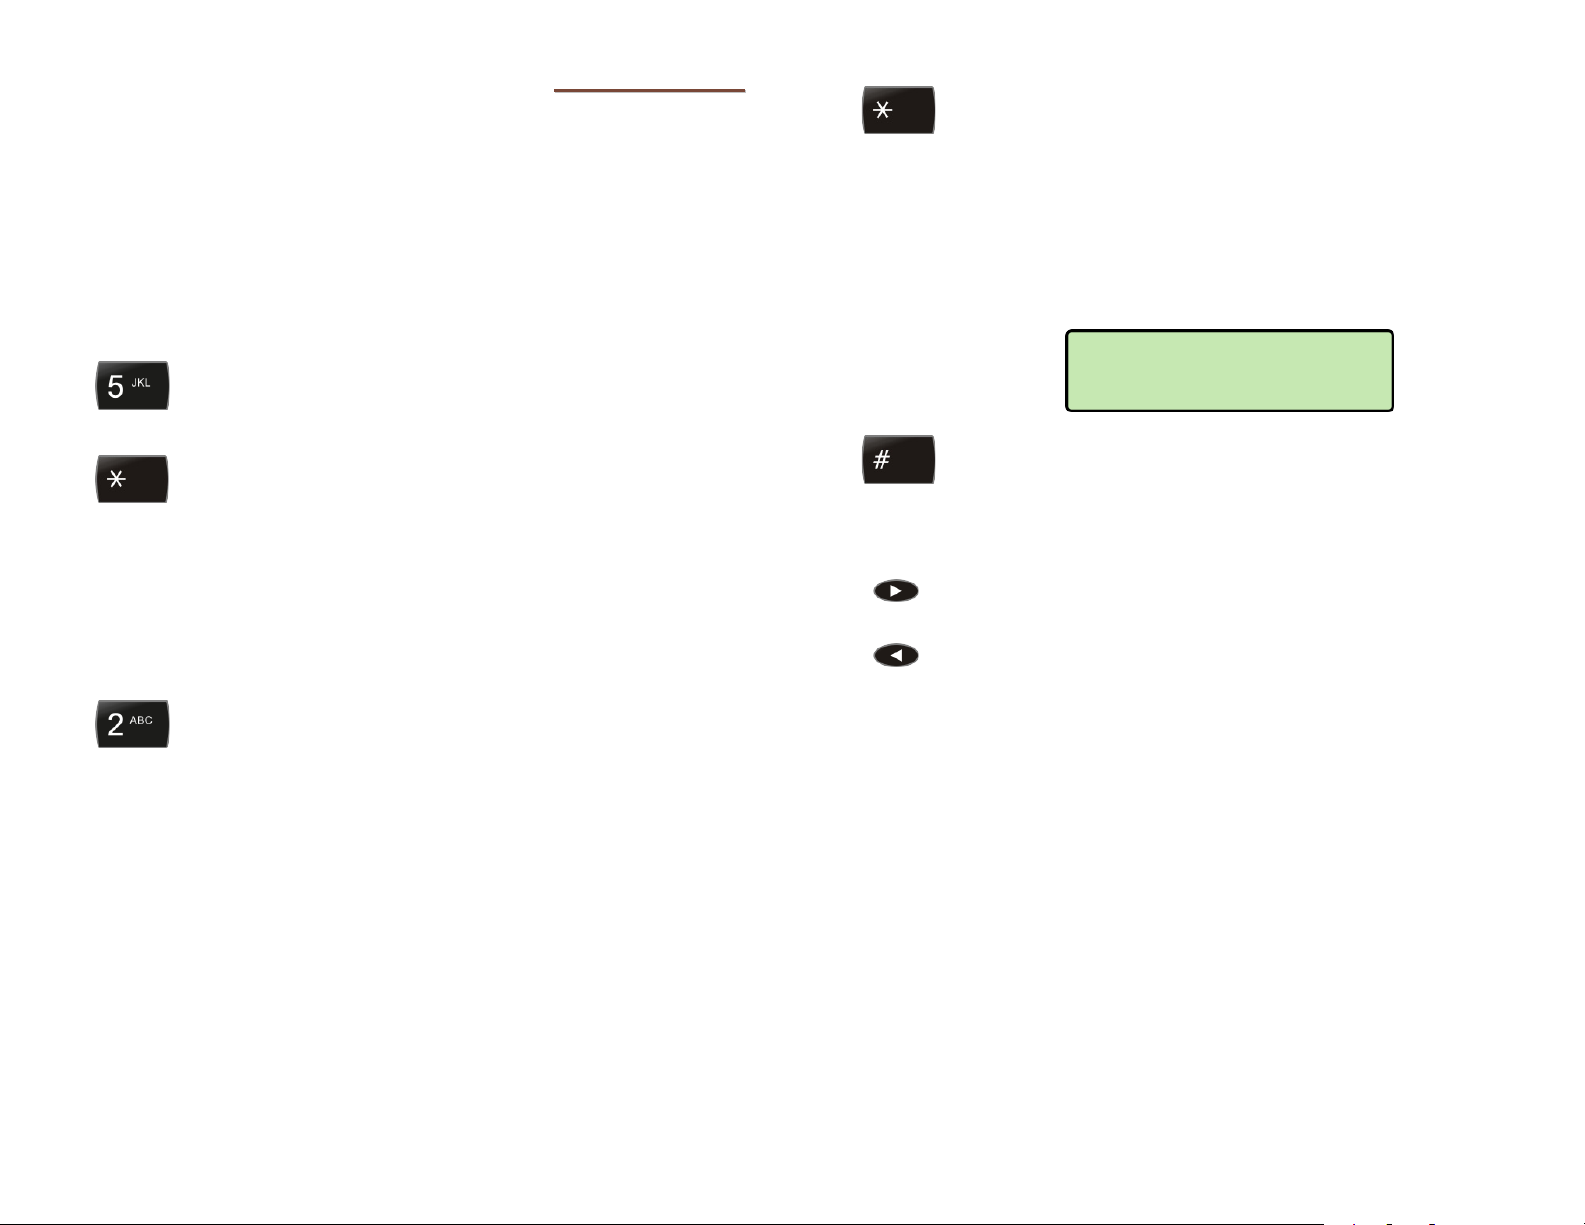
or a period, press the * key repeatedly
∗
s
To enter punctuation or special characters, press the
key to show available characters in the bottom
*
line of the display. Press the
the cursor is on the desired character. After a short
delay, the character will be added to the dial string
and the cursor will advance to the next character
position. You can also immediately press a dial pad
key to enter the next character without waiting for
the delay.
key repeatedly until
*
DIR>EDIT>NAME=
*.:+@_-/\,;"()<>
To enter a space or #, press the # key repeatedly
until the desired character appears.
EEddiittiinngg CChhaarraacctteerr SSttrriinnggss
Press the Right Arrow key to move the cursor to the
right.
UUppppeerr oorr LLoowweerr CCaassee CChhaarraacctteerrss
These characters entered are entered with dial pad
keys 2-9. Press a key repeatedly until the desired
character appears. After a short delay, the cursor will
advance to the next character position. For example,
repeatedly pressing dial pad key 7 produces these
characters:
7 p q r s P Q R S 7
Teo IP Phone 4101 User Guide 17
…
Press the Left Arrow key to delete the character to
the left of the cursor.
Page 18

SSeettttiinngg tthhee TTiimmee aanndd DDaatte
Note: If server-based (SNTP) automatic time update is configured
on your phone by your installer, manual time and date
settings will be overwritten.
From the User Options menu, select CLOCK.
MENU → USER → CLOCK)
(
The current time and date will be displayed, with the
cursor flashing on the first digit.
e
09-15-12 03:36PM
Enter new digits for the date and time with the dial
pad. The cursor will advance automatically as each
digit is entered.
Time must be entered in 12-hour format.
If you need to make corrections, use the Left or Right
Arrow key to move the cursor.
SSeettttiinngg UUpp SSppeeeedd DDiiaall KKeeyys
Speed Dial keys facilitate dialing for voice mail, auto attendant,
and similar applications. Pressing a Speed Dial key with no
active call will originate a call and dial the selected number. If a
Speed Dial key is pressed while connected on an active call, the
speed dial number is dialed on that call; this can be used to
send digits to an automated attendant or voice mail system.
Speed dialing can be used in conjunction with manual dialing.
Any unused multifunction key can be configured as a Speed
Dial key.
Note: Multifunction keys can also be used as feature activators;
they must be programmed by your installer.
Dialing strings can include dialing pauses.
From the User Options menu, select KEYS.
MENU → USER → KEYS)
(
s
USER>KEYS
Press the Up Arrow or Down Arrow key to change
AM/PM.
When all changes have been made, press the
key to return to the User Options menu.
ENTER
SELECT A KEY
Press a multifunction key.
Any existing speed dial number will be shown in the
display.
M1>SPEED DIAL
§
Enter the speed dial string with the dial pad.
M1>SPEED DIAL
5553491000
Teo IP Phone 4101 User Guide 18
Page 19

““SSmmaarrtt”” PPaauusseess
Pauses are entered with the HOLD key, and are
shown in the display as a
pause in a dial string will delay dialing until the call
is answered; additional pauses delay dialing for one
second per pause. Enter multiple pauses to increase
the delay time.
You can use a smart pause to automatically enter a
PIN code after the called number answers.
M1>SPEED DIAL
5553491000¥1234#
IImmmmeeddiiaattee oorr EEddiittaabbllee DDiiaalliinngg
For one-touch dialing, enter a # character at the end
of the dial string. The string will be dialed
immediately when the Speed Dial key is pressed.
A Speed Dial key can be used in conjunction with
manual dialing. If you want to enter more digits after
pressing the Speed Dial key, or edit the dial string
before dialing,
setting up the Speed Dial key.
do not
include the # character when
¥ character. The first
UUnnuusseedd KKeeyyss
Any Speed Dial key can be changed to an Unused key by
clearing the dialing string.
Press a Speed Dial key.
Any existing speed dial number will be shown in the
display.
M1>SPEED DIAL
5553491000#
Press the Right Arrow key repeatedly to move the
cursor to the end of the dial string.
Press the Left Arrow key repeatedly to delete all
digits.
M1>SPEED DIAL
§
Press the ENTER key to return to the key selection
menu. The key is converted to an Unused key.
When all digits have been entered, press the ENTER
key.
Teo IP Phone 4101 User Guide 19
Page 20

SSeettttiinngg UUpp tthhee VVooiiccee MMaaiill KKeeyy
KEYS>VOICE MAIL
The VOICE MAIL key is used to speed dial your voice mail
system.
Note: The
VMAIL key must be programmed to dial the voice mail
access number in order for this feature to work properly.
“Smart” pauses and PIN codes can be included in the
number.
From the User Options menu, select KEYS.
MENU → USER → KEYS)
(
USER>KEYS
SELECT A KEY
Press the VOICE MAIL key.
KEYS>VOICE MAIL
§
Any existing voice mail access number will be shown in
the display.
95551432¥1234
When all digits have been entered, press the
key.
ENTER
Enter the voice mail access number with the dial
pad, 128 digits maximum.
A # character at the end of the dial string is not
required for immediate dialing; the voice mail key
always dials immediately when pressed.
Pauses are entered with the HOLD key, and are
shown in the display as a
pause in a dial string will delay dialing until the call
is answered; additional pauses delay dialing for one
second per pause. Enter multiple pauses to increase
the delay time.
You can use a pause to automatically enter a voice
mail PIN code after the voice mail system answers.
Teo IP Phone 4101 User Guide 20
¥ character. The first
Page 21

SSeettttiinngg UUpp tthhee CCaallll DDiirreeccttoorryy
Up to 12 telephone numbers can be stored in the Call Directory.
Directory entries are similar to Speed Dial keys, but are
accessed from a display menu. Place your most frequentlydialed numbers on Speed Dial keys, if available, and put other
numbers in the directory.
From the User Options menu, select EDIT
DIRECTORY.
MENU → USER → EDIT DIRECTORY)
(
The first directory entry will be displayed.
For example, repeatedly pressing dial pad key 7
produces these characters:
7 p q r s P Q R S 7
Spaces and punctuation can be entered with the #
*
keys.
and
After a short delay, the flashing cursor will advance
to the next character. Press the Right Arrow key if
you want to manually move to the next character.
If you need to make corrections while entering the
name, press the Left Arrow key to delete the previous
character.
…
To display a different entry, press the Up Arrow or
Down Arrow key, or press the dial pad key
corresponding to the entry.
Press the ENTER key to select the displayed entry for
editing.
DDiissppllaayy NNaammee
Select NAME to edit the display name.
Using the dial pad, enter a name to identify the
directory entry (13 characters maximum). Press the
dial pad key repeatedly until the desired number,
lowercase letter, or upper case letter appears in the
display (page 17).
01=Mike
10238
03=Jill Morton
5554321
DIRECTORY>EDIT
NAME
DIR>EDIT>NAME=
Jill Morton
Press the ENTER key when finished entering the
name.
DDiiaalliinngg SSttrriinngg
Select NUMBER to edit the dialing string.
Enter up to 128 digits with the dial pad.
Enter a # character at the end of the dial string to
allow immediate dialing when the directory entry is
selected.
If you need to make corrections while entering the
number, press the Left Arrow key to delete the
previous digit.
DIR>EDIT>NUMBER=
5554321#
Press the ENTER key when finished entering the
dialing string.
Press the
MENU key to return to key selection.
Teo IP Phone 4101 User Guide 21
Page 22

PPeerrssoonnaall RRiinnggiinngg OOppttiioonnss
OOffff--HHooookk RRiinnggiinngg OOppttiioonnss
RRiinnggiinngg TToonnee
Your telephone has six distinct ringing tones available. In office
environments with multiple phones, unique ringing tones for
each phone can help identify ringing stations.
From the User Options menu, select RING.
MENU → USER → RING)
(
USER>RINGING
TONE
Select TONE.
RINGING>TONE
5
The current ringing tone selection will be displayed.
Press the Up Arrow or Down Arrow key, or press a
dial pad key (1-6) to select a ringing tone and hear a
sample of the tone.
Incoming calls ring at a muted volume level when you are offhook on another call. You can select normal ringing or a single
burst of the ringing pattern.
Select OFF HOOK.
The current off-hook ringing setting will be displayed.
RINGING>OFF HOOK
*SINGLE BURST
Select NORMAL or SINGLE BURST to change the
setting.
When finished, press the
Ringing menu.
ENTER key to return to the
RINGING>TONE
6
When finished, press the ENTER key to return to the
Ringing menu.
Teo IP Phone 4101 User Guide 22
Page 23

VOICE>MODE
HHaannddsseett//HHeeaaddsseett CCoonnffiigguurraattiioon
n
PPrreesseett VVoolluummee LLeevveellss
VVooiiccee MMooddee
Select default handset/speakerphone or headset operation with
this option. The voice mode determines which device will be
used when a line is automatically selected.
The handset, headset, and speakerphone can be used in either
mode by lifting the handset, pressing the
pressing the
HEADSET key, or
SPEAKER key.
From the User Options menu, select VOICE.
(
MENU → USER → VOICE)
USER>VOICE
MODE
Select MODE.
VOICE>MODE
*HANDSET
Select HANDSET or HEADSET to select handset or
headset mode.
Preset volume levels may be set for handset and headset, and
speakerphone operation. Change these settings to match a
particular headset’s transmission characteristics, provide higher
preset volume levels for hearing impaired users, or to suit
personal preference. Receiver volume levels set with the
Volume
telephone is reset to the preset volume level whenever a call is
originated or answered.
Separate preset transmit and receive levels are stored for
handset and headset modes. There is no receive volume preset
for the speakerphone; the phone retains the speakerphone
volume set with the
key are used only for the duration of a call. The
VOLUME key between calls.
Select VOLUME.
VOICE>VOLUME
HANDSET
Select MODE.
*HANDSET
When finished, press the
Voice menu.
Teo IP Phone 4101 User Guide 23
ENTER key to return to the
Select HANDSET, HEADSET, or SPEAKER
TRANSMIT (speakerphone).
If you selected HANDSET or HEADSET, now select
RECEIVE or TRANSMIT.
The display will show the current preset volume setting.
HEADSET>RECEIVE
[¦¦¦¦¦ ]
Press the Up Arrow or Down Arrow key to change
the volume setting.
Press the ENTER key to return to the previous menu.
Page 24

USER>AUTO ANSWER
VOLUME>RESET?
RReesseett ttoo DDeeffaauullttss
To set all receive and transmit preset volume levels
to the factory defaults, select RESET, and then select
YES to confirm).
Select SET TO DEFAULT or DON'T CHANGE.
SET TO DEFAULT
CCoonnffiigguurriinngg AAuuttoo AAnnsswweer
The phone can be configured to automatically answer a call
when the phone is idle (page 7). Criteria for identifying an Auto
Answer call request are configured by your system
administrator. Calls can be answered in 2-way speakerphone
mode or with the microphone muted. Applications for the Auto
Answer feature include paging, intercom calls, ACD calls, and
dialing or answering from computer-based applications.
From the User Options menu, select KEYS.
MENU → USER → AUTO ANSWER)
(
The current Auto Answer state is shown in the
bottom line of the display.
r
USER>AUTO ANSWER
*DISABLED
To change the Auto Answer state, select ENABLED
2-WAY, ENABLED w/MUTE, or DISABLED.
Teo IP Phone 4101 User Guide 24
*ENABLED 2-WAY
USER>AUTO ANSWER
*ENABLED w/MUTE
When disabled, auto answer calls will ring normally
with a distinctive ring pattern.
Page 25

SSeettttiinngg aa CCaallll LLoogg PPIIN
You can set a PIN to prohibit unauthorized access to your Call
Log.
From the User Options menu, select PIN.
MENU → USER → PIN)
(
N
LOG PIN
SET
If a PIN is currently set, the display will prompt you to
enter your PIN prior to making changes.
CCrreeaattiinngg//CChhaannggiinngg YYoouurr PPIINN
Select SET.
NEW PIN:
§
Enter a new 4 to 20 digit PIN with the dial pad.
Each entered character will be briefly shown in the
display.
Repeat the PIN when prompted to verify the new
entry.
VERIFY PIN:
*******
Press the ENTER key.
“PIN SET” will be displayed to confirm the new PIN.
PIN SET
Record your PIN for future reference.
RReemmoovviinngg tthhee PPIINN
Select CLEAR.
“PIN CLEARED” will be displayed to confirm that the
PIN has been removed.
PIN CLEARED
NEW PIN:
*******
Press the ENTER key.
Teo IP Phone 4101 User Guide 25
WWhhaatt ttoo ddoo iiff yyoouu lloossee yyoouurr PPIINN
Your system administrator must reset the phone to remove the
Call Log PIN.
Resetting will clear all Call Log entries, programmed numbers,
PINs, and settings in your phone.
Page 26

U
s
e
r
O
p
t
i
o
n
s
M
e
n
u
T
r
e
e
U
s
e
r
O
p
t
i
o
n
s
M
e
n
u
T
U
s
e
r
O
p
t
i
o
n
s
M
e
n
u
r
T
e
e
e
e
r
USER (User Options)
CLOCK (Set Time and Date) ............................................. page 18
(Speed Dial Keys) .................................................... page 18
KEYS
EDIT DIRECTORY
RINGING
VOICE (Handset Options)
(Personal Ringing)
TONE
1 - 6
OFF HOOK (Off-Hook Ringing) ................................. page 22
NORMAL
SINGLE BURST
MODE
HANDSET
HEADSET
VOLUME ................................................................. page 23
HANDSET
HEADSET
SPEAKER TRANSMIT (Speakerphone)
RESET
(Call Directory) .................................... page 21
(Ringing Tone) ............................................... page 22
(Voice Mode) ................................................ page 23
RECEIVE
TRANSMIT
RECEIVE
TRANSMIT
(Reset to Default Volume Levels)
PIN (Call Log PIN) ............................................................ page 25
(Set New PIN)
SET
CLEAR
AUTO ANSWER .............................................................. page 24
DISABLED
ENABLED 2-WAY
ENABLED w/MUTE
Teo IP Phone 4101 User Guide 26
(Remove PIN)
(No Auto Answer)
(Answer with Microphone Enabled)
(Answer with Microphone Disabled)
Page 27

W
a
r
r
a
n
t
y
W
a
r
r
a
W
a
TTeeoo PPrroodduucctt WWaarrrraannttyy
For a period of one year from date of dealer purchase, but not
to exceed 16 months from date of manufacture, Teo
Technologies, Inc. (Teo) warrants its products to be free from
defects in material and workmanship under conditions of
normal use and service. Teo shall, at its option, repair or
replace any defective product which, in its opinion, has not
been misused, damaged, or improperly installed.
Repair or replacement under this warranty will be performed at
Teo's factory. Authorization must be obtained from Teo prior to
returning a product for repair. Freight must be prepaid for all
units returned to Teo. Units repaired under warranty will be
shipped UPS Ground (or equivalent), freight prepaid by Teo.
Products that are older than the warranty period, but less than 7
years old, or still manufactured by Teo may be repaired at the
factory for a flat rate charge. Repaired out-of-warranty units are
warranted for 90 days from the date of repair.
n
r
r
a
n
t
y
t
y
The repair or replacement of a product under this warranty
represents the entire obligation of Teo; Teo shall not be liable
for any special or consequential damages resulting from or
caused by any defect, failure, incapacity or malfunction of any
of its products.
The foregoing express warranty is in lieu of all other
warranties, express or implied, including but not limited
to any implied warranty of merchantability, fitness, or
adequacy for any purpose or use, quality, productiveness
or capacity; Teo, to the extent permitted by law, hereby
disclaims all such other warranties.
Teo IP Phone 4101 User Guide 27
Page 28

R
e
g
u
l
a
t
o
r
y
S
t
a
t
e
m
e
n
t
s
R
e
g
u
l
a
t
o
r
y
S
t
a
t
e
m
R
e
g
u
l
a
t
o
r
y
S
t
a
t
e
m
e
e
n
n
t
s
t
s
IImmppoorrttaanntt SSaaffeettyy IInnssttrruuccttiioonnss
1. Never install telephone wiring during a lightning storm.
2. Never install telephone jacks in wet locations unless the jack is
specifically designed for wet locations.
3. Never touch uninsulated telephone wires or terminals unless the
telephone line has been disconnected at the network interface.
4. Use caution when installing or modifying telephone lines.
When using your telephone equipment, basic safety precautions should
always be followed to reduce the risk of fire, electric shock and injury to
persons, including the following:
5. Read and understand all instructions.
6. Follow all warnings and instructions marked on the product.
7. Unplug the line cord before cleaning. Do not use liquid or aerosol
cleaners. Use a damp cloth for cleaning.
8. Do not use this product near water, for example, near a bathtub, wash
bowl, kitchen sink, or laundry tub, in a wet basement, or near a
swimming pool.
9. Do not place this product on an unstable cart, stand, or table. The product
may fall, causing serious damage to the product.
10. This product should be operated only from the type of power source
indicated on the marking label. If you are not sure of the type of power
supply to your home, consult your dealer or local power company.
11. Do not allow anything to rest on the power cord. Do not locate this
product where the cord will be abused by persons walking on it.
12. Do not overload wall outlets and extension cords as this can result in the
risk of fire or electric shock.
13. Never push objects of any kind into this product through any openings as
they may touch dangerous voltage points or short out parts that could
result in a risk of fire or electric shock. Never spill liquid of any kind on
this product.
14. To reduce the risk of electric shock, do not disassemble this product, but
take it to a qualified serviceman when some service or repair work is
required. Opening or removing covers may expose you to dangerous
voltages or other risks. Incorrect reassembly can cause electric shock
when the appliance is subsequently used.
15. Unplug this product from the wall outlet and refer servicing to qualified
service personnel under the following conditions:
A. When the power supply cord or plug is damaged or frayed.
B. If liquid has been spilled into the product.
C. If the product has been exposed to rain or water.
D. If the product does not operate normally by following the operating
instructions. Adjust only those controls that are covered by the
operating instructions, because improper adjustment of other controls
may result in damage and will often require extensive work by a
qualified technician to restore the product to normal operation.
E. If the product has been dropped or the case has been damaged.
F. If the product exhibits a distinct change in performance.
16. Avoid using a telephone (other than a cordless type) during an electrical
storm. There may be a remote risk of electric shock from lightning.
17. Do not use the telephone to report a gas leak in the vicinity of the leak.
SSAAVVEE TTHHEESSEE IINNSSTTRRUUCCTTIIOONNSS
FFCCCC RReeqquuiirreemmeennttss
The Teo 4101 is hearing-aid compatible (HAC) per Section 68.316, FCC Rules
and Regulations.
This equipment has been tested and found to comply with the limits for a
Class A digital device, pursuant to Part 15 of the FCC Rules. These limits are
designed to provide reasonable protection against harmful interference when
the equipment is operated in a commercial environment. This equipment
generates, uses, and can radiate radio frequency energy and, if not installed
and used in accordance with the instruction manual, may cause harmful
interference to radio communications. Operation of this equipment in a
residential area is likely to cause harmful interference in which case the user
will be required to correct the interference at his own expense.
Teo IP Phone 4101 User Guide 28
Page 29

Teo IP Phone 4101 User Guide 29
Page 30

Teo Technologies, Inc.
11609 49th Place West
Mukilteo, WA 98275-4255
(425) 349-1000
(800) 524-0024
(425) 349-1010 Fax
www.teotech.com
© 2014 Teo Technologies, Inc. All rights reserved.
 Loading...