

Page 1
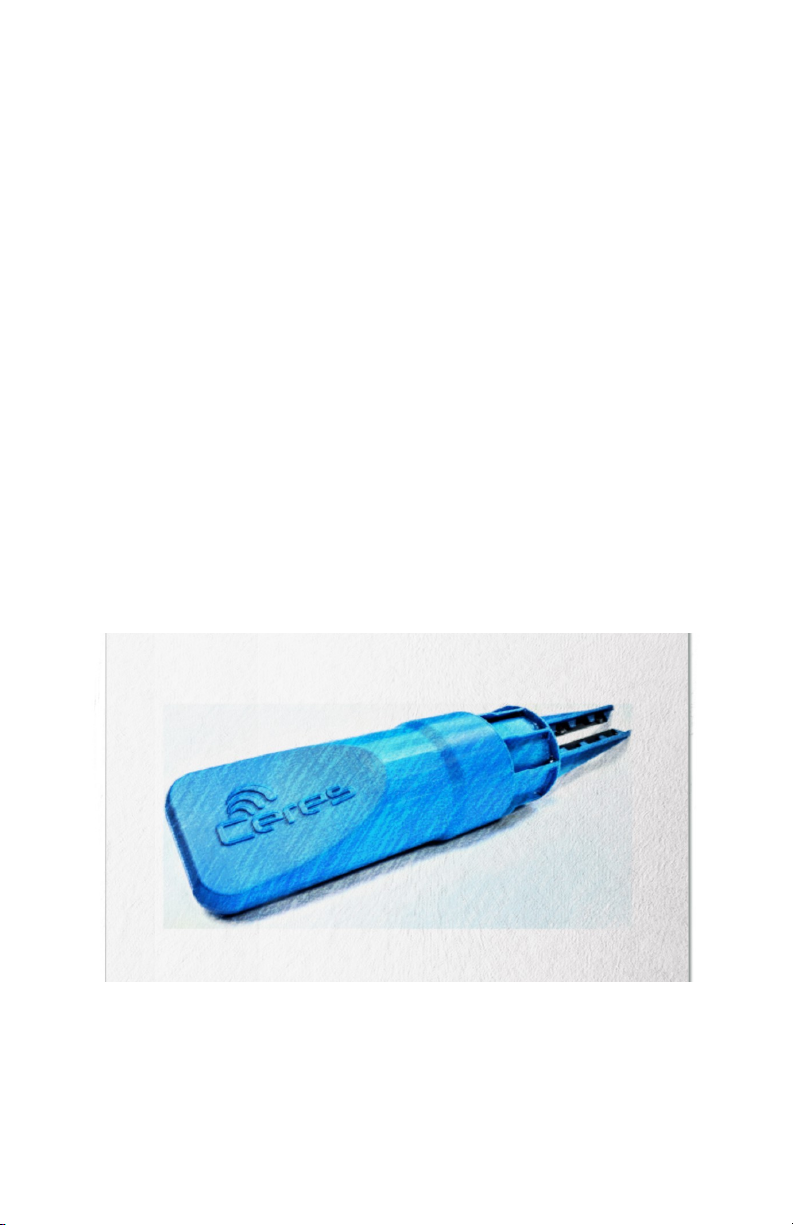
Ceres CS1
Soil Sensor
TENETICS, LLC
Advanced Wireless for Agriculture
Page 2

Table of Contents
Overview.......................................................................................................................... 1
Sensor Controls............................................................................................................. 1
Adding a New Sensor.................................................................................................. 2
Location and Deployment.........................................................................................2
Advanced Installation................................................................................................. 3
Link Test........................................................................................................................... 3
Storage.............................................................................................................................. 3
Un-pairing....................................................................................................................... 3
Specifications................................................................................................................. 4
FCC Notice....................................................................................................................... 5
Page 3
Getting Started
Congratulations on selecting Ceres for your precision
agriculture needs. This manual will help you get your CS1
Soil Sensor installed and running in less than 5 minutes.
Overview
The CS1 Soil Sensor measures soil moisture
and temperature levels every 15 minutes and
transmits them to a Ceres Gateway using
proprietary long-range wireless technology.
Ceres Gateways forward your data to secure
online storage which can be accessed any
time using your smart-phone or computer.
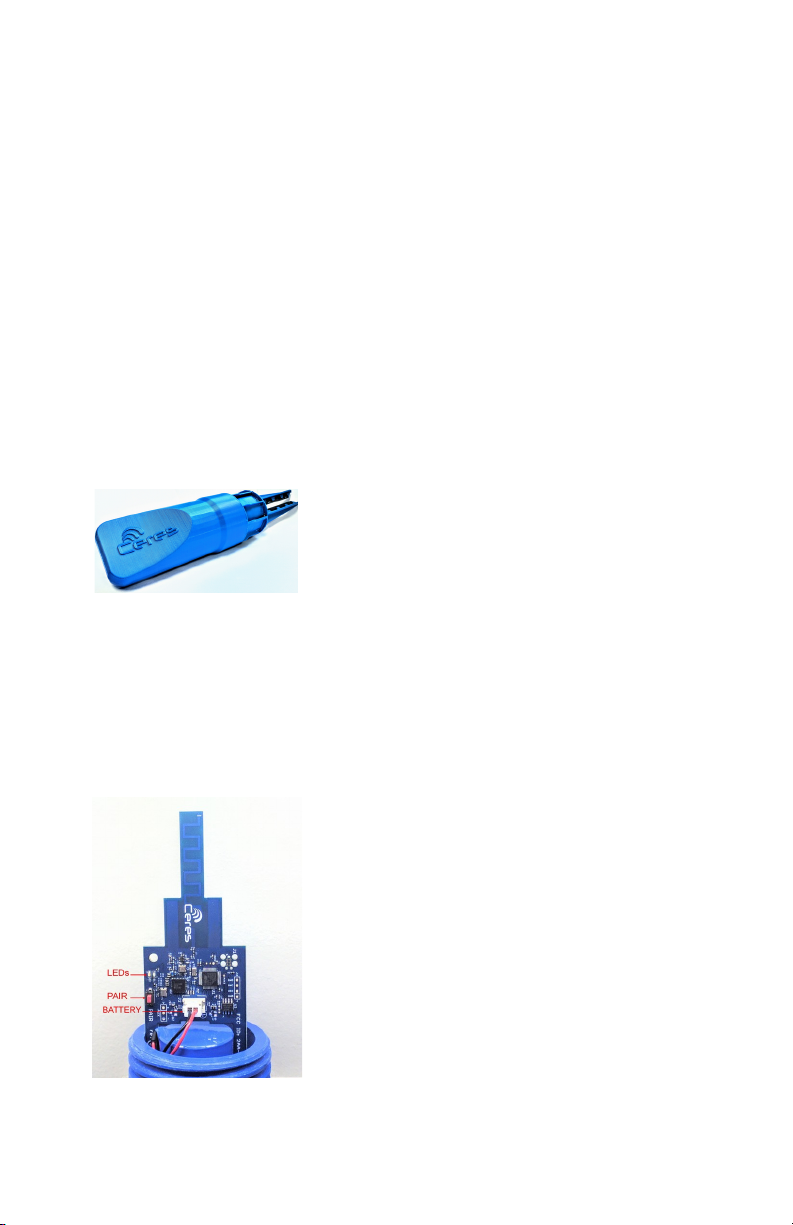
Controls
Unscrew the top (cap) to access the
sensor controls.
• LEDs show the sensor status
• PAIR button is used to activate the
sensor and pair it with a gateway
• The white BATTERY connector is
used to connect the battery or
disconnect it for shipping/storage
Avoid exposing the electronic controls to
water or static shock.
Page 4

Adding (Pairing) a new sensor: as easy as 1,2,3
Bring your new sensor to your installed Ceres gateway and:
1. Plug the sensor’s battery into the connector as shown in the
Controls section. Make sure the red wire is by the + symbol.
2. Press and release the PAIR button on your Ceres gateway to
enter pairing mode; the blue light will start blinking.
3. Press and release the PAIR button on your Ceres CS1; the LEDs
on the CS1 will blink several times to indicate successful paring
and the blue light on the gateway will stop blinking.
4. Repeat step 3 if needed.
Screw the cap on tightly and you’re ready to deploy your sensor.
Location and Deployment
Your CS1 should be located in soil with the same drainage and exposure
as the crops to be monitored. Prepare the soil exactly as you would for
a seedling: augur the soil to create a planting hole, remove rocks and
sticks, insert the probes fully into the soil until the base of the sensor is
flush with the ground. Pack soil back into the hole to eliminate large air
pockets.
For accurate moisture readings, the soil around the sensor must hold
water in the same way as the soil around your crops and soil must fill
the space between the probes.
Pro Tips:
• For tall crops, place a fiberglass marker next to the sensor.
• Remove the sensor before cultivating or harvesting.
• Do not hammer or force the sensor into the ground
2 3
Page 5

Advanced Installation
Use the Ceres app for Android for easier management of your paired CS1
sensors. The app helps you name your sensors as you install them and
automatically tracks their GPS location on the map display.
• Launch the Ceres App
• Select Equipment->Sensors->Install
• Scan the QR or bar code on your sensor
• Give your sensor a name (e.g. Cabbage Patch)
• Press Install and deploy your sensor.
Wireless Link Test
Press and release the PAIR button on your already paired CS1. The CS1
will transmit a message to the gateway and the LEDs will blink 1-5 times
to indicate the strength of the wireless link.
Storage
At the end of the season, you may remove and store your sensor.
Carefully remove the sensor from the ground, loosening the soil first if it
has become compacted. You may also disconnect the battery to save
power. Clean the sensor with running water before opening it and
replace the cap before storing.
Un-Pairing
To permanently un-pair a sensor from a gateway, bring the sensor near
the gateway and press and hold the PAIR button on the sensor for 5-10
seconds. The LED will blink twice to show that un-pairing is complete.
Page 6

Specifications
Power
• A lithium primary battery supplies power for years of reliable
operation and will exceed the life of the sensor.
Physical
• 12.5” x 2.5” and 250g
• -40 to +85C operating temperature range
• IP67 rated for outdoor use
Wireless
• Long range sub-GHz frequency band
• Secure frequency hopping spread spectrum (FHSS)
• Advanced filtering resists cellular and pager interference
Sensing
• Non-contact VHF soil moisture sensing for >5% accuracy.
• Soil temperature sensing at 2” and 4” depths. +/-1C accuracy.
Processor
• 32-bit microprocessor with 4Mb flash storage
• Digital encryption and authentication
4 1
Page 7

FCC Notice
This device complies with Part 15 of the FCC Rules. Operation is subject
to the following two conditions: (1) This device may not cause harmful
interference, and (2) this device must accept any interference received,
including interference that may cause undesired operation.
This device and its antenna(s) must not be co-located or operating in
conjunction with any other antenna or transmitter.
Changes or modifications not expressly approved by the party
responsible for compliance could void your authority to operate the
equipment.
This equipment has been tested and found to comply with the limits for
a Class B digital device, pursuant to part 15 of the FCC Rules. These
limits are designed to provide reasonable protection against harmful
interference in a residential installation. This equipment generates, uses
and can radiate radio frequency energy and, if not installed and used in
accordance with the instructions, may cause harmful interference to
radio communications. However, there is no guarantee that interference
will not occur in a particular installation. If this equipment does cause
harmful interference to radio or television reception, which can be
determined by turning the equipment off and on, the user is encouraged
to try to correct the interference by one or more of the following
measures:
● Reorient or relocate the receiving antenna.
● Increase the separation between the equipment and receiver.
● Connect the equipment into an outlet on a circuit different from
that to which the receiver is connected.
● Consult the dealer or an experienced radio/TV technician for
help.
This equipment complies with FCC radiation exposure limits set forth
for an uncontrolled environment. This equipment should be installed
and operated with minimum distance 20cm between the radiator and
your body.
5
Page 8

Who we are
Tenetics is committed to bringing precision agriculture to small and
medium-sized farms. Our Ceres wireless products help you monitor and
manage your farm from your computer or smart-phone.
Ceres is designed for agriculture:
Easy installation
Maintenance free
Long wireless range
Wide operating temperature
Rugged outdoor reliability
Ceres (Demeter) was the Greek and
Roman goddess of agriculture.
“Cereal” comes from her name.
Contact Us
Tenetics is located in suburban Maryland. For more information about
Ceres products, please contact us or visit our website.
Phone: 301-970-9700
Email: [email protected]
Web: https://www.tenetics.com
Tenetics, LLC
10630 Little Patuxent Pkwy
Columbia, MD 21044
 Loading...