

Page 1
User Manual
Headsets and microphones for PC voice applications
Congratulations!
You have just selected a Telex headset/microphone for PC voice
applications. This product will give you consistently clear audio input for
PC applications like speech recognition, voice command and control,
Internet phone and chat, videoconferencing and speakerphone.
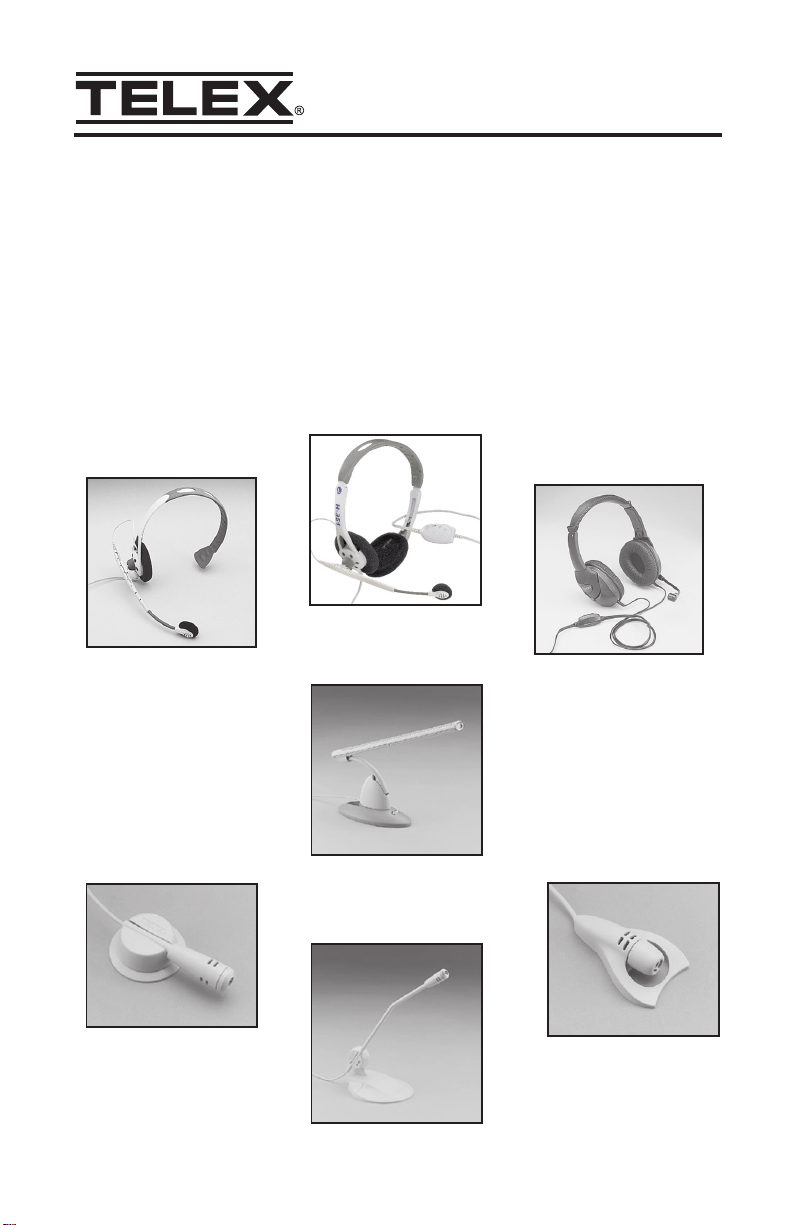
H-351
H-341
H-51
M-30
M-60
M-20
M-40
Page 2

Setup
For T elex headsets:
1. Connect the microphone plug to your computers microphone input jack.
2. Connect the headset plug to your computers headset output jack.
3. Adjust the microphone position for the best sound quality. For best
performance, the microphone should be approximately ¼ from the corner
of your mouth.
Note: For best sound quality, position the microphone at the side of your
mouth, not directly in front.
For T elex desktop microphones
1. Connect the microphone plug to your computers microphone input jack.
2. For best performance, point the microphone toward your mouth and
position it about 12-24 from your lips.
V olume adjustment
Windows 95
1. Go to: Start, Programs, Accessories, Multimedia, Volume Control, Options,
Properties.
2. Select Properties for Recording and select Microphone.
3. Adjust the volume slider to the appropriate level. Be sure that Select is
checked or Mute is unchecked.
Windows 98
1. Go to: Start, Programs, Accessories, Entertainment, Volume Control,
Options, Properties.
2. Select Properties for Recording and select Microphone.
3. Adjust the volume slider to the appropriate level. Be sure that Select is
checked or Mute is unchecked.
Windows Me & 2000
1. Go to: Start, Programs, Accessories, Entertainment, Volume Control,
Options, Properties.
2. Select Properties for Recording and select Microphone.
3. Adjust the volume slider to the appropriate level. Be sure that Select is
checked or Mute is unchecked.
Windows XP
1. Go to: Start, All Programs, Accessories, Entertainment, Volume Control
Options, Properties.
2. Select Properties for Recording and select Microphone.
3. Adjust the volume slider to the appropriate level. Be sure than Select is
checked or Mute is unchecked.
Page 3

Special considerations for speech dictation applications:
When upgrading to a new microphone for speech recognition applications,
always create a new user file. For large vocabulary dictation systems, this usually
involves running the applications Audio Setup Wizard to adjust the volume, and
going through a new enrollment process to train the system for the new acoustic
properties of the microphone.
It is very important to position the microphone properly for best performance on
speech dictation systems. Please follow these positioning guidelines when using
Telex microphones and headsets for speech dictation.
For T elex headsets with noise canceling microphones:
Position the microphone ¼ to ½ from your lips, off the corner of your mouth.
Be sure that the microphone is out of the way from any air blasts from your nose
or mouth when speaking. Use the microphone wind screen for best performance.
For M-60 Super-Directional Desktop Microphone:
Position the microphone on your desktop about 12 to 24 from your lips and
point it directly at your mouth. Adjust the distance from your mouth depending
on the noise level in your environment. For louder environments, position the
microphone at 12. For quiet environments, position the microphone at 18-24.
The M-60 uses a highly directional pick up pattern to enhance voice input and
cancel background noises. Small, closed rooms (under 64 sq. ft.) with hard walls
and floors can adversely affect the performance of far-field, directional
microphone structures like the M-60. This can be particularly evident if a hard
wall is located directly behind the talker, enabling noise to be reflected directly
into the front of the microphone at the same angle as your voice. Try to position
the microphone so that it points away from noise sources and reflective walls.
Safety
For the safety of you and your equipment, always follow these precautions:
Keep your headset or microphone away from heat sources, such as radiators,
heat registers and other similar appliances.
Keep your headset or microphone away from liquids.
Protect your headset or microphone from dampness.
Not recommended for small children. Children may choke through entanglement.
May also contain small parts.
Page 4

Troubleshooting
Microphone does not record sound when connected to PC
• Check all Connections.
• Check the Microphone Volume Settings
Windows 95
1. Go to: Start, Programs, Accessories, Multimedia, Volume Control, Options,
Properties.
2. Select Properties for Recording and select Microphone.
3. Adjust the volume slider to the appropriate level. Be sure that Select is
checked or Mute is unchecked.
4. Go to: Start, Programs, Accessories, Multimedia, Sound Recorder to test
microphone.
Windows 98
1. Go to: Start, Programs, Accessories, Entertainment, Volume Control,
Options, Properties.
2. Select Properties for Recording and select Microphone.
3. Adjust the volume slider to the appropriate level. Be sure that Select is
checked or Mute is unchecked.
4. Go to: Start, Programs, Accessories, Entertainment, Sound Recorder to test
microphone.
Windows Me & 2000
1. Go to: Start, Programs, Accessories, Entertainment, Volume Control,
Options, Properties.
2. Select Properties for Recording and select Microphone.
3. Adjust the volume slider to the appropriate level. Be sure that Select is
checked or Mute is unchecked.
4. Go to: Start, Programs, Accessories, Entertainment, Sound Recorder to test
microphone.
Windows XP
1. Go to: Start, All Programs, Accessories, Entertainment, Volume Control,
Options, Properties.
2. Select Properties for Recording and select Microphone.
3. Adjust the volume slider to the appropriate level. Be sure that Select is
checked or Mute is unchecked.
4. Go to: Start, Programs, Accessories, Entertainment, Sound Recorder to test
microphone.
Customer Service and Tech Support
Phone: 800-328-3771
e-mail: computeraudio@telex.com
Web: www.computeraudio.telex.com
© Telex Communications, Inc. All rights reserved. Telex is a trademark of Telex Communications, Inc. All other
names are trademarks, registered trademarks, or service marks of their resperctive companies.
38109-780 Rev E 10/01
 Loading...