

Page 1
Installation Guide
LCP-32/16 Level Control Panel
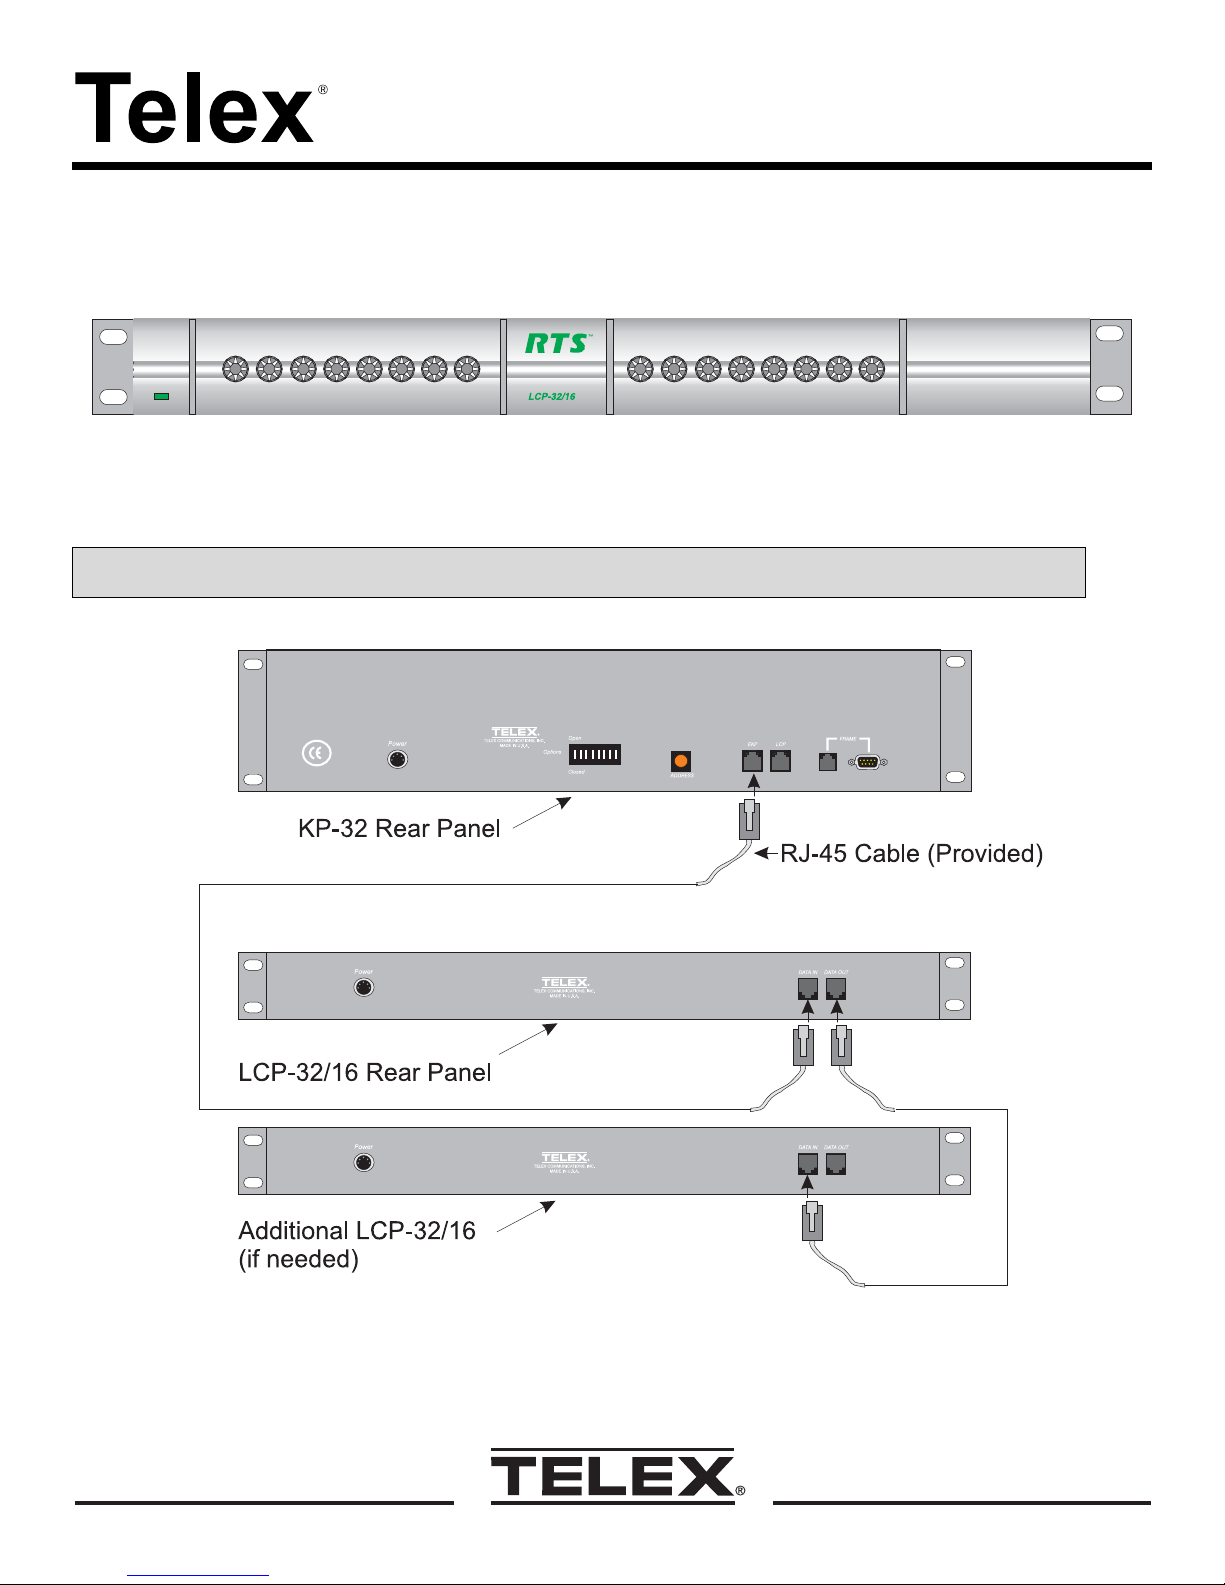
The LCP-32/16 Level Control Panel is connected to KP-32 Keypanels and additional LCP-32/16 panels as shown in
the diagram below. Configuration instructions are included on the back of this document. A maximum of three
LCP-32/16 panels may be connected to one KP-32 Keypanel.
CAUTION: Do not connect a KP-32 power supply to the LCP-32/16. Doing so could cause damage to the unit.
9350-7672-000 Rev A 6/2001
Page 2

The LCP-32/16 can usually be connected to a KP-32 and used without any additional intervention. Up to three LCP-32/16
panels can be connected. They are assigned in order of their connection. The first LCP32/16 that is connected to a KP-32
is assigned (by default) to keys 1-16. The second LCP-32/16 is connected to the first LCP-32/16 and is assigned (by
default) to keys 17-32. The third LCP-32/16 is connected to the second LCP-32/16 and is assigned (by default) to keys 33-
48. The only time that the KP-32 will need to be configured for use with an LCP-32/16 is when the KP-32’s LCP-32/16
settings have been changed from their defaults, or when you need to change the settings from their defaults such as when
an LCP-32/16 is only needed on keys 17-32.
To change the LCP-32/16 configuration on the KP-32 do the following:
1. Press the MENU key.
2. Display will appear in the Call Waiting Window (CWW).
3. Press the
↓↓↓↓
↓↓ key until Service appears in the CWW.
↓↓↓↓
4. Press the PGM key.
5. Aux Inputs will appear in the CWW.
6. Press the
↓↓↓↓
↓↓ key until LCP-32 appears in the CWW.
↓↓↓↓
7. Press the PGM key.
8. 1-16: Yes or 1-16: Skip will appear in the CWW.
9. You can enable (Yes) or disable (Skip) the LCP-32/16 key assignments by using the FWD key.
10. Press the
↓↓↓↓
↓↓ key again and 17-32: Yes or 17-32: Skip will appear in the CWW window.
↓↓↓↓
11. You can enable (Yes) or disable (Skip) the LCP-32/16 key assignments by using the FWD key.
12. Press the
↓↓↓↓
↓↓ key again and 33-48: Yes or 33-48: Skip will appear in the CWW window.
↓↓↓↓
13. You can enable (Yes) or disable (Skip) the LCP-32/16 key assignments by using the FWD key.
14. Pressing the
↓↓↓↓
↓↓ key will take you back to the display in step 8.
↓↓↓↓
15. Press the CLR key when you are finished with the LCP-32/16 assignments.
 Loading...