

Page 1

25
S
Telenav® GPS Navigator™ v6.2
GPS Navigation Suite for:
BlackBerry™ 9310
Available on the Boost Mobile® network
User’s Guide
Page 2

Copyright
© 2012 Telenav, Inc. All rights reserved. Telenav GPS Navigator™ is a trademark and Telenav® is a registered
trademark of Telenav, Inc., Sunnyvale, California in the United States and may be registered in other countries.
No part of this manual may be reproduced, transmitted, copied, or stored in any storage medium, for any
purpose, without prior written consent from Telenav, Inc. Telenav, Inc. hereby grants the right to download one
copy of this manual onto a hard drive for personal use. This manual is copyrighted and contains proprietary
information that is subject to change without notice. For more information, visit www.telenav.com
© 2012 TomTom. All rights reserved. This material is proprietary and the subject of copyright protection and/or
database right protection and/or other intellectual property rights owned by TomTom or its suppliers. The use of
this material is subject to the terms of a license agreement. Any unauthorized copying or disclosure of this
material will lead to criminal and civil liabilities.
.
Revision History
Version Date Released Description of Changes Author
6.2a 5/16/2012 Initial release. Michael Smith
6.2b 5/1/2013 Removed Open Table
(no longer supported).
Daisy Luu
© 2012 Telenav, Inc. Page 2 of 58
Page 3

Table of Contents
1. Welcome ...........................................................................................................................................................7
2. Safety and Legal Notices................................................................................................................................8
3. Device Controls ...............................................................................................................................................9
3.1 Navigation on Non-Touch Devices.............................................................................................................. 10
4. Getting Started with Telenav GPS Navigator ............................................................................................10
4.1 Telenav GPS Navigator Account ................................................................................................................ 10
4.2 Software Installation ..................................................................................................................................... 11
4.3 Network Access............................................................................................................................................ 11
5. Launching Telenav GPS Navigator.............................................................................................................12
6. Common Features .........................................................................................................................................13
6.1 Address Pattern Recognition....................................................................................................................... 13
6.2 BlackBerry Universal Search....................................................................................................................... 13
6.3 Search Bar.................................................................................................................................................... 14
7. Speech Input ..................................................................................................................................................14
8. Using a Bluetooth Headset ..........................................................................................................................15
9. Drive To Menu ................................................................................................................................................16
9.1 Getting Driving Directions ............................................................................................................................ 16
9.1.1 Resume Trip....................................................................................................................................... 17
9.1.2 Home .................................................................................................................................................. 17
9.1.3 My Favorites....................................................................................................................................... 17
9.1.3.1 Category................................................................................................................................... 18
9.1.3.2 Create New Category.............................................................................................................. 18
9.1.3.3 Delete or Rename a Category ................................................................................................ 19
9.1.4 Recent Places .................................................................................................................................... 19
9.1.5 Address............................................................................................................................................... 20
9.1.6 Contacts.............................................................................................................................................. 20
9.1.7 Places ................................................................................................................................................. 21
9.1.8 Airport ................................................................................................................................................. 21
9.2 Other Ways to Get Directions...................................................................................................................... 21
9.3 Trip Confirmation Screen............................................................................................................................. 22
9.3.1 Editing Your Route............................................................................................................................. 22
9.3.1.1 Edit Origin................................................................................................................................. 22
9.3.1.2 Edit Destination........................................................................................................................ 22
© 2012 Telenav, Inc. Page 3 of 58
Page 4

9.3.1.
3 Edit Route Settings .................................................................................................................. 23
9.3.2 Moving to the Nearest Street............................................................................................................. 23
9.3.3 Audible Guidance Tones ................................................................................................................... 23
9.3.4 Audio Replay...................................................................................................................................... 23
9.3.5 Miss a Turn?....................................................................................................................................... 23
9.4 Navigation Views.......................................................................................................................................... 24
9.4.1 3D Moving Map.................................................................................................................................. 24
9.4.2 2D Moving Map.................................................................................................................................. 24
9.5 On-Screen Navigation Icons........................................................................................................................ 26
9.6 Navigation Menu Options ............................................................................................................................ 26
9.6.1 Places ................................................................................................................................................. 27
9.6.2 Map ..................................................................................................................................................... 27
9.6.3 Directions (Route Summary)............................................................................................................. 28
9.6.4 Traffic Summary................................................................................................................................. 28
9.6.5 Report Traffic Camera and Speed Trap ........................................................................................... 29
9.7 Avoiding Traffic............................................................................................................................................. 30
9.7.1 From Traffic Summary....................................................................................................................... 30
9.7.2 From Traffic Alert................................................................................................................................ 31
10. Places Menu...................................................................................................................................................32
10.1 Using Places............................................................................................................................................... 32
10.1.1 Search by Category......................................................................................................................... 33
10.1.2 Define a Location ............................................................................................................................. 34
10.2 Sorting Options........................................................................................................................................... 34
10.2.1 Sort by Distance............................................................................................................................... 34
10.2.2 Sort by Popularity............................................................................................................................. 34
10.2.3 Map Results ..................................................................................................................................... 34
10.3 Sponsored Results..................................................................................................................................... 35
10.4 Most Popular Category .............................................................................................................................. 35
10.5 Search for Gas by Price............................................................................................................................. 36
10.6 Ratings........................................................................................................................................................ 36
10.6.1 Submit Your Own Rating................................................................................................................. 36
11. Maps & Traffic Menu .....................................................................................................................................37
11.1 Map Menu Options..................................................................................................................................... 37
11.1.1 Traffic Cameras and Speed Traps.................................................................................................. 37
11.2 Check Traffic............................................................................................................................................... 38
© 2012 Telenav, Inc. Page 4 of 58
Page 5

11.3 Other Ways
12. Local Apps .....................................................................................................................................................39
12.1 Movies......................................................................................................................................................... 39
12.2 Weather ...................................................................................................................................................... 40
12.3 Commute Alerts.......................................................................................................................................... 40
12.3.1 Create New Alert.............................................................................................................................. 41
12.4 My Mileage ................................................................................................................................................. 41
13. Telenav Menu Options..................................................................................................................................42
13.1 Upgrade ...................................................................................................................................................... 42
13.2 About........................................................................................................................................................... 42
13.2.1 About Telenav GPS Navigator........................................................................................................ 42
13.2.2 Support Info...................................................................................................................................... 43
13.2.3 Your PIN Number............................................................................................................................. 43
13.2.4 Diagnostic Tools............................................................................................................................... 43
13.2.5 Cancel Subscription......................................................................................................................... 43
to View a Map........................................................................................................................ 38
13.3 Settings ....................................................................................................................................................... 43
Profile ........................................................................................................................................................... 43
13.3.1 General............................................................................................................................................. 44
13.3.2 Navigation......................................................................................................................................... 44
13.3.3 Audio................................................................................................................................................. 44
13.3.4 Side Key ........................................................................................................................................... 45
13.3.5 Opt-In Features ................................................................................................................................ 45
13.4 Bluetooth On............................................................................................................................................... 45
13.5 Feedback .................................................................................................................................................... 45
13.5.1 Feedback for Places ........................................................................................................................ 46
14. Share Address ...............................................................................................................................................46
15. Suspending Telenav GPS Navigator ..........................................................................................................47
15.1 Making a Phone Call from Telenav GPS Navigator................................................................................. 47
15.2 Taking an Incoming Call ............................................................................................................................ 47
15.3 Telenav GPS Navigator Options from Device Contact List .....................................................................48
15.4 Calendar and E-mail Events...................................................................................................................... 48
16. Exiting Telenav GPS Navigator ...................................................................................................................48
17. Removing Telenav GPS Navigator .............................................................................................................48
18. The Telenav GPS Navigator Pre-Planning Website..................................................................................49
18.1 Changing your PIN number....................................................................................................................... 49
© 2012 Telenav, Inc. Page 5 of 58
Page 6

Error Conditions ............................................................................................................................................50
19.
20. FAQs................................................................................................................................................................51
21. Customer Support.........................................................................................................................................54
21.1 Technical Support ...................................................................................................................................... 54
22. Telenav Services Warranty ..........................................................................................................................55
23. Appendix A: Telenav 6.2 Features Matrix ..................................................................................................56
© 2012 Telenav, Inc. Page 6 of 58
Page 7

1. Welcome
Telenav GPS Navigator™ utilizes the integration of GPS position determination technology, the Java™ programming
environment, and access to your wireless carrier’s data network. Supported BlackBerry devices provide both the Java
environment and access to the wireless network. Depending on your subscription, the Telenav GPS Navigator
application provides:
GPS navigation that punctually guides you turn-by-turn to any destination address in the Continental U.S
and Canada. If you miss a turn or get off-track, Telenav GPS Navigator will calculate a new route for you.
You can enter one or more destination addresses by keying or speaking directly into the device, entering
them on the Telenav GPS Navigator website, or by pulling your contacts from your device’s contact list.
Optionally, you can input a remote origin and receive Driving Directions from that origin address to the
selected destination address.
Up to three routes to choose from before your trip, with estimated times for each route to put you in
control of navigation.
Navigation features such as Lane Assist to help you determine which lane(s) to be in at a multi-lane
highway junction or an intersection. View traffic camera locations on your navigation map, as well as the
legal speed limit.
Audio and visual traffic alerts while driving or viewing maps, as well as traffic rerouting capabilities to
minimize delays on your trip.
The ability to enter destination addresses by keying or speaking directly into the device, entering them on
the Telenav GPS Navigator website, or by pulling your contacts from the device’s Contacts list.
Optionally, you can input a remote origin and receive Driving Directions from that origin address to the
selected destination address.
A Places feature that allows you to find businesses or points of interest near your current location, around
a Favorite, around an entered address, or around an airport. You can call the business first to check
availability of an item or get a reservation and then navigate to it. You can also save the address for use
later in the day.
Points-of-Interest search result ads that offer merchant review, deals, and restaurant menus (depends on
availability).
Maps of the area around your current location, a marked Favorite, or an address you enter manually or
have previously entered. You can pan the map (adjust left/right/up/down), and zoom in or out. Maps and
points-of-interest are frequently updated for accuracy, at no additional charge to you.
The ability to set up alerts for your daily commute and view any traffic incidents on the map of the route.
The ability to set Daytime or Nighttime colors for your map or navigation screens. You can also set this to
“Auto” for automatic color adjustment throughout the day.
A Movies feature to search for movies based on location or theaters.
Weather conditions and movie listings for your area.
The ability to personalize the application by selecting the use of U.S. customary or metric distance units,
the language for audible guidance, the volume and map colors, etc.
For a comparison of features between subscription accounts, please refer to Appendix A on page 56
.
© 2012 Telenav, Inc. Page 7 of 58
Page 8

2. Safety and Legal Notices
Please read this section carefully before using Telenav GPS Navigator
Telenav will not accept any responsibility whatsoever for accidents resulting from failure to observe common sense
precautions. Your personal judgment, traffic regulations, and common sense must always take precedence over any
driving direction produced by Telenav GPS Navigator.
WARNING: Keep your eyes on the road.
It is your responsibility as the vehicle operator to keep your eyes on the road and be an alert driver at all times,
ESPECIALLY when the vehicle is moving. The vehicle operator should not be distracted by the application displays,
audible cues, or manually interacting with the controls. When you need to enter data on your device using the keypad or
study the display, please do so while the vehicle is parked, not while in motion. Should your ability to drive responsibly be
decreased, please turn off the device.
WARNING: Install the equipment safely.
If you are using a device mounting kit, make sure that it does not obscure your vision. You may wish to charge the
device while using Telenav GPS Navigator. If so, make sure the charging cable does not interfere with any of the vehicle
controls.
WARNING: Drive safely and use common sense.
The vehicle operator’s personal judgment, traffic regulations, and common sense must always take precedence over the
instructions provided by Telenav GPS Navigator.
It is your responsibility as the vehicle operator to drive safely, observe all traffic rules, and above all use your own
personal judgment while driving. If you feel that a route suggested by the navigation software instructs you to perform an
unsafe or illegal maneuver, places you in an unsafe situation, or routes you into an area which you consider unsafe, do
not follow the instructions.
© 2012 Telenav, Inc. Page 8 of 58
Page 9
3. Device Controls
Your BlackBerry device provides several different ways for you to control Telenav GPS Navigator and input
information. You may have a touch- or non-touch-screen device, in which case the controls may vary slightly. For
information about how to use your BlackBerry device and the appearance of specific keys, please refer to the device
user’s manual.
The screenshots in this User’s Guide are for a touch-screen BlackBerry. The table below explains the physical
device control keys most commonly referenced.
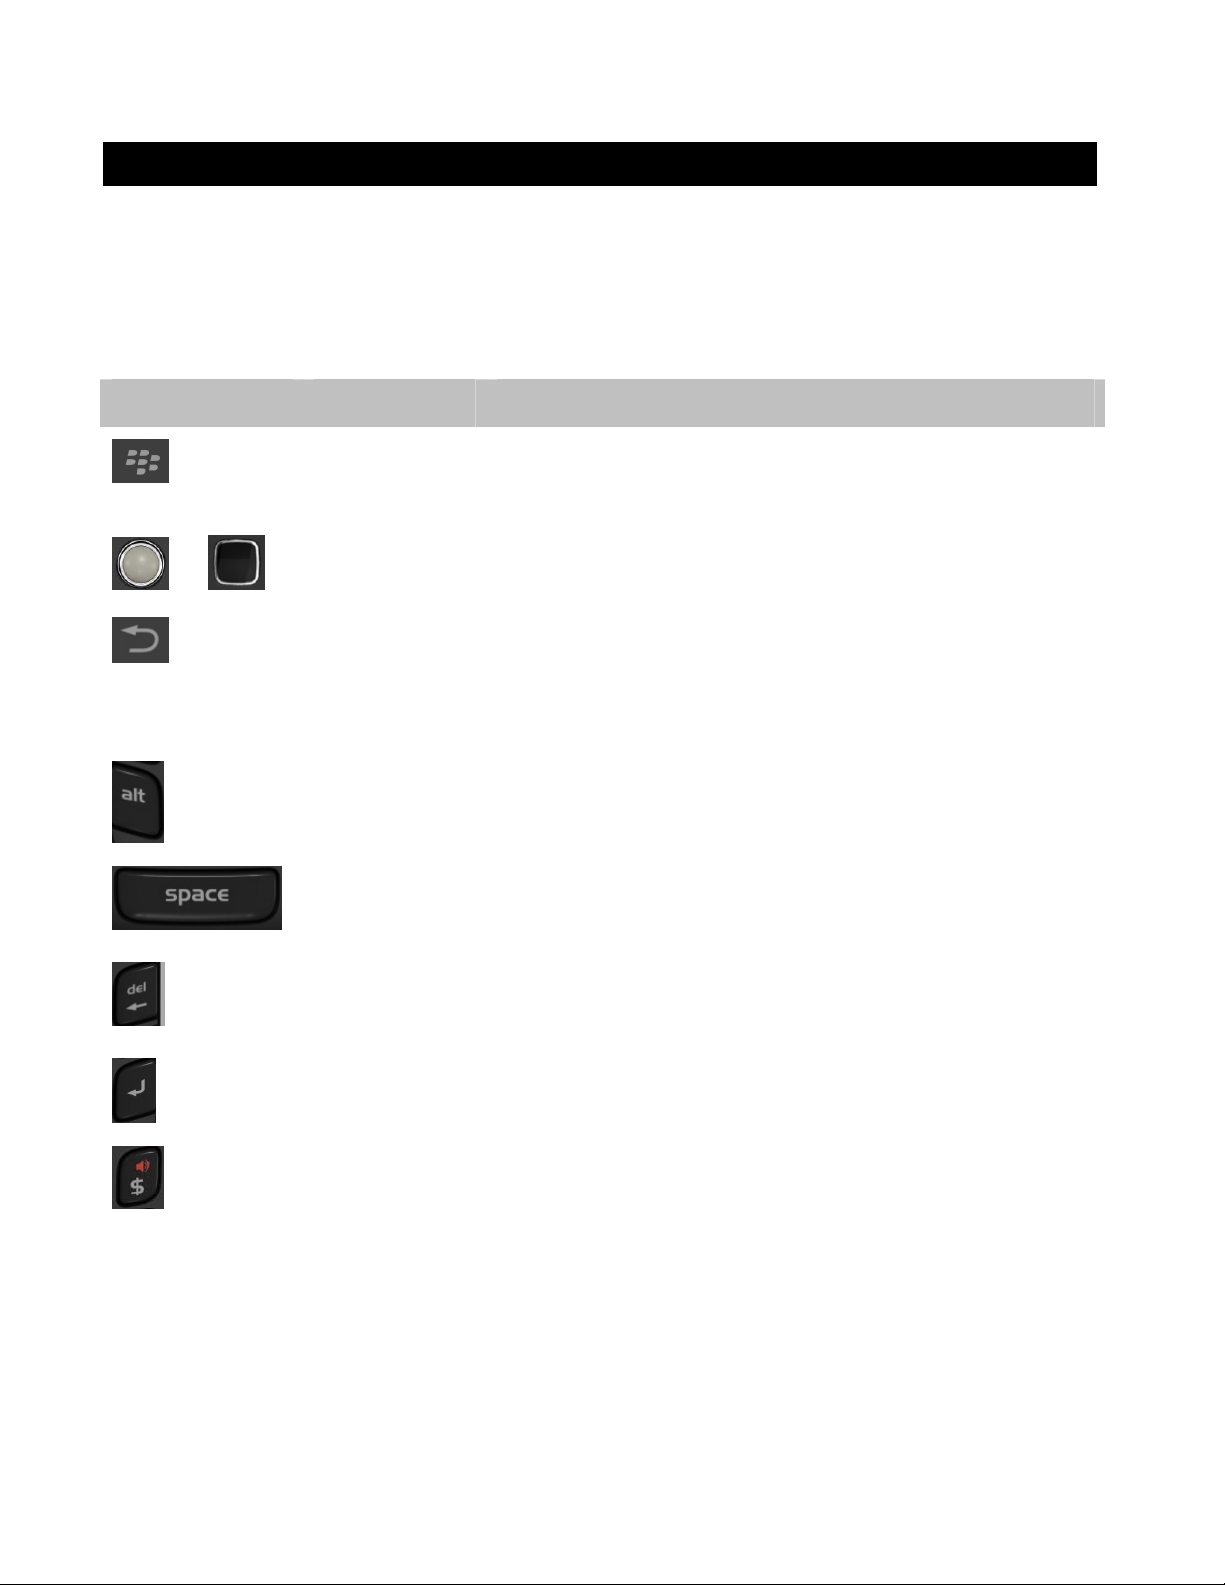
Key Name Function
Menu Call up the menu in most Telenav GPS Navigator screens for
Trackball/Trackpad Navigate through form fields, scroll, and pan maps. In this document,
or
Escape Go back to the previous screen. When you press Escape on the
additional functions to choose from. The menu options vary, depending
on the screen you are viewing.
this key will be referred to as the “trackpad.”
Telenav GPS Navigator Main Menu, you will be putting the application
in “Suspended” mode (running in the background) to access the
BlackBerry menus. Choose Menu >> Exit to completely exit the
application.
Alt Toggle between typing letters, numbers, or symbols on the keyboard.
Space On devices with a physical keyboard, the Space key is used to input a
Delete Delete text entry, individual addresses, or categories, such as in the
Enter Toggle to the next entry field on a form. Also acts as an OK key.
Speaker Toggle Bluetooth on and off when viewing a navigation screen.
voice command dictation. It also repeats the last audio prompt on a
navigation screen.
Favorites or Recent Places screens. To go back to the previous
screen, use the Escape key instead.
© 2012 Telenav, Inc. Page 9 of 58
Page 10
Ch
oosing the Menu key or the trackpad while using the Telenav GPS Navigator application may give you a variety of
options, depending on what screen you are on. The options are discussed in the appropriate sections below. There is
usually an option to take you back to Telenav Home to reduce the number of times you would have to press the Escape
key.
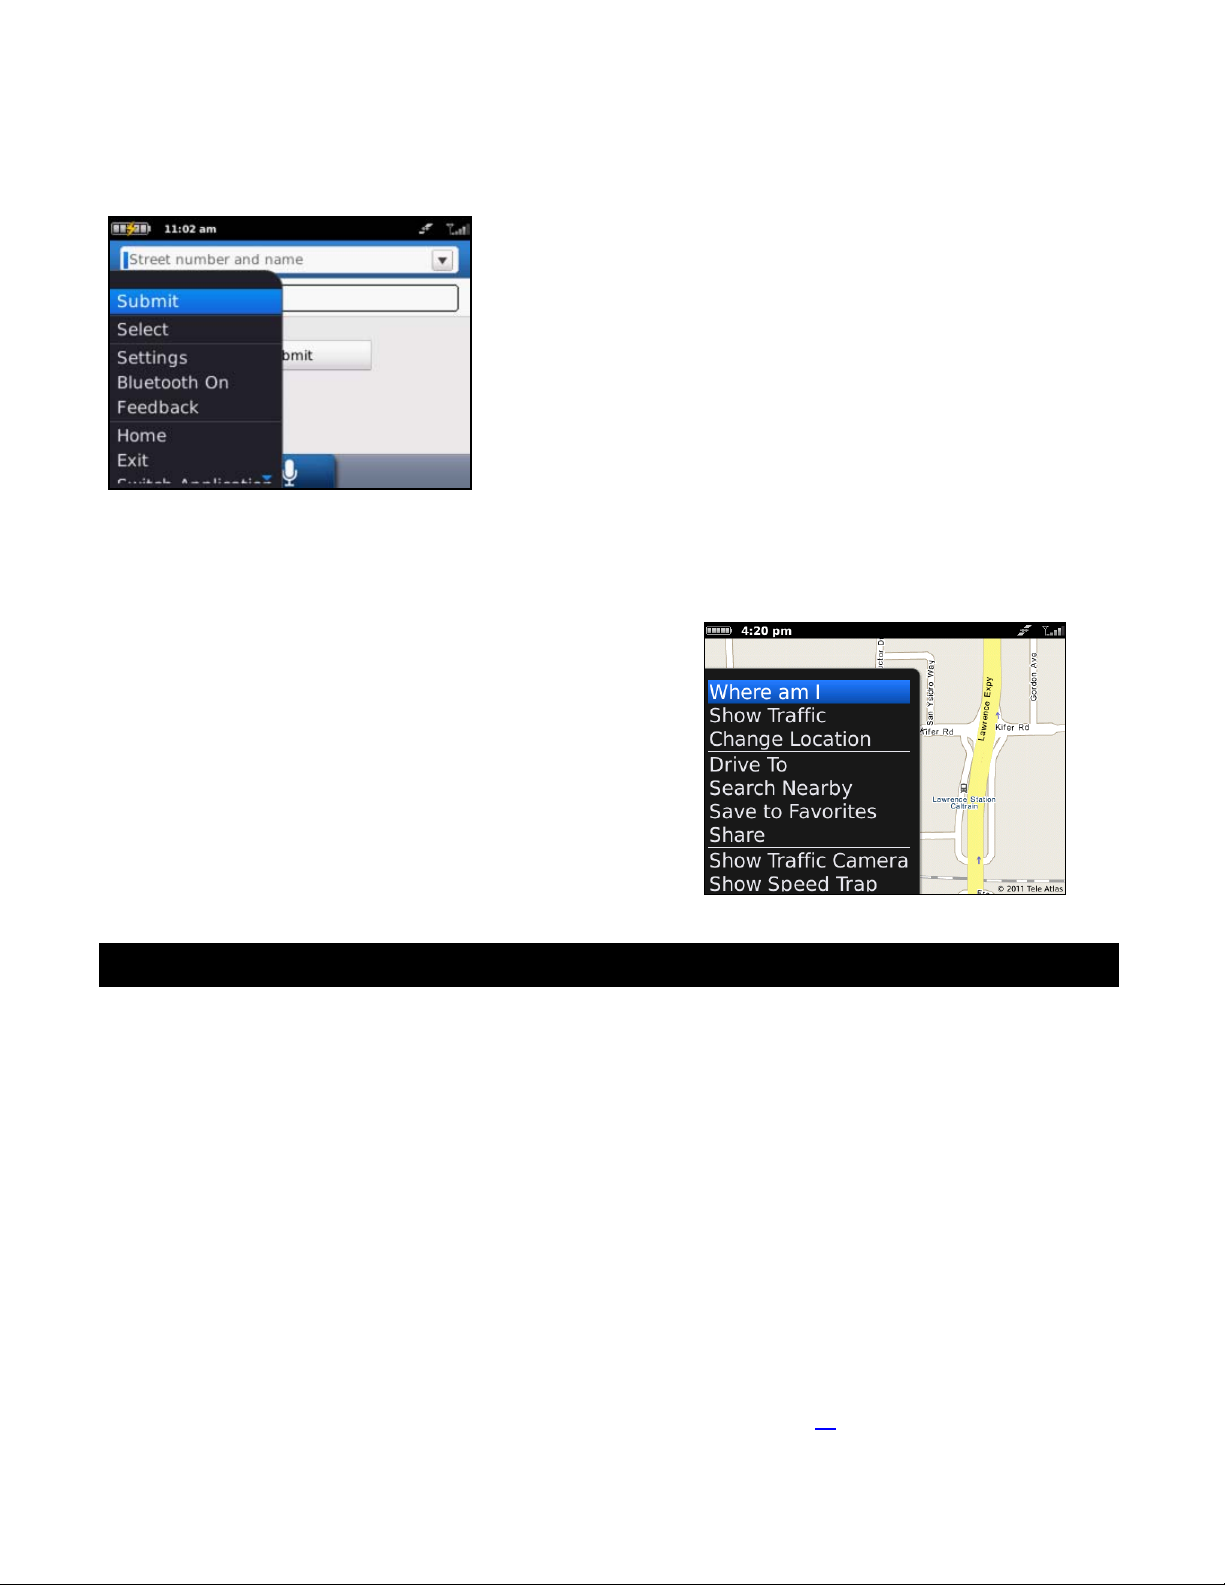
3.1 Navigation on Non-Touch Devices
On non-touch BlackBerry devices, calling up the Menu would
usually give you navigation options on a screen. For example, on a
Maps screen for a location, press Menu for the following options:
Where Am I – Center the map on your current
location.
Show/Hide Traffic – Toggle traffic flow on/off.
Change Location – Get a map for a different
location.
4. Getting Started with Telenav GPS Navigator
The Telenav GPS Navigator application installed on your device requires a Telenav GPS Navigator subscription and
means of accessing the public Internet.
4.1 Telenav GPS Navigator Account
There are a few types of accounts available:
“Monthly Unlimited” or “Daily Unlimited” (Bundle) – This type of paid account offers features such as
moving maps, voice directions, and POI search but does not have as many features as a Premium
account. You will be given the option to upgrade to Premium within the application.
Premium – This paid account gives you access to all the features of Telenav GPS Navigator. It is available
as a stand-alone if you have a Pay As You Go account or as an upgrade from a Boost bundle plan.
The features you can access will vary depending on account. This User’s Guide discusses all features as offered by the
Premium plan; if you are subscribed to a different plan, what you see on the Telenav GPS Navigator screens will be
different.
For details on the features offered by each plan, please refer to Appendix A on page 56
© 2012 Telenav, Inc. Page 10 of 58
.
Page 11
4.2 Software Installation
Telenav GPS Navigator is pre-loaded on most Boost Mobile devices, and you can launch it by choosing the Telenav
Navigator icon
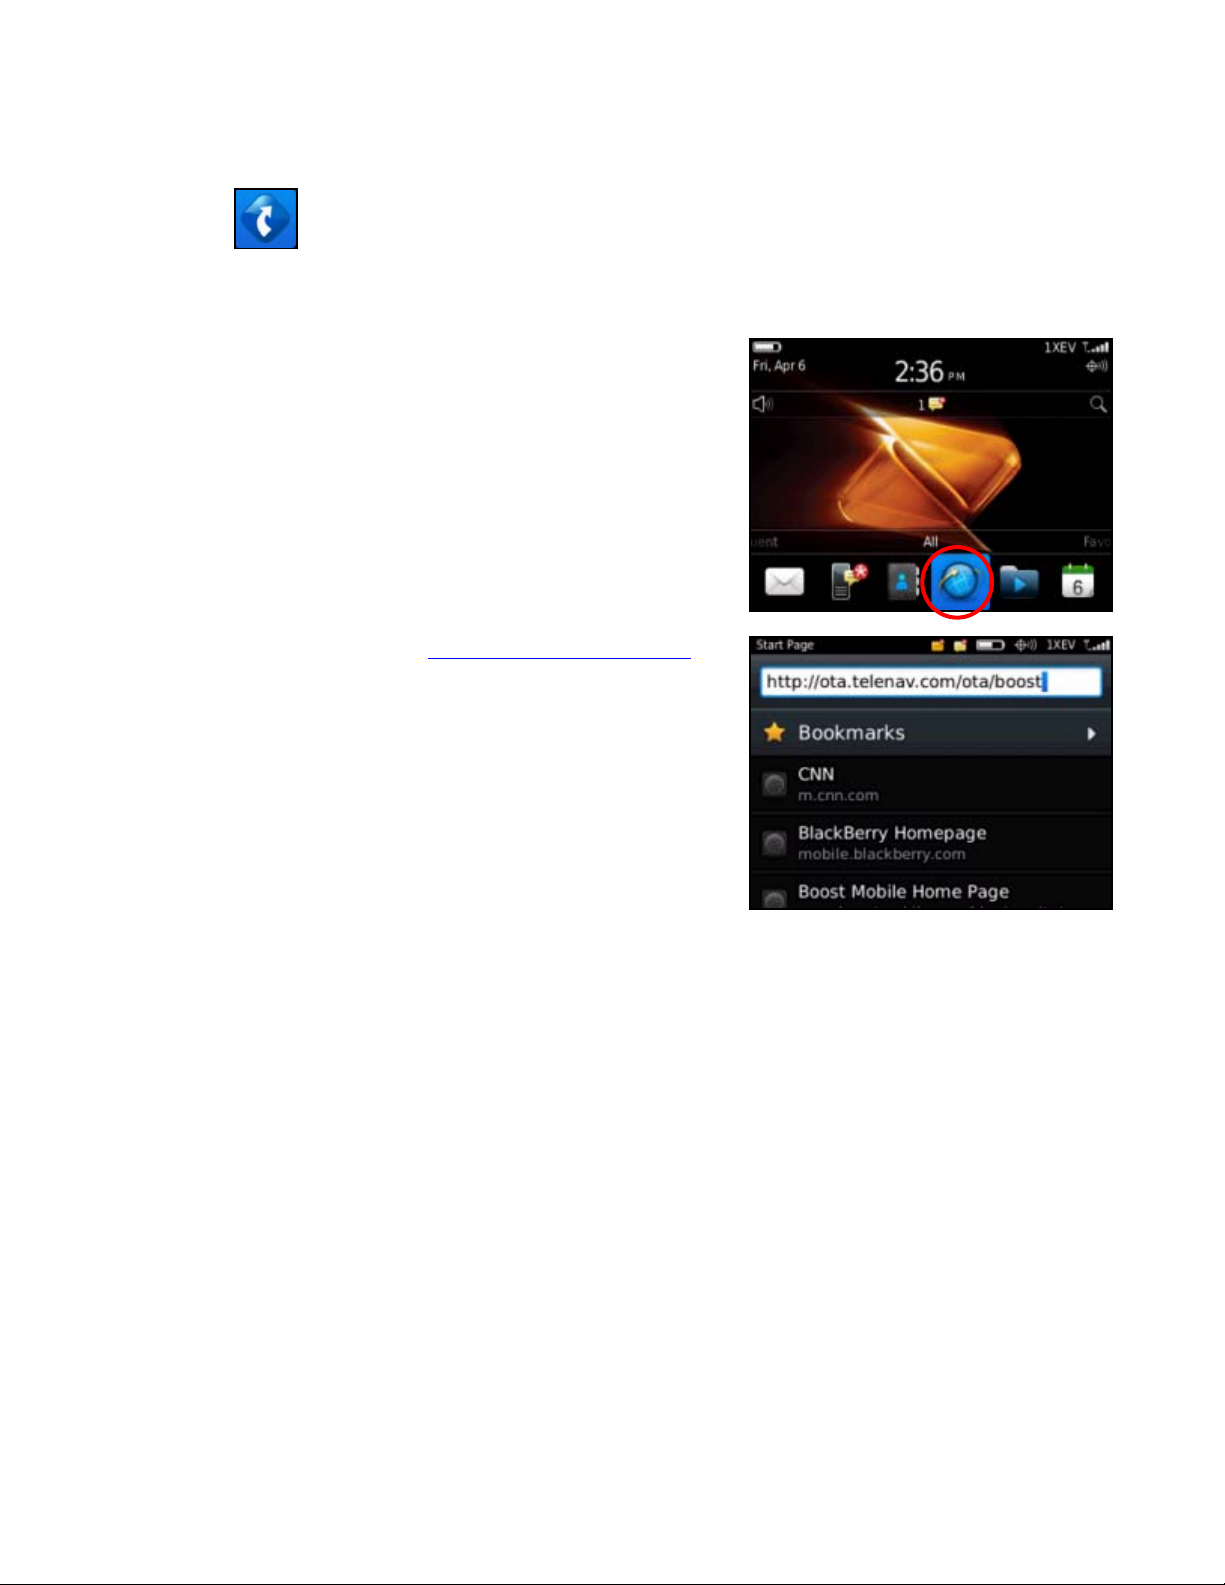
If you cannot find the application, it can be downloaded directly onto your BlackBerry device using its Browser by
following the instructions below:
1. From the BlackBerry Main Menu, launch the Web Browser.
2. Input the OTA download link: http://ota.telenav.com/ota/boost
3. Press the Enter key or click the trackpad. Then follow the on-
screen prompts to complete the download.
NOTE: Once the application has finished downloading, it will appear on
the Applications screen.
.
4.3 Network Access
Telenav GPS Navigator uses the public Internet to access its servers for mapping, routing, and search services from
your device. If you are not using your BlackBerry for e-mail services, you will still need to add an individual BlackBerry email plan to have access to data services. There are three different network settings for you to select from. Wait 90
seconds after turning on your BlackBerry to allow these services options to register. These access methods are
automatically determined by Telenav GPS Navigator when it launches, but you can change the settings in Settings
menu of Telenav GPS Navigator.
© 2012 Telenav, Inc. Page 11 of 58
Page 12
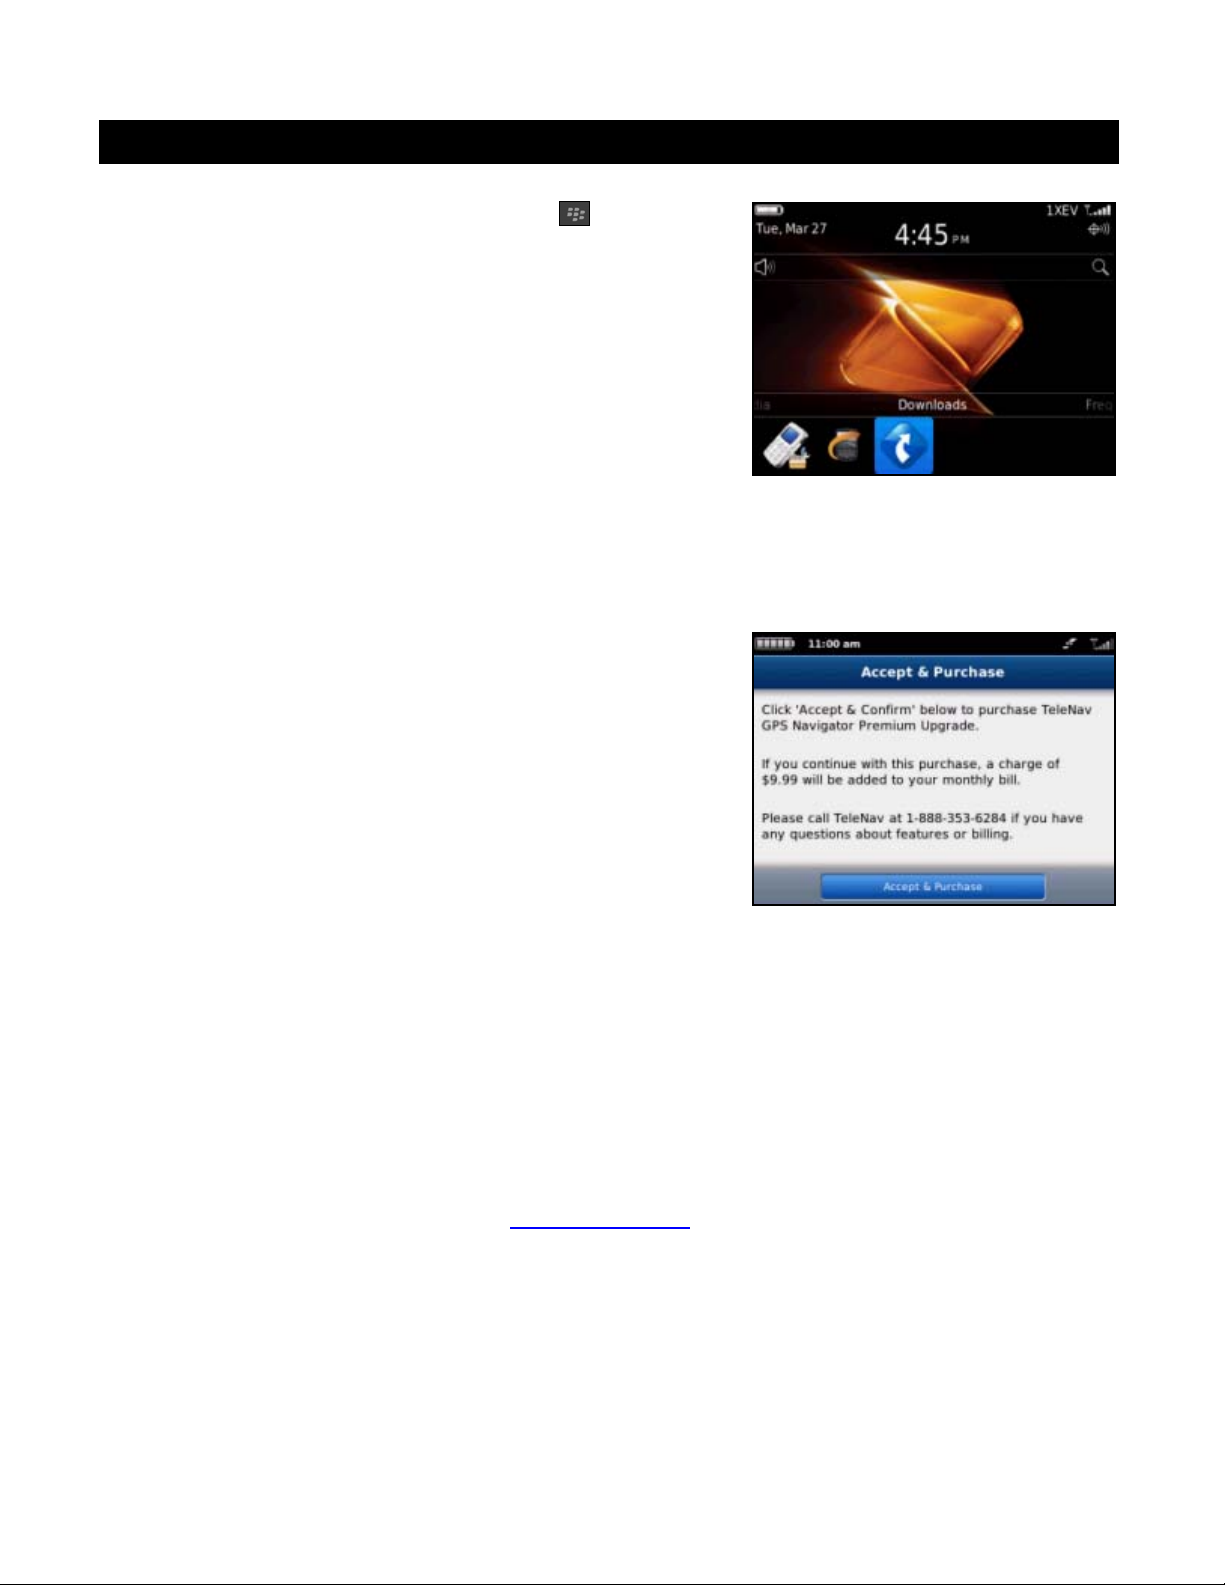
5. Launching Telenav GPS Navigator
1. On the BlackBerry main screen, press Menu >> Maximize
Panel to expose all the applications. Then choose “Telenav GPS
Navigator.”
2. The first time you launch Telenav GPS Navigator, the application may ask you for access permissions. Make
any changes to the Permissions screen. Telenav GPS Navigator recommends accepting the default values.
3. Choose Menu >> Save when you are done. Then choose Download to begin downloading the application to
your device.
4. The splash screen briefly appears, followed by the Terms of Use.
If you agree to the terms and conditions, choose Accept to
continue.
5. Choose your access choice on the Subscription screen:
Monthly Subscription – Unlimited access to the application,
charged monthly to your phone bill.
Day Pass – Access the application for 24 hours (you will see
the charge for each day’s use on your phone bill).
6. During your first use of Telenav GPS Navigator, the device will download the audible and graphical content
needed to build the displays and produce audible messages.
NOTE: Do not interact with the BlackBerry while this download is underway. Wait for it to finish. When the
download is completed, you will see the Telenav GPS Navigator Main Menu.
NOTE: If Tele nav GPS Navigato r indicates that it can not reach the se rvers, th e most likel y reaso n is that yo ur carri er
data service plan is not yet active. You may need to contact your carrier to extend your service agreement. You will not
be able to progress beyond this point until your account is returned to current status. You m ay also se e an important
message from Telenav GPS Navigator re garding upgrad es, scheduled do wntime, pendi ng account expiration, etc.
When the device reaches the Telenav GPS Navigator servers with a valid and active phone number and PIN, the
device will be registered to use Telenav GPS Navigator and will not present any of the above screens except the splash
and Terms of Use screens in the future. Visiting http://my.telenav.com
the above registration process.
and changing your PIN will require you to repeat
© 2012 Telenav, Inc. Page 12 of 58
Page 13
6. Common Features
6.1 Address Pattern Recognition
Address Pattern Recognition allows you to use the Telenav GPS Navigator Application features in conjunction with the
BlackBerry Native Applications.
NOTE: This feature is only availa ble on Blackberry d evices running OS 6 and a bove.
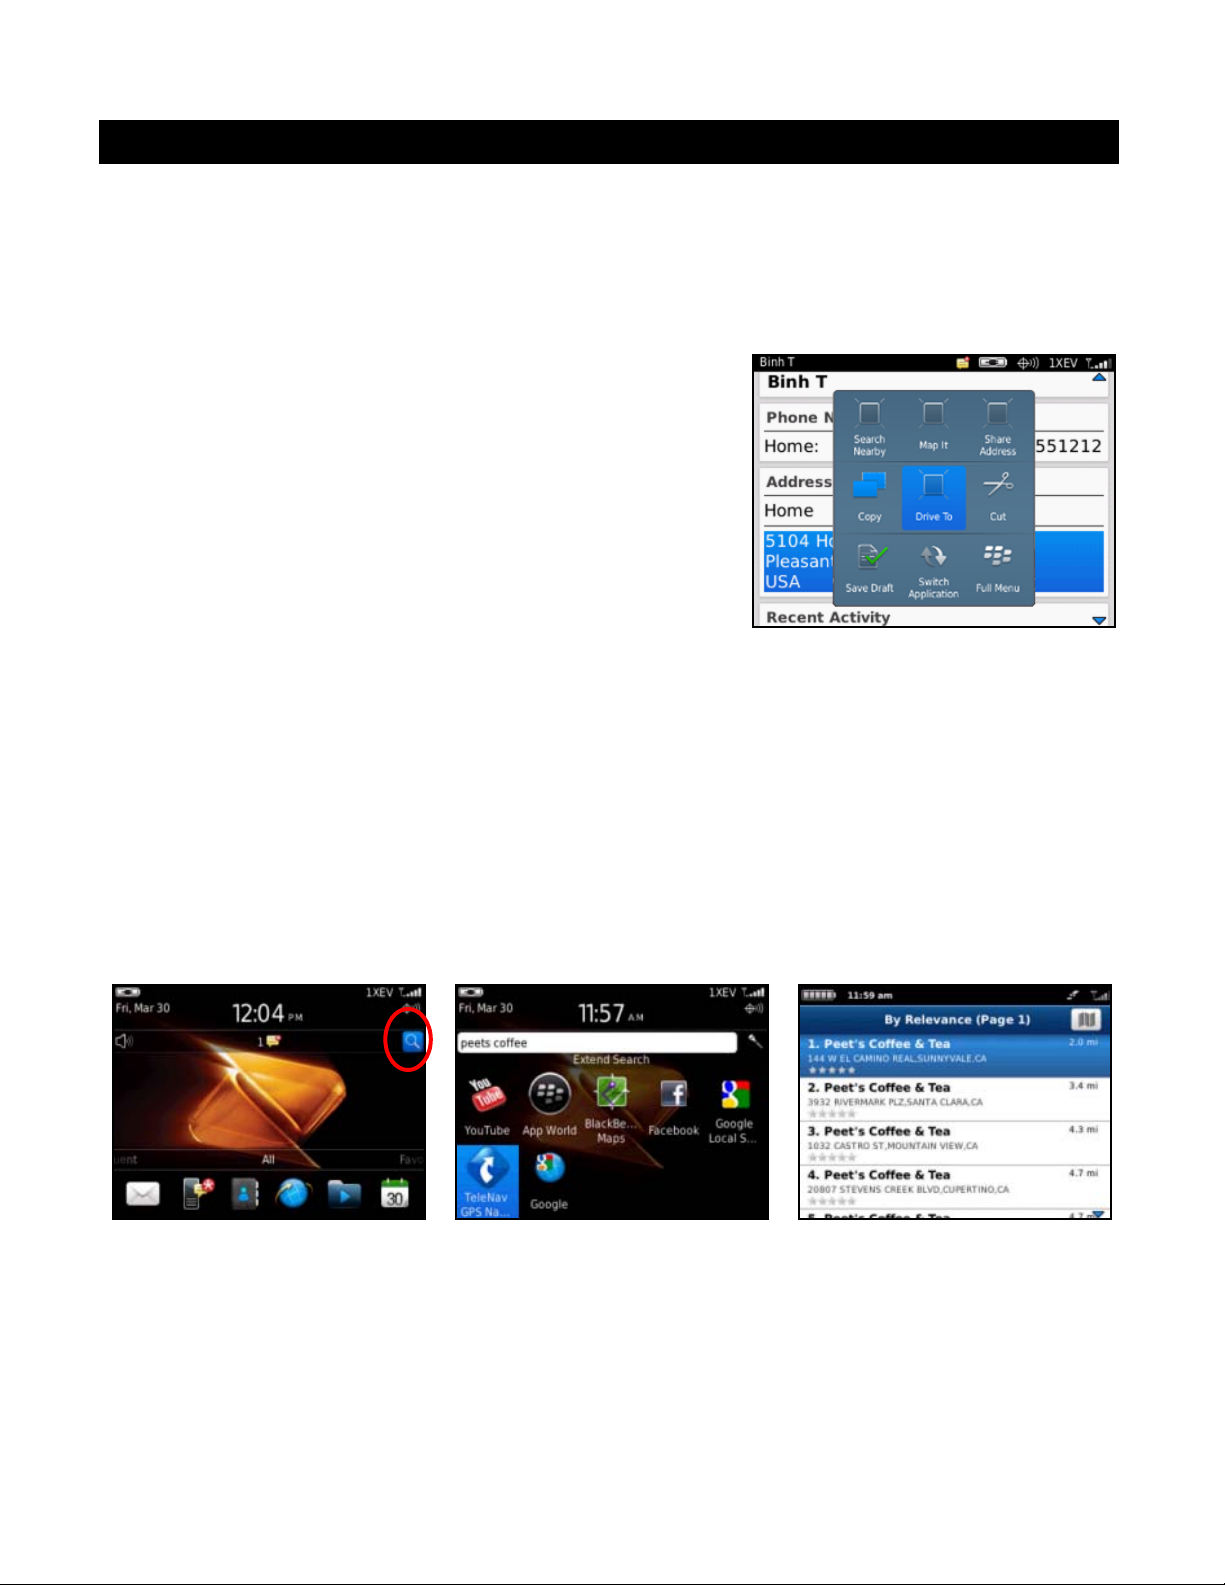
1. Choose an address from your BlackBerry Personal Information
Manager, such as Calendar and Contacts, or Message
Applications.
2. A menu will appear with the following options:
Search Nearby
Map It
Share Address
Drive To
3. Choose an option to launch Telenav GPS Navigator.
6.2 BlackBerry Universal Search
This feature allows you to enter an address or business from the Search bar on the BlackBerry home screen and then
launch Telenav GPS Navigator to get Drive To directions to the location.
NOTE: This feature is only availa ble on Blackberry d evices running OS 6 and a bove.
1. Choose the Magnifying Glass icon on the BlackBerry Home Screen to call up the Search bar.
2. Enter an address or business from the BlackBerry home screen, and then choose the Telenav GPS Navigator
app.
3. Telenav GPS Navigator will launch and search for the destination that you typed into the BlackBerry Universal
Search bar.
© 2012 Telenav, Inc. Page 13 of 58
Page 14
6.3 Search Bar
The Search box at the top of the Home, Drive To, and Places screens lets you quickly and conveniently key in an
address or business. For example, you can type in “coffee” or a specific address to drive to.
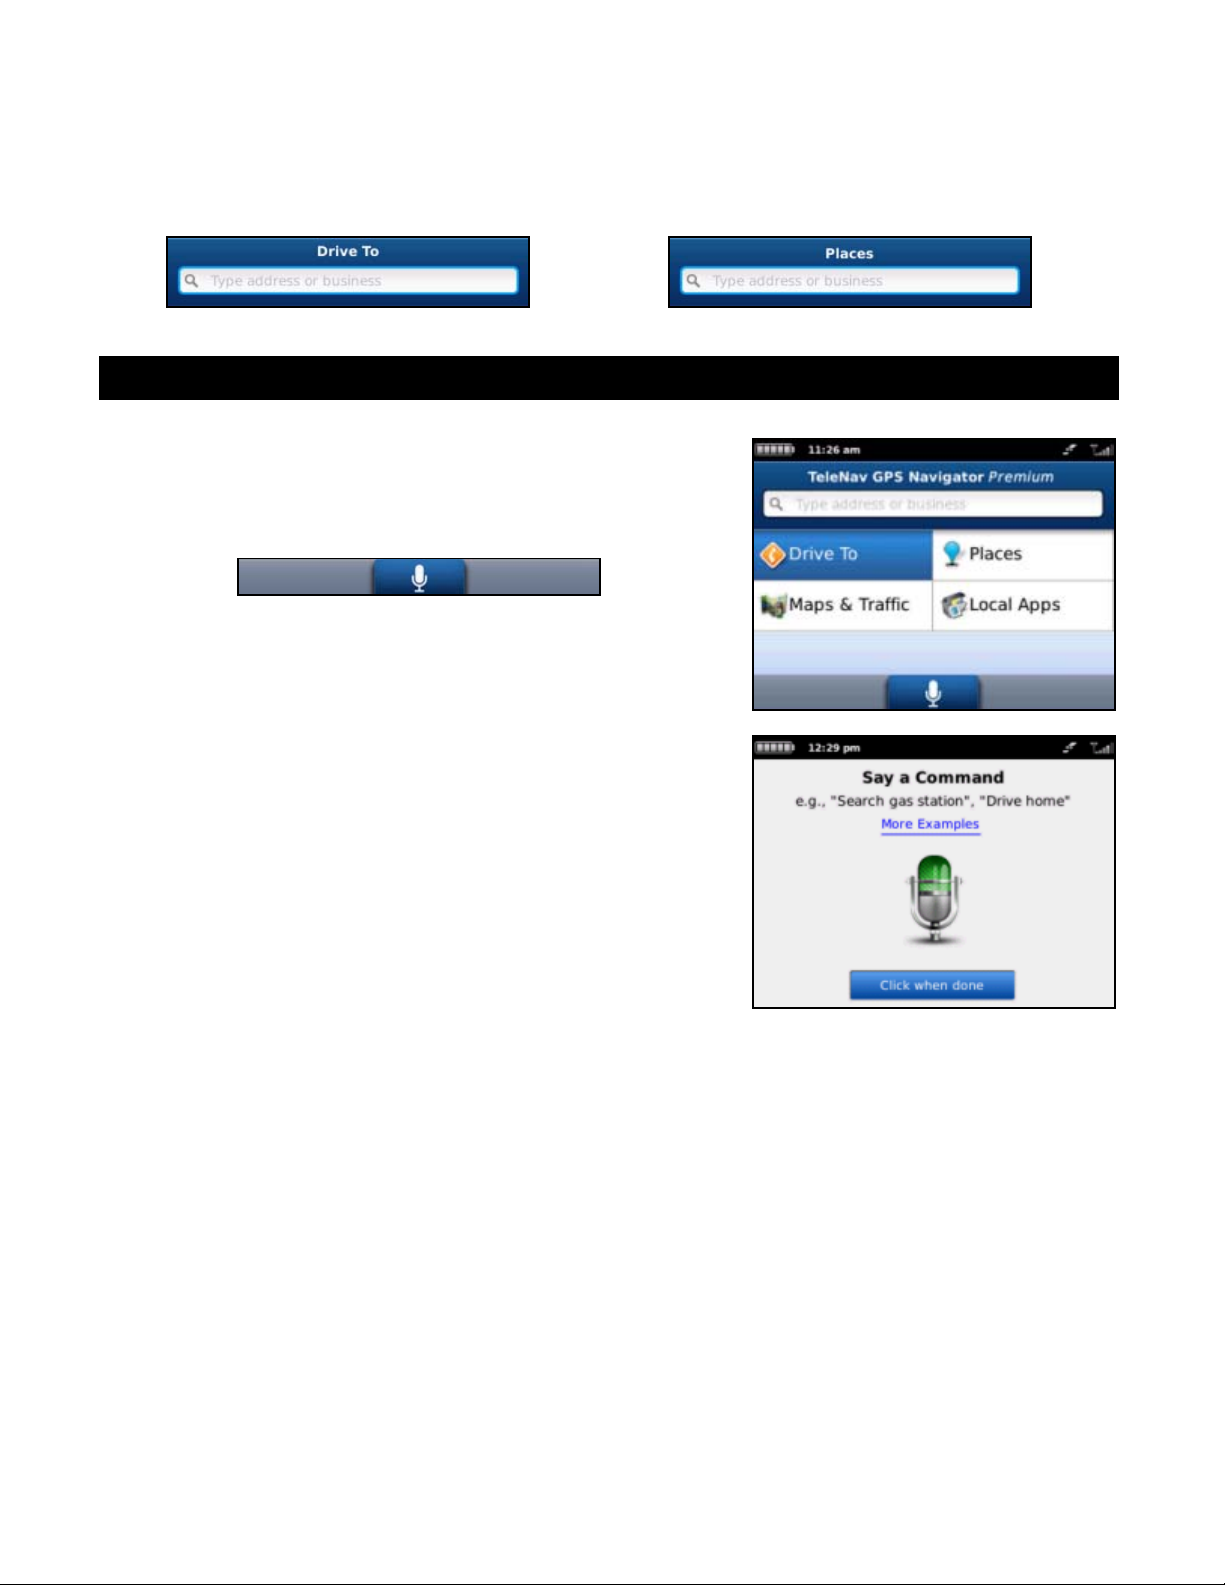
7. Speech Input
Instead of typing in an address or other keyword, or choosing a menu on
screen, you can use the voice-recognition system to speak in a command,
address, and/or keyword.
1. Choose the Speech Input icon.
2. Following the on-screen prompts to say a command, address,
and/or keyword.
3. Wait for the application to react, or choose Click when done.
4. The appropriate screen will then appear. For example: If you say
“Map here”, Telenav GPS Navigator will display a map of your
location as if you had chosen Maps & Traffic from the Home
screen.
© 2012 Telenav, Inc. Page 14 of 58
Page 15

8. Using a Bluetooth Headset
You can use a Bluetooth headset with the Telenav GPS Navigator application for features such as Drive To navigation
instructions, or to call or speak in an address. You must first pair your Bluetooth headset from the BlackBerry menu.
1. From the BlackBerry Main Menu, go to Options (the wrench icon) >> Networks and Connections >> Bluetooth
Connections.
2. Make sure Bluetooth is set to “On.” Choose Add New Device and then Search. The BlackBerry will search for
nearby Bluetooth devices.
3. Find the device name in the Select Device results list. You may need to follow the pairing instructions and
provide a password if asked, depending on your specific Bluetooth device.
4. Once the device is paired, launch Telenav GPS Navigator (Menu >> Telenav GPS Navigator).
5. Make sure your Bluetooth device is powered ON. Then choose a destination in the Drive To menu.
6. Once you are on the navigation screen, if you are using a non-touch-screen BlackBerry with a physical
keyboard, press the Speaker key
headset. If you are using a touch-screen BlackBerry, choose Menu >> Bluetooth On.
NOTE: If your Bluetooth headset is off, you will see a pop-up reminding you to turn it on. You shoul d see a small
Bluetooth icon at the top of the screen indicating that audio i s being routed to the headset. On a non -touch-screen
BlackBerry, press the Speaker key again on the navig ation screen to toggl e off the Bluetooth mode.
If you exit the Telenav GPS Navigator ap plication, you will need to toggl e Bluetooth back on when you return to the
navigation screen.
on the BlackBerry. Audio will now be routed through your Bluetooth
© 2012 Telenav, Inc. Page 15 of 58
Page 16
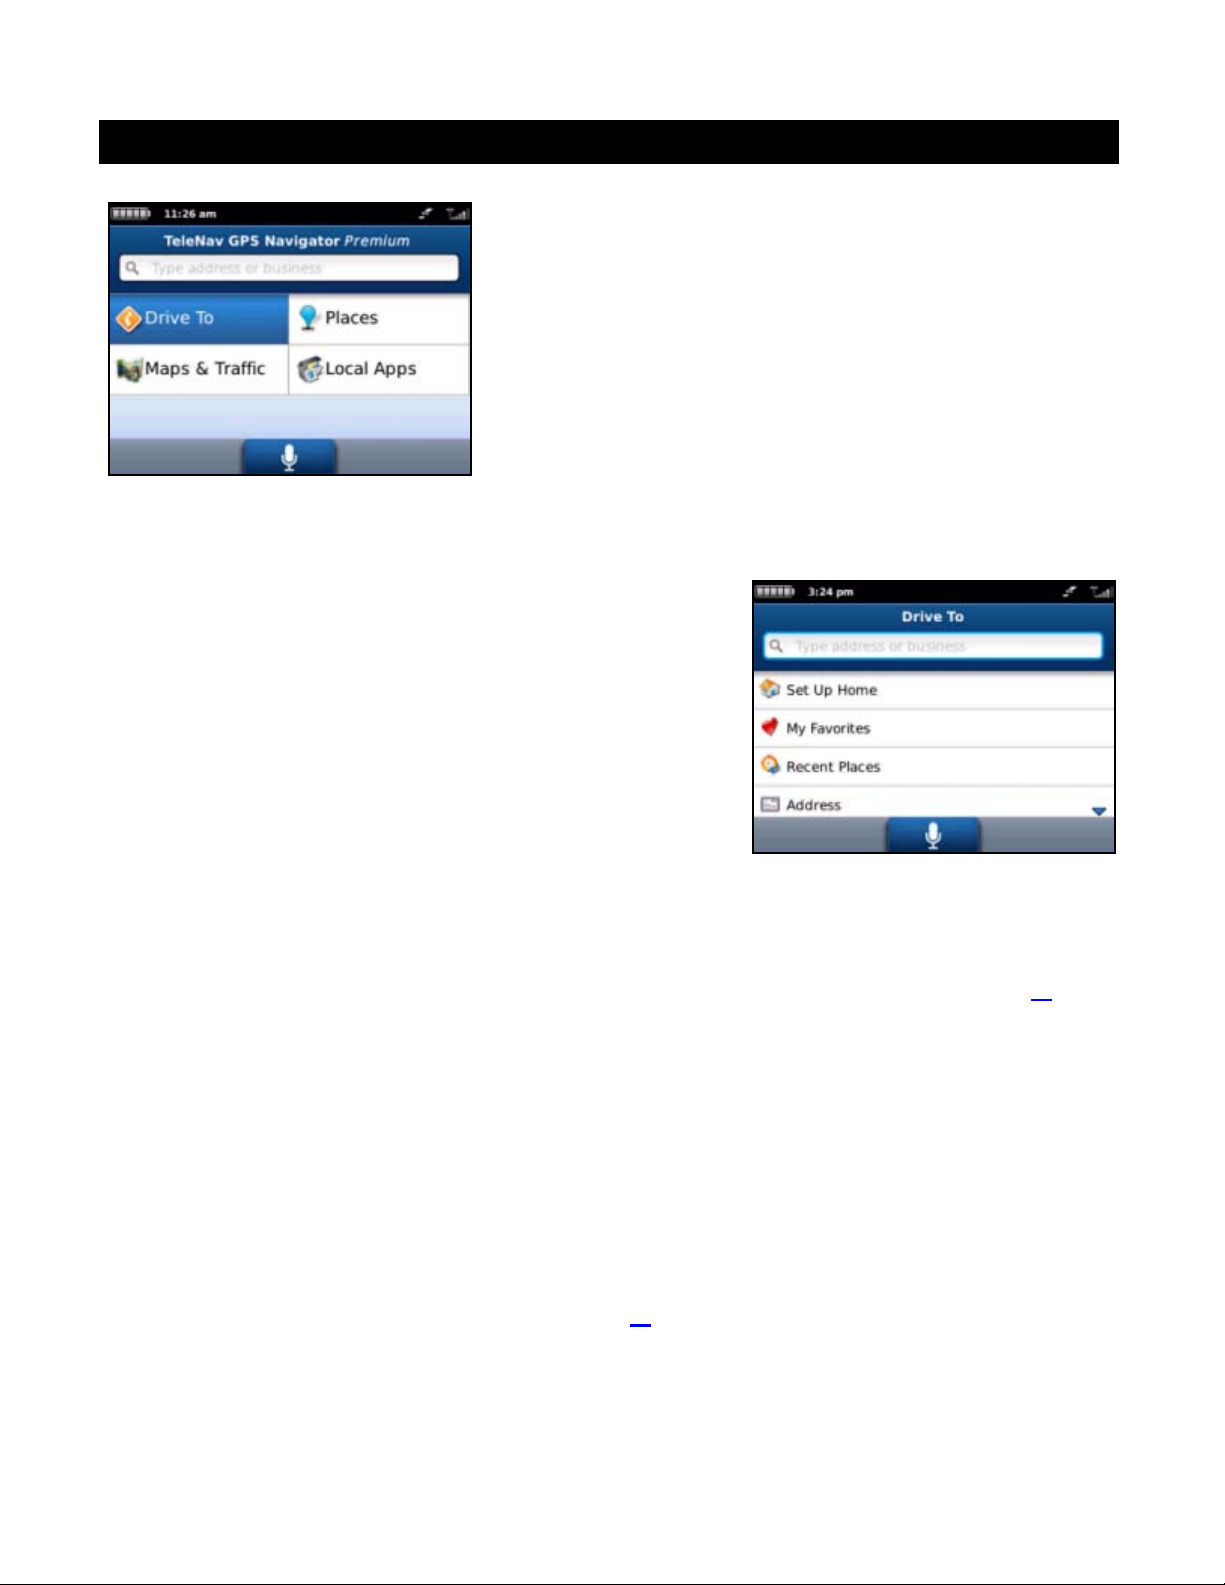
9. Drive To Menu
From the Telenav GPS Navigator Home screen (referred to in this guide
as the Home screen), use Drive To and choose from a variety of ways to
navigate to an address.
The bar along the bottom of the Home Screen shows a briefing of the
local weather, new movies, and any Telenav announcements.
NOTE: You can return to the Hom e screen from most screens in Telenav
GPS Navigator by pressing the Menu key and choosing Home.
9.1 Getting Driving Directions
To use the Drive To menu, do the following steps:
1. Choose Drive To from the Home screen.
2. Choose one of the following options from the Drive To menu as
shown in the illustration to the right and discussed below.
Resume Trip – This option appears if your last navigation
session was interrupted before you arrived at your
destination. Choose “Resume” to navigate to the destination
from your current location.
Home – Get directions from any location to your home
address.
My Favorites – Choose a Favorite place to get directions to
it. These are addresses that you have found and saved in the
past.
Recent Places – You can get directions to a Recent Place that you have navigated to. See page 19
more details.
Address – Enter a street address by typing or speaking.
Contacts – Choose saved contacts from your device’s Address Book.
Places – Search the directory for businesses such as restaurants, hotels, gas stations, etc. Sort businesses
by user popularity or distance. Once you find what you are looking for, you can get audible and visual
driving or walking directions.
Airport – Quickly find airports by 3-letter code or city name. Airports closest to your current location are
automatically suggested.
After you choose an address, the Trip Confirmation screen will appear. If you want to change your starting point,
destination, or route settings, choose the box at the top of the screen. You will be taken to the Route screen, where you
can choose an option to edit. See “Trip Confirmation” on page 22
for more information.
for
© 2012 Telenav, Inc. Page 16 of 58
Page 17
9.1.1 Resume Trip
This option appears if you have previously interrupted a navigation session. Your destination and route settings are
saved if you exit navigation while on a route so that you may easily resume the trip later. The settings for a paused trip
will clear if you begin a new route.
9.1.2 Home
This option allows you to quickly get directions from your currently location to your home address. The first time you
choose Home, you will be asked to type in the street address of your home.
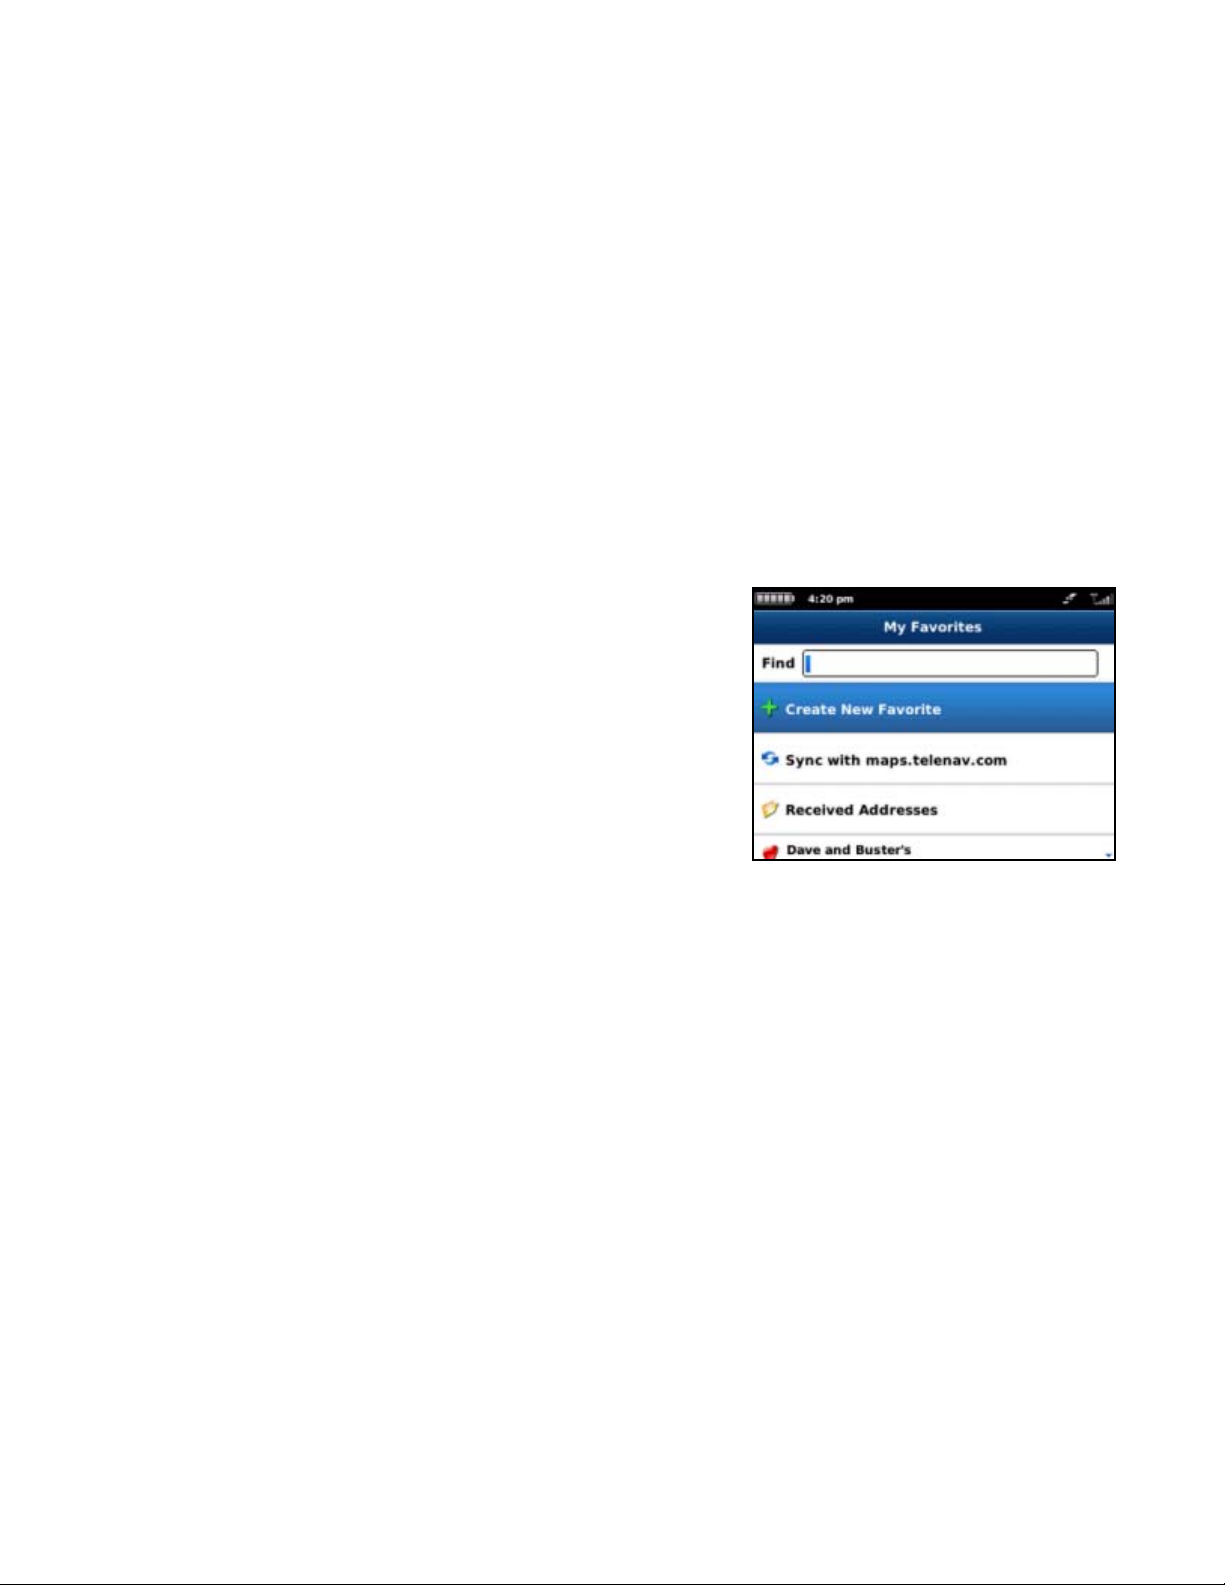
9.1.3 My Favorites
Favorites are places that you have saved in the past so you can quickly access them. Many users save their work
address as a Favorite so they can easily reuse the address later.
Your Favorites list can grow to an unlimited length. If your Favorites list is long, it may be easier to use the Find function
to find your desired Favorite. To use the Find function, enter one or more alphanumeric characters in the Find field. As
you type, the closest match(es) will appear at the top of the list.
You have the following options on this screen:
User-Created Categories – These are folders that you can
create when you save or edit a favorite. For example, when
you save an airport or coffee shop, you can create a category
for that type of place.
Received Addresses – This folder contains addresses that
other users have shared with you.
NOTE: You can delete favorites from this category, but the
category itself may not be deleted or renamed.
Individual Favorites – These are represented by the heart
icon. Highlight a Favorite and then press the Menu key or
click the trackpad for additional options:
o Drive To – Get driving directions to this location.
o Call – Call the business (if there is a phone number listed with the Favorite).
o Map – Plot this location on a map.
o Edit – Edit the name, address, or category the favorite is located in (See Category below).
o Delete – Delete the Favorite from the list.
o Share – Share the address with contacts from your device’s contact list or by providing recipients’
phone numbers (choose up to 10 at once).
NOTE: Depending on the F avorite, not all o f these options may be a vailable.
© 2012 Telenav, Inc. Page 17 of 58
Page 18
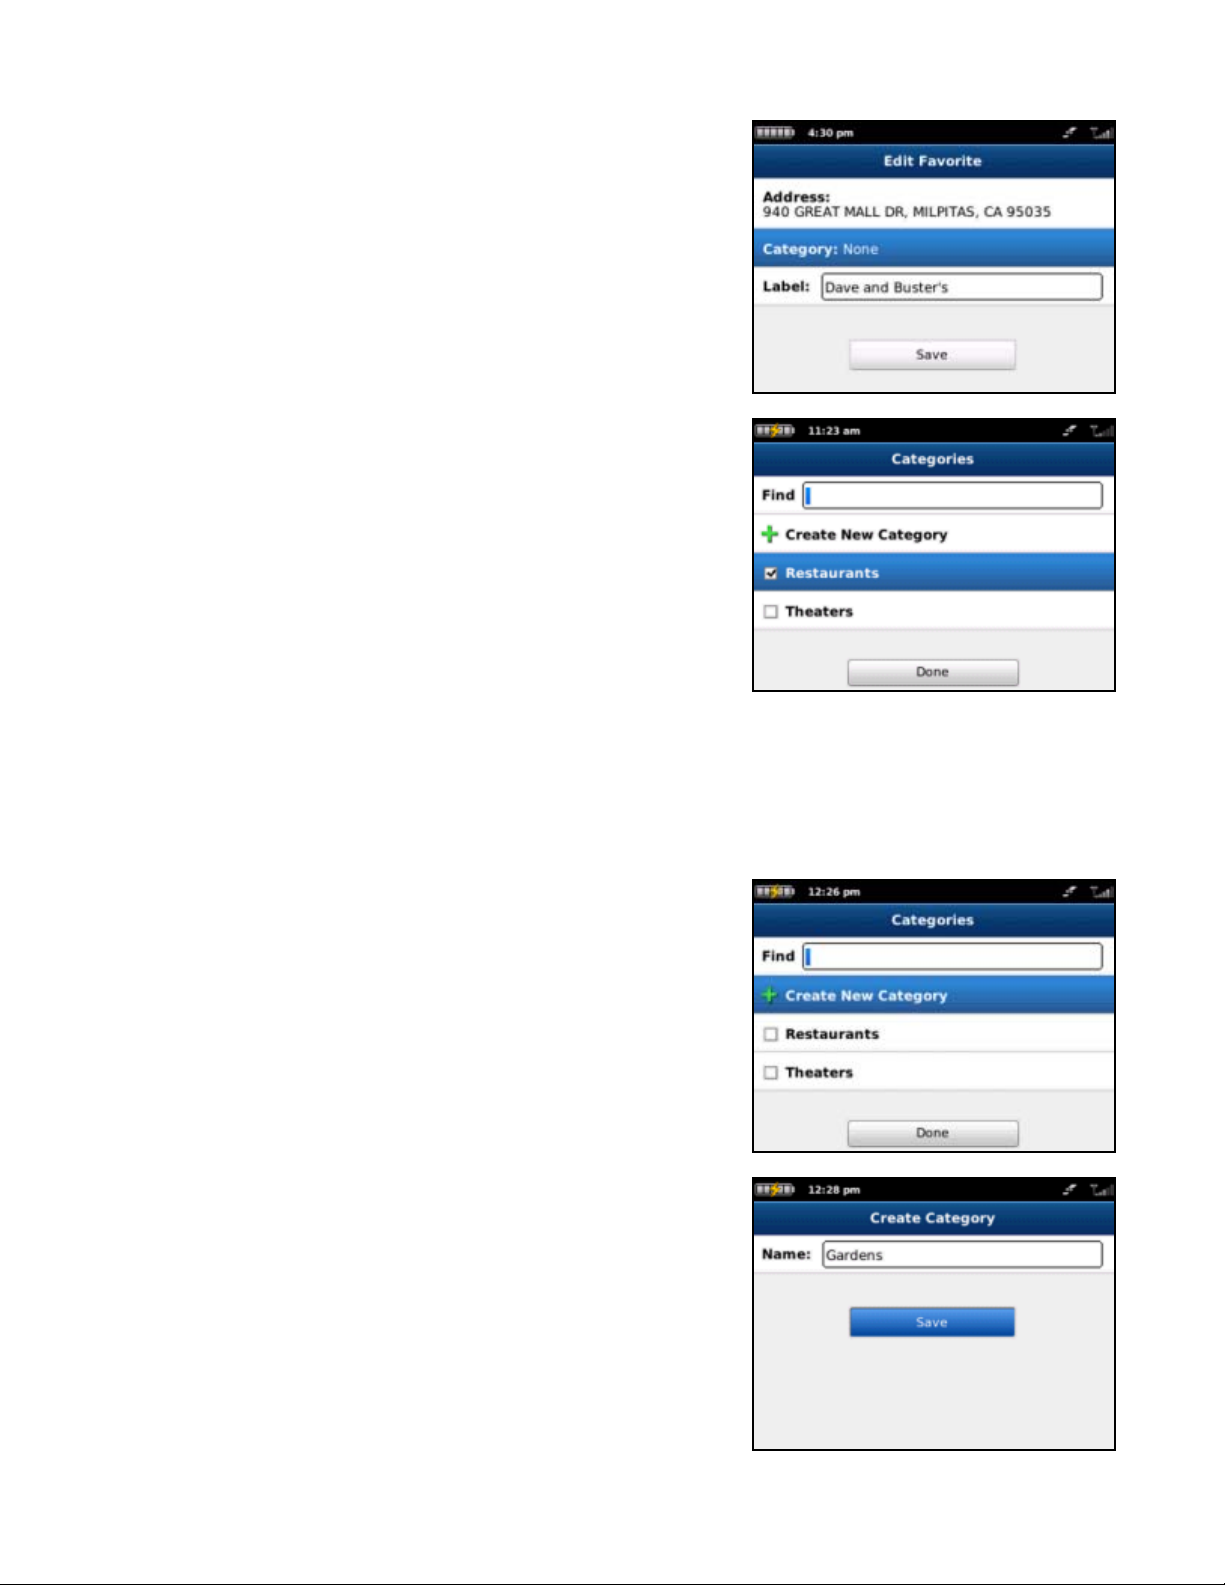
9.1.3.1 Category
This option allows you to organize where a location should be stored.
1. In My Favorites, highlight an individual Favorite from the list.
2. Press the Menu key and choose Edit. The Edit Favorite screen
appears.
3. Choose the Category field.
4. On the Categories screen, check the category folder in the list to
add the location to the folder. You may choose as many
categories as you would like.
5. Choose Done. You will be taken back to the Edit Favorite screen.
9.1.3.2 Create New Category
1. In My Favorites, highlight an individual Favorite from the list.
2. Press the Menu key and choose Edit. The Edit Favorite screen appears.
3. Choose the Category field.
4. On the Categories screen, choose New Category.
5. On the next screen, enter a category name and choose Save.
© 2012 Telenav, Inc. Page 18 of 58
Page 19
9.1.3.3 Delete or Rename a Category
You can delete or rename a category that you have created in My Favorites (the default “Received Addresses” category,
which stores addresses other users may have shared with you, cannot be deleted or renamed).
1. Choose Drive To >> My Favorites.
2. Highlight the category that you want to rename or delete. Then press Menu >> Rename or Menu >> Delete.
You have the following delete options:
Category Only – Delete just the category. All favorites will be moved out of it and appear on the Favorites
screen.
Category & Favorites – Delete the category and all favorites in it. This deletes the favorites in this category
only. If a favorite is also saved under a different category, this action does not delete it there.
Cancel – Close the pop-up and go back to the My Favorites screen.
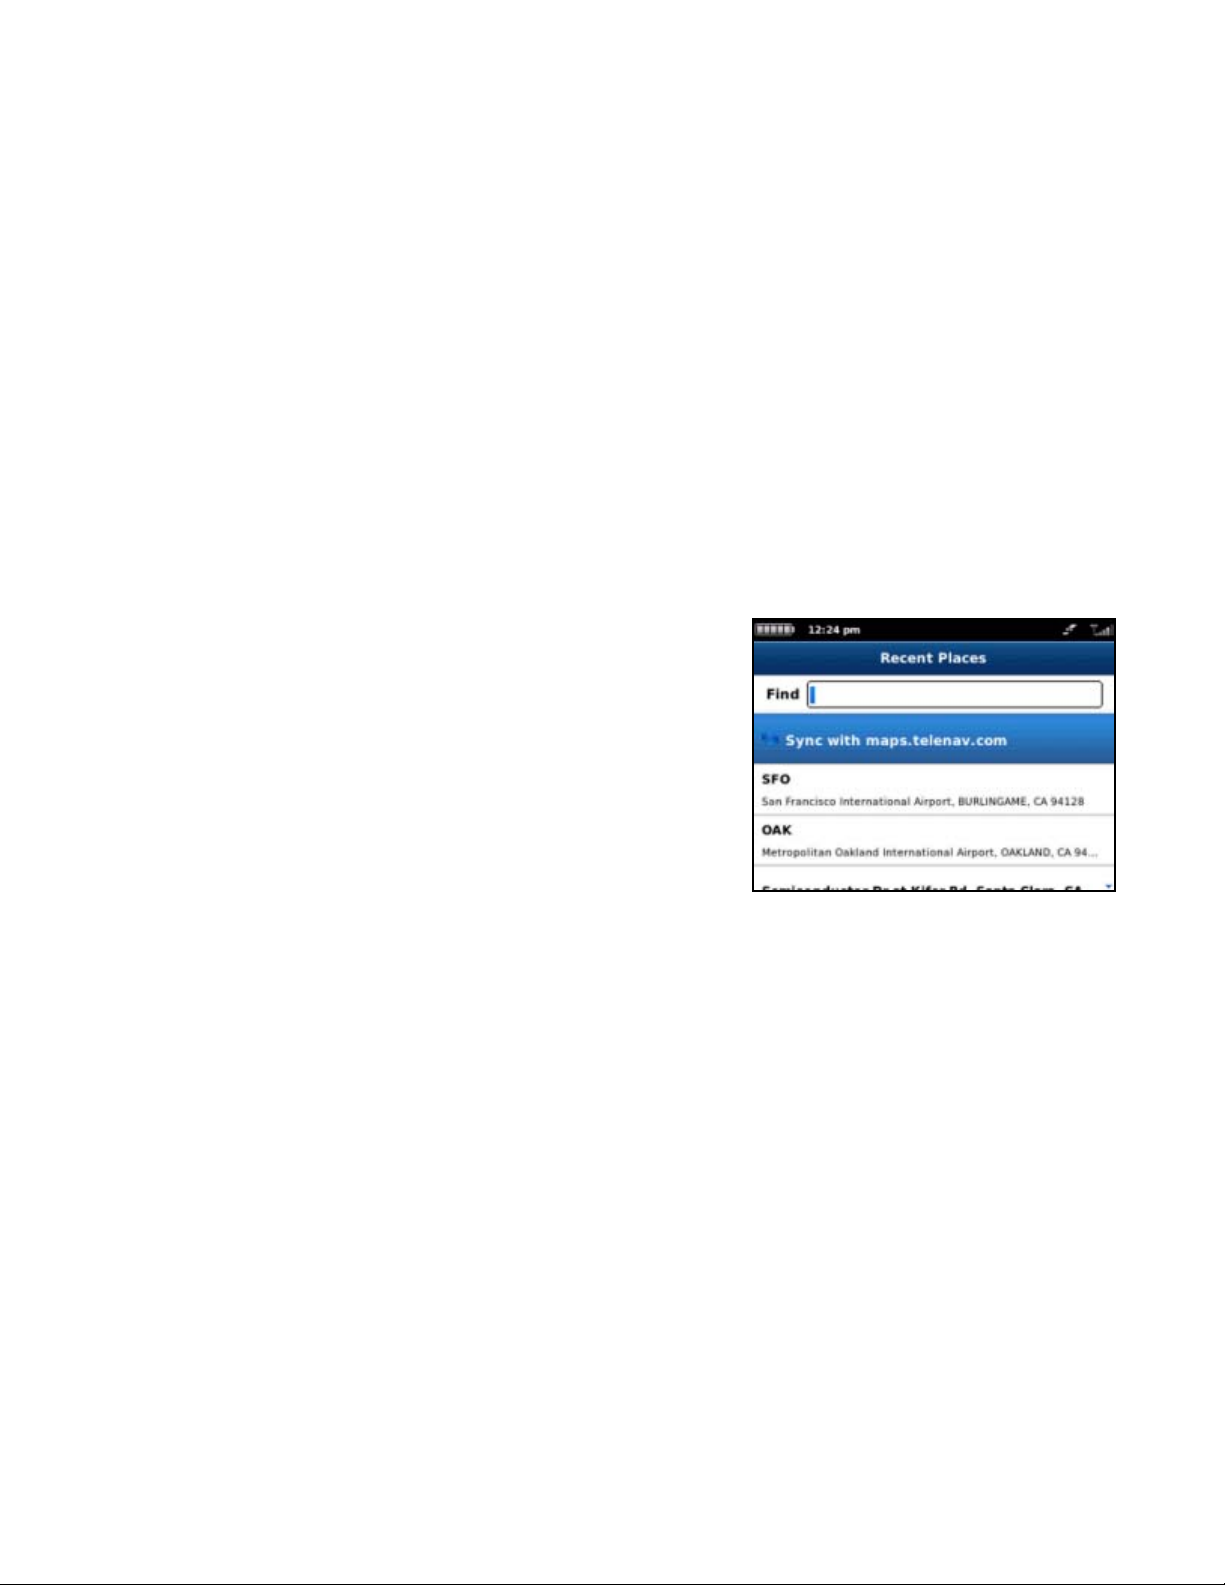
9.1.4 Recent Places
Recent Places are addresses used recently for navigation. When an
address in the list is used, it is promoted to the head of the list.
Your Recent places list can grow to an unlimited length. If you have a
large Recent Places list, it may be easier to use the Find function to find
your desired Recent Place. To use the Find function, enter one or more
alphanumeric characters in the Find text box. As you type, the closest
match(es) will appear at the top of the list.
You can choose a location in Recent Places and press the Menu key for the following options.
Drive To – Get driving directions to this location.
Call – Call the business (if there is a phone number listed with the Recent Place).
Map – Plot this location on a map.
Save – Save the Recent Place to your Favorites list to easily locate it later.
Delete – Delete the Recent Place from the list.
Rate – Submit your rating for this location.
Share – Share the address with contacts from your device’s contact list or by providing recipients’ phone
numbers (choose up to 10 at once).
NOTE: Depending on the Recent Place, not all of the se options may b e available.
In the Recent Places screen, choose your desired location to begin navigation.
© 2012 Telenav, Inc. Page 19 of 58
Page 20

9.1.5 Address
Enter a street address by typing in the appropriate fields. The address is automatically saved to your Recent Places list.
1. On the Drive To menu, choose Address.
2. Type in a street address or speak it (see page 14
information on speech input).
NOTE: When typing, partial entry (5 or more letters) i s okay for
the street name. You can also leave the Address field blank and
just input a city and state or zip code to use the address of the
city’s center. If you are typing, nearby citi es or addresse s that you
have recently visited will be automatically suggested as you enter
characters. To save time, you can choose the sugge stions befor e
you finish typing.
3. Choose Submit when you are finished typing.
Telenav GPS Navigator checks to see if the address that you entered can be found. Telenav GPS Navigator prompts
you to modify the address if the address is too new to be found in the mapping database or if the street number cannot
be found for some other reason, for example, if the street number does not exist. The application may also propose an
address closest to the range of your entry.
NOTE: You can edit your route whil e in navigation m ode. See “Edit Route” on page 22
for more
for further details.
9.1.6 Contacts
Quickly find addresses that you have saved in your device’s contact list. If you have a large contact list, it may be easier
to use the Find function to find your desired address. To use the Find function, enter a First or Last name of a contact in
the Find text box. As you type, the closest match(es) will appear at the top of the list.
1. On the Drive To menu, choose Contacts.
2. In the Contacts screen, choose a contact to get navigation
directions.
© 2012 Telenav, Inc. Page 20 of 58
Page 21

9.1.7 Places
Telenav GPS Navigator offers a full national business directory. Search by typing in a keyword or by choosing a
category in the extensive directory.
1. On the Drive To menu, choose Places.
2. Type in a business name or speak it (see page 14
information on speech input). You can also choose a category
like ATM, Food/Coffee, Gas, Grocery, or Lodging.
3. When a business matching your criteria appears, choose it to get
navigation directions to that address.
See the Places menu on page 32
for more details about this feature.
for more
9.1.8 Airport
Quickly find airports by Airport Code or City Name.
1. In the Airport screen, type or speak the three-letter abbreviation of
the airport, or type the whole name of the airport (see page 14
more information on speech input).
NOTE: Airports nearest to your destination will be suggested in
the drop-down box. As you type, matching airpo rts will also be
suggested. You can choose one of the sugge stions to save time.
2. Choose Submit to get navigation directions to the airport.
for
9.2 Other Ways to Get Directions
Telenav GPS Navigator allows you to get directions to an address in a number of ways.
Open your device’s contact list to choose a contact with a validly formatted postal address – example: street number and
street name, city, state, zip code (optional). Choose Menu >> Drive To.
Use the Search option on the Home screen and search for a Point of Interest (POI). Then Drive To that location.
© 2012 Telenav, Inc. Page 21 of 58
Page 22

9.3 Trip Confirmation Screen
Moments after you choose a Drive To location, the Trip Confirmation
screen appears. Telenav GPS Navigator calculates what it believes to be
an optimal route to your destination and offers up to three routes for your
trip, based on your selected Route Style.
9.3.1 Editing Your Route
Telenav GPS Navigator assumes that you want to start from your current
location, but you can edit your route.
1. Choose the route detail box at the top of the screen for editing
options.
2. After you are finished, choose Get Route to get directions.
NOTE: You can also make adj ustments to you r route style in Menu >>
Settings >> Navigation (see page 44
for details).
9.3.1.1 Edit Origin
This option lets you choose a street address other than your current location from which to start your route.
1. Choose the Origin field on the Route screen. This menu is almost identical to the Drive To menu.
2. Use the menu to choose a new starting point.
9.3.1.2 Edit Destination
This option lets you change your destination to a different street address.
1. Choose the Destination field on the Route screen.
2. Use the menu to choose a new ending point for the trip.
© 2012 Telenav, Inc. Page 22 of 58
Page 23

9.3.1.3 Edit Route Settings
Choose the Route Settings field on the Route screen and then choose one of the following to edit your route style:
Fastest - This default Route Style finds the fastest driving route.
Shortest - This Route Style may or may not take more time to drive, but it shows you the shortest distance.
Prefer Streets - Use streets instead of highways if possible.
Prefer Highway - Use highways instead of streets if possible.
Pedestrian - Find walking directions.
NOTE: The “Pedest rian” rout e style may m ake your walking rout e easier, for e xample by allo wing you to take advantage
of going the wrong way down one-way street s. As always, u se your comm on sense to determi ne the safety of any route.
When you choose one of the above options, you will see a screen where you can select what to avoid on your route.
Choose an option, and then choose Done.
NOTE: This screen doe s not appear if you selected “Pe destrian” as your Route St yle.
9.3.2 Moving to the Nearest Street
If you are not directly on a street, for example you are in a large parking lot or driveway, you will see a screen that shows
Telenav GPS Navigator’s best estimate of where you are with guidance on how to move to the first street.
9.3.3 Audible Guidance Tones
Telenav GPS Navigator delivers spoken audible directions as you drive. A preparatory audible tone is typically heard no
less than 30 seconds before reaching a turn, and an action audible tone is typically heard no less than 10 seconds
before reaching a turn. The preparatory audible tone may not be sounded if the distance to the next turn only allows time
for the action tone.
The lead times for the audible guidance tones are increased proportionally to your driving speed. This allows more time
for changing lanes before a turn if you are driving at highway speeds as opposed to driving more slowly on local streets.
A Preference setting determines whether street names are included in the messages or not. Enabling street names
increases packet data usage.
9.3.4 Audio Replay
To repeat an audio prompt during navigation, press the top navigation bar.
9.3.5 Miss a Turn?
Whenever you miss a turn, turn the wrong way, turn too early or too late, or otherwise get off the planned route to your
destination, the Telenav GPS Navigator automatically creates a new route to your desired destination, audibly
announce, “Rerouting,” and give you a new set of instructions.
If you realize you have missed a turn or have otherwise gotten off the route, just keeping driving. Telenav GPS Navigator
detects your current location and recalculates a new set of driving directions to get you back on track.
It may take approximately 15 to 30 seconds for Telenav GPS Navigator to update your route. If during this process you
make additional deviations from your current route, Telenav GPS Navigator may have to contact its servers for another
new route.
Since Telenav GPS Navigator requires access your carrier’s network, if you are off route and outside of the carrier’s
coverage area, you must return to your carrier’s coverage area in order for Telenav GPS Navigator to recalculate your
route.
© 2012 Telenav, Inc. Page 23 of 58
Page 24

9.4 Navigation Views
9.4.1 3D Moving Map
A 3-dimensional map with turn icons (default).
This view allows you to see how the road ahead is organized, similar to
the perspective of a bird flying above the route. You can see the route to
your destination as a blue overlay on one of the roads with white triangles
leading you in the correct direction. Orange arrows mark any upcoming
turns.
The name of the street you are currently on is displayed at the bottom of
the screen. The street name for your next turn is shown at the top.
9.4.2 2D Moving Map
The 2D view allows you to see how the road network is organized, similar to
the perspective of a cartographer looking down on a map.
The name of the street you are currently on is displayed at the bottom of
the screen. The street name for your next turn is shown at the top.
In 3D and 2D moving maps, you can zoom in or out while navigating by using - and +. You can also pan the map up,
down, left, and right by using the trackpad. You may see a small network activity indicator comprised of two arrows in the
upper right corner of the display when you change map scale factor.
© 2012 Telenav, Inc. Page 24 of 58
Page 25

The
content on the 3D Moving Map navigation view is explained below.
Next turn
prompt
Distance
until next
turn
Name of the
street you will
turn onto
Total
distance and
estimated
time of
arrival
Directional
heading
Upcoming
ss street
cro
Name of the
street you are
on
© 2012 Telenav, Inc. Page 25 of 58
Page 26
9.5 On-Screen Navigation Icons
The following table explains some of the icons that you may see during a navigation session when viewing a 2D or 3D
Map.
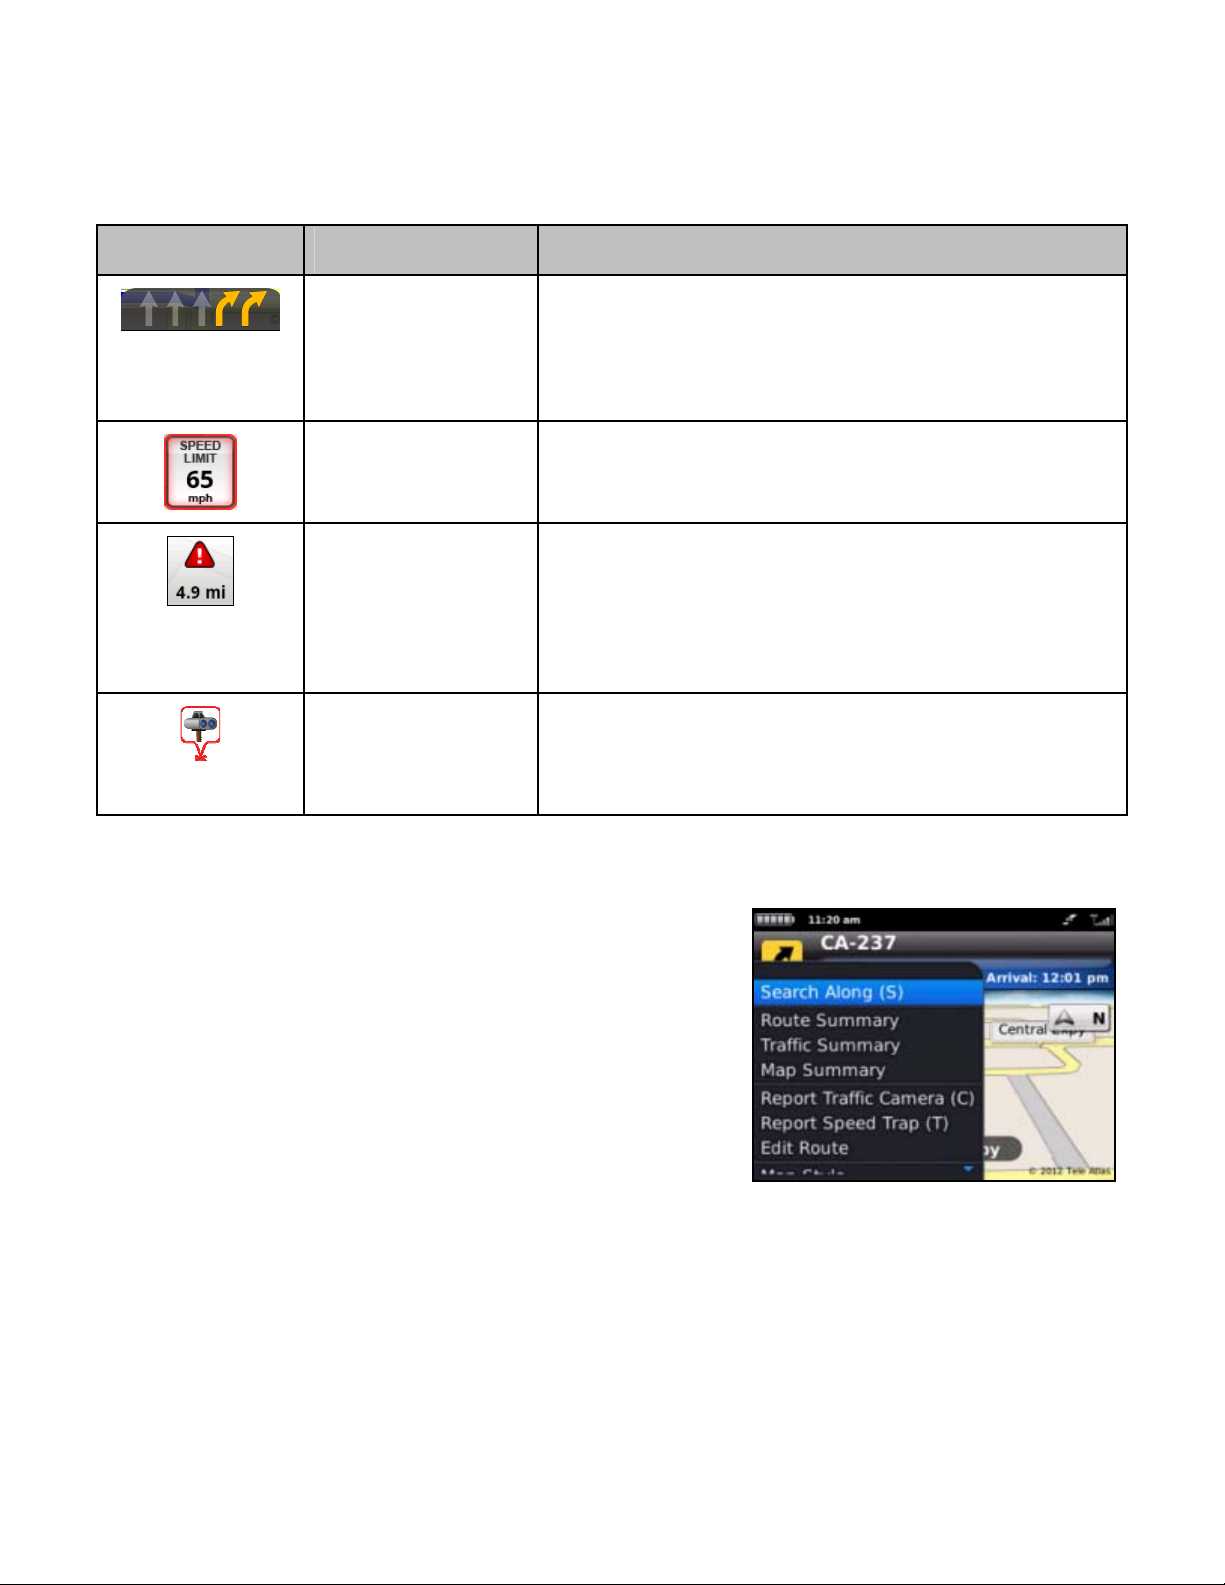
Icon Name Function
Lane Assist The Lane Assist feature is designed to help you determine which
Speed Limit The legal speed limit will be displayed on the screen for major roads
Traffic Alert When you are viewing moving maps during navigation and have
lane(s) to be in at a multi-lane highway junction or an intersection.
As you approach a turn or junction, the Lane Assist graphic will be
displayed on the screen with correct lanes highlighted for your
route. Lane Assist is shown at the bottom of the screen.
and highways. The Speed Limit icon will show a red outline if you
are exceeding the posted limit.
set Traffic Alerts to “On” in Menu >> Settings >> Navigation >>
Traffic Incident Alert, an icon will appear on the map if there is an
accident less than 15 miles ahead of your current route. You will
see the distance along the route until the incident and hear an audio
warning.
Traffic Cameras/
Speed Traps
You will see an icon when you are approaching a traffic camera or
a reported Speed Trap. Traffic camera and police trap data is
reported by users of Telenav GPS Navigator and a 3
provider.
9.6 Navigation Menu Options
To view navigation options, press the Menu key. A sidebar menu will
appear on the navigation screen. The options are described in the
sections below.
When you arrive at your destination, Choose Menu >> Home to return to
the Telenav GPS Navigator Main Menu, or simply press the Escape key.
rd
-party
© 2012 Telenav, Inc. Page 26 of 58
Page 27
The
Navigation menu has the following options:
9.6.1 Places
Use the Places menu to find the desired locations along your navigation
route. For example, find every Mexican restaurant on your route between
San Francisco and Sacramento.
After you have entered a keyword for your search or selected from the
available categories, you have the following search options:
Up Ahead – Find points of interests along the route near
your current location.
Near Destination – Find points of interest near your
destination.
The results screen displays either the number of miles from your current
location (if you chose Up Ahead), or the number of miles from your
destination (if you chose Near Destination). Choose a restaurant from the
Search Along list to get driving directions from your current location to the
restaurant.
Choose the Map button
along your route.
You can change the sorting options (by Relevance, Distance, or Rating),
or page through the Search Results list by using the buttons along the
bottom of the screen.
to view the points of interest on a map
9.6.2 Map
The entire route from your starting location to your destination is drawn on
a map, complete with the latest traffic alerts and traffic flow information.
The route is displayed as a blue line connecting the Start and Finish flags.
Highways and major roads with traffic flow information are color-coded by
speed in each direction of travel:
Speed Road Color
> 50 mph Green
30 – 50 mph Yellow
< 30 mph Red
Go to Menu key >> Show/Hide Traffic to hide or show traffic (depends on availability). Use the “+” and “-” keys to zoom
in and out of the map. Use the trackpad to pan the map.
Unknown No color
NOTE: To go back, press the Escape key.
© 2012 Telenav, Inc. Page 27 of 58
Page 28

The f
ollowing are some icons you may see depicting different types of incidents:
Accident
Congestion
Construction
Incident or
events
9.6.3 Directions (Route Summary)
A text listing of every turn for this navigation session from your starting
location to your destination, along with mini turn icons.
Choose a segment to view a turn-by-turn map of that segment.
9.6.4 Traffic Summary
Displays overall delay from traffic, a summary of incidents on the route,
and the average speed for each segment where available. You can
choose any line to view more details.
Below is an explanation of what you will see on the Traffic Alert screen:
Incidents (triangle icons) – Total number of remaining incidents directly
along the route. The color of the triangle indicates incident severity:
Color Severity
Yellow Only Minor incidents
Orange At least one Major incident,
no severe incidents
NOTE: “N/A” is displa yed for segments wit hout traffic flow inf ormation (u sually local street s) or segments fa rther than
200 miles away.
Red At least one Severe incident
Trip Time – Estimated time the entire trip will take, including any traffic delays.
Mph/Kph – Average speed on that road segment.
Street – The street or highway name of the road segment.
© 2012 Telenav, Inc. Page 28 of 58
Page 29

If you cho
ose an incident line, you can view the details. Below is an
explanation of what you will see on the Traffic Detail screen:
Average Speed Bar – Average speed of a segment on a
scale of 0 to the maximum-posted speed for that segment.
Incident Detail – Each incident is displayed with the
following:
o Incident graphic detailing the type of incident
o Location
o Additional comments
9.6.5 Report Traffic Camera and Speed Trap
Traffic Camera and Speed Trap data is generated by Telenav GPS
Navigator users and a 3
Speed Trap, choose Menu >>” Report Traffic Camera” or “Report Speed
Trap” during a navigation session. On devices with physical keyboards,
you can press the shortcut keys C and T, respectively.
rd
-party provider. To report a Traffic Camera or a
© 2012 Telenav, Inc. Page 29 of 58
Page 30
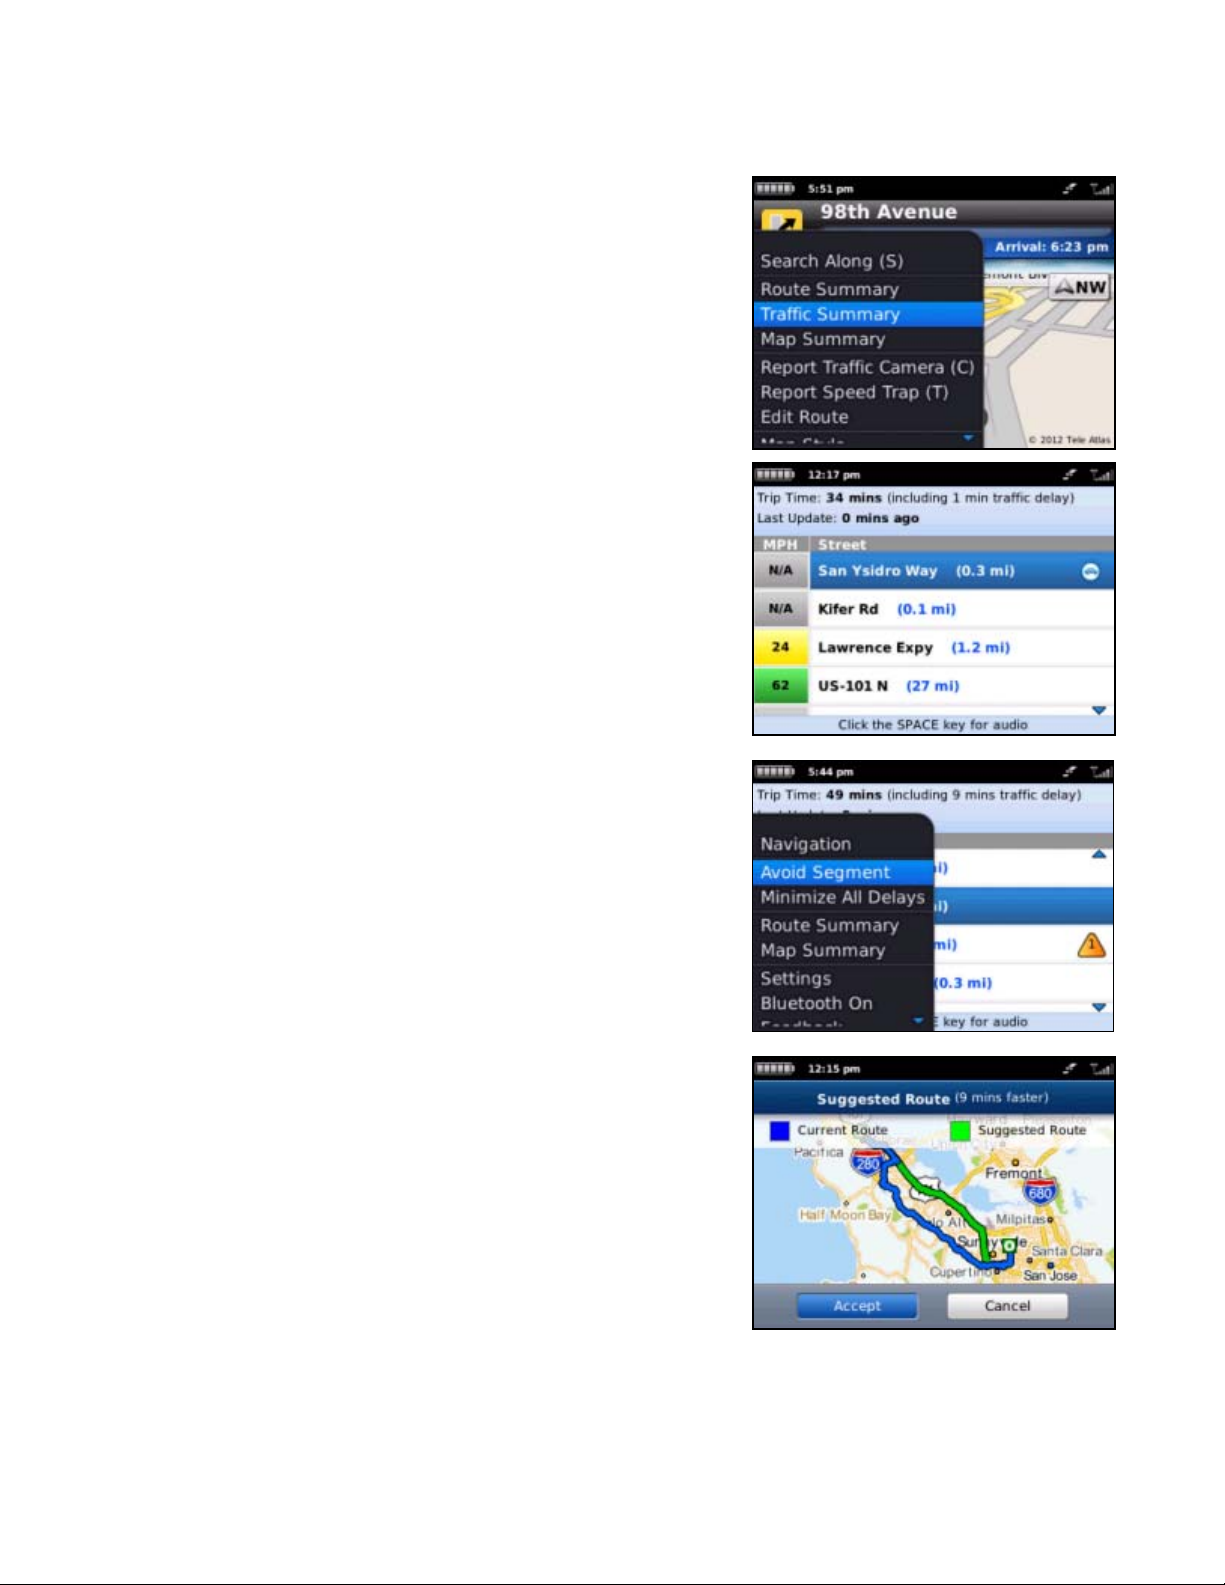
9.7 Avoiding Traffic
9.7.1 From Traffic Summary
While you are in a navigation session, you can choose to re-route starting
from the Traffic Summary screen to avoid traffic congestion.
1. During navigation, press the Menu key and then choose Traffic
Summary.
2. Choose a line to view traffic details for a particular segment.
Minimize Delays – Reroute to minimize traffic delays for the
entire current route.
Avoid Segment (this option appears when you choose a
segment with an incident detail) – Reroute to avoid the
selected segment.
NOTE: Press the Escape key to go back t o the navigation screen.
The Suggested Route screen shows the proposed new route, outlining the
original (blue) and suggested route (green), as well as listing the estimated
time saved.
Choose Accept to generate a navigation session for the new
route.
Choose Cancel to go back to the Traffic Summary screen.
© 2012 Telenav, Inc. Page 30 of 58
Page 31
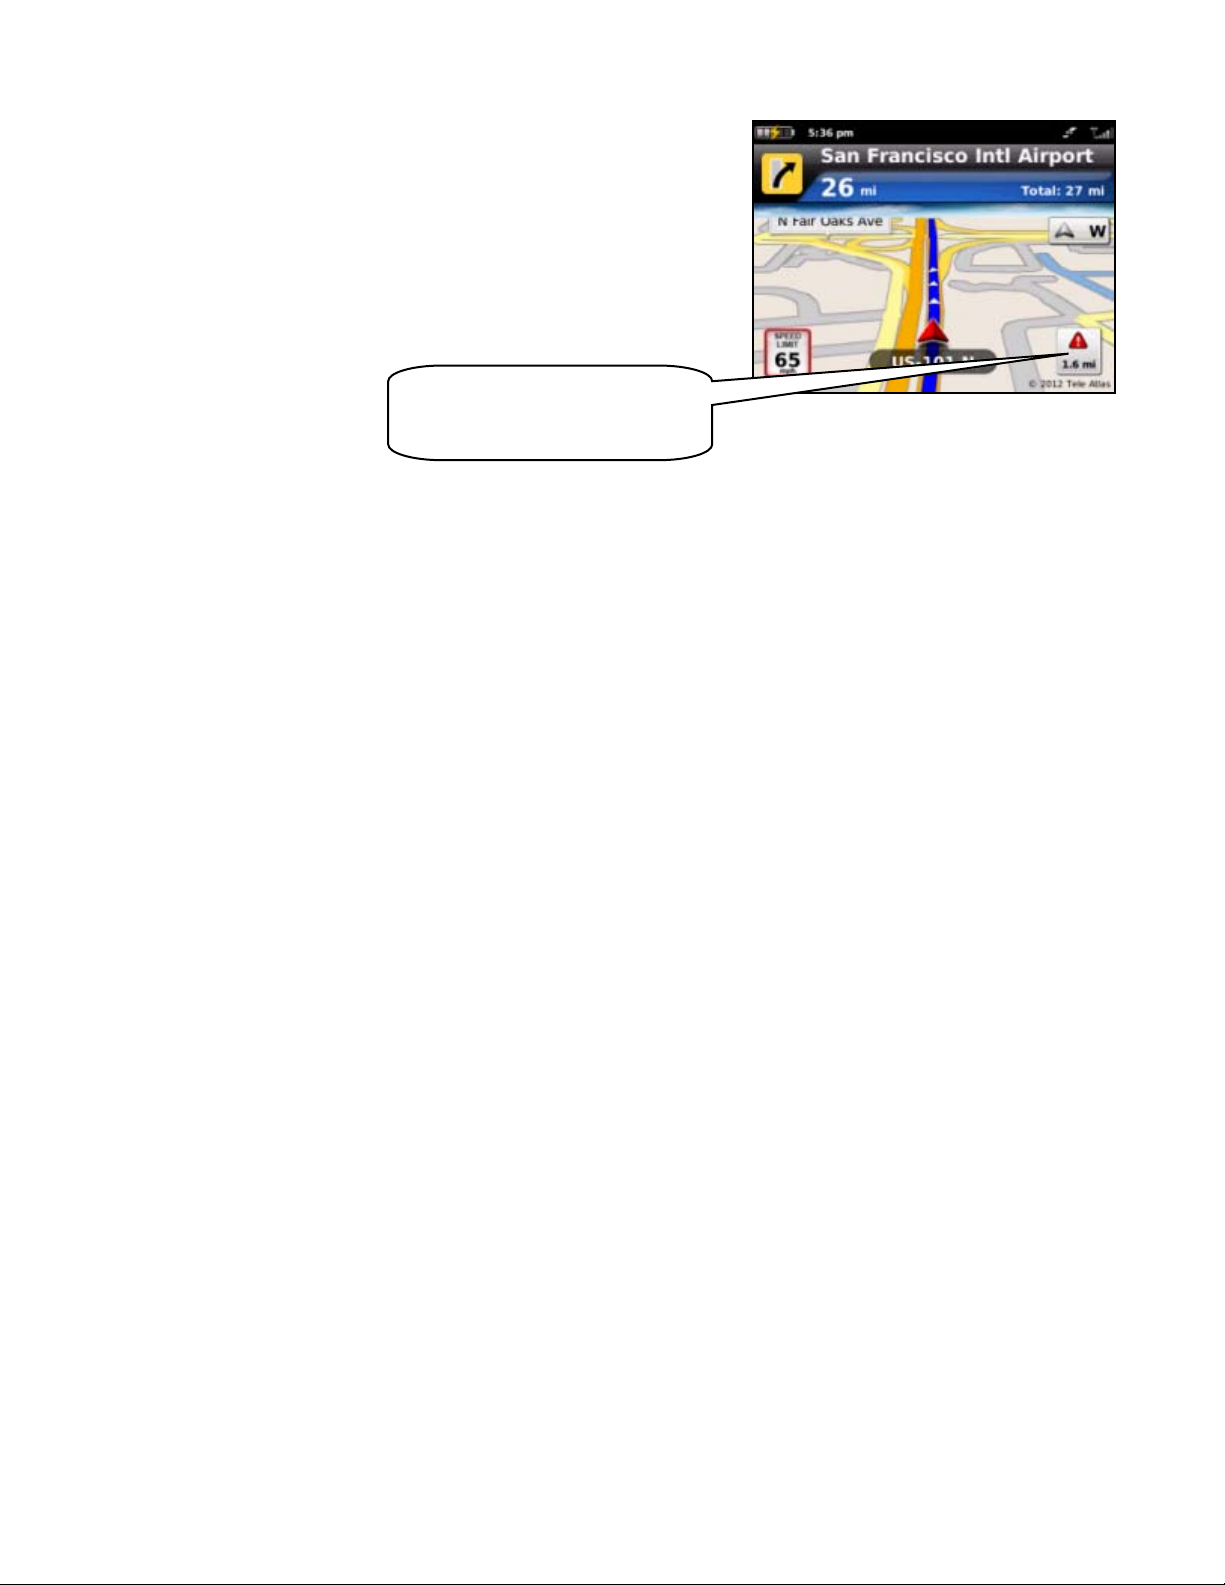
9.7.2 From Traffic Alert
When you hear an audio warning about a traffic incident during your
navigation session, you can re-route directly from this screen to avoid
congestion ahead.
During navigation, an audio warning sounds to alert you to traffic incidents
along your route. An alert icon appears at the right of the map, showing
severity and distance to the incident.
(Audio) “Accident 1.6 miles ahead
on US Highway 101; 1 lane closed.
Press ‘0’ to avoid.”
Press ‘0’ on the device. The application automatically calculates a route to
avoid all incidents within a 15-mile range.
© 2012 Telenav, Inc.
Page 31 of 58
Page 32

10. Places Menu
The Places menu provides you with a few different ways to find the
addresses and phone numbers of businesses such as restaurants, hotels,
and gas stations.
If the search succeeds, a list of businesses will appear. These businesses
will be near your current position or near the location you chose.
Once you find what you are looking for, you can get audible and visual
driving or walking directions, view a map of the location, or save the
location to your Favorites list. You can also place a call to make
reservations.
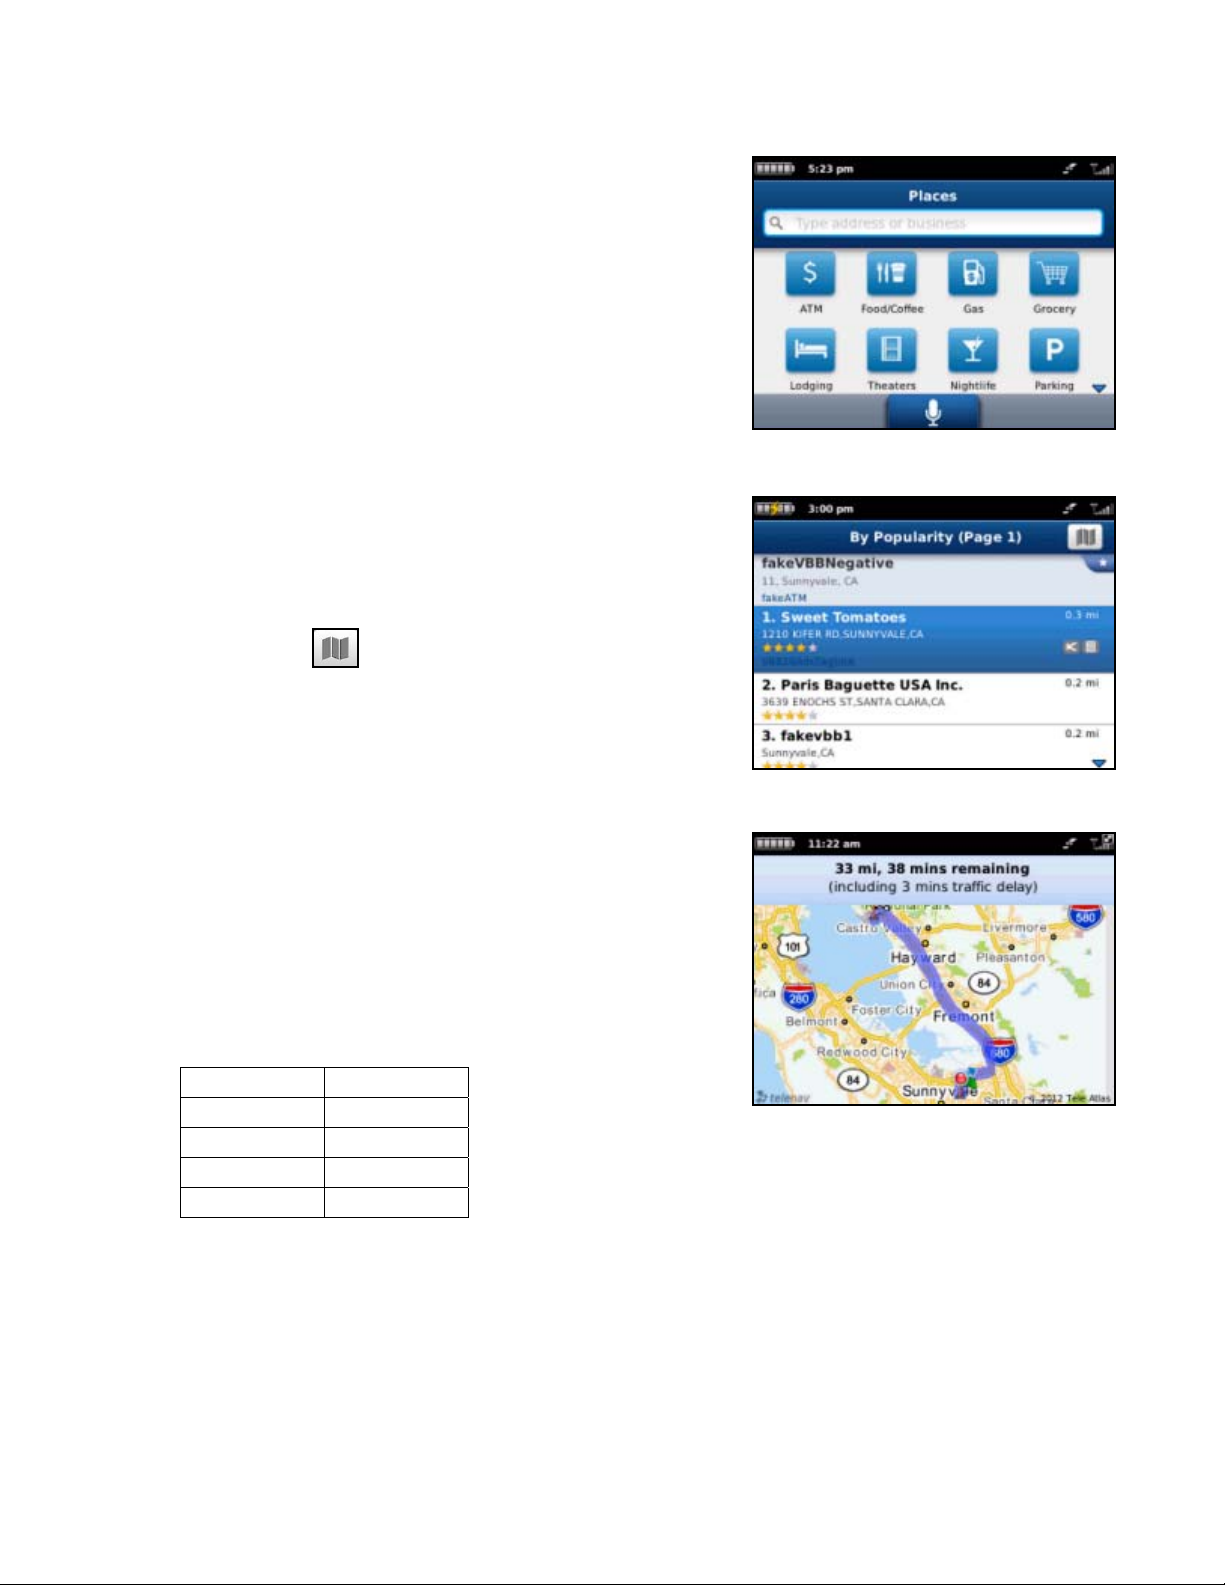
10.1 Using Places
To use the Places feature, do the following steps:
1. From the Home screen, choose Places.
2. The Places screen will appear.
3. You can search for a business by typing in or speaking a keyword
(see page 14
input). You can also search by Category.
for more information on how to use on speech
Choose the text input field to type in keywords.
Choose the Speech Input icon to say keywords.
Choose More to search through an extensive category list.
4. A list of nearby results will be displayed. Most of these results will
be ordered by “Relevance,” which is a combination of best match
and distance. Make a selection from the list.
© 2012 Telenav, Inc. Page 32 of 58
Page 33

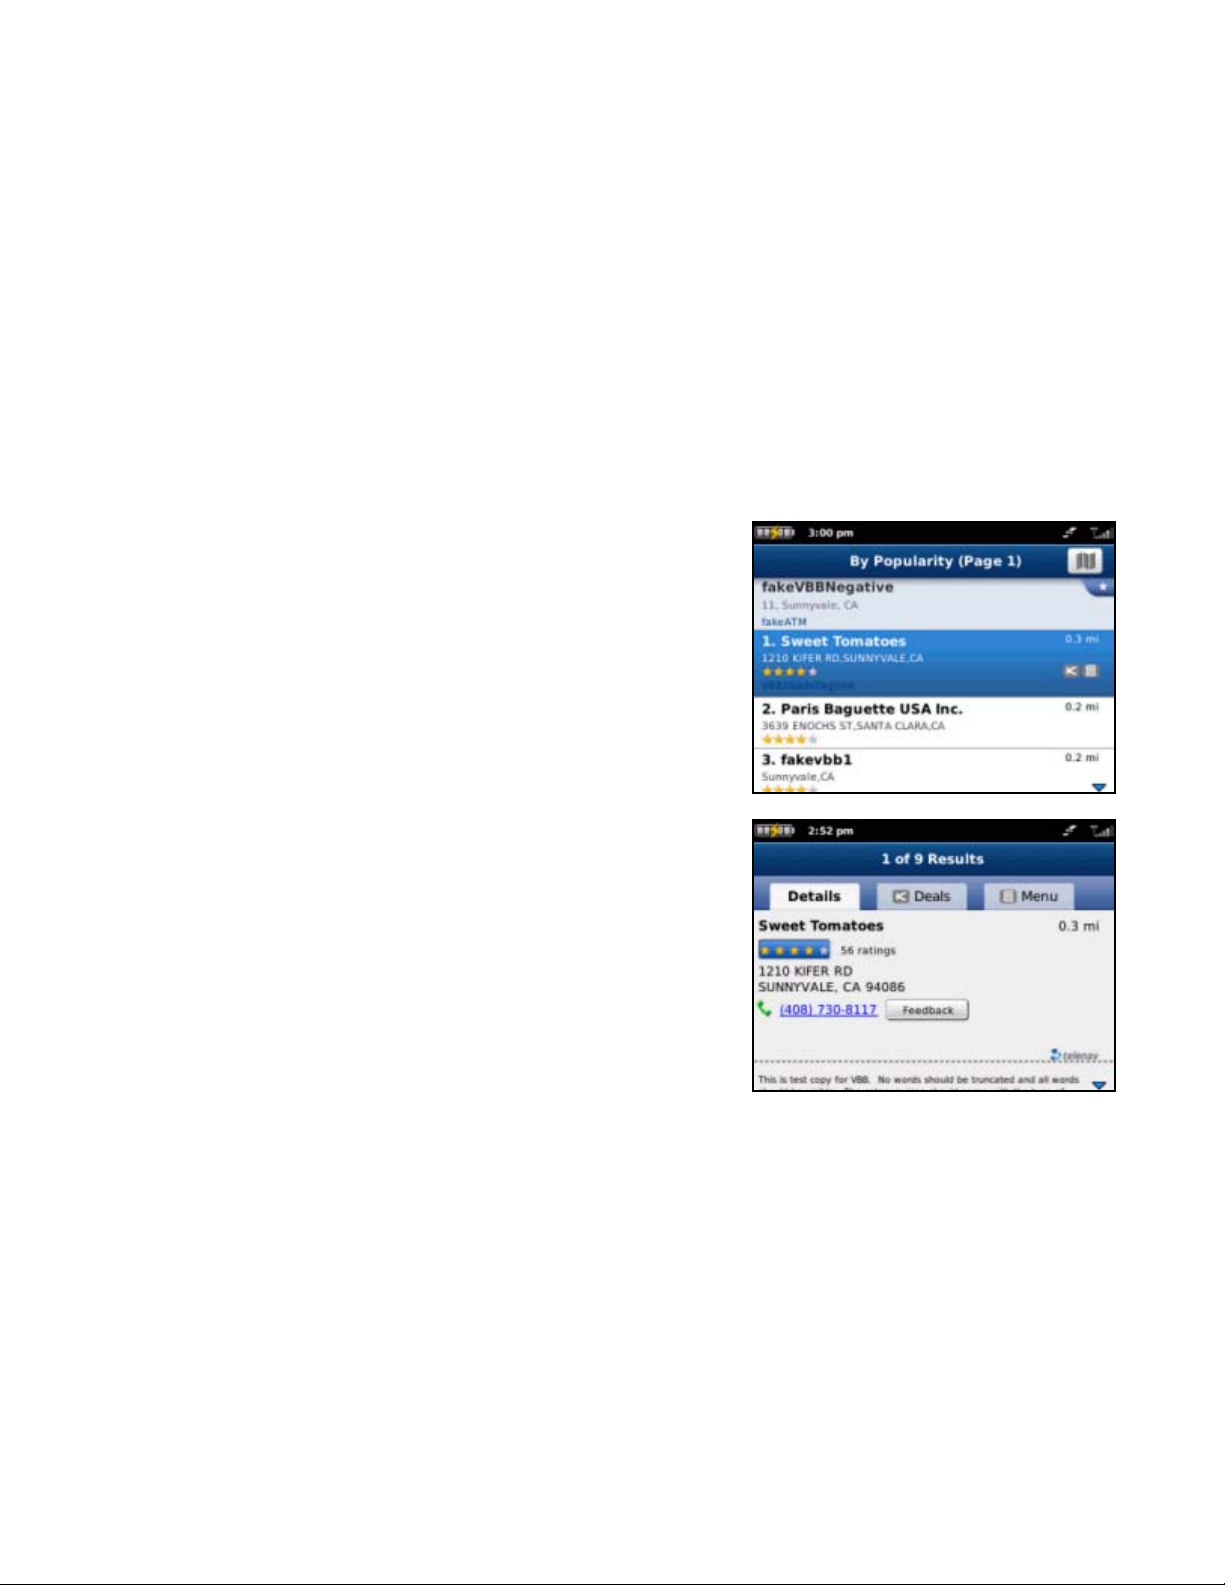
10.1.1 Search by Category
Choose a Category on the Places screen. A list of nearby results will be
displayed. These results are usually ordered by “Relevance,” which is a
combination of best match and distance.
NOTE: If you choose Food/Coffee or Gas, a list of options will appear
before any results are displayed.
Make a selection from the list.
The Results screen appears with details about your selection. The screen
shows: a) the name of the business, b) the distance from the search point,
c) the street address, d) the phone number (if available), and e) usersubmitted ratings for the business.
You can choose from the following options by pressing the Menu key.
Depending on the business that you view, not all of the options may be
available.
Drive To – Get driving directions (this option will take you
to the Trip Confirmation screen).
Call – Call the location by choosing the phone number
(option only available if there is a phone number shown on
the Results screen).
NOTE: When the call ends, you will be returned to the
Results screen. The calling option will not be available if you
are already on another call.
Map It – View a map of the area surrounding the business
address (See “Map Results” on page 34
Share Address – Share the address with contacts from your
device’s contact list or with recipients whose phone number
you provide (see “Share Address” on page 46
Save to Favorites – Save the location to your Favorites.
Rate This – Submit your own rating for the business by
choosing the rating bar with the stars (see “Ratings” on page
).
36
Feedback – Choose the Feedback button to give your
input about this location (see “Feedback” on page 45
).
).
).
© 2012 Telenav, Inc. Page 33 of 58
Page 34

10.1.2 Define a Location
The default search is around your current location, but you can specify a
different search origin.
1. After you have selected a search category, a pop-up appears,
allowing you to select another location than your current. Choose
the Change Location button.
2. The Choose Location screen appears. Choose a new location to
conduct your search.
10.2 Sorting Options
You have a variety of options to sort your search results. On the Search
Results screen, press the Menu key and choose “Sort by Distance” or
“Sort by Popularity.”
10.2.1 Sort by Distance
Sort the businesses in your Search Results screen by order of distance to
your chosen location.
10.2.2 Sort by Popularity
For businesses such as restaurants, sort the list by those that have
received the highest popularity points. See “Most Popular Category” on
page 35
for an explanation of how popularity points are calculated.
10.2.3 Map Results
You can view your search results plotted on a map. On the Search Results screen, choose the Map icon. From
the Map Results screen, you can also choose a corresponding number to view more details about a particular point of
interest.
On the Map Results screen, choose 1-9 to center on a certain location.
Choose the Back
non-touch devices) to view more results.
Points of interests are ordered based on how they were sorted on the
Search Results page. If sorted by distance, the #1 point of interest is the
one closest to the search location. If sorted by rating, the #1 point of
interest is the one with the highest rating.
If you are viewing the Map Results screen from the Address Details
screen, the search result number for that point of interest is highlighted by
default. For example, if you are looking at the third search result and
choose Map, the third result appears in the center of the page.
or Forward arrows (or the 0 key on
You can also press the + and – keys to zoom in and out or use the
trackpad to pan the map. Zooming out may allow you to view more results
o
n the page.
© 2012 Telenav, Inc. Page 34 of 58
Page 35

10.3 Sponsored Results
Icons next to business names in the Search Results list indicate that more
information is available in the Details screen.
The Sponsored Results (Details) screen shows business details and
descriptions. The tabs you see may vary, depending on what is available
for the business.
Browse any deals or promotions that the business may be
offering.
View menus for restaurant searches.
10.4 Most Popular Category
You can search for the most popular food/coffee places.
In the Places screen, choose the Food/Coffee category, and then choose
Most Popular.
The Most Popular search results screen displays items that are frequently
given higher star ratings. By default, results are sorted by the number of
points they have received (popularity). Items with no points or negative
points are not displayed.
Popularity is calculated by the user-generated ratings, averaged by
considering the scores of the ratings and the number of users that have
rated the location. A location accrues points based on how many stars it is
given by Telenav GPS Navigator users. When a location consistently
achieves above-average ratings, its popularity count increases. Negative
ratings lower the popularity count of the location.
See “Ratings” on page 36
for more information.
© 2012 Telenav, Inc. Page 35 of 58
Page 36
10.5 Search for Gas by Price
You can search for the cheapest gas prices around your current location or another location that you specify.
1. Choose Places in the Home screen.
2. Choose Gas.
3. Choose Any to search all categories, or choose a fuel grade.
4. The Search Results screen displays with a list of gas stations sorted by price.
5. Choose a gas station to go to its Details screen. The date the price was last updated is also listed.
6. On the Details screen, you can Drive To, Map, or Save the location to your Favorites. You can also share the
address with a friend.
10.6 Ratings
Locations with star ratings next to them indicate those for which you can
view the average rating by other users. You can also submit your own
rating for this location, indicated by the number of stars (the range is from
1 to 5).
10.6.1 Submit Your Own Rating
1. In the Search Results screen, choose a location.
2. In the Details screen, choose the ratings icon.
3. In the Rating screen, choose a rating from 1 to 5 stars.
NOTE: If you choose the “Rate Thi s” option for a locati on that you have
already rated, the original rating is displayed by default. If yo u submit a
modified rating, the old rating is excluded f rom the average and replaced
with the new rating, and the number of reviews remains t he same.
© 2012 Telenav, Inc. Page 36 of 58
Page 37

11. Maps & Traffic Menu
The Maps & Traffic Menu shows you a map of your current location.
You can zoom in or out using + and –. To pan the map, use the trackpad of
the device.
11.1 Map Menu Options
You have the following options on the menu when viewing a map:
Where Am I - Center the map back on your current location.
Show/Hide Traffic – View or hide the traffic conditions for your
current map area (see “Check Traffic” section below).
Drive To – Drive to the address at, or nearest, the point you
have chosen on the map.
Search Nearby - Search for points of interest near the location
displayed on the map.
Save – Save the address of your chosen map point to
Favorites.
Share – Share the address of your chosen map point with
other users.
Show /Hide Traffic Camera – View or hide the locations of
traffic cameras in the area.
Show/Hide Speed Trap – View or hide the locations of speed
traps in the area.
Zoom – Zoom in or out to see a smaller or larger area.
NOTE: Pressing the Menu key lets you change the lo cation and get a map
for a different area.
11.1.1 Traffic Cameras and Speed Traps
Traffic cameras are represented on the map by this icon:
© 2012 Telenav, Inc. Page 37 of 58
Page 38

11.2 Check Traffic
On the Maps & Traffic screen, you can check traffic conditions around a certain area.
1. Choose Maps & Traffic on the Home screen.
2. The map of your last known location appears. Press the Menu
key and choose Show Traffic to display traffic flow information.
NOTE: You can zoom in or out using + and –. Zoom levels rang e from 1
(closest) to 9 (farthest). Use the trackpad to pan the m ap. When yo u zoom
or pan, there may be brief activity to fetch the updated m ap. If no traffic
information appears on the map, try zooming out to sh ow a larger area.
Traffic flow information will only appear for large roads such as highways.
11.3 Other Ways to View a Map
There are several ways in which you can view a map and traffic information:
From the Maps & Traffic option in the Home screen. A map of your last known location is automatically displayed when
you choose this option. To view a map of a different area, choose Menu key >> Change Location. You can view a map
of: the address you set as your Home, a Favorite Place, a Recent Place, an Address you type or speak in, a Contact
from your device’s contacts list, a Place (business), or an Airport.
From the “Map” option for Favorites and Recent Places in the Drive To menu. For example, from the Home screen,
choose Drive To >> My Favorites >> highlight a Favorite >> Menu key >> Map.
From the “Map” option for any location that you have found using the Places menu option. For example, from the Home
screen, choose Places. Search the category for your desired location and then choose Map in the Details screen for the
location that you found.
© 2012 Telenav, Inc. Page 38 of 58
Page 39

12. Local Apps
The Local Apps menu lets you search for movie listings, check your local
weather conditions, and manage your commute alerts.
12.1 Movies
Get movie listings, show times, and detailed information for movies
playing near your current location or a location that you choose.
1. Type in a movie name, or leave the Movie field blank.
2. Use your current location, or choose Where to select a different
location.
3. Choose When if you want listings for another day.
4. Choose Search to get the listings that match your criteria.
5. Choose a movie from the Search Results list to view more
information. A red “Ticket” icon next to certain theaters allows you
to buy movie tickets through Fandango directly from your device.
© 2012 Telenav, Inc. Page 39 of 58
Page 40

12.2 Weather
Check the weather conditions for your current location or for another location that you select. You can also see the
extended weekly forecast.
1. Go to Local Apps >> Weather.
2. The weather condition for your current location is displayed, along
with the forecast for the next six days.
3. Choose Menu >> Change Location to view weather for another
city.
12.3 Commute Alerts
You can set up traffic alerts (20 maximum) for frequent commutes. Get a
text message, e-mail, or alert within Telenav GPS Navigator that gives you
traffic information and estimated delay time for the route that your specify.
You can also sync your Commute Alerts with the Telenav GPS Navigator
website at http://my.telenav.com
.
Go to Local Apps >> Commute Alerts.
A list of your alerts is displayed in the order they were created. Highlight
an alert and press the Menu key for additional options:
View Current Map – View this route on a map, complete
with any traffic incidents and flow information.
Edit Alert – Edit details of the alert, including origin,
destination, route settings, time and frequency of commute,
and notification preferences.
Turn Off Alert – Save the alert in the list, but turn notification
off. This option only appears if notifications were enabled with
the alert.
Delete Alert – Delete the alert from the list.
Create Copy – Create another copy of the alert (useful for
when you would like to create a similar alert and do not want
to re-type all the information).
Create Reverse Alert – Swap your Origin and Destination
addresses.
© 2012 Telenav, Inc. Page 40 of 58
Page 41

12.3.1 Create New Alert
To set up a new commute alert, do the following:
1. Go to Local Apps >> Commute Alerts and choose the New
button at the lower-right of the screen.
2. In the Commute Alert screen, fill out the following information:
Route Name – Assign a name for the route (e.g., “Home to
Work”). Maximum 15 characters. If you do not assign a
name, the street address of the origin will be used as default.
Origin – Select a location for your starting point (default is
your current location).
Destination – Select a location for your ending point.
Route Settings – Choose Fastest, Shortest, Prefer Streets,
Prefer Highways, and what to avoid (Carpool/HOV Lanes,
Tolls, or Traffic Delays).
Time – Set a time to trigger the alert.
Frequency – Choose Once, Daily, Weekly (select a specific
day of the week), Mon-Fri, or Weekends.
Notification – Choose Text Message, E-mail, or Alert Within
Telenav GPS Navigator to be notified of your Commute Alert.
3. Choose Save when you are finished.
12.4 My Mileage
My Mileage provides a convenient way to track and record your vehicle’s
mileage expenses, such as business transportation for tax purposes. The
first time you use this feature, you will need to accept the Terms and
Conditions.
© 2012 Telenav, Inc. Page 41 of 58
Page 42

e My Mileage page, choose Start to begin tracking your mileage and
On th
Stop at the end of your trip. You have the following choices on this screen:
Settings – Check subscription types and requirements for
My Mileage usage. Change logging preferences, such as the
frequency of logging and the mileage rate.
Logs – View mileage reports for your 10 most recent trips,
including date and time stamps, distance of travel, and
deduction rates for each trip.
Info – View FAQs for the My Mileage feature.
NOTE: You can view your complete record of mileage reports by loggi ng
on to http://my.telenav.com
also have mileage reports emailed to you periodi cally, or export the
records to Excel or PDF files. In the event where you forget to choose
Stop at the end of a trip, My Mileage automatically detects stops of longer
than 15 minutes and starts loggin g a new trip.
and choosing the My Mileage tab. You can
13. Telenav Menu Options
The following are additional options you can call up by pressing the Menu key while on the Home screen of Telenav
GPS Navigator.
13.1 Upgrade
You can upgrade your Telenav GPS Navigator Subscription account directly from your handset if one is available.
Choose Menu >> Upgrade and follow the steps on the screen.
13.2 About
Find important information about Telenav GPS Navigator account such as
the version number you are using and your PIN. You can quickly find
contact information for Telenav Customer Support or offer your feedback
for the application.
13.2.1 About Telenav GPS Navigator
This menu option shows the exact version of Telenav GPS Navigator that is on your device. Knowing the exact version
of your software may be helpful if you ever have to call Telenav GPS Navigator Technical Support.
© 2012 Telenav, Inc. Page 42 of 58
Page 43
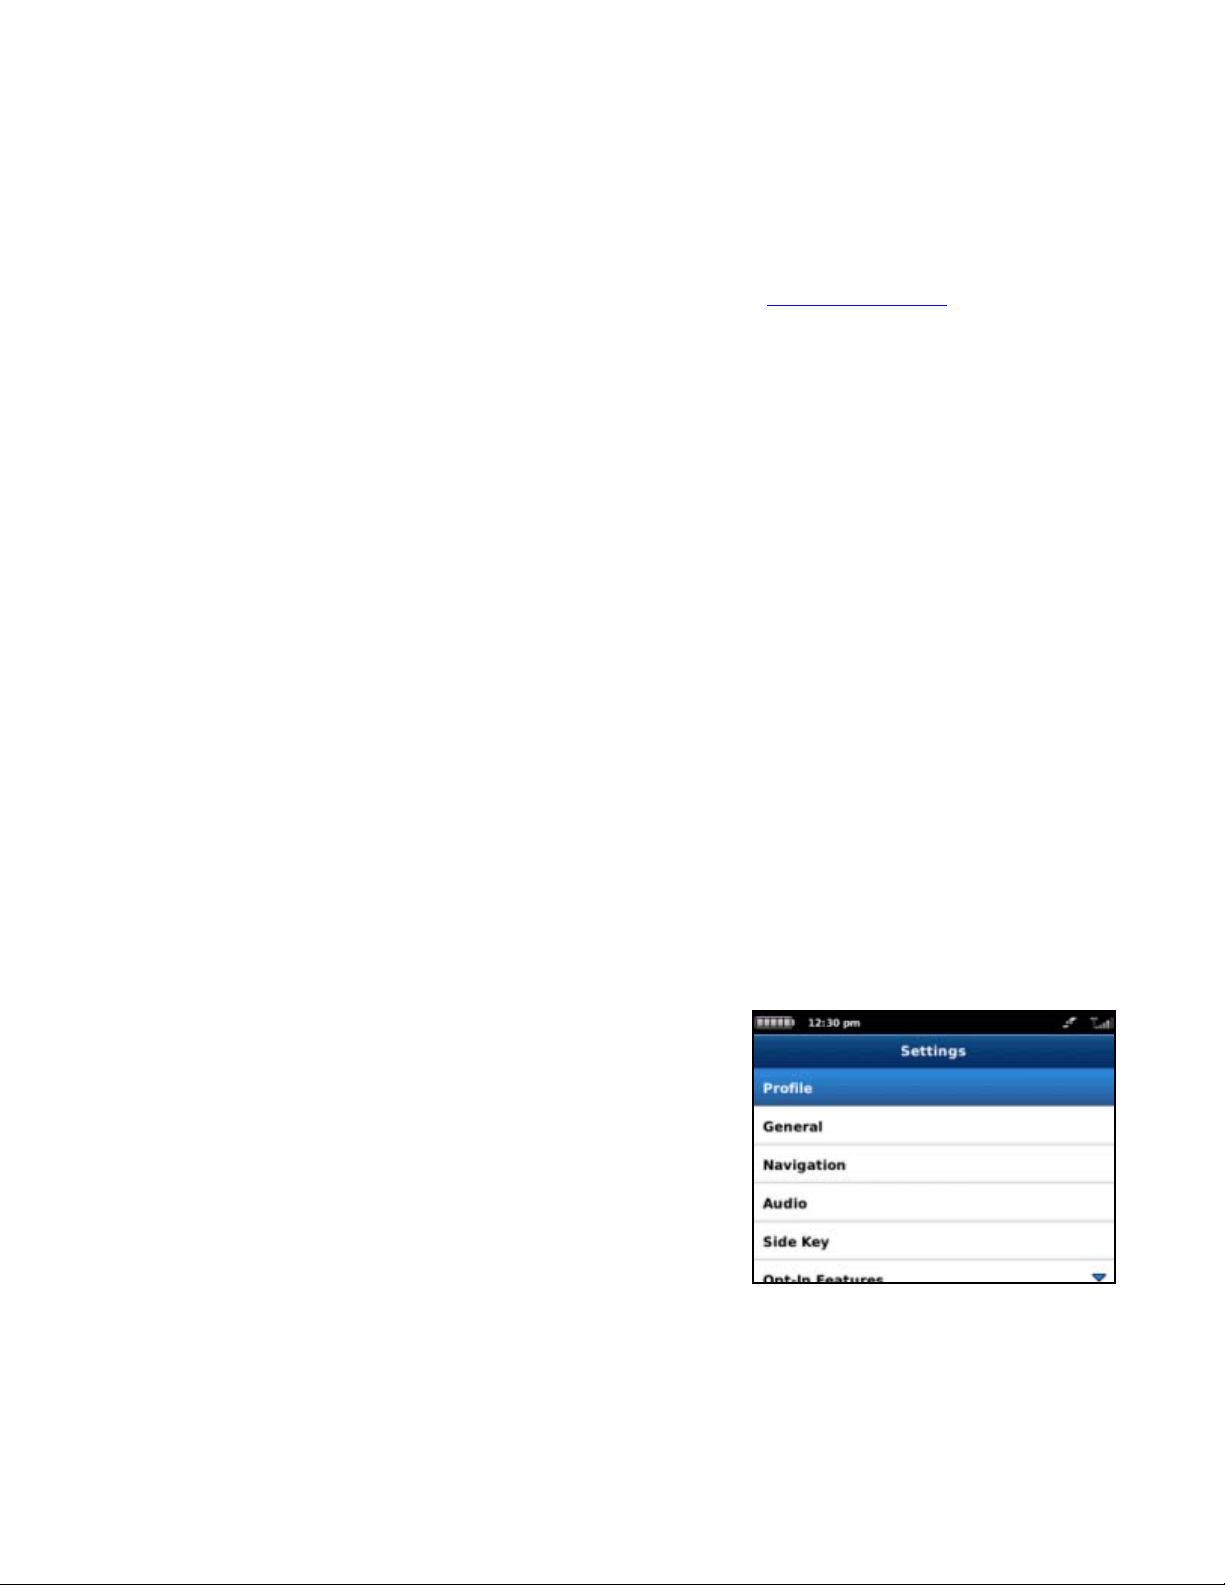
13.2.2 Support Info
Find contact information for Telenav GPS Navigator Customer Support here. Once you are on the Support screen, you
can quickly call Customer Support or view additional support information from your device’s Internet browser.
13.2.3 Your PIN Number
View your PIN number. Your PIN is used to log into Telenav GPS Navigator at http://my.telenav.com for pre-planning.
13.2.4 Diagnostic Tools
This screen displays the following information, which may be requested by a support representative for troubleshooting
purposes:
Phone Number
Service Plan Code
GPS Status
Network Status
Location Permission
Netguard Setting
Data Roaming Status
Airplane Mode
Data Service
Battery Level
13.2.5 Cancel Subscription
If you have a Premium subscription for Telenav GPS Navigator and wish to cancel it, choose this option. You will be
prompted with a short questionnaire. Choosing Next will complete the process.
13.3 Settings
Go to Menu >> Settings for options on setting your preferences and other
features. Be sure to choose Save to keep any changes you have made.
Profile
In Menu >> Settings >> Profile, you can edit the following:
Phone – This field cannot be changed. It is displayed for reference purposes.
© 2012 Telenav, Inc. Page 43 of 58
Page 44

Firs
Email – Edit your e-mail here. Your e-mail address is used to send important messages about Telenav
NOTE: Y ou must confirm your e-mail befo re it can be used for Commute Alerts or Fe edback Confirmation.
t/Last Name – Edit your name here. This name will be displayed to users when you share addresses
with them.
GPS Navigator account, as well as any commute alert e-mails you have created.
13.3.1 General
In Menu >> Settings >> General, you can edit the following:
Language – Determines the language used for screen labeling and audio prompts.
Distance Units – Miles/feet or kilometers/meters.
13.3.2 Navigation
In Menu >> Settings >> Navigation, you can edit the following:
Route Style – Fastest, Shortest, Prefer Streets, Prefer Highway, or Pedestrian. By default, all routes are
“Fastest” to minimize traffic delays. You can choose “Ask me each trip” for a reminder pop-up each time
you choose navigation.
Map Color – Choose from Daytime, Nighttime, or Auto. Nighttime colors have greater contrast to let you
better see the navigation screen in the dark. Choose “Auto” to have the navigation maps automatically
switch between Daytime and Nighttime colors.
Avoid – Choose what to avoid on your route: HOV/Carpool lanes, Tolls, and Traffic Delays. You can make
multiple selections.
Map Style – Choose between 3D or 2D moving maps.
Backlight – Choose whether the device’s backlight should be Always On, On at Turns, or Device Default.
The “On at Turn” option turns the backlight on when a turn is approaching. This can save battery life.
“Device Default” follows the settings from the BlackBerry menu in Options >> Display >> Screen Display.
Speed Limit – Show or hide the speed limit along a street or highway during navigation.
Lane Assist – Show or hide lane assist arrows during navigation. These icons are arrows that indicate
which direction each lane on a street or highway will take you.
Traffic Incident Alerts – On or Off. If this feature is On, audio and visual traffic alerts will appear on the 2D
or 3D Moving Maps screen if there is a traffic incident on the route ahead.
Traffic Camera – On or Off. By default, this feature is Off. If you choose On, the locations of traffic cameras
will appear on the map or the 2D or 3D Moving Maps during navigation.
Speed Trap – On or Off. By default, this feature is Off. If you choose On, the locations of speed traps will
appear on the map or the 2D or 3D Moving Maps during navigation.
13.3.3 Audio
In Menu >> Settings >> Navigation Audio, you can edit the following:
Audio Guidance – With Street Names, Without Street Names, or No Audio.
Announce Search Results – Yes or No. Choose Yes to have the search results list read off to you for a
Places search.
© 2012 Telenav, Inc. Page 44 of 58
Page 45
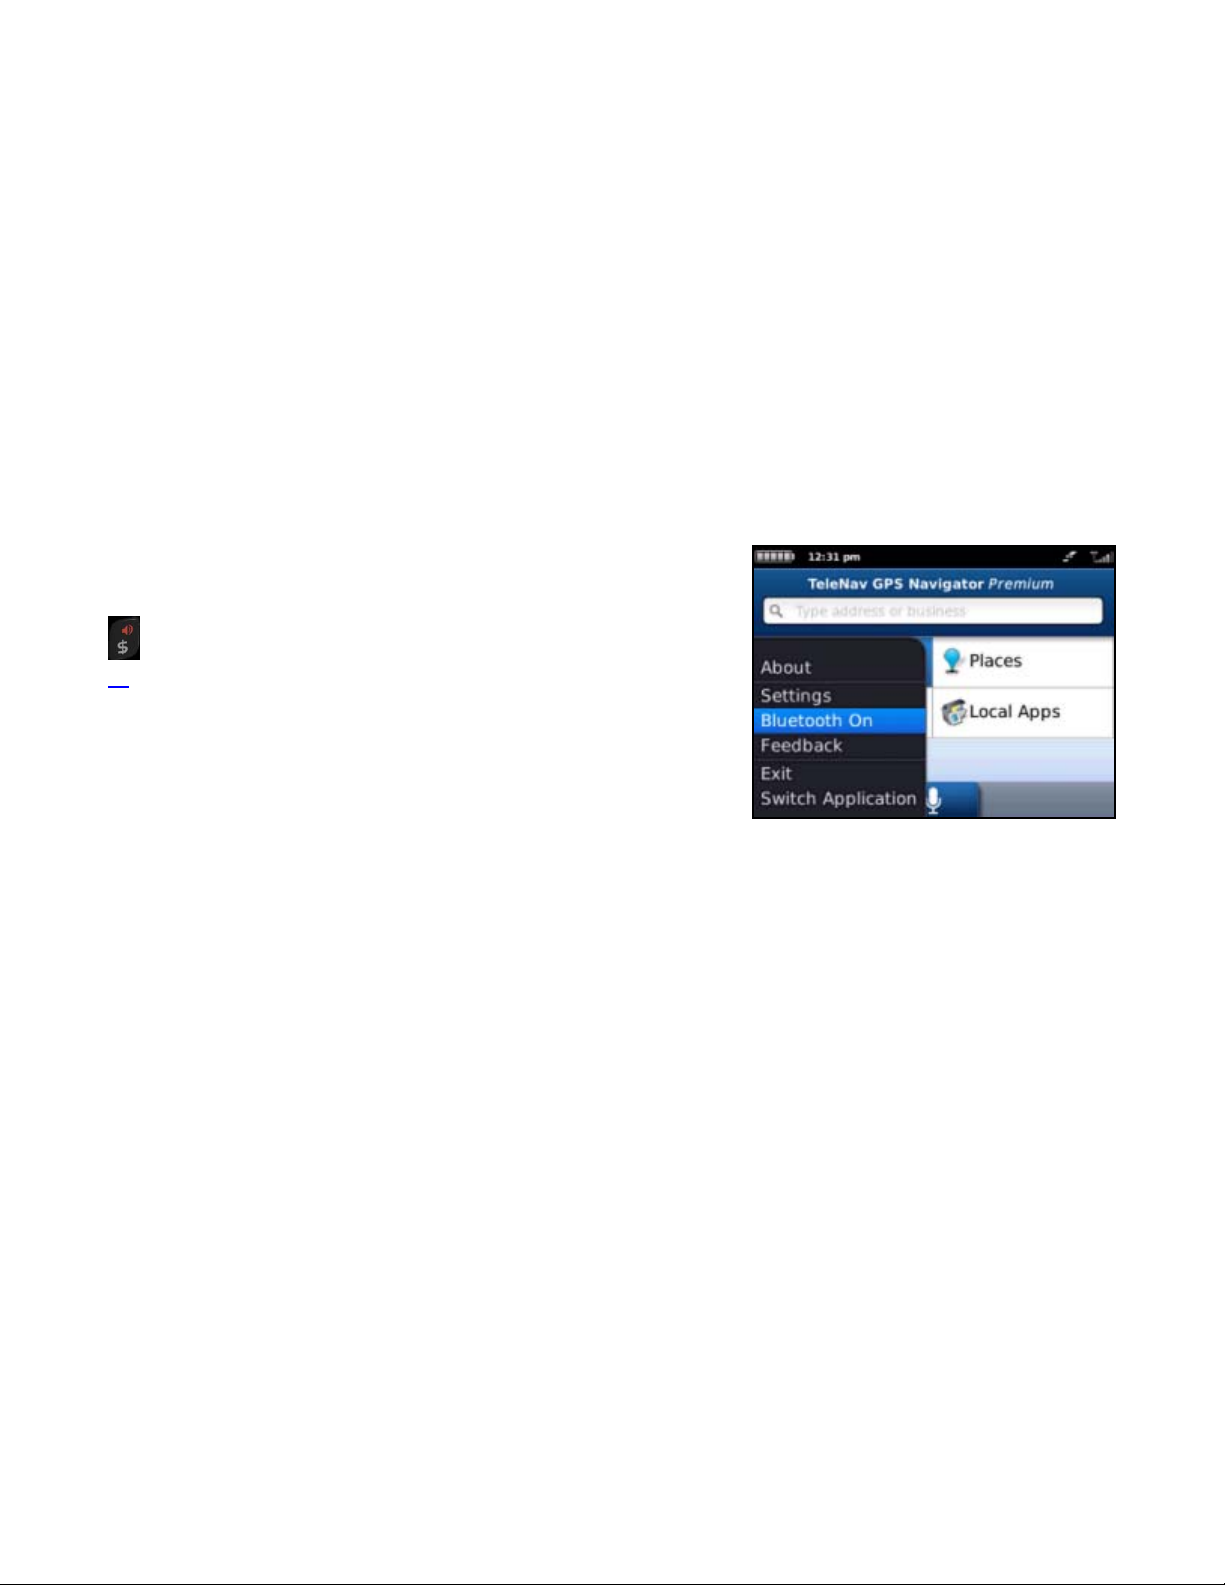
13.3.4 Side Key
Set up the Side Key on your BlackBerry device for quick access to the Telenav GPS Navigator application.
13.3.5 Opt-In Features
In Menu >> Settings >> Opt-In Features, you can edit the following:
Message from Merchant – Turn messages from sponsors on or off.
Deals – Turn notification of deals such as holiday sales on or off.
Menu – Turn restaurant menus on or off.
Sponsored Results – Choose whether to see sponsors at the top of each search results list in Places.
13.4 Bluetooth On
On touch-screen devices, go to Menu >> Bluetooth On to route audio
through your Bluetooth when using the Telenav GPS Navigator
application. On non-touch-screen devices, you can use the Speaker key
during a navigation session to toggle Bluetooth on and off. See page
for instructions on how to first pair your Bluetooth device with your
15
BlackBerry.
13.5 Feedback
Telenav GPS Navigator is always striving to give you the best user experience.
You can give Feedback from any page in Telenav GPS Navigator by holding down the “F” key for two seconds on a
device with a physical keyboard, or by pressing Menu >> Feedback in Drive To, Places, and Maps & Traffic screens.
© 2012 Telenav, Inc. Page 45 of 58
Page 46
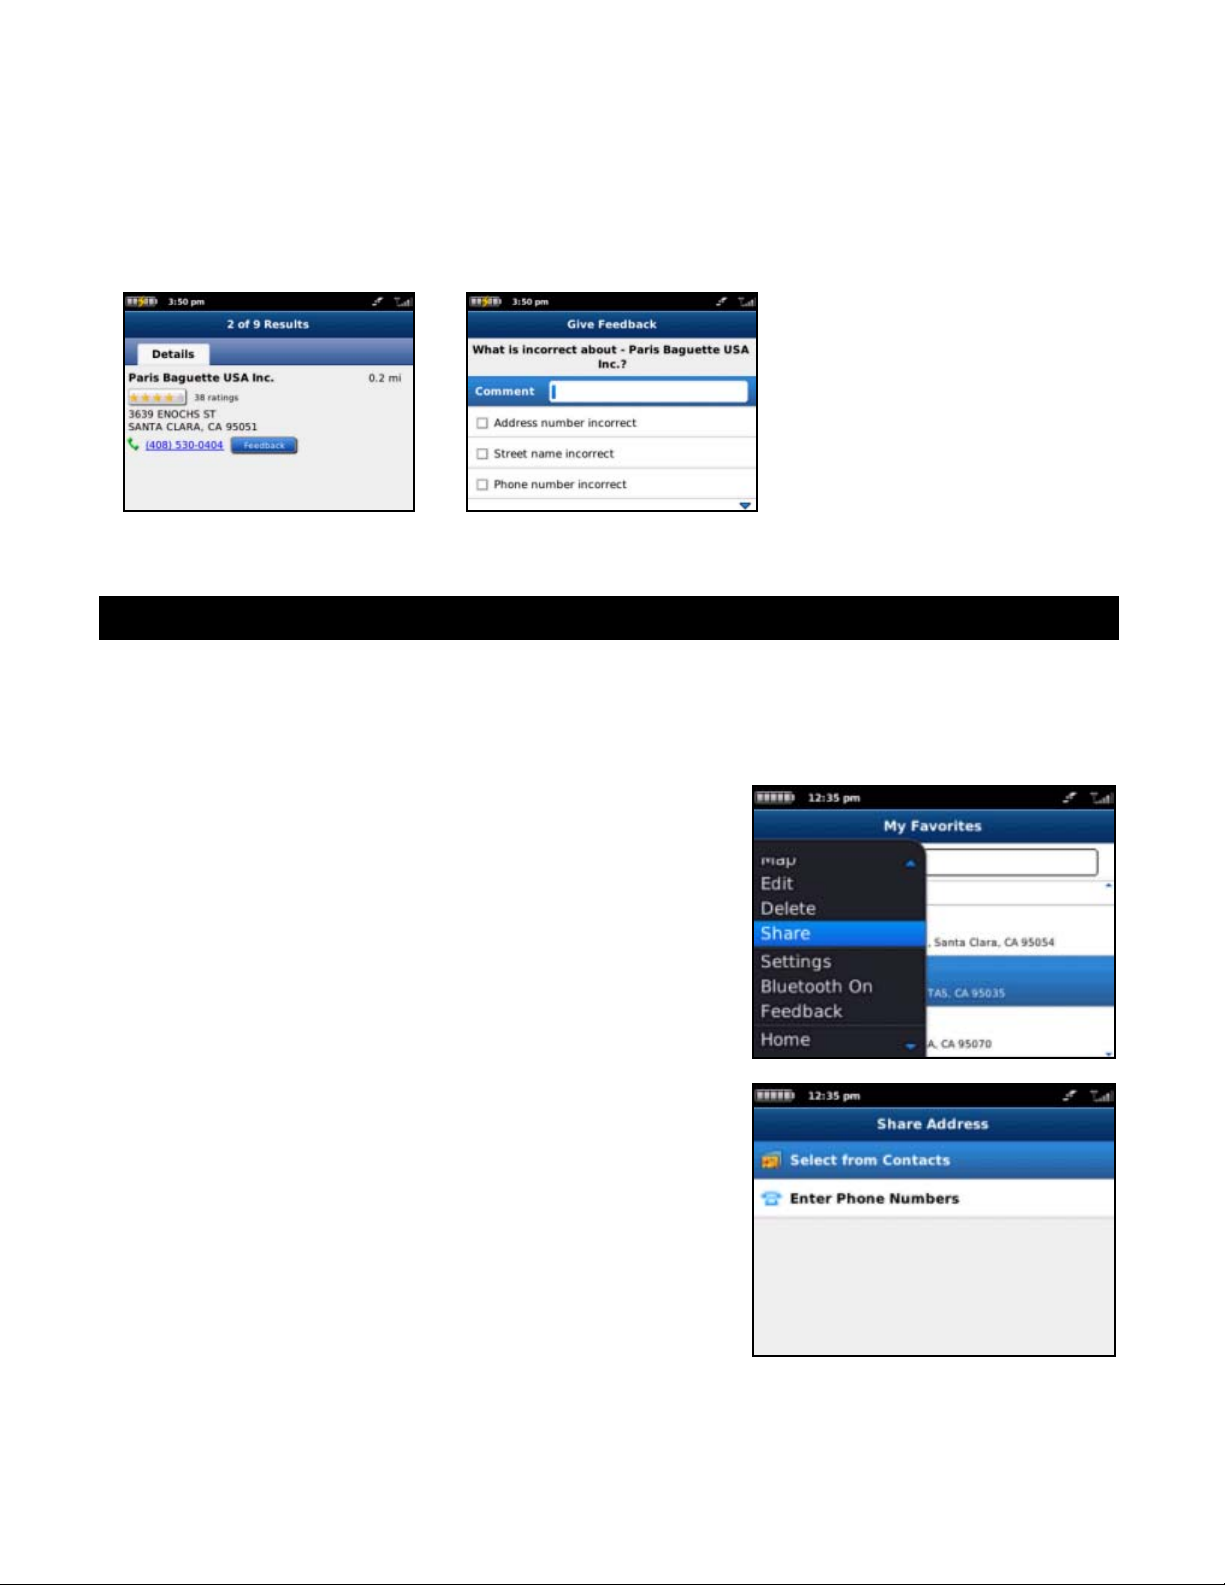
13.5.1 Feedback for Places
You can also give feedback on a Details screen from a Places search. This allows you to specifically provide comments
and suggestions for improvement to the information on the business generated by the search.
While viewing a Places detail screen, choose the Feedback button. Then enter your comments on the Feedback screen
and check any relevant selections. Choose Save to submit your feedback.
14. Share Address
You can send addresses to friends as a text message from different menus within Telenav GPS Navigator. Friends who
are also using Telenav GPS Navigator will receive the address in their My Favorites >> Received Addresses folder.
Although the following example shows how to do this from Recent Places, the steps will be the same no matter where
you encounter this feature.
After highlighting any address or place, press the Menu key and choose
Share. You can also choose Share when viewing the details screen of a
Places search.
Choose a contact in “Select from Contacts,” or type in phone numbers
using “Enter Phone Numbers.” Choose Done.
© 2012 Telenav, Inc. Page 46 of 58
Page 47
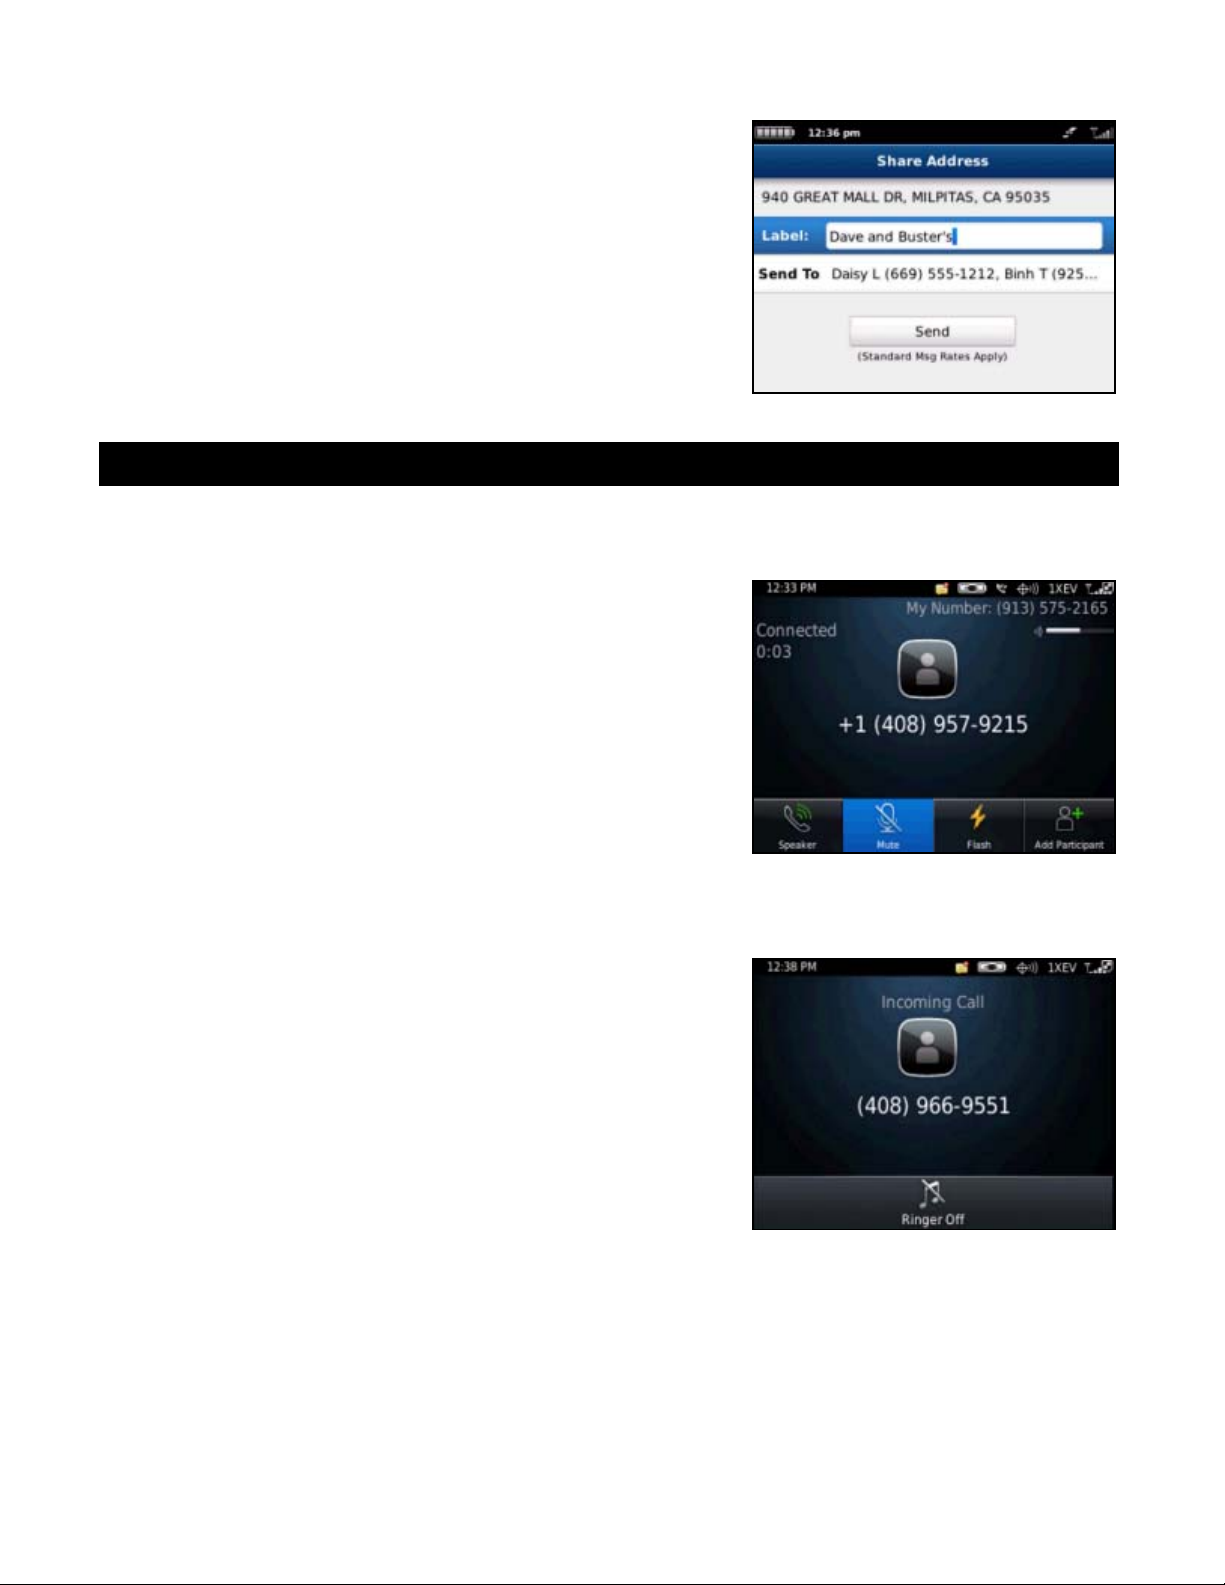
s screen allows you to change any of the following:
Thi
Label – This field is optional. Give the address a name for
easier identification, such as “My Home.”
Send To – Choose this field add or remove a contact or
phone number. You can choose contacts from your device’s
contact list or type in up to 10 phone numbers.
Choose Send when you are finished. The selected recipients will receive
a text message with the shared address.
15. Suspending Telenav GPS Navigator
15.1 Making a Phone Call from Telenav GPS Navigator
You can Call In to a location that you have found in a Places search such
as a restaurant or a hotel or make reservations or check for availability.
Simply choose the phone number on the search detail screen for a
business.
15.2 Taking an Incoming Call
When you are using Telenav GPS Navigator and your device receives an
incoming call, your device rings and displays a screen that gives you the
option to Answer the call or Ignore the call.
If you ignore the call, the Telenav GPS Navigator application resumes and
continues with the function that you were using before the call came in.
If you answer the call, Telenav GPS Navigator will be operating but
“suspended.” After the call, press the Escape key to end the call. At this
point, Telenav GPS Navigator should resume from its suspended state. If
you are navigating and have gotten off the route, Telenav GPS Navigator
will say “Rerouting” and obtain a new route for you.
NOTE: When Telena v GPS Navi gator briefly u ses the da ta network,
incoming calls may be blocked. When you are on an incom ing call,
Telenav GPS Navigator is still running and will periodically collect a GPS
fix from the internal GPS receiver. When this fix is taken, there may be a
very brief loss of intelligibility on the received audio from the call er.
© 2012 Telenav, Inc. Page 47 of 58
Page 48

15.3 Telenav GPS Navigator Options from Device Contact List
You can interact with Telenav GPS Navigator from your device’s Contact
List. Choose Contacts from the BlackBerry Main Menu, highlight a
contact, and press Menu for the following options:
Drive To – Launch navigation in Telenav GPS Navigator to
get driving directions to your contact.
Search Nearby – Launch Places to find businesses around
the Contact’s address.
Map It – Plot the Contact’s address on a map.
Share Address – Share the Contact’s address with other
Contacts from your device or with recipients whose phone
numbers you provide.
15.4 Calendar and E-mail Events
When a scheduled calendar event occurs, or an e-mail message arrives while you are using Telenav GPS Navigator, a
pop-up notification will appear. You can interact with the Calendar or e-mail event by Opening it, or you can Dismiss it. If
you Open the application associated with the notification, Telenav GPS Navigator will continue to run in the background.
If you are in a navigation session, the audio directions will continue to be announced, unless you are on a call.
16. Exiting Telenav GPS Navigator
To exit the Telenav GPS Navigator application, do the following:
1. In any menu, press the Menu key.
2. Choose Exit.
17. Removing Telenav GPS Navigator
You do not need to remove Telenav GPS Navigator if you are installing a new version, but if you choose to do so, you
can remove the application directly from the device.
1. In the BlackBerry Main Menu, go Options (the wrench icon) >> Device >> Application Management.
2. Wait for the Applications list to load, and then choose Telenav GPS Navigator from the list.
3. Choose Delete.
© 2012 Telenav, Inc. Page 48 of 58
Page 49

18. The Telenav GPS Navigator Pre-Planning Website
You can use many of Telenav GPS Navigator’s features on the Telenav GPS Navigator website. To access the website,
go to http://my.telenav.com
Route planning for planning a trip by entering the starting and destination addresses (this does not update
information on your device).
The Directory (Places menu) for finding restaurants, hotels, stores, schools, government offices, etc. You
can also get addresses, phone numbers, maps, and directions.
Contact Customer Support.
Add an address and save it to the My Favorites list on your device. The next time you launch the Telenav
GPS Navigator application on your device, the new address will appear in your My Favorites and Recent
Places lists after you manually sync it on the device.
NOTE: Favorites cre ated on the websit e will only sh ow up in your M y Favorites li st on the de vice after you
choose the “Sync with Website” option o n the Favorites p age in Telenav GPS Navigator.
Manage addresses in your My Favorites and Recent Places lists (both of which update information on your
device). You can also delete addresses you no longer need.
Manage an independent Web address book (saved to your Web address book only, not saved to your
device).
View addresses you shared with others.
Update your personal information including your home and work addresses and your e-mail address.
. You can do the following:
Change your PIN number.
Set up Commute Alerts and sync them with your device.
Enable or disable e-mails from Telenav GPS Navigator, including marketing e-mails and Commute Alerts.
If you need to migrate your account to a different phone number, please call Telenav Customer Care at
1-888-353-6284. For security reasons, you cannot perform this change unassisted.
18.1 Changing your PIN number
1. In an Internet browser, go to the Telenav GPS Navigator Web site at http://my.telenav.com.
2. Enter your phone number and PIN to log in.
3. Click on the My Settings tab and choose “Change PIN” on the left navigation bar.
4. Enter your current PIN number and your new PIN number.
5. Click Save.
NOTE: You can find your current PIN number by sel ecting Menu >> About >> Your PIN Number:
© 2012 Telenav, Inc. Page 49 of 58
Page 50

19. Error Conditions
Account cancelled or Account not found
You do not have a valid Telenav GPS Navigator account. Contact Telenav GPS Navigator Customer Care at
1-888-353-6284.
GPS signal weak, Cannot get GPS signal, or No GPS data
Move to an area where your device has a clearer view of the sky and can still connect with your device. Please note that
some car windshields that have heat-reflective coatings may reduce the quality of the GPS signal. Your device should
announce when you have adequate GPS signal again.
Low battery
The GPS will not work if the device’s battery charge level is below about 15%. Starting with a freshly charged standard
battery, we have used Telenav GPS Navigator for around 4 hours before it became necessary to connect the charging
cable. If you get a low battery warning, connect a charging cable as soon as possible. In some cases, you may need to
wait a while for the battery to become sufficiently charged so that the GPS receiver will work.
Network signal weak
If the carrier network signal is weak, move to an area where reception is better and try the function that requires network
access again.
Telenav GPS Navigator encountered an error
Telenav GPS Navigator is having technical problems with the specific request that you made. This can be due to an
address that it cannot find, or mapping data that does not allow routing from where you are to where you want to go. In
this case, try to use a nearby address.
Telenav GPS Navigator not available
If you get an advisory message that Telenav GPS Navigator is not available, exit the Telenav GPS Navigator application
and then re-launch it. If the problem recurs, it may be due to a temporary Telenav GPS Navigator server outage.
Unable to generate a route
Telenav GPS Navigator could not generate a route between the two endpoints of the route. This may be a temporary
error if you have a weak GPS signal when establishing the origin but may be caused by errors in the map data in the
area around the destination.
Unable to reach Telenav GPS Navigator server
You may see this message for several different reasons: a) your data plan is not active, b) your WIX services are not
enabled, c) you are outside of coverage, d) the data network is currently experiencing difficulties, or
e) the Telenav GPS Navigator server is not acknowledging your device’s attempt to communicate.
You should call Telenav Customer Support at 1-888-353-6284.
© 2012 Telenav, Inc. Page 50 of 58
Page 51

Duri
ng the installation process, what happens if I get a “Cannot connect to server” message?
If you see the above error during the installation and login process, most likely your BlackBerry needs to be configured to
allow the GPS Navigator application to use the data network. Please follow these simple steps from the BlackBerry
home screen:
1. In the BlackBerry Main Menu, go Options (the wrench icon) >> Device >> Application Management.
2. Wait for the Applications list to load, and then choose Telenav GPS Navigator from the list.
3. On the Application Properties screen, choose Edit Permissions.
4. Set the application settings for “Connections”, “Interactions” and “User Data” to “Allow” and save your changes.
Your account has expired
You do not have a valid Telenav GPS Navigator account. Order Telenav GPS Navigator by calling Telenav Customer
Support at 1-888-353-6284.
20. FAQs
Why do I need the carrier’s data service?
The data plan allows you to access nationwide routes, maps, and Places content from the Telenav GPS Navigator
servers using the data communication features of your device. These services are different from your cellular airtime. To
order a data plan from your wireless carrier, please contact their customer support directly.
How long after I apply for the data service until I can use my Telenav GPS Navigator system?
With data, you should be able to start using the Telenav GPS Navigator application right after it has been downloaded.
Does Telenav GPS Navigator use up my voice plan minutes?
Telenav GPS Navigator uses data to provide its navigation functions. Using data does not use any of your voice
minutes. However, calling business from the Places menu does use voice minutes.
Why do I need a PIN number?
Your 4-digit PIN is used to log in to the pre-planning website.
You may need a four-digit PIN to log in to Telenav GPS Navigator for the very first time. You will also need this number
to access the pre-planning website. Your PIN is unique to your account and identifies that your account is active.
How do I find my PIN number?
Your PIN can be found in the About menu. See page 43
http://my.telenav.com
How do I increase or decrease the voice prompt volume and control the backlighting?
The backlight can be controlled from within Telenav GPS Navigator’s Menu >> Settings >> Navigation >> Backlight
menu. Speaker volume can also be controlled with the volume buttons on the right-hand side of the device. If the
speaker volume is set to at least mid-range and you are still not receiving audio prompts, verify that your device profile is
not set to vibrate or quiet. To change your profile settings, choose the Sounds icon on the BlackBerry Main Menu (it
looks like a loudspeaker) and make sure your Sound Profile is set to “Normal (Active).”
How do I conserve battery life on my device?
Set the backlight to “On at Turns” in Menu >> Settings >> Navigation >> Backlight menu. This option turns the
backlight on only when a turn is approaching.
.
for details. You can use this PIN for pre-planning on
© 2012 Telenav, Inc. Page 51 of 58
Page 52

Why
don’t I hear audio navigation prompts when I am using a Bluetooth headset?
If you are using a Bluetooth headset with a non-touch-screen BlackBerry, be sure to press the Speaker key
on the
device while in navigation mode so that you will be able to hear the audio prompts. A Bluetooth symbol will be shown in
the upper-left corner of the screen if you have redirected the audio through a Bluetooth headset. If you are using a touchscreen device, choose Menu >> Bluetooth On within the application. You may first need to pair your Bluetooth with the
device (see page 15
for instructions).
Why can’t I get the “Call in Address” feature to work for entering an address?
If you have never placed a call on your new device, the “Call in Address” feature may not work. To resolve this issue,
simply place a call from the device’s Applications menu. When prompted, type in your home area code and continue
with the call. The “Call in Address” feature will now work after you re-launch Telenav GPS Navigator.
How accurate is the GPS?
GPS accuracy can range from 20m (approx. 65 ft.) to 100m (approx. 328 ft.). Most of the time, the GPS is accurate to
less than 50 meters (approx. 164 ft.).
What are ideal conditions for GPS navigation?
Ideally, a device with a GPS receiver needs a clear view of the sky, starting from about five to ten degrees above the
horizon. Solid or massive obstructions can reduce accuracy or block GPS signals, and may cause extended initialization
time (time to first GPS fix). Common obstructions include tall buildings, covered parking lots, tunnels, trees, and terrain
features.
If you are parked in a covered parking lot or near a tall building, it is recommended that you move to an open area and
then begin to use Telenav GPS Navigator.
Why does GPS not work near buildings and other tall objects?
Your device requires signals from GPS satellites in order to work, so it needs a clear view of the sky. Dense materials
(such as concrete, rock, steel, heavy wood), tall buildings, terrain features (like mountains, ridges, and cliffs), and large
trees can block or degrade GPS signals and may make it impossible to determine your location.
GPS satellites are not always immediately overhead and could be anywhere in the skies at any time, even low on the
horizon; however, there are enough satellites in orbit so that four or more will be view of your device if not blocked by
large objects, terrain, or dense materials.
How do I know that my device is receiving GPS signals?
Telenav GPS Navigator alerts you if your device is not receiving GPS signals. If this happens, move to an area where
there is a clear view of the sky so your device can receive GPS signals from space.
What happens if I’m using Telenav GPS Navigator for driving directions and I lose the GPS signal while driving
across a bridge or through a tunnel or lose the GPS signal for some other reason?
Telenav GPS Navigator remembers the speed at which you were driving before losing the GPS signal. Telenav GPS
Navigator continues to give you driving directions based on an estimate of the projected distance that you may have
traveled at your last recorded rate of speed. Telenav GPS Navigator recalculates your current position when you regain
a GPS signal and adjusts your driving directions accordingly.
Will I be able to get a route when there is no GPS?
Smartly-cached map data on your handset allows you to navigate and get turn-by-turn re-routing directions even when
you have traveled a small distance outside the carrier’s coverage area.
How do I delete my list of “Recent Places?”
You may remove multiple addresses by logging into your Telenav GPS Navigator account online at
http://my.telenav.com
handset by choosing Delete All in the Recent Places menu.
. In Recent Places, check the addresses you want to remove. You may also do this from your
© 2012 Telenav, Inc. Page 52 of 58
Page 53

I have recently changed phone numbers. How do I move my subscription over to my new phone number?
Contact your carrier to change the phone number.
How do I reinstall the application on my device?
Contact your carrier to obtain the latest build for Telenav GPS Navigator.
How often are your maps updated?
Our maps are updated quarterly.
I noticed there are stars next to some restaurants I have viewed or saved. How is popularity rated?
Popularity is calculated by the user-generated ratings, averaged by considering the scores of the ratings and the number
of users that have rated the location. A location accrues points based on how many stars it is given by Telenav GPS
Navigator users. When a location consistently achieves above-average ratings, its popularity count increases. Negative
ratings lower the popularity count of the location.
How long are ratings kept?
Ratings expire after two years.
Telenav GPS Navigator is freezing up on me. How do I fix this?
If Telenav GPS Navigator is freezing, power your device off for about 20 seconds before turning it back on. Once you’ve
done this, try launching Telenav GPS Navigator again. If you are still experiencing issues, please contact your carrier.
The application sometimes freezes on the splash screen. How can I fix this?
You can fix application freezing on the splash screen by changing the application permissions to allow for “Connections,
Interactions, and User Data.” Follow the instructions on page 51
to adjust permission settings.
If for some reason the application is still freezing on the splash screen, please remove and re-install the application on
your device.
Why can’t I change permission settings on my device?
If a device is on a BlackBerry Enterprise Server, you will usually not be able to change permission settings due to the
restrictions set by your company or administrator. If you get a prompt upon launching the application that permission
settings need to be changed, please contact your company’s IT administrator so that they can make these changes to
the BlackBerry Enterprise Server.
© 2012 Telenav, Inc. Page 53 of 58
Page 54

21. Customer Support
Send an email with your questions or comments to Telenav GPS Navigator Customer Support, or enter a comment
through the Telenav GPS Navigator Web site. We will promptly reply to your inquiries.
21.1 Technical Support
Toll Free Customer Support Line: 1-88-Telenav-4 (1-888-353-6284)
Fax: 408-245-0238
care@telenav.com
www.telenav.com
Telenav Inc.
950 De Guigne Drive
Sunnyvale, CA 94085
© 2012 Telenav, Inc. Page 54 of 58
Page 55

22. Telenav Services Warranty
The content and Java application services provided by Telenav is provided “as is” and “as available” without
warranties of any kind, either expressed or implied, including but not limited to any warranties of merchantability
or fitness for particular use, or non-infringement. You acknowledge that your use of the Telenav service is at your
sole risk and you agree that the service and the information provided are without warranty of any kind by Telenav.
Telenav does not warrant the availability, accuracy, completeness, currentness, or reliability of the services available
from Telenav, or the service itself. Unavailability, errors, omissions, or inaccurate data may result from unreliable data
due to equipment failure or other technical problems beyond the control of Telenav, and Telenav does not warrant the
services in any respect due to such circumstances beyond its control.
Although certain information provided to you by Telenav may be obtained or compiled from sources Telenav
believes to be reliable, Telenav cannot and does not guarantee the accuracy, validity, kindness, or completeness
of any information made available to you for any particular purpose. Under no circumstances, including
negligence, will Telenav or any of its affiliates, directors, officers or employees, or any third party be liable for any
direct, indirect, incidental, special or consequential damages that results from your use or your inability to use the
services. You acknowledge that this limitation applies to all content information or other services available from
Telenav, and whether or not Telenav has notice of the possibility of such damages, and whether or not to
circumstances giving rise to such damages may have been within the control of Telenav.
Some states do not allow the exclusion of certain warranties, so some of the above exclusions may not apply to
you. In those states, liability is limited to the fullest extent allowed by law.
By using the service, you agree to indemnify Telenav and its parents, subsidiaries, affiliates, officers and
employees and hold them harmless from any and all claims and expenses, including reasonable attorney’s fees,
asserted third party due to, or arising out of your use of the service and the site.
Telenav Inc.
950 De Guigne Drive
Sunnyvale, CA 94085
T: 408.245.3800
F: 408.245.0238
www.telenav.com
© 2012 Telenav, Inc. Page 55 of 58
Page 56

23. Appendix A: Telenav 6.2 Features Matrix
Features
TextDirections‐English
VoiceDirection‐English
TextDirections‐Spanish
VoiceDirection‐Spanish
AutomaticReroute
NavView:2DMovingMaps
NavView:3DMovingMaps
Nighttimemapcolors
(Basedonsunriseandsunsettime)
ResumeTrip
NavigationPreferencetoAvoid
- HOVlanes
- Tolls
- TrafficDelays
TrafficSummaryofRoute
TrafficRerouting&Alerts
RoutePlanningwithupto3alternateroutes
SaveTriptoFavoritesafterendtrip
Resumetripaftersearchalongroute
SpeedTrap
TrafficCamera
LaneAssist
LegalSpeedLimit
Boost TN 6.2
(Bundle Users)
Navigation
Standard
√ √
√ √
√ √
√ √
√ √
√ √
√ √
√ √
√ √
√ √
√
√
√
√
√
Boost TN6.2
Premium
√
√
√
√
√
√
√
√
√
Directory Search
OneBoxSearchforAddressandPOI
BusinessFinder
GasbyPrice
WiFiSpots
FuzzySearch
SearchAlongRoute
Ratings&Reviews
© 2012 Telenav, Inc. Page 56 of 58
√
√ √
√ √
√ √
√ √
√ √
√ √
√
Page 57
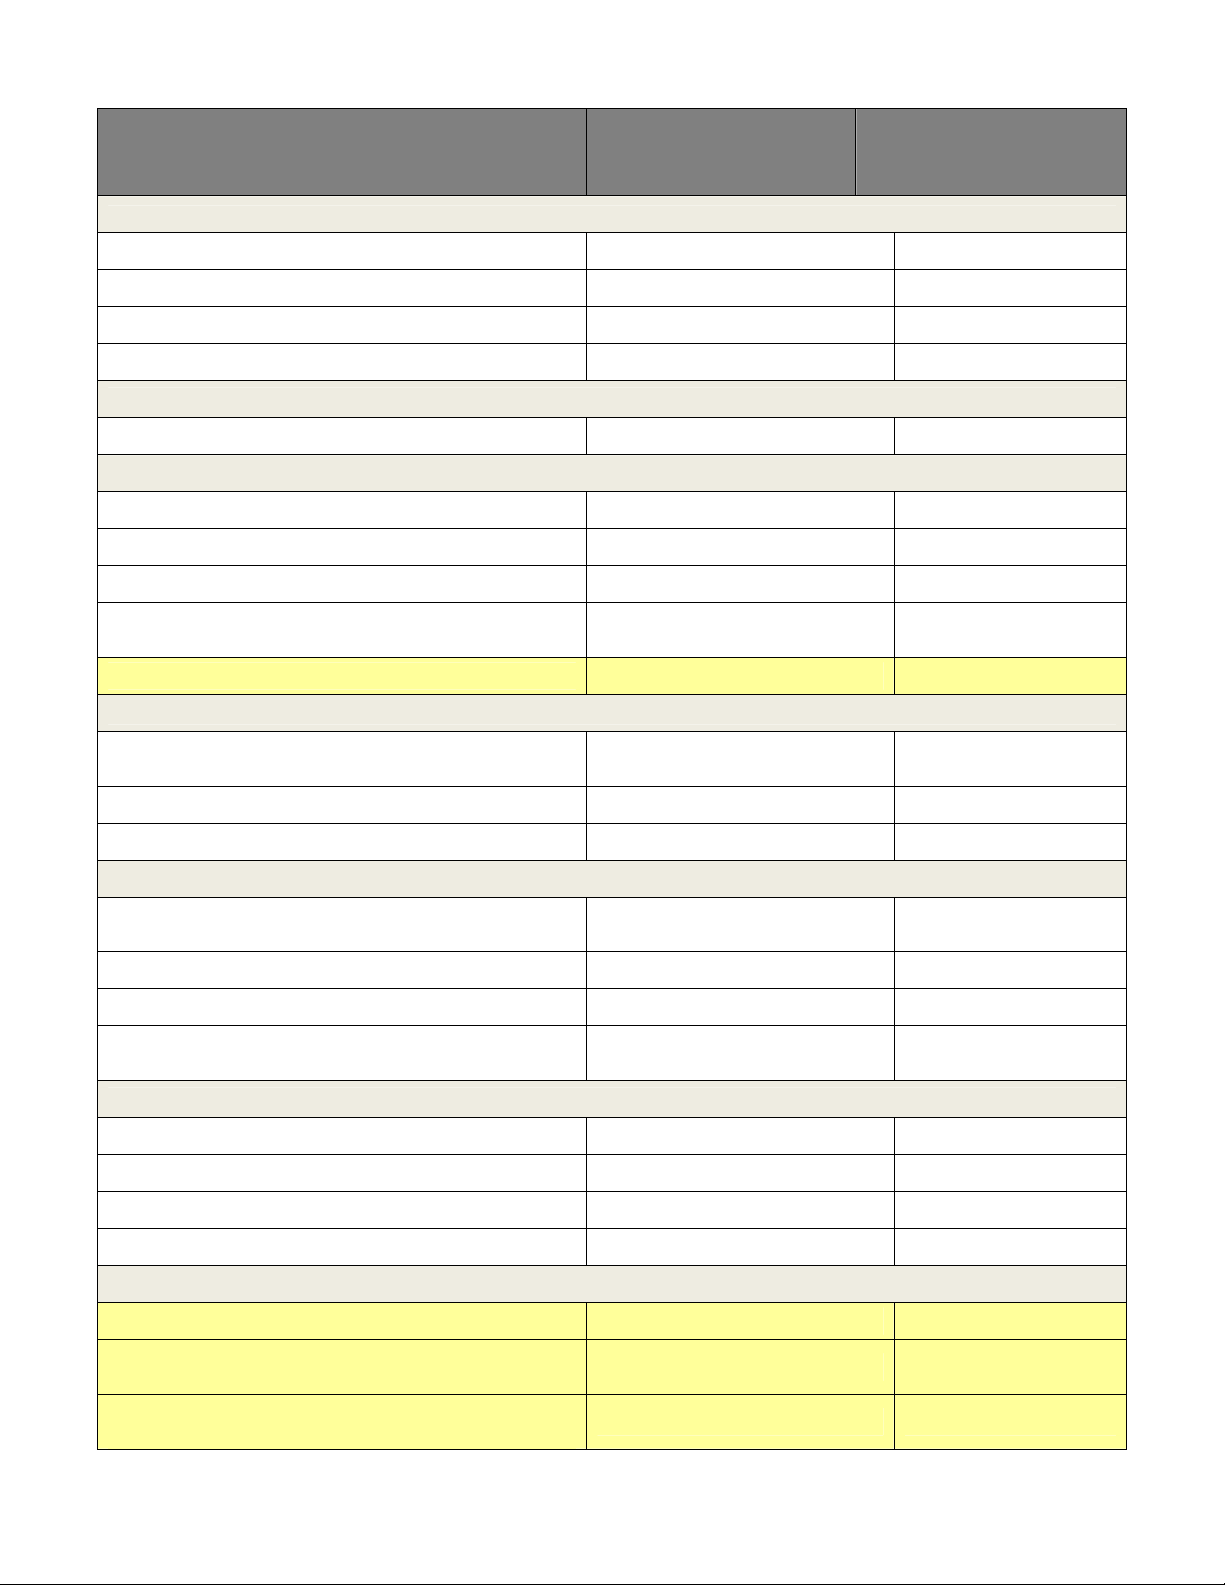
Features
Maps&Traffic
StaticMap(2DNorthup)
FollowMeMap(2DNorthup)
TrafficonMaps
Getthephysicaladdressofthecursorpointonmap
Boost TN 6.2 Boost TN6.2
Standard Premium
(Bundle Users)
√ √
√ √
√ √
√ √
Billing
Purchasenon‐recurringMonthlyPassforPremium
MerchantReview
Deals
Menu
SponsoredListings(upto2sponsoredlistingsper
searchresultspage)
HouseAdonHomeScreen
Speed Recognition
SingleClickVoiceInput
(CommandandControl)
DSRforAddressInput
DSRforPOISearch
Addresssharingwithsavedcontactsorrecipients
whosephonenumberyouprovide
SavetoFavorites
GiveFeedback
DiagnosticMenu(Alltroubleshootinginfo&toolsin
oneplace)
Local Apps
Ads
Others
√
NA
√ √
√ √
√ √
√ √
√ √
√ √
√ √
√ √
√ √
√ √
√ √
√ √
Weather
CommuteAlerts
Movies(ExternalWAPsiteforpurchase)
MyMileageTracking
BlackBerry Integrated Experience
UniversalSearchIntegrationonBBOS6.0
IntegrationwithBlackberryNativeMessaging
Applications
IntegrationwithBlackberryNativeContactsand
CalendarApplications
© 2012 Telenav, Inc.
Page 57 of 58
√ √
√
√ √
√
√
√
√
√
√
√
Page 58

Legend:
New features in Telenav GPS Navigator 6.2
© 2012 Telenav, Inc. Page 58 of 58
 Loading...