

Page 1

Page 2

ENGLISH
DIGITAL PHOTO FRAME OPERATING INSTRUCTIONS
TELEFUNKEN DPF 10934
I. Learn about and install your frame ................................................. 2
1. Box contents ......................................................................................................... 2
2. Frame diagrams .................................................................................................... 3
3. Remote control ...................................................................................................... 3
4. Installation ............................................................................................................. 4
II. Use your frame ................................................................................. 4
1. Selecting a language ............................................................................................. 4
2. “ECO LOGIC” mode .............................................................................................. 5
3. Reading a memory card or a USB key .................................................................. 5
4. Copying photos to the internal memory ................................................................. 6
5. Deleting photos ..................................................................................................... 8
III. Selecting the type of files to play .................................................. 10
1. Internal memory/Removable media .................................................................... 10
2. Selecting a folder/Multimedia mode .................................................................... 10
3. Photos ................................................................................................................. 10
4. Videos ................................................................................................................. 11
5. Music ................................................................................................................... 11
IV. Settings ........................................................................................... 12
1. Photos Setup ...................................................................................................... 12
2. Music Setup ........................................................................................................ 15
3. Video Setup ........................................................................................................ 16
4. Calendar setup .................................................................................................... 16
5. System configuration ........................................................................................... 19
V. Connecting to a computer ............................................................. 21
VI. Safety instructions ......................................................................... 22
VII. Warranty ......................................................................................... 23
VIII. Specifications ................................................................................. 25
Non contractual document subject to change in case of typographical errors (Mktg1011) COPYRIGHT SOPEG 2011
The manufacturer reserves the right to modify the product specifications without notice.
1
Page 3
ENGLISH
PRELIMINARY NOTICE
During the first use, the animated demo is played. To exit and go to the frame functions, simply press the
“Slideshow” key on the remote control, or on “Left” key of the digital frame during 3 seconds.
I. Learn about and install your frame
Thank you for your recent purchase of a TELEFUNKEN DPF 10934 digital photo frame. Before using
your device, please consult these operating instructions and keep them so you may refer to them later.
1. Box contents
- 1 digital photo frame
- 1 AC adaptor
- 1 remote control
Non contractual document subject to change in case of typographical errors (Mktg1011) COPYRIGHT SOPEG 2011
The manufacturer reserves the right to modify the product specifications without notice.
2
Page 4

ENGLISH
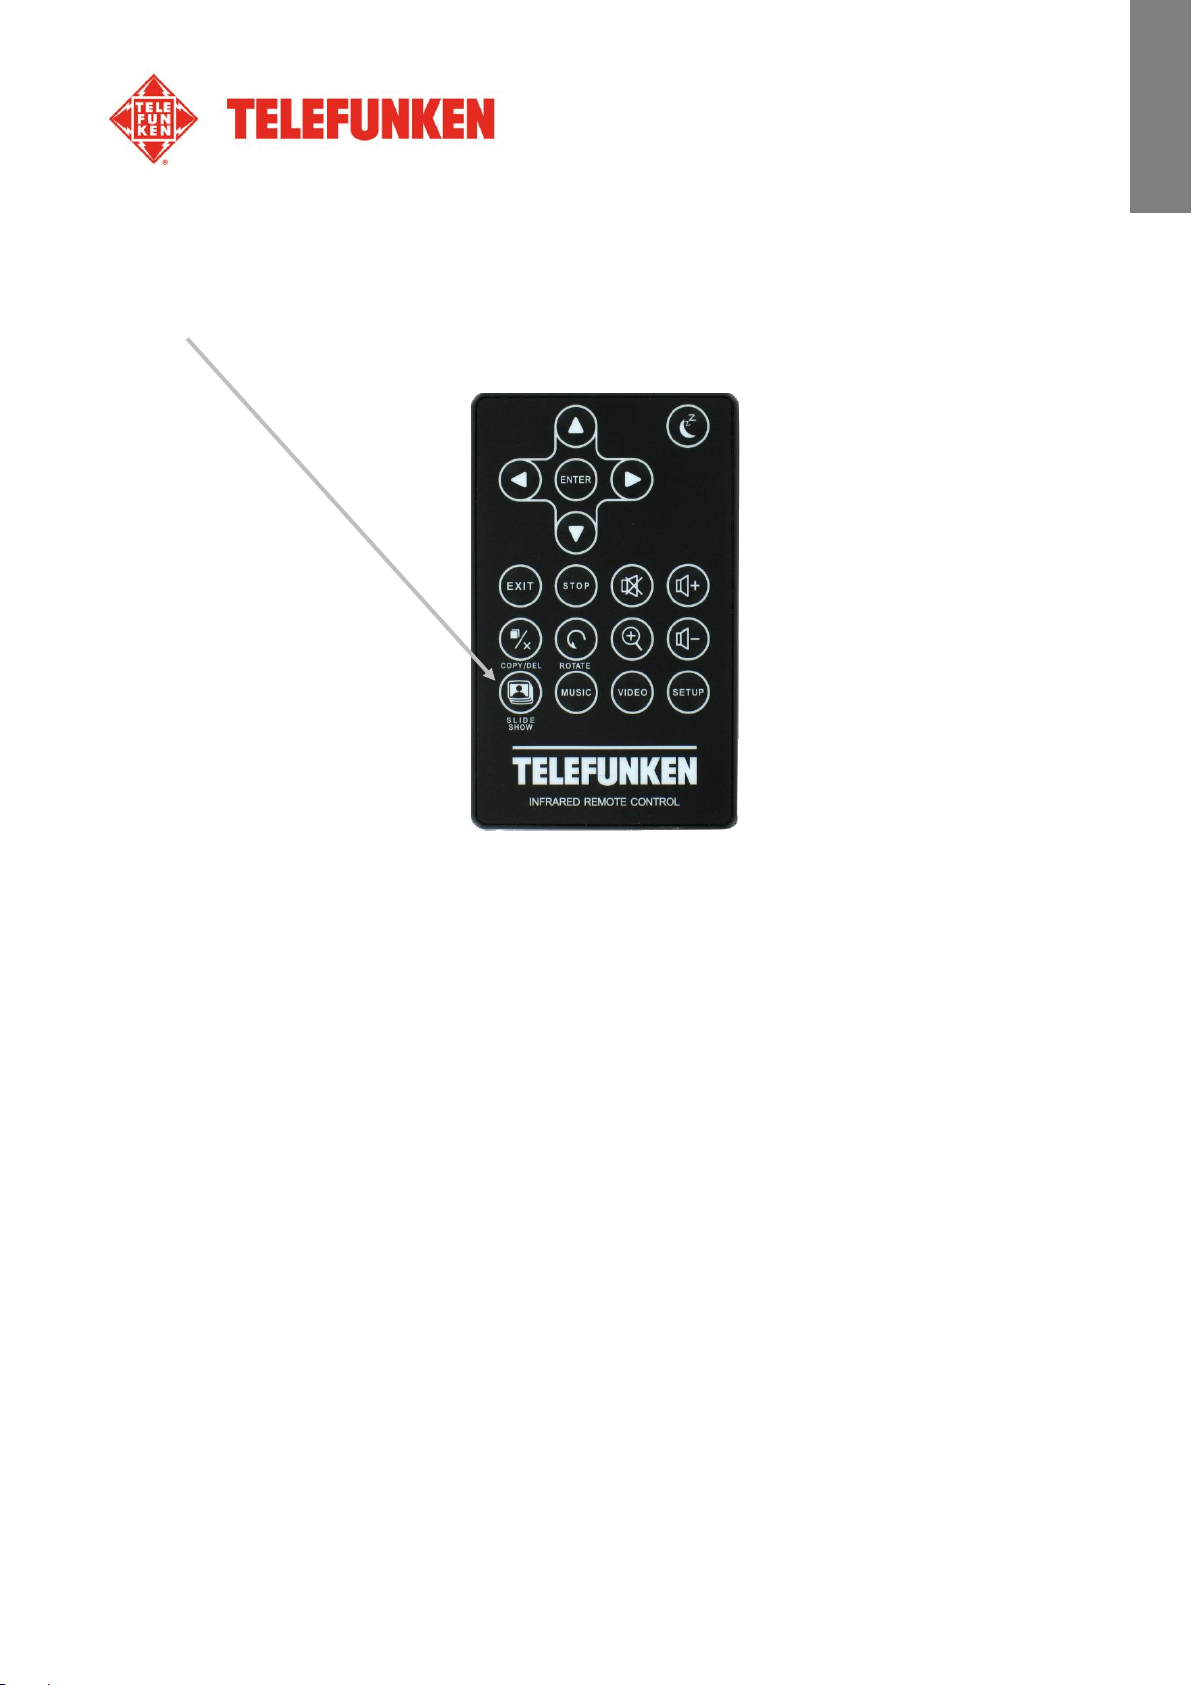
Key
Function
▲
Navigation up in the menus
◄
Navigation left in the menus and skip to the previous file (photo, music or movie)
▼
Navigation down in the menus
►
Navigation right in the menus and skip to the next file (photo, music or movie)
ENTER
Confirm your selection or switch modes
Switch the digital photo frame on or to standby mode
EXIT
Exit current menu and return to previous menu
STOP
Stop file playback (photo, music or movie) and return to main menu
Mute/unmute sound, in mute mode the mute icon is displayed
Increase volume, the volume level is displayed
(COPY/DEL)
Access copy, delete and sort functions (only in main menu)
(ROTATE)
Rotate photo clockwise 90°
Enlarge image, press repeatedly to cycle through zoom modes x2, x4, x8 and x16;
press again to return to normal size
Decrease volume, the volume level is displayed
(SLIDESHOW)
Start the photo slideshow directly
2. Frame diagrams
3. Remote control
All functions can be accessed with the remote control. Press the following keys to access the functions:
Non contractual document subject to change in case of typographical errors (Mktg1011) COPYRIGHT SOPEG 2011
The manufacturer reserves the right to modify the product specifications without notice.
3
Page 5

ENGLISH
MUSIC
Access setup menu (MUSIC) directly
VIDEO
Access setup menu (VIDEO) directly
SETUP
Access setup menu (Settings) directly
4. Installation
- Take your frame and its accessories out of their packaging.
- Remove the plastic film protecting the front of the frame.
- Pull the plastic tab protecting the contacts in the remote control.
- Stand the frame in the desired location, pulling the adjustable stand towards you (see diagram
above).
- Connect the electrical cord to the frame in the space provided.
- Plug your frame into an outlet. Your frame will start up automatically.
II. Use your frame
1. Selecting a language
During the first use, the animated demo is played. To exit and go to the
frame functions, simply press the “Slideshow” key on the remote.
The language selection screen then appears.
- Select your language using the arrow keys on the remote
control, then press “ENTER”.
Once you have selected your language, the frame is ready for use.
Simply insert a memory card or flash drive to begin playback of your pictures.
Caution: The animated demo is contained in the folder named “DEMO”. You must delete it for the
frame to keep benefit of the 2 GB internal memory.
Non contractual document subject to change in case of typographical errors (Mktg1011) COPYRIGHT SOPEG 2011
The manufacturer reserves the right to modify the product specifications without notice.
4
Page 6

ENGLISH
2. “ECO LOGIC” mode
ECO LOGIC mode combines 3 essential elements to reduce energy consumption by over 40%
compared to a standard frame:
- A LED screen, which uses less energy while improving picture quality;
- A low-energy and 'Energy Star'-certified power adapter;
- A light sensor.
This sensor, on by default, will automatically turn off your picture frame at night and turn it on during the
day.
You can deactivate the light sensor in your frame's system settings menu.
Caution: Depending on where you place the frame (for example, in furniture or under a shelf, there may
not be enough light to turn on the frame or it may unexpectedly turn off. You can turn it back on by
pressing the standby key on the top right of the remote. This will deactivate the sensor. To reactivate it,
simply bring into bright light for 5 seconds.
3. Reading a memory card or a USB key
If your frame is off:
- Insert your card or USB key in the space provided.
- Switch on your frame: The slideshow will automatically play the contents of your memory card or
USB key.
If your frame is on and playing the slideshow from the
internal memory:
- Your memory card is automatically detected
-
5
Non contractual document subject to change in case of typographical errors (Mktg1011) COPYRIGHT SOPEG 2011
The manufacturer reserves the right to modify the product specifications without notice.
Page 7
ENGLISH
Resizing allows the copies to fit the
resolution of your frame, considerably reducing their file size.
Thanks to this system, you can store over 10,000 photos in the
internal memory.
If your media (memory card, USB key or built-in memory)
contains music and if you want to play a musical slideshow,
press the “Enter” key during the slideshow. The digital frame will display “Musical Slideshow”.
4. Copying photos to the internal memory
If you did not select automatic copying when you inserted the card, you have 2 ways to copy pictures
from your memory card to the frame's internal memory.
- Copy your photos from the file manager
If you use this method, you can only copy files one at a time, and you will not be able to resize them to
the frame's resolution.
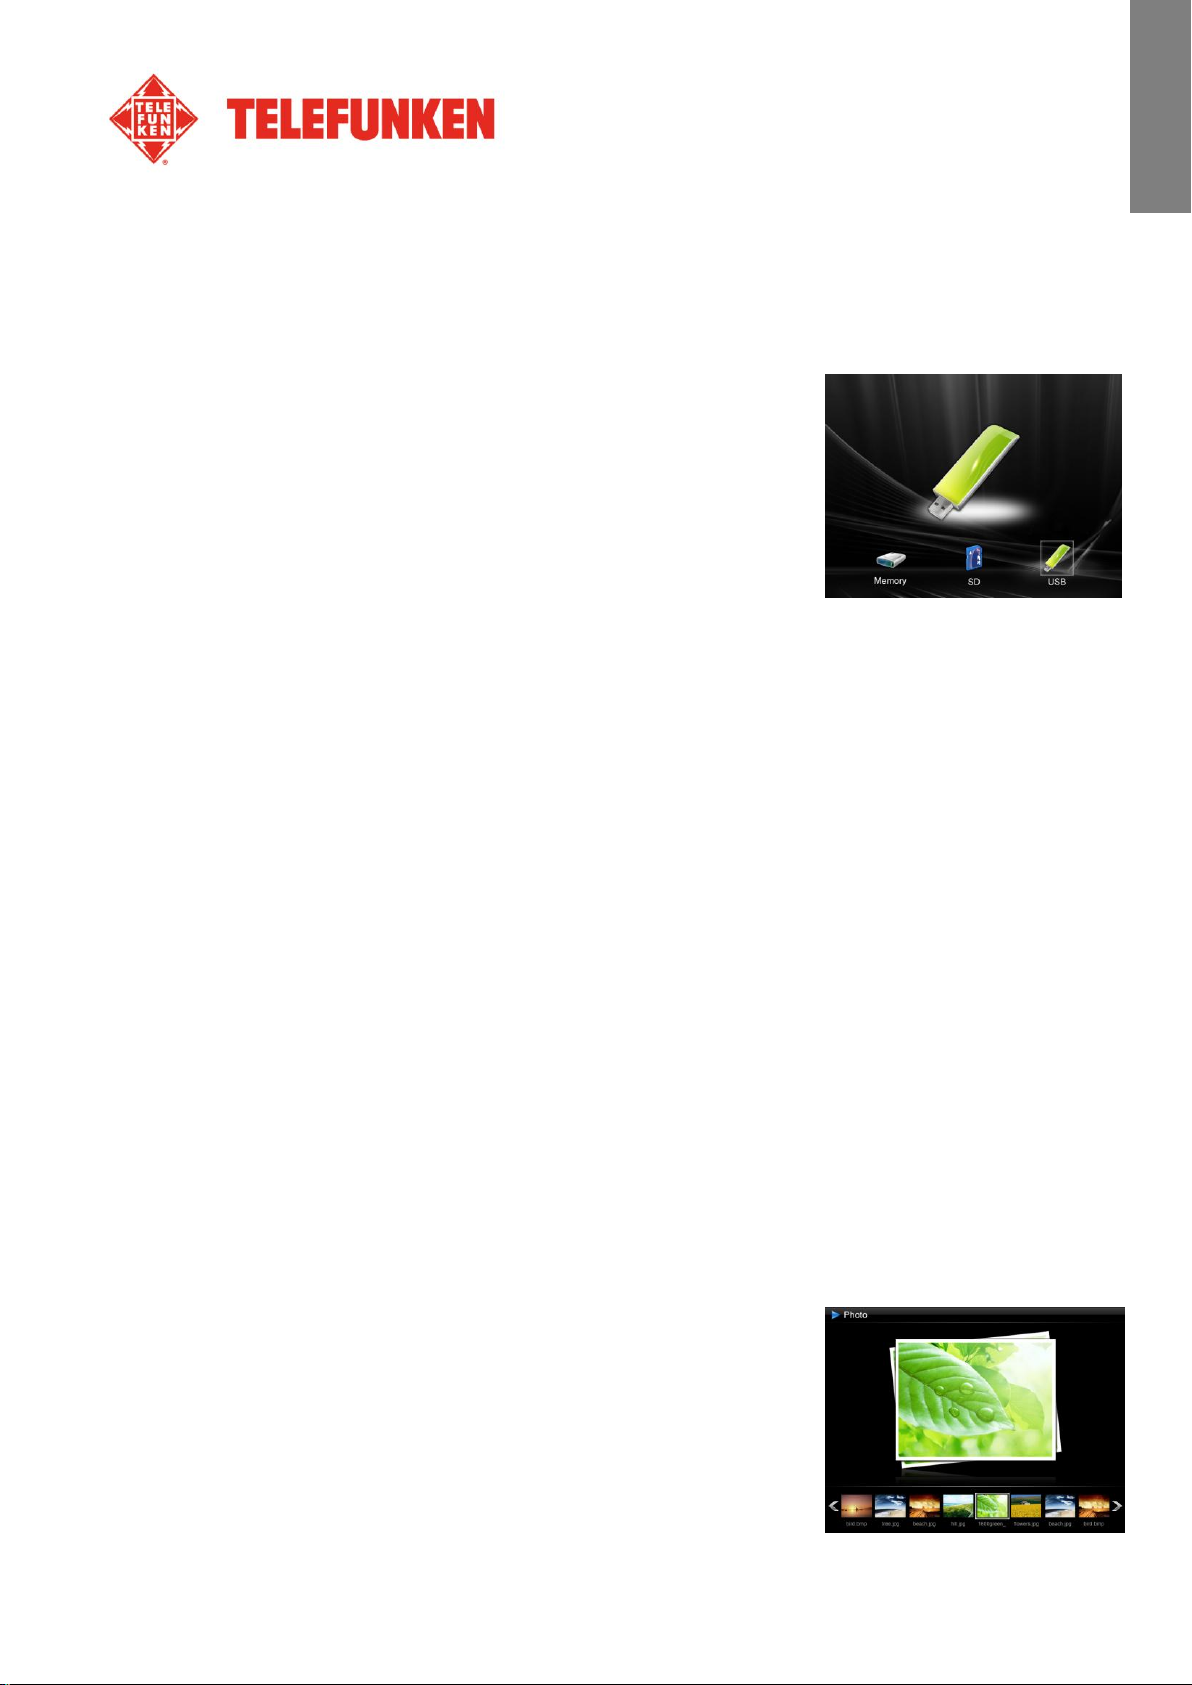
1. Press the “Exit” key on your remote as many times as
necessary for the media selection screen to come up.
2. Select the removable medium (memory card or USB key)
storing the photos to be copied using the “Left/Right”
keys on the remote. Press “Enter”.
3. Using the “Left/Right” keys on the remote, select the
“Files” icon and press “Enter”.
4. Select the folder to be copied using the “Up/Down” keys
on the remote and press “Copy/Del”. The following
message appears: “Copy?” Make your selection using
the “Left/Right” keys and press “Enter”.
6
Non contractual document subject to change in case of typographical errors (Mktg1011) COPYRIGHT SOPEG 2011
The manufacturer reserves the right to modify the product specifications without notice.
Page 8
ENGLISH
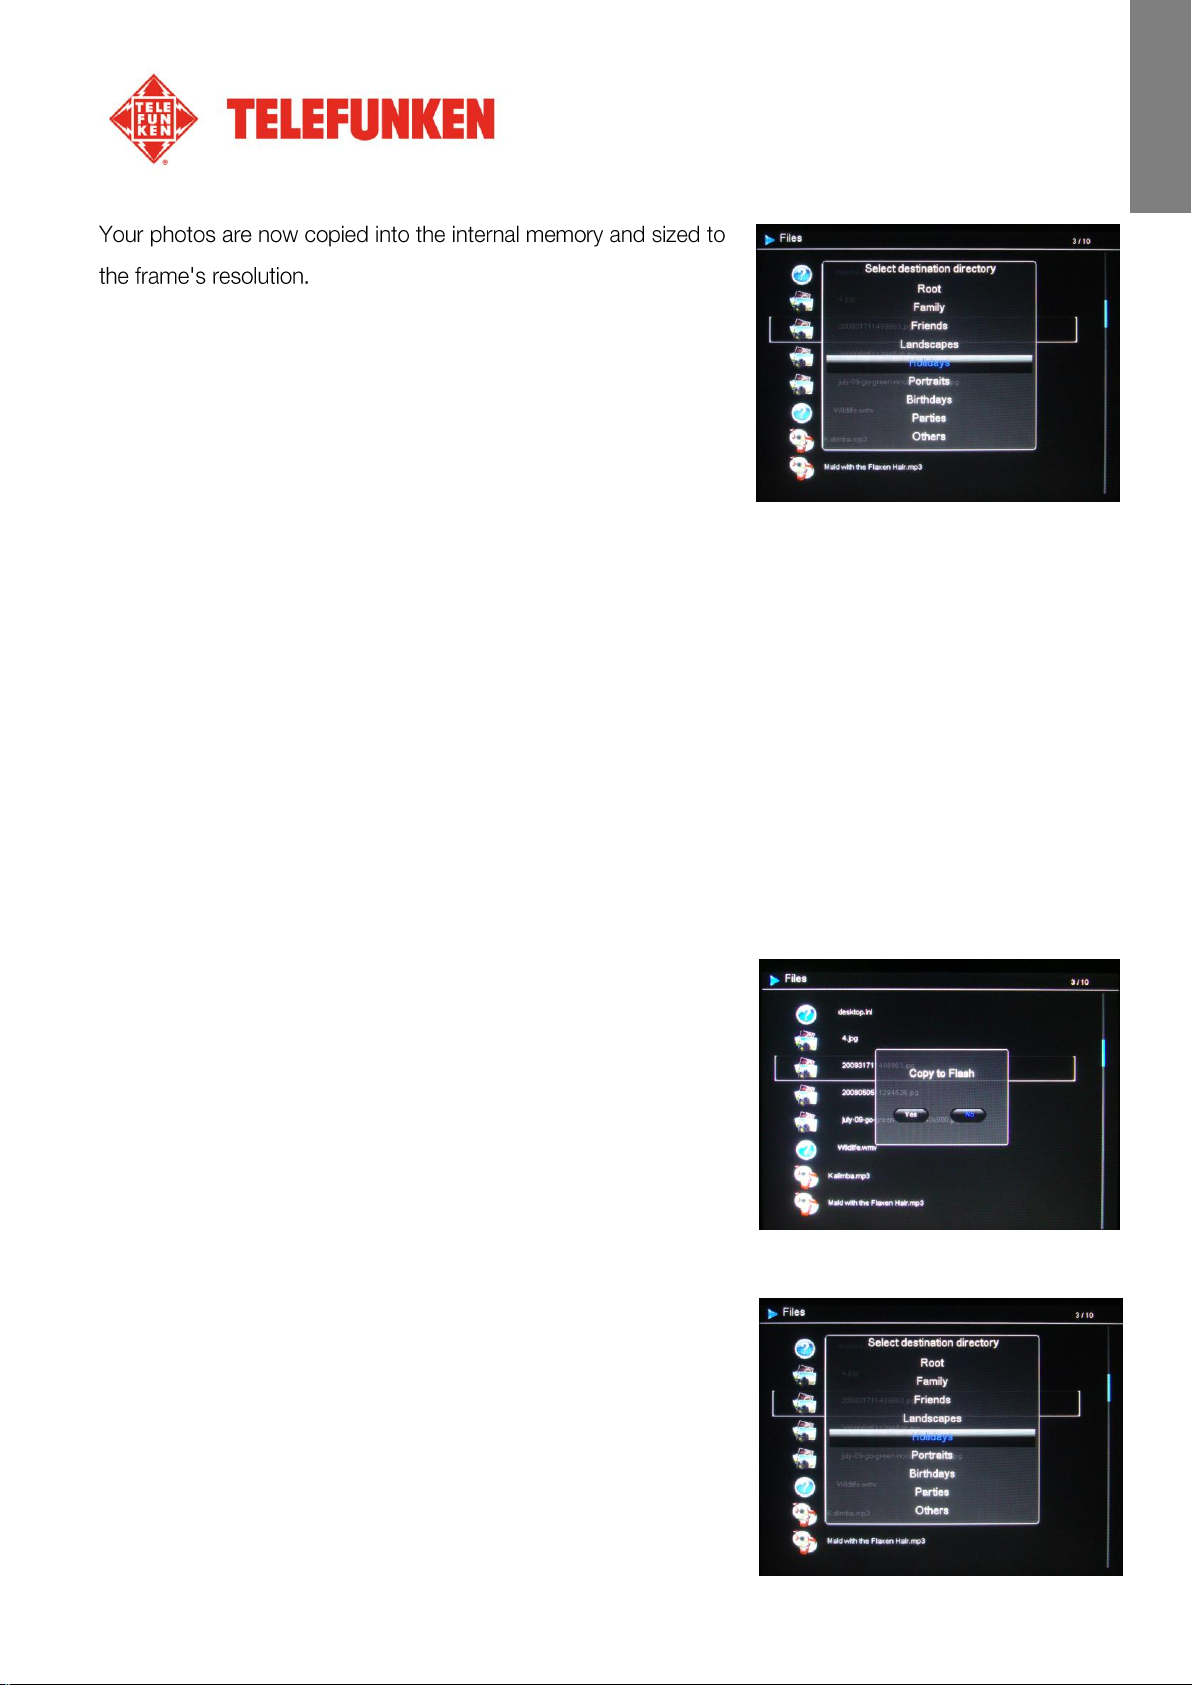
5. Choose the directory where you want to store your file using the “Up/ Down” keys and press
“Enter”. Your file has been copied.
If your memory card contains one or more folders, you can copy them one by one in full. They will be
stored in the internal memory folder of your choice, and you can play each back independently of the
others.
- Copy your photos from the thumbnail mode
Using this method, you can copy all or a selection of photos, with
the ability to resize them to the frame's resolution in order to
optimize internal memory capacity.
1. Press the “Exit” key on your remote as many times as
necessary for the media selection screen to come up.
2. Select the removable medium (memory card or USB key)
storing the photos to be copied using the “Left/Right”
keys on the remote. Press “Enter”.
3. Using the “Left/Right” keys, select photo mode and press “Enter”. The slideshow will then start.
4. Press the “Exit” key on the remote to access the
thumbnails.
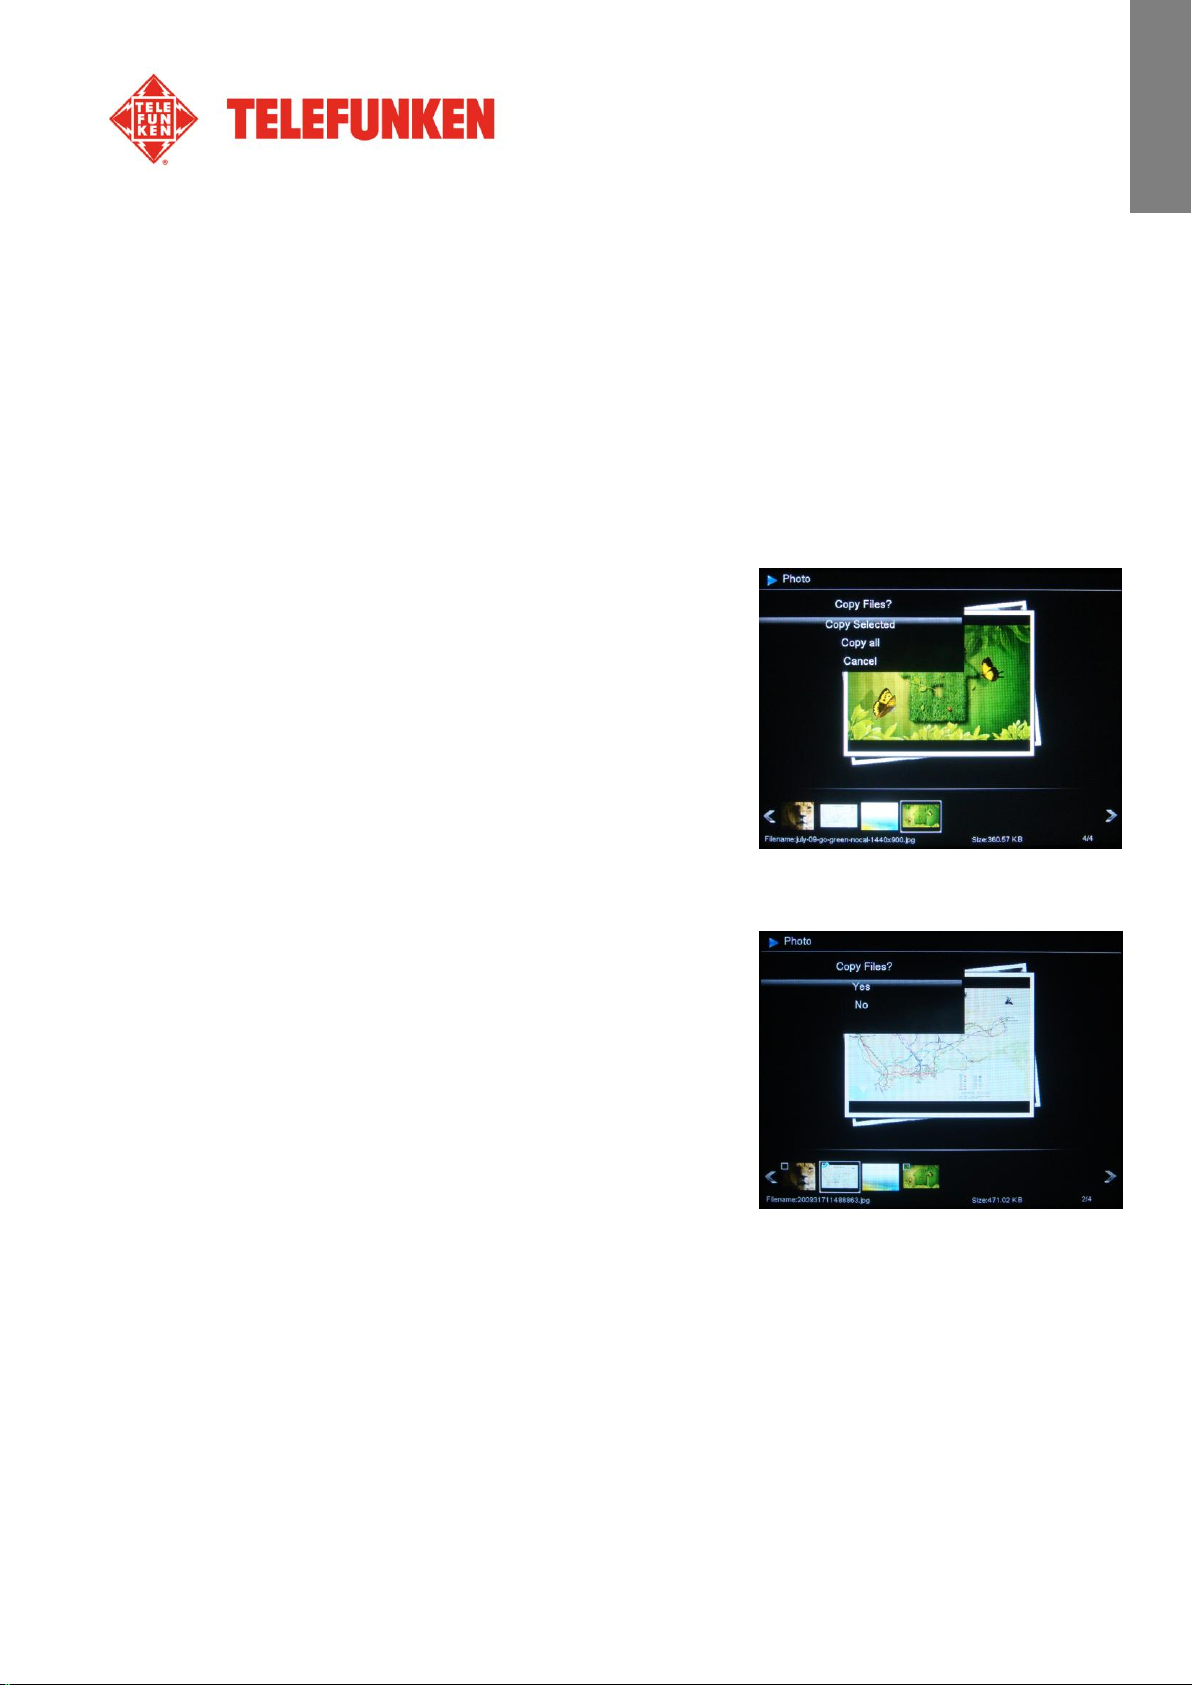
5. Press the “Copy/Del” key. The screen will display “Copy
files?” (Select or All). Select and press “Enter”
The thumbnails will reappear, with a check box in the top left
corner of each picture. Select the photos to be copied using
the “Left/Right” keys on the remote, pressing “Enter” for
each photo you wish to select.. (If you have chosen “Copy all”, every thumbnail will be checked).
Press the “Copy/Del” key. A confirmation message will appear.
Press “Enter” to confirm your selection.
The screen will show a dialog box asking you if you want to resize your images.
Select the desired option using the “Up/Down” keys on the remote and confirm the choice by
selecting “Confirm”. Press “Enter”. Your photos are now copied into the internal memory and sized
to the frame's resolution.
7
Non contractual document subject to change in case of typographical errors (Mktg1011) COPYRIGHT SOPEG 2011
The manufacturer reserves the right to modify the product specifications without notice.
Page 9
ENGLISH
5. Deleting photos
You can delete photos that are in your frame's internal memory.
- Delete your photos from the file manager
If you use this method, you can only delete one file at a time.
1. Press the “Exit” key on your remote as many times as
necessary for the media selection screen to come up.
2. Select the removable medium (memory card or USB key)
storing the photos to be copied using the “Left/Right”
keys on the remote. Press “Enter”.
3. Using the “Left/Right” keys on the remote, select the
“Files” icon and press “Enter”.
Non contractual document subject to change in case of typographical errors (Mktg1011) COPYRIGHT SOPEG 2011
The manufacturer reserves the right to modify the product specifications without notice.
8
Page 10
ENGLISH
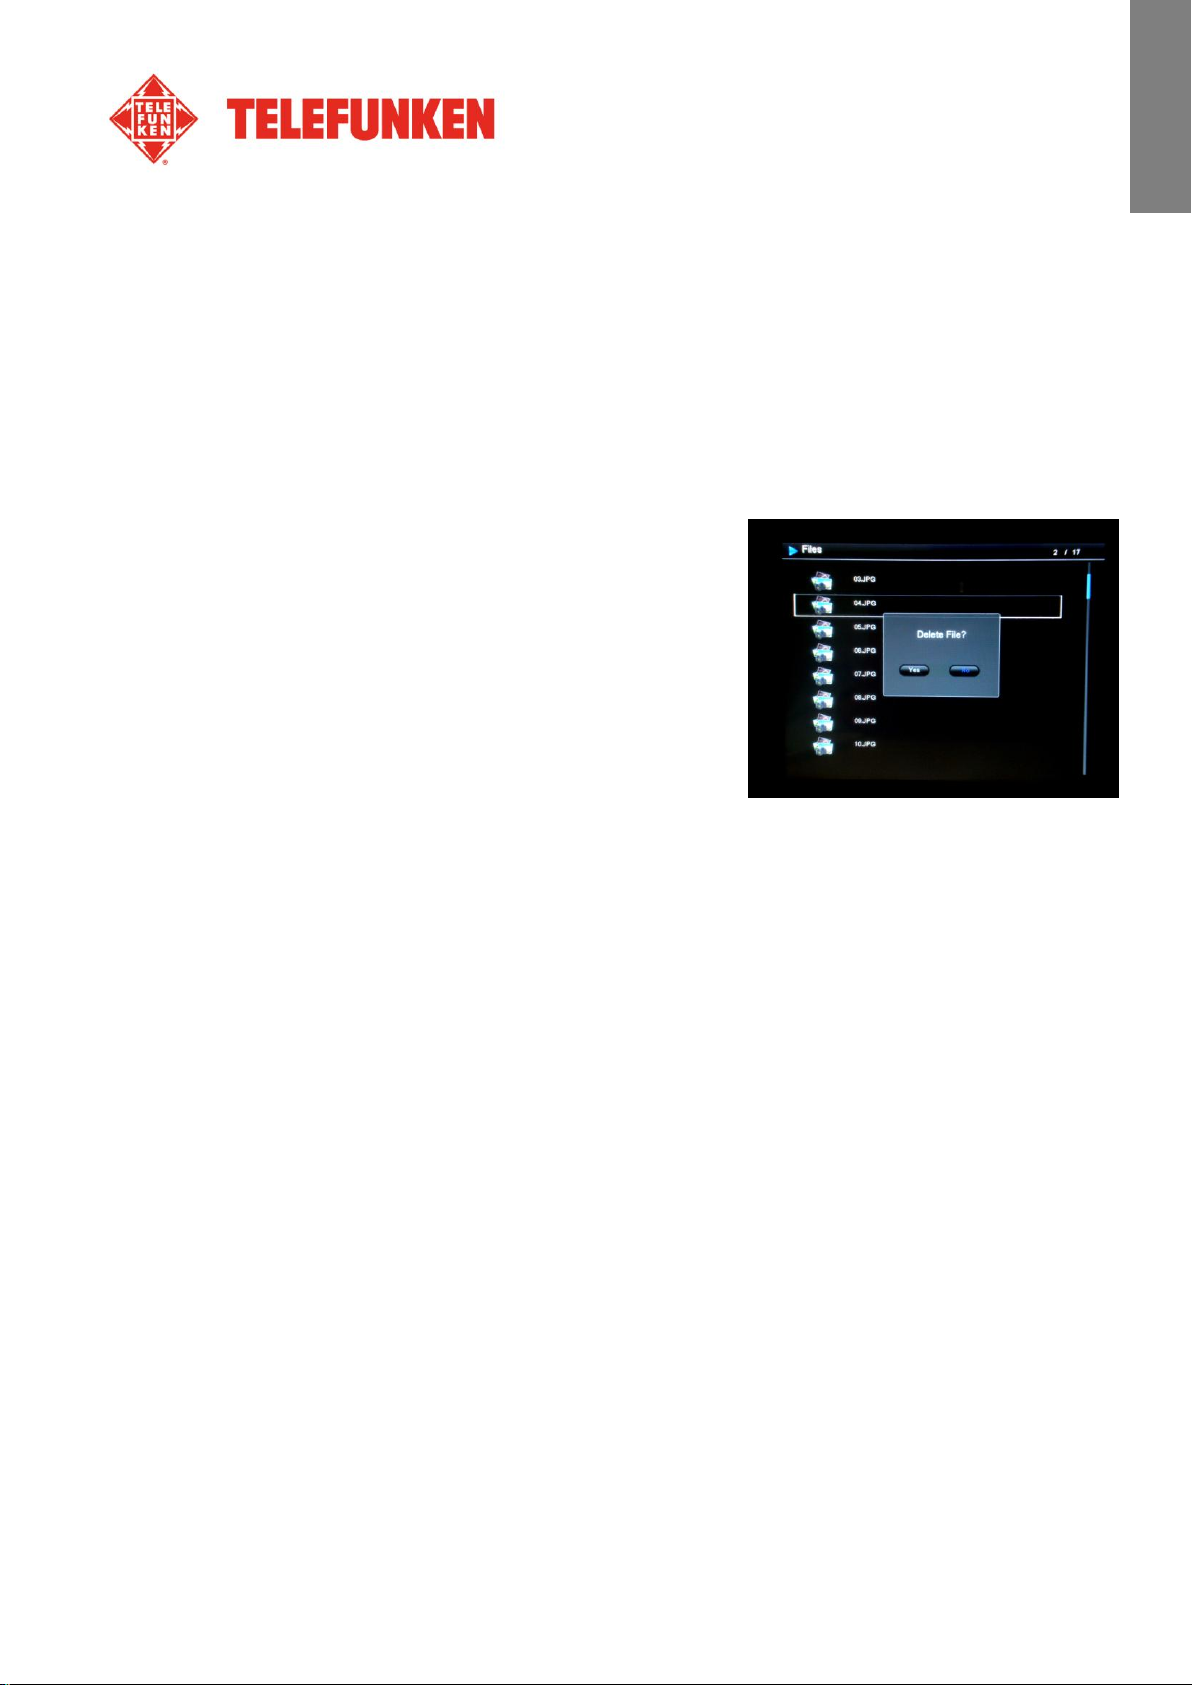
4. Select the file using the “Up/Down” keys on the remote, and press the “Copy/Del” key. The
screen will display “Delete file? YES/NO”. Choose the desired option and press “Enter”. Your
file has been deleted.
You can also delete one of your personal folders located in one of the preset directories.
- Delete your photos from the thumbnail mode
With this method, you can delete all or a selection of photos in the internal memory.
1. Press the “Exit” key on your remote as many times as
necessary for the media selection screen to come up.
2. Select the internal memory using the “Left/Right” keys
on the remote. Press “Enter”.
3. Using the “Left/Right” keys, select the photo mode and
press “Enter”. The slideshow will then start.
4. Press the “Exit” key on the remote to access the
thumbnails.
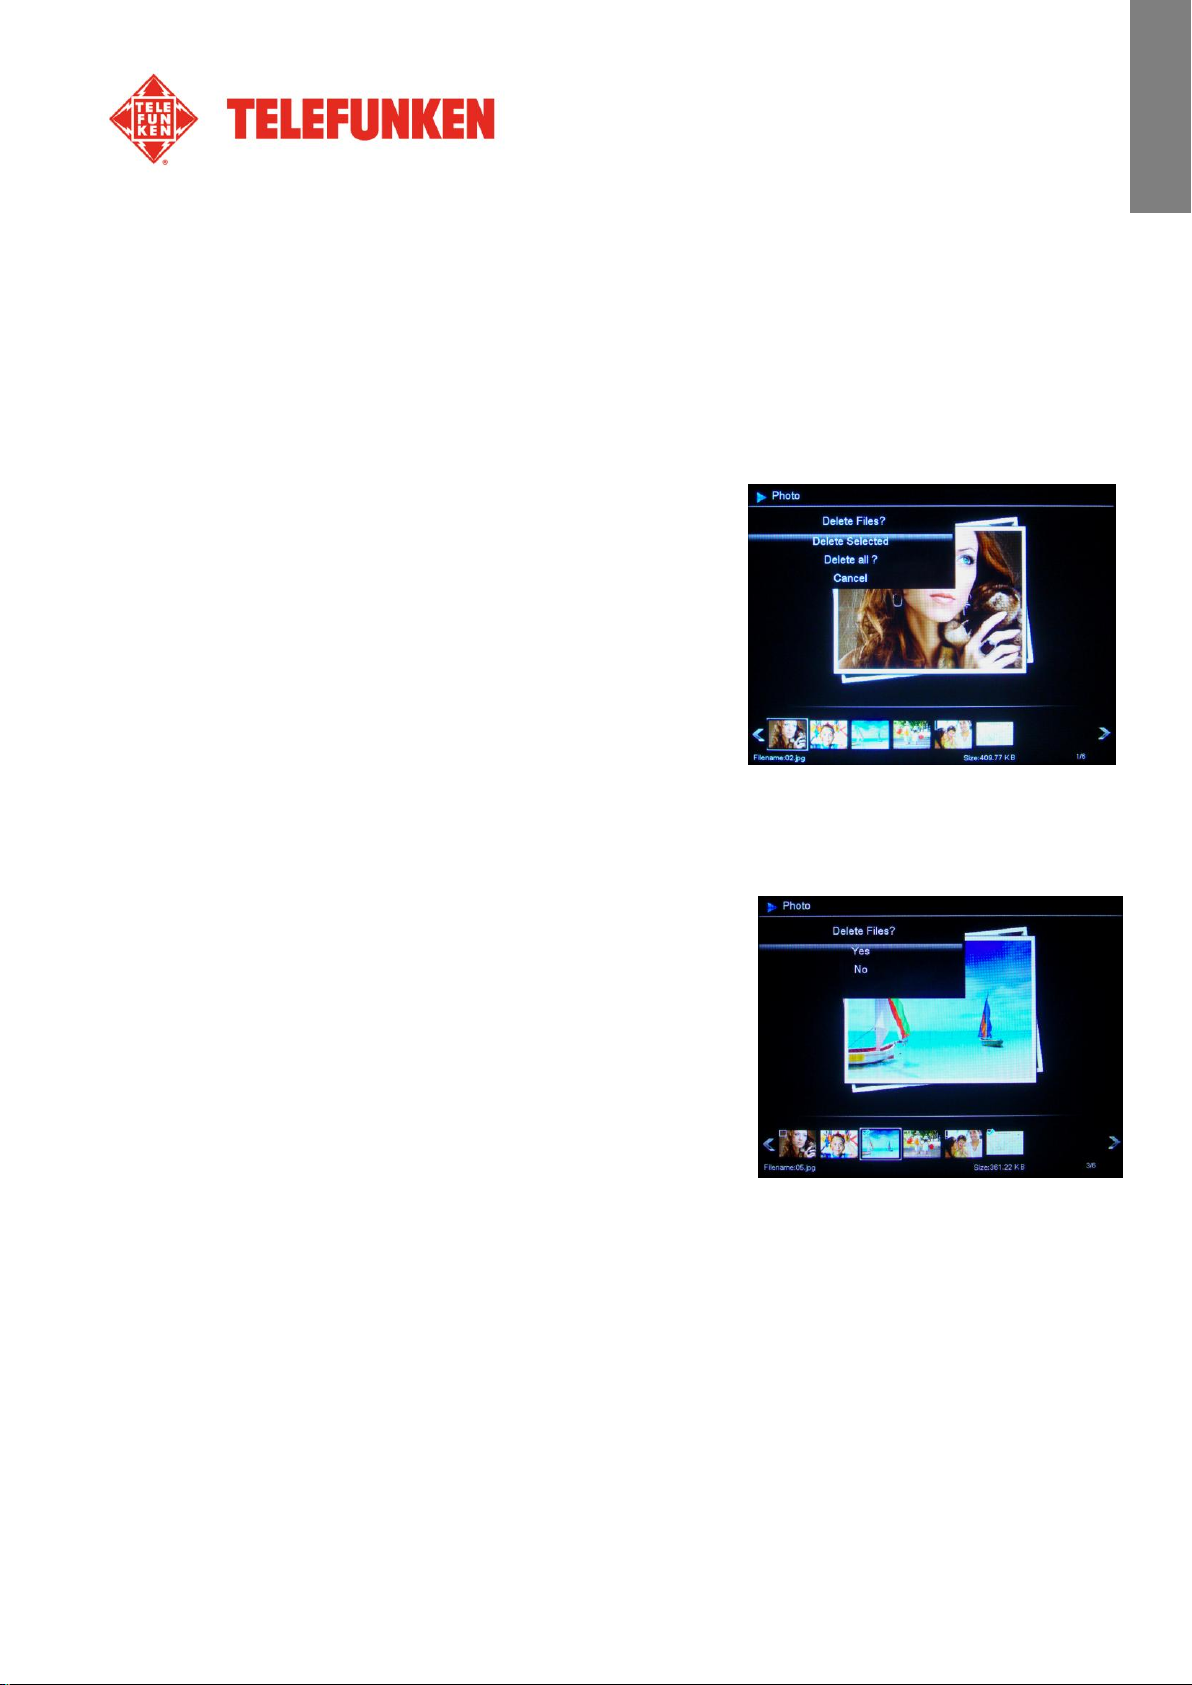
5. Press the “Copy/Del” key. The screen will display “Delete?” (Select or All). Select and press
“Enter”.
6. The thumbnails will appear, with a check box in the upper
left corner of each picture. Select the photos to be deleted
using the “Left/Right” keys on the remote, pressing
“Enter” for each photo you wish to select. (If you have
chosen the “Delete all” option, every thumbnail will be
checked).
7. Press the “Copy/Del” key, then press “Enter”.
8. The screen will display “Delete?”
9. Select the desired option using the “Up/Down” keys on the remote. Press “Enter”. Your photos
have now been deleted from the internal memory
Non contractual document subject to change in case of typographical errors (Mktg1011) COPYRIGHT SOPEG 2011
The manufacturer reserves the right to modify the product specifications without notice.
9
Page 11
ENGLISH
III. Selecting the type of files to play
1. Internal memory/Removable media
If no media has been inserted, the slideshow from the internal memory
will launch automatically whenever the frame is turned on.
If there is a memory card or a flash drive inserted when the frame is
turned on, the card’s content will be played.
In this case, you can toggle between the card and the internal memory
as follows:
Keep pressing the “Exit” key on your remote to go to the select media screen.
Use the “Left/Right” keys on the remote to select the media you want to play, then press “Slideshow”
on your remote. The slideshow will then start.
2. Selecting a folder/Multimedia mode
Thanks to its exclusive multimedia mode, the DPF 10934 lets you play the entire content of a folder,
whether it is photo, video or music. The files are played in the order in which they have been stored in
the folder.
You can play one of the preset folders in the internal memory, or play one of your personal folders,
saved either on your removable media or in the internal memory.
To do this, keep pressing the “Exit” key on your remote until the main menu appears. Using the
“Left/Right” keys, select the “Files” icon. If you want to play a pre-programmed folder, select it using
the “Up/Down” keys, and press “Enter” twice. The slideshow of this folder will then launch.
If you want to play one of your own folders, first select its place (USB key or Memory card), then select
the folder you want. Then, follow the steps above to launch the slideshow.
3. Photos
- Keep pressing the “Exit” key twice to display the main screen.
- Using the “Left/Right” arrows on the remote, select the “Photo”
icon.
Non contractual document subject to change in case of typographical errors (Mktg1011) COPYRIGHT SOPEG 2011
The manufacturer reserves the right to modify the product specifications without notice.
10
Page 12
ENGLISH
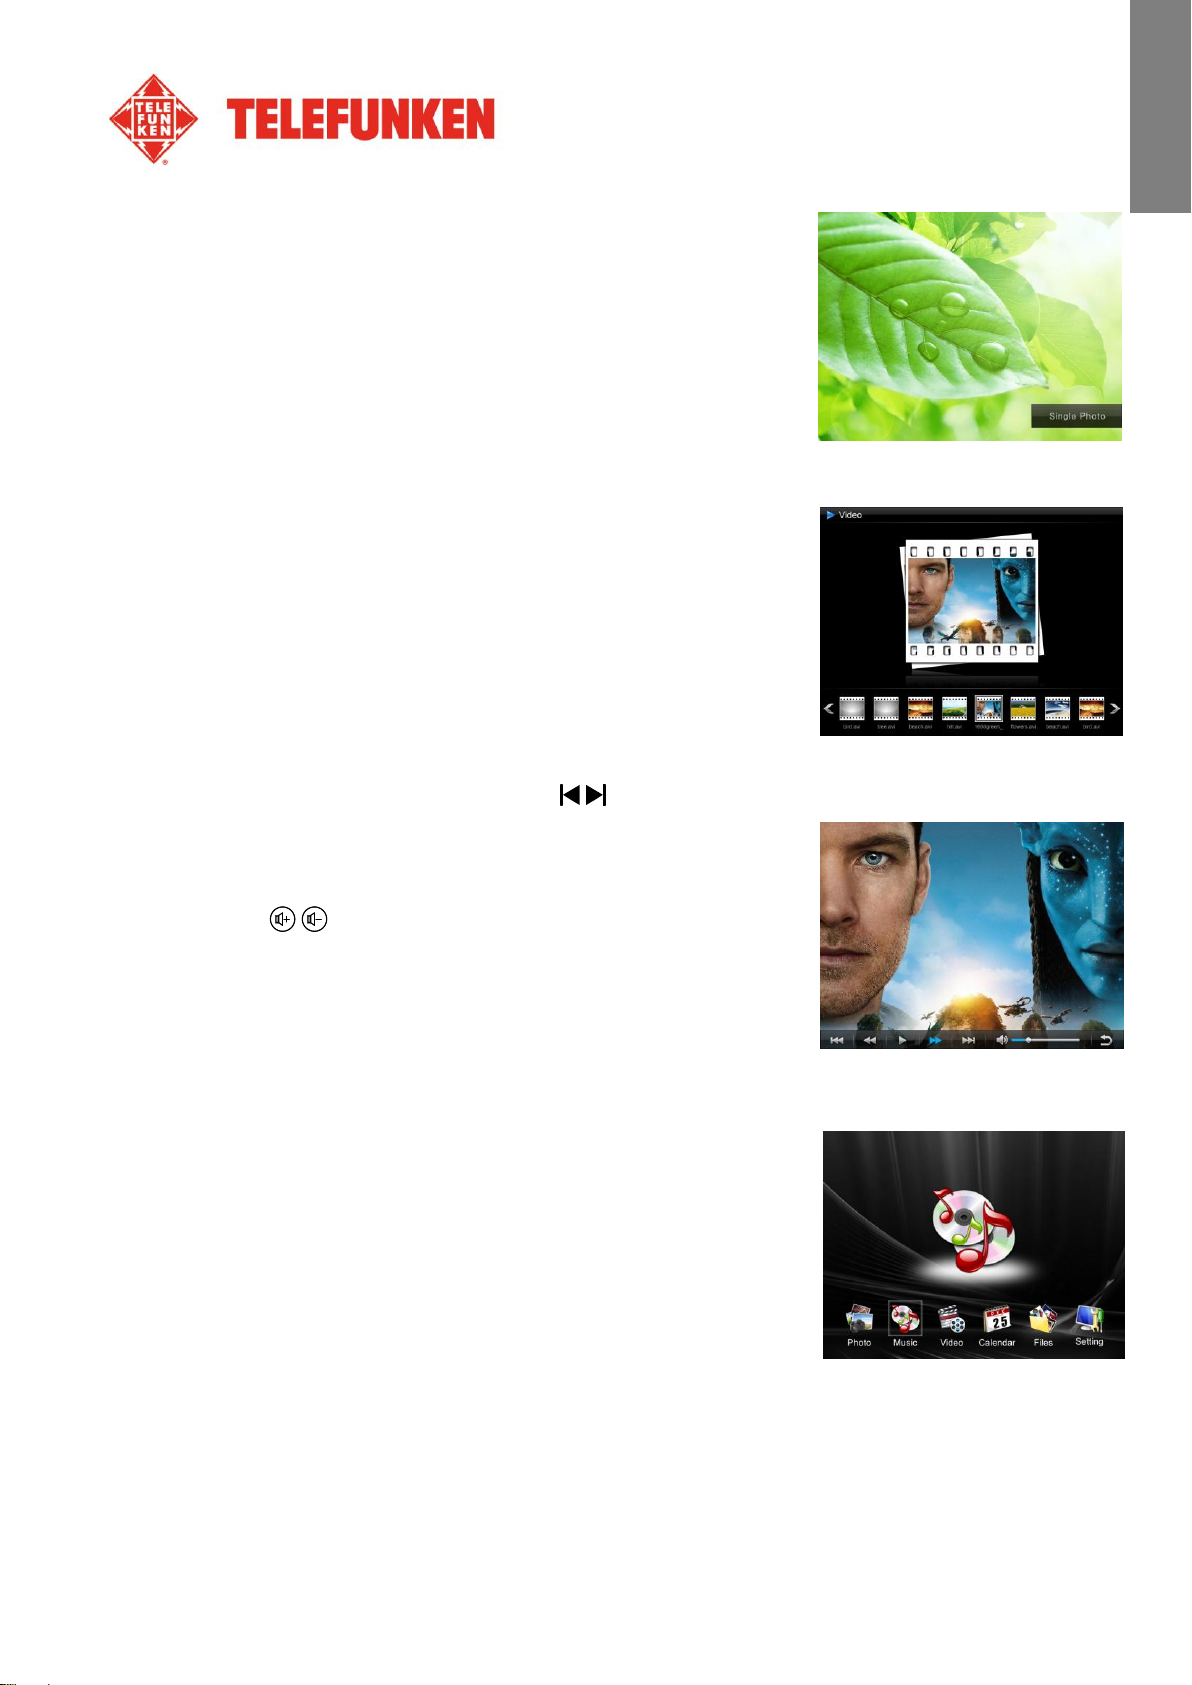
- Press the “Enter” key repeatedly to select the play mode as
follows:
Photo Slideshow
Slideshow+Music
Single Photo
4. Videos
- Press the “Exit” key twice to display the main screen.
- Using the “Left/Right” arrows on the remote, select the
“Video” icon.
- Press the “Enter” key: the video will start.
- Use the “Left/Right” keys to select /(Play/Pause) on screen, and then press “Enter”.
- Use the “Left/Right” keys to select the / (Previous/Next) on screen, and then press “Enter”.
- Use the “Left/Right” keys to select / (Rewind/Fast
Forward) on screen, and then press “Enter”.
- Press the / on the remote to adjust the sound level.
- Pressing the “VIDEO” key on the remote can also access the
Video menu.
5. Music
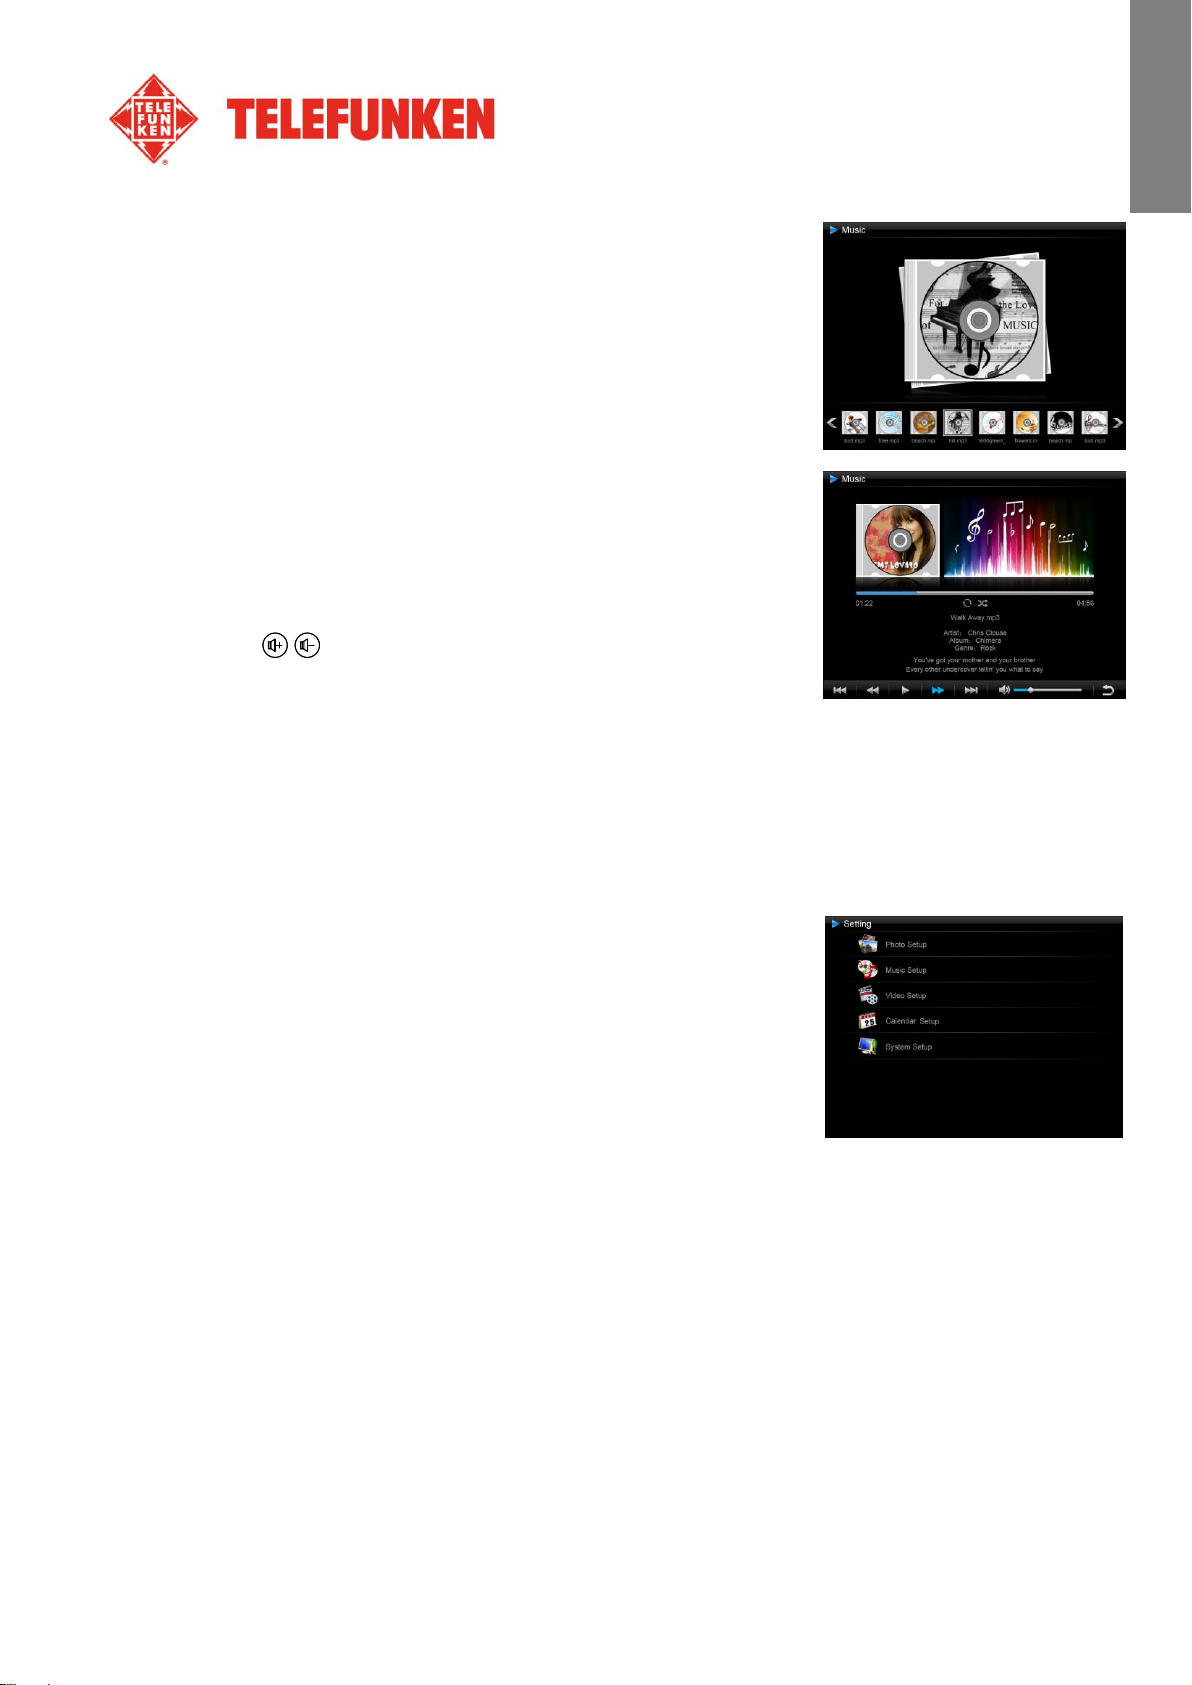
- Press the “Exit” key twice to display the main screen.
- Using the “Left/Right” arrows on the remote, select the
“Music” icon.
- Press the “Enter” key: the music will begin.
- Use the “Left/Right” keys to select/(Play/Pause) on screen,
and then press “Enter”.
11
Non contractual document subject to change in case of typographical errors (Mktg1011) COPYRIGHT SOPEG 2011
The manufacturer reserves the right to modify the product specifications without notice.
Page 13
ENGLISH
- Use the “Left/Right” keys to select / (Previous/Next) on
screen, and then press “Enter”.
- Use the “Left/Right” keys to select / (Rewind/Fast
Forward)) on screen, and then press “Enter”.
- Use the “Left/Right” keys to select (Volume) on screen, and
then press “Enter” keys to decrease the sound level.
- Use the “Left/Right” keys to select (Volume) on screen,
and then press the “Enter” key to increase the sound level.
- To return to the previous settings, press the “Exit” key on the
remote.
- Pressing / on the remote can also adjust the sound level.
- Press “MUSIC” on the remote to access the Music menu.
IV. Settings
On the main screen, select the “Settings” icon using the “Left/Right” and “Up/Down” keys on your
remote to access the different settings for your frame.
If a slideshow is playing, simply press the “Setup” key on your remote
to access the settings menus.
When you are into the settings menus, the “Up/Down” keys on the
remote allow you to select the parameters to adjust, and the
“Left/Right” keys allow you to choose the appropriate setting for the
selected parameter.
1. Photos Setup
Select “Photo Setup” using the “Up/Down” keys on the remote, then press “Enter”. The opposite
screen will appear:
You will then be able to change settings using the arrow keys on the remote.
Non contractual document subject to change in case of typographical errors (Mktg1011) COPYRIGHT SOPEG 2011
The manufacturer reserves the right to modify the product specifications without notice.
12
Page 14

ENGLISH
- Display mode
Select “Display Mode” using the “Up/Down” keys on the remote and press “Enter”, then use the
“Up/Down” keys to choose between:
Slideshow: images scroll one after another
Thumbnails: the images display as thumbnails. (Note: When your frame is in this mode, you
can access Slideshow, Slideshow+Music or Single by pressing the “Enter” key repeatedly.)
Single: A single photo is displayed
- Display ratio
Select the “Display Ratio” using the “Up/Down” keys on the remote and press “Enter”, then use the
“Up/Down” keys to choose between:
Fit to screen: the photo remains in its original format
Crop for fill: the photo is centered and cropped to fit the entire screen
Full-screen: the photo is altered in order to occupy the full screen
- Slideshow duration
Select the “Slideshow duration” using the “Up/Down” keys on the remote and press “Enter”, then use
the “Up/Down” keys to choose between:
5 Sec.
15 Sec.
30 Sec.
60 Sec.
5 Min.
15 Min.
- Slideshow effect
Select the “Slideshow effect” using the “Up/Down” keys on the remote and press “Enter”, then use
the “Up/Down” keys to choose between the following effects:
13
Non contractual document subject to change in case of typographical errors (Mktg1011) COPYRIGHT SOPEG 2011
The manufacturer reserves the right to modify the product specifications without notice.
Page 15

ENGLISH
- Slideshow repeat
Select “Slideshow repeat” using the “Up/Down” keys on the remote and press “Enter”, then use the
“Up/Down” keys to choose between:
Repeat: the slideshow plays in a loop
Once: the slideshow is played once
Random: the pictures will be displayed randomly
- Magic Window
Select the “Magic Window” using the “Up/Down” keys on the remote, then press the “Enter” key to
choose “On” or “Off”.
- Clock
Select “Clock” using the “Up/Down” keys on the remote, then press the “Enter” key to choose “On” or
“Off”.
- Resize
Select “Resize” using the “Up/Down” keys on the remote, then press the “Enter” key to choose “On” or
“Off”.
- Cut Out When Copy
Select “Cut Out When Copy” using the “Up/Down” keys on the remote, then press the “Enter” key to
choose “On” or “Off”.
- Show tip When Copy
Select “Show tip When Copy” using the “Up/Down” keys on the remote, then press the “Enter” key to
choose “On” or “Off”.
Non contractual document subject to change in case of typographical errors (Mktg1011) COPYRIGHT SOPEG 2011
The manufacturer reserves the right to modify the product specifications without notice.
14
Page 16

ENGLISH
2. Music Setup
In the settings menu, select the “Music setup” using the “Up/Down” keys on your remote, and then
press “Enter”.
You can set:
- Play mode
Select the “Play Mode” using the “Up/Down” keys on the remote and press “Enter”, then use the
“Up/Down” keys to choose:
Repeat: the tracks will be played in a loop
Random: the tracks will be played randomly
Once: each track willbe played once
Repeat one: each track will be played twice
- Music Effect
Your TELEFUNKEN frame has an equalizer to adapt the sound to the type of music being listened to.
Select “Music Effect” using the “Up/Down” keys on the remote and press “Enter”, then use the
“Up/Down” keys to choose between:
Jazz
DBB
Normal
Rock
Pop
Classic
Soft
- Show Spectrum
When playing a music file, you can display the equalizer on the screen of your TELEFUNKEN frame.
Select “Show Spectrum” using the “Up/Down” keys on the remote, and then press “Enter” key to
select “On” or “Off”.
- Auto Play
When enabled, the frame plays automatically your audio files, as soon as audio mode is selected.
15
Non contractual document subject to change in case of typographical errors (Mktg1011) COPYRIGHT SOPEG 2011
The manufacturer reserves the right to modify the product specifications without notice.
Page 17

ENGLISH
Select “Auto Play” using the “Up/Down” keys on the remote, and then press “Enter” key to select “On”
or “Off”.
3. Video Setup
In the settings menu, select the “Video Setup” using the “Up/Down” keys on your remote and press
“Enter”.
- Display mode
Select “Display Mode” using the “Up/Down” keys on the remote and press “Enter”, then use the
“Up/Down” keys to choose between:
Full-screen: your video will be displayed in 4:3
Original Size: your video will be displayed in its original format
- Play mode
Select “Play Mode” using the “Up/Down” keys on the remote and press “Enter”, then use the
“Up/Down” keys to choose between:
Repeat: your video will play in a loop
Once: your video will only play once
- Auto play
When enabled, the frameautomatically plays your video files, as soon as video mode is selected.
Select “Auto Play” using the “Up/Down” keys on the remote, then press “Enter” key to choose “On” or
“Off”.
4. Calendar setup
Select the “Calendar Setup” into the Settings menu using the “Up/Down” keys on the remote and press
“Enter”.
You can use the arrow keys or the “Enter” key on the remote to adjust the:
Non contractual document subject to change in case of typographical errors (Mktg1011) COPYRIGHT SOPEG 2011
The manufacturer reserves the right to modify the product specifications without notice.
16
Page 18

ENGLISH
- The calendar's display mode
Select “Display Mode” using the “Up/Down” keys on the remote and press “Enter”, then use the
“Up/Down” keys to choose between:
Monthly Calendar
Calendar
Analog clock
- Date Format
Select “Date Format” using the “Up/Down” keys on the remote and press “Enter”, then use the
“Up/Down” keys to choose between:
MM/DD/YYYY
DD/MM/YYYY
YYYY/MM/DD
- Date
Select “Date” using the “Up/Down” keys on the remote and press “Enter”, then:
Use the “Up/Down” keys to choose between Month, Day, Year
Use the “Left/Right” keys to set the values for Month, Day, Year
- Clock mode (12- or 24-hour)
Select “Clock Mode” using the “Up/Down” keys on the remote and press “Enter”, then press the
“Up/Down” keys to choose 12- or 24-hr format, press “Enter” to confirm.
- Clock Time
Select “Clock Time” using the “Up/Down” keys on the remote and press “Enter”, then:
Use the “Up/Down” keys to choose between Hour, Min, AM, PM
Use the “Left/Right” keys to set the values for Hour, Min, AM, PM
- Alarm status
Select “Alarm Status” using the “Up/Down” keys on the remote, then press “Enter” key to select “On”
or “Off”.
- Alarm time
To set the time for the alarm, select “Alarm Time” using the “Up/Down” keys on the remote and press
“Enter”, then:
17
Non contractual document subject to change in case of typographical errors (Mktg1011) COPYRIGHT SOPEG 2011
The manufacturer reserves the right to modify the product specifications without notice.
Page 19

ENGLISH
Use the “Up/Down” keys to choose between Hour, Min, AM, PM
Use the “Left/Right” keys to set the values for Hour, Min, AM, PM
- Alarm frequency
Select “Alarm Frequency” using the “Up/Down” keys on the remote and press “Enter”, then use the
“Up/Down” keys to choose between:
Once
Everyday
Mon. to Fri.
Weekend
Non contractual document subject to change in case of typographical errors (Mktg1011) COPYRIGHT SOPEG 2011
The manufacturer reserves the right to modify the product specifications without notice.
18
Page 20

ENGLISH
5. System configuration
This menu allows you to set the operating parameters of your frame.
- Light sensor on/off
Select “Light sensor” using the “Up/Down” keys on the remote, then
press “Enter” key to choose “On” or “Off”.
- Language
Select “Language” using the “Up/Down” keys on the remote and press “Enter”, then use the
“Up/Down” keys to choose between:
English
French
German
Italian
Netherlands
Portuguese
Spanish
- Brightness
Select “Brightness” using the “Up/Down” keys on the remote and press “Enter”, then press the
“Left/Right” keys to adjust the brightness level (1-16).
- Contrast
Select “Contrast” using the “Up/Down” keys on the remote and press “Enter”, then press the
“Left/Right” keys to adjust the contrast level (1-16).
- Saturation
Select “Saturation” using the “Up/Down” keys on the remote and press “Enter”, then press the
“Left/Right” keys to adjust the saturation level (1-16).
- Tint
Select “Tint” using the “Up/Down” keys on the remote and press “Enter”, then press the “Left/Right”
keys to adjust the tint level (1-100).
19
Non contractual document subject to change in case of typographical errors (Mktg1011) COPYRIGHT SOPEG 2011
The manufacturer reserves the right to modify the product specifications without notice.
Page 21

ENGLISH
- Power on
Select “Power on” using the “Up/Down” keys on the remote, then press the “Enter” key to select “On”
or “Off”.
- Auto boot time
Select “Auto Boot Time” using the “Up/Down” keys on the remote and press “Enter”, then:
Use the “Up/Down” keys to choose between Hour, Minute, AM, PM
Use the “Left/Right” keys to set the values for Hour, Minute, AM, PM
- Power off
Select “Power off” using the “Up/Down” keys on the remote, then press the “Enter” key to choose “On”
or “Off”.
- Auto shut time
Select “Auto Shut Time” using the “Up/Down” keys on the remote and press “Enter”, then:
Use the “Up/Down” keys to choose between Hour, Minute, AM, PM
Use the “Left/Right” keys to set the values for Hour, Minute, AM, PM
- Auto power frequency
Select “Auto-Power Frequency” using the “Up/Down” keys on the remote and press “Enter”, then
press the “Up/Down” keys to choose between:
Once
Everyday
Mon. to Fri.
Weekend
- Reset
If the frame is handled incorrectly, it may be useful to reset its default settings. To do so, select “Default”
using the “Up/Down” keys on the remote and press “Enter”, then use “Up/Down” keys to select “On” or
“Off”.
Note: After Resetting, the language selection screen will appear during the following start-up, just as it
did for its first use.
- Version number of the internal software (for information only)
20
Non contractual document subject to change in case of typographical errors (Mktg1011) COPYRIGHT SOPEG 2011
The manufacturer reserves the right to modify the product specifications without notice.
Page 22

ENGLISH
V. Connecting to a computer
It is possible to transfer files to the frame by connecting it to your personal computer. To do so, connect
your frame via USB cable (mini-USB port on the frame, and standard USB port for the computer) to the
computer, then turn on your frame: the frame's screen will show “PC connection...” Return to normal
operation after disconnecting.
On your computer, the following dialog box will appear:
- Click “Open folder and display files” in order to view the contents of the internal memory.
The following screen will appear:
Open the directory storing the files you want to transfer to the frame, and place them in the desired
folder using “Copy/paste” or “Drag and drop”.
Caution! Photos transferred in this way will not be resized.
- Disconnect the USB cable: your frame will restart automatically.
21
Non contractual document subject to change in case of typographical errors (Mktg1011) COPYRIGHT SOPEG 2011
The manufacturer reserves the right to modify the product specifications without notice.
Page 23

ENGLISH
VI. Safety instructions
Handle the digital photo frame with care, and avoid touching the screen; fingerprints are difficult to
remove.
Always set the digital photo frame on a flat and stable surface to prevent it from falling and being
damaged.
Avoid exposing the digital photo frame to the sun or high temperatures, as these may damage the frame
or reduce its operational life. Do not place it near heat sources like radiators or space heaters. Do not
position the frame facing direct sunlight in order to avoid reflections.
Avoid exposing the digital photo frame to rain, water, or moisture. Do not place it in a sink or basin where
it may come in contact with water.
Never place heavy or sharp objects on the frame, the screen, or the frame's power supply.
Do not plug the digital photo frame into an outlet or cord with a power supply that is too high. This may
cause overheating, a fire, or electrical shock.
Be careful of the location of the power cord; it must not be walked on or come in contact with other
objects. Do not place the cord under a rug. Regularly check the condition of the cord to prevent damage.
If the cord is damaged, unplug it and replace it.
Ventilation
Keep the digital frame at a sufficient distance from the wall to ensure its ventilation.
Do not place the digital photo frame on a bed or sofa to avoid overheat.
Caution!
Never remove the plastic cover on the back of the frame. The digital photo frame has electrical circuits
and you could be hurt if you touch them.
Do not try to repair the digital photo frame by yourself.
22
Non contractual document subject to change in case of typographical errors (Mktg1011) COPYRIGHT SOPEG 2011
The manufacturer reserves the right to modify the product specifications without notice.
Page 24

ENGLISH
VII. Warranty
The warranty does not cover damage caused if you (or any unauthorized person) tried to repair the
frame.
If the frame is emitting smoke, noise, or an unusual smell, immediately turn it off and unplug it. Contact
your store.
If you do not use the digital frame for a while, make sure to unplug the power cord.
The warranty concerns the digital photo frame and does not include the accessories. The following are
considered accessories:
The power supply unit,
The remote (according to model).
However, these accessories may be ordered from our technical division:
By email: assistance@sopeg.fr
Warranty period
This digital frame is under warranty for 12 months. The warranty period begins on the date the frame is
purchased.
The warranty must be proven by presenting the original invoice or receipt on which the date and model
purchased appear.
Coverage
A defective digital frame must be returned complete to your distributor with an explanation.
If this digital frame presents a defect during the warranty period, the authorized After-Sales Service will
repair any defective component or manufacturing defect. The After-Sales Service will unilaterally decide
whether to repair or replace the digital frame, in part or in whole.
The initial purchase date will determine the starting date for the warranty period.
If the digital frame is repaired or exchanged by our After-Sales Service, the warranty period is not
extended.
23
Non contractual document subject to change in case of typographical errors (Mktg1011) COPYRIGHT SOPEG 2011
The manufacturer reserves the right to modify the product specifications without notice.
Page 25

ENGLISH
Exclusions
Damage or defects caused by the improper use or handling of the digital frame, or by the use of
accessories, which are not original or not recommended in these instructions, are not covered by the
warranty.
The warranty does not cover damage caused by outside elements, like lightning, water, or fire, or any
other damage caused during transport.
No warranty coverage may be claimed if the digital frame's serial number has been modified, removed,
erased, or made illegible.
No warranty coverage may be claimed if the digital frame has been repaired, altered, or modified by the
buyer or any repair personnel not officially qualified and authorized.
The manufacturer does not guarantee the technical properties described in this manual. The hardware
and accessories described in this manual are subject to change without advance notice. For this reason,
the manufacturer reserves the right to change the related documents, components, options, and
characteristics without advance notice.
Compliance with current regulations:
This digital frame complies with current CE marking standards, and is compatible with the RoHS
standard.
Recycling end-of-life electrical equipment and electronics
Used electrical and electronic devices must not be discarded with ordinary household refuse.
The presence of the symbol on the product or its packaging serves as a reminder of this.
Some materials constituting this product may be recycled if you take them to an appropriate recycling
centre. By reusing the components and raw materials of old devices, you contribute significantly to
protecting the environment.
For further information on collection sites for used equipment, you can enquire at your city hall, the waste
treatment department, or the shop where you purchased the product.
Non contractual document subject to change in case of typographical errors (Mktg1011) COPYRIGHT SOPEG 2011
The manufacturer reserves the right to modify the product specifications without notice.
24
Page 26

ENGLISH
Specifications
DPF 10934
Screen size
10,1’’ (25,6 cm)
Resolution
1024 x 600
Screen type
LED
Image ratio
16/9
Internal memory
2 GB
Audio/video
YES
Cards supported
SD/MMC,SDHC, MS, XD, USB sticks
Files supported
JPEG/WAV, MP3/MPEG1,4, MOTION JPEG
Auto resizing
YES
Auto rotation
YES
Power input
100-240 V AC 50/60 Hz
Power output
5V DC 2Ah
Energy consumption while in standby
<1W
Energy consumption while in use
<8W
Dimensions
280*176*26mm
Weight
630 g
System compatibility
Windows XP, Vista, 7, Mac OS 9.0 & followings
VIII. Specifications
Non contractual document subject to change in case of typographical errors (Mktg1011) COPYRIGHT SOPEG 2011
The manufacturer reserves the right to modify the product specifications without notice.
25
Page 27

FRANCAIS
MODE D’EMPLOI CADRE PHOTOS NUMERIQUES
TELEFUNKEN DPF 10934
I. Découvrez et installez votre cadre ............................................................ 2
1. Contenu de la boîte ................................................................................................ ........... 2
2. Schémas ........................................................................................................................... 3
3. Télécommande ................................................................................................................. 3
4. Installation ......................................................................................................................... 4
II. Utilisez votre cadre .................................................................................... 4
1. Sélection de la langue ....................................................................................................... 4
2. Le mode « ECO LOGIC » ................................................................................................. 5
3. Lecture d’une carte mémoire ou d’une clé USB ................................................................ 5
4. Copie de photos vers la mémoire interne .......................................................................... 6
5. Suppression de photos ..................................................................................................... 8
III. Sélection du type de fichiers à lire ......................................................... 10
1. Mémoire interne/Support amovible ................................................................................. 10
2. Sélection d’un dossier/Mode multimédia ......................................................................... 10
3. Les photos ...................................................................................................................... 11
4. Les vidéos ....................................................................................................................... 11
5. La musique ..................................................................................................................... 12
IV. Les réglages ............................................................................................. 13
1. Réglages Photos ............................................................................................................. 13
2. Réglages musique .......................................................................................................... 15
3. Configuration vidéo ......................................................................................................... 17
4. Configuration calendrier .................................................................................................. 18
5. Configuration système .................................................................................................... 20
V. Connexion à un ordinateur ...................................................................... 22
VI. Instructions de sécurité ........................................................................... 24
VII. Garantie .................................................................................................... 25
VIII. Caractéristiques techniques ................................ ................................... 27
Document non contractuel soumis à modifications en cas d’erreurs typographiques (Mktg1011) COPYRIGHT SOPEG 2011
Le fabricant se réserve le droit de modifier les caractéristiques du produit sans préavis
1
Page 28

FRANCAIS
PRELIMINARY NOTICE
AVERTISSEMENT PREALABLE :
A la mise en route de votre cadre, le cadre affiche l’animation de démonstration. Pour en sortir et
accéder aux fonctions du cadre, appuyez simplement sur la touche « Slideshow » de votre
télécommande ou durant 3 secondes sur la touche « Gauche » du cadre.
I. Découvrez et installez votre cadre
Vous venez d’acheter un cadre photo numérique TELEFUNKEN DPF 10934 et nous vous en remercions.
Avant d’utiliser votre appareil, veuillez consulter le présent mode d’emploi et le conserver afin de pouvoir
vous y reporter ultérieurement.
1. Contenu de la boîte
- 1 Cadre photo numérique
- 1 Adaptateur secteur
- 1 Télécommande
2
Document non contractuel soumis à modifications en cas d’erreurs typographiques (Mktg1011) COPYRIGHT SOPEG 2011
Le fabricant se réserve le droit de modifier les caractéristiques du produit sans préavis
Page 29

FRANCAIS
Touche
Fonction
▲
Pour sélectionner l’option supérieure du menu.
◄
Pour sélectionner l’option de gauche du menu/sélectionner le fichier précédent
(photo, musique ou vidéo).
▼
Pour sélectionner l’option inférieure du menu.
►
Pour sélectionner l’option de droite du menu/sélectionner le fichier suivant (photo,
musique ou vidéo).
ENTER
Pour confirmer votre sélection ou sélectionner un autre mode.
Pour mettre en marche le cadre photo numérique ou activer le mode Attente.
EXIT
Pour quitter le menu affiché et revenir au menu précédent.
STOP
Pour arrêter la lecture du fichier (photo, musique ou vidéo) et revenir au menu
principal.
Pour activer/désactiver le son, l’indicateur Muet s’affiche lorsque le son est
désactivé.
Pour augmenter le volume, le niveau de volume s’affiche dès la pression de cette
touche.
(COPY/DEL)
Pour accéder aux fonctions de copie, suppression et classement (seulement sous
le menu principal).
(ROTATE)
Pour effectuer une rotation sur image de 90°.
2. Schémas
3. Télécommande
Toutes les fonctions peuvent être contrôlées depuis la télécommande. Utilisez les touches suivantes
pour accéder aux différentes fonctions :
Document non contractuel soumis à modifications en cas d’erreurs typographiques (Mktg1011) COPYRIGHT SOPEG 2011
Le fabricant se réserve le droit de modifier les caractéristiques du produit sans préavis
3
Page 30

FRANCAIS
Pour agrandir l’image, appuyez de manière répétée sur cette touche pour permuter
entre les différents modes de zoom : x2, x4, x8 et x16 ; appuyez à nouveau sur
cette touche pour afficher l’image sous sa taille normale.
Pour diminuer le volume, le niveau de volume s’affiche dès la pression de cette
touche.
(SLIDESHOW)
Pour directement lancer le diaporama des photos.
MUSIC
Pour directement accéder au menu Configuration (MUSIQUE).
VIDEO
Pour directement accéder au menu Configuration (VIDEO).
SETUP
Pour directement accéder au menu Réglages
4. Installation
- Sortez votre cadre et ses accessoires de leur emballage
- Otez le film plastique de protection sur la façade du cadre
- Tirez sur la languette plastique destinée à protéger les contacts de la télécommande
- Posez le cadre à l’endroit souhaité en tirant vers vous le pied ajustable (voir schéma p.2)
- Connectez le cordon secteur au cadre à l’emplacement prévu à cet effet.
- Branchez votre cadre sur une prise de courant. Votre cadre se met en route automatiquement.
II. Utilisez votre cadre
1. Sélection de la langue
A la mise en route de votre cadre, le cadre affiche l’animation de
démonstration. Pour en sortir et accéder aux fonctions du cadre,
appuyez simplement sur la touche « Slideshow » de votre
télécommande.
L’écran de sélection des langues s’affiche alors.
- Sélectionnez votre langue à l’aide des touches fléchées de la télécommande puis appuyez sur
« ENTER ».
Une fois votre langue sélectionnée, votre cadre est prêt à être utilisé. Il vous suffit d’insérer une carte ou
une clé USB pour commencer à lire vos images.
Attention : l’animation de démonstration se trouve dans un dossier nommé « DEMO ». Il est
préférable de le supprimer pour conserver la totalité de l’espace mémoire.
Document non contractuel soumis à modifications en cas d’erreurs typographiques (Mktg1011) COPYRIGHT SOPEG 2011
Le fabricant se réserve le droit de modifier les caractéristiques du produit sans préavis
4
Page 31

FRANCAIS
2. Le mode « ECO LOGIC »
Le mode ECO LOGIC associe 3 éléments essentiels permettant une réduction de la consommation
d’énergie de plus de 40% par rapport à un cadre standard :
- Un écran LED, moins gourmand en énergie tout en améliorant la qualité de l’image
- Un adaptateur secteur basse consommation certifié « Energy Star »
- Un capteur de luminosité
Ce capteur, activé par défaut, permet à votre cadre photo de s’éteindre automatiquement lorsqu’il fait
nuit, et de s’allumer avec le jour.
Vous pouvez désactiver ce capteur de luminosité dans le menu de réglages système de votre cadre
Attention : Suivant l’endroit où le cadre est positionné (dans un meuble sous une étagère par exemple, il
est possible que la lumière ne soit pas suffisante pour que le cadre se mette en route ou bien encore
qu’il s’éteigne inopinément. Vous pouvez le remettre en route en appuyant sur le bouton de mise en
veille situé en haut à droite de la télécommande. Dans ce cas, le capteur sera désactivé. Pour le
réactiver, il suffit de le présenter à une source de lumière suffisante durant 5secondes.
3. Lecture d’une carte mémoire ou d’une clé USB
Si votre cadre est éteint :
- Insérez votre carte ou votre clé USB à l’emplacement
prévu à cet effet.
- Mettez votre cadre sous tension : Le diaporama lit
automatiquement le contenu de votre carte mémoire ou
de votre clé USB.
Si votre cadre est allumé et joue le diaporama de la mémoire interne :
5
Document non contractuel soumis à modifications en cas d’erreurs typographiques (Mktg1011) COPYRIGHT SOPEG 2011
Le fabricant se réserve le droit de modifier les caractéristiques du produit sans préavis
Page 32

FRANCAIS
- Votre carte mémoire est automatiquement détectée
- Après quelques secondes, le message «Voulez vous copier dans la mémoire interne ?» s’affiche
- Sans intervention de votre part au bout de 15 secondes, le
diaporama contenu dans la carte sera lu mais les images
ne seront pas copiées.
-
-
Le redimensionnement permet à la copie de vos photos de s’adapter à la définition du cadre et
ainsi de réduire considérablement leur poids. C’est grâce à ce système qu’il est possible de
stocker plus de 10 000 photos dans la mémoire interne.
(IMPORTANT : Seules les copies de vos photos seront redimensionnées, les photos originales
de la carte ne seront évidemment pas modifiées)
Si votre support (carte, clé ou mémoire interne ) contient de la musique et que vous désirez un
diaporama musical, appuyez sur la touche « Enter » de la télécommande pendant la lecture du
diaporama. L’écran affichera alors « Diaporama musical ».
4. Copie de photos vers la mémoire interne
Si vous n’avez pas choisi la copie automatique au moment de
l’insertion de la carte, 2 méthodes s’offrent à vous pour copier des
images de votre carte mémoire vers la mémoire interne du cadre.
6
Document non contractuel soumis à modifications en cas d’erreurs typographiques (Mktg1011) COPYRIGHT SOPEG 2011
Le fabricant se réserve le droit de modifier les caractéristiques du produit sans préavis
Page 33

FRANCAIS
- Copier vos fichiers à partir du gestionnaire de fichiers
Si vous utilisez cette méthode, vous ne pourrez copier les fichiers que un par un et n’aurez pas la
possibilité de les redimensionner à la résolution du cadre.
1. Appuyez sur la touche « Exit » de votre télécommande
autant de fois que nécessaire pour afficher l’écran de
choix des supports.
2. A l’aide des touches « Gauche/Droite » de la
télécommande, sélectionnez l’icône « Fichiers » et
appuyez sur « Enter ».
3. Sélectionnez le fichier à copier» à l’aide des touches
« Haut/Bas » de la télécommande et appuyez sur « Copy/Del ». Le message suivant s’affiche :
« Copier ? Faites votre choix à l’aide des touches « Gauche/Droite »puis appuyez sur
« Enter »
4. Choisissez le répertoire de destination de votre photo à l’aide des touches « Haut/Bas » puis
appuyez sur « Enter »Votre fichier est copié
Si votre carte mémoire contient un ou plusieurs dossiers, vous pouvez copier ceux-ci un par un dans
leur intégralité. Il seront stockés dans le dossier de la mémoire interne que vous choisirez, et vous
pourrez les lire indépendamment les un des autres.
- Copier vos fichiers à partir du mode vignettes_
Avec cette méthode, vous pouvez copier une sélection de photos en ayant la possibilité de les
redimensionner à la définition du cadre afin d’optimiser la capacité de la mémoire interne.
1. Appuyez sur la touche « Exit » de votre télécommande
autant de fois que nécessaire pour afficher l’écran de
choix des supports.
2. Sélectionnez le support amovible sur lequel se trouvent
les photos à copier (carte mémoire ou clé USB), à l’aide
des touches « Gauche/Droite » de la télécommande.
Appuyez sur « Enter ».
7
Document non contractuel soumis à modifications en cas d’erreurs typographiques (Mktg1011) COPYRIGHT SOPEG 2011
Le fabricant se réserve le droit de modifier les caractéristiques du produit sans préavis
Page 34

FRANCAIS
3. A l’aide des touches « droite gauche », sélectionnez le
mode photo et appuyez sur « Enter ». Le diaporama se
lance.
4. Appuyez sur la touche « Exit » de la télécommande pour
accéder aux vignettes.
5. Appuyez sur la touche « Copy/Del ». L’écran affiche
« Copier fichiers ? » (Sélection ou tout) Sélectionnez
l’option choisie et appuyez sur « Enter ».
Les miniatures s’affichent à nouveau, avec une case à cocher sur la partie supérieure gauche
de chaque image. Sélectionnez les photos à copier à l’aide des touches « Gauche/Droite » de la
télécommande en appuyant sur « Enter » à chaque photo sélectionnée. Le petit carré est alors
coché pour chaque image sélectionnée. (Si vous avez choisi « tout copier », toutes les vignettes sont
cochées
Appuyez sur la touche « Copy/Del ». ». Un message de confirmation s’affiche
Appuyez sur « Enter ». pour valider votre choix
L’écran affiche une boîte de dialogue vous demandant si vous souhaitez redimensionner vos images
Sélectionnez l’option choisie à l’aide des touches « Haut/Bas » de la télécommande et confirmez en
sélectionnant « Confirmer ». Appuyez sur « Enter ». Vos photos sont maintenant copiées dans la
mémoire interne et dimensionnées à la définition du cadre.
5. Suppression de photos
Vous pouvez supprimer des photos qui se trouvent dans la mémoire interne de votre cadre.
- Supprimez vos photos à partir du gestionnaire de fichiers
Si vous utilisez cette méthode, vous ne pourrez supprimer les
fichiers que un par un.
1. Appuyez sur la touche « Exit » de votre télécommande
autant de fois que nécessaire pour afficher l’écran de
choix des supports.
2. A l’aide des touches « Gauche/Droite » de la
télécommande, sélectionnez l’icône « Fichiers » et
8
Document non contractuel soumis à modifications en cas d’erreurs typographiques (Mktg1011) COPYRIGHT SOPEG 2011
Le fabricant se réserve le droit de modifier les caractéristiques du produit sans préavis
Page 35

FRANCAIS
appuyez sur « Enter ».
3. Sélectionnez la photo ou le fichier musical ou vidéo pour à l’aide des touches « Haut/Bas » de la
télécommande et appuyez sur la touche « Copy/Del ». L’écran affiche « Supprimer fichier ?-
Oui/Non ». Choisissez l’option souhaitée et appuyer sur « Enter ». Votre fichier est supprimé.
Vous pouvez également supprimer un de vos dossiers personnels situés dans un des répertoires prédéfinis »
- Supprimer vos photos à partir du mode vignettes
Avec cette méthode, vous pouvez supprimer une sélection ou toutes les photos de la mémoire interne.
1. Appuyez sur la touche « Exit » de votre télécommande
autant de fois que nécessaire pour afficher l’écran de
choix des supports.
2. Sélectionnez la mémoire interne à l’aide des touches
« Gauche/Droite » de la télécommande. Appuyez sur
« Enter ».
3. A l’aide des touches « Gauche/Droite », sélectionnez le
mode photo et appuyez sur « Enter ». Le diaporama se
lance.
4. Appuyez sur la touche « Exit » de la télécommande pour
accéder aux vignettes.
5. Appuyez sur la touche « Copy/Del ». L’écran affiche
« Supprimer ? » (Sélection ou tout) Sélectionnez
l’option choisie et appuyez sur « Enter ».
6. Les miniatures s’affichent à nouveau, avec une case à cocher sur la partie supérieure gauche de
chaque image. Sélectionnez les photos à supprimer à l’aide des touches « Gauche/Droite » de
la télécommande en appuyant sur « Enter » à chaque photo sélectionnée. (Si vous avez choisi
l’option « tout supprimer », les vignettes sont toutes cochées)
7. Appuyez sur la touche « Copy/Del » puis appuyez sur « Enter ».
8. L’écran affiche « Supprimer ? ».
9. Sélectionnez l’option choisie à l’aide des touches « Haut/Bas » de la télécommande. Appuyez
sur « Enter ». Vos photos sont maintenant supprimées de la mémoire interne.
9
Document non contractuel soumis à modifications en cas d’erreurs typographiques (Mktg1011) COPYRIGHT SOPEG 2011
Le fabricant se réserve le droit de modifier les caractéristiques du produit sans préavis
Page 36

FRANCAIS
III. Sélection du type de fichiers à lire
1. Mémoire interne/Support amovible
Lorsqu’aucun support n’est inséré, le diaporama de la mémoire interne
se lance automatiquement à l’allumage du cadre.
Si une carte mémoire ou une clé USB est insérée au moment de la mise
en route, c’est le contenu de la carte qui sera lu.
En ce cas, vous pouvez basculer de la carte à la mémoire interne de la
façon suivante :
Appuyez sur la touche « Exit » de la télécommande autant de fois que nécessaire pour accéder à
l’écran de sélection des supports.
A l’aide des touches « Gauche/Droite » de la télécommande, choisissez le support à lire puis appuyez
sur la touche « Slideshow » de votre télécommande. Le diaporama se lance.
2. Sélection d’un dossier/Mode multimédia
Le DPF 10934 vous permet grâce à son mode multimédia exclusif, de lire à la suite tout le contenu
d’un dossier, que celui-ci soit composé de photos, de vidéos et de musique. Les fichiers seront lus dans
l’ordre dans lequel ils auront été stockés dans le dossier.
Vous pouvez lire un des dossiers préenregistrés dans la mémoire interne ou lire un de vos dossiers
personnels, situés soit sur votre support amovible, soit dans la mémoire interne, dans le répertoire
prédéfini choisi.
Pour cela, Appuyez sur la touche « Exit » autant de fois que nécessaire pour atteindre le menu principal.
A l’aide des touches « Gauche/Droite », sélectionnez l’icône « Fichiers ». Si vous souhaitez lire un
dossier préprogrammé, sélectionnez le à l’aide des touches « Haut/Bas » puis appuyez 2 fois sur
« Enter ». Le diaporama de ce dossier se lance.
Lorsque vous souhaitez lire un de vos répertoires, sélectionnez tout d’abord son emplacement (clé USB
ou carte mémoire), sélectionnez ensuite le répertoire de votre choix. Suivez ensuite les étapes ci-dessus
pour lancer le diaporama.
Document non contractuel soumis à modifications en cas d’erreurs typographiques (Mktg1011) COPYRIGHT SOPEG 2011
Le fabricant se réserve le droit de modifier les caractéristiques du produit sans préavis
10
Page 37

FRANCAIS
3. Les photos
- Appuyez autant de fois que nécessaire sur la touche « Exit »
pour afficher l’écran principal.
- A l’aide des flèches « Gauche/Droite » de la télécommande,
sélectionnez l’icône « Photo ».
- Appuyez de manière répétée sur la touche « Enter » pour
sélectionner le mode de lecture :
Diapo photo
Diapo + Musique
Photo seule
4. Les vidéos
- Appuyez autant de fois que nécessaire sur la touche « Exit »
pour afficher l’écran principal.
- A l’aide des flèches « Gauche/Droite » de la télécommande,
sélectionnez l’icône « Vidéo ».
- Appuyez sur la touche « Enter » : la lecture de la vidéo
commence.
- Utilisez les touches directionnelles « Gauche/Droite » pour sélectionner/(Lecture/Pause),
appuyez ensuite sur la touche « Enter ».
- Utilisez les touches directionnelles « Gauche/Droite » pour
sélectionner / (Précédent/Suivant), appuyez ensuite sur la
touche « Enter ».
- Utilisez les touches directionnelles « Gauche/Droite » pour
sélectionner/(Rembobinage/Avance rapide), appuyez
ensuite sur la touche « Enter ».
- Utilisez les touches + de la télécommande pour régler le volume.
- Appuyer sur la touche « VIDEO » de la télécommande permet également d’accéder au menu
Vidéo.
Document non contractuel soumis à modifications en cas d’erreurs typographiques (Mktg1011) COPYRIGHT SOPEG 2011
Le fabricant se réserve le droit de modifier les caractéristiques du produit sans préavis
11
Page 38

FRANCAIS
5. La musique
- Appuyez autant de fois que nécessaire sur la touche « Exit »
pour afficher l’écran principal.
- A l’aide des flèches « Gauche/Droite » de la télécommande,
sélectionnez l’icône « Musique ».
- Appuyez sur la touche « Entée » : la lecture de la musique
démarre.
- Utilisez les touches directionnelles « Gauche/Droite » pour
sélectionner/(Lecture/Pause), appuyez ensuite sur la
touche « Enter ».
- Utilisez les touches directionnelles « Gauche/Droite » pour
sélectionner/(Précédent/Suivant), appuyez ensuite sur la
touche « Enter ».
- Utilisez les touches directionnelles « Gauche/Droite » pour
sélectionner/(Rembobinage/Avance rapide), appuyez
ensuite sur la touche « Enter ».
- Utilisez les touches directionnelles « Gauche/Droite » pour
sélectionner (Volume), appuyez ensuite sur la touche « Enter » pour diminuer le volume.
- Utilisez les touches directionnelles « Gauche/Droite » pour sélectionner (Volume), appuyez
ensuite sur la touche « Enter » pour augmenter le volume.
- Appuyez sur la touche « Exit » de la télécommande pour revenir au menu précédent.
- Les touches + de la télécommande permettent également de régler le volume.
- Appuyez sur la touche « MUSIC » de la télécommande pour accéder au menu Musique.
12
Document non contractuel soumis à modifications en cas d’erreurs typographiques (Mktg1011) COPYRIGHT SOPEG 2011
Le fabricant se réserve le droit de modifier les caractéristiques du produit sans préavis
Page 39

FRANCAIS
IV. Les réglages
Lorsque vous êtes sur l’écran principal, Sélectionnez l’icône « Regl. »
à l’aide des touches « Gauche/Droite » de votre télécommande pour
accéder aux différents réglages de votre cadre.
En cours de lecture d’un diaporama, appuyez simplement sur la touche
« Régl. » de la télécommande pour accéder au menu de réglages.
Une fois dans le menu Réglages, les touches directionnelles
« Haut/Bas » de la télécommande vous permettent de configurer une option, les touches directionnelles
« Gauche/Droite » vous permettent de choisir une sous-option.
1. Réglages Photos
Sélectionnez « Configuration photo » à l’aide des touches directionnelles « Haut/Bas » de la
télécommande, appuyez ensuite sur la touche « Enter ». L’interface opposée s’affiche :
Vous pouvez ensuite modifier les options via les touches directionnelles de la télécommande.
- Mode d'affichage
Sélectionnez « Mode d’affichage » à l’aide des touches directionnelles « Haut/Bas » de la
télécommande puis appuyez sur la touche « Enter », utilisez les touches directionnelles « Haut/Bas »
pour sélectionner parmi :
Diaporama : les images défilent les unes après les autres.
Miniatures : les images s’affichent sous forme de miniatures. (Remarque : Lorsque ce mode est
activé, vous pouvez accéder à Diaporama, Diaporama+Musique ou Seule en appuyant de
manière répétée sur la touche « Enter ».)
Seule : Une seule photo s’affiche.
- Format d’affichage
Sélectionnez « Ratio d’affichage » à l’aide des touches directionnelles « Haut/Bas » de la
télécommande puis appuyez sur la touche « Enter », utilisez les touches directionnelles « Haut/Bas »
pour sélectionner parmi :
Ajuster à l'écran : la photo est affichée sous son format original.
13
Document non contractuel soumis à modifications en cas d’erreurs typographiques (Mktg1011) COPYRIGHT SOPEG 2011
Le fabricant se réserve le droit de modifier les caractéristiques du produit sans préavis
Page 40

FRANCAIS
Recadrer pour remplir : la photo est centrée puis rognée afin de pouvoir être affichée
Plein écran : la photo est modifiée afin de pouvoir être affichée en plein écran
- Durée du diaporama
Sélectionnez « Durée diaporama » à l’aide des touches directionnelles « Haut/Bas » de la
télécommande puis appuyez sur la touche « Enter », utilisez les touches directionnelles « Haut/Bas »
pour sélectionner parmi :
5 sec.
15 sec.
30 sec.
60 sec.
5 min.
15 min.
- Effets de diaporama
Sélectionnez « Effet diaporama » à l’aide des touches directionnelles « Haut/Bas » de la
télécommande puis appuyez sur la touche « Enter », utilisez les touches directionnelles « Haut/Bas »
pour sélectionner parmi les effets suivants :
14
Document non contractuel soumis à modifications en cas d’erreurs typographiques (Mktg1011) COPYRIGHT SOPEG 2011
Le fabricant se réserve le droit de modifier les caractéristiques du produit sans préavis
Page 41

FRANCAIS
- Répétition du diaporama
Sélectionnez « Répéter diaporama » à l’aide des touches directionnelles « Haut/Bas » de la
télécommande puis appuyez sur la touche « Enter », utilisez les touches directionnelles « Haut/Bas »
pour sélectionner parmi :
Répéter : le diaporama est lu en boucle.
Une fois : le diaporama est lu une fois.
Aléatoire : les images sont affichées aléatoirement.
- Affichage multiple
Sélectionnez « Affichage multiple » à l’aide des touches directionnelles « Haut/Bas » de la
télécommande puis appuyez sur la touche « Enter » pour sélectionner parmi « Activé » ou
« Désactivé ».
- Horloge
Sélectionnez « Horloge » à l’aide des touches directionnelles « Haut/Bas » de la télécommande puis
appuyez sur la touche « Enter » pour sélectionner parmi « Activé » ou « Désactivé ».
- Redimensionner
Sélectionnez « Redimensionner » à l’aide des touches directionnelles « Haut/Bas » de la
télécommande puis appuyez sur la touche « Enter » pour sélectionner parmi « Activé » ou
« Désactivé ».
- Couper lors de la copie
Sélectionnez « Couper lors de la copie » à l’aide des touches directionnelles « Haut/Bas » de la
télécommande puis appuyez sur la touche « Enter » pour sélectionner parmi « Activé » ou
« Désactivé ».
- Afficher conseil lors de la copie
Sélectionnez « Afficher conseil lors de la copie » à l’aide des touches directionnelles « Haut/Bas » de
la télécommande puis appuyez sur la touche « Enter » pour sélectionner parmi « Activé » ou
« Désactivé ».
2. Réglages musique
Document non contractuel soumis à modifications en cas d’erreurs typographiques (Mktg1011) COPYRIGHT SOPEG 2011
Le fabricant se réserve le droit de modifier les caractéristiques du produit sans préavis
15
Page 42

FRANCAIS
Lorsque vous êtes dans le menu de réglage, sélectionnez la ligne « Configuration musique » à l’aide
des touches « Haut/Bas » de votre télécommande puis appuyez sur «Enter».
Vous pouvez paramétrer :
- Mode de lecture
Sélectionnez « Mode de lecture » à l’aide des touches directionnelles « Haut/Bas » de la
télécommande puis appuyez sur la touche « Enter », utilisez les touches directionnelles « Haut/Bas »
pour sélectionner parmi :
Répéter : les pistes sont lues en boucle.
Aléatoire : les pistes sont lues aléatoirement.
Une fois : chaque piste est lue une fois.
Répéter une fois : chaque piste est lue deux fois.
- Effet musical
Votre cadre TELEFUNKEN est doté d’un égaliseur permettant d'adapter le son à la musique écoutée.
Sélectionnez « Effet musical » à l’aide des touches directionnelles « Haut/Bas » de la télécommande
puis appuyez sur la touche « Enter », utilisez les touches directionnelles « Haut/Bas » pour sélectionner
parmi :
Jazz
DBB
Normal
Rock
Pop
Classique
Doux
- Afficher spectre
En cours de lecture d’un fichier audio, il est possible d’afficher l’égaliseur sur l’écran de votre cadre
TELEFUNKEN.
Sélectionnez « Afficher spectre » à l’aide des touches directionnelles « Haut/Bas » de la
télécommande puis appuyez sur la touche « Enter » pour sélectionner parmi « Activé » ou
« Désactivé ».
16
Document non contractuel soumis à modifications en cas d’erreurs typographiques (Mktg1011) COPYRIGHT SOPEG 2011
Le fabricant se réserve le droit de modifier les caractéristiques du produit sans préavis
Page 43

FRANCAIS
- Lecture automatique
Lorsque cette option est activée, les fichiers audio sont automatiquement lus dès l’activation du mode
Audio.
Sélectionnez « Lecture automatique » à l’aide des touches directionnelles « Haut/Bas » de la
télécommande puis appuyez sur la touche « Enter » pour sélectionner parmi « Activé » ou
« Désactivé ».
3. Configuration vidéo
Dans le menu de réglage, sélectionnez la ligne « Réglages vidéo » à l’aide des touches « Haut/Bas »
de votre télécommande et appuyez sur «Enter».
- Mode d'affichage
Sélectionnez « Mode d'affichage » à l’aide des touches directionnelles « Haut/Bas » de la
télécommande puis appuyez sur la touche « Enter », utilisez les touches directionnelles « Haut/Bas »
pour sélectionner parmi :
Plein écran : la vidéo s'affiche au format 4:3.
Taille originale : la vidéo s'affiche sous son format original.
- Mode de lecture
Sélectionnez « Mode de lecture » à l’aide des touches directionnelles « Haut/Bas » de la
télécommande puis appuyez sur la touche « Enter », utilisez les touches directionnelles « Haut/Bas »
pour sélectionner parmi :
Répéter : la vidéo est lue en boucle.
Une fois : la vidéo est seulement lue une fois.
- Lecture automatique
Lorsque cette option est activée, les fichiers vidéo sont automatiquement lus dès l’activation du mode
Vidéo.
Sélectionnez « Lecture automatique » à l’aide des touches directionnelles « Haut/Bas » de la
télécommande puis appuyez sur la touche « Enter » pour sélectionner parmi « Activé » ou
« Désactivé ».
17
Document non contractuel soumis à modifications en cas d’erreurs typographiques (Mktg1011) COPYRIGHT SOPEG 2011
Le fabricant se réserve le droit de modifier les caractéristiques du produit sans préavis
Page 44

FRANCAIS
4. Configuration calendrier
Sélectionnez l’option « Configuration calendrier » du menu Configuration à l’aide des touches
directionnelles « Haut/Bas » de la télécommande, appuyez ensuite sur la touche « Enter ».
Utilisez les touches directionnelles ou la touche « Enter » pour régler :
- Le mode d’affichage du calendrier
Sélectionnez « Mode d’affichage » à l’aide des touches directionnelles « Haut/Bas » de la
télécommande puis appuyez sur la touche « Enter », utilisez les touches directionnelles « Haut/Bas »
pour sélectionner parmi :
Calendrier mensuel
Calendrier
Horloge analogique
- Format de date
Sélectionnez « Format de date » à l’aide des touches directionnelles « Haut/Bas » de la télécommande
puis appuyez sur la touche « Enter », utilisez les touches directionnelles « Haut/Bas » pour sélectionner
parmi :
MM/JJ/AAAA
JJ/MM/AAAA
AAAA/MM/JJ
- Date
Sélectionnez « Date » à l’aide des touches directionnelles « Haut/Bas » de la télécommande, appuyez
ensuite sur la touche « Enter », ensuite :
Utilisez les touches directionnelles « Haut/Bas » pour sélectionner parmi Mois, Jour et Année.
Utilisez les touches directionnelles « Gauche/Droite » pour régler un des champs suivants :
Mois, Jour et Année.
- Format d’affichage de l’horloge (12/24 heures)
Sélectionnez « Mode d’horloge » à l’aide des touches directionnelles « Haut/Bas » de la
télécommande puis appuyez sur la touche « Enter », utilisez les touches directionnelles « Haut/Bas »
18
Document non contractuel soumis à modifications en cas d’erreurs typographiques (Mktg1011) COPYRIGHT SOPEG 2011
Le fabricant se réserve le droit de modifier les caractéristiques du produit sans préavis
Page 45

FRANCAIS
pour sélectionner parmi le format 12 heures et 24 heures, appuyez sur la touche « Enter » pour
confirmer.
- Heure de l’horloge
Sélectionnez « Heure de l’horloge » à l’aide des touches directionnelles « Haut/Bas » de la
télécommande, appuyez ensuite sur la touche « Enter », ensuite :
Utilisez les touches directionnelles « Haut/Bas » pour sélectionner parmi Heure, Min, AM et
PM.
Utilisez les touches directionnelles « Gauche/Droite » pour régler un des champs suivants :
Heure, Min, AM et PM.
- État de l'alarme
Sélectionnez « Etat de l’alarme » à l’aide des touches directionnelles « Haut/Bas » de la
télécommande puis appuyez sur la touche « Enter » pour sélectionner parmi « Activé » ou
« Désactivé ».
- Heure de l’alarme
Pour régler l’heure de l’alarme, sélectionnez « Heure de l’alarme » à l’aide des touches directionnelles
« Haut/Bas » de la télécommande, appuyez ensuite sur la touche « Enter », ensuite :
Utilisez les touches directionnelles « Haut/Bas » pour sélectionner parmi Heure, Min, AM et PM.
Utilisez les touches directionnelles « Gauche/Droite » pour régler un des champs suivants :
Heure, Min, AM et PM.
- Fréquence de l’alarme
Sélectionnez « Fréquence de l’alarme » à l’aide des touches directionnelles « Haut/Bas » de la
télécommande puis appuyez sur la touche « Enter », utilisez les touches directionnelles « Haut/Bas »
pour sélectionner parmi :
Une fois
Tous les jours
Du Lundi au Vendredi.
Weekend
19
Document non contractuel soumis à modifications en cas d’erreurs typographiques (Mktg1011) COPYRIGHT SOPEG 2011
Le fabricant se réserve le droit de modifier les caractéristiques du produit sans préavis
Page 46

FRANCAIS
5. Configuration système
Ce menu vous permet de régler les paramètres de fonctionnement de
votre cadre.
- L’activation/Désactivation du capteur de luminosité
Sélectionnez « Capteur de lumière » à l’aide des touches
directionnelles « Haut/Bas » de la télécommande puis appuyez sur la touche « Enter » pour
sélectionner parmi « Activé » ou « Désactivé ».
- Langue
Sélectionnez « Langue » à l’aide des touches directionnelles « Haut/Bas » de la télécommande puis
appuyez sur la touche « Enter », utilisez les touches directionnelles « Haut/Bas » pour sélectionner
parmi :
Anglais
Français
Allemand
Italien
Néerlandais
Portugais
Espagnol
- Luminosité
Sélectionnez « Luminosité » à l’aide des touches directionnelles « Haut/Bas » de la télécommande
puis appuyez sur la touche « Enter », utilisez les touches directionnelles « Gauche/Droite » pour régler
le niveau de luminosité de 1 à 16.
- Contraste
Sélectionnez « Contraste » à l’aide des touches directionnelles « Haut/Bas » de la télécommande puis
appuyez sur la touche « Enter », utilisez les touches directionnelles « Gauche/Droite » pour régler le
niveau de contraste de 1 à 16.
20
Document non contractuel soumis à modifications en cas d’erreurs typographiques (Mktg1011) COPYRIGHT SOPEG 2011
Le fabricant se réserve le droit de modifier les caractéristiques du produit sans préavis
Page 47

FRANCAIS
- Saturation
Sélectionnez « Saturation » à l’aide des touches directionnelles « Haut/Bas » de la télécommande puis
appuyez sur la touche « Enter », utilisez les touches directionnelles « Gauche/Droite » pour régler le
niveau de luminosité de 1 à 16.
- Teinte
Sélectionnez « Teinte » à l’aide des touches directionnelles « Haut/Bas » de la télécommande puis
appuyez sur la touche « Enter », utilisez les touches directionnelles « Gauche/Droite » pour régler le
niveau de luminosité de 1 à 100.
- Mise en marche
Sélectionnez « Mise en marche » à l’aide des touches directionnelles « Haut/Bas » de la
télécommande puis appuyez sur la touche « Enter » pour sélectionner parmi « Activé » ou
« Désactivé ».
- Heure de démarrage automatique
Sélectionnez « Heure de démarrage automatique » à l’aide des touches directionnelles « Haut/Bas »
de la télécommande, appuyez ensuite sur la touche « Enter », ensuite :
Utilisez les touches directionnelles « Haut/Bas » pour sélectionner parmi Heure, Min, AM et
PM.
Utilisez les touches directionnelles « Gauche/Droite » pour régler un des champs suivants :
Heure, Min, AM et PM.
- Mise à l’arrêt
Sélectionnez « Mise à l’arrêt » à l’aide des touches directionnelles « Haut/Bas » de la télécommande
puis appuyez sur la touche « Enter » pour sélectionner parmi « Activé » ou « Désactivé ».
- Heure d’arrêt automatique
Sélectionnez « Heure d’arrêt automatique » à l’aide des touches directionnelles « Haut/Bas » de la
télécommande, appuyez ensuite sur la touche « Enter », ensuite :
Utilisez les touches directionnelles « Haut/Bas » pour sélectionner parmi Heure, Minutes, AM
et PM.
Utilisez les touches directionnelles « Gauche/Droite » pour régler un des champs suivants :
Heure, Minutes, AM et PM.
Document non contractuel soumis à modifications en cas d’erreurs typographiques (Mktg1011) COPYRIGHT SOPEG 2011
Le fabricant se réserve le droit de modifier les caractéristiques du produit sans préavis
21
Page 48

FRANCAIS
- Fréquence d’alimentation automatique
Sélectionnez « Fréquence d’alimentation automatique » à l’aide des touches directionnelles
« Haut/Bas » de la télécommande puis appuyez sur la touche « Enter », utilisez les touches
directionnelles « Haut/Bas » pour sélectionner parmi :
Une fois
Tous les jours
Du Lundi au Vendredi.
Weekend
- Réinitialisation
La réinitialisation du cadre est parfois utile lors d’une erreur de manipulation. Pour cela, sélectionnez
« Défaut » à l’aide des touches directionnelles « Haut/Bas » de la télécommande, appuyez sur la
touche « Enter » puis utilisez les touches directionnelles « Haut/Bas » pour sélectionner
parmi « Activé » ou « Désactivé ».
Remarque : Une fois la réinitialisation terminée, l’interface de sélection de la langue s’affiche au
démarrage du cadre, de manière identique à la première utilisation de l’unité.
- Le numéro de version du logiciel interne (à titre informatif)
V. Connexion à un ordinateur
Il est possible de transférer des fichiers dans le cadre en reliant celui-ci à votre micro-ordinateur. Pour
cela, reliez votre cadre à l’ordinateur via un câble USB (Prise mini USB côté cadre, et USB standard
côté ordinateur) puis allumez votre cadre : l’écran du cadre affiche « Connexion PC… » Retour au
fonctionnement normal après déconnexion
Sur votre ordinateur, la boîte de dialogue suivante s’affiche :
22
Document non contractuel soumis à modifications en cas d’erreurs typographiques (Mktg1011) COPYRIGHT SOPEG 2011
Le fabricant se réserve le droit de modifier les caractéristiques du produit sans préavis
Page 49

FRANCAIS
- Cliquez sur « ouvrir le dossier et afficher les fichiers » afin de visualiser le contenu de la
mémoire interne.
L’écran suivant s’affiche :
Ouvrez le répertoire dans lequel sont stockés les fichiers que vous souhaitez transférer dans le
cadre, et déposez les dans le dossier voulu par « copier/coller » ou « Glisser/déposer ».
Attention ! Les photos ainsi transférées ne seront pas redimensionnées.
- Débranchez le câble USB : votre cadre se remet en fonction automatiquement.
23
Document non contractuel soumis à modifications en cas d’erreurs typographiques (Mktg1011) COPYRIGHT SOPEG 2011
Le fabricant se réserve le droit de modifier les caractéristiques du produit sans préavis
Page 50

FRANCAIS
VI. Instructions de sécurité
Manipulez le cadre photo numérique avec précaution et évitez de toucher l’écran ; les traces de doigts
sont difficiles à enlever.
Placez toujours le cadre photo numérique sur une surface plane et stable pour éviter qu’il ne tombe et
ne soit endommagé.
Évitez d’exposer le cadre photo numérique au soleil ou aux températures élevées car ceci peut
endommager le cadre ou réduire sa durée d’utilisation. Ne le placez pas près de sources de chaleurs
telles que les radiateurs, les chauffages d’appoints… Ne positionnez pas le cadre face aux rayons du
soleil pour éviter les reflets.
Évitez d’exposer le cadre photo numérique à la pluie, l’eau ou l’humidité. Ne le placez pas dans un évier
ou dans un bassin où il pourrait entrer en contact avec l’eau.
Ne placez jamais d’objets lourds ou coupants sur le cadre, l’écran ou l’alimentation du cadre.
Veillez à ne pas brancher le cadre photo numérique sur une prise ou un cordon à l’alimentation trop
puissante. Ceci pourrait provoquer une surchauffe, un feu ou un choc électrique.
Veillez à l’emplacement du cordon d’alimentation ; celui-ci ne doit pas être piétiné ou en contact avec
d’autres objets. Ne placez pas le cordon sous un tapis. Vérifiez régulièrement l’état du cordon pour éviter
tout dommage. Si le cordon est endommagé, débranchez-le et remplacez-le.
Ventilation
Gardez le cadre numérique à une distance suffisante du mur pour assurer sa ventilation.
Ne placez pas le cadre photo numérique sur un lit ou un canapé pour éviter toute surchauffe.
Attention !
Ne retirez jamais le capot en plastique situé à l’arrière du cadre. Le cadre photo numérique comporte
des circuits électriques et vous pouvez être blessé si vous les touchez.
Ne tentez pas de réparer votre cadre numérique seul.
24
Document non contractuel soumis à modifications en cas d’erreurs typographiques (Mktg1011) COPYRIGHT SOPEG 2011
Le fabricant se réserve le droit de modifier les caractéristiques du produit sans préavis
Page 51

FRANCAIS
VII. Garantie
La garantie ne couvre pas les dommages causés si vous (ou toute personne non habilitée) avez tenté
de réparer le cadre.
Si le cadre émet de la fumée, un bruit ou une odeur inhabituelle, éteignez-le et débranchez-le
immédiatement. Contactez votre magasin.
Si vous n’utilisez pas le cadre numérique pendant quelques temps, veillez à débrancher le cordon
d’alimentation.
La garantie porte sur le cadre photo numérique et n’inclut pas les accessoires. Sont considérés comme
accessoires :
Le bloc d’alimentation secteur,
La télécommande (selon modèle).
Toutefois, ces accessoires peuvent être commandés auprès de notre service technique :
(N°Indigo Assistance Technique : 0892 7050 44 (0.34€ la minute) ou par mail :
assistance@sopeg.fr )
Période de garantie
Ce cadre numérique bénéficie d’une durée de garantie de 12 mois. La période de garantie débute à la
date d’achat du cadre.
La garantie doit être prouvée par la présentation de la facture d’origine ou du reçu sur lesquels
apparaissent la date et le modèle acheté.
Couverture
Un cadre numérique défectueux doit être retourné complet auprès de votre distributeur avec une note
explicative.
Si ce cadre numérique présente une défectuosité pendant la période de garantie, le Service Après Vente
agréé réparera tous les éléments défectueux ou tout défaut de fabrication. Le Service Après Vente
décidera unilatéralement de la réparation ou du remplacement du cadre numérique en intégralité ou en
partie.
La date d’achat initiale détermine la date de début de période de garantie
25
Document non contractuel soumis à modifications en cas d’erreurs typographiques (Mktg1011) COPYRIGHT SOPEG 2011
Le fabricant se réserve le droit de modifier les caractéristiques du produit sans préavis
Page 52

FRANCAIS
La période de garantie n’est pas prolongée en cas de réparation ou d’échange du cadre numérique par
notre Service Après vente.
Exclusion
Les dommages ou défauts causés par une mauvaise utilisation ou manipulation du cadre numérique et
par l’utilisation d’accessoires autres que ceux d’origine ou non recommandés par la présente notice ne
sont pas couverts par la garantie.
La garantie ne couvre pas les dommages causés par des éléments extérieurs comme la foudre, l’eau ou
le feu ou tout autre dommage causé pendant un transport.
Aucune prise sous garantie ne pourra être réclamée si le numéro de série du cadre numérique a été
modifié, enlevé, effacé ou rendu illisible.
Aucune prise sous garantie ne pourra être réclamée si le cadre numérique a été réparé, altéré ou
modifié par l’acquéreur ou tout autre réparateur non officiellement agréé et qualifié.
Le fabricant ne garantit pas les propriétés techniques décrites dans ce manuel. Le matériel et les
accessoires décrits dans ce manuel sont sujets à modification sans préavis. Pour cette raison, le
fabricant se réserve le droit de modifier les composants, les options, les caractéristiques et les
documents s’y rattachant sans préavis.
Conformité au règlement en vigueur :
Ce cadre numérique est conforme aux normes CE en vigueur et compatible avec la norme RoHS.
Recyclage des équipements électriques et électroniques en fin de vie.
Les appareils électriques et électroniques usagés ne doivent pas être éliminés avec les déchets
ménagers ordinaires. La présence de ce symbole sur le produit ou son emballage vous le rappelle.
Certains matériaux composants ce produit peuvent être recyclés si vous le déposez auprès d’un centre
de recyclage approprié. En réutilisant les pièces et matières premières des appareils usagés, vous
apportez une contribution importante à la protection de l’environnement.
Pour plus d’informations sur les lieux de collecte des équipements usagés, vous pouvez vous adresser à
votre mairie, au service de traitement des déchets usagés ou au magasin où vous acheté le produit.
Document non contractuel soumis à modifications en cas d’erreurs typographiques (Mktg1011) COPYRIGHT SOPEG 2011
Le fabricant se réserve le droit de modifier les caractéristiques du produit sans préavis
26
Page 53

FRANCAIS
Caractéristiques
DPF 10934
Taille
10,1’’ (25,6 cm)
Définition
1024 x 600
Type d’écran
LED
Ratio image
16/9
Mémoire interne
2 Go
Audio/vidéo
OUI
Cartes compatibles
SD/MMC,SDHC, MS, XD, Clés USB
Fichiers lus
JPEG/WAV, MP3/MPEG1,4, MOTION JPEG
Redimensionnement auto
OUI
Rotation auto
OUI
Enter alimentation
100-240 V AC 50/60 Hz
Sortie alimentation
5V DC 2Ah
Consommation en veille
<1W
Consommation en utilisation
<8W
Dimensions
280*176*26mm
Poids
630 g
Compatibilité système
Windows XP, Vista, 7, Mac OS 9.0 et suivants
VIII. Caractéristiques techniques
Document non contractuel soumis à modifications en cas d’erreurs typographiques (Mktg1011) COPYRIGHT SOPEG 2011
Le fabricant se réserve le droit de modifier les caractéristiques du produit sans préavis
27
Page 54

DEUTSCH
GEBRAUCHSANWEISUNG FÜR DIGITALEN BILDERRAHMEN
TELEFUNKEN DPF 10934
............................ 2
1. Inhalt der Verpackung ....................................................................................................... 2
2. Abbildungen des Bilderrahmens ..................................................................................... 3
3. Fernbedienung ................................................................................................................... 3
4. Installation ........................................................................................................................... 4
II. Benutzung Ihres Bilderrahmens ......................................................... 4
1. Sprachauswahl ................................................................................................................... 4
2. Der Stromsparmodus ........................................................................................................ 5
3. Lesen einer Speicherkarte oder eines USB-Speichers ............................................... 5
4. Kopieren von Fotos in den internen Speicher ............................................................... 6
5. Löschen von Fotos ............................................................................................................ 8
III. Auswahl des zu lesenden Dateityps ................................................. 10
1. Interner Speicher/Mobiler Datenträger ......................................................................... 10
2. Auswahl eines Ordners/Multimedia-Modus ................................................................. 10
3. Fotos .................................................................................................................................. 11
4. Videos ................................................................................................................................ 11
5. Musik.................................................................................................................................. 12
IV. Einstellungen ........................................................................................ 13
1. Fotoeinstellungen ............................................................................................................ 13
2. Musikeinstellungen .......................................................................................................... 15
3. Videoeinstellungen .......................................................................................................... 16
4. Kalendereinstellungen .................................................................................................... 17
5. Systemeinstellung ........................................................................................................... 19
V. Verbindung mit einem Computer ...................................................... 21
VI. Sicherheitshinweise ............................................................................ 23
VII. Garantie ................................................................................................. 24
VIII. Technische Merkmale ......................................................................... 26
Dokument ohne vertraglichen Charakter. Änderungen aufgrund von Druckfehlern bleiben vorbehalten (Mktg1011) COPYRIGHT SOPEG
2011
Hersteller behält sich das Recht vor, die Produktmerkmale ohne vorherige Benachrichtigung zu ändern.
1
Page 55

DEUTSCH
ow“
vor Sie Ihr
Gerät benutzen, lesen Sie bitte die vorliegende Gebrauchsanweisung durch und bewahren Sie sie gut
auf, um später auf sie zurückgreifen zu können.
1. Inhalt der Verpackung
- 1 digitaler Bilderrahmen
- 1 Netzadapter
- 1 Fernbedienung
Dokument ohne vertraglichen Charakter. Änderungen aufgrund von Druckfehlern bleiben vorbehalten (Mktg1011) COPYRIGHT SOPEG
2011
Hersteller behält sich das Recht vor, die Produktmerkmale ohne vorherige Benachrichtigung zu ändern.
2
Page 56

DEUTSCH
Taste
Funktion
▲
In den Menüs nach oben navigieren
◄
In den Menüs nach links navigieren und zur vorherigen Datei (Bild, Musik oder
Film) springen
▼
In den Menüs nach unten navigieren
►
In den Menüs nach rechts navigieren und zur nächsten Datei (Bild, Musik oder
Film) springen
ENTER
Auswahl bestätigen oder Modi wechseln
Digitalen Bilderrahmen einschalten oder in Standby schalten
EXIT
Aktuelles Menü beenden und zum vorherigen Menü gehen
STOP
Dateiwiedergabe beenden (Bild, Musik oder Film) und zum vorherigen Menü
zurück gehen
Ton Stumm schalten oder aktivieren, ist der Ton ausgeschaltet, wird das Symbol
angezeigt
Lautstärke erhöhen, die Lautstärke wird angezeigt
(COPY/DEL)
Aufrufen der Kopier-, Lösch- und Sortierungsfunktionen (nur im Hauptmenü)
(ROTATE)
Bilder 90° drehen
Bild vergrößern, drücken Sie mehrmals, um durch die verschiedenen Zoom-Modi
zu schalten x2, x4, x8 und x16. Drücken Sie nochmals, um zur Ausgangsgröße zu
gelangen
2. Abbildungen des Bilderrahmens
3. Fernbedienung
Alle Funktionen können mit der Fernbedienung ausgeführt werden. Drücken Sie die folgenden Tasten,
um die jeweiligen Funktionen zu aktivieren:
Dokument ohne vertraglichen Charakter. Änderungen aufgrund von Druckfehlern bleiben vorbehalten (Mktg1011) COPYRIGHT SOPEG
2011
Hersteller behält sich das Recht vor, die Produktmerkmale ohne vorherige Benachrichtigung zu ändern.
3
Page 57

DEUTSCH
Lautstärke verringern, die Lautstärke wird angezeigt
(SLIDESHOW)
Diashow direkt starten
MUSIC
Einstellungsmenü (MUSIC) direkt aufrufen
VIDEO
Einstellungsmenü (VIDEO) direkt aufrufen
SETUP
Einstellungsmenü (Settings) direkt aufrufen
4. Installation
- Nehmen Sie Ihren Bilderrahmen und sein Zubehör aus der Verpackung.
- Entfernen Sie die Schutzfolie von der Vorderseite des Bilderrahmens.
- Ziehen Sie den Plastikstreifen zum Schutz der Kontakte der Fernbedienung ab.
- Stellen Sie den Bilderrahmen an der gewünschten Stelle auf, indem Sie den justierbaren Ständer
in Ihre Richtung ziehen (s. Abbildung oben).
- Schließen Sie das Netzkabel an der vorgesehenen Stelle am Bilderrahmen und an einer
Steckdose an.
- Ihr Bilderrahmen schaltet sich automatisch ein.
II. Benutzung Ihres Bilderrahmens
1. Sprachauswahl
Bei Inbetriebnahme des Rahmens wird die Demo-Animation
angezeigt. Um diese zu verlassen und auf die Funktionen des
Rahmens zuzugreifen, drücken Sie einfach die Taste „Slideshow“
Ihrer Fernbedienung.
Nun wird der Bildschirm „Sprachenauswahl“ angezeigt.
- Wählen Sie Ihre Sprache mithilfe der Pfeiltasten der
Fernbedienung aus und drücken Sie auf „Enter“.
Wenn Sie die gewünschte Sprache ausgewählt haben, steht Ihr Rahmen zur Nutzung bereit. Legen Sie
einfach eine Karte oder einen USB-Speicher ein, und schon können Sie Ihre Bilder abspielen.
Achtung: Die Demo-Animation befindet sich in einem Ordner mit der Bezeichnung „DEMO“.
Diese Animation sollte entfernt werden, um die 2 GB internen Speicher nutzen zu können.
Dokument ohne vertraglichen Charakter. Änderungen aufgrund von Druckfehlern bleiben vorbehalten (Mktg1011) COPYRIGHT SOPEG
2011
Hersteller behält sich das Recht vor, die Produktmerkmale ohne vorherige Benachrichtigung zu ändern.
4
Page 58

DEUTSCH
2. Der Stromsparmodus
Der Stromsparmodus verbindet drei wesentliche Elemente, die im Vergleich zu einem Standardrahmen
für eine Verringerung des Energieverbrauchs um mehr als 40% sorgen:
- Einen LED-Bildschirm, der bei verbesserter Bildqualität weniger Energie benötigt
- Einen Energie sparenden Netzadapter mit Energy-Star-Zertifizierung
- Einen Helligkeitssensor
Dieser Sensor ist standardmäßig aktiviert und sorgt dafür, dass sich Ihr Fotorahmen bei Dunkelheit
automatisch aus- und bei Helligkeit einschaltet.
Sie können diesen Helligkeitssensor im Systemeinstellungsmenü Ihres Rahmens deaktivieren.
Achtung: Je nach Aufstellungsort des Rahmens (etwa in einem Möbelstück, unter einem Regal) kann es
sein, dass das Licht für den Betrieb des Rahmens nicht ausreicht oder das der Rahmen unerwartet
abschaltet. Sie können ihn wieder einschalten, indem Sie die Standby-Taste oben rechts auf der
Fernbedienung drücken. In diesem Fall wird der Sensor deaktiviert. Um ihn wieder zu aktivieren, genügt
es, ihn 5 Sekunden lang einer ausreichenden Lichtquelle auszusetzen.
3. Lesen einer Speicherkarte oder eines USB-Speichers
Falls Ihr Bilderrahmen ausgeschaltet ist:
- Führen Sie Ihre Speicherkarte oder Ihren USB-Speicher
an der hierfür vorgesehenen Stelle ein.
- Schalten Sie Ihren Bilderrahmen ein. Die Diashow spielt
den Inhalt Ihrer Speicherkarte oder Ihres USBSpeichers automatisch ab.
Falls Ihr Rahmen eingeschaltet ist und die Diashow des
internen Speichers abspielt:
- Ihre Speicherkarte wird automatisch erkannt
5
Dokument ohne vertraglichen Charakter. Änderungen aufgrund von Druckfehlern bleiben vorbehalten (Mktg1011) COPYRIGHT SOPEG
2011
Hersteller behält sich das Recht vor, die Produktmerkmale ohne vorherige Benachrichtigung zu ändern.
Page 59

DEUTSCH
- Nach einigen Sekunden erscheint die Nachricht „Möchten Sie die Bilder in den internen Speicher
kopieren?“
- Falls Sie innerhalb von 15 Sekunden nicht reagieren,
werden die auf der Karte enthaltenen Bilder als Diashow
abgespielt, die Bilder werden jedoch nicht kopiert.
-
Beim Skalieren werden die Kopien Ihrer Fotos an die Auflösung des Rahmens angepasst,
wodurch sich ihre Dateigröße erheblich verringert. Dank dieses Systems haben mehr als
10 000 Fotos im internen Speicher Platz.
(WICHTIG: Es werden ausschließlich die Kopien Ihrer Fotos skaliert; die Originalfotos auf der
Karte werden nicht geändert.)
Falls auf Ihrem Datenspeicher, USB-Speicher oder internen Speicher Musik gespeichert ist, und falls Sie
ein musikales Diaporama wünschen, dann drücken Sie bitte die 'Enter' Taste der Fernbedienung,
während des Lesens des Diaporamas. Auf Ihrem Bildschirm sehen Sie dann „Musik-Diashow“.
4. Kopieren von Fotos in den internen Speicher
Wenn Sie beim Einschieben der Karte nicht das automatische Kopieren gewählt haben, stehen Ihnen
zwei Methoden zur Verfügung, um die Bilder Ihrer Speicherkarte in den internen Speicher des Rahmens
zu kopieren.
6
Dokument ohne vertraglichen Charakter. Änderungen aufgrund von Druckfehlern bleiben vorbehalten (Mktg1011) COPYRIGHT SOPEG
2011
Hersteller behält sich das Recht vor, die Produktmerkmale ohne vorherige Benachrichtigung zu ändern.
Page 60

DEUTSCH
- Kopieren Ihrer Fotos über den Dateimanager
Falls Sie diese Methode anwenden, können Sie die Dateien nur
eine nach der anderen kopieren und haben nicht die Möglichkeit,
sie auf die Auflösung des Bilderrahmens zu skalieren.
1. Drücken Sie die „Exit“-Taste Ihrer Fernbedienung so oft,
bis die Datenträger-Auswahl auf dem Bildschirm
erscheint.
2. Wählen Sie mit den Tasten „Links/Rechts“ der
Fernbedienung das Symbol „Dateien“ aus und drücken Sie auf „Enter“.
3. Wählen Sie die zu kopierende Datei mit den Tasten
„Hoch/Runter“ der Fernbedienung und drücken Sie
„Copy/Del“. Nun erscheint die Nachricht: „Kopieren?“
Wählen Sie mit den Tasten „Links/Rechts“ aus und
drücken Sie danach „Enter“.
4. Wählen Sie das Verzeichnis, in das Sie das Foto kopieren
wollen, mit den Tasten „Hoch/Runter“ und drücken Sie
danach „Enter“. Ihre Datei wird kopiert.
Falls Ihre Speicherkarte einen oder mehrere Ordner enthält, können Sie diese nacheinander komplett
kopieren. Sie werden in dem von Ihnen ausgewählten Ordner des internen Speichers abgespeichert,
und Sie können sie unabhängig voneinander abspielen.
- Kopieren Ihrer Fotos über den Miniatur-Modus.
Mit dieser Methode können Sie eine Auswahl an Fotos kopieren
und haben dabei die Möglichkeit, sie auf die Auflösung des
Bilderrahmens zu skalieren, um die Kapazität des internen
Speichers zu optimieren.
1. Drücken Sie die „Exit“-Taste Ihrer Fernbedienung so oft,
bis die Datenträger-Auswahl auf dem Bildschirm
erscheint.
7
Dokument ohne vertraglichen Charakter. Änderungen aufgrund von Druckfehlern bleiben vorbehalten (Mktg1011) COPYRIGHT SOPEG
2011
Hersteller behält sich das Recht vor, die Produktmerkmale ohne vorherige Benachrichtigung zu ändern.
Page 61

DEUTSCH
2. Wählen Sie mit den Tasten „Links/Rechts“ der Fernbedienung den mobilen Datenträger, auf
dem sich die zu kopierenden Fotos befinden
(Speicherkarte oder USB-Stick). Drücken Sie auf „Enter“.
3. Wählen Sie mit den Tasten „Links/Rechts“ den
Fotomodus und drücken Sie auf „Enter“. Die Diashow
startet.
4. Drücken Sie auf die „Exit“-Taste der Fernbedienung, um
zu den Miniaturbildern zu gelangen.
5. Drücken Sie die Taste „Copy/Del“. Auf dem Bildschirm
erscheint „Dateien kopieren?“. (Auswahl oder alles). Wählen Sie und drücken Sie auf „Enter“.
Die Miniaturbilder erscheinen wieder, mit einem Markierungsfeld in der oberen linken Ecke jedes
Bildes. Wählen Sie die zu kopierenden Fotos mit den Tasten „Links/Rechts“ der Fernbedienung
aus, indem Sie für jedes ausgewählte Foto „Enter“ drücken. (Falls Sie „Alles kopieren“ gewählt
haben, werden alle Miniaturbilder markiert.)
Drücken Sie die Taste „Copy/Del“. Es erscheint eine Bestätigungsnachricht
Drücken Sie „Enter“, um Ihre Auswahl zu bestätigen
Auf dem Bildschirm erscheint eine Dialogbox, die Sie fragt, ob Sie Ihre Bilder skalieren möchten.
Wählen Sie die gewünschte Option mit den Tasten „Hoch/Runter“ der Fernbedienung aus und
„Bestätigen“ Sie. Drücken Sie auf „Enter“. Ihre Fotos werden nun in den internen Speicher kopiert
und auf die Auflösung des Bilderrahmens skaliert.
5. Löschen von Fotos
Sie können Fotos löschen, die sich im internen Speicher Ihres
Bilderrahmens befinden.
- Löschen Ihrer Fotos über den Dateimanager.
Falls Sie diese Methode anwenden, können Sie die Dateien nur
eine nach der anderen löschen.
1. Drücken Sie die „Exit“-Taste Ihrer Fernbedienung so oft, bis die Datenträger-Auswahl auf dem
Bildschirm erscheint.
8
Dokument ohne vertraglichen Charakter. Änderungen aufgrund von Druckfehlern bleiben vorbehalten (Mktg1011) COPYRIGHT SOPEG
2011
Hersteller behält sich das Recht vor, die Produktmerkmale ohne vorherige Benachrichtigung zu ändern.
Page 62

DEUTSCH
2. Wählen Sie mit den Tasten „Links/Rechts“ der Fernbedienung das Symbol „Dateien“ aus und
drücken Sie auf „Enter“.
3. Wählen Sie das Foto mit den Tasten „Hoch/Runter“ der Fernbedienung aus und drücken Sie
auf die Taste „Copy/Del“. Auf dem Bildschirm erscheint „Datei löschen? –Ja/Nein“. Wählen
Sie die gewünschte Option und drücken Sie auf „Enter“. Ihre Datei wird gelöscht.
Sie können auch einen Ihrer persönlichen Ordner in einem der vordefinierten Verzeichnisse löschen.
- Löschen Ihrer Fotos über den Miniatur-Modus.
Mit dieser Methode können Sie eine Auswahl oder alle Fotos
aus dem internen Speicher löschen.
1. Drücken Sie die „Exit“-Taste Ihrer Fernbedienung so
oft, bis die Datenträger-Auswahl auf dem Bildschirm
erscheint.
2. Wählen Sie mit den Tasten „Links/Rechts“ der
Fernbedienung den internen Speicher. Drücken Sie auf
„Enter“.
3. Wählen Sie mit den Tasten „Links/Rechts“ den Fotomodus und drücken Sie auf „Enter“. Die
Diashow startet.
4. Drücken Sie auf die „Exit“-Taste der Fernbedienung, um zu den Miniaturbildern zu gelangen.
5. Drücken Sie die Taste „Copy/Del“. Auf dem Bildschirm erscheint „Löschen?“. (Auswahl oder
alles). Wählen Sie und drücken Sie auf „Enter“.
6. Die Miniaturbilder erscheinen wieder, mit einem
Markierungsfeld in der oberen linken Ecke jedes
Bildes. Wählen Sie die zu löschenden Fotos anhand
der Tasten „Links/Rechts“ der Fernbedienung aus,
indem Sie für jedes ausgewählte Foto „Enter“
drücken. (Falls Sie die Option „Alles löschen“ gewählt
haben, werden alle Miniaturbilder markiert)
7. Drücken Sie auf die Taste „Copy/Del“ und anschließend auf „Enter“.
8. Auf dem Bildschirm erscheint „Löschen?“.
9. Wählen Sie mit den Tasten „Hoch/Runter“ der Fernbedienung die gewünschte Option. Drücken
Sie auf „Enter“. Ihre Fotos werden nun aus dem internen Speicher gelöscht.
9
Dokument ohne vertraglichen Charakter. Änderungen aufgrund von Druckfehlern bleiben vorbehalten (Mktg1011) COPYRIGHT SOPEG
2011
Hersteller behält sich das Recht vor, die Produktmerkmale ohne vorherige Benachrichtigung zu ändern.
Page 63

DEUTSCH
III. Auswahl des zu lesenden Dateityps
1. Interner Speicher/Mobiler Datenträger
Wenn kein Datenträger eingeschoben ist, startet beim Einschalten des
Rahmens automatisch die Diashow des internen Speichers.
Falls sich beim Einschalten eine Speicherkarte oder ein USB-Speicher
im Rahmen befindet, wird der Inhalt der Karte bzw. des USB-Speichers
abgespielt.
In diesem Fall können Sie wie folgt von der Karte/dem USB-Speicher
zum internen Speicher wechseln:
Drücken Sie die „Exit“-Taste der Fernbedienung so häufig, bis die Datenträger-Auswahl auf dem
Bildschirm erscheint.
Wählen Sie mithilfe der Tasten „Links/Rechts“ der Fernbedienung den zu lesenden Datenträger aus
und drücken Sie die Taste „Slideshow“ Ihrer Fernbedienung. Die Diashow startet.
2. Auswahl eines Ordners/Multimedia-Modus
Mit dem exklusiven Multimedia-Modus des DPF 10934 können Sie den gesamten Inhalt eines
Ordners abspielen, der Fotos, Video und Musik enthalten kann. Die Dateien werden in der Reihenfolge
abgespielt, in der sie im Ordner gespeichert sind.
Sie können einen der im internen Speicher bereits vorhandenen Ordner oder einen Ihrer persönlichen,
entweder auf Ihrem mobilen Datenträger oder im internen Speicher im ausgewählten vordefinierten
Verzeichnis befindlichen Ordner abspielen.
Drücken Sie dafür so häufig die „Exit“-Taste, bis Sie zum Hauptmenü gelangen. Wählen Sie mit den
Tasten „Links/Rechts“ das Symbol „Dateien“ aus. Falls Sie einen vorprogrammierten Ordner
abspielen möchten, wählen Sie ihn mit den Tasten „Hoch/Runter“ aus und drücken Sie zwei Mal
„Enter“. Die Diashow dieses Ordners startet.
Wenn Sie einen Ihrer eigenen Ordner spielen wollen, wählen Sie zunächst den Ort (USB-Speicher oder
Speicherkarte), wählen Sie dann den gewünschten Ordner. Befolgen Sie dann die oben genannten
Schritte, um eine Diashow zu starten.
Dokument ohne vertraglichen Charakter. Änderungen aufgrund von Druckfehlern bleiben vorbehalten (Mktg1011) COPYRIGHT SOPEG
2011
Hersteller behält sich das Recht vor, die Produktmerkmale ohne vorherige Benachrichtigung zu ändern.
10
Page 64

DEUTSCH
3. Fotos
- Drücken Sie die „Exit“-Taste so oft, bis Sie zum
Hauptbildschirm gelangen.
- Wählen Sie mit den Richtungstasten „Links/Rechts“ der
Fernbedienung das Symbol „Foto“.
- Drücken Sie „Enter“ mehrfach, um die Wiedergabemodi auszuwählen:
Diashow
Diashow+Musik
Einzelfoto
4. Videos
- Drücken Sie die „Exit“-Taste so oft, bis Sie zum
Hauptbildschirm gelangen.
- Wählen Sie mit den Richtungstasten „Links/Rechts“ der
Fernbedienung das Symbol „Video“.
- Drücken Sie „Enter“: das Video wird abgespielt.
- Wählen Sie mit den „Links/Rechts“ Tasten /(Wiedergabe/Pause) auf dem Bildschirm und
drücken Sie „Enter“.
- Wählen Sie mit den „Links/Rechts“ Tasten / (Vorheriger/Nächster) auf dem Bildschirm und
drücken Sie „Enter“.
- Wählen Sie mit den „Links/Rechts“ Tasten / (Schneller Rücklauf/Vorlauf) auf dem
Bildschirm und drücken Sie „Enter”.
- Drücken Sie / auf der Fernbedienung, um die Lautstärke
einzustellen.
- Drücken Sie „VIDEO“ auf der Fernbedienung, um ebenfalls
zum Videomenü zu gelangen.
11
Dokument ohne vertraglichen Charakter. Änderungen aufgrund von Druckfehlern bleiben vorbehalten (Mktg1011) COPYRIGHT SOPEG
2011
Hersteller behält sich das Recht vor, die Produktmerkmale ohne vorherige Benachrichtigung zu ändern.
Page 65

DEUTSCH
5. Musik
- Drücken Sie die „Exit“-Taste so oft, bis Sie zum
Hauptbildschirm gelangen.
- Wählen Sie mit den Richtungstasten „Links/Rechts“ der
Fernbedienung das Symbol „Musik“.
- Drücken Sie „Enter“: die Musik wird abgespielt.
- Wählen Sie mit den „Links/Rechts“ Tasten
/(Wiedergabe/Pause) auf dem Bildschirm und drücken
Sie „Enter“.
- Wählen Sie mit den „Links/Rechts“ Tasten /
(Vorheriger/Nächster) auf dem Bildschirm und drücken Sie
„Enter“.
- Wählen Sie mit den „Links/Rechts“ Tasten /
(Schneller Rücklauf/Vorlauf) auf dem Bildschirm und drücken
Sie „Enter“.
- Wählen Sie mit den „Links/Rechts“ Tasten (Lautstärke)
auf dem Bildschirm und drücken Sie „Enter“ zum Verringern
der Lautstärke.
- Wählen Sie mit den „Links/Rechts“ Tasten (Lautstärke)
auf dem Bildschirm und drücken Sie „Enter“ zum Erhöhen der Lautstärke.
- Drücken Sie „Exit“ auf der Fernbedienung, um zu den vorherigen Einstellungen zu gelangen.
- Drücken Sie auch / auf der Fernbedienung, um die Lautstärke einzustellen.
- Drücken Sie „MUSIC“ auf der Fernbedienung, um ebenfalls zum Videomenü zu gelangen.
12
Dokument ohne vertraglichen Charakter. Änderungen aufgrund von Druckfehlern bleiben vorbehalten (Mktg1011) COPYRIGHT SOPEG
2011
Hersteller behält sich das Recht vor, die Produktmerkmale ohne vorherige Benachrichtigung zu ändern.
Page 66

DEUTSCH
IV. Einstellungen
Wenn Sie sich auf dem Hauptbildschirm befinden, wählen Sie das
Symbol „Einst.“ mit den Tasten „Links/Rechts“ und „Hoch/Runter“
Ihrer Fernbedienung, um zu den verschiedenen
Einstellungsmöglichkeiten für Ihren Bilderrahmen zu gelangen.
Falls Ihre Fotos abgespielt werden, drücken Sie einfach auf die
„Setup“-Taste Ihrer Fernbedienung, um auf die Einstellungsmenüs
zuzugreifen.
Wenn Sie sich in den Einstellungsmenüs befinden, ermöglichen die „Hoch/Runter“-Tasten der
Fernbedienung es Ihnen, die einzustellenden Parameter auszuwählen. Mit den Tasten „Links/Rechts“
können Sie den ausgewählten Parameter dann entsprechend einstellen.
1. Fotoeinstellungen
Wählen Sie „Fotoeinstellungen“ mit den Tasten „Hoch/Runter“ auf der Fernbedienung, drücken Sie
„Enter“. Die folgende Anzeige erscheint:
Sie können nun Einstellungen mit den Richtungstasten auf der Fernbedienung ändern.
- Anzeigemodus
Wählen Sie „Anzeigemodus“ mit den Tasten „Hoch/Runter“ auf der Fernbedienung und drücken Sie
„Enter“, wählen Sie mit den Tasten „Hoch/Runter“:
Diashow: Anzeige der Bilder nacheinander.
Miniaturbild: Anzeige der Bilder als Miniaturbild. (Hinweis: Die Bilder werden in Miniatur
angezeigt. (Hinweis: Ist Ihr Bilderrahmen in diesem Modus, können Sie Diashow,
Diashow+Musik oder Einzeln durch mehrfaches Drücken von „Enter“ aufrufen.)
Single: Ein einzelnes Bild wird angezeigt.
- Bildformat
Wählen Sie „Bildformat“ mit den Tasten „Hoch/Runter“ auf der Fernbedienung und drücken Sie
„Enter“, wählen Sie mit den Tasten „Hoch/Runter“:
Bildschirm anpassen: Das Bild wird in seinem eigenen Format angezeigt.
Beschneiden: Das Bild ist zentriert und geschnitten, um den Bildschirm auszufüllen.
Vollbild: Das Bild wurde geändert, um den gesamten Bildschirm zu füllen.
13
Dokument ohne vertraglichen Charakter. Änderungen aufgrund von Druckfehlern bleiben vorbehalten (Mktg1011) COPYRIGHT SOPEG
2011
Hersteller behält sich das Recht vor, die Produktmerkmale ohne vorherige Benachrichtigung zu ändern.
Page 67

DEUTSCH
- Diashowintervall
Wählen Sie „Diashow Intervall“ mit den Tasten „Hoch/Runter“ auf der Fernbedienung, drücken Sie
„Enter“, wählen Sie mit den Tasten „Hoch/Runter“:
5 Sek.
15 Sek.
30 Sek.
60 Sek.
5 Min.
15 Min.
- Diashow Bildübergang
Wählen Sie „Diashow Bildübergang“ mit den Tasten „Hoch/Runter“ auf der Fernbedienung, drücken
Sie „Enter“, wählen Sie mit den Tasten „Hoch/Runter“ einen der folgenden Effekte:
Zufall
Nichts
Verblassen
Schlange
Partition
Löschen
Jalousie
3D
Grid
Rect.
Schließen
- Diashow Wiederholung
Wählen Sie „Diashow Wiederholung“ mit den Tasten „Hoch/Runter“ auf der Fernbedienung, drücken
Sie „Enter“, wählen Sie mit den Tasten „Hoch/Runter“:
Wiederholung: Die Diashow wiederholt sich von vorne.
EInmal: Die Diashow wird nur ein Mal abgespielt.
Zufall: Die Bilder werden zufällig abgespielt.
- Magisches Fenster
Wählen Sie „Magisches Fenster“ mit den Tasten „Hoch/Runter“ auf der Fernbedienung, drücken Sie
„Enter“, um „Ein“ oder „Aus“ zu wählen.
14
Dokument ohne vertraglichen Charakter. Änderungen aufgrund von Druckfehlern bleiben vorbehalten (Mktg1011) COPYRIGHT SOPEG
2011
Hersteller behält sich das Recht vor, die Produktmerkmale ohne vorherige Benachrichtigung zu ändern.
Page 68

DEUTSCH
- Uhr
Wählen Sie „Uhr“ mit den Tasten „Hoch/Runter“ auf der Fernbedienung, drücken Sie „Enter“, um
„Ein“ oder „Aus“ zu wählen.
- Größe anpassen
Wählen Sie „Größe anpassen“ mit den Tasten „Hoch/Runter“ auf der Fernbedienung, drücken Sie
„Enter“, um „Ein“ oder „Aus“ zu wählen.
- Beim Kopieren ausschneiden
Wählen Sie „Beim Kopieren ausschneiden“ mit den Tasten „Hoch/Runter“ auf der Fernbedienung,
drücken Sie „Enter“, um „Ein“ oder „Aus“ zu wählen.
- Beim Kopieren Tipp anzeigen
Wählen Sie „Beim Kopieren Tipp anzeigen“ mit den Tasten „Hoch/Runter“ auf der Fernbedienung,
drücken Sie „Enter“, um „Ein“ oder „Aus“ zu wählen.
2. Musikeinstellungen
Wenn Sie sich im Einstellungsmenü befinden, wählen Sie mit den Tasten „Hoch/Runter“ Ihrer
Fernbedienung die Zeile „Musikeinstellungen“ und drücken Sie auf „Enter“.
Sie können einstellen:
- Wiedergabemodus
Wälen Sie „Wiedergabemodus“ mit den Tasten „Hoch/Runter“ auf der Fernbedienung, drücken Sie
„Enter“, wählen Sie mit den Tasten „Hoch/Runter“:
Wiederholung: Die Titel werden wieder von vorne abgespielt.
Zufall: Die Titel werden zufällig abgespielt.
Einmal: Jeder Titel wird nur ein Mal abgespielt.
1 Wiederholen: Jeder Titel wird zwei Mal abgespielt.
- Musikeffekt
Ihr TELEFUNKEN Bilderrahmen verfügt über einen Equalizer, um den Ton an die abgespielte Musik
anzupassen.
Wählen Sie „Musikeffekt“ mit den Tasten „Hoch/Runter“ auf der Fernbedienung, drücken Sie „Enter“,
wählen Sie mit den Tasten „Hoch/Runter“:
15
Dokument ohne vertraglichen Charakter. Änderungen aufgrund von Druckfehlern bleiben vorbehalten (Mktg1011) COPYRIGHT SOPEG
2011
Hersteller behält sich das Recht vor, die Produktmerkmale ohne vorherige Benachrichtigung zu ändern.
Page 69

DEUTSCH
Jazz
DBB
Normal
Rock
Pop
Klassik
Sanft
- Spektrum anzeigen
Während der Wiedergabe einer Musikdatei können Sie den Equalizer auf dem Bildschirm Ihres
TELEFUNKEN Bilderrahmens anzeigen.
Wählen Sie „Spektrum anzeigen“ mit den Tasten „Hoch/Runter“ auf der Fernbedienung, drücken Sie
„Enter“, um „Ein“ oder „Aus“ zu wählen.
- Automatische Wiedergabe
Ist diese Funktion aktiviert, spielt der Bilderrahmen Audiodateien automatisch ab, sobald der
Audiomodus gewählt wurde.
Wählen Sie „AutoPlay“ mit den Tasten „Hoch/Runter“ auf der Fernbedienung, drücken Sie „Enter“, um
„Ein“ oder „Aus“ zu wählen.
3. Videoeinstellungen
Wählen Sie im Einstellungsmenü mit den Tasten „Hoch/Runter“ Ihrer Fernbedienung die Zeile
„Videoeinstellungen“ und drücken Sie auf „Enter“.
- Anzeigemodus
Wählen Sie „Anzeigemodus“ mit den Tasten „Hoch/Runter“ auf der Fernbedienung, drücken Sie
„Enter“, wählen Sie mit den Tasten „Hoch/Runter“:
Vollbild: Ihr Video wird im 4:3-Format angezeigt.
Originalgröße: Ihr Video wird in seiner Originalgröße angezeigt.
- Wiedergabemodus
Wählen Sie „Wiedergabemodus“ mit den Tasten „Hoch/Runter“ auf der Fernbedienung, drücken Sie
„Enter“, wählen Sie mit den Tasten „Hoch/Runter“:
Wiederholung: Ihr Video wird wieder von vorne abgespielt.
16
Dokument ohne vertraglichen Charakter. Änderungen aufgrund von Druckfehlern bleiben vorbehalten (Mktg1011) COPYRIGHT SOPEG
2011
Hersteller behält sich das Recht vor, die Produktmerkmale ohne vorherige Benachrichtigung zu ändern.
Page 70

DEUTSCH
Einmal: Ihr Video wird ein Mal abgespielt.
- Automatische Wiedergabe
Ist diese Funktion aktiviert, spielt der Bilderrahmen Videodateien automatisch ab, sobald der
Videomodus gewählt wurde.
Wählen Sie „AutoPlay“ mit den Tasten „Hoch/Runter“ auf der Fernbedienung, drücken Sie „Enter“, um
„Ein“ oder „Aus“ zu wählen.
4. Kalendereinstellungen
Wählen Sie „Kalendereinstellung“ im Einstellungsmenü mit den Tasten „Hoch/Runter“ auf der
Fernbedienung, drücken Sie „Enter“.
Sie können mit den Richtungstasten oder „Enter“ auf der Fernbedienung folgendes einstellen:
- Den Anzeigemodus des Kalenders
Wählen Sie „Anzeigemodus“ mit den Tasten „Hoch/Runter“ auf der Fernbedienung, drücken Sie
„Enter“, wählen Sie mit den Tasten „Hoch/Runter“:
Monatlicher Kalender
Kalender
Analoguhr
- Datumsformat
Wählen Sie „Datumformat“ mit den Tasten „Hoch/Runter“ auf der Fernbedienung, drücken Sie „Enter“,
wählen Sie mit den Tasten „Hoch/Runter“:
MM/TT/JJJJ
TT/MM/JJJJ
JJJJ/MM/TT
- Datum
Wählen Sie „Datum“ mit den Tasten „Hoch/Runter“ auf der Fernbedienung, drücken Sie „Enter“:
Wählen Sie mit „Hoch/Runter“ Monat, Tag, Jahr.
Stellen Sie mit „Links/Rechts“ Monat, Tag, Jahr ein.
17
Dokument ohne vertraglichen Charakter. Änderungen aufgrund von Druckfehlern bleiben vorbehalten (Mktg1011) COPYRIGHT SOPEG
2011
Hersteller behält sich das Recht vor, die Produktmerkmale ohne vorherige Benachrichtigung zu ändern.
Page 71

DEUTSCH
- Zeitformat (12- oder 24-Stunden)
Wählen Sie „Zeitformat“ mit den Tasten „Hoch/Runter“ auf der Fernbedienung, drücken Sie „Enter“,
drücken Sie nun „Hoch/Runter“, um das 12- oder 24-Stunden-Format zu wählen, drücken Sie
„Enter“ zum Bestätigen.
- Uhrzeit
Wählen Sie „Uhrzeit“ mit den Tasten „Hoch/Runter“ auf der Fernbedienung, drücken Sie „Enter“:
Wählen Sie mit „Hoch/Runter“ Stunde, Minute, AM, PM.
Stellen Sie mit „Links/Rechts“ Stunde, Minute, AM, PM ein.
- Alarmstatus
Wählen Sie „Alarmstatus“ mit den Tasten „Hoch/Runter“ auf der Fernbedienung, drücken Sie „Enter“,
um „Ein“ oder „Aus“ zu wählen.
- Alarmzeit
Zum Einstellen der Alarmzeit wählen Sie „Alarmzeit“ mit den Tasten „Hoch/Runter“ auf der
Fernbedienung, drücken Sie „Enter“:
Wählen Sie mit „Hoch/Runter“ Stunde, Minute, AM, PM.
Stellen Sie mit „Links/Rechts“ Stunde, Minute, AM, PM ein.
- Alarmhäufigkeit
Wählen Sie „Alarmhäufigkeit“ mit den Tasten „Hoch/Runter“ auf der Fernbedienung, drücken Sie
„Enter“, wählen Sie mit den Tasten „Hoch/Runter“:
Einmal
Täglich
Mo bis Fr
Wochenende
18
Dokument ohne vertraglichen Charakter. Änderungen aufgrund von Druckfehlern bleiben vorbehalten (Mktg1011) COPYRIGHT SOPEG
2011
Hersteller behält sich das Recht vor, die Produktmerkmale ohne vorherige Benachrichtigung zu ändern.
Page 72

DEUTSCH
5. Systemeinstellung
Dieses Menü ermöglicht es Ihnen, die Funktionsparameter Ihres
Bilderrahmens einzustellen.
- Aktivierung/Deaktivierung des Helligkeitssensors
Wählen Sie „Lichtsensor“ mit den Tasten „Hoch/Runter“ auf der
Fernbedienung, drücken Sie „Enter“, um „Ein“ oder „Aus“ zu wählen.
- Sprache
Wählen Sie „Sprache“ mit den Tasten „Hoch/Runter“ auf der Fernbedienung, drücken Sie „Enter“,
wählen Sie mit den Tasten „Hoch/Runter“:
Englisch
Französisch
Deutsch
Italienisch
Niederländisch
Portugiesisch
Spanisch
- Helligkeit
Wählen Sie „Helligkeit“ mit den Tasten „Hoch/Runter“ auf der Fernbedienung, drücken Sie „Enter“,
drücken Sie nun „Links/Rechts“, um die Helligkeitsstufe einzustellen (1-16).
- Kontrast
Wählen Sie „Kontrast“ mit den Tasten „Hoch/Runter“ auf der Fernbedienung, drücken Sie „Enter“,
drücken Sie nun „Links/Rechts“, um die Kontraststufe einzustellen (1-16).
- Farbsättigung
Wählen Sie „Farbsättigung“ mit den Tasten „Hoch/Runter“ auf der Fernbedienung, drücken Sie
„Enter“, drücken Sie nun „Links/Rechts“, um die Farbsättigungsstufe einzustellen (1-16).
- Tönung
Wählen Sie „Tönung“ mit den Tasten „Hoch/Runter“ auf der Fernbedienung, drücken Sie „Enter“,
drücken Sie nun „Links/Rechts“, um die Tönungsstufe einzustellen (1-100).
19
Dokument ohne vertraglichen Charakter. Änderungen aufgrund von Druckfehlern bleiben vorbehalten (Mktg1011) COPYRIGHT SOPEG
2011
Hersteller behält sich das Recht vor, die Produktmerkmale ohne vorherige Benachrichtigung zu ändern.
Page 73

DEUTSCH
- Einschalten
Wählen Sie „Einschalten“ mit den Tasten „Hoch/Runter“ auf der Fernbedienung, drücken Sie „Enter“,
um „Ein“ oder „Aus“ zu wählen.
- Automatische Einschaltzeit
Wählen Sie „Auto Einschaltzeit“ mit den Tasten „Hoch/Runter“ auf der Fernbedienung, drücken Sie
„Enter“:
Wählen Sie mit „Hoch/Runter“ Stunde, Minute, AM, PM.
Stellen Sie mit „Links/Rechts“ Stunde, Minute, AM, PM ein.
- Ausschalten
Wählen Sie „Ausschalten“ mit den Tasten „Hoch/Runter“ auf der Fernbedienung, drücken Sie „Enter“,
um „Ein“ oder „Aus“ zu wählen.
- Automatische Ausschaltzeit
Wählen Sie „Auto Ausschaltzeit“ mit den Tasten „Hoch/Runter“ auf der Fernbedienung, drücken Sie
„Enter“:
Wählen Sie mit „Hoch/Runter“ Stunde, Minute, AM, PM.
Stellen Sie mit „Links/Rechts“ Stunde, Minute, AM, PM ein.
- Automatische Einschaltung Häufigkeit
Wählen Sie „Auto Einschaltung Häufigkeit“ mit den Tasten „Hoch/Runter“ auf der Fernbedienung,
drücken Sie „Enter“, wählen Sie mit den Tasten „Hoch/Runter“:
Einmal
Täglich
Mo bis Fr
Wochenende
- Zurücksetzen auf Standardeinstellungen
Sollte der Bilderrahmen inkorrekt bedient worden sein, kann es hilfreich sein, diesen auf die
Standardeinstellungen zurückzusetzen. Wählen Sie „Standardeinstellung“ mit den Tasten
„Hoch/Runter“ auf der Fernbedienung, drücken Sie „Enter“, wählen Sie nun mit
„Hoch/Runter“ „Ein“ oder „Aus“.
Hinweis: Nach dem Zurücksetzen erscheint die Sprachauswahl beim nächsten Einschalten, wie beim
ersten Gebrauch.
20
Dokument ohne vertraglichen Charakter. Änderungen aufgrund von Druckfehlern bleiben vorbehalten (Mktg1011) COPYRIGHT SOPEG
2011
Hersteller behält sich das Recht vor, die Produktmerkmale ohne vorherige Benachrichtigung zu ändern.
Page 74

DEUTSCH
- Versionsnummer der internen Software (nur zu Ihrer Information).
V. Verbindung mit einem Computer
Es ist möglich, Dateien von einem PC auf den Bilderrahmen zu übertragen. Schließen Sie hierfür Ihren
Bilderrahmen mit einem USB-Kabel (Mini-USB-Stecker für den Rahmen, Standard-USB-Stecker für den
Computer) an den Computer an und schalten Sie den Rahmen ein: auf dem Bildschirm des Rahmens
erscheint „PC-Verbindung …“. Zurück zum normalen Betrieb nach dem Trennen der Verbindung
Auf Ihrem Computer erscheint die folgende Dialogbox:
Klicken Sie auf „Ordner öffnen und Dateien anzeigen“, um den Inhalt des internen Speichers
aufzurufen.
Der folgende Bildschirm erscheint:
21
Dokument ohne vertraglichen Charakter. Änderungen aufgrund von Druckfehlern bleiben vorbehalten (Mktg1011) COPYRIGHT SOPEG
2011
Hersteller behält sich das Recht vor, die Produktmerkmale ohne vorherige Benachrichtigung zu ändern.
Page 75

DEUTSCH
Öffnen Sie das Verzeichnis, in dem die Dateien gespeichert sind, die Sie auf den Rahmen
übertragen wollen, und übertragen Sie sie durch „Kopieren und Einfügen“ oder „Ziehen und Ablegen“
in den gewünschte Ordner.
Achtung! Die so übertragenen Fotos werden nicht skaliert.
- Ziehen Sie das USB-Kabel heraus: Ihr Bilderrahmen nimmt seinen Betrieb automatisch wieder
auf.
Dokument ohne vertraglichen Charakter. Änderungen aufgrund von Druckfehlern bleiben vorbehalten (Mktg1011) COPYRIGHT SOPEG
2011
Hersteller behält sich das Recht vor, die Produktmerkmale ohne vorherige Benachrichtigung zu ändern.
22
Page 76

DEUTSCH
VI. Sicherheitshinweise
Behandeln Sie den digitalen Bilderrahmen mit Vorsicht und vermeiden Sie es, den Bildschirm zu
berühren, denn Fingerabdrücke lassen sich nur schwer entfernen.
Stellen Sie den digitalen Bilderrahmen stets auf einer ebenen und stabilen Fläche auf, um Schäden
durch Herunterfallen zu vermeiden.
Setzen Sie Ihren Bilderrahmen nicht der Sonne oder hohen Temperaturen aus, da er hierdurch
beschädigt oder seine Gebrauchsdauer verringert werden könnte. Stellen Sie ihn nicht in der Nähe von
Hitzequellen wie Heizkörper oder Zusatzheizgeräte auf. Richten Sie ihn nicht gegen das Sonnenlicht, um
Reflektionen zu vermeiden.
Vermeiden Sie es, den Bilderrahmen Regen, Wasser oder Feuchtigkeit auszusetzen. Stellen Sie ihn
nicht in ein Spül- oder anderes Becken, in dem er in Kontakt mit Wasser kommen könnte.
Stellen Sie niemals schwere oder scharfe Objekte auf den Bilderrahmen, den Bildschirm oder sein
Stromkabel.
Achten Sie darauf, den digitalen Bilderrahmen nicht an eine Steckdose oder an ein Stromkabel mit zu
hoher Spannung anzuschließen. Dies könnte zu Überhitzung, Feuer oder einem Elektroschock führen.
Achten Sie auf den Verlauf des Netzkabels; es darf nicht daraufgetreten werden und es darf nicht in
Kontakt mit anderen Gegenständen kommen. Verlegen Sie das Kabel nicht unter einem Teppich.
Überprüfen Sie regelmäßig den Zustand des Kabels, um Schäden zu vermeiden. Sollte das Kabel
beschädigt sein, ziehen Sie es aus der Steckdose und tauschen Sie es aus.
Belüftung
Achten Sie auf genügend Abstand zwischen dem Bilderrahmen und der Wand, um für eine
ausreichende Belüftung zu sorgen.
Stellen Sie den digitalen Bilderrahmen nicht auf ein Bett oder ein Sofa, um Überhitzung zu vermeiden.
Achtung!
Nehmen Sie in keinem Fall die Kunststoffabdeckung auf der Rückseite des Bilderrahmens ab. Der
digitale Bilderrahmen enthält Stromkreise, an denen Sie sich verletzen können, falls Sie sie anfassen.
Versuchen Sie nicht, Ihren digitalen Bilderrahmen selbst zu reparieren.
23
Dokument ohne vertraglichen Charakter. Änderungen aufgrund von Druckfehlern bleiben vorbehalten (Mktg1011) COPYRIGHT SOPEG
2011
Hersteller behält sich das Recht vor, die Produktmerkmale ohne vorherige Benachrichtigung zu ändern.
Page 77

DEUTSCH
VII. Garantie
Die Garantie deckt keine Schäden ab, die durch einen Reparaturversuch durch Sie (oder eine andere
nicht autorisierte Person) entstanden sind.
Sollte der Bilderrahmen Rauch, ein ungewöhnliches Geräusch oder einen ungewöhnlichen Geruch
abgeben, schalten Sie ihn unverzüglich aus und ziehen Sie das Kabel aus der Steckdose. Kontaktieren
Sie Ihren Händler.
Falls Sie den digitalen Bilderrahmen längere Zeit nicht benutzen, achten Sie darauf, das Stromkabel aus
der Steckdose herauszuziehen.
Die Garantie gilt für den digitalen Bilderrahmen, nicht jedoch für die Zubehörteile. Als Zubehörteile
gelten:
Das Netzteil,
Die Fernbedienung (je nach Modell).
Diese Zubehörteile können jedoch über unseren technischen Dienst bestellt werden:
Per E-Mail:
traum
Die Garantiedauer für diesen digitalen Bilderrahmen beträgt 12 Monate. Der Garantiezeitraum beginnt
mit dem Kaufdatum.
Die Garantie muss durch die Vorlage der Originalrechnung oder des Kassenbelegs bewiesen werden,
auf denen das Datum und die Modellnummer angegeben sind.
Deckung
Ein defekter digitaler Bilderrahmen muss komplett und zusammen mit einer Erläuterung an Ihren
Händler zurückgebracht oder -gesendet werden.
Falls der digitale Bilderrahmen während des Garantiezeitraums einen Defekt aufweist, repariert der
anerkannte Kundendienst alle defekten Elemente oder Fabrikationsfehler. Allein der Kundendienst
entscheidet darüber, ob der Bilderrahmen repariert oder ganz oder teilweise ausgetauscht wird.
Das ursprüngliche Kaufdatum bestimmt den Beginn des Garantiezeitraums.
Der Garantiezeitraum verlängert sich im Falle einer Reparatur oder eines Austauschs des Bilderrahmens
durch unseren Kundendienst nicht.
24
Dokument ohne vertraglichen Charakter. Änderungen aufgrund von Druckfehlern bleiben vorbehalten (Mktg1011) COPYRIGHT SOPEG
2011
Hersteller behält sich das Recht vor, die Produktmerkmale ohne vorherige Benachrichtigung zu ändern.
Page 78

DEUTSCH
Ausschluss
Schäden oder Defekte, die durch eine unsachgemäße Benutzung oder Handhabung des digitalen
Bilderrahmens oder durch die Verwendung von nicht originalen Zubehörteilen oder von Zubehörteilen,
die von der vorliegenden Gebrauchsanweisung nicht empfohlen werden, entstehen, sind von der
Garantie ausgeschlossen.
Die Garantie deckt keine Schäden ab, die durch äußere Einflüsse wie Blitz, Wasser oder Feuer
verursacht werden oder während eines Transports entstehen.
Es besteht kein Garantieanspruch, sollte die Seriennummer des digitalen Bilderrahmens abgeändert,
entfernt oder unlesbar gemacht worden sein.
Es besteht kein Garantieanspruch, falls der digitale Bilderrahmen durch den Käufer oder durch einen
anderen nicht offiziell anerkannten und qualifizierten Service repariert oder verändert wurde.
Der Hersteller gibt keine Garantie für die in dieser Gebrauchsanweisung beschriebenen technischen
Daten. Das Gerät und die in dieser Gebrauchsanweisung beschriebenen Zubehörteile können ohne
Vorankündigung geändert werden. Aus diesem Grund behält sich der Hersteller das Recht vor, die
Bestandteile, Optionen, Merkmale und zugehörigen Dokumente ohne Vorankündigung zu ändern.
Konformität mit den geltenden Vorschriften:
Dieser digitale Bilderrahmen entspricht den geltenden CE-Normen und ist mit dem RoHS-Standard
kompatibel.
Recycling von elektrischen und elektronischen Geräten am Ende ihrer Lebensdauer.
Gebrauchte elektrische und elektronische Geräte dürfen nicht im normalen Haushaltsmüll entsorgt
werden. Dieses Symbol auf dem Produkt oder seiner Verpackung erinnert Sie daran.
Einige Bestandteile dieses Produkts können recycelt werden, wenn Sie es zu einem entsprechenden
Recyclingzentrum bringen. Durch die Wiederverwertung der Teile und Rohstoffe gebrauchter Geräte
leisten Sie einen wichtigen Beitrag zum Umweltschutz.
Für weitere Informationen zu den Sammelstellen für gebrauchte Geräte können Sie sich an Ihre
Stadtverwaltung, an den Altschrottentsorgungsdienst oder an das Geschäft, in dem Sie das Produkt
gekauft haben, wenden.
25
Dokument ohne vertraglichen Charakter. Änderungen aufgrund von Druckfehlern bleiben vorbehalten (Mktg1011) COPYRIGHT SOPEG
2011
Hersteller behält sich das Recht vor, die Produktmerkmale ohne vorherige Benachrichtigung zu ändern.
Page 79

DEUTSCH
Merkmale
DPF 10934
Größe
25,6 cm (10,1˝)
Auflösung
1024 x 600
Bildschirmtyp
LED
Bildratio
16/9
Interner Speicher
2 GB
Audio/Video
JA
Kompatible Karten
SD/MMC,SDHC, MS, XD,USB Stick
Abgespielte Dateien
JPEG/WAV, MP3/MPEG1,4, MOTION JPEG
Automatische Skalierung
JA
Automatisches Drehen
JA
Eingangsspannung
100-240 V AC 50/60 Hz
Ausgangsspannung
5 V DC, 2 Ah
Stromverbrauch im Standby
<1 W
Stromverbrauch im Betrieb
<8 W
Abmessungen
280*176*26 mm
Gewicht
630 g
Systemkompatibilität
Windows XP, Vista, 7, Mac OS 9.0 und folgende
VIII. Technische Merkmale
Dokument ohne vertraglichen Charakter. Änderungen aufgrund von Druckfehlern bleiben vorbehalten (Mktg1011) COPYRIGHT SOPEG
2011
Hersteller behält sich das Recht vor, die Produktmerkmale ohne vorherige Benachrichtigung zu ändern.
26
Page 80

........................................................... 2
............................................................................................. 2
............................................................................................ 3
................................................................................................ 3
............................................................................................................. 4
............................................................................... 4
............................................................................................. 4
............................................................................................. 5
....................................... 5
................................................................... 6
................................................................................................ 8
............................................ 10
...................................................................... 10
...................................................... 10
................................................................................................................... 11
................................................................................................................. 11
................................................................................................................ 12
............................................................................................ 13
Configuración de Fotos ....................................................................................... 13
Configuración de Música ..................................................................................... 15
Configuración de Video ....................................................................................... 16
Configuración de Calendario ............................................................................... 17
.................................................................................. 19
.............................................................. 21
........................................................... 23
.......................................................................................... 24
................................................................ 26
Documento no contractual que puede sufrir modificaciones en caso de errores tipográficos (Mktg1011) COPYRIGHT SOPEG 2011
El fabricante se reserva el derecho a modificar las características del producto sin previo aviso.
1
Page 81

ADVERTENCIA PREVIA:
Al primero encender el marco, éste muestra la animación de demostración. Para salir de ella y acceder
a las funciones del marco, sólo tiene que pulsar el botón Slideshow del mando a distancia, o
sobre el boton «Izquierda» del marco durante 3 segundos.
Le agradecemos la compra de un marco de fotos digital TELEFUNKEN DPF 10934. Antes de utilizar el
aparato, lea las presentes instrucciones de uso, y luego guárdelas para poder consultarlas
posteriormente.
1 marco de fotos digital
1 adaptador de corriente
1 mando a distancia
Documento no contractual que puede sufrir modificaciones en caso de errores tipográficos (Mktg1011) COPYRIGHT SOPEG 2011
El fabricante se reserva el derecho a modificar las características del producto sin previo aviso.
2
Page 82

▲◄▼
►
(COPY/DEL)
(ROTATE)
Documento no contractual que puede sufrir modificaciones en caso de errores tipográficos (Mktg1011) COPYRIGHT SOPEG 2011
3
El fabricante se reserva el derecho a modificar las características del producto sin previo aviso.
Page 83

(SLIDESHOW)
MUSIC
VIDEO
SETUP
Saque el marco y sus accesorios de su embalaje
Retire la lámina de plástico de protección de la pantalla del marco
Tire de la lengüeta de plástico que protege los contactos del mando a distancia
Coloque el marco en el lugar deseado tirando hacia usted de la base ajustable (véase el
esquema más arriba)
Conecte el cable de alimentación al marco en el punto previsto a tal efecto.
Enchufe el marco a una toma de corriente. El marco se pondrá en marcha automáticamente.
La primera vez que enciende el marco, éste muestra la animación de
demostración. Para salir de ella y acceder a las funciones del marco,
sólo tiene que pulsar el botón «Slideshow» del mando a distancia.
Aparecerá la pantalla de selección de idioma.
Una vez seleccionado el idioma, el marco estará listo para su uso. Sólo tiene que insertar una tarjeta o
un lápiz USB para comenzar a reproducir las imágenes.
¡Atención!: La animación de demostración se encuentra en una carpeta llamada «DEMO». Esta
animación se deben eliminar para el beneficio de todos los 2 GB de memoria interna.
Documento no contractual que puede sufrir modificaciones en caso de errores tipográficos (Mktg1011) COPYRIGHT SOPEG 2011
El fabricante se reserva el derecho a modificar las características del producto sin previo aviso.
Seleccione su idioma por medio de los botones de flecha del
mando a distancia y luego pulse «Enter».
4
Page 84

El modo ECO LOGIC asocia 3 elementos esenciales que permiten reducir el consumo de energía más
de un 40% en comparación con un marco estándar:
Una pantalla LED, que consume menos energía a la vez que mejora la calidad de la imagen
Un adaptador de corriente de bajo consumo certificado «Energy Star»
Un sensor de luminosidad
Este sensor, activado por defecto, hace que el marco se apague automáticamente al anochecer y se
encienda al amanecer.
Puede desactivar este sensor de luminosidad en el menú de ajustes del sistema de su marco
¡Atención! Dependiendo del lugar donde se encuentre el marco (en un mueble sobre una balda, por
ejemplo), es posible que la luz no sea suficiente para que el marco se encienda o bien se apagará sin
motivo. Puede volver a encenderlo pulsando el botón de modo de espera situado en la parte superior
derecha del mando a distancia. En tal caso, el sensor se desactivará. Para reactivarlo, sólo tiene que
poner el marco frente a una fuente de luz suficiente durante 5 segundos.
Si el marco está apagado:
Inserte la tarjeta o la llave USB en el punto previsto a tal efecto.
Conecte el marco a la red eléctrica: La presentación de diapositivas lee automáticamente el
contenido de la tarjeta de memoria o la llave USB.
Si el marco está encendido y reproduce las diapositivas de
la memoria interna:
La tarjeta de memoria se detecta automáticamente
Documento no contractual que puede sufrir modificaciones en caso de errores tipográficos (Mktg1011) COPYRIGHT SOPEG 2011
El fabricante se reserva el derecho a modificar las características del producto sin previo aviso.
5
Page 85

Al cabo de unos segundos, aparecerá el mensaje «¿Desea copiar los datos en la memoria
interna?»
Si no realiza ninguna acción durante 15 segundos, se iniciará la presentación de diapositivas
desde la tarjeta pero no se copiarán las imágenes.
Si responde «Sí» a la petición de copia de las imágenes, aparecerá el mensaje «¿Copiar
archivos? » Seleccione «Sí» y pulse «Enter».
Esta función permite adaptar las fotografías a la
definición del marco en el momento de copiarlas,
reduciendo así enormemente su peso. Gracias a este
sistema es posible almacenar más de 10.000 fotografías en la memoria interna.
(IMPORTANTE: sólo se cambiará el tamaño de las copias, las fotografías originales de la tarjeta
no se modificarán).
Si su soporte (carta, llave o memoria interna) contiene música y que usted desea un diaporama
musical, pulse el botón « Enter » del mando a distancia durante el diaporama. La pantalla fijara
entonces «Diapositivas con música».
Si no ha elegido la copia automática al insertar la tarjeta, dispone de 2 métodos para copiar las
imágenes desde la tarjeta de memoria en la memoria interna de
la tarjeta.
Copiar sus fotos a través del administrador de
archivos
Si opta por este método, sólo podrá copiar los archivos de uno
en uno, y no tendrá la posibilidad de ajustar su tamaño a la
resolución del marco.
Documento no contractual que puede sufrir modificaciones en caso de errores tipográficos (Mktg1011) COPYRIGHT SOPEG 2011
El fabricante se reserva el derecho a modificar las características del producto sin previo aviso.
6
Page 86

Pulse el botón «Exit» del mando a distancia tantas veces como sea necesario hasta ver la
pantalla de selección de soportes.
Por medio de los botones «Izquierda/Derecha» del mando a distancia, seleccione el icono
«Archivos» y pulse «Enter».
Seleccione el archivo que desee copiar con ayuda de los
botones «Arriba/Abajo» del mando a distancia y pulse
«Copy/Del». Aparecerá el mensaje siguiente:
«¿Copiar?» Seleccione la opción deseada con los
botones «Izquierda/Derecha» y pulse «Enter».
Elija el directorio de destino de su fotografía con ayuda de
los botones «Arriba/Abajo» y pulse «Enter». Su archivo se copiará.
Si la tarjeta de memoria contiene una o varias carpetas, podrá copiarlas una a una en su totalidad. Se
almacenarán en el directorio que elija de la memoria interna y podrá reproducirlas de forma
independiente entre ellas.
Copiar sus fotos mediante el modo de viñetas
Con este método, puede copiar una selección de fotos teniendo la posibilidad de ajustar su tamaño al
del marco, con el fin de optimizar la capacidad de la memoria
interna.
Pulse el botón «Exit» del mando a distancia tantas veces
como sea necesario hasta ver la pantalla de selección de
soportes.
Seleccione el soporte extraíble en que se encuentran las
fotos para copiar (tarjeta de memoria o llave USB),
mediante los botones «Izquierda/Derecha» del mando a distancia. Pulse «Enter».
Por medio de los botones «Izquierda/Derecha»,
seleccione el modo de foto y pulse «Enter». Se iniciará la
presentación de diapositivas.
Pulse el botón «Exit» del mando a distancia para acceder
a las viñetas.
Documento no contractual que puede sufrir modificaciones en caso de errores tipográficos (Mktg1011) COPYRIGHT SOPEG 2011
El fabricante se reserva el derecho a modificar las características del producto sin previo aviso.
7
Page 87

Pulse el botón «Copy/Del». Aparecerá en la pantalla el mensaje «¿Copiar archivos? »
(Selección o todas). Seleccione y pulse «Enter».
Las miniaturas volverán a aparecer, con una casilla de verificación en la esquina superior izquierda
de cada imagen. Seleccione las fotos que desee copiar mediante los botones «Izquierda/Derecha»
del mando a distancia, y pulse «Enter» después de seleccionar cada foto. Se marcarán entonces las
casillas de las imágenes seleccionadas. (Si ha elegido «copiar todo», se seleccionarán todas las
viñetas.)
Pulse el botón «Copy/Del». Se muestra un mensaje de confirmación.
Pulse «Enter» para confirmar su selección.
Aparecerá en la pantalla un cuadro de diálogo preguntándole si desea cambiar el tamaño de sus
imágenes.
Seleccione la opción deseada mediante los botones «Arriba/Abajo» del mando a distancia y
confírmela seleccionando «Confirmar». Pulse «Enter». Sus fotos se copiarán en la memoria interna
y su tamaño se ajustará a la definición del marco.
Puede suprimir fotos que se encuentren en la memoria interna de su marco.
Suprima sus fotos a través del administrador de archivos
Si opta por este método, sólo podrá suprimir los archivos de uno en uno.
Pulse el botón «Exit» del mando a distancia tantas veces como sea necesario hasta ver la
pantalla de selección de soportes.
Por medio de los botones «Izquierda/Derecha» del
mando a distancia, seleccione el icono «Archivos» y
pulse «Enter ».
Seleccione la foto mediante los botones «Arriba/Abajo»
del mando a distancia, y luego pulse «Copy/Del». En la
pantalla aparecerá el mensaje «¿Suprimir archivo?-
Sí/No». Escoja la opción deseada y pulse «Enter». Su
archivo se suprimirá.
Documento no contractual que puede sufrir modificaciones en caso de errores tipográficos (Mktg1011) COPYRIGHT SOPEG 2011
El fabricante se reserva el derecho a modificar las características del producto sin previo aviso.
8
Page 88

También puede eliminar una de sus carpetas personales ubicadas en uno de los directorios
predefinidos.
Suprima sus fotos mediante el modo de viñetas
Mediante este método, puede suprimir una selección de fotos de la memoria interna o bien todas ellas.
Pulse el botón «Exit» del mando a distancia tantas
veces como sea necesario hasta ver la pantalla de
selección de soportes.
Seleccione la memoria interna mediante los botones
«Izquierda/Derecha» del mando a distancia. Pulse
«Enter».
Por medio de los botones «Izquierda/Derecha»,
seleccione el modo de foto y pulse «Enter». Se iniciará
la presentación de diapositivas.
Pulse el botón «Exit» del mando a distancia para
acceder a las viñetas.
Pulse el botón «Copy/Del». Aparecerá en la pantalla el
mensaje «¿Suprimir? » (Selección o todas).Seleccione
y pulse «Enter».
Las miniaturas aparecerán con una casilla de verificación en la esquina superior izquierda de
cada imagen. Seleccione las fotos que desee borrar mediante los botones «Izquierda/Derecha»
del mando a distancia, y pulse «Enter» después de seleccionar cada foto. (Si ha elegido la
opción «eliminar todo», se seleccionarán todas las viñetas.)
Pulse el botón «Copy/Del», y luego pulse «Enter».
Aparecerá en la pantalla «¿Suprimir?».
Seleccione la opción deseada mediante los botones «Arriba/Abajo» del mando a distancia.
Pulse «Enter». Sus fotos se suprimirán de la memoria interna
Documento no contractual que puede sufrir modificaciones en caso de errores tipográficos (Mktg1011) COPYRIGHT SOPEG 2011
El fabricante se reserva el derecho a modificar las características del producto sin previo aviso.
9
Page 89

Si no se ha insertado ningún soporte, la presentación de diapositivas de
la memoria interna se inicia automáticamente al encender el marco.
Si en el momento del encendido hay insertada una tarjeta de memoria o
un lápiz USB, se reproducirá el contenido de la tarjeta/lápiz USB.
En tal caso, puede alternar entre la tarjeta/lápiz USB y la memoria
interna de la siguiente forma:
Pulse el botón «Exit» del mando a distancia tantas veces como sea necesario hasta ver la pantalla de
selección de soportes.
Por medio de los botones «Izquierda/Derecha» del mando a distancia, seleccione el soporte que desee
reproducir y pulse «Slideshow» en el mando a distancia. Se iniciará la presentación de diapositivas.
El modelo DPF 10934 permite reproducir automáticamente todo el contenido de una carpeta, ya se trate
de fotografías, vídeos o música gracias a su exclusivo modo multimedia. Los archivos se leerán en el
orden en que estén guardados en la carpeta.
Es posible reproducir una de las carpetas pregrabadas en la memoria interna o una de sus carpetas
personales, ubicadas en un soporte extraíble o en la memoria interna, dentro del directorio predefinido
elegido.
Para ello, pulse el botón «Exit» repetidamente hasta llegar al menú principal. Por medio de los botones
«Izquierda/Derecha», seleccione el icono «Archivos». Si desea reproducir una carpeta
preprogramada, selecciónela con los botones «Arriba/abajo» y, a continuación, pulse 2 veces «Enter ».
Se iniciará la presentación de diapositivas de dicha carpeta.
Si desea reproducir una de sus propias carpetas, primero seleccione el lugar (llave USB o tarjeta de
memoria); a continuación, seleccione la carpeta que desee. A continuación, siga los pasos anteriores
para lanzar la presentación.
Documento no contractual que puede sufrir modificaciones en caso de errores tipográficos (Mktg1011) COPYRIGHT SOPEG 2011
El fabricante se reserva el derecho a modificar las características del producto sin previo aviso.
10
Page 90

Pulse repetidamente el botón «Exit» para volver a la pantalla
principal.
Por medio de los botones «Izquierda/Derecha» del mando a
distancia, seleccione el icono «Foto» .
Pulse el botón de «Enter» varias veces para seleccionar el
modo de reproducción de la siguiente manera:
Presentación
Diapositivas + Música
Foto Individual
Pulse repetidamente el botón «Exit» para volver a la pantalla principal.
Por medio de los botones «Izquierda/Derecha» del mando a distancia, seleccione el icono
«Vídeo»
Pulse el botón de «Enter»: el vídeo se iniciará.
Utilice los botones de «Izquierda/Derecha» para seleccionar
/ (Reproducir / Pausa) en la pantalla, y luego presione
“Enter”.
Utilice los botones de «Izquierda/Derecha» para seleccionar el
/ (Anterior / Siguiente) en la pantalla, y luego presione
“Enter”.
Utilice los botones de «Izquierda/Derecha» para seleccionar / (rebobinado / avance rápido)
en la pantalla, y luego presione “Enter”.
Presione / en el mando a distancia ajustar el nivel de
sonido.
Si se presione el botón de «VIDEO» del mando a distancia,
también se puede acceder al menú de vídeo.
Documento no contractual que puede sufrir modificaciones en caso de errores tipográficos (Mktg1011) COPYRIGHT SOPEG 2011
El fabricante se reserva el derecho a modificar las características del producto sin previo aviso.
11
Page 91

Pulse repetidamente el botón «Exit» para volver a la pantalla
principal.
Por medio de los botones «Izquierda/Derecha» del mando a
distancia, seleccione el icono «Música» .
Pulse el botón de «Enter»: la música comenzará.
Utilice los botones de «Izquierda/Derecha» para seleccionar
/ (Reproducir / Pausa) en la pantalla, y luego presione
«Enter».
Utilice los botones de «Derecha / Izquierda» para seleccionar
/ (Anterior / Siguiente) en la pantalla, y luego
presione«Enter».
Utilice los botones de «Derecha / Izquierda» para seleccionar / (rebobinado / avance rápido)
en la pantalla, y luego presione «Enter».
Utilice los botones de «Derecha / Izquierda» para seleccionar (Volumen) en la pantalla, y
luego presione «Enter» para disminuir el nivel de sonido.
Utilice los botones de «Derecha / Izquierda» para seleccionar
(volumen) en la pantalla y, a continuación pulse el botón de
«Enter» para aumentar el nivel de sonido.
Para volver a la configuración anterior, pulse el botón de
«Exit» del mando a distancia.
Presionando / en el mando a distancia puede regular el volumen del sonido.
Pulse el botón de «Música» del mando a distancia para acceder al menú de Música.
Documento no contractual que puede sufrir modificaciones en caso de errores tipográficos (Mktg1011) COPYRIGHT SOPEG 2011
El fabricante se reserva el derecho a modificar las características del producto sin previo aviso.
12
Page 92

Desde la pantalla principal, seleccione el icono «Ajustes» mediante los
botones «Izquierda/Derecha» y «Arriba/Abajo» del mando a distancia
para acceder a los distintos ajustes de su marco.
Si está reproduciendo una presentación, simplemente pulse el botón de
«Configuración» en su mando a distancia para acceder a los menús de
configuración.
Cuando usted está en los menús de configuración, los botones de «Arriba / Abajo» del mando a
distancia le permiten seleccionar los parámetros a ajustar, y los botones de «Derecha / Izquierda» le
permiten elegir la configuración adecuada para el parámetro seleccionado.
Configuración de Fotos
Seleccione «Configuración de Foto» mediante los botones de «Arriba / Abajo» del mando a distancia, a
continuación, presione «Enter». La pantalla contraria aparecerá:
A continuación, podrá cambiar la configuración de los botones de flecha del mando a distancia.
Modo de pantalla
Seleccione «Modo de pantalla» mediante los botones de «Arriba / Abajo» del mando a distancia y
presione «Enter», a continuación, use los botones de «Arriba / Abajo» para elegir entre:
Presentación: las imágenes se desplazan una tras otra
Miniaturas: las imágenes se muestran como miniaturas.(Nota: Cuando su marco esté en este
modo, podrá acceder a Presentación, Presentación + Música o Individual pulsando el botón de
«Enter» en varias ocasiones.)
Individual: Una sola foto se muestra
Mostrar proporción
Seleccione los botones de «Mostrar proporciόn» mediante los botones de «Arriba / Abajo» del mando a
distancia y presione «Enter», a continuación, use los botones de «Arriba / Abajo» para elegir entre:
Ajustar a la pantalla: la fotografía sigue permaneciendo en su formato original
Recortar para ajustar: la foto es centrada y recortada para ajustarse a la pantalla completa
Pantalla completa: la foto se ve alterada mediante los botones de para ocupar la pantalla
completa
Documento no contractual que puede sufrir modificaciones en caso de errores tipográficos (Mktg1011) COPYRIGHT SOPEG 2011
El fabricante se reserva el derecho a modificar las características del producto sin previo aviso.
13
Page 93

Duración de presentación
Seleccione la «Duración de presentación» mediante los botones de «Arriba / Abajo» del mando a
distancia y pulse «Enter», a continuación, use los botones de «Arriba / Abajo» para elegir entre:
5 seg.
15 seg.
30 seg.
60 seg.
5 min.
15 min.
Efecto de presentaciόn
Seleccione el «Efecto de presentación» mediante los botones de «Arriba / Abajo» del mando a distancia
y presione «Enter», a continuación, use los botones de «Arriba / Abajo» para elegir entre los siguientes
efectos:
Aleatorio
Sin transicion
Atenuar
Serpiente
Particion
Borrar
Persianas
3D
Grid
Rect
Cerrar
Repetir presentación
Seleccione «Repetir presentación» mediante los botones de «Arriba / Abajo» del mando a distancia y
presione «Enter», a continuación, use los botones de «Arriba / Abajo» para elegir entre:
Repetir: la presentación se reproduce en bucle
Una Vez: la presentación se reproduce una vez
Aleatorio: las imágenes se muestran de forma aleatoria
Documento no contractual que puede sufrir modificaciones en caso de errores tipográficos (Mktg1011) COPYRIGHT SOPEG 2011
El fabricante se reserva el derecho a modificar las características del producto sin previo aviso.
14
Page 94

Ventana Mágica
Seleccione los botones de «Ventana Mágica» mediante los botones de «Arriba / Abajo» del mando a
distancia, a continuación, presione el botón de «Enter» para seleccionar «Sí» o «No».
Reloj
Seleccione «Reloj» mediante los botones de «Arriba / Abajo» del mando a distancia, a continuación,
presione el botón de «Enter» para seleccionar «Sí» o «No».
Cambiar el tamaño
Seleccione «Redimensionar» mediante los botones de «Arriba / Abajo» del mando a distancia, a
continuación, presione el botón de «Enter» para seleccionar «Sí» o «No».
Recortar al copiar
Seleccione «Recortar al copiar» mediante los botones de «Arriba / Abajo» del mando a distancia, a
continuación, presione el botón de «Enter» para seleccionar «Sí» o «No».
Mostrar ayuda al copiar
Seleccione «Mostrar ayuda al copiar» mediante los botones de «Arriba / Abajo» del mando a distancia,
a continuación, presione el botón de «Enter» para seleccionar «Sí» o «No».
Configuración de Música
Desde el menú de ajuste, seleccione la opción «Ajustes de música» mediante los botones
«Arriba/Abajo» del mando a distancia y luego pulse «Enter».
Puede ajustar:
Modo de reproducción
Seleccione los botones de «Modo de reproducción» mediante los botones de «Arriba / Abajo» del
mando a distancia y presione «Enter», a continuación, use los botones de «Arriba / Abajo» para elegir:
Repetir: las pistas se reproducirán en bucle
Aleatorio: las pistas se reproducirán de forma aleatoria
Una Vez: cada pista es reproducida una vez
Repetir una vez: cada pista se reproducirá dos veces
Documento no contractual que puede sufrir modificaciones en caso de errores tipográficos (Mktg1011) COPYRIGHT SOPEG 2011
El fabricante se reserva el derecho a modificar las características del producto sin previo aviso.
15
Page 95

Efecto de la Música
Su marco TELEFUNKEN tiene un ecualizador para adaptar el sonido al tipo de música que se escuche.
Seleccione «Efecto de la Música» mediante los botones de «Arriba / Abajo» del mando a distancia y
presione «Enter», a continuación, use los botones de «Arriba / Abajo» para elegir entre:
Jazz
DBB
Normal
Rock
Pop
Clásico
Suave
Mostrar espectro
Al reproducir un archivo de música, usted puede mostrar el ecualizador en la pantalla de su marco de
TELEFUNKEN.
Seleccione «Mostrar espectro» mediante los botones de «Arriba / Abajo» del mando a distancia, y
presione «Enter» para seleccionar «Sí» o «No».
Auto reproducción
Cuando se activa, el marco reproduce automáticamente los archivos de audio en cuanto se seleccione
un modo de audio.
Seleccione «Auto reproducción» mediante los botones de «Arriba / Abajo» del mando a distancia, y
presione «Enter» para seleccionar «Sí» o «No».
Configuración de Video
En el menú de ajuste, seleccione la opción «Ajustes de vídeo» mediante los botones «Arriba/Abajo»
del mando a distancia y pulse «Enter».
Modo de pantalla
Seleccione «Modo de pantalla» mediante los botones de «Arriba / Abajo» del mando a distancia y
presione «Enter», a continuación, use los botones de «Arriba / Abajo» para elegir entre:
Pantalla completa: el vídeo se mostrará en 04:03
Tamaño original: el vídeo se mostrará en su formato original
Documento no contractual que puede sufrir modificaciones en caso de errores tipográficos (Mktg1011) COPYRIGHT SOPEG 2011
El fabricante se reserva el derecho a modificar las características del producto sin previo aviso.
16
Page 96

Modo de reproducción
Seleccione «Modo de reproducción» mediante los botones de «Arriba / Abajo» del mando a distancia y
pulse «Enter», a continuación, use los botones de «Arriba / Abajo» para elegir entre:
Repetir: el vídeo se reproducirá en bucle
Una Vez: el vídeo sólo se reproducirá una vez
Auto reproducción
Cuando se activa, el marco auto reproduce sus archivos de video, tan pronto como se seleccione el
modo de vídeo.
Seleccione «Auto reproducción» mediante los botones de «Arriba / Abajo» del mando a distancia, a
continuación, pulse «Enter» para seleccionar «Sí» o «No».
Configuración de Calendario
Seleccione los botones de «Configuración de Calendario» en el menú de Configuración a través del
«Arriba / Abajo» del mando a distancia y presione «Enter».
Puede utilizar los botones de flecha o el botón de «Enter» del mando a distancia para ajustar el:
Modo de pantalla del calendario
Seleccione «Modo de pantalla» mediante los botones de «Arriba / Abajo» del mando a distancia y
presione «Enter», a continuación, use los botones de «Arriba / Abajo» para elegir entre:
Calendario mensual
Calendario
Reloj analógico
Formato de Fecha
Seleccione «Formato de fecha» mediante los botones de «Arriba / Abajo» del mando a distancia y pulse
«Enter», a continuación, use los botones de «Arriba / Abajo» para elegir entre:
MM / DD / AAAA
MM / DD / AAAA
AAAA / MMM / DD
Documento no contractual que puede sufrir modificaciones en caso de errores tipográficos (Mktg1011) COPYRIGHT SOPEG 2011
El fabricante se reserva el derecho a modificar las características del producto sin previo aviso.
17
Page 97

Fecha
Seleccione «Fecha» mediante los botones de «Arriba / Abajo» del mando a distancia y pulse «Enter»,
entonces:
Utilice los botones de «Arriba / Abajo» para elegir entre Mes, Día, Año
Utilice los botones de «Derecha / Izquierda» para establecer los valores de Mes, Día, Año
Modo de reloj (12 - 24 horas)
Seleccione «Modo de reloj» mediante los botones de «Arriba / Abajo» del mando a distancia y presione
«Enter», a continuación, presione el botón de «Arriba / Abajo» para elegir formato de 12 ó 24 horas;
presione «Enter» para confirmar.
Hora
Seleccione «Hora» mediante los botones de «Arriba / Abajo» del mando a distancia y presione «Enter»,
entonces:
Utilice los botones de «Arriba / Abajo» para elegir entre Hora, Min, AM, PM
Utilice los botones de «Derecha / Izquierda» para establecer los valores de Hora, Min, AM, PM
Estado de alarma
Seleccione «Estado de alarma» mediante los botones de «Arriba / Abajo» del mando a distancia, a
continuación, presione «Enter» para seleccionar «Sí» o «No».
Hora de la alarma
Para ajustar la hora de la alarma, seleccione «Hora de la alarma» mediante los botones de «Arriba /
Abajo» del mando a distancia y presione «Enter», entonces:
Utilice los botones de «Arriba / Abajo» para elegir entre horas, minutos, AM, PM
Utilice los botones de «Derecha / Izquierda» para establecer los valores de Hora, minutos, AM,
PM
Frecuencia de la alarma
Seleccione «Frecuencia de la alarma» mediante los botones de «Arriba / Abajo» del mando a distancia
y presione «Enter», a continuación, use los botones de «Arriba / Abajo» para elegir entre:
Una Vez
Todos los días
Lun. a vie.
Fin de semana
Documento no contractual que puede sufrir modificaciones en caso de errores tipográficos (Mktg1011) COPYRIGHT SOPEG 2011
El fabricante se reserva el derecho a modificar las características del producto sin previo aviso.
18
Page 98

Este menú le permite ajustar los parámetros de funcionamiento de su
marco.
La activación/desactivación del sensor de luminosidad
Seleccione «Sensor de luz» mediante los botones de «Arriba / Abajo»
del mando a distancia, a continuación, presione «Enter» para seleccionar
«Sí» o «No».
Idioma
Seleccione «Idioma» mediante los botones de «Arriba / Abajo» del mando a distancia y presione
«Enter», a continuación, use los botones de «Arriba / Abajo» para elegir entre:
Inglés
Francés
Alemán
Italiano
Holandés
Portugués
Español
Brillo
Seleccione «Brillo» mediante los botones de «Arriba / Abajo» del mando a distancia y pulse «Enter», a
continuación, pulse el botón de «derecha / izquierda» para ajustar el nivel de brillo (1-16).
Contraste
Seleccione «Contraste» mediante los botones de «Arriba / Abajo» del mando a distancia y presione
«Enter», a continuación, pulse el botón de «derecha / izquierda» para ajustar el nivel de contraste (1-
16).
Saturación
Seleccione «saturación» mediante los botones de «Arriba / Abajo» del mando a distancia y presione
«Enter», a continuación, pulse el botón de «derecha / izquierda» para ajustar el nivel de saturación (1-
16).
Documento no contractual que puede sufrir modificaciones en caso de errores tipográficos (Mktg1011) COPYRIGHT SOPEG 2011
El fabricante se reserva el derecho a modificar las características del producto sin previo aviso.
19
Page 99

Tono
Seleccione «Tono» mediante los botones de «Arriba / Abajo» del mando a distancia y pulse «Enter», a
continuación, pulse el botón de «derecha / izquierda» para ajustar el nivel de tinte (1-100).
Encendido
Seleccione «Encendido» mediante los botones de «Arriba / Abajo» del mando a distancia, a
continuación, presione el botón de «Enter» para seleccionar «Sí» o «No».
Hora de autoencendido
Seleccione «Hora de autoencendido» mediante los botones de «Arriba / Abajo» del mando a distancia y
presione «Enter», entonces:
Utilice los botones de «Arriba / Abajo» para elegir entre horas, minutos, AM, PM
Utilice los botones de «Derecha / Izquierda» para establecer los valores de horas, minutos, AM,
PM
Apagado
Seleccione «Apagado» mediante los botones de «Arriba / Abajo» del mando a distancia, a continuación,
presione el botón de «Enter» para seleccionar «Sí» o «No».
Hora de autoapagado
Seleccione «Hora de autoapagado» mediante los botones de «Arriba / Abajo» del mando a distancia y
presione «Enter», entonces:
Utilice los botones de «Arriba / Abajo» para elegir entre horas, minutos, AM, PM
Utilice los botones de «Derecha / Izquierda» para establecer los valores de horas, minutos,
AM, PM
Autofrecuencia de corriente
Seleccione «Autofrecuencia de corriente» mediante los botones de «Arriba / Abajo» del mando a
distancia y presione «Enter», a continuación, presione el botón de «Arriba / Abajo» para elegir entre:
Una Vez
Todos los días
Lun. a vie.
Fin de semana
Documento no contractual que puede sufrir modificaciones en caso de errores tipográficos (Mktg1011) COPYRIGHT SOPEG 2011
El fabricante se reserva el derecho a modificar las características del producto sin previo aviso.
20
Page 100

Restablecer
Si el marco se maneja incorrectamente, puede ser útil restablecer la configuración predeterminada. Para
ello, seleccione «Por defecto» mediante los botones de «Arriba / Abajo» del mando a distancia y pulse «
Enter», entonces se recomienda usar los botones de «Arriba / Abajo» para seleccionar «Sí» o «No».
Nota: Después de la restauración, la pantalla de selección de idioma aparecerá en la siguiente puesta
en marcha, tal como lo hizo para su primer uso.
El número de versión del software interno (meramente informativo)
Documento no contractual que puede sufrir modificaciones en caso de errores tipográficos (Mktg1011) COPYRIGHT SOPEG 2011
El fabricante se reserva el derecho a modificar las características del producto sin previo aviso.
21
 Loading...