

Page 1
Hoja de Características
Folha de Caracteristicas
Feature List
Feuille de Caractéristiques
Datenblatt
HKE-635
Page 2

2
Page 3
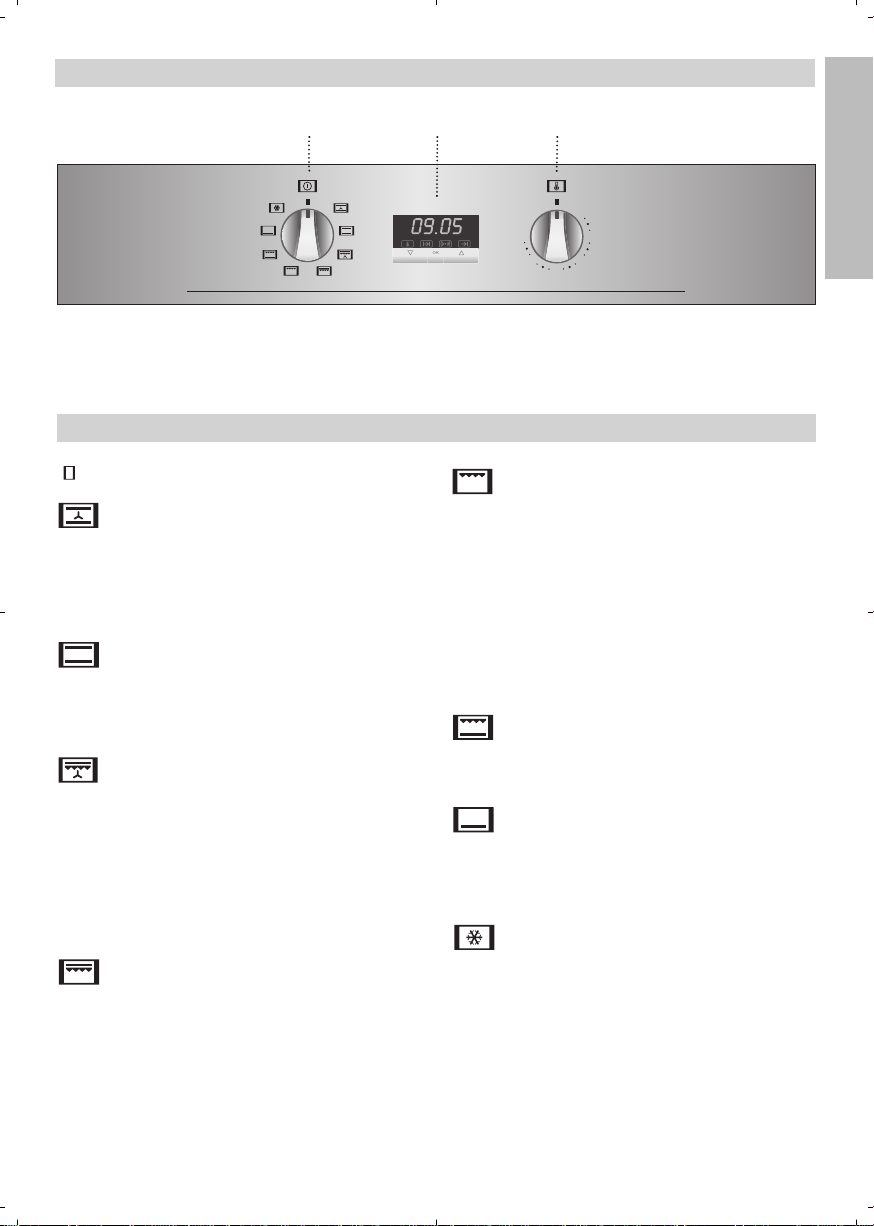
Frontal de Mandos
gnf
lf
pf
gif
hgf
hlf
21 3
ESPAÑOL
1 Selector de funciones.
2 Reloj electrónico programador.
Funciones del Horno
Desconexión del horno
Convencional con Turbina
Adecuado para asados y pastelería. El ventilador reparte de forma uniforme el calor en el
interior del horno, reduciendo el tiempo y la
temperatura de cocinado.
Convencional
Se usa en bizcochos y tartas en los que el
calor recibido debe ser uniforme y para que
consigan una textura esponjosa.
MaxiGrill con Turbina
Permite el asado uniforme al mismo tiempo
que dora superficialmente. Ideal para parrilladas. Especial para piezas con gran volumen
como aves, caza,... Se recomienda colocar la
pieza de carne sobre la parrilla del horno y la
bandeja por debajo, para el escurrido de jugos
o grasa.
MaxiGrill
Permite el gratinado en mayores super ficies
que en Grill, así como una mayor potencia de
gratinado, obteniendo un dorado del alimento
de forma más rápida.
3 Selector de temperaturas.
Grill
Gratinado y asado superficial. Permite el dorado de la capa exterior sin afectar al interior del
alimento. Indicado para piezas planas como
bistec, costillas, pescado, tostadas.
Atención
Durante el uso de la función Grill, MaxiGrill o
MaxiGrill con Turbina la puerta debe mantenerse cerrada.
Grill y Solera
Especial para asados. Puede usarse para cualquier pieza, independiente de su tamaño.
Solera
Calor sólo desde la parte inferior. Apropiado
para calentar platos o levantar masas de
repostería y afines.
Descongelación
Esta función es apropiada para descongelaciones suaves de alimentos. En especial aquellos que son consumidos sin calentar, por
ejemplo cremas, pastas, tartas, pasteles, etc.
Nota
La lámpara permanece encendida en cualquier
función de cocinado.
3
Page 4
Manejo del Horno
Puesta en Hora del Reloj Electrónico
Al conectar su horno, observará que en el
reloj aparece parpadeando la indicación
00:00. Pulsando las teclas ó pondrá
el reloj en hora; a continuación escuchará 2
beep seguidos como confirmación de la hora
elegida.
Si desea modificar la hora, pulse las teclas ó
hasta que parpadee la hora actual. A conti-
nuación pulse la tecla . Pulsando las teclas
ó podrá modificar la hora. Finalmente
escuchará 2 beep seguidos como confirmación
del cambio realizado.
Funcionamiento Manual
Tras poner el reloj en hora, su horno está listo
para cocinar. Seleccione una función de cocinado y una temperatura.
Durante el cocinado observará que el símbolo
se ilumina para indicar la transmisión de
calor al alimento. Este símbolo se apaga cuando se alcanza la temperatura seleccionada.
Para apagar el horno, ponga los mandos en
posición .
Funciones del Reloj Electrónico
Avisador: Genera una señal acústica al cabo
del tiempo, para ello no es necesario que el
horno esté cocinando.
Duración del Cocinado: Permite cocinar durante un tiempo seleccionado, a continuación el
horno se apagará de forma automática.
Hora de Finalización del Cocinado: Permite
cocinar hasta una hora establecida, a continuación el horno se apagará de forma automática.
Duración y Fin del Cocinado: Permite programar la duración y la hora de finalización del
cocinado. Con esta función el horno se pondrá
en marcha de forma automática a la hora
necesaria para cocinar durante el tiempo
seleccionado (Duración) y finalizando de forma
automática a la hora que le hayamos indicado
(Fin del Cocinado).
4
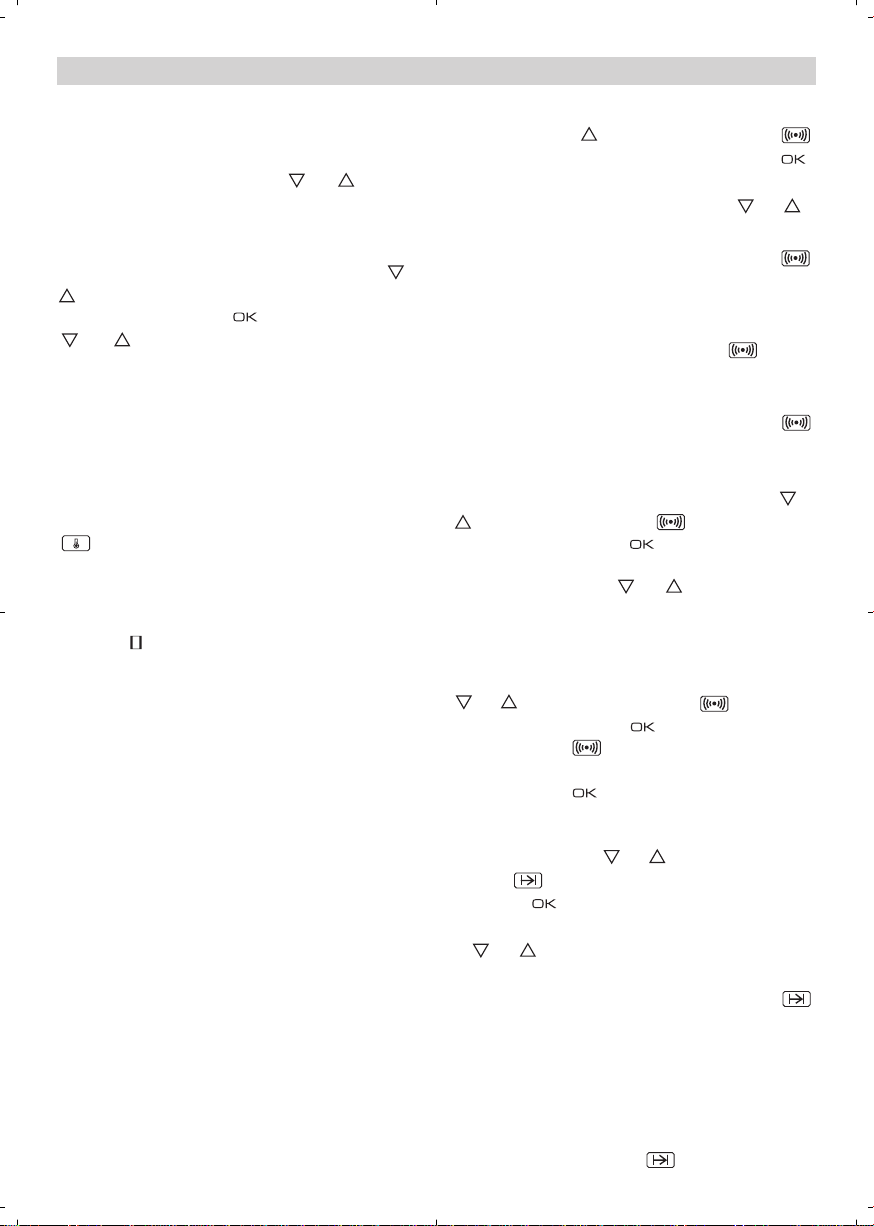
Programación del Avisador
1 Pulse la tecla hasta que el símbolo
se ilumine. A continuación pulse la tecla .
2 Seleccione el tiempo tras el cual desea que
el reloj avise, pulsando las teclas ó .
3 Posteriormente sonarán 2 beep seguidos,
se mostrará la hora actual y el símbolo
permanecerá iluminado, indicando que el
avisador ya está programado.
4 Transcurrido el tiempo programado, sonará
una señal acústica y el símbolo empezará a parpadear.
5 Pulse cualquier tecla para detener la señal
acústica, en ese momento el símbolo
se apagará.
En cualquier momento usted puede visualizar
el tiempo restante, pulsando las teclas ó
hasta que el símbolo parpadee y pulsando luego la tecla . En ese momento
usted puede modificar el tiempo seleccionado
pulsando las teclas ó . A continuación
escuchará 2 beep seguidos como confirmación del cambio.
Si desea ver de forma permanente el tiempo
restante hasta la finalización, pulse las teclas
ó hasta que el símbolo parpadee
y luego pulse la tecla de forma prolongada. El símbolo estará parpadeando. Para
volver a la hora actual basta con pulsar de
nuevo la tecla de forma prolongada.
Programación de la Duración del Cocinado
1 Pulse las teclas ó hasta que el sím-
bolo se ilumine. A continuación pulse
la tecla .
2 Seleccione la duración, pulsando las teclas
ó.
3 Posteriormente sonarán 2 beep seguidos,
se mostrará la hora actual y el símbolo
permanecerá iluminado, indicando que su
horno se apagará de forma automática.
4 Seleccione una función y una temperatura
de cocinado.
5 Transcurrida la duración del cocinado, el
horno se desconectará, sonará una señal
acústica y el símbolo parpadeará.
Page 5

6 Pulse cualquier tecla para detener la señal
acústica, encendiéndose el horno de nuevo.
7 Ponga los mandos en posición para apa-
gar el horno.
En cualquier momento usted puede visualizar
el tiempo restante de cocinado, pulsando las
teclas ó hasta que el símbolo
parpadee y pulsando luego la tecla . En
ese momento usted puede modificar el tiempo
seleccionado pulsando las teclas ó . A
continuación escuchará 2 beep seguidos
como confirmación del cambio.
Si desea ver de forma permanente el tiempo
restante hasta la finalización, pulse las teclas
ó hasta que el símbolo parpadee
y luego pulse la tecla de forma prolongada. El símbolo estará parpadeando. Para
volver a la hora actual basta con pulsar de
nuevo la tecla de forma prolongada.
Programación de la Hora de Finalización del
Cocinado
1 Pulse las teclas ó hasta que el sím-
bolo se ilumine. A continuación pulse
la tecla .
2 Seleccione la hora de finalización del coci-
nado, pulsando las teclas ó .
3 Posteriormente sonarán 2 beep seguidos,
se mostrará la hora actual y el símbolo
permanecerá iluminado, indicando que su
horno se apagará de forma automática.
4 Seleccione una función y una temperatura
de cocinado.
5 Alcanzada la hora seleccionada el horno se
desconectará, sonará una señal acústica y
el símbolo parpadeará.
6 Pulse cualquier tecla para detener la señal
acústica, encendiéndose el horno de nuevo.
7 Ponga los mandos en posición para apa-
gar el horno.
En cualquier momento usted puede visualizar
la hora de finalización del cocinado, pulsando
las teclas ó hasta que el símbolo
parpadee y pulsando luego la tecla . En
ese momento usted puede modificar la hora
de finalización seleccionada pulsando las
teclas ó . A continuación escuchará 2
beep seguidos como confirmación del cambio.
Puede emplear esta función aunque usted ya
esté cocinando con su horno. Para ello siga
las instrucciones indicadas salvo la número 4.
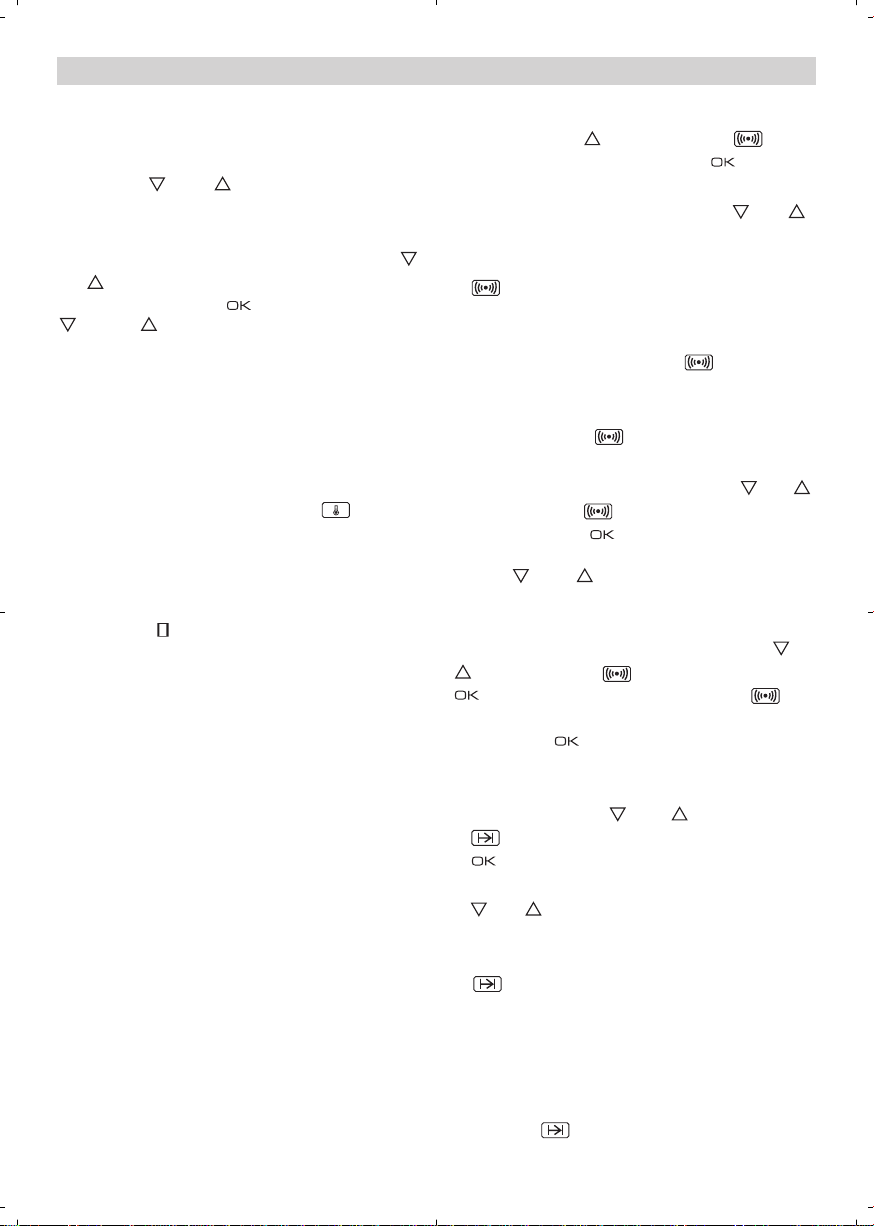
Programación de la Duración y Fin del
Cocinado
1 Pulse las teclas ó hasta que el sím-
bolo se ilumine. A continuación pulse
la tecla .
2 Seleccione la duración, pulsando las
teclas ó .
3 Posteriormente sonarán 2 beep seguidos,
se mostrará la hora actual y el símbolo
permanecerá iluminado.
4 Pulse las teclas ó hasta que el sím-
bolo se ilumine. A continuación pulse
la tecla .
5 Seleccione la hora de finalización del coci-
nado, pulsando las teclas ó .
6 Posteriormente sonarán 2 beep seguidos,
se mostrará la hora actual y el símbolo
permanecerá iluminado.
7 Seleccione una función y una temperatura
de cocinado.
8 El horno permanecerá desconectado, que-
dándose iluminados los símbolos y
. Su horno está programado.
9 Cuando se alcance la hora de comienzo
del cocinado, el horno se pondrá en marcha y se realizará el cocinado durante el
tiempo seleccionado.
10 Alcanzada la hora de finalización que se
había programado, el horno se desconectará, sonará una señal acústica y los símbolos y parpadearán.
11 Pulse cualquier tecla para detener la señal
acústica, encendiéndose su horno de
nuevo.
12 Ponga los mandos en posición para apa-
gar el horno.
Si usted desea modificar la hora de finalización, pulse las teclas ó hasta que se ilumine el símbolo y pulse la tecla . En
ese momento usted puede modificar la hora
seleccionada pulsando las teclas ó . A
continuación escuchará 2 beep seguidos como
confirmación del cambio.
ESPAÑOL
5
Page 6

Atención
En caso de un corte de suministro eléctrico,
se borrará toda la programación de su reloj
electrónico y aparecerá parpadeando la indicación 00:00 en el reloj. Deberá ponerlo en hora
y programarlo de nuevo.
6
Page 7

Painel de Comandos
gnf
lf
pf
gif
hgf
hlf
21 3
1 Selector de funções.
2 Relógio electrónico.
Funções do Forno
Desconexão do forno
Convencional com Turbina
Adequado para assados e pastelaria. O ventilador reparte de forma uniforme o calor no
interior do forno.
Convencional
Usado em bolos e tartes nos quais o calor
recebido deve ser uniforme para que adquiram
uma textura esponjosa.
MaxiGrill com Turbina
Permite assar de modo uniforme ao mesmo
tempo que aloura superficialmente. Ideal para
churrascos. Especial para pedaços com grande volume como aves, caça,... Recomenda-se
colocar a porção de carne sobre a grelha do
forno com a bandeja por baixo, para recolher
os molhos ou gorduras.
MaxiGrill
Permite gratinar superfícies maiores que com
o Grill, bem como gratinar com maior potência,
alourando assim o alimento de forma mais
rápida.
3 Selector de temperatura.
PORTUGUÉS
Grill
Gratina e assa superficialmente. Permite alourar a camada exterior sem afectar o interior
do alimento. Indicado para pedaços planos
como filetes, costelas, peixe, tostas.
Atenção
Durante o uso da função Grill, MaxiGrill ou
MaxiGrill com Turbina deve-se manter a porta
fechada.
Grill e Resistência Inferior
Especial para assados. Pode ser usado para
qualquer porção, independente do seu tamanho.
Resistência Inferior
Calor somente na parte inferior. Apropriado
para aquecer pratos ou levantar massas de
confeitaria e semelhantes.
Descongelação
Esta função é apropriada para a descongelação leve de alimentos. En especial alimentos
sem aquecer, por exemplo, cremes, natas,
pastas, tartes, biscoitos, frutas...
Nota
A lâmpada permanece acesa em qualquer função de cozinhado.
7
Page 8
Uso do Forno
Acerto do Relógio Electrónico
Ao ligar o forno, observará que, no relógio,
aparece a piscar a indicação 00:00. Premindo
as teclas ou acer tará o relógio; a
seguir ouvirá 2 beeps seguidos como confirmação da hora seleccionada.
Se desejar alterar a hora, prima as teclas
ou até a hora actual começar a piscar. A
seguir prima a tecla . Premindo as teclas
ou poderá modificar a hora.
Finalmente, ouvirá 2 beeps seguidos como
confirmação da alteração realizada.
Funcionamento Manual
Depois de acertar o relógio, o forno está pronto para cozinhar. Seleccione uma função de
cozinhado e uma temperatura.
Durante o cozinhado, o símbolo iluminase indicando que o forno está a transmitir
calor ao alimento, e desliga-se quando é atingida a temperatura seleccionada.
Para desligar o forno, coloque os comandos
na posição .
Funções do Relógio Electrónico
Avisador: Gera um sinal acústico ao fim de
algum tempo, para tal, não é necessário que o
forno esteja a cozinhar.
Duração do Cozinhado: Permite cozinhar
durante um tempo seleccionado; de seguida,
o forno desligar-se-á de forma automática.
Hora de Finalização do Cozinhado: Permite
cozinhar até a uma hora estabelecida, de
seguida, o forno desligar-se-á de forma automática.
Duração e Fim do Cozinhado: Permite programar a duração e a hora de finalização do cozinhado. Com esta função, o forno colocar-se-á
em funcionamento de forma automática à
hora necessária para cozinhar durante o
tempo seleccionado (Duração), finalizando de
forma automática à hora anteriormente indicada. (Fim do Cozinhado).
Programação do Avisador
1 Prima a tecla até o símbolo ilumi-
nar-se. A seguir prima a tecla .
2 Seleccione o tempo após o qual deseja que o
relógio avise, premindo as teclas ou .
3 Posteriormente, soarão 2 beeps seguidos,
será mostrada a hora actual e o símbolo
permanecerá iluminado, indicando que
o avisador já está programado.
4 Decorrido o tempo programado, soará um
sinal acústico e o símbolo começará a
piscar.
5 Prima qualquer tecla para parar o sinal acús-
tico, o símbolo desligar-se-á.
Em qualquer momento, pode visualizar o
tempo restante, premindo as teclas ou
até o símbolo piscar, e premindo de
seguida a tecla . Neste momento, pode
alterar o tempo seleccionado premindo as
teclas ou . A seguir ouvirá 2 beeps
seguidos como confirmação da alteração.
Se desejar ver de forma permanente o tempo
restante até à finalização prima as teclas ou
até o simbolo piscar e prima a tecla
de forma prolongada. O símbolo piscará. Para voltar à hora actual, basta premir de
novo a tecla de forma prolongada.
Programação da Duração do Cozinhado
1 Prima as teclas ou até o símbolo
iluminar-se. De seguida prima a tecla
.
2 Seleccione a duração, premindo as teclas
ou .
3 Posteriormente soarão 2 beeps seguidos,
será mostrada a hora actual e o símbolo
permanecerá iluminado, indicando que
o forno desligar-se-à de forma automática.
4 Seleccione uma função e uma temperatura
de cozinhado.
5 Decorrida a duração do cozinhado, o forno
desligar-se-á, soará um sinal acústico e o
símbolo piscará.
8
Page 9

6 Prima qualquer tecla para parar o sinal acús-
tico, ligando-se o forno de novo.
7 Coloque os comandos na posição para
desligar o forno.
A qualquer momento, pode visualizar o tempo
restante de cozinhado, premindo as teclas
ou até o símbolo piscar, e premindo
de seguida a tecla . Neste momento, pode
modificar o tempo seleccionado premindo as
teclas ou . A seguir ouvirá 2 beeps
seguidos, como confirmação da alteração.
Se desejar ver de forma permanente o tempo
restante até à finalização prima as teclas ou
até o simbolo piscar e prima a tecla
de forma prolongada. O símbolo piscará. Para voltar à hora actual, basta premir de
novo a tecla de forma prolongada.
Programação da Hora de Finalização do
Cozinhado
1 Prima as teclas ou até o símbolo
iluminar-se. De seguida prima a tecla .
2 Seleccione a hora de finalização do cozinha-
do, premindo as teclas ou .
3 Posteriormente soarão 2 beeps seguidos,
será mostrada a hora actual e o símbolo
permanecerá iluminado, indicando que
o forno desligar-se-à de forma automática.
4 Seleccione uma função e uma temperatura
de cozinhado.
5 Alcançada a hora seleccionada, o forno des-
ligar-se-á, soará um sinal acústico e o símbolo piscará.
6 Prima qualquer tecla para parar o sinal acús-
tico, ligando-se o forno de novo.
7 Coloque os comandos na posição para
desligar o forno.
A qualquer momento pode visualizar a hora de
finalização do cozinhado, premindo as teclas
ou até o símbolo piscar, e premindo de seguida a tecla . Neste momento, pode modificar a hora de finalização seleccionada premindo as teclas ou . A
seguir ouvirá 2 beeps seguidos, como confirmação da alteração.
Pode usar esta função mesmo que já esteja a
utilizar o forno. Para tal, siga as instruções
indicadas, excepto a número 4.
Programação da Duração e Fim do
Cozinhado
1 Prima as teclas ou até o símbolo
iluminar-se. De seguida prima a
tecla .
2 Seleccione a duração, premindo as
teclas ou .
3 Posteriormente soarão 2 beeps segui-
dos, será mostrada a hora actual e o
símbolo permanecerá iluminado.
4 Prima as teclas ou até o símbolo
se iluminar. A seguir prima a tecla
.
5 Seleccione a hora de finalização do
cozinhado, premindo as teclas ou
.
6 Posteriormente soarão 2 beeps segui-
dos, será mostrada a hora actual e o
símbolo permanecerá iluminado.
7 Seleccione uma função e uma tempera-
tura de cozinhado.
8 O forno permanecerá desligado, ficando
iluminados os símbolos e . O
seu forno está programado.
9 Quando alcançar a hora de início do
cozinhado, o forno entrará em funcionamento e realizar-se-á o cozinhado durante o tempo seleccionado.
10 Alcançada a hora final que tinha sido pro-
gramada, o forno desligar-se-á, soará um
sinal acústico e os símbolos
piscarão.
11 Prima qualquer tecla para parar o sinal
acústico, ligando-se o seu forno de novo.
12 Coloque os comandos na posição
para desligar o forno.
Se desejar modificar a hora de finalização,
prima as teclas ou até se iluminar o
símbolo , e prima a tecla . A partir
deste momento, pode modificar a hora seleccionada premindo as teclas ou . A
seguir ouvirá 2 beeps seguidos, como confirmação da modificação.
e
PORTUGUÉS
9
Page 10

Atenção
No caso de um corte de fornecimento eléctrico, será eliminada toda a programação do
relógio electrónico e aparecerá a indicação
00:00 a piscar no relógio. Deverá acertá-lo e
programá-lo de novo.
10
Page 11

Control Panel
gnf
lf
pf
gif
hgf
hlf
21 3
1 Function selector.
2 Electronic clock.
Oven Functions
Switch off oven
Conventional with fan
Appropriate for roasts and cakes. The fan
spreads the heat uniformly inside the oven.
Conventional
It is used for sponges and cakes where the
heat received must be uniform to achieve a
spongy texture.
MaxiGrill with fan
Allows uniform roasting at the same time as
surface browning. Ideal for grills. Special for
large volume pieces, such as poultry game
etc. It is recommended to put the item on a
rack with a tray beneath to collect the stock
and juices.
MaxiGrill
Allows greater surfaces to be prepared, than
with the grill, together with higher power
reducing the time required for browning of the
food.
3 Temperature selector.
Caution
While using the Grill, MaxiGrill or MaxiGrill with
fan, the door must be kept closed.
Grill and Lower element
Special for roasts. It can be used for any
piece, whatever its size.
ENGLISH
Lower element
Heats only from beneath. Suitable for heating
dishes and raising pastry and similar.
Defrosting
This cooking mode is suitable for gently
defrosting of food. In special food to be
consumed unwarmed, e.g.: cream, custard,
pastry, tarts, cakes, fruit,...
Note
The pilot light remains on in any cooking
function.
Grill
For preparing dishes with superficial roasting.
It allows the outer layer to be browned without
affecting the inside of the food. Ideal for flat
food, such as steaks, ribs, fish, toast.
11
Page 12

Use of the Oven
Setting the time on the Electronic Clock
When the oven is connected to the power supply,
the indication 00:00 flash on the display. Press
or to set the time on the clock. The clock
beeps twice to confirm the selected time.
If you wish to modify the time, press or
until the current time flash on the screen.
Press . Then press or to modify
the time. The clock beeps twice to confirm the
modification.
Manual Operation
The oven is ready to be used when the clock
has been set. Select a cooking function and a
temperature.
When you begin cooking, symbol lights
up to indicate that the oven is heating the contents; the symbol goes out when the
selected temperature is reached.
Set the controls to to turn the oven off.
Functions of the Electronic Clock
Alarm: Creates an alarm signal when the peri-
od of time finishes; the oven does not need to
be in use in order to use this function.
Cooking Time: To cook for a selected length of
time; the oven turns itself off automatically
when the time finishes.
End Cooking Time: To cook until a set time;
the oven turns itself off automatically when
the time finishes.
Cooking time and End Cooking Time: To cook
for a selected length of time and end at a set
time. When this function is set, the oven
comes on automatically at the time required in
order to cook for the set length of time
(Cooking time) and end automatically at the
indicated time (End Cooking Time)
Programming the Alarm
1 Press until symbol lights up. Press
.
2 Set the period of time after which you wish
the alarm to sound by pressing or .
3 The clock beeps twice, the current time is
displayed and symbol lights up permanently to indicate that the alarm has been
set.
4 When the set period of time comes to an
end, the alarm sounds and symbol
starts to flash.
5 Press any button to stop the alarm; symbol
goes out.
You can consult the remaining time at any
moment by pressing or until symbol
flashes and then pressing . You can
also modify the set time at this point by pressing or . The clock beeps twice to confirm the change.
If you wish the remaining time to be displayed
until the end of the set period of time, press
or until symbol flashes and then
press and keep it pressed in. Symbol
flashes. Keep pressed in again to
return to the real time.
Setting the Cooking Time
1 Press or until symbol lights up.
Press .
2 Select the period of time you wish to cook
for by pressing or .
3 The clock beeps twice, the current time is
displayed and symbol lights up permanently to indicate that the oven will turn
itself off automatically.
4 Select a cooking function and temperature.
5 When the cooking time comes to an end, the
oven turns itself off, the alarm sounds and
symbol flashes.
6 Press any button to stop the alarm and turn
the oven back on again.
7 Set the controls to to turn the oven off.
12
Page 13

You can consult the remaining cooking time at
any moment by pressing or until symbol flashes and then pressing . You
can also modify the set time at this point by
pressing or . The clock beeps twice to
confirm the change.
If you wish the remaining time to be displayed
until the end of the set period of time, press
or until symbol flashes and then
press and keep it pressed in. Symbol
flashes. Keep pressed in again to
return to the real time.
Setting the End Cooking Time
1 Press or until symbol lights up.
Press .
2 Select the time you wish the cooking
process to finish at by pressing or .
3 The clock beeps twice, the current time is
displayed and symbol lights up permanently to indicate that the oven will turn
itself off automatically.
4 Select a cooking function and temperature.
5 When the set time is reached, the oven
turns itself off, the alarm sounds and symbol flashes.
6 Press any button to stop the alarm and turn
the oven back on again.
7 Set the controls to to turn the oven off.
You can consult the end cooking time at any
moment by pressing or until symbol
flashes and then pressing . You can
also modify the end cooking time at this point
by pressing or . The clock beeps twice
to confirm the change.
This function can be used even when you are
already using the oven. To do this, follow the
instructions indicated above except point
number 4.
Setting the Cooking Time and the End
Cooking Time
1 Press or until symbol lights
up. Press .
2 Select the period of time you wish to
cook for by pressing or .
3 The clock beeps twice, the current time
is displayed and symbol lights up
permanently.
4 Press or until symbol lights
up. Press .
5 Select the time you wish the cooking
process to finish at by pressing or
.
6 The clock beeps twice, the current time
is displayed and symbol lights up
permanently.
7 Select a cooking function and tempera-
ture.
8 The oven remains off with symbols
and lit up. Your oven is set.
9 When the time to start cooking is
reached, the oven starts up and cooks
for the set period of time.
10 When the set end cooking time is
reached, the oven turns itself off, the
alarm sounds and symbols and
flash.
11 Press any button to stop the alarm and
turn the oven back on again.
12 Set the controls to to turn the oven
off.
You can modify the end cooking time by pressing or until symbol lights up and
then pressing . You can now modify the
end cooking time by pressing or . The
clock beeps twice to confirm the change.
ENGLISH
13
Page 14

Important
In the event of a power cut, all the electronic
clock settings are deleted and the indication
00:00 flashes on the display. It is necessary
to set the time and programme the clock
again.
14
Page 15

Panneau Frontal de Commande
gnf
lf
pf
gif
hgf
hlf
21 3
1 Sélecteur de fonctions.
2 Horloge électronique.
Fonctions du Four
Arrêt du four
Conventionnel avec turbine
Recommandé pour les rôtis et la pâtisserie. Le
ventilateur répartit la chaleur de façon
uniforme à l'intérieur du four.
Conventionnel
Utiliser pour les gâteaux et les tartes qui
doivent recevoir une chaleur uniforme et pour
obtenir une texture moelleuse.
MaxiGrill avec turbine
Permet en même temps de rôtir de façon
uniforme et de dorer super ficiellement. Idéal
pour les grillades. Spécial pour les pièces
volumineuses telles que les volailles, le gibier.
Il est recommandé de placer la pièce de
viande sur la grille du four et la lèchefrite endessous pour recueillir les jus de cuisson ou la
graisse.
MaxiGrill
Permet de gratiner des surfaces plus grandes
qu'avec le Grill avec une puissance pour
gratiner supérieure, qui permet ainsi de dorer
l'aliment de façon plus rapide.
3 Sélecteur de températures.
l'intérieur de l'aliment. Indiqué pour les pièces
plates telles que les beefsteaks, les côtelettes,
les poissons, les toasts.
Attention
Quand on utilise la fonction Grill, MaxiGrill ou
MaxiGrill avec Turbine, la porte doit rester fermée.
Grill et résistance inférieure
Spécial pour les rôtis. Peut être utilisé pour
toutes sortes de pièces, indépendamment de
leur volume.
Résistance inférieure
La chaleur provient seulement de la partie
inférieure. Approprié pour réchauffer des plats
ou faire lever des pâtes pour pâtisseries et
analogues.
FRANÇAIS
Décongeler
Cette fonction permet de décongeler
doucement des mets. Spécialement mets qui
ne doivent pas être chauffés, comme p.ex.
crème chantilly, crème vanille, pâtes, gâteaux,
fruits,...
Attention
Grill
Pour gratiner et rôtir superficiellement. Permet
de dorer la couche extérieure sans affecter
La lampe reste allumée pendant toutes les
fonctions de cuisson.
15
Page 16

Maniement du Four
Mise à l’heure de l’horloge électronique
Lorsque vous branchez votre four, vous observez
que l’indication 00:00 clignotent dans l’horloge.
Mettez l’horloge à l’heure à l’aide des touches
ou . Vous entendrez 2 bips consécutifs
comme confirmation de la mise à l’heure.
Si vous souhaitez modifier l’heure, appuyez sur
les touches ou jusqu’à ce que l’heure
actuelle se mettent à clignoter. Appuyez ensuite
sur la touche . À l’aide des touches ou
, vous pouvez alors modifier l’heure. Vous
entendrez 2 bips consécutifs comme confirmation de la modification réalisée.
Fonctionnement manuel
Une fois l’horloge mise à l’heure, votre four
est prêt à fonctionner. Sélectionnez une fonction de cuisson et une température.
Lors de la cuisson, le symbole s´allume
indiquant que le four est en train de transmettre
de la chaleur à l’aliment et s´éteint lorsque la
température sélectionnée est atteinte.
Pour éteindre le four, mettez les commandes
sur la position .
Fonctions de l’horloge électronique
Avertisseur: génère un signal acoustique à un
moment donné; pour ce faire, il n’est pas
nécessaire que le four soit allumé.
Durée de cuisson: permet de cuire pendant
une durée sélectionnée, le four s’éteignant de
façon automatique.
Heure de fin de cuisson: permet de cuire jusqu’à une heure définie, le four s’éteignant de
façon automatique.
Durée et fin de cuisson: permet de programmer la durée et l’heure de fin de cuisson. Avec
cette fonction, le four se mettra en marche de
façon automatique à l’heure indiquée pour
cuire pendant la durée sélectionnée (Durée) et
s’éteindre de façon automatique à l’heure indiquée (Fin de cuisson).
Programmation de l’avertisseur
1 Appuyez sur la touche jusqu’à ce que le
symbole s’allume. Appuyez ensuite sur
la touche .
16
2 Sélectionnez le temps au bout duquel vous
souhaitez que l’horloge vous avertisse en
appuyant sur les touches ou .
3 Vous entendrez alors 2 bips consécutifs,
l’heure actuelle sera affichée et le symbole
s’allumera, indiquant que l’avertisseur
est programmé.
4 Une fois le temps programmé écoulé, un
signal acoustique sonnera et le symbole
commencera à clignoter.
5 Appuyez sur n’importe quelle touche pour
arrêter le signal acoustique, à ce moment le
symbole s’éteindra.
Vous pouvez afficher le temps restant à tout
moment en appuyant sur les touches ou
jusqu’à ce que le symbole clignote,
puis en appuyant sur la touche . Vous pouvez alors modifier le temps sélectionné en
appuyant sur les touches ou . Vous
entendrez 2 bips consécutifs comme confirmation de la modification.
Si vous souhaitez afficher de façon permanente le temps restant jusqu’à la fin, appuyez sur
les touches ou jusqu’à ce que le symbole clignote and appuyez sur la touche
de façon prolongée. Le symbole clignotera. Pour revenir à l’heure actuelle, il suffit d’appuyer à nouveau sur la touche de
façon prolongée.
Programmation de la durée de cuisson
1 Appuyez sur la touche ou jusqu’à ce
que le symbole s’allume. Appuyez
ensuite sur la touche .
2 Sélectionnez la durée en appuyant sur les
touches ou .
3 Vous entendrez alors 2 bips consécutifs,
l’heure actuelle sera affichée et le symbole
s’allumera, indiquant que votre four
s’éteindra de façon automatique.
4 Sélectionnez une fonction et une températu-
re de cuisson.
5 Une fois la durée de cuisson écoulée, le four
se déconnectera, un signal acoustique sonnera et le symbole clignotera.
Page 17

6 Appuyez sur n’importe quelle touche pour
arrêter le signal acoustique; le four s’allumera de nouveau.
7 Mettez les commandes sur la position
pour éteindre le four.
Vous pouvez afficher le temps de cuisson restant à tout moment en appuyant sur les
touches ou jusqu’à ce que le symbole
clignote, puis en appuyant sur la touche
. Vous pouvez alors modifier le temps
sélectionné en appuyant sur les touches
ou . Vous entendrez 2 bips consécutifs
comme confirmation de la modification.
Si vous souhaitez afficher de façon permanente le temps restant jusqu’à la fin, appuyez sur
les touches ou jusqu’à ce que le symbole clignote and appuyez sur la touche
de façon prolongée. Le symbole clignotera. Pour revenir à l’heure actuelle, il suffit d’appuyer à nouveau sur la touche de
façon prolongée.
Programmation de l’heure de fin de cuisson
1 Appuyez sur la touche ou jusqu’à ce
que le symbole s’allume. Appuyez
ensuite sur la touche .
2 Sélectionnez l’heure de fin de cuisson en
appuyant sur les touches ou .
3 Vous entendrez alors 2 bips consécutifs,
l’heure actuelle sera affichée et le symbole
s’allumera, indiquant que votre four
s’éteindra de façon automatique.
4 Sélectionnez une fonction et une températu-
re de cuisson.
5 Une fois l’heure sélectionnée atteinte, le
four se déconnectera, un signal acoustique
sonnera et le symbole clignotera.
6 Appuyez sur n’importe quelle touche pour
arrêter le signal acoustique; le four s’allumera de nouveau.
7 Mettez les commandes sur la position
pour éteindre le four.
Vous pouvez afficher l’heure de fin de cuisson
à tout moment en appuyant sur les touches
ou jusqu’à ce que le symbole clignote, puis en appuyant sur la touche .
Vous pouvez alors modifier l’heure de fin
sélectionnée en appuyant sur les touches
ou . Vous entendrez 2 bips consécu-
tifs comme confirmation de la modification.
Vous pouvez utiliser cette fonction même si
vous êtes déjà en train d’utiliser votre four.
Pour ce faire, suivez les instructions indiquées sauf la numéro 4.
Programmation de la durée et de la fin de
cuisson
1 Appuyez sur la touche ou jusqu’à
ce que le symbole s’allume.
Appuyez ensuite sur la touche .
2 Sélectionnez la durée en appuyant sur
les touches ou .
3 Vous entendrez alors 2 bips consécutifs,
l'heure actuelle sera affichée et le symbole s’allumera.
4 Appuyez sur la touche ou jusqu’à
ce que le symbole s’allume.
Appuyez ensuite sur la touche .
5 Sélectionnez l’heure de fin de cuisson en
appuyant sur les touches ou .
6 Vous entendrez alors 2 bips consécutifs,
l'heure actuelle sera affichée et le symbole s’allumera.
7 Sélectionnez une fonction et une tempé-
rature de cuisson.
8 Le four restera déconnecté, et les sym-
boles et seront allumés. Votre
four est alors programmé.
9 Lorsque l’heure de début de cuisson est
atteinte, le four se mettra en marche et
la cuisson se fera pendant le temps
sélectionné.
10 Une fois l’heure de fin programmée attein-
te, le four se déconnectera, un signal
acoustique sonnera et les symboles
et se mettront à clignoter.
11 Appuyez sur n’importe quelle touche
pour arrêter le signal acoustique; le four
s’allumera de nouveau.
12 Mettez les commandes sur la position
pour éteindre le four.
Si vous souhaitez modifier l’heure de fin,
appuyez sur les touches ou jusqu’à
ce que le symbole s’allume, puis
appuyez sur la touche . Vous pouvez
FRANÇAIS
17
Page 18

alors modifier l’heure sélectionnée en
appuyant sur les touches ou . Vous
entendrez 2 bips consécutifs comme confirmation de la modification.
Attention
En cas de coupure de l’alimentation électrique,
toute la programmation de votre horloge électronique sera effacée et l’indication 00:00 clignotera dans l’horloge. Vous devrez la mettre à
l’heure et la programmer à nouveau.
18
Page 19

Bedienfeld
gnf
lf
pf
gif
hgf
hlf
21 3
1 Funktionswahl.
2 Elektronische Schaltuhr.
Funktionen des Herds
Ausschalten des Herds
Normal mit Umluft
Geeignet zum Braten und für Gebäck. Der
Lüfter verteilt die Wärme gleichmäßig im Herd.
Normal
Verwendung für Kuchen und Tortenböden, bei
denen die Wärmeeinwirkung gleichmäßig sein
muß, damit diese gut aufgehen.
MaxiGrill mit Umluft
Gestattet gleichzeitig ein gleichmäßiges Garen
und Anbräunen der Oberfläche. Ideal zum
Grillen. Besonders für große Stücke wie
Geflügel, Wild usw. Es wird empfohlen, das
Stück auf den Rost zu legen und die
Auffangschale darunter einzusetzen, um
Bratensaft und Fett aufzufangen.
MaxiGrill
Grillen auf größerer Oberfläche und mit
größerer Leistung als mit dem Grill, hierdurch
erfolgt ein schnelleres Bräunen der Speisen.
3 Temperaturregler.
Grill
Gratinieren und Anbräunen. Gestattet das
Anbräunen der Außenschicht, ohne das Innere
der Nahrungsmittel zu beeinflussen. Geeignet
für flache Stücke wie Beefsteak, Rippchen,
Fisch, Toastbrot.
Achtung
Bei Benutzung der Funktionen Grill, MaxiGrill
oder MaxiGrill mit Umluft muß die Herdtür
geschlossen sein.
Grill und Unterhitze
Besonders geeignet zum Braten. Kann für
Stücke mit beliebiger Größe eingesetzt werden.
Unterhitze
Es wird nur von der Unterseite Wärme
zugeführt. Geeignet zum Anwärmen von
Tellern, zum Aufgehen von Teigmassen oder
für ähnliche Anwendungen.
Auftauen
Ideal für schonendes Auftauen von feinen
Speisen, die kalt verwendet werden, wie z. B.
Sahne, Vanillesoße, Teig, Kuchen, Obst...
Achtung
Die Beleuchtung ist bei allen Kochfunktionen
eingeschaltet.
19
DEUTSCH
Page 20

Bedienung des Herds
Stellen der elektronischen Schaltuhr
Nach dem Einschalten des Herds zeigt die
elektronische Schaltuhr 00.00 an. Durch
Betätigen der Tasten oder wird die Uhr
gestellt; anschließend werden zwei kurze
Signaltöne zur Bestätigung der eingestellten
Uhrzeit abgegeben.
Zur Veränderung der eingestellten Uhrzeit
betätigen Sie die Taste oder so oft, bis
die aktuelle Uhrzeit blinken. Drücken Sie
anschließend die Taste . Jetzt können Sie
die Uhrzeit mit den Tasten oder
einstellen. Nach Abschluss der Einstellung
werden die Änderungen mit zwei kurzen
Signaltönen bestätigt.
Manueller Betrieb
Nach dem Stellen der Uhr ist der Herd
betriebsbereit. Wählen Sie Garfunktion aus
und stellen Sie die gewünschte Temperatur ein.
Zum Abschalten des Herds bringen Sie alle
Bedienelemente in Stellung .
Funktionen der elektronischen Schaltuhr
Signalgeber: Sendet ein akustisches Signal
nach Ablauf der eingestellten Zeit aus, der
Herd muss hierzu nicht eingeschaltet sein.
Dauer des Garvorgangs: Gestattet das Garen
während der eingestellten Zeit, anschließend
wird der Herd automatisch abgeschaltet.
Endzeit des Garvorgangs: Gestattet das
Garen bis zu der eingestellten Zeit,
anschließend wird der Herd automatisch
abgeschaltet.
Dauer und Ende des Garvorgangs: Mit Hilfe
dieser Funktion können Sie die Dauer des
Garvorgangs und die Uhrzeit einstellen, zu
welcher dieser abgeschlossen sein soll. Mit
dieser Funktion wird der Herd zum
erforderlichen Zeitpunkt automatisch
eingeschaltet, bleibt für die gewählte Dauer in
Betrieb und schaltet sich automatisch zu der
gewählten Endzeit aus (Ende des Garvorgangs).
Programmierung des akustischen Signals
1 Betätigen Sie die Taste bis das Symbol
aufleuchtet. Drücken Sie anschließend
die Taste .
20
2 Stellen Sie mit den Tasten oder die
Zeit ein, nach der die Schaltuhr das Signal
abgeben soll.
3 Anschließend ertönen zwei kurze Signale, es
wird die aktuelle Uhrzeit angezeigt und das
Symbol leuchtet und zeigt an, dass der
Signalgeber programmiert ist.
4 Nach Ablauf der eingestellten Zeit ertönt ein
akustisches Signal und das Symbol
blinkt.
5 Das akustische Signal wird durch Betätigen
einer beliebigen Taste abgeschaltet und das
Symbol verlischt.
Sie können die Restzeit anzeigen, indem Sie
die Taste oder so oft betätigen, bis das
Symbol blinkt, anschließend bestätigen
Sie mit der Taste . Jetzt können Sie die
gewählte Restzeit mit den Tasten oder
verändern. Nach Abschluss der Einstellung
werden die Änderungen mit zwei kurzen
Signaltönen bestätigt.
Wenn Sie eine dauernde Anzeige der Restzeit
wünschen, indem Sie die Taste oder so
oft betätigen, bis das Symbol blinkt und
betätigen Sie die Taste etwas länger. Das
Symbol blinkt. Wenn Sie die Taste
nochmals etwas länger betätigen, erfolgt die
Rückkehr zur Anzeige der Uhrzeit.
Programmierung der Garzeiten
1 Betätigen Sie die Taste oder bis das
Symbol aufleuchtet. Drücken Sie
anschließend die Taste .
2 Stellen Sie mit den Tasten oder die
gewünschte Dauer ein.
3 Anschließend ertönen zwei kurze Signale, es
wird die aktuelle Uhrzeit angezeigt und das
Symbol leuchtet und zeigt an, dass der
Herd nach Ablauf der eingestellten Zeit
automatisch abgeschaltet wird.
4 Wählen Sie eine Gar funktion aus und stellen
Sie die gewünschte Temperatur ein.
5 Nach Ablauf der eingestellten Garzeit
schaltet sich der Herd ab, es ertönt ein
akustisches Signal und die Kontrolleuchte
beginnt zu blinken.
6 Betätigen Sie eine beliebige Taste zum
Abstellen des Signaltons, hierdurch wird der
Herd erneut eingeschaltet.
Page 21

7 Zum Abschalten des Herds bringen Sie alle
Bedienelemente in Stellung .
Sie können die restliche Garzeit anzeigen, indem
Sie die Taste oder so oft betätigen, bis
das Symbol blinkt, anschließend
bestätigen Sie mit der Taste . Jetzt können
Sie die gewählte Restzeit mit den Tasten
oder verändern. Nach Abschluss der
Einstellung werden die Änderungen mit zwei
kurzen Signaltönen bestätigt.
Wenn Sie eine dauernde Anzeige der Restzeit
wünschen, indem Sie die Taste oder so
oft betätigen, bis das Symbol blinkt und
betätigen Sie die Taste etwas länger. Das
Symbol blinkt. Wenn Sie die Taste
nochmals etwas länger betätigen, erfolgt die
Rückkehr zur Anzeige der Uhrzeit.
Programmierung der Uhrzeit für das Ende des
Garvorgangs.
1 Betätigen Sie die Taste oder bis das
Symbol aufleuchtet. Drücken Sie
anschließend .
2 Stellen Sie die gewünschte Uhrzeit für die
Beendigung des Garvorgangs mit den
Tasten oder ein.
3 Anschließend ertönen zwei kurze Signale, es
wird die aktuelle Uhrzeit angezeigt und das
Symbol leuchtet und zeigt an, dass der
Herd nach Ablauf der eingestellten Zeit
automatisch abgeschaltet wird.
4 Wählen Sie eine Gar funktion aus und stellen
Sie die gewünschte Temperatur ein.
5 Bei Erreichen der eingestellten Endzeit
schaltet sich der Herd ab, es ertönt ein
akustisches Signal und das Symbol
beginnt zu blinken.
6 Betätigen Sie eine beliebige Taste zum
Abstellen des Signaltons, hierdurch wird der
Herd erneut eingeschaltet.
7 Zum Abschalten des Herds bringen Sie alle
Bedienelemente in Stellung .
Sie können die Endzeit des Garvorgangs
anzeigen, indem Sie die Taste oder so oft
betätigen, bis das Symbol blinkt,
anschließend bestätigen Sie mit der Taste .
Jetzt können Sie die gewählte Endzeit mit den
Tasten oder verändern. Nach Abschluss
der Einstellung werden die Änderungen mit zwei
kurzen Signaltönen bestätigt.
Sie können die Funktion nutzen, auch wenn Sie
bereits mit dem Herd kochen. Befolgen Sie hierzu
die Anweisungen mit Ausnahme von Punkt 4.
Programmierung der Dauer der Garzeit und
der Uhrzeit für dessen Beendigung
1 Betätigen Sie die Taste oder bis das
Symbol aufleuchtet. Drücken Sie
anschließend .
2 Stellen Sie mit den Tasten oder die
gewünschte Dauer ein.
3 Anschließend werden zwei kurze Signaltöne
abgegeben, es wird die aktuelle Uhrzeit
angezeigt und das Symbol leuchtet.
4 Betätigen Sie die Taste oder bis das
Symbol aufleuchtet. Drücken Sie
anschließend .
5 Stellen Sie die gewünschte Uhrzeit für die
Beendigung des Garvorgangs mit den
Tasten oder ein.
6 Anschließend werden zwei kurze
Signaltöne abgegeben, es wird die aktuelle
Uhrzeit angezeigt und das Symbol
leuchtet.
7 Wählen Sie eine Garfunktion aus und stellen
Sie die gewünschte Temperatur ein.
8 Der Herd bleibt abgeschaltet, die Symbole
und leuchten weiterhin. Damit
ist Ihr Herd programmiert.
9 Bei Erreichen der Uhrzeit für den Beginn
des Garvorgangs schaltet sich der Herd
ein und führt den Garvorgang während der
eingestellten Zeitdauer aus.
10 Nach Erreichen der programmier ten
Endzeit wird der Herd abgeschaltet, es
ertönt ein akustisches Signal und die
Symbol und blinken.
11 Betätigen Sie eine beliebige Taste zum
Abstellen des Signaltons, hierdurch wird
der Herd erneut eingeschaltet.
12 Zum Abschalten des Herds bringen Sie alle
Bedienelemente in Stellung .
Wenn Sie während des Garvorgangs die
Endzeit verändern möchten, betätigen Sie die
Taste oder bis das Symbol
aufleuchtet und bestätigen Sie mit der Taste
. Jetzt können Sie die gewählte Endzeit
mit den Tasten oder verändern. Nach
21
DEUTSCH
Page 22

Abschluss der Einstellung werden die
Änderungen mit zwei kurzen Signaltönen
bestätigt.
Achtung
Bei einem Ausfall der elektrischen
Stromversorgung wird die gesamte
Programmierung der elektronischen Schaltuhr
gelöscht, als Uhrzeit wird 00:00 blinkend
angezeigt. Sie müssen diese anschließend
stellen und erneut programmieren.
22
Page 23

FICHA / FICHA / BROCHURE / FICHE / DATENBLATT
Fabricante Fabricante Manufacturer Fabricant Hersteller TEKA
Modelo Modelo Model Modèle Modell HKE-635
Clase de
eficiencia energética,
en una escala
que abarca
de A (más
eficiente)
a G (menos
eficiente).
Función de
calentamiento.
Calentamiento
convencional.
Convección
forzada.
Consumo
de energía.
Classe de eficiência energética, numa
escala de A
(eficiente) a G
(ineficiente).
Função de
aquecimento.
Convencional.
Convecção
forçada de ar.
Consumo
de energia.
Energy
efficiency
class on a
scale of A
(more efficient)
to G (less
efficient).
Heating
function.
Conventional.
Forced air
convection.
Energy
consumption.
Classement
selon son
efficacité
énergétique
sur une
échelle
allant de A
(économe) à G
(peu économe).
Fonction chauffage.
Classique.
Convection
forcée.
Consommation
d´énergie.
Energieeffizienzklasse auf
einer Skala
von A
(niedriger
Verbrauch)
bis G (hoher
Verbrauch).
Beheizung.
Konventionelle
Beheizung.
Umluft /
Heißluft.
Energieverbrauch.
A
Calentamiento
convencional.
Convección
forzada.
Volumen neto
(litros).
Tipo:
Pequeño
Medio
Grande
Tiempo de
cocción con
carga normal.
Calentamiento
convencional.
Convección
forzada.
Superficie de
cocción.
Ruido (dB (A)
re 1 pW).
Convencional.
Convecção
forçada de ar.
Volume útil
(litros).
Tipo:
Pequeno
Médio
Grande
Tempo de
cozedura da
carga-padrão.
Convencional.
Convecção
forçada de ar.
Zona de
cozedura.
Nível de ruído
dB(A) re 1 pW.
Conventional.
Forced air
convection.
Usable volume
(litres).
Size:
Small
Medium
Large
Time to cook
standard load.
Conventional.
Forced air
convection.
Baking area.
Noise (dB (A)
re 1 pW).
Classique.
Convection
forcée.
Volume utile
(litres).
Type:
Faible volume
Volume moyen
Grand volume
Temps de
cuisson en
charge normale.
Classique.
Convection
forcée.
Surface de
cuisson.
Bruit (dB (A) re
1 pW).
Konventionelle
Beheizung.
Umluft /
Heißluft.
Netto-volumen
(liter).
Typ:
Klein
Mittel
Groß
Kochzeit bei
Standardbeladung.
Konventionelle
Beheizung.
Umluft /
Heißluft.
Backfläche
Geräusch (dB
(A) re 1 pW).
0,71
Kwh
0,74
Kwh
35
42 min.
40 min.
1250 cm
- - -
2
Page 24

TEKA GROUP
COUNTRY COMPANY CC TELEPHONE E-MAIL / FAX
AUSTRALIA TEKA AUSTRALIA Pty. Ltd. 61 3 9550 6100 sales@tekaaustralia.com.au
AUSTRIA KÜPPERSBUSCH GesmbH 43 1 866 800 info@kueppersbusch.at
BELGIEUM B.V.B.A. KÜPPERSBUSCH S.P.R.L. 32 2 466 8740 info@kuppersbusch.be
BULGARY TEKA BULGARIA EOOD. 359 2 9768 330 2 9768 332
CANADA TEKA CANADA LTD. 1 866-282-5403 info@tekacanada.com
CHILE TEKA CHILE, S.A. 56 2 4386 000 info@teka.cl
P. R. CHINA TEKA INTERNATIONAL TRADING (Shanghai) 86 21 511 688 41 info@teka.cn
CZECH REPUBLIC TEKA CZ S.R.O. 420 2 84 691940 info@teka-cz.cz
ECUADOR TEKA ECUADOR, S.A. 593 4 2251174 ventas@teka.ec
FRANCE TEKA FRANCE S.A.S. 33 1 343 01597 1 343 01598
GERMANY TEKA KÜCHENTECHNIK GmbH 49 27718141-0 info@teka-kuechentechnik.de
GREECE TEKA HELLAS A.E. 30 210 9760283 info@tekahellas.gr
HUNGARY TEKA HUNGARY KFT 36 1 3542110 teka@teka.hu
INDONESIA PT TEKA BUANA 62 21 390 5274 teka@tekabuana.com
ITALY TEKA ITALIA S.P.A. 39 0775 898271 info@tekaitalia.it
KOREA (SOUTH REP.) TEKA KOREA CO. LTD. 82 2 599 4444 222 345 668
MALAYSIA TEKA KÜCHENTECHNIK (MALAYSIA) SDN. 60 3 7620 1600 customer_svc@teka.com.my
MAROC TEKA MAROC SA 212 22674462/63
MIDDLE EAST TEKA KÜCHENTECHNIK MIDDLE EAST FZE 971 4 887 2912 teka@emirates.net.ae
MEXICO TEKA MEXICANA S.A. de C.V. 52 555 133 0493 ventas@tekamexicana.com.mx
PAKISTAN KÜPPERSBUSCH-TEKA PAKISTAN Pvt. Ltd. 92 42 576 1656 42 576 1657
POLAND TEKA POLSKA SP. ZO.O. 48 22 7383270 teka@teka.com.pl
PORTUGAL TEKA PORTUGAL, S.A. 351 234 329 510 sacliente@teka.pt
ROMANIA TEKA KÜCHENTECHNIK ROMANIA SRL 40 212334450 office@tekaromania.com
RUSSIA TEKA RUS LLC 7 495 101 31 08 info@tekarus.ru
SINGAPORE TEKA SINGAPORE PTE. LTD. 65 67342415 tekasin@pacific.net.sg
SPAIN TEKA INDUSTRIAL, S.A. 34 942350505 mail@teka.com
THAILAND TEKA (THAILAND) CO. LTD. 66 2 652 2999 2 652 2740 1
TURKEY TEKA TEKNIK MUTFAK 90 212 288 3134 teka@teka.com.tr
UKRAINE TEKA UKRAINE LLC 380 44 496 0680 info@teka.ua
UNITED ARAB EMIRATES TEKA KÜCHENTECHNIK U.A.E. LLC 971 4 283 3047 uaeteka@emirates.net.ae
UNITED KINGDOM TEKA PRODUCTS LTD. 44 1235 861916 info@teka.co.uk
USA TEKA USA, INC. 1 813 2888820 info@tekausa.com
VENEZUELA TEKA ANDINA, S.A. 58 2 1229 12821 teka@teka.com.ve
VIETNAM TEKA VIETNAM CO., LTD 84 838258746 phuongtrangten@vnn.vn
www.teka.com
Teka industrial, S.A.
Cajo 17
39011 Santander (Spain)
Tel.: 34 - 942 - 35 50 50
Fax: 34 - 942 - 34 76 94
http://www.teka.es
Teka Küchentechnik GmbH
Sechsheldener Str. 122
35708 Haiger (Germany)
Tel.: 49 - 2771 - 8141-0
Fax: 49 - 2771 - 8141-10
http://www.teka.com
Nuestra aportación a la protección del medio-ambiente: utilizamos papel reciclado.
A nossa contribução para a protecção do ambiente: utilizamos papel reciclado.
Our contribution to enviromental protection: we use recycled paper.
Notre contribution à la protection de l’environnement : nous utilisons du papier recyclé.
Unser Beitrag zum Umweltschutz: wir verwenden umweltfreundliches Papier.
Cod.: 83172411/3172411-000
 Loading...