


1K-1 Baby Monitor Manual_ Cover
i st udi o2008/Nov/17Techwall Electronics
1K-1 Baby Monitor Manual_ Page 1
Thank you for purchasing our IK-1 baby monitor. Your unit has been manufactured
and checked under the strictest quality control to ensure that each unit leaves the
factory in perfect condition. If in the unlikely event you find any defects or have any
problem, please contact your dealer, our branch or service center.
Please read this manual carefully to obtain maximum performance and extended
service life from the unit.
Features
- Voice activated transmitter
- Indicator on receiver showing received signal loudness even when volume is turned
down
- Selectable two channels with crystal clear sound
- Low battery indicator on transmitter and receiver
- Subaudible private tone function minimize interference from other electrical devices
- Transmitter and receiver can operate with either AA size batteries or 9V AC adapter
Power Supply
i st udi o2008/Nov/17Techwall Electronics
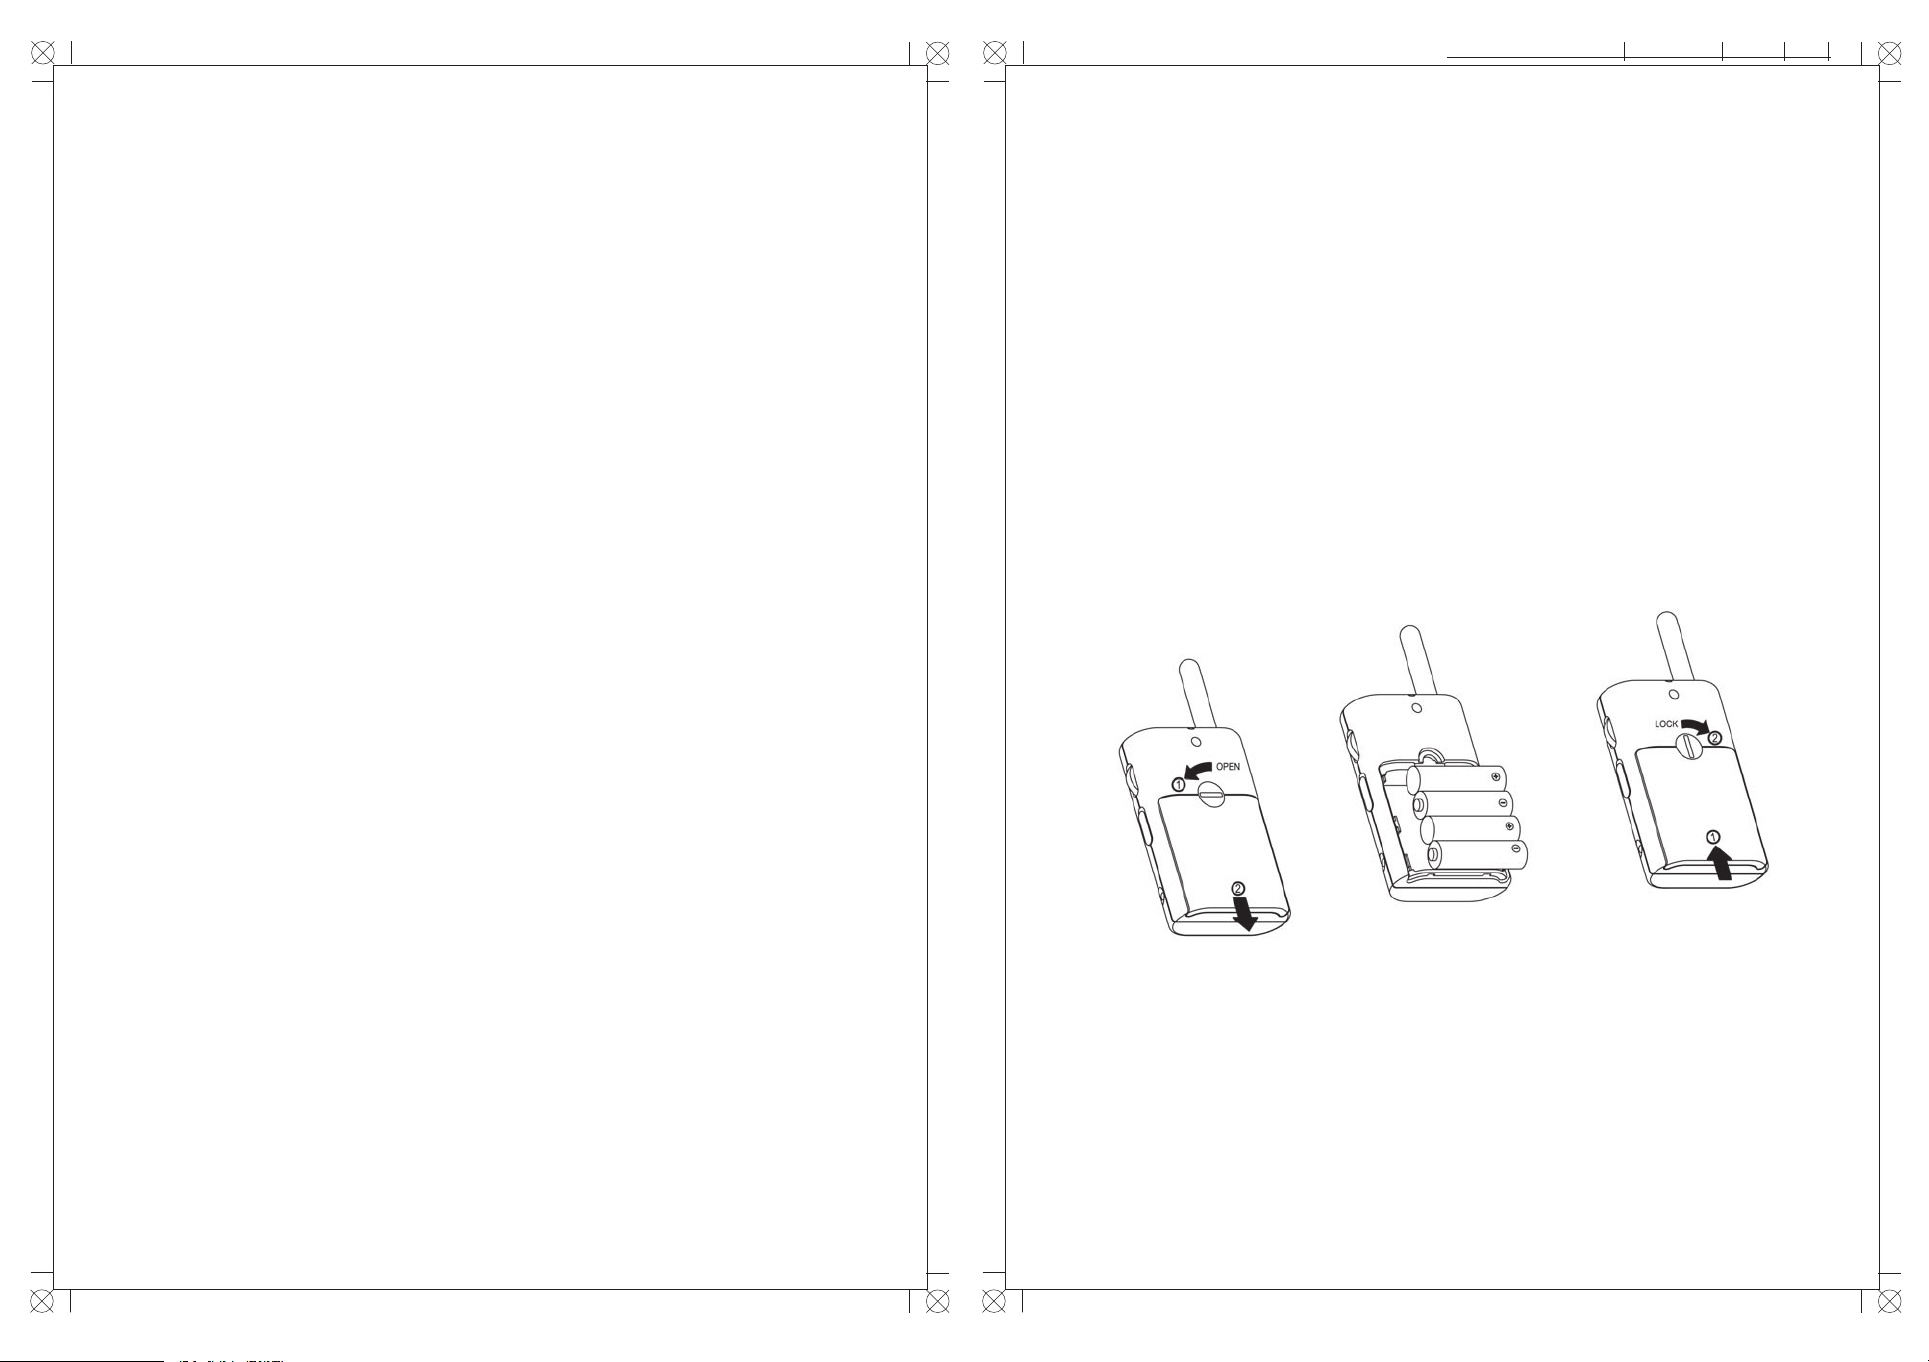
1. Operation from batteries
Turn the locking s c r e w c o u n ter clockwise 90° a n d s l i d e open the battery
cover in the direction as shown. Insert four UM-3/AA size batteries, observe
co rrect polarit y (+/-) indica tion. I nstall back the ba ttery d oor and turn t he
locking screw clockwise 90° to lock the battery door in place.
N.B. For best performance, do not mix use old and new batteries or alkaline
and rechargeable batteries.
1
1K-1 Baby Monitor Manual_ Page 2
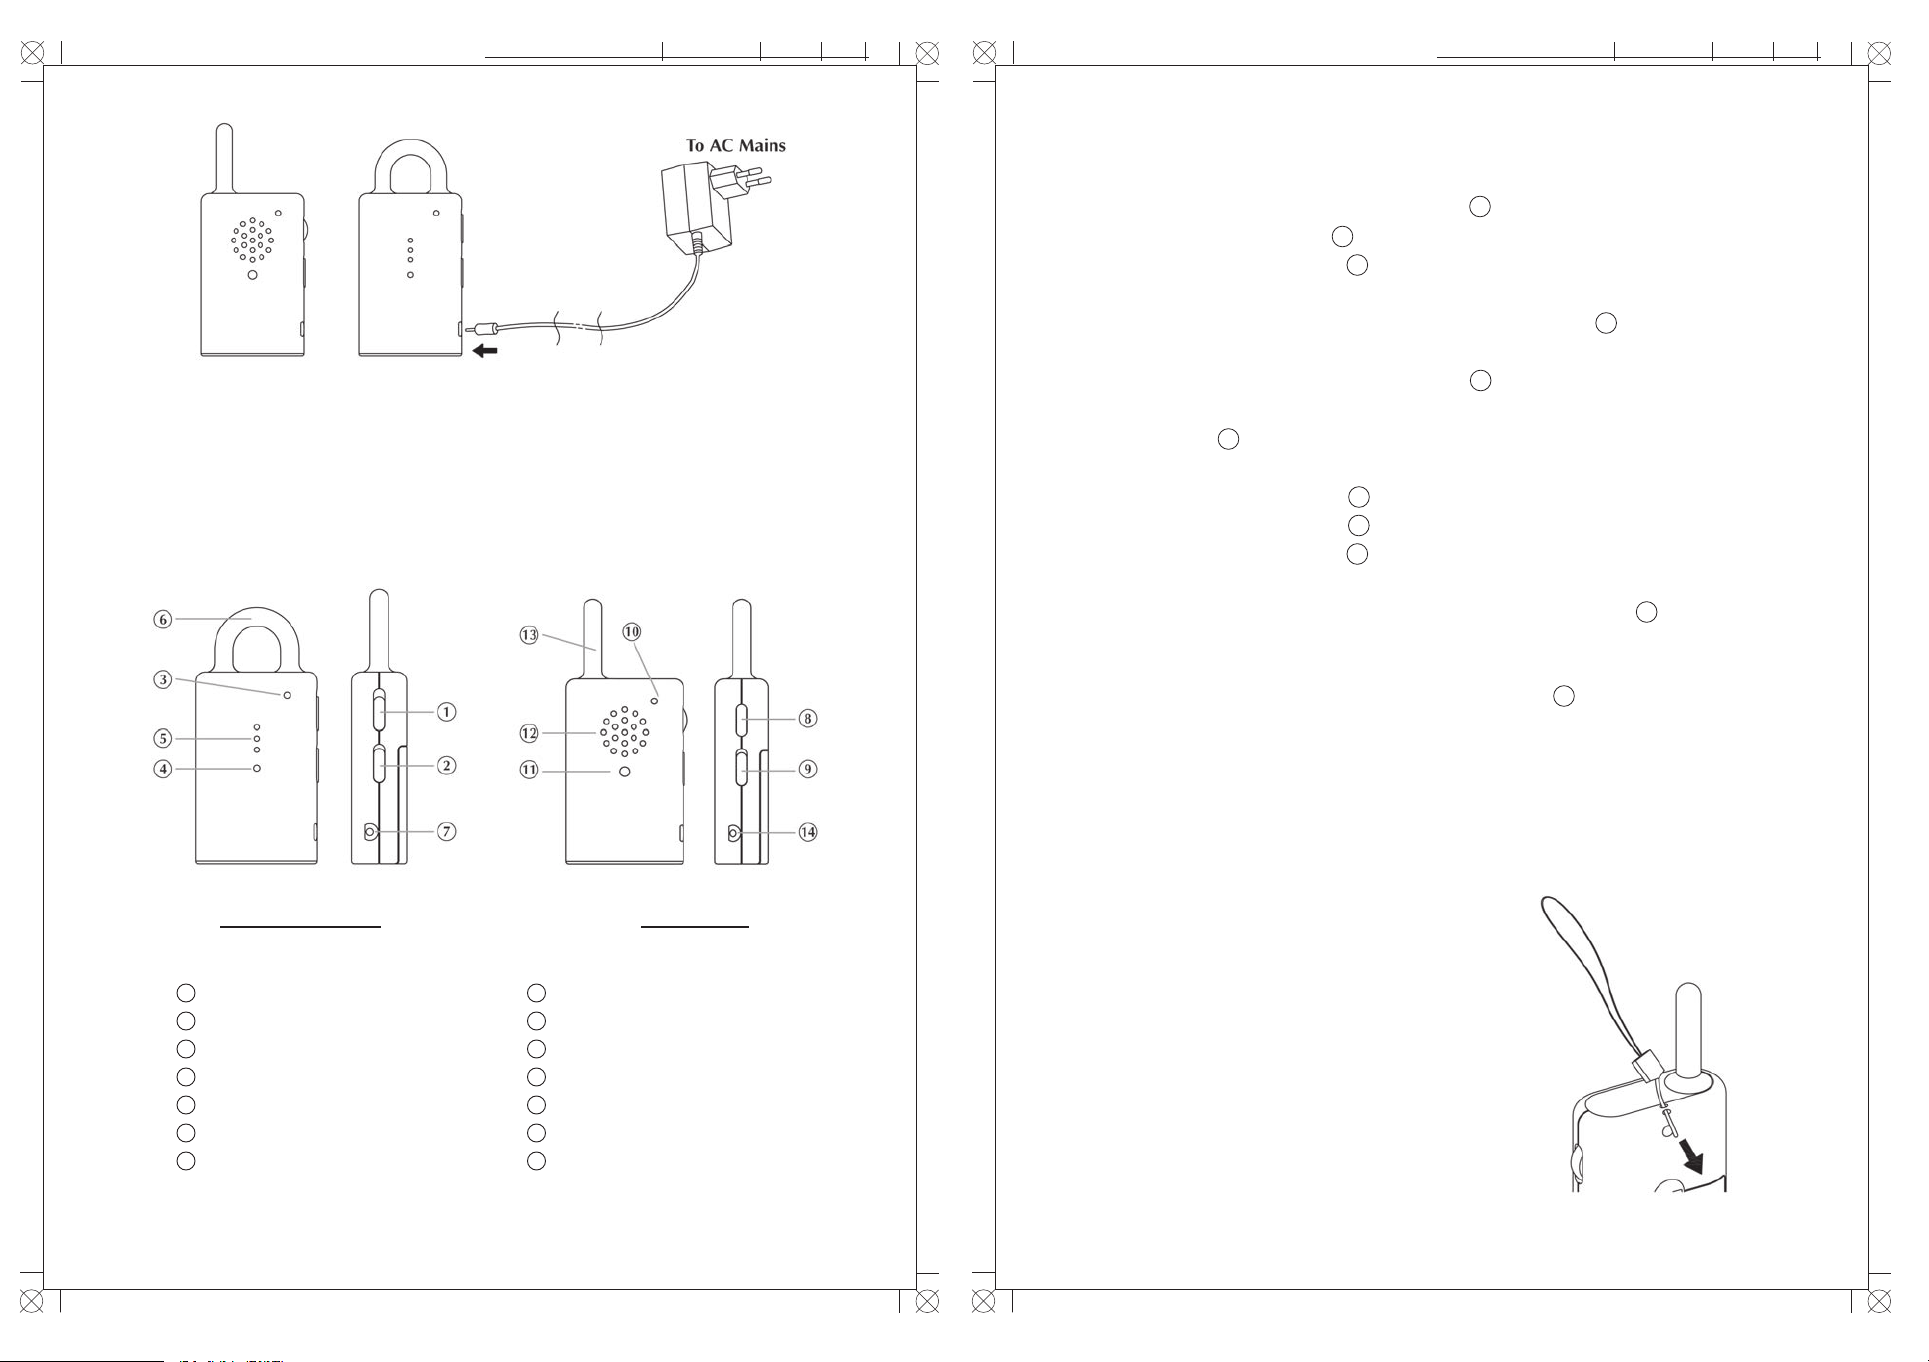
2. Operation from AC manis
The unit can be operated on AC mains using 9V 100mA type AC adapter (purchased
separately). Connect the output plug (Ø 2.35mm) of the adapter to the DC jack on
the unit, make sure the polarity is correct.
Controls Layout
TRANSMITTER RECEIVER
1
Power ON/OFF switch
2
Channel selector
3
Power On and Battery Low indicator
4
Transmit indicator
5
Microphone
6
Antenna
7
DC jack
8
Volume control with ON/OFF switch
9
Channel selector
10
Power On and Battery Low indicator
11
Receive indicator
12
Speaker
13
Antenna
14
DC jack
i st udi o2008/Nov/17Techwall Electronics
1K-1 Baby Monitor Manual_ Page 3
i st udi o2008/Nov/17Techwall Electronics
OPERATION
1. Set the transmitter Power ON-OFF switch 1 to ON position.
2. Set the channel selector 2 to either CH1 or CH2 position .
3. The Power On indicator 3 will light up green. If it becomes red or dim, the
batteries have run down and need to be replaced.
4. Place the transmitter nearby the cot with the microphone 5 facing towards the
baby, preferably 1m away.
5. Once the built-in condenser microphone 5 picks up any sound from the baby,
the transmitter will automatically switches into transmit mode and the transmit
indicator 4 lights up.
6. When the baby stops making sound, the transmitter will return to standby mode
and the transmit indicator 4 goes off.
7. Using the Channel Selector 9 on receiver, set to the same channel as the transmitter.
8. Turn the Volume Control 8 to switch on the receiver at a reasonable distance
away from the transmitter. (Too close a distance will create feedback which cause
a screeching sound at the speaker). The Power On indicator 10 will light up
green, if it becomes red or dim, the batteries have run down and need to be
replaced.
9. Whenever a signal is received, the receiver indicator 11 will light up. The louder
the voice, the brighter the indicator. This indicator is useful to monitor the baby
when volume of speaker is turned down.
10. In case you hear interference or static noises, change to another channel on both
the transmitter and receiver.
11. This baby monitor is incorporated with private tone feature, so static noises will
not be heard in the receiver under standby mode. However, it is necessary
that the transmitter and receiver have the same
private tone (as indicated by colour code in the
battery compartment) to communicate with
each other.
12. Both the transmitter and receiver can be carried
around using hand strap. To install hand strap
(purchased separately), follow diagram as shown.
2
3
1K-1 Baby Monitor Manual_ Page 4
i st udi o2008/Nov/24Techwall Electronics
1K-1 Baby Monitor Manual_ Page 5
i st udi o2008/Nov/24Techwall Electronics
Precautions
- Use only 9V 100mA type AC adapters. Use of other AC adapter may cause damage
to the unit.
- When not using the unit for a long period of time, remove all battery from the
transmitter and receiver to avoid battery leakage.
- Disconnect the AC adapter from the wall outlet when the unit is not to be operated.
- The unit is best performed within a temperature range of 0 °C to 40°C (22 F to
104 F).
- Do not leave the unit expose to direct sunlight for a long time or near any heat
source, moisture and excessive dust environment.
- When the unit cabinet become dirty, use detergent and clean with a soft cloth.
Never use abrasive cleaner or chemical solvent.
- Do not open the cabinet, no serviceable parts inside.
Standard Accessor
a. Transmitter Unit ……………………………………………………………........ 1
b. Receiver Unit ………………………………………………………………….…. 1
c. User Manual ……………………………………………………………….…….. 1
The users manual or instruction manual for an intentional or unintentional radiator
shall caution the user that changes or modifications not expressly approved by the
party responsible for compliance could void the user’s authority to operate the
equipment. In cases where the manual is provided only in a form other than paper,
such as on a computer disk or over the Internet, the information required by this
section may be included in the manual in that alternative form, provided the user
can reasonably be expected to have the capability to access information in that form.
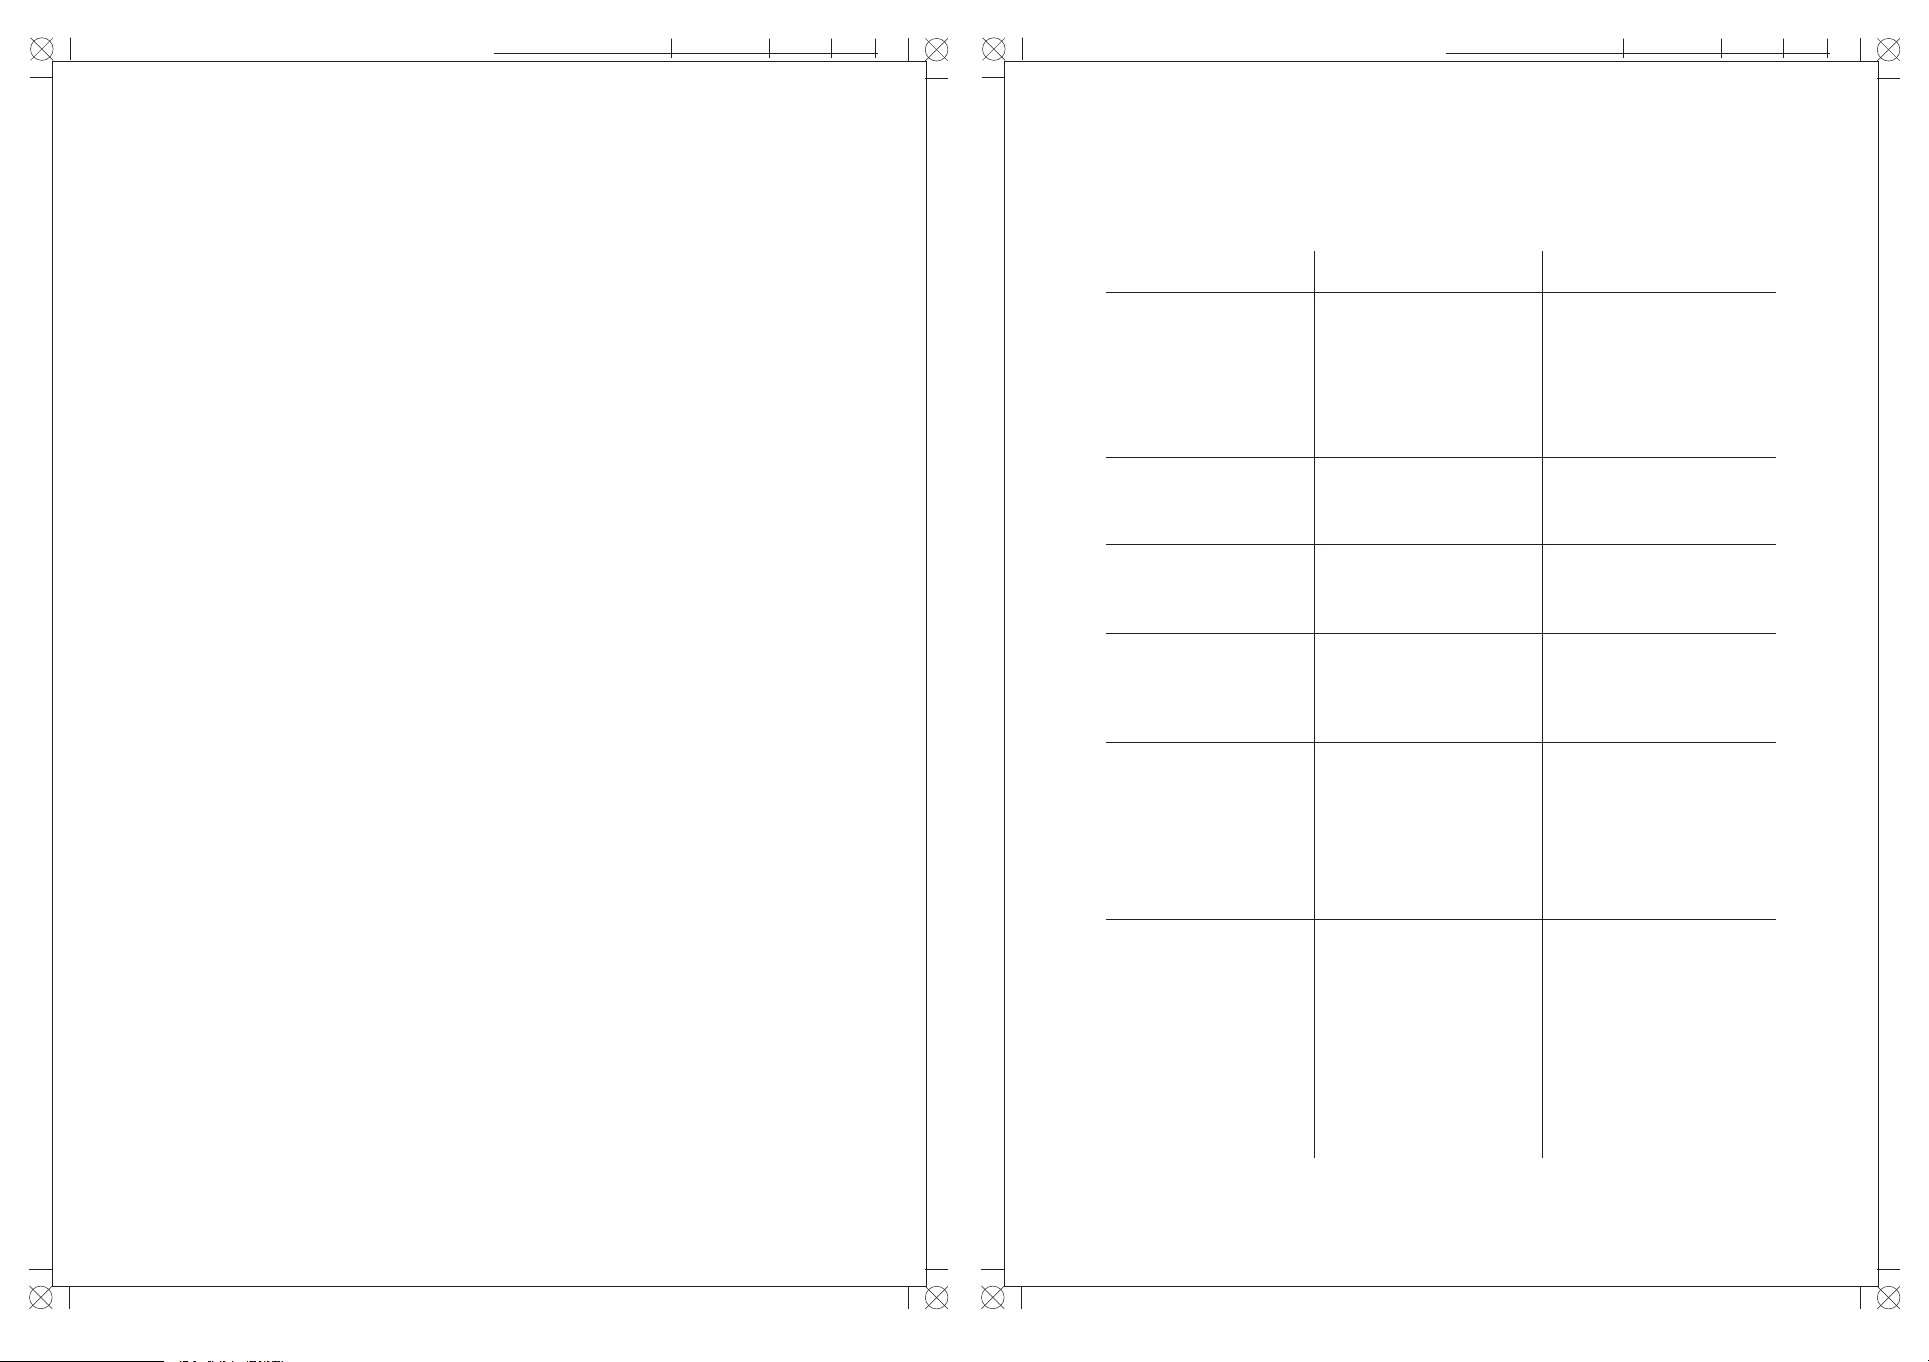
TROUBLE SHOOTING GUIDE
Problem Possible Causes Solution
Transmitter has no
transmission
Transmitter always on
Static noise sometimes
heard
Many static noises and
interference
Communication distance is
too short
- The input sound level is
too low
- Battery has run down or
AC adapter improperly
connected
- The input sound level is
too high
- Interference from other
devices operating on
same channel
- Transmitter is located
near other electrical
appliances
- Transmitter or receiver
battery has run down
- Place transmitter
closer to baby
- Replace with new battery
or check connection
- Place the
transmitter further away
from the baby
- Switch to another channel
- Remove the electrical
appliance or re-locate the
transmitter far away from
the source of interference.
- Replace with new battery
or use AC adapters as power
supply
FCC Information
This device complies with Part 15 of the FCC Results.
Operation is subject to the following two conditions :
(1) This device may not cause harmful interface, and
(2) This device must accept any interference received, including interference that
may cause undesired operation.
WARNING
Change or modification not expressly approved by the manufacturer could void the
user’s authority to operate the equipment.
4
Receiver cannot receive
signal from transmitter
- Too many metal shielding
structures between
transmitter and receiver
- Receiver and transmitter
are set with different
private tones
5
- Re-locate the transmitter
or receiver
- Consult your dealer and
change another set with
properly matched private
tone.
 Loading...