

Page 1
UK
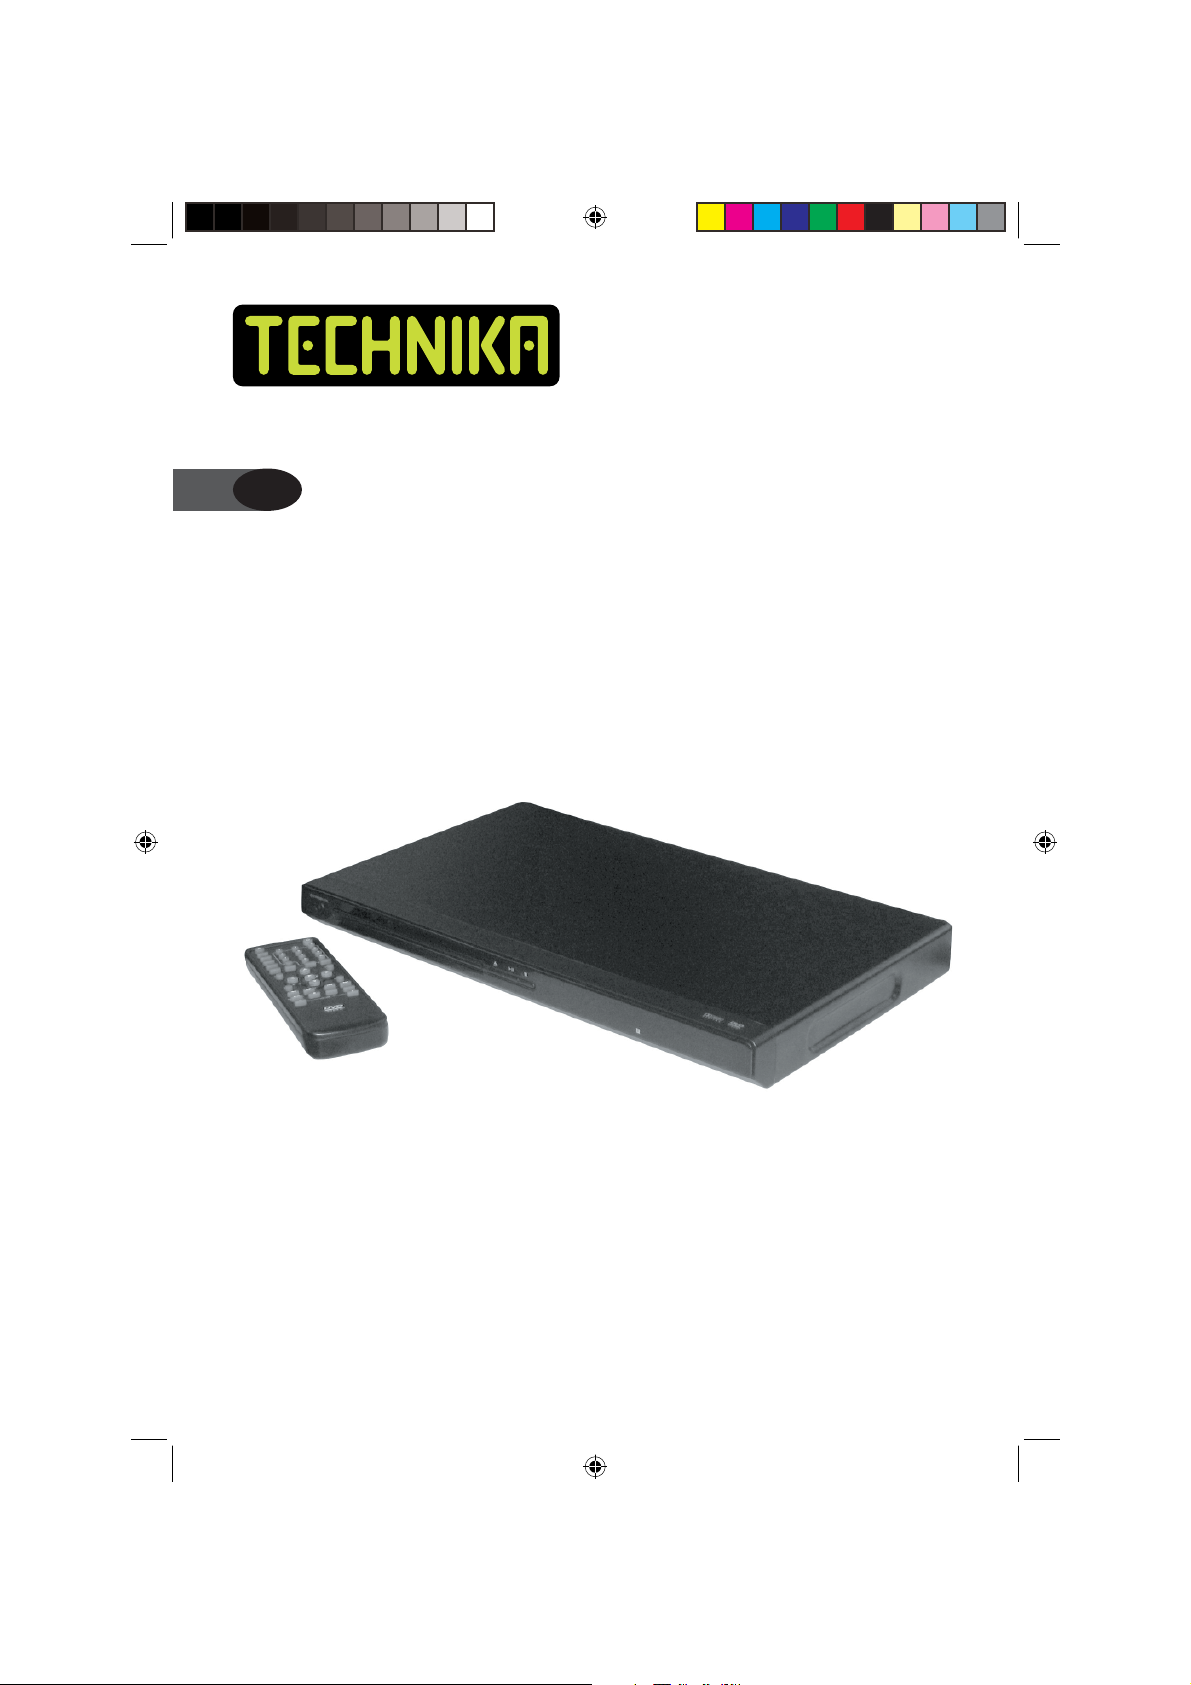
DVD Player
User Guide
DVDFAW08
Technika DVDFAW08 1B V01.indd 1Technika DVDFAW08 1B V01.indd 1 23/07/2008 14:43:3523/07/2008 14:43:35
Page 2

Technika DVDFAW08 1B V01.indd 2Technika DVDFAW08 1B V01.indd 2 23/07/2008 14:44:1923/07/2008 14:44:19
Page 3

CONTENTS
User Guide
INTRODUCTION .............................. 2
Safety is Important ................................. 2
IN THE BOX ..................................... 2
SAFETY INFORMATION .................. 3
Power Source ......................................... 3
General .................................................. 3
Cleaning ................................................. 4
Ventilation .............................................. 4
Servicing ................................................. 4
Battery Disposal ...................................... 4
How Do I Dispose of This Product? ......... 5
ELECTRICAL SAFETY ....................... 5
PARTS IDENTIFICATION .................. 6
Front View ..............................................6
Rear View ............................................... 6
Remote Control ...................................... 7
GETTING STARTED .......................... 8
Connecting to the TV ............................. 8
The Remote Control ............................... 8
Switching the DVD Player On and Off ..... 9
Screen Saver ........................................... 9
INSERTING A DISC ........................ 10
DVD ..................................................... 10
Audio CD .............................................10
Photo CD ............................................. 10
Compatible Discs .................................. 11
DVD PLAYER FUNCTIONS ............. 12
Playing DVDs ........................................ 12
Pause Play ............................................ 12
Stop Play ..............................................12
Fast Forward/Reverse ............................ 12
Skip to the Next/Previous Chapter .........13
Step ..................................................... 13
Mute .................................................... 13
Volume ................................................. 13
PAL/NTSC .............................................13
SPECIAL DVD FUNCTIONS ............ 14
Menu ................................................... 14
Title ...................................................... 14
Subtitles ............................................... 14
Audio ................................................... 14
Zoom ................................................... 15
Search .................................................. 15
Angle ................................................... 16
Repeat .................................................. 16
A-B Repeat ........................................... 16
On Screen Display (OSD) ....................... 17
Program ............................................... 17
PLAYING AUDIO CDs .................... 18
Loading Audio CDs ............................... 18
Selecting Tracks .................................... 18
Control During Playback ....................... 18
Repeat .................................................. 19
A-B Repeat ........................................... 19
Program ............................................... 19
Search .................................................. 20
PLAYING PHOTO CDs ................... 20
Loading Photo CDs ............................... 20
Accessing the Photo CD contents ......... 21
Control During Playback ....................... 21
Basic Controls ....................................... 22
Language Setup ................................... 23
Screen Setup ........................................ 24
Audio Setup .........................................26
Custom Setup ...................................... 26
Default ................................................. 28
HELP AND ADVICE ........................ 28
CARE AND MAINTENANCE .......... 29
Handling Discs ...................................... 29
TECHNICAL SPECIFICATION .......... 30
WARRANTY .................................. 30
1
Technika DVDFAW08 1B V01.indd Sec1:1Technika DVDFAW08 1B V01.indd Sec1:1 23/07/2008 14:44:1923/07/2008 14:44:19
Page 4
DVD Player DVDFAW08
INTRODUCTION
Thank you for purchasing this Technika DVD player which has been designed and manufactured to
give you many years of trouble-free service.
You may already be familiar with using a similar product but please take time to read these
instructions which have been written to ensure you get the very best from your purchase.
Safety is Important
To ensure your safety and the safety of others, please read the Safety precautions BEFORE you
operate this product.
Keep this information in a safe place for future reference.
WARNING! THIS PRODUCT UTILISES A CLASS 1 LASER. USE OF CONTROLS,
ADJUSTMENTS OR PROCEDURE NOT LISTED IN THIS USER GUIDE MAY RESULT IN
HAZARDOUS RADIATION EXPOSURE.
IN THE BOX
You will fi nd the following:
• DVD Player
• User Guide
• Remote Control
NOTE: If any of the items listed are damaged or missing, please contact the Tesco Electrical
Helpline on 0845 456 6767.
2
Technika DVDFAW08 1B V01.indd Sec1:2Technika DVDFAW08 1B V01.indd Sec1:2 23/07/2008 14:44:2023/07/2008 14:44:20
Page 5
User Guide
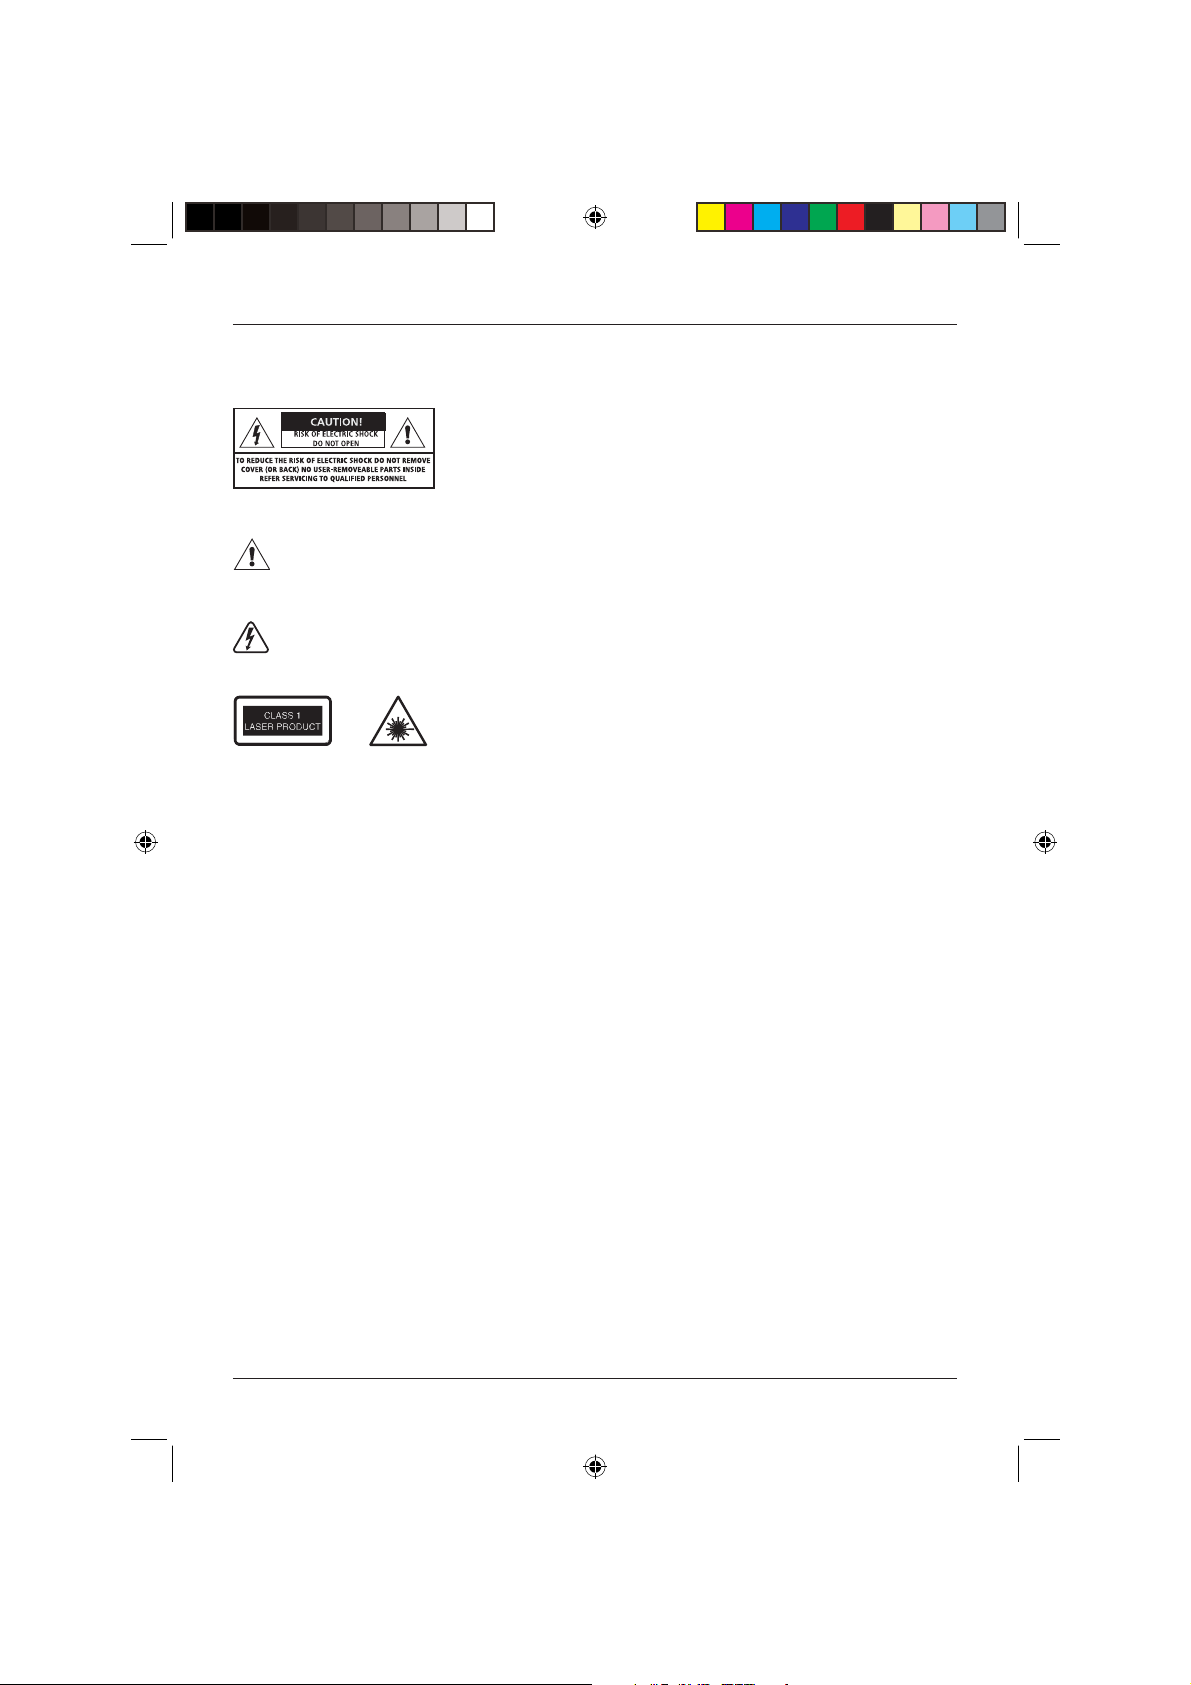
SAFETY INFORMATION
This symbol indicates that there are important operating and maintenance instructions in the
literature accompanying this product.
This symbol indicates that dangerous voltage constituting a risk of electric shock is present
within this product.
These labels tell you that the product contains a laser component.
Do not stare at the laser lens.
Power Source
• This product requires a 110-240V AC, 50/60Hz mains supply. Do not use any other supply.
General
• Position cables so that they cannot be walked on or pinched by other items placed on or
against them.
• Do not use this product in humid or damp conditions.
• Do not allow this product to get wet.
• Do not expose this product to dripping or splashing.
• Do not place water fi lled objects such as vases on top of this product.
• Do not place naked fl ame sources, such as candles on top of this product.
• Do not install or operate near any heat sources such as radiators, stoves, or other apparatus
that produce heat.
• Unplug this product during lightning storms or when unused for long periods of time.
• When the disc tray is open a safety interlock disconnects power to the laser. Do not override
this safety interlock.
3
Technika DVDFAW08 1B V01.indd Sec1:3Technika DVDFAW08 1B V01.indd Sec1:3 23/07/2008 14:44:2023/07/2008 14:44:20
Page 6

DVD Player DVDFAW08
• This product generates, uses and can radiate radio frequency energy and, if not installed
and used in accordance with the instructions, may cause harmful interference to radio
communication. However, this is no guarantee that interference will not occur in a particular
installation. If this product does cause harmful interference to radio or television reception,
which can be determined by turning the product off and on, the user is encouraged to try to
correct the interference by one of the following measures:
- Reorient or relocate the receiving antenna.
- Increase the separation between the product and receiver.
- Connect the product into an outlet on a circuit different from that to which the receiver is
connected.
- Consult the dealer or an experienced radio/TV technician for help.
• Caution: Changes or modifi cations not expressly approved by the manufacturer could void the
user’s authority to operate this product.
• Caution: Usage of controls or adjustments or performance of procedures other than those
specifi ed herein may result in hazardous exposure.
Cleaning
• Always unplug this product from the mains supply before you clean it.
• Do not use liquid or aerosol cleaners.
• This product should be cleaned with a soft, barely damp cloth.
Ventilation
• The slots and openings on this product are for ventilation purposes. Do not cover or block them
as this could cause overheating.
• Never let children push anything into the slots or openings.
Servicing
• There are no user-serviceable parts in this product.
• If servicing is required, always refer to qualifi ed service personnel.
• Always consult the dealer if you are ever in doubt about the installation, operation or safety of
this product.
Battery Disposal
• Please ensure that used batteries are disposed of safely.
• Please do not dispose of batteries in a fi re or with household waste.
• Please check with your local authority for disposal regulations.
4
Technika DVDFAW08 1B V01.indd Sec1:4Technika DVDFAW08 1B V01.indd Sec1:4 23/07/2008 14:44:2123/07/2008 14:44:21
Page 7
User Guide
How Do I Dispose of This Product?
UK: Waste electrical products should not be disposed of with household waste. Separate
disposal facilities exist, for you nearest facilities see www.recycle-more.co.uk or instore
for details.
ROI: Produced after 13th August 2005
Waste electrical products should not be disposed of with household waste. Please recycle
where facilities exist. Check with your Local Authority or retailer for recycling advice.
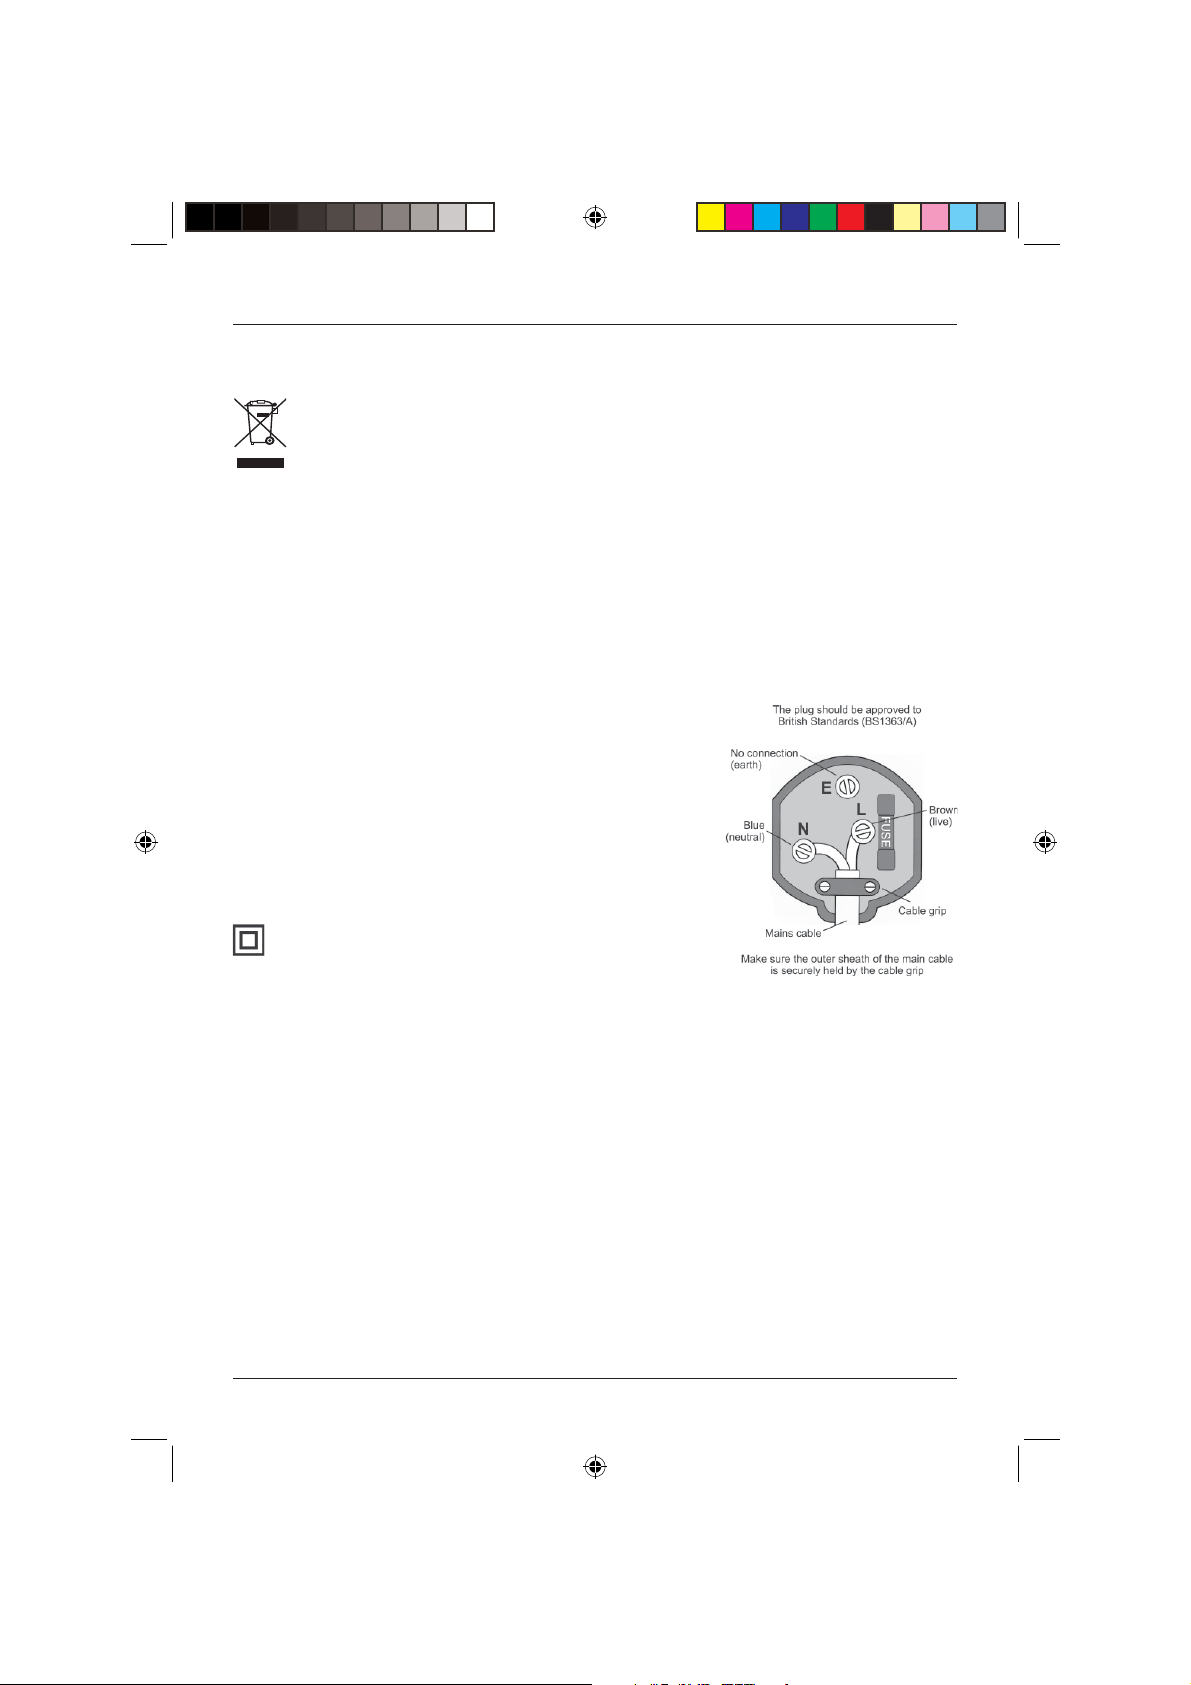
ELECTRICAL SAFETY
This appliance is fi tted with a BS1363/A 13 amp plug. If it is not suitable for your supply sockets
it must be removed and replaced with an appropriate plug. If the plug becomes damaged and/or
needs to be replaced please follow the wiring instructions below.
The plug removed must be disposed of immediately.
It must not be plugged into a supply socket as this will be
an electrical hazard.
If the fuse needs to be replaced it must be of the same
rating and ASTA approved to BS1362. If the plug is
changed, a fuse of the appropriate rating must be fi tted in
the plug, adapter or at the distribution board. If the fuse in
a moulded plug is replaced, the fuse cover must be refi tted
before the appliance can be used.
This symbol means this appliance is a class II appliance
and therefore, an earth connection is not required.
5
Technika DVDFAW08 1B V01.indd Sec1:5Technika DVDFAW08 1B V01.indd Sec1:5 23/07/2008 14:44:2123/07/2008 14:44:21
Page 8
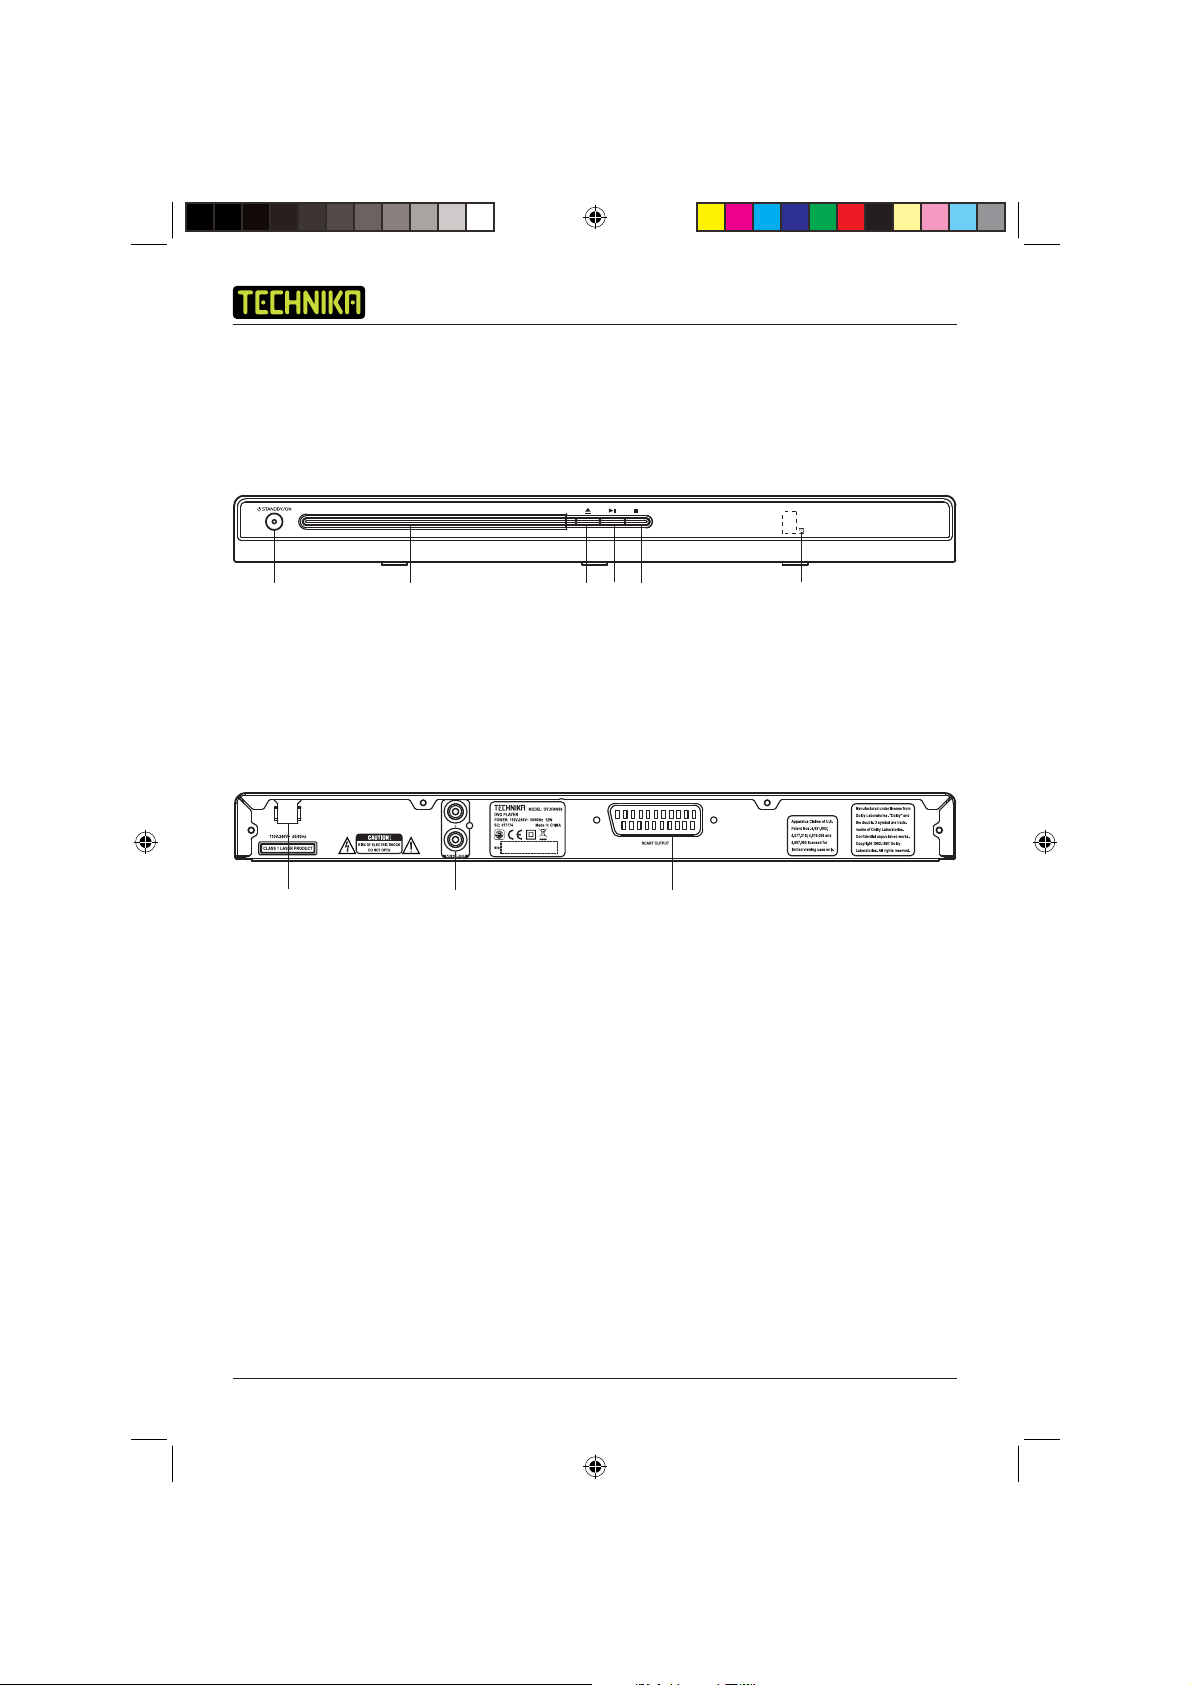
PARTS IDENTIFICATION
Front View
DVD Player DVDFAW08
qerty
Rear View
ui
1. Standby On/Off
2. Disc Tray
3. Open/Close
4. Play/Pause
5. Stop
w
o
6. Remote Control Sensor
7. Mains Cable
8. 2 Channel Audio Output
9. SCART Output
6
Technika DVDFAW08 1B V01.indd Sec1:6Technika DVDFAW08 1B V01.indd Sec1:6 23/07/2008 14:44:2223/07/2008 14:44:22
Page 9
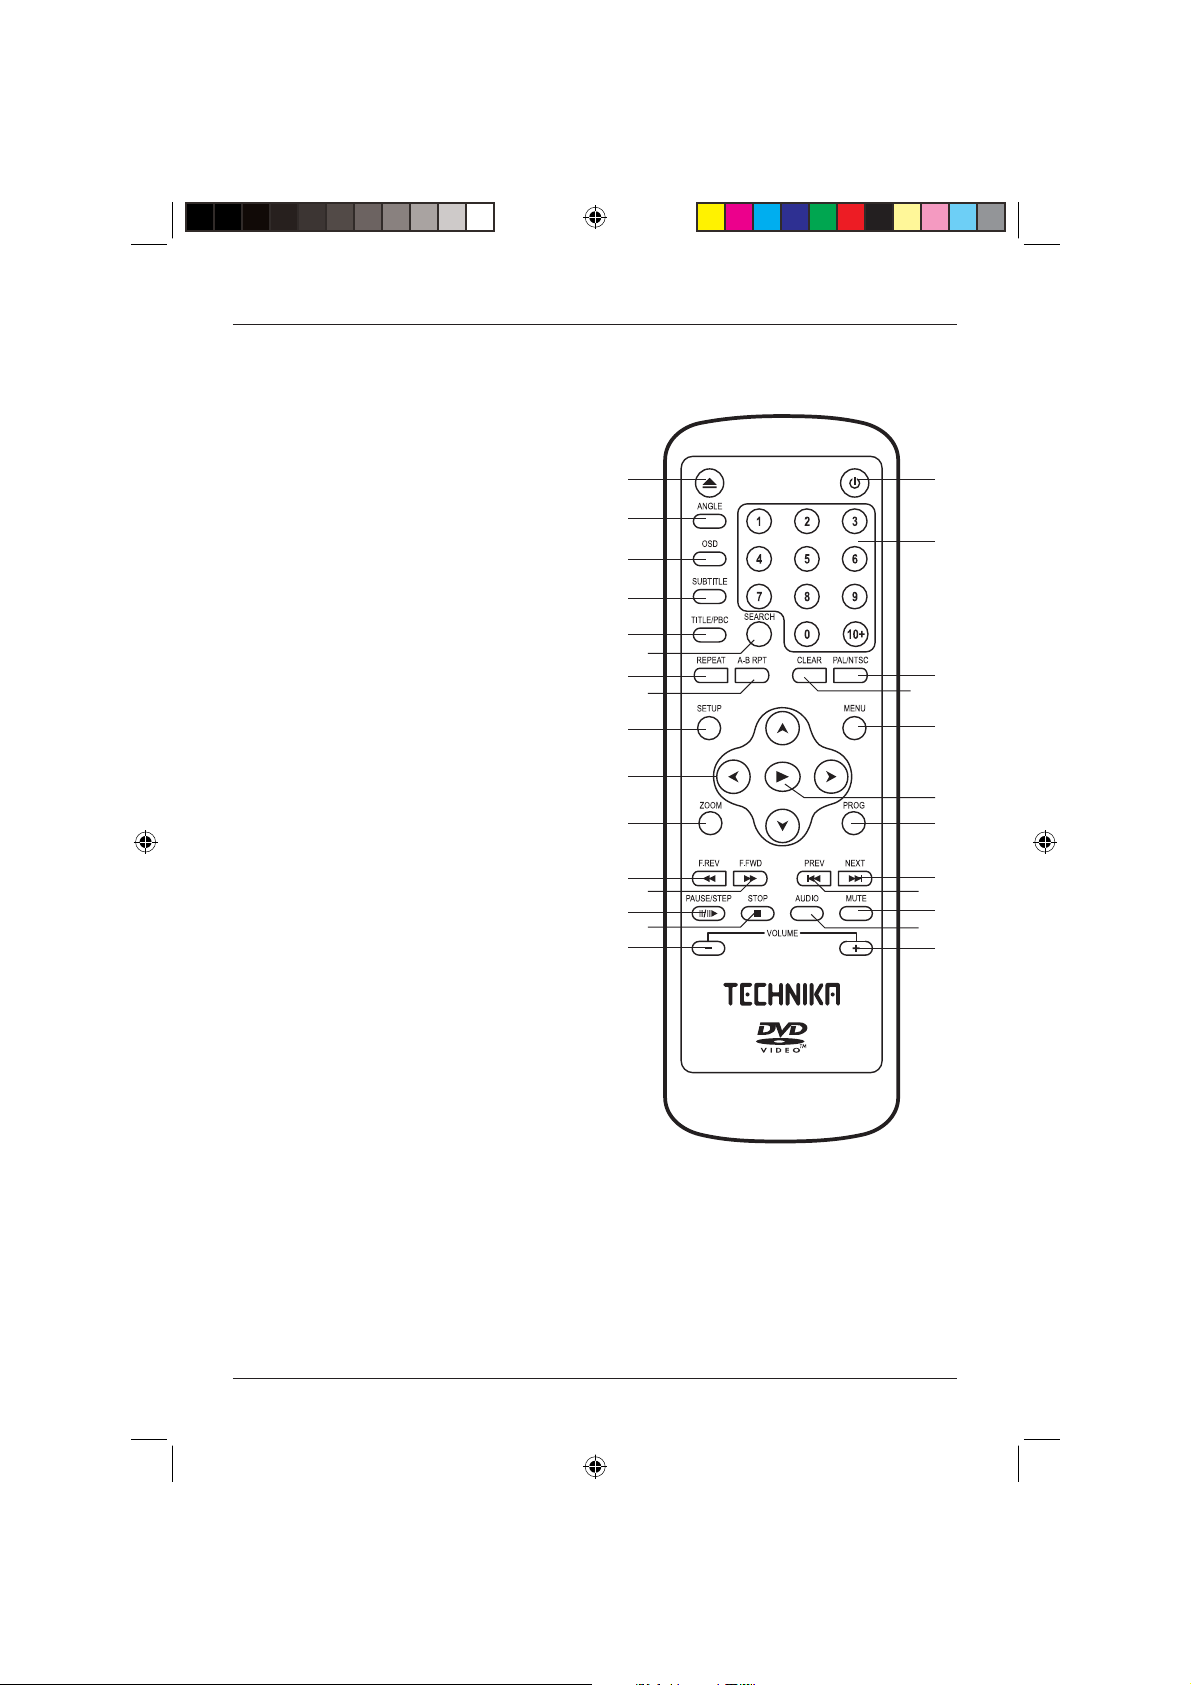
Remote Control
1. OPEN/CLOSE Opens and closes the disc tray
2. ANGLE Switches between camera angles
3. OSD Switches the On Screen Display
(OSD) on or off
4. SUBTITLE Switches the subtitles on or off
5. TITLE/PBC Returns to the title menu of the
disc
6. SEARCH Used to jump to a specifi c point
on the disc
7. REPEAT Repeats chapter, track or title
8. A-B RPT Repeats a user defi ned section of
the disc
9. SETUP Opens the setup menu
10. ARROWS Used to navigate the menu
screens
11. ZOOM Enlarges or reduces the picture
12. F.REV Searches backwards during
playback
13. F.FWD Searches forward during playback
14. PAUSE/STEP Pauses during playback and steps
frame by frame
15. STOP Stops playback
16. VOLUME - Decreases the volume
17. STANDBY Switches the product on or off
18. NUMERIC BUTTONS
19. PAL/NTSC Selects the video output
20. CLEAR Clears the current entry in a
menu
21. MENU Opens the root menu of the disc
22. PLAY Starts playback and confi rms
menu selections
23. PROG Programs playback in a user
defi ned order
24. NEXT Skips to the next chapter/track
25. PREV Skips to the previous chapter/
track
26. MUTE Turns the sound on or off
27. AUDIO Switches between audio modes
28. VOLUME + Increases the volume
q
w
e
r
t
u
o
1)
1!
d
g
j
y
i
f
h
User Guide
k
l
;
2)
2!
2@
2#
2$
2%
2^
2&
2*
7
Technika DVDFAW08 1B V01.indd Sec1:7Technika DVDFAW08 1B V01.indd Sec1:7 23/07/2008 14:44:2323/07/2008 14:44:23
Page 10
DVD Player DVDFAW08
GETTING STARTED
Connecting to the TV
The Quick Start Guide shows how to connect your DVD player to your television. These methods
are described below.
SCART lead
The SCART lead (not supplied) should be used to connect your DVD player to your TV. This
connection uses component video signals i.e. the red, green and blue (RGB) content of the video
are sent as separate signals. This gives an excellent quality video signal.
RCA AV cable
The RCA AV Cable (not supplied) can be used to connect your DVD player to an external sound
system such as your home stereo or a surround sound system. This connection method separates
the left and right audio signals to provide superior quality sound.
The Remote Control
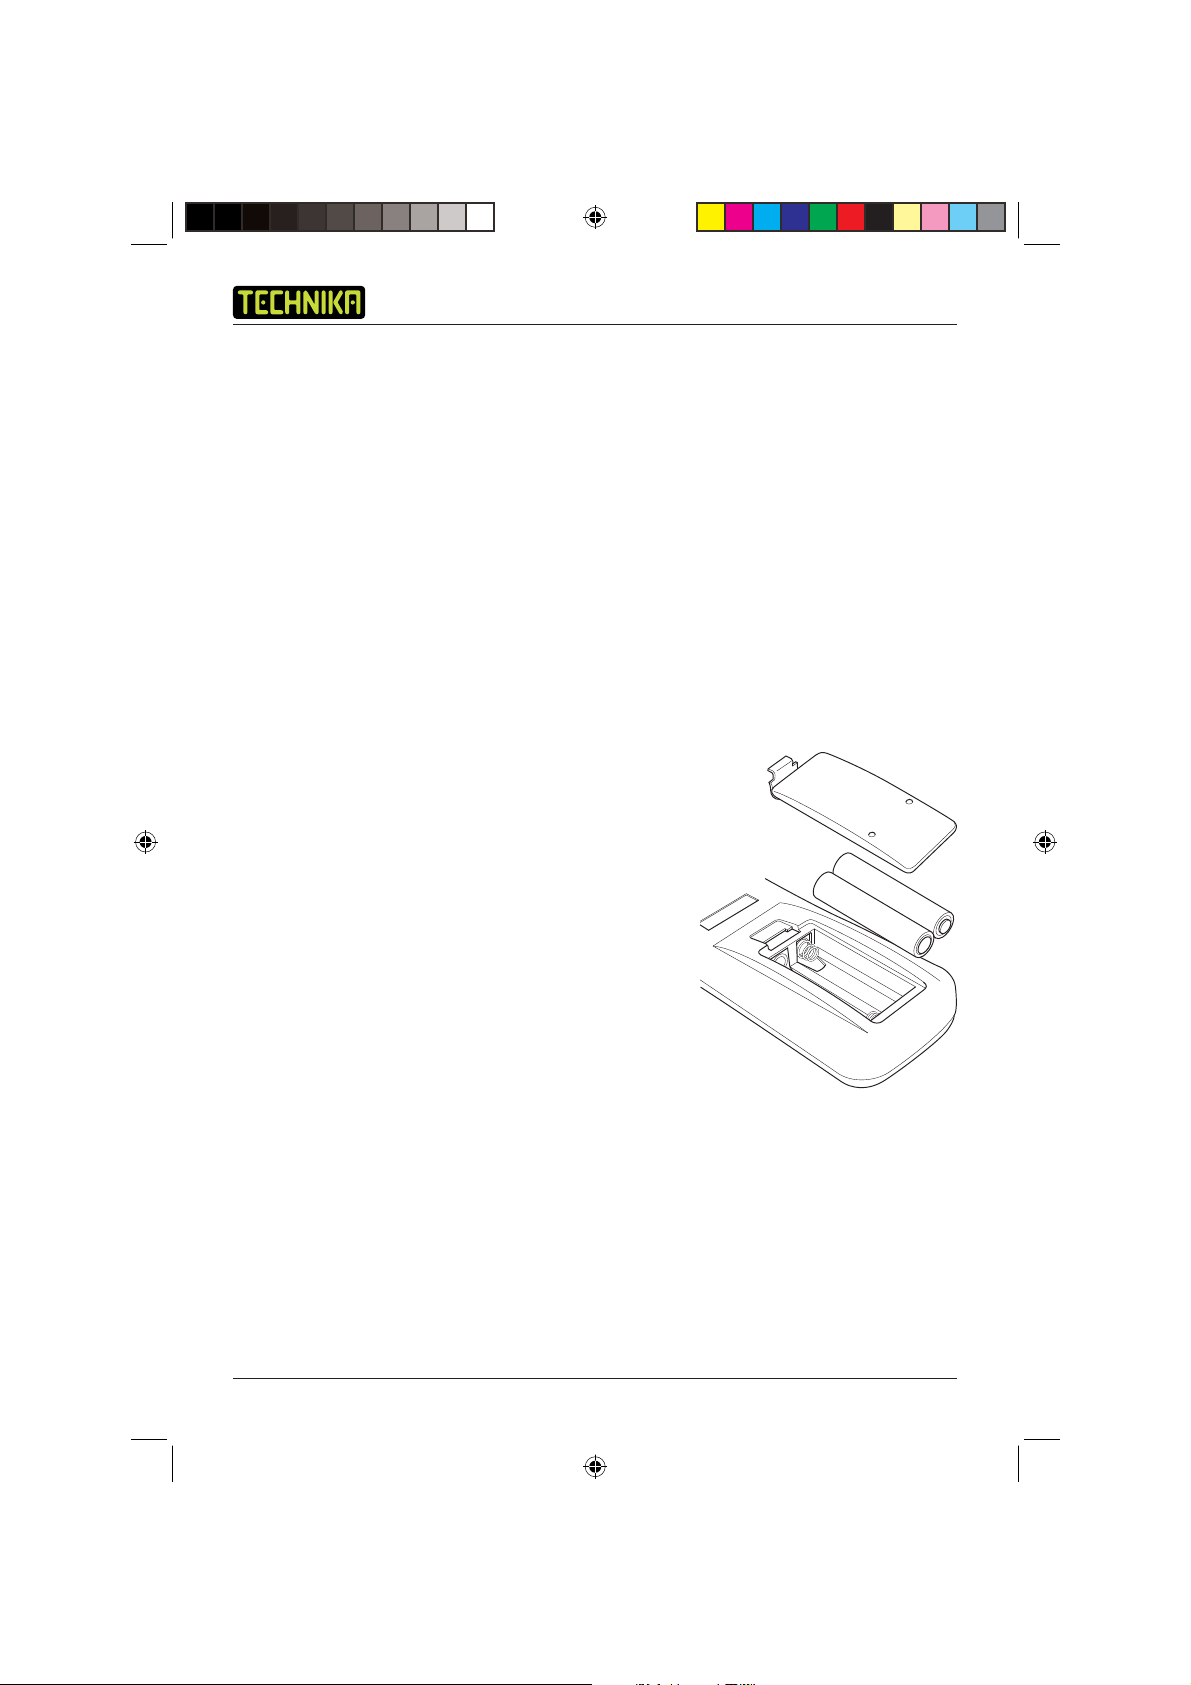
Installing the Remote Control Batteries
1. To remove the battery compartment cover, push the
cover away from the remote control.
2. Place two AAA size batteries in the compartment
following the battery polarity (+ and -) symbols
indicated inside the battery compartment.
3. Replace the lid in position and press until it clicks shut.
Use of the Remote Control
To use the remote control, point it at the right hand front
of the DVD player.
The remote control has a range of up to 6 metres from
the DVD player and at an angle of up to + 30 and
-30 degrees.
Do not block the path of the beam from the remote control to the DVD player.
NOTE: Sunlight or very bright light will reduce the remote control sensitivity.
8
Technika DVDFAW08 1B V01.indd Sec1:8Technika DVDFAW08 1B V01.indd Sec1:8 23/07/2008 14:44:2323/07/2008 14:44:23
Page 11

User Guide
Switching the DVD Player On and Off
Your DVD player requires a mains supply of 110-240 V AC at 50/60Hz. Please ensure that your
mains supply is compatible.
1. Unwind the mains cable and insert the mains plug into the mains outlet socket and switch on.
2. To turn the DVD player on, press the Standby On/Off button on the front of the DVD player.
The Standby button on the Remote Control works in the same way as the Standby On/Off
button on the front of the DVD player. The LED in the centre of the button will change from red to
green.
Screen Saver
Television screens can sometimes be damaged by displaying stationary images for prolonged
periods of time. To prevent this, the DVD player is equipped with an automatic screen saver to
protect your television screen.
If the DVD player is in the stop mode and no buttons are pressed for approximately two minutes,
the screen saver is displayed. The screen saver moves the TECHNIKA graphic around the screen.
Press any button on the remote control to deactivate the screen saver.
9
Technika DVDFAW08 1B V01.indd Sec1:9Technika DVDFAW08 1B V01.indd Sec1:9 23/07/2008 14:44:2323/07/2008 14:44:23
Page 12

DVD Player DVDFAW08
INSERTING A DISC
Ensure the DVD player is connected to the mains supply and correctly connected to your television.
1. Press the Standby On/Off button on the front of your DVD player or alternatively the Standby
button on the Remote Control. The screen displays the static TECHNIKA DVD logo.
2. Press the Open/Close button on the front of the DVD player or the Remote Control to open the
DVD disc tray. In the top right of the TV screen, ’Open’ will be displayed.
3. Place a compatible DVD disc into the recess on the disc tray, ensuring that the label is facing
upwards. Place 8cm discs on the inner recess.
4. Press the Open/Close button on the DVD player or the remote control to close the disc drawer.
In the top right of the TV screen, ‘Close’ will be displayed.
DVD
When the disc drawer has closed, ‘Loading...’ will be displayed on the TV screen followed by ‘DVD’.
The DVD will automatically start to play and pause at the start of the disc menu to enable you to
make any selections.
Audio CD
If an Audio CD has been inserted, after the screen loading message, the DVD player will
automatically start to play the fi rst audio track on the CD. The elapsed time and track number will
be displayed on the TV screen.
Photo CD
If a Photo CD has been inserted, after the screen loading message, the DVD player will
automatically display the fi rst photo on the CD. The remaining photos on the CD will be played in a
slide show. During the slide show a progress bar will be shown as each photo is loaded.
10
Technika DVDFAW08 1B V01.indd Sec1:10Technika DVDFAW08 1B V01.indd Sec1:10 23/07/2008 14:44:2423/07/2008 14:44:24
Page 13

User Guide
Compatible Discs
Your DVD player can play discs that are marked with the following logos:
8cm/12cm DVD Video Discs.
12cm Compact Disc Recordable Discs.
12cm Compact Disc Re-Writable Discs.
8cm/12cm Compact Disc Audio Discs.
12cm Photo Compact Discs.
Kodak Picture Compact Discs.
Region code
If the region code of the disc being played does not match the region code of this DVD player
then the disc cannot be played. If you do try to do this a region violation notice will appear on the
screen.
The region code for this player is region 2 (refer to the symbols below).
11
Technika DVDFAW08 1B V01.indd Sec1:11Technika DVDFAW08 1B V01.indd Sec1:11 23/07/2008 14:44:2423/07/2008 14:44:24
Page 14

DVD Player DVDFAW08
DVD PLAYER FUNCTIONS
NOTE: Unless otherwise stated, all references to buttons refer to the remote control.
Playing DVDs
When you load a DVD it will start to play automatically, most will stop at the Title menu. This
enables you to select from various play options, such as different titles, trailer, and language
options. The options available are dependent on the DVD. Normally you will need to press the
Play button.
Pause Play
1. Press the Pause/Step button to pause play. In the top right of the TV screen,
’II’ will be displayed.
2. To resume normal play, press the Play button. In the top right of the TV screen, ‘’ will be
briefl y displayed.
Stop Play
1. Press the Stop button to stop play. The static TECHNIKA DVD logo is displayed.
2. Press the Play button to resume play. In the top right of the TV screen, ’Resume’ will be briefl y
displayed.
NOTE: Play will commence from the exact position where the DVD was stopped, unless either the
DVD disc has been removed from the player or the Stop button is pressed a second time.
Fast Forward/Reverse
You can fast search the contents of a DVD during playback.
1. Press either the F.FWD button, to fast forward through the disc or the F.REV button, to search
backwards through the disc.
2. Each press of the F.FWD or F.REV button steps through the fi ve available speeds. These are x2,
x4, x8, x16 and x32 normal play speed. The set speed will be displayed on screen after each
press of the button as ‘2x’, ‘4x’, ‘8x’, ’ 16x’ or ‘32x’ for fast forward and
‘2x’, ‘4x’, ‘8x’, ’ 16x’ or ‘32x’ for fast reverse.
3. Press the Play button at any time while fast forwarding or fast reversing to return to normal
playing speed. In the top right of the TV screen, ’’ will be briefl y displayed.
12
Technika DVDFAW08 1B V01.indd Sec1:12Technika DVDFAW08 1B V01.indd Sec1:12 23/07/2008 14:44:2423/07/2008 14:44:24
Page 15

User Guide
Skip to the Next/Previous Chapter
You can skip to the next or previous chapter during playback.
1. Press the Next button to skip to the next chapter. Playback continues at the beginning of the
next chapter and ’I’ will be briefl y displayed in the top right of the screen.
2. Press the Prev button to skip to the beginning of the current chapter. Playback continues at
the beginning of the current chapter and ’I’ will be briefl y displayed in the top right of the
screen.
3. Pressing the Prev button again will skip to the previous chapter. Playback continues at the
beginning of the previous chapter and ’I’ will be briefl y displayed in the top right of the
screen.
Step
The Step function allows you to advance through the program one frame at a time.
1. Press the Pause/Step button to pause playback.
2. While playback is paused, press the Pause/Step button to advance playback by one frame.
Repeatedly press the Pause/Step button to continue advancing by one frame.
3. To return to normal playback, press the Play button.
Mute
The audio outputs from the DVD player can be muted at any time by pressing the Mute button.
1. Press the Mute button to mute the sound output. In the top left of the TV screen, the mute
symbol will be briefl y displayed.
2. To restore sound output, press the Mute button again. In the top left of the TV screen, the
mute off symbol will be briefl y displayed.
Volume
The volume of the DVD player can be adjusted by pressing the Volume + and Volume - buttons.
PAL/NTSC
The correct TV System should be chosen to ensure the optimum picture quality. The available TV
Systems are PAL, NTSC and Auto.
1. Press the PAL/NTSC button. In the top right of the TV screen, the current TV System will be
displayed.
2. To change the TV System, press the PAL/NTSC button again. In the top right of the TV screen,
the new TV System will be displayed. Repeatedly pressing the PAL/NTSC button will cycle
through the available TV Systems.
13
Technika DVDFAW08 1B V01.indd Sec1:13Technika DVDFAW08 1B V01.indd Sec1:13 23/07/2008 14:44:2523/07/2008 14:44:25
Page 16

DVD Player DVDFAW08
SPECIAL DVD FUNCTIONS
NOTE: The functions described in the following sections may not be supported on all DVD discs.
Refer to the DVD packaging for details of supported features and availability of languages
and subtitles etc.
Menu
The DVD main menu provides numerous playback, setup and language options.
1. To access the DVD main menu, press the Menu button at any time during playback. In the top
right of the TV screen, ‘Root Menu’ will be briefl y displayed before the main menu appears.
2. Press the Arrow buttons to navigate the DVD main menu and press the Play button to select
an option.
Title
1. To return to the fi rst title of the DVD at any time during playback, press the Title/PBC button.
In the top right of the TV screen, ‘Title Menu’ will be briefl y displayed before the title menu
appears.
2. Press the Arrow buttons to navigate the title menu and press the Play button to select
an option.
Subtitles
Some DVD discs contain subtitles in several languages.
1. To display the subtitles, press the Subtitle button. In the top left of the TV screen, the word
‘Subtitle’ will be displayed followed by the current language.
2. To change the subtitle language, repeatedly press the Subtitle button until the desired
language is displayed in the top left of the TV screen.
The selected language will appear on screen shortly after selection.
NOTE: The Subtitle button overrides any selections made in the setup menus.
Audio
Some DVD discs contain audio tracks and audio commentaries in several languages.
1. To change the audio track, press the Audio button. In the top left of the TV screen, the
following audio panel will be displayed.
: AC3 5.1CH English 1/1
2. Repeatedly press the Audio button until the desired audio track is displayed in the top left of
the TV screen.
The selected audio track will be heard shortly after selection.
14
Technika DVDFAW08 1B V01.indd Sec1:14Technika DVDFAW08 1B V01.indd Sec1:14 23/07/2008 14:44:2523/07/2008 14:44:25
Page 17

User Guide
NOTE: The Audio button overrides any selections made in the setup menus.
Zoom
The Zoom function allows you to magnify the picture displayed on the TV screen.
1. Press the Zoom button to magnify the picture.
2. Each press of the Zoom button steps through the three available magnifi cations. These are x2,
x4 and Off. The magnifi cation will be displayed in the top right of the TV screen after each
press of the button as ‘Zoomx2’, ‘Zoomx4’ and ‘Zoom Off’.
3. When using the Zoom function, you can move around the picture using the Arrow buttons.
‘Move Up’, ‘Move Down’, ‘Move Right’, ‘Move Left‘ is displayed.
4. To cancel the Zoom function, repeatedly press the Zoom button until ‘Zoom Off’ is displayed.
Search
You can search to a specifi c point in the DVD by either defi ning the title, chapter or the elapsed
time.
Title Search
1. To perform a title search, press the Search button. In the top left of the TV screen, the following
search panel will be displayed.
/ 15 01 / 01
2. Press the Up or Down Arrow button to change the title number. Alternatively, enter the title
number using the Numeric buttons.
3. Once the desired title number is displayed, press the Play button. Playback of the selected title
will begin.
Chapter Search
1. To perform a chapter search, press the Search button. In the top left of the TV screen, the
following search panel will be displayed.
/ 15 01 / 01
2. Press the Right Arrow button to highlight the chapter number. This is shown in the search
panel below.
15 / 15 / 01
3. Press the Up or Down Arrow button to change the chapter number. Alternatively, enter the
chapter number using the Numeric buttons.
4. Once the desired chapter number is displayed, press the Play button. Playback of the selected
chapter will begin.
15
Technika DVDFAW08 1B V01.indd Sec1:15Technika DVDFAW08 1B V01.indd Sec1:15 23/07/2008 14:44:2523/07/2008 14:44:25
Page 18

DVD Player DVDFAW08
Elapsed Time Search
1. To perform an elapsed time search, press the Search button twice. In the top left of the TV
screen, the following search panel will be displayed.
01 / 15 _ : _ _ : _ _
2. Using the Numeric buttons, enter the elapsed time. This should be in an Hours, Minutes and
Seconds format. For example to enter a time of 1 hour, 25 minutes and 20 seconds, press the
1 button followed by the 2, 5, 2, and 0 buttons.
3. Press the Play button. Playback from the specifi ed elapsed time will begin.
Angle
Some DVD movie scenes are fi lmed using different camera angles and these may be included on
the DVD disc. These can be viewed using the Angle feature.
1. Press the Angle button repeatedly to cycle through the available camera angles.
NOTE: Once a camera angle is selected using the Angle function, this camera angle will remain
until changed or the DVD disc is removed from the DVD player.
Repeat
The Repeat function allows you to automatically replay the current title or chapter.
1. Each press of the Repeat button cycles through the available repeat options. These are Title,
Chapter, All and Off.
2. To repeat a chapter, press the Repeat button once. In the top right of the TV screen
Chapter’ will be displayed.
‘
3. To repeat a title, press the Repeat button twice. In the top right of the TV screen ‘
be displayed.
4. To repeat the entire DVD, press the Repeat button three times. In the top right of the TV screen
‘
All’ will be displayed.
5. To cancel the repeat function, press the Repeat button until ‘
of the TV screen.
Off’ is displayed in the top right
Title’ will
A-B Repeat
The A-B Repeat function allows you to specify a section of the DVD to be replayed. Replay of the
selected section will continue until the A-B Repeat function is cancelled.
1. During playback of the DVD disc, press the A-B RPT button at the start point of the section to
be repeated. In the top right of the TV screen ‘
2. At the end point of the section to be repeated, press the A-B RPT button again. In the top
right of the TV screen ‘
repeatedly played.
3. To cancel the A-B Repeat function and return to normal playback, press the A-B RPT button a
third time. In the top right of the TV screen ‘
A-B’ will be displayed. The selected section of the DVD disc will be
A’ will be displayed.
Off’ will be displayed.
16
Technika DVDFAW08 1B V01.indd Sec1:16Technika DVDFAW08 1B V01.indd Sec1:16 23/07/2008 14:44:2623/07/2008 14:44:26
Page 19

User Guide
On Screen Display (OSD)
The OSD provides information on the current title, chapter, time, audio track and subtitles.
1. Press the OSD button to show the OSD. The OSD appears in the top of the TV screen as shown
below.
: 1 / 15 : 1 / 27 Time Elapsed 00 : 00 : 30
2. Press the OSD button repeatedly to cycle through the following OSD information.
• Title time elapsed
• Title time remaining
• Chapter time elapsed
• Chapter time remaining
• Current Subtitle and Audio Track
3. To remove the OSD, repeatedly press the OSD button until the OSD disappears from the TV
screen.
Program
The Program function can be used to play selected chapters in a specifi c order. Up to 20 chapters
can be programmed at any one time.
NOTE: It is possible to program a chapter more than once.
1. Press the Prog button to access the program menu. The program menu will be displayed as
shown below.
PROGRAM
Title Chapter
1. _________________
2. _________________
3. _________________
4. _________________ 01
5. _________________ 02
6. _________________ 03
7. _________________ 04
8. _________________ 05
___ ___
: Select : Play : Clear
2. Press the Up or Down Arrow button to select the fi rst programmable slot.
3. Press the Right Arrow button to program the title.
17
Technika DVDFAW08 1B V01.indd Sec1:17Technika DVDFAW08 1B V01.indd Sec1:17 23/07/2008 14:44:2623/07/2008 14:44:26
Page 20

DVD Player DVDFAW08
4. Press the Up or Down Arrow button to select the title number.
5. Press the Right Arrow button to program the chapter.
6. Press the Up or Down Arrow button to select the chapter number.
7. Press the Play button to set the fi rst programmable slot.
8. Repeat steps 2 through 7 to program the next slots.
9. If you make a mistake while programming a slot, press the Clear button to delete your
selections.
10. Press the Play button to begin playback of the programmed chapters.
11. To cancel the Program function, press the Stop button twice at any time.
NOTE: If the DVD disc is removed from the DVD player, the Program function will be cancelled.
PLAYING AUDIO CDs
Loading Audio CDs
1. Press the Standby button. The screen displays the static TECHNIKA DVD logo.
2. Press the Open/Close button to open the DVD disc tray. In the top right of the TV screen,
’Open’ will be displayed.
3. Place a compatible CD into the recess on the disc tray, ensuring that the label is facing upwards.
4. Press the Open/Close button to close the disc drawer. In the top right of the TV screen, ‘Close’
will be displayed.
Selecting Tracks
1. To select a specifi c track, enter the track number using the Numeric buttons. In the top right of
the TV screen the track number will be displayed.
2. Press the Play button to begin playing the selected track. Alternatively, wait fi ve seconds and it
will automatically start.
3. To select the next track on the CD, press the Next button.
4. To select the previous track on the CD, press the Prev button.
Control During Playback
The Volume, Mute, Play, Stop, Fast Forward and Fast Reverse functions operate in the same way as
described for DVDs.
18
Technika DVDFAW08 1B V01.indd Sec1:18Technika DVDFAW08 1B V01.indd Sec1:18 23/07/2008 14:44:2723/07/2008 14:44:27
Page 21

User Guide
Repeat
The Repeat function allows you to automatically replay a specifi c track or the entire CD.
1. Each press of the Repeat button cycles through the available repeat options. These are Track, All
and Off.
2. To repeat a Track, press the Repeat button once. In the top right of the TV screen ‘
be displayed.
3. To repeat the entire CD, press the Repeat button twice. In the top right of the TV screen ‘
will be displayed.
4. To cancel the repeat function, press the Repeat button until ‘
of the TV screen.
Off’ is displayed in the top right
A-B Repeat
The A-B Repeat function operates in the same way as described for DVDs. See page 16.
Program
The Program function can be used to play selected tracks in a specifi c order. Up to 20 tracks can be
programmed at any one time.
NOTE: It is possible to program a track more than once.
1. Press the Prog button to access the program menu. The program menu will be displayed as
shown below.
Track will
All’
PROGRAM
Track
14. _________________
15. _________________ 01
16. _________________ 02
17. _________________ 03
18. _________________ 04
19. _________________ 05
20. _________________
___
: Select : Play : Clear
2. Press the Up or Down Arrow button to select the fi rst programmable slot.
3. Press the Right Arrow button to program the Track.
4. Press the Up or Down Arrow button to select the Track number.
5. Press the Play button to set the fi rst programmable slot.
19
Technika DVDFAW08 1B V01.indd Sec1:19Technika DVDFAW08 1B V01.indd Sec1:19 23/07/2008 14:44:2723/07/2008 14:44:27
Page 22

DVD Player DVDFAW08
6. Repeat steps 2 through 5 to program the next track.
7. If you make a mistake while programming a slot, press the Clear button to delete your
selections.
8. Press the Play button to begin playback of the programmed tracks.
9. To cancel the Program function, press the Stop button twice at any time.
NOTE: If the CD is removed from the DVD player, the Program function will be cancelled.
Search
You can search to a specifi c point in the CD by defi ning the elapsed time.
1. To perform an elapsed time search, press the Search button. In the top left of the TV screen,
the following search panel will be displayed.
_ : _ _ : _ _
2. Using the Numeric buttons, enter the elapsed time. This should be in an Hours, Minutes and
Seconds format. For example to enter a time of 25 minutes and 20 seconds, press the 0 button
followed by the 2, 5, 2, and 0 buttons.
3. Press the Play button. Playback from the specifi ed elapsed time will begin.
PLAYING PHOTO CDS
The DVD Player allows you to view the photos of 12 cm Photo Compact Discs or Kodak Picture
Compact Disc.
Loading Photo CDs
1. Press the Standby button. The screen displays the static TESCO DVD logo.
2. Press the Open/Close button to open the DVD disc tray. In the top right of the TV screen,
’Open’ will be displayed.
3. Place a compatible Photo CD into the recess on the disc tray, ensuring that the label is facing
upwards.
4. Press the Open/Close button to close the disc drawer. In the top right of the TV screen, ‘Close’
will be displayed.
5. After the ‘loading’ message disappears, the fi rst photo will automatically be displayed. The
remaining photos on the Photo CD will be shown in sequence in a slide show. A progress bar
will appear in the top left hand corner of the screen as each image or photo is loaded.
20
Technika DVDFAW08 1B V01.indd Sec1:20Technika DVDFAW08 1B V01.indd Sec1:20 23/07/2008 14:44:2723/07/2008 14:44:27
Page 23

User Guide
Accessing the Photo CD contents
The fi les and folders on the Photo CD can be accessed at any time, allowing you to browse and
locate specifi c images or photos.
1. Press the Menu button to access the root
menu of the Photo CD. The root menu will be
shown as displayed below.
2. Press the Left and Right Arrow buttons to
ROOT
images
Photos
switch between the folder pane on the right
hand side of the screen and the contents pane
on the left hand side of the screen.
3. Press the Up or Down Arrow buttons to
highlight a folder.
4. Press the Play button to list the photos of a
selected folder in the contents pane.
5. Press the Right Arrow button to highlight the fi rst photo in the contents pane.
6. Press the Up or Down Arrow buttons to highlight a specifi c photo. A thumbnail of the
selected photo will be displayed in the bottom left hand corner of the screen.
7. Press the Play button to display the photo. The selected photo will be displayed full screen.
Control During Playback
Once a slideshow has started, each photo will be displayed at 5 second intervals until all the photos
have been displayed.
DSCF0216 26
DSCF0216 27
DSCF0216 28
DSCF0216 29
DSCF0216 30
DSCF0216 31
DSCF0216 32
DSCF0216 33
Stopping a Slide Show
1. Press the Menu button at any time during the slide show to return to the root menu.
Pause a slide show
1. Press the Pause/Step button at any time to pause the slide show.
2. Press the Play or Pause/Step button to resume the slide show.
Repeat
The Repeat function allows you to replay the contents of the current folder or a single photo.
1. Each press of the Repeat button cycles through the available repeat options. These are Track
and All.
2. To repeat a photo, press the Repeat button once. In the top right of the TV screen ‘Track’ will
be displayed.
3. To repeat a folder, press the Repeat button twice. In the top right of the TV screen ‘Folder’ will
be displayed.
4. To cancel the repeat function, press the Repeat button until ‘Off’ is displayed in the top right of
the TV screen.
21
Technika DVDFAW08 1B V01.indd Sec1:21Technika DVDFAW08 1B V01.indd Sec1:21 23/07/2008 14:44:2823/07/2008 14:44:28
Page 24

DVD Player DVDFAW08
Image Manipulation
The Image Manipulation feature allows you to rotate the displayed photo in 90 degree steps
clockwise or anti-clockwise or fl ipped horizontally or vertically.
1. Press the Right Arrow button to rotate the photo 90 degrees clockwise. In the top right hand
corner of the screen, ‘Rotate Right 90º’ will be displayed.
2. Press the Left Arrow button to rotate the photo 90 degrees anti-clockwise. In the top right
hand corner of the screen, ‘Rotate Left 90º’ will be displayed.
3. Press the Up Arrow button to fl ip the photo horizontally. In the top right hand corner of the
screen, ‘Flip Horizontally’ will be displayed.
4. Press the Down Arrow button to fl ip the photo vertically. In the top right hand corner of the
screen, ‘Flip Vertically’ will be displayed.
5. Photos can be rotated or fl ipped as many times as required.
Zoom
The Zoom function allows you to increase or decrease the size of the photo. While a photo size is
increased, you can move around the zoomed photo to view any areas which are not displayed.
1. Press the Zoom button repeatedly to cycle through the available zoom factors.
2. Each press of the Zoom button increases or decreases the zoom factor. The available zoom
factors in sequence are: 100%, 150%, 200%, 25% and 50%. In the top right hand corner of
the screen, the zoom factor will be displayed as ‘150%’ etc.
3. Press the Left Arrow button while a photo is zoomed, to move the photo to the left.
4. Press the Right Arrow button while a photo is zoomed, to move the photo to the right.
5. Press the Up Arrow button while a photo is zoomed, to move the photo up.
6. Press the Down Arrow button while a photo is zoomed, to move the photo down.
7. To return the photo to its original size, press the Play button.
SETUP MENUS
Basic Controls
1. Ensure that the DVD player does not have a disc inserted. Press the Setup button to access the
Setup menus.
2. Press the Up or Down Arrow button to scroll through the available Setup menus. Each setup
menu will be shown with the currently available sub menus.
3. Press the Right Arrow button to access the sub menus. Each sub menu will be shown with the
currently available options.
4. Press the Up or Down Arrow button to highlight and select an option in a sub menu.
5. Press the Play button to select a highlighted option.
6. Press the Left Arrow button to return to the previous menu.
7. To exit the Setup menus, press the Setup button again or alternatively highlight and select ‘Exit
Setup Mode’ from the Setup menu.
22
Technika DVDFAW08 1B V01.indd Sec1:22Technika DVDFAW08 1B V01.indd Sec1:22 23/07/2008 14:44:2823/07/2008 14:44:28
Page 25

User Guide
Language Setup
The Language Setup menu allows you to select the language options for the OSD and the DVD
Menu, audio track and subtitles.
OSD
This menu allows you to set the OSD
language. The available options are:
• English
• Polish
• Czech
• Slovak
• Hungarian
• Turkish
Language Setup
OSD
Menu
Audio
Subtitle
English
Polish
Czech
Slovak
Hungarian
: Select
Menu
This menu allows you to set the DVD menu
language. The available menu languages
will be dependent on the DVD disc loaded.
Audio
This menu allows you to set the DVD audio
language. The available audio language will
be dependent on the DVD disc loaded.
Language Setup
OSD
Menu
Audio
Subtitle
Language Setup
OSD
Menu
Audio
Subtitle
English
Chinese
Japanese
French
German
: Select
English
Chinese
Japanese
French
German
: Select
23
Technika DVDFAW08 1B V01.indd Sec1:23Technika DVDFAW08 1B V01.indd Sec1:23 23/07/2008 14:44:2923/07/2008 14:44:29
Page 26

DVD Player DVDFAW08
Subtitle
This menu allows you to set the DVD subtitle
language. The available subtitle languages
will be dependent on the DVD disc loaded.
Screen Setup
The Screen Setup menu allows you to adjust
the DVD player and TV screen settings to suit
your viewing preferences.
TV Type
This menu allows you to set the aspect ratio
to suit your TV. The available options are:
• 4:3 PS - Stretches a widescreen format to
fi ll the entire screen (Pan and Scan).
• 4:3 LB - Standard 4:3 format (letterbox).
• 16:9 - Standard widescreen format.
Screen Saver
This menu allows you to turn the Screen
Saver On or Off. If the screen saver is turned
on, an animated image will appear on the
screen when the DVD player has been left
idle for a certain length of time.
TV System
This menu allows you to select the correct TV
System for your TV to ensure the optimum
picture quality. The available options are:
• NTSC - This option should be selected to
view NTSC signals.
• PAL - This option should be selected to
view PAL signals.
• Auto - This option should be selected if
you are unsure of which TV System you
are using.
Language Setup
OSD
Menu
Audio
Subtitle
Screen Setup
TV Type
Screen Saver
TV System
Video Output
Brightness
Contrast
Screen Setup
TV Type
Screen Saver
TV System
Video Output
Brightness
Contrast
Screen Setup
TV Type
Screen Saver
TV System
Video Output
Brightness
Contrast
English
Chinese
Japanese
French
German
: Select
4:3 PS
4:3 LB
16:9
: Select
On
Off
: Select
NTSC
PAL
Auto
: Select
24
Technika DVDFAW08 1B V01.indd Sec1:24Technika DVDFAW08 1B V01.indd Sec1:24 23/07/2008 14:44:2923/07/2008 14:44:29
Page 27

User Guide
Video Output
This menu allows you to select the video
output type. The only option available is
SCART.
Brightness
This menu allows you to select one of three
brightness levels. The available options are:
• Normal - This option should be selected
for viewing standard images.
• Bright - This option should be selected
when viewing images with bright or
strong colours.
• Soft - This option should be selected
when viewing images with soft or weak
colours.
Contrast
This menu allows the contrast to be set to
suit your viewing preferences.
Screen Setup
TV Type
Screen Saver
TV System
Video Output
Brightness
Contrast
Screen Setup
TV Type
Screen Saver
TV System
Video Output
Brightness
Contrast
Screen Setup
TV Type
Screen Saver
TV System
Video Output
Brightness
Contrast
SCART
: Select
Normal
Bright
Soft
: Select
-2
-1
0
+1
+2
: Select
25
Technika DVDFAW08 1B V01.indd Sec1:25Technika DVDFAW08 1B V01.indd Sec1:25 23/07/2008 14:44:3023/07/2008 14:44:30
Page 28

DVD Player DVDFAW08
Audio Setup
The Audio Setup menu allows you to adjust
the audio output format.
Downmix
This menu allows you to select either Stereo
output or Lt/Rt.
The Lt/Rt option should be set when the
DVD player is connected to an external
sound system such as a Stereo or Surround
Sound System. When set, the left and right
audio outputs are separated and sent to the
external sound system individually.
Custom Setup
The Custom Setup menu allows you to confi gure the general settings of the DVD player including
Parental Control.
Parental Control
This menu allows you to set a suitable rating level to prevent playback of DVD discs which may be
unsuitable for children.
The Parental Control feature requires a password to be entered. If you have not changed the
password, this will be the default password. For more information on setting the password, refer to
‘Password’ on page 27.
Audio Setup
Downmix
STEREO
Lt/Rt
: Select
NOTE: The Parental Control feature will only work if the DVD disc supports content rating. Refer to
the DVD packaging for more information.
The available content ratings are:
• KID SAF
• G
• PG
• PG-13
• PGR
• R
• NC17
• ADULT
26
Technika DVDFAW08 1B V01.indd Sec1:26Technika DVDFAW08 1B V01.indd Sec1:26 23/07/2008 14:44:3123/07/2008 14:44:31
Page 29

User Guide
Password
This menu allows you to set the Parental
Control password.
1. To change the password, use the Up
and Down Arrow buttons to highlight
Password in the Custom Setup menu.
2. Press the Right Arrow button to set
the password. The Password screen is
displayed.
3. Using the Numeric buttons, enter the old
password. The default password is ‘9922’.
NOTE: If the password is entered incorrectly,
‘Wrong Password’ will be displayed.
4. Using the Numeric buttons, enter the new
four digit password.
5. Using the Numeric buttons, verify the
new four digit password.
Style
This menu allows you to choose the colour
scheme for the Setup menus. There are four
styles to choose from each with a different
variety of colours.
Custom Setup
Parental Ctrl
Password ...
Style
Angle Mark
Old - - - -
New - - - -
Verify - - - -
Custom Setup
Parental Ctrl
Password ... Style2
Style
Angle Mark
: Select
Style1
Style3
Style4
: Select
Angle Mark
This menu allows you to turn the angle mark
on or off. The angle mark provides a visual
indication when multiple angles are available
during playback of a DVD disc.
Custom Setup
Parental Ctrl
Password ... Off
Style
Angle Mark
On
: Select
27
Technika DVDFAW08 1B V01.indd Sec1:27Technika DVDFAW08 1B V01.indd Sec1:27 23/07/2008 14:44:3123/07/2008 14:44:31
Page 30

DVD Player DVDFAW08
Default
This menu allows you to reset the DVD
player to the default factory settings.
NOTE: It does not change the Password or
Parental Control settings.
Default
Default
Restore Default
: Select
HELP AND ADVICE
Problem Probable cause
The DVD player will
not power up.
Disc does not play. Check that the disc has been correctly loaded, label facing up.
No picture. Ensure that the DVD player and TV are powered on.
No sound. Check that the volume has not been set low on the TV.
The picture quality is
poor.
Some functions do
not work (e.g. Angle,
Search etc.)
No response to Remote
Control.
If none of the above suggestions seem to work, try switching your DVD player off and then on
again. If this does not work, contact either your supplier or a qualifi ed repair technician. Never
attempt to repair your DVD player yourself.
Tesco Electrical Helpline: 0845 456 6767
Ensure that the plug is connected to the mains socket and switched on.
Replace the fuse in the plug.
Check that the format of the disc is supported. If it is a DVD disc, ensure
that it is Region 2.
Check that the cables are fi tted securely.
Ensure that the TV has the AV channel or equivalent selected.
Try a DVD disc that you know plays.
Check that the volume has not been muted on either the TV or DVD
player.
Check that the cables are fi tted securely.
Check that the disc surface has not been damaged.
Try cleaning the disc.
Check that the cables are fi tted securely.
Refer to the DVD packaging. Not all functions are available.
Remote Control not aimed correctly.
The Remote Control Sensor is obstructed.
Remote Control batteries inserted incorrectly.
Remote Control batteries exhausted.
28
Technika DVDFAW08 1B V01.indd Sec1:28Technika DVDFAW08 1B V01.indd Sec1:28 23/07/2008 14:44:3223/07/2008 14:44:32
Page 31

User Guide
CARE AND MAINTENANCE
Handling Discs
• To remove a disc from its storage case, press down on the centre of the case and lift the disc out.
• Discs should be returned to their cases after use. This avoids serious scratches that could cause
the laser pickup to skip.
• Hold the disc by the edges, to avoid touching the recorded side of the disc.
• Fingerprints and dust should be carefully wiped from the disc’s surface with a soft cloth.
• Never use chemicals such as record sprays, antistatic sprays, benzene, or thinners to clean the
discs. These chemicals can irreparably damage the disc’s surface.
• Audio discs and DVD discs have no grooves to collect dust and microscopic debris so gently
wiping with a soft cloth should remove most particles.
• Wipe in a straight line from the inside to the outside of the disc. Small dust particles and light
stains should have no effect on reproduction quality.
• Do not expose discs to direct sunlight, high humidity, or high temperatures for extended periods.
Exposure to high temperatures can warp the disc.
• Do not stick paper or write anything with a ball point pen on the label side of the disc.
29
Technika DVDFAW08 1B V01.indd Sec1:29Technika DVDFAW08 1B V01.indd Sec1:29 23/07/2008 14:44:3223/07/2008 14:44:32
Page 32

DVD Player DVDFAW08
TECHNICAL SPECIFICATION
Power Supply 110-240V AC at 50/60Hz
Power Consumption 12W
Physical Disc Sizes 12cm and 8cm
Video Signal System PAL and NTSC
WARRANTY
Your Tesco appliance is covered by a warranty for 12 months from the date of purchase. If a fault
develops during this period, please contact the Tesco electrical help line on 0845 456 6767. Please
have your original purchase receipt with you when you call. This warranty in no way affects your
consumer rights.
30
Technika DVDFAW08 1B V01.indd Sec1:30Technika DVDFAW08 1B V01.indd Sec1:30 23/07/2008 14:44:3223/07/2008 14:44:32
Page 33

User Guide
31
Technika DVDFAW08 1B V01.indd Sec1:31Technika DVDFAW08 1B V01.indd Sec1:31 23/07/2008 14:44:3323/07/2008 14:44:33
Page 34

UK
Technika DVDFAW08 1B V01.indd Sec1:32Technika DVDFAW08 1B V01.indd Sec1:32 23/07/2008 14:44:3323/07/2008 14:44:33
TESCO Stores Ltd, Cheshunt, EN8 9SL, UK.
 Loading...