

Page 1
DAB 106 DAB Radio User Manual
SYSTEM RESET EXTERNAL AUDIO CONNECTIONS WARRANTY
DAB is a terrestrial system and the frequencies
in your area may be very different to those in
another area.
If you move the radio to another part of the
country performing a Full Scan may not be
enough to re program the radio you may need to
reset the radio.
To restore the factory settings:
$ Press and hold the MENU button.
Press SELECT to
confirm reset
$ Press the SELECT button when you see the
above message.
$ The Radio will now carry out a full search of
all the DAB broadcast stations in your area.
When you reset the system all the settings are
returned to the factory defaults and all the
presets are erased.
There is a headphone output socket on the rear Your Technika appliance is covered by a
of the radio. To connect to the line input of a
regular stereo system. You will need a
connecting lead with a 3.5mm stereo jack plug
to fit the radio with audio connections suitable
for your stereo unit.
CARE AND CLEANING
Occasionally wipe the radio with a lint free
duster. Never clean the radio with liquids or
solvents.
Clean the screen from time to time with a
approved anti-static cleaner or a calotherm
cloth available from opticians.
warranty for 12 months from the date of
purchase. If a fault develops during this period,
please contact the TESCO electrical help line on
0845 601 2549. Please have your original
purchase receipt with you when you call. This
warranty in no way affects your consumer rights
SPECIFICATIONS
Power Supply 220-240V AC 50 Hz
Battery 9V DC (6X UM2 1.5V)
Output Power 1.5Watts
Frequency Range DAB: 174-240 MHz
User Handbook
Tesco Stores Ltd, Delamare Road, Cheshunt, Herts, EN8 9SL
DAB 106
DAB Radio
Page 2
IMPORTANT SAFETY INFORMATION
DISPLAY MODES
CAUTION!
RISK OF ELECTRIC SHOCK
DO NOT OPEN
TO REDUCE THE RISK OF ELECTRIC SHOCK DO
NOT REMOVE COVER (OR BACK)
This symbol indicates that there are important
operating and maintenance instructions in the
literature accompanying this unit.
This symbol indicates that dangerous voltage
constituting a risk of electric shock is present within
this unit.
Read these instructions.
Keep these instructions.
Heed all warnings.
Follow all instructions.
Do not use this apparatus near water.
Clean only with a slightly damp cloth.
Do not block any ventilation openings.
Install in accordance with the manufacturer's instructions.
Do not install or operate near any heat sources such as radiators,
stoves, or other apparatus that produce heat.
Unplug this apparatus during lightning storms or when unused for
long periods of time.
Refer all servicing to qualified service personnel. Servicing is
required when the apparatus has been damaged in any way, such as
the power-supply cord or plug is damaged, liquid has been spilled or
objects have fallen into the apparatus, the apparatus has been
exposed to rain or moisture, does not operate normally, or has been
dropped.
Warning: To reduce the risk of fire or electrical shock, do not expose
this product to rain or moisture. The product must not be exposed to
dripping and splashing and no object filled with liquids such as a
vase of flowers should be placed on the product.
No naked flame sources such as candles should be placed on the
product.
Caution: Changes or modifications not expressly approved by the
manufacturer could void the user's authority to operate this device.
Caution: Usage of controls or adjustments or performance of
procedures other than those specified herein may result in
hazardous exposure.
This unit can get warm during extended operation. This is normal.
There is a high level of microprocessor circuitry in this radio. In the
rare event that it fails to respond to a command, unplug the radio,
leave it for 15 minutes and reconnect it. It will now work normally.
IMPORTANT
This equipment generates, uses and can radiate radio frequency
energy and, if not installed and used in accordance with the
instructions, may cause harmful interference to radio ommunication.
However, this is no guarantee that interference will not occur in a
particular installation. If this equipment does cause harmful
interference to radio or television reception, which can be determined
by turning the equipment off and on, the user is encouraged to try to
correct the interference by one of the following measures:
- Reorient or relocate the receiving antenna.
- Increase the separation between the equipment and receiver.
- Connect the equipment into an outlet on a circuit different from
that to which the receiver is connected.
- Consult the dealer or an experienced radio/TV technician for help.
ELECTRICAL INFORMATION
Mains Supply: The mains operating voltage of this unit is on the
rating plate on the rear. In the UK this is 230/240 V.
The appliance cord is terminated with a UK approved mains plug
fitted with a 3A fuse. If
approved BS1362 fuse rated at 3A must be used. If you need to
change the mains plug, remove the fuse and dispose of this plug
safely immediately after cutting it from the cord.
The wires in the mains lead are coloured in accordance with the
code: Blue: NEUTRAL; Brown: LIVE:
As these colours may not correspond to the coloured markings
identifying the terminals in your plug, proceed as follows:
The BLUE wire must be
connected to t he
terminal marked with
the letter N or coloured
BLUE or BLACK. The
BROWN wire must be
connected to t he
terminal marked with
the letter L or coloured BROWN or RED.
DO NOT connect either of these wires to the terminal marked E, or
coloured green or green and yellow, or marked by the earth symbol.
Disconnection from the mains is via the mains plug. The mains
plug on this radio must unobstructed at all times and be readily
operable.
the fuse needs to be replaced, an ASTA or BSI
3A FUSE
BS 1362
BLUE
(Neutral)
BROWN
(Live)
Class II construction double insulated. This product must
not be connected to earth.
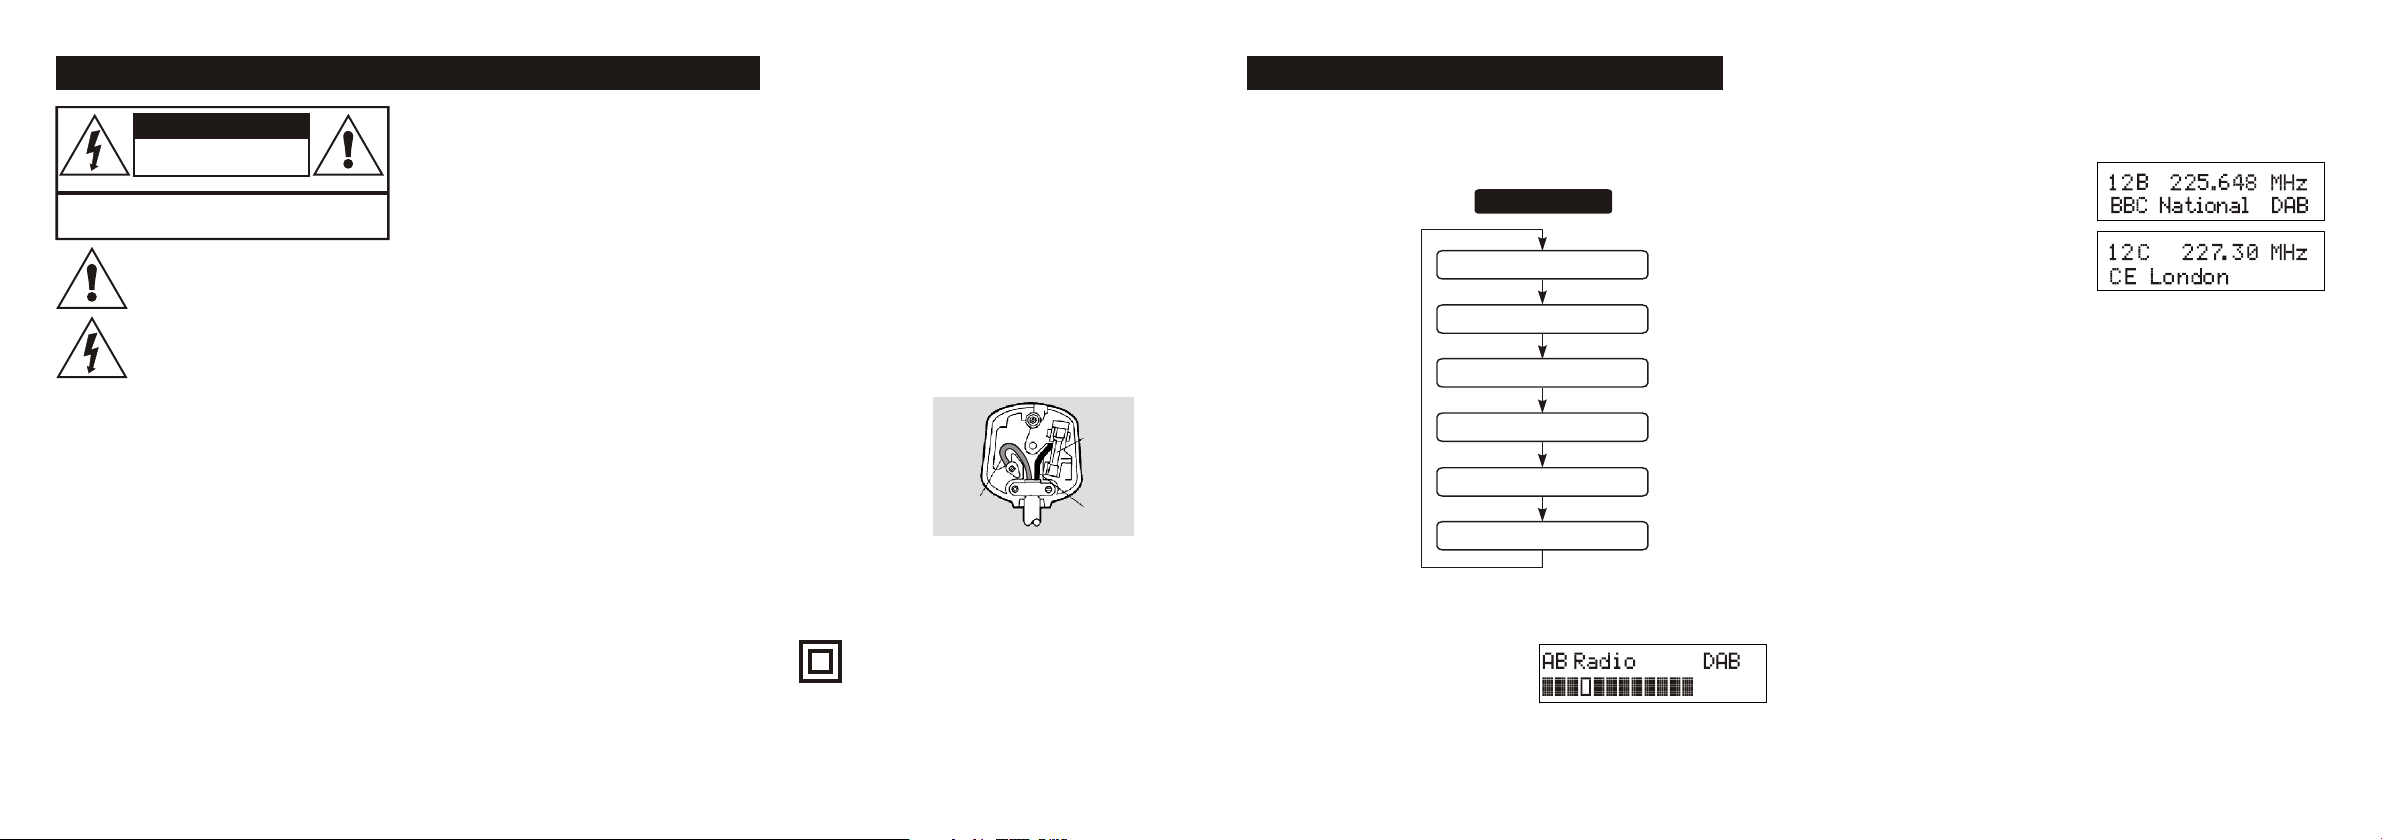
There are many different information settings available on the radio. Some
stations have a lot of extra information available, some very little.
$ Pressing the INFO button will cycle you through these settings:
DAB MODE
Signal strength
DLS(Scrolling text)
Programme Type
Multiplex(Group name)
Time/Date
Bit Rate
SIGNAL STRENGTH: This is a bar to indicate the signal strength. The
stronger the signal, the longer the bar will be from left to right.
Tip: Adjusting the aerial to maximise the
length of the bar will greatly improve the
quality of your reception.
DLS (Dynamic Label Segment): This is a scrolling message giving realtime information - song titles, news headlines, etc.
PROGRAMME TYPE: This describes the style of the programme being
broadcast. If the not available, the display will show <Programme Type>
MULTIPLEX (GROUP NAME)
A multiplex is a collection of radio
stations bundled and transmitted
together in a single frequency. There are
national and local multiplexes; local ones
contain stations specific to your area.
TIME AND DATE: Time and date are updated by the broadcasted
information. If no clock information is received, the display shows
<Time/Date>
BIT RATE: DAB allows broadcasters to vary the BIT RATE (or the amount by
which an audio signal can be compressed) depending on the type of
broadcast. This enables the amount of stations on a multiplex to be
maximised. Speech and News are often broadcast at a lower Bit Rate; music
needs a higher Bit Rate for good sound fidelity.
ADDITIONAL SERVICES
On some occasions you will see a ">" symbol after the name of the station.
This indicates that there are secondary services available. These secondary
services contain extra services that relate to the primary station.
5
Page 3

ADVANCED OPERATION
DAB 106 DAB RADIO USER MANUAL
QUICK AND FULL SCANS MANUAL SELECTION
When the radio is switched on from standby for
the first time, the radio will carry out a scan of all
the DAB stations available in the UK.
In normal use, when you switch the radio on,
from Standby the last used station displays, but
there is a short delay as the scan completes.
You can carry out a Full or a Quick scan.
A Full Scan includes all usable DAB stations
available in your area - domestic and continental
A Quick Scan carries out a scan only on the (UK)
stations receivable.
$ Quick Scan: Press the SCAN button
$ Full Scan: Press sand hold the SCAN button
The indication is the same but when you select
Full scan, the search bar will move more slowly
because the radio is scanning many more
stations.
You can carry out either a Full or a Quick scan at
any time without affecting any of your presets.
Manual Selection
$ Press the MENU button.
$ Press the SELECT button to enter the menu.
$ Repeatedly press the SCROLL UP / SCROLL
DOWN buttons to go up or down the station
groups (from 5A to 13F) in sequence.
$ Press and hold SCROLL UP / SCROLL
DOWN to go through the station groups
(from 5A to 13F) in sequence. When you get
to the wanted group release the button.
$ Press the SELECT button to enter the menu
and see details of the group.
$ Press and hold the SELECT button to return
to the last station you were listening to.
Introduction
DAB (Digital Audio Broadcasting) technology
allows many more radio stations compared to
FM. DAB transmissions do away with problems
of hiss and fade that plague AM and FM
broadcasts and are less likely to be affected by
adverse weather conditions or other sources of
interference. In addition to speech and music
DAB transmissions carry high levels of data far greater than the limited RDS information
available on FM stations.
Unlike FM, DAB is broadcast on many
frequencies. Many countries in Europe,
including the UK use Band III (174-230 MHz);
others, France for example, use the L-Band
(1452-1492 MHz). Germany uses both bands.
Your radio can tune Band III. Countries in
Europe that use Band III include: Belgium,
Denmark, Holland, Italy, Norway, Portugal,
Spain, Sweden, Switzerland. Your radio will
tune stations in all these countries.
Your radio cannot receive French or German
stations broadcasting in the L-Band.
Being digital, DAB transmissions can have a
wider frequency range and greater dynamics
than that available with FM technology.
Your DAB radio utilises a screen, on which a
wide range of information can be displayed,
such as the title of a song, the name of the artist,
what’s on next, scrolling news headlines. The
screen also displays setup information about
your radio.
A headphone output is provided for personal
listening. This output may also be connected to
the line input of an audio system for added
convenience.
UNPACKING
The carton should contain:
! The DAB radio
! Mains Power cord
! Operating Manual
If any items are missing or damaged, contact
your nearest TESCO store for a replacement.
Have your receipt ready when you call. Retain
the packaging. If you dispose of it, do so having
regard to any recycling regulations in your area.
NOTE: Batteries are not supplied with this
product.
4
1
Page 4

CONTROLS AND FEATURES
1% 1^ 1& 1*
BASIC OPERATION
b f
g
h
i
j
1)
1!
PRESETSPRESETSPRESETSPRESETS
PRESETSPRESETSPRESETS
CONTROLS
1. PRESET 1 BUTTON
2. PRESET 2 BUTTON
3. AUTO TUNE BUTTON
4. PRESET 4 BUTTON
5. PRESET 5 BUTTON
6. SCAN
7. INFO BUTTON
8. MENU BUTTON
9. SCROLL DOWN BUTTON
10. SELECT BUTTON
11. SCROLL UP BUTTON
12. DISPLAY SCREEN
1@
13. STANDBY BUTTON
14. VOLUME KNOB
15. AC CORD SOCKET
16. HANDLE
17. ROD ANTENNA
1#
18. HEADPHONE JACK
19. BATTERY DOOR
1$
1(
UM2
UM2 UM2
UM2UM2
UM2
INSERTING AND USING BATTERIES
Unplug the power cord from the radio. as sets. Never mix old and new batteries.
Open the battery compartment cover and
Place 6 UM2 batteries in the battery
compartment. Replace the cover.
Battery operation is the same as mains into water, the general rubbish or in a fire.
operation.
As the radio uses power in Standby mode radio. Replace in good time!
battery life will not be very long. Always
use alkaline batteries and replace them
Dispose of used batteries with regard to
the recycling regulations in your area. Do
NOT short circuit batteries or throw them
Weak batteries can leak and damage the
NEVER connect the power cord when
there are batteries in the radio!
GETTING STARTED
$ Connect the power cord to the socket in the
radio.
$ Plug the cord into the mains power point.
$ Switch on at the mains.
The welcome message appears on the screen
and the set will go into STANDBY mode.
In Standby mode the display is run at a low level
and only the clock time is displayed.
You cannot adjust the clock time. It is updated by
broadcast information.
$ Press the STANDBY button to bring the radio
in and out of Standby mode.
When your radio is used for the first time:
The radio will do a scan of the stations which are
receivable in your area. This will vary from
location to location.
The number of stations detected by the radio is
displayed at the right of the screen.
During the scan the radio stores all the stations it
detects in an alphanumeric sequence:
1 Radio, 2 Radio, AA Radio, AB Radio ...
When the scan is complete:
The radio will display the name of the first station
in the sequence and begin playing at the default
system volume of 10.
SELECTING A STATION
SCROLL DN
To go through the stored list of stations:
$ Repeatedly press the SCROLL UP / SCROLL
DOWN buttons to go up or down the list one
station at a time
$ Press and hold the SCROLL UP / SCROLL
DOWN buttons to go up or down the list in
sequence. When you get to the wanted
station release the button.
To select and play a station:
$ Press the SELECT button.
If you do not press SELECT the radio reverts to
the station played before the search was started.
STORING A STATION
$ Select the wanted station.
SELECT
SCROLL UP
PRESETSPRESETS
$ Press and hold a preset button.
$ When the preset is stored, release the
button.
TO PLAY A PRESET STATION
$ Give a short press on the preset number to
recall the stored station
If nothing is stored in the preset:
ALTERING THE VOLUME
You can alter the volume from 0 (off) to 20 (max).
$ Rotate the Volume knob
one click at a time to the
RIGHT to increase and
one click at a time to the
LEFT to decrease the
volume. or
$ Rotate and hold to increase or decrease the
volume. Release to set the new level.
– VOLUME +
2
3
 Loading...