

Page 1
ORDER
NO.
SD7702-1182
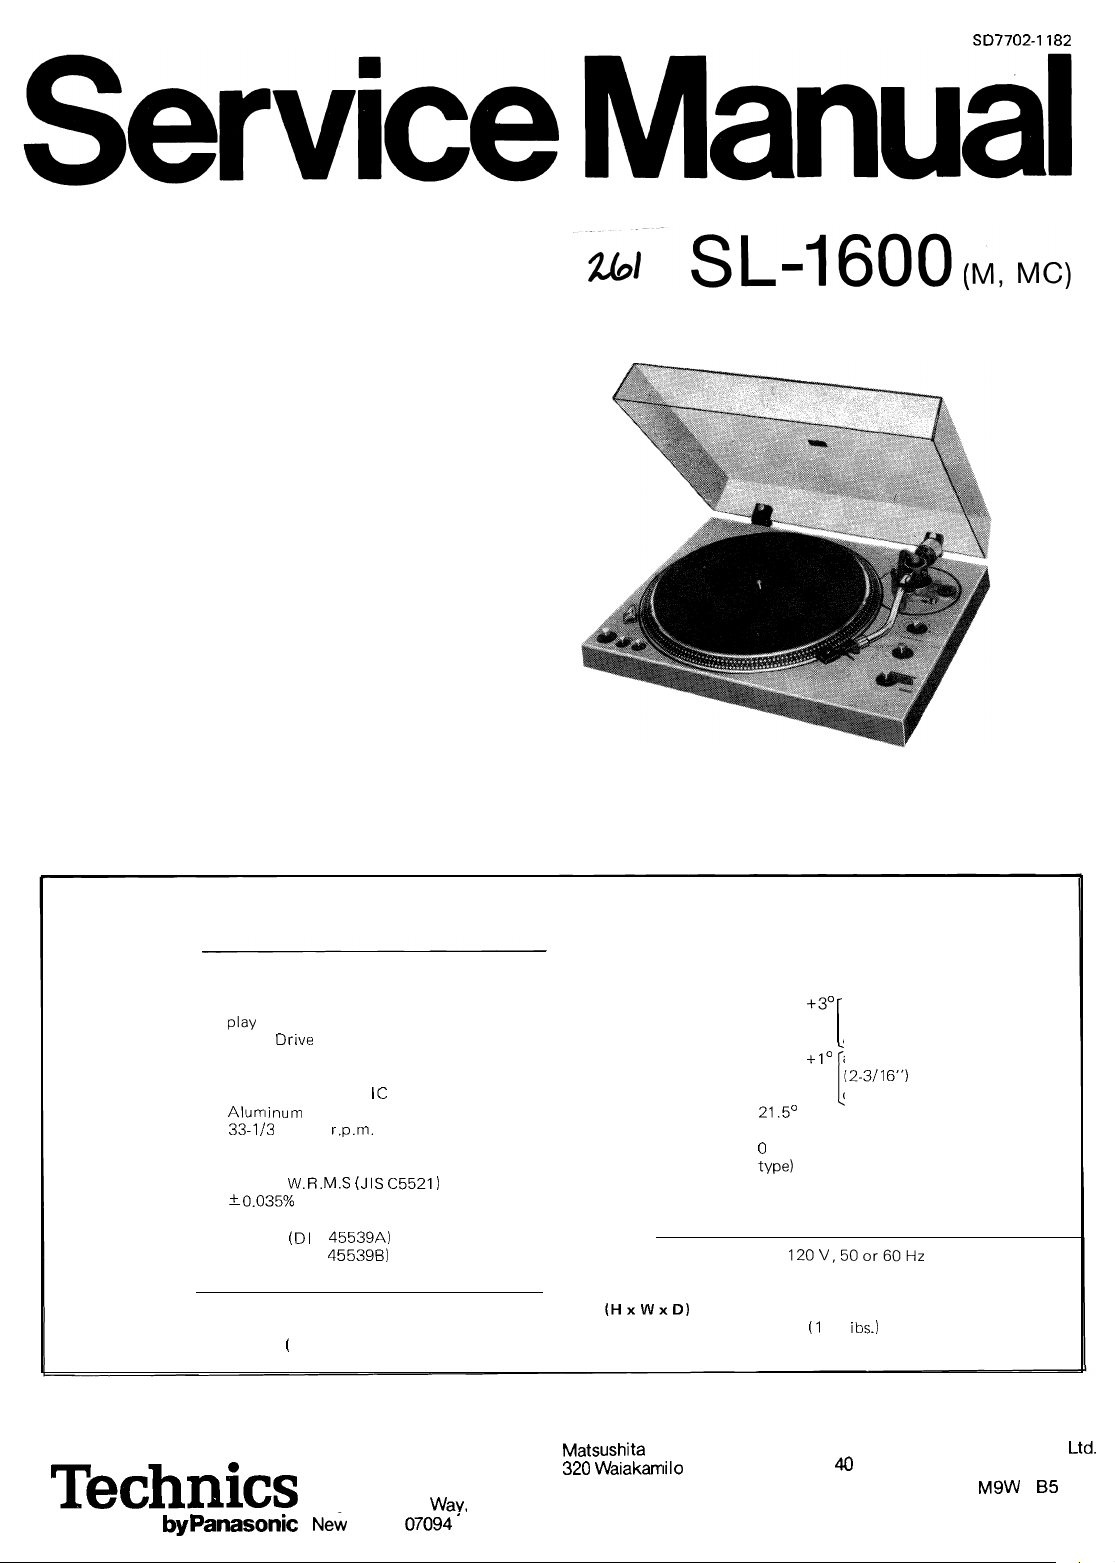
Direct drive automatic Turntable System
Specifications
Turntable section
Type:
Drive method:
Motor:
Turntable platter:
Turntable speeds:
Pitch controls:
Wow and flutter:
Rumble:
Tonearm section
Type:
Effective length: 230 mm (9
Overhang:
Technics
bypanasonic
Specifications are subject to change without notice for further improvement.
Weights and dimensions shown are approximate.
Direct Drive Automatic Turntable System,
Automatic start, Automatic return, Automatic
shut
-
off and MEMO-REPEAT play Manual
play
Direct Dr~ve
Back Electromotive Force Frequency
Generator servo DC motor
employing one chip
Alurr~inum die-cast, 33 cm (13")
33-113 and 45 r.p.m.
Individual adjustment controls. 10%
adjustment range
0.025%
-
-
W.R.M.S (JIS C5521)
k0.035% Weighted zero to peak
(DIN 45507)
50 dB (Dl N 45539A)
73 dB (DIN 45539B)
Universal tubular arm, staticbalanced type
1 5 mm
-
(
19/32")
Panasonic Company
Division of Matsushita Electric
Corporation of America Hawaii 96817 Ontario, Canada
One Panasonic Wav. Secaucus,
IC
1/16',)
New Jersey 07094.
Friction:
Effective mass: 22 g (6.0 g cartridge weight 1.75 g stylus
Tracking error angle:
Offset angle:
Adjustable stylus
pressure range:
Cartridge weight range: 5 to 11 g
Head shell weight: 9.5 g
General
Power supply: AC 120V.50or60Hz
Power consumption: 6 W
Dimensions: 12.5 x 45.3 x 36.9 cm
(HxWxD)
Wegiht:
Matsushita Electric of Hawaii, Inc. Matsushita Electric of Canada Ltd.
320 Waiakarr~ilo Road, Honolulu,
7 mg (horizontally and vertically)
pressure)
Within
+3O at the point of 145
(5-45164") from the
center
within
21.5O
0 to 3 g (stylus pressure direct reading
tv
pe)
14-15/16 x 17-12/16 x 14-9/16 inches)
9.0 kg
i
+lo
at the point of 55 mm
(2-311 6") from the
center
I
(1 9.8 ibs.)
40
Ronson Drive, Rexdale,
mm
1
I
M9W
1
B5
Page 2
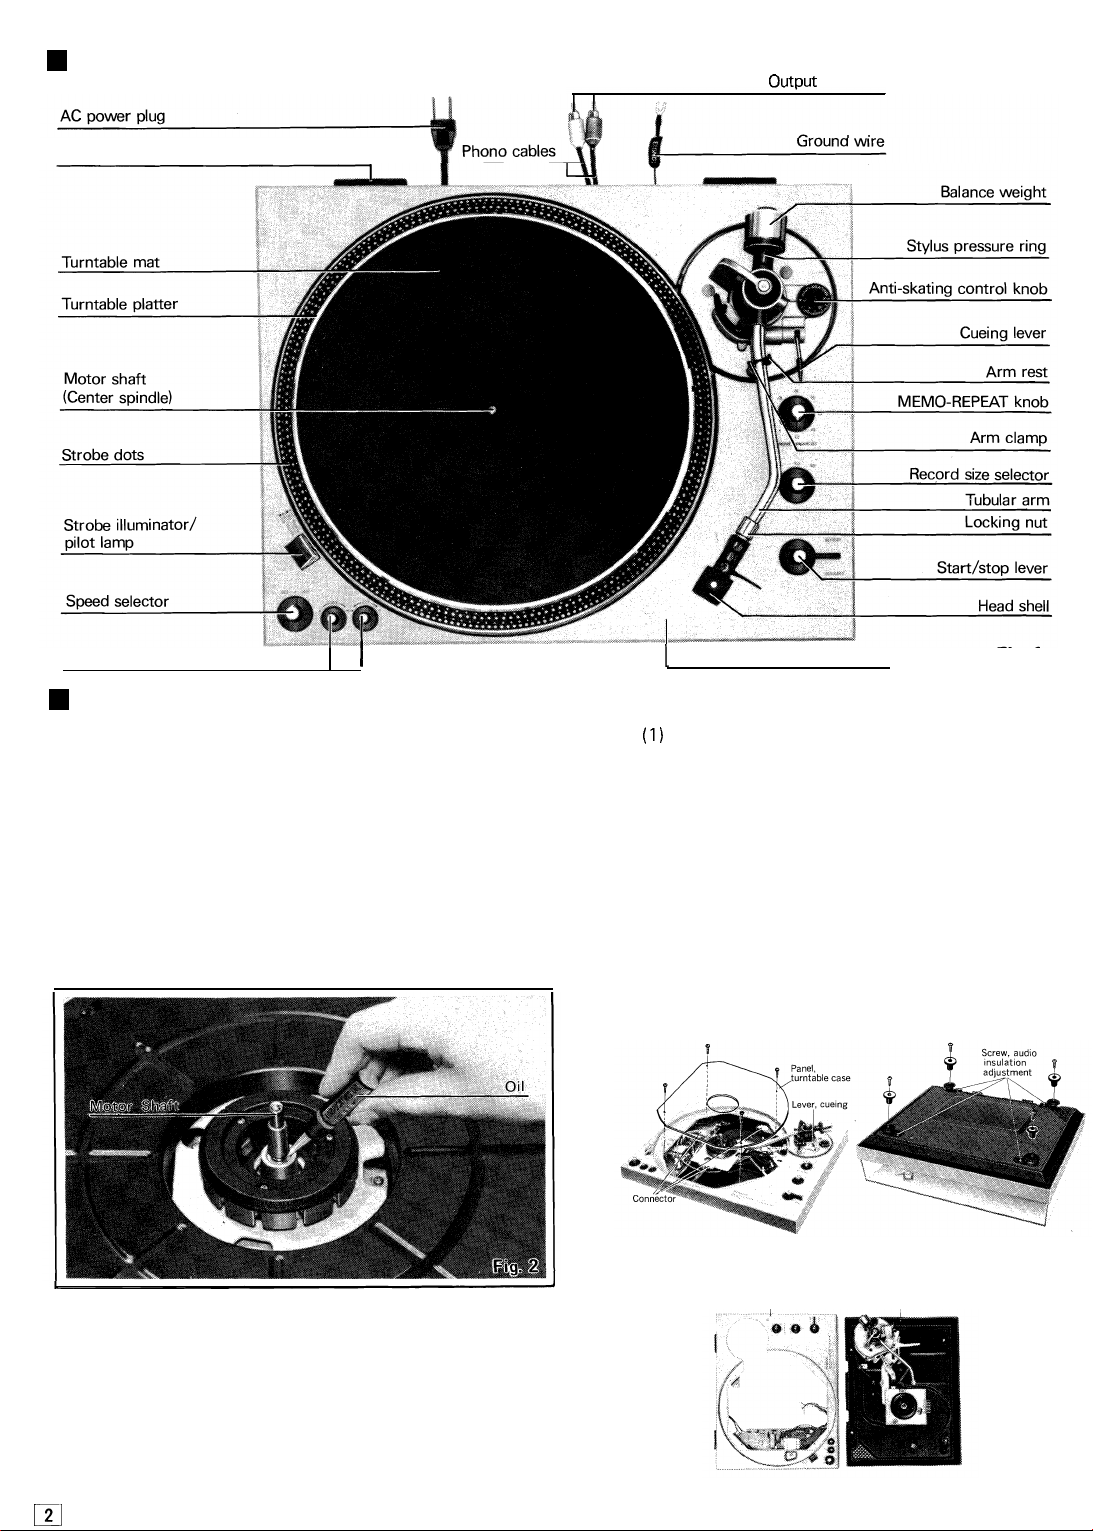
Parts identification
Hinge
Output terminals
Pitch control knobs
1
Assembly and set-up
Apply two or three drops of oil to the motor shaft
using the furnished oil container.
Although the unit has been lubricated before shipping
from the factory, apply a few drops of oil to the
motor shaft for assurance. After that, application of
two or three drops of oil once every
operation or so is sufficient. The time interval is
much longer than that of the former type motors
(200 - 500 hours), so do not apply too much oil, nor
more frequently than necessary. Never use any other
type of oil.
(See Fig.
2)
2000 hours'
.
Fig.
1
(1)
For removal of the cover, take off 4 vis-screws
from the panel cover.
(2)
Draw out three connectors.
(3)
For separation of the body from the main
base, turn the cueing lever upward, move the
-
arm in inboard direction, then lift up the
tone
body.
Note:
The turntable horizontaliy to the panel face is
already adjusted before shipment.
If deviated, correct it by means of the adjust
screws using a 5mm box spanner.
Turntable base
1
1.
2.
3.
4.
5.
6.
121
SL-1600
Remove the cartrige.
Fix the tone arm to the arm rest.
Remove the turntable.
Turn the player set upside down with good care
not to damage the acryl cover.
Take off 4 vis-screws from the back panel.
Place the player set face upward holding it with
both hands so that the body is not separated from
the main body.
Turntable
base Main base
Page 3
H
Adjustments
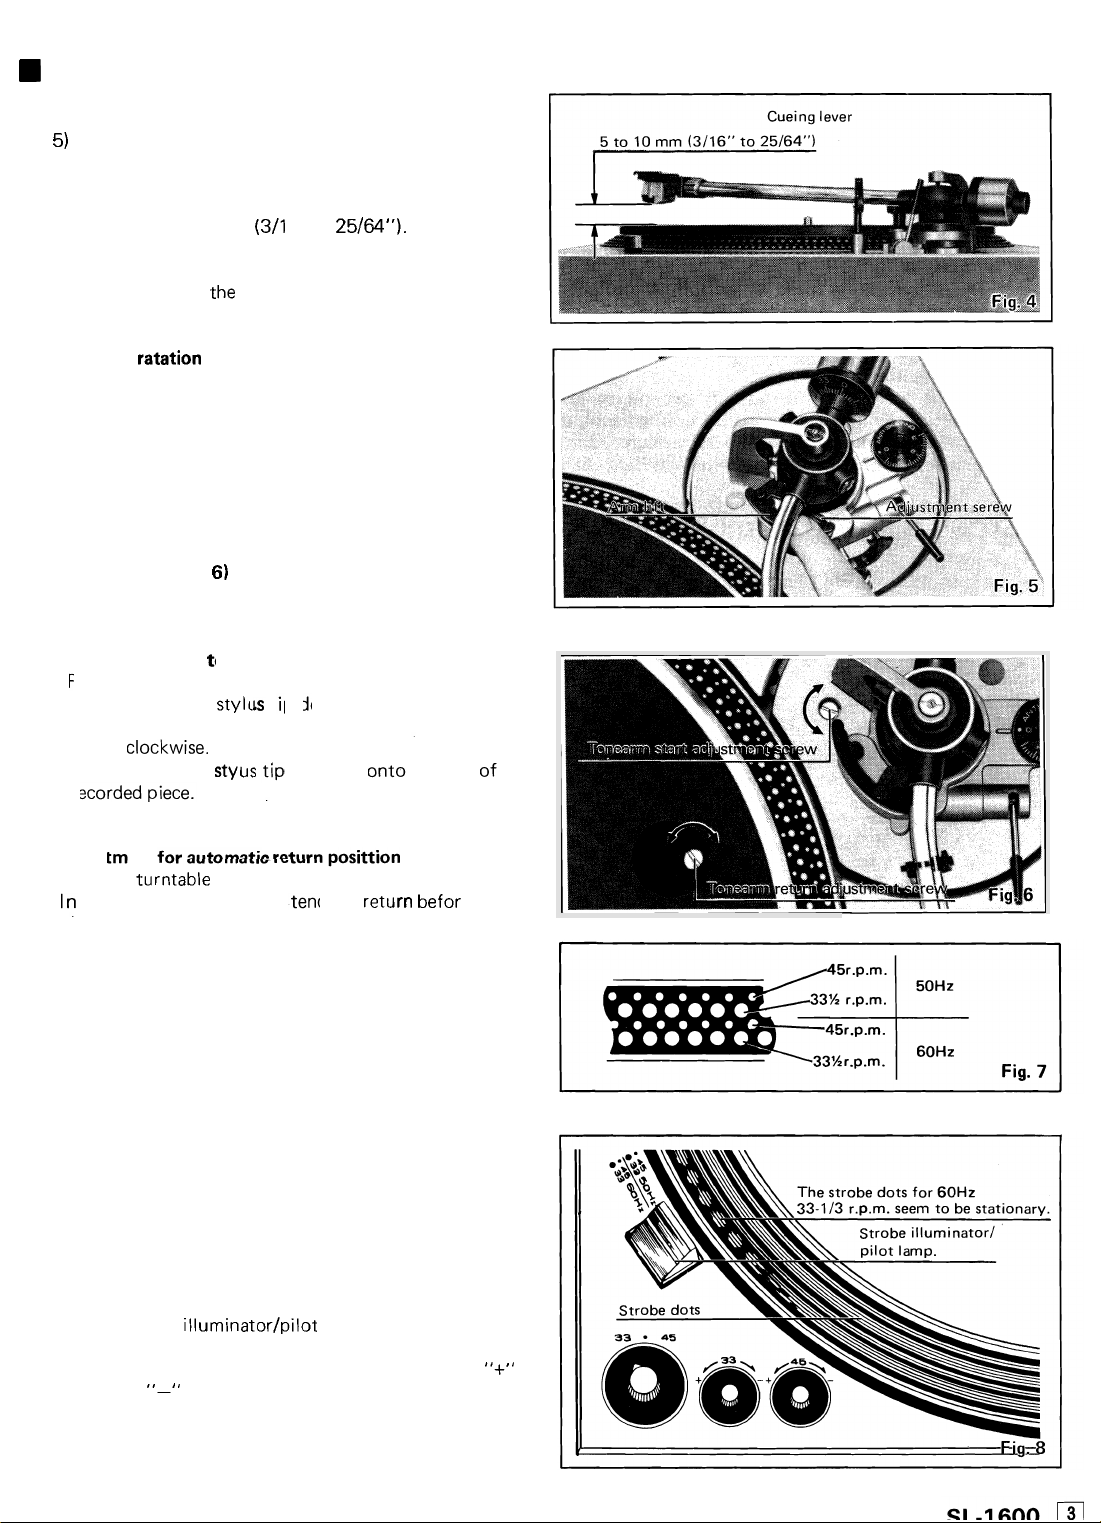
Adjustment of the arm lift height
(See Figs. 4 and
5)
The arm lift height (distance between the stylus tip
and record surface when cueing lever is raised) has
been adjusted at the factory before shipping to ap
proximately 5 to
If the clearance becomes too narrow or too wide be
cause of the physical size of the different cartridges
on the market turn
counterclockwise, at the same time pushing the arm
lift down.
Clockwise ratation
-
distance between the record and stylus tip is reduc
ed.
Counterclockwise rotation
-
distance between the record and stylus tip increases.
Note:
As the adjusting screw has a hexagon head, be sure to
make the adjustment while depressing the arm lift.
Adjustments for automatic start and automatic return
positions (See Fig.
Should the tonearm not function correctly, make
adjustments according to the follwing procedures.
Adjustment for automatic start position
(Remove the rubber cap.)
In cases where the
record.
-
Move
C~OCKW~S~.
In cases where the styus tip descends onto halfway of
a recorded piece.
-
Move counterclockwise
10
mm
(311
6
"
to
25/64").
.the adjustment screw clockwise or
6)
styl~s tip descends outside of the
-
-
-
Adjustment for automatic return posittion
(Remove l~rntable sheet.)
n cases where the tonearm tends to
playing has finished.
-
Move clockwise.
In cases where the tonearm fails to return after the
last groove of the record.
-
Move counterclockwise.
Speed adjustment (with pitch control knobs)
Figs. 7.8 and
Strobe dots are set on the tapered rim of the turn
table platter according to the power frequency and
the number of revolutions of the records. Make
adjustment, referring to strobe dot indication. (See
Fig. 7)
1.
Set the speed selector to the number of revolutions to
be adjusted. (See Fig.
2.
Release the arm clamp and raise the cueing lever
3.
Move the tonearm to a slight extent towards the
turntable platter.
The strobe
luminating the strobe dots.
4.
While turning the pitch control knobs either to
side or
strobe dots of the turntable look as if they were
stationary.
9)
8)
illuminator/pilot lamp will be lit for it
"-"
side, adjust to such an extent that the
retclrn befor the
(See
-
-
"+"
Page 4
The state under which the strobe dots seem to be
stationary represents the correct number of revolu
tions.
"+"
direction
This increases the speed of the turntable rota
the strobe dot pattern seems to flow in the same
direction as the rotational direction of the turntable
platter.
"-"
direction
This decreases the speed of the turntable rotation,
resulting in a state opposite to that in the
tion.
Note:
Strobe dot pattern.
The strobe
the commercially available power source. The frequency
of such power source, when actually measured, has a
fluctuation of about 0.2%. As such a fluctuation of the
illuminator/pilot lamp of this unit employs
tion, and
"+"
direc
-
-
power source affects the strobe illuminator, the strobe
dot pattern also seems to fluctuate to a certain extent.
But the unit is not affected by
power source, since a D.C. motor is employed.
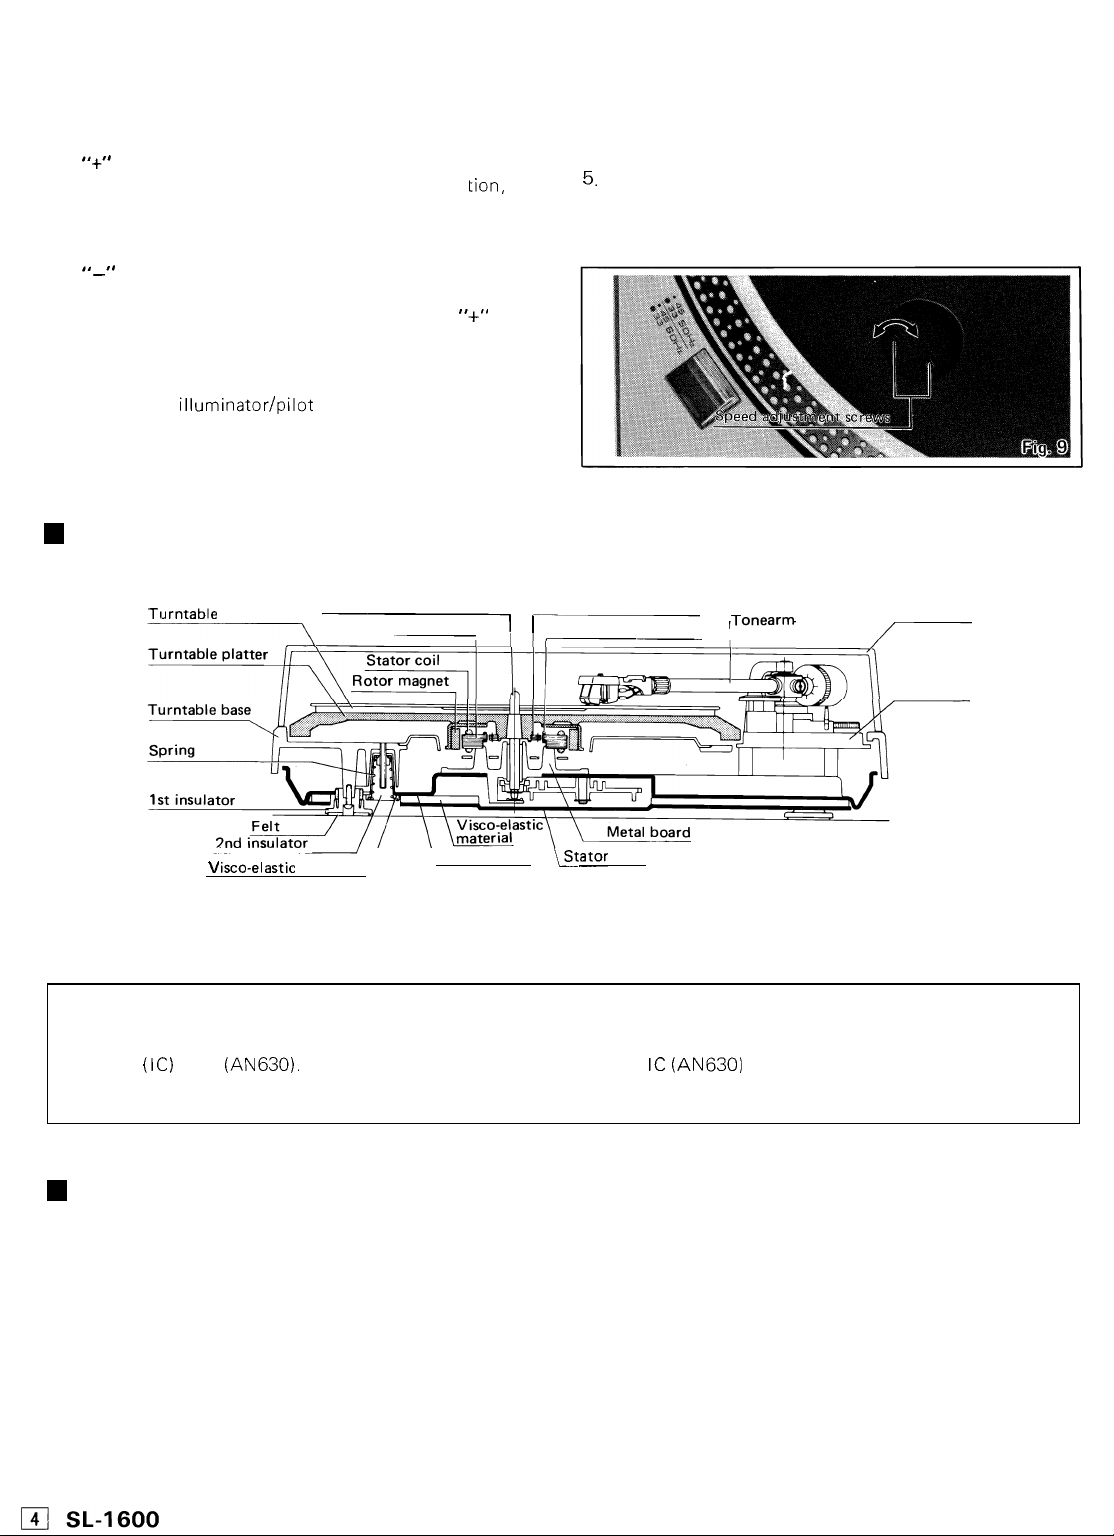
5,
If the desired speed can not be obtained by the variable
pitch controls, turn the speed adjusting screws with a
screw driver for further adjustments. (See Fig.
-
the fluctuations of the
Cross section of motor portion and double insulator
9)
Turntable mat
V
isco-elastic material
Motor shaft (Center spindle)
Stator
\
Main base \tator frame
Operation principles of the
This unit, like the SL 1300 has a rational motor structure, and its drive control circuit is the B.F.G. type (Back
TECHNICAL EXPLANATION electromotive force frequency generator) which is constructed on a single integrated
circuit
(IC) chip (AN630). The following is a block diagram of the IC (AN6303 for which the operating principle will
be briefly explained
Position detecting rotor
I
I
Position detecting coil
I-
SL-1600
Tonearm
Dust cover
Arm base
Operating principle
The back electromotive force, which is generated by the
drive coil winding according to the rotation of the
motor, is detected and converted to a frequency signal
that is proportional to the numder of revolutions.
Conversion is performed by a wave
logic circuit (This is referred to as the B.F.G. method).
This frequency signal is compared with a standard signal
by means of a frequency
which converts
constant number of revolutions. After removing un
necessary
-
shaping circuit and a
-
voltage conversion circuit
it
to a voltage signal in order maintain a
frequency components, with
active filter, from this voltage signal, it controls the cur
rent flow in three differential switching circuits. As a
result, the flow of current in the drive coil winding is
always constant maintaining the correct rotational spe
ed. Control of the rotational speed can be performed by
means of adjusting the standard signal generator circuit
according to the rotational speed adjustment cricuit.
-
-
the operational-amplifier
-
-
Page 5

Explanation of each part
1.
B.F.G. METHOD (BACK ELECTROMOTIVE
FORCE FREQUENCY GENERATOR)
Making use of the back electromotive force that is
generated in the drive coil winding of the motor as a
frequency generator, the frequency of the frequency
generator is converted to the number of revolutions for
the turntable.
After shaping the wave form of this back electromotive
it
force,
generated that is proportional to the number of revolu
tions.
drive coil winding, frequency generator coil windings
and magnets are not necessary, yielding a motor struc
ture that is very compact.
2.
FREOUENCY-VOLTAGE CONVERSION CIRCUIT
Being composed of a
a pulse generating circuit and a sampling integration cir
cuit, the B.F.G. output frequency is converted to a vol
tage, and control output voltage is generated in order to
maintain the rotational speed of the turntable at a cons
tant level.
is composed logically, and a frequency is
This is the use of the B.F.G. Making use of the
trapezoidal
wave generating circult.
3.
OPERATION CONTROL CIRCUIT
The operation control circuit functions as a control out
put voltage control keeping the rotational speed of the
turntable constant with regard to the start of turntable
operation and the operation of the mechanism. With
this circuit, transient response characteristics and start
ing characteristics are very good.
-
-
-
-
-
4.
OPERATIONAL AMPLIFIER (OP AMP) ACTIVE
FILTER
Because of using an operational amplifier in the active
filter, an ideal filter operation is possible.
As a result, such high performance as a signal
(SN) ratio of
0.03%
of
5.
DRIVE CIRCUIT
By incorporating a large copacity power transistor in the
integrated circuit, a starting torque of
obtained. By means of this large starting torgue, prompt
starts have been realized.
6.
THREE DIFFERENTIAL SWITCHING CIRCUITS
By means of the signal from the position signal coil, the
starting circuit power transistor selector operates,
obtaining smooth rotation.
60
dB (I EC-B) and a wow-and-flutter level
(WRMS) have been achieved.
-to-
1
kg-cm can be
-
-
noise
Block diagram
Page 6

RECT
AN630
with the development of new technology)
(This schematic diagram may be modified at any time
Schematic Di agra
-
-
-
-
-
____
-
-
-
-
-
-
-
-
IZOY
AC
152
-
RECT
SVDMI
I
--------------------
I
I
IS
position.
Power swltch 1s off
Speed selector swltch
2:
-
1, S2
S2
1. S1:
2.
NOTES:
position.
r.p.m
1/3
33
chassls with a standard tester that has an
from the
The voltage values entered are the values measured
3.
rotational
at a
100Kfl/V
of
r.p.m.
1/3
33
resistance
internal
speed of
Page 7

SWITCH
POWER
Circuit Board Wiring View
Page 8

EXPLODED
VIEW
OF
TURNTABLE
Page 9

EXPLODED
VIEW
OF
TURNTABLE
Page 10

ECEA50ZR22
ECEA50ZR33
ECQMlH104KZ
ECEA50M2R2R
ECEA50MR33R
ECQM1 H472KZ
ECQMlH223KZ
ECQM1 H823KZ
ECQFlA473MD
ECQUlA473MC
table Mat, Set for [MC]
SFTE170-01A
Name Plate, Set for [MC]
SFNN 16OMO1
Clarnper, AC Power Cord
Spacer. AC Power Cord
REPLACEMENT PARTS LIST
H
1%. Metallic
1%. Metallic
5%. Metallic
5%. Carbon
k
L
*
*
2.7R. 1W.
47KR. 1/4W,
ERD25TJ330
ERXIANJ2R7
ER025CKF3902 39KR. 1/4W.
ER025C KF6202 68KR. 1/4W.
ERD25TJ473
5%. Carbon
5%, Carbon
5%. Carbon
5%. Metall~c
*
*
*
*
120KR. 1/4W.
1KR. 1/4W.
1.5R. 1W.
56KR. 114W.
ERD25TJ102
ERD25TJ124
ERD25TJ563
ERXlANJlR5
Page 11

Page 12

 Loading...