

Page 1
GETTING
C
O
NN
E
CTE
D
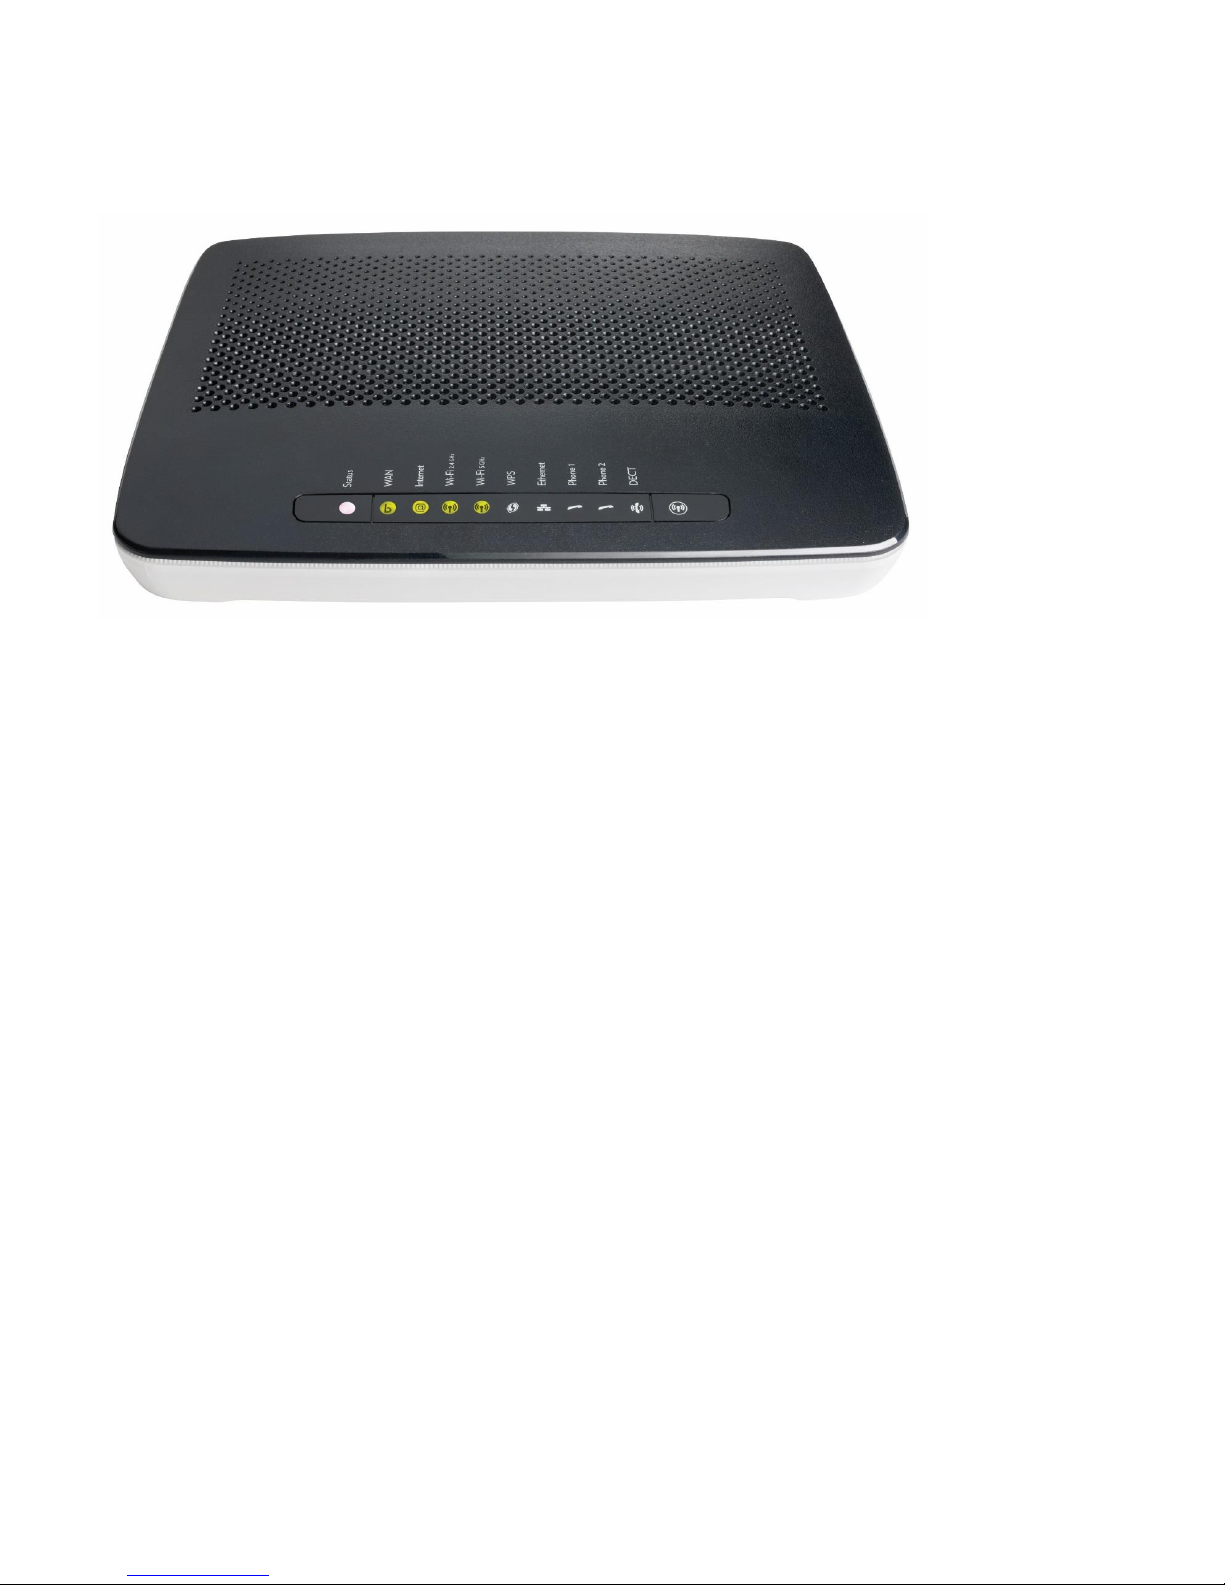
Installation instructions for your
Home Network Gateway (HNG) TG799
This guide is designed to help you get started with your new HNG.
It relates to services being delivered over NBN FTTB and FTTN
connections. Please make sure you keep it in a safe place, as you
may find you need to refer to it again at a later date.
Page 2

1
I
M
POR
TA
NT:
READ BEFORE
YOU START
For your new HNG to operate successfully with your existing ADSL
broadband service until you change over to the NBN, you will need to
re-establish your current ADSL broadband service on the HNG using
your existing user ID and password details. If you need assistance,
please contact your service provider.
In most cases an NBN technician will not need access to your
premises in order to connect you to the NBN. If access is required,
then your service provider will contact you to arrange a suitable time.
Once connected to the NBN, your new home phone or broadband
service will be delivered directly from the HNG. This means the
existing internal home wiring connected to your phone wall sockets
(telephone outlets) may no longer deliver a working phone service.
For your NBN home phone or broadband service to work properly,
the NBN connection from your home’s main telephone socket needs
to be directly connected only to the HNG, with all other cabling and
existing devices disconnected.
If required, a qualified licensed cable installer or electrician
can carry out any changes required to your internal home
cabling and reconnect your existing devices to the HNG.
Page 3
2
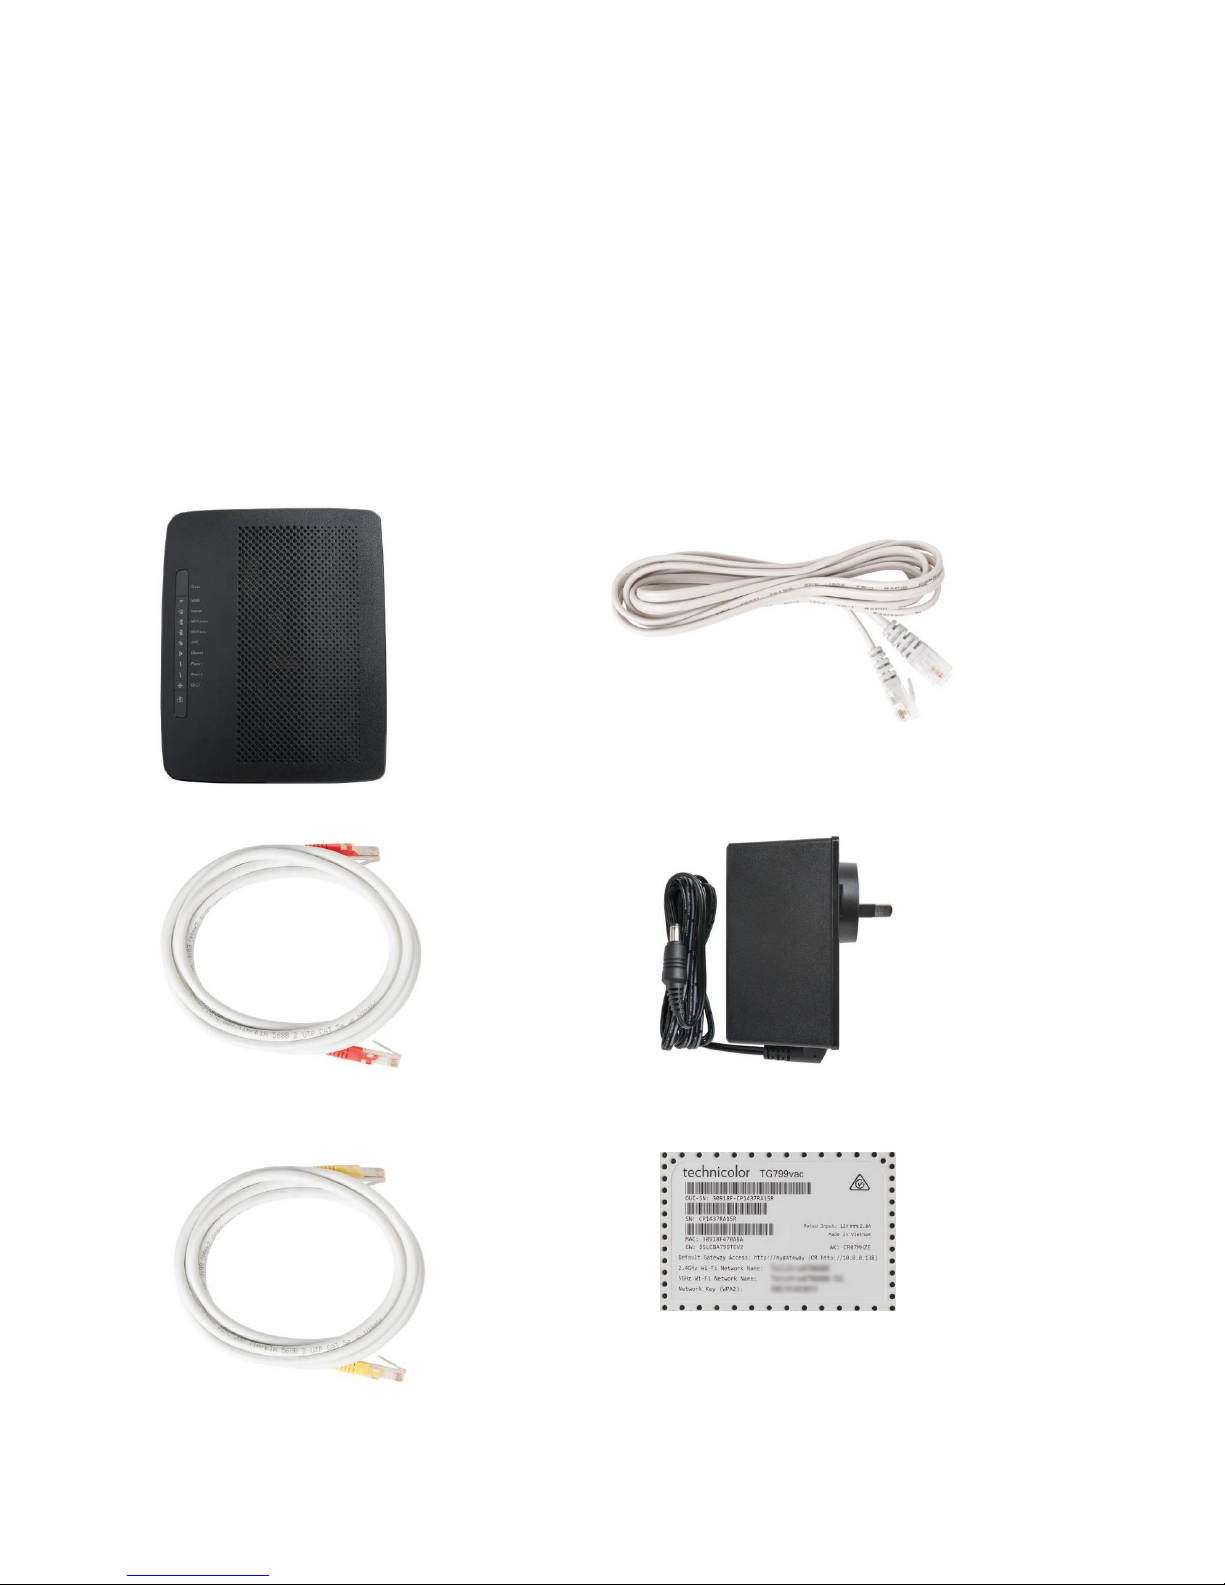
CONTENTS
01. Home Network Gateway (HNG)
02. WAN Ethernet cable (white with red ends)
03. LAN Ethernet cable (white with yellow ends)
04. Telephone cables (grey) x 3
05. Power supply adaptor and cable
06. Wi-Fi Information label (sample)
01.
02.
03.
04.
05.
06.
Page 4
3
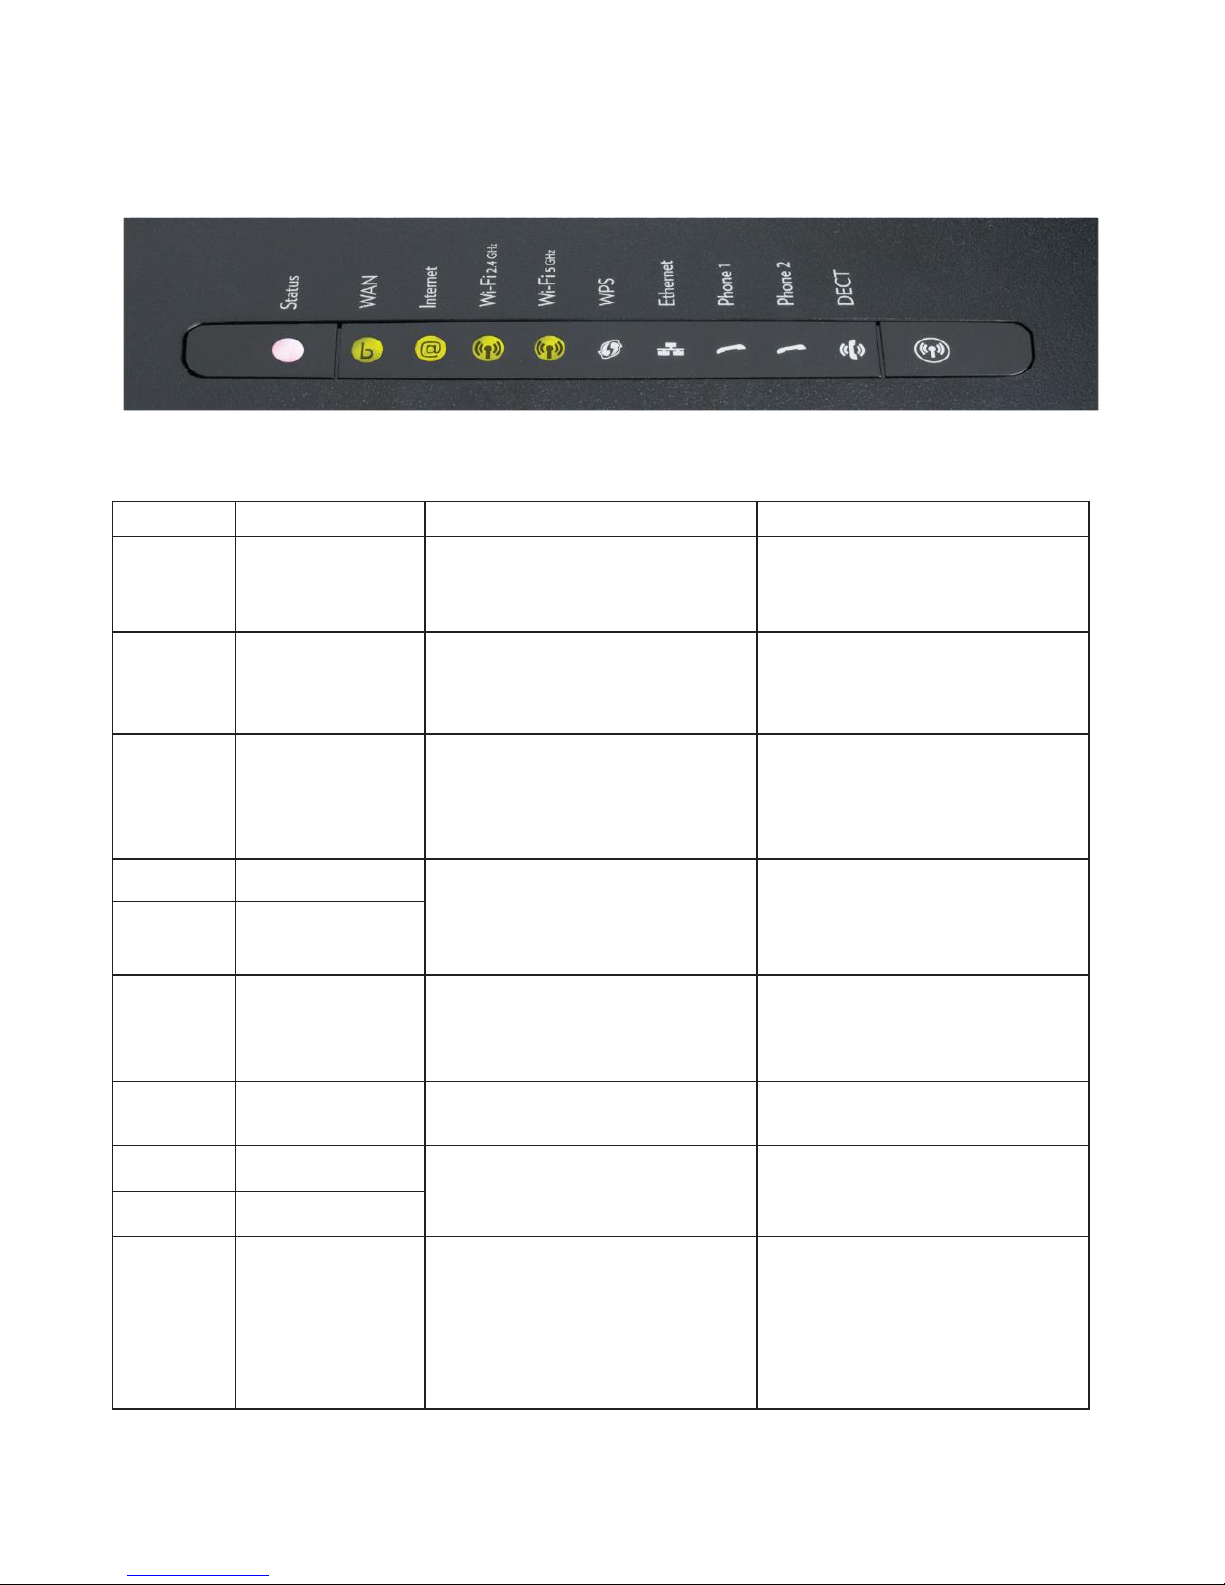
LIGHTS ON THE HNG
Light
Definition
Function
Notes
Status
Status Indicator
(Status has no other button
functionality)
Off – No power
Green Solid – Normal operation
Green Flashing – Device starting up
Red – No internet connection
WAN
Wide Area Network
Off – No network connection
Green Solid – Network connection established
Green Fast Flashing – Data activity
Green Slow Flashing – Trying to detect
network connection
Internet
Internet
Off – No internet connection
Green Solid – Internet connection established
Green Flashing – Data activity
Red – Connection or configuration error
Internet light will turn on solid green when
the HNG has acquired an IP address and
can connect to a DNS server. It doesn’t mean
you’ll have access to the internet unless
provisioned by your Service Provider.
Wi-Fi 2.4GHz
Wireless Network 2.4GHz
Off – Wi-Fi disabled
Green – Wireless device(s) connected,
no data activity
Green Flashing – Wireless device(s) connected,
data activity
Your wireless device has to be compatible
with 2.4G and 5G Wi-Fi standards.
Wi-Fi 5GHz
Wireless Network 5GHz
WPS
Wi-Fi Protected Setup
Off – WPS not being used
Green – WPS setup successful
Orange Flashing – WPS setup in progress
Red – WPS setup failed
The WPS button (C) can be used to add a new
wireless device also equipped with WPS capability
to your network without the need to enter any of
your wireless settings manually.
Ethernet
Ethernet
Off – No network connection
Green Solid – Network connection established
Green Fast Flashing – Data activity
Phone 1
Phone 1
Off – No phone service connection established
Green Solid – Phone service connection
established
Green Fast Flashing – Phone service activity
Phone 2
Phone 2
DECT
DECT – Cordless
Phone Base Station
Off – DECT Service not available/no cordless
phone paired
Green Solid – DECT service available/cordless
phone paired
Orange Slow Flashing – DECT
pairing in progress
The HNG can be put in DECT cordless phone
pairing mode by pressing the DECT button (D) on
the side of the device for a few seconds until the
DECT LED is flashing. Note: a compatible DECT
cordless phone handset is required to enjoy all the
features (DECT cordless phone handset not
provided here).
Page 5
4
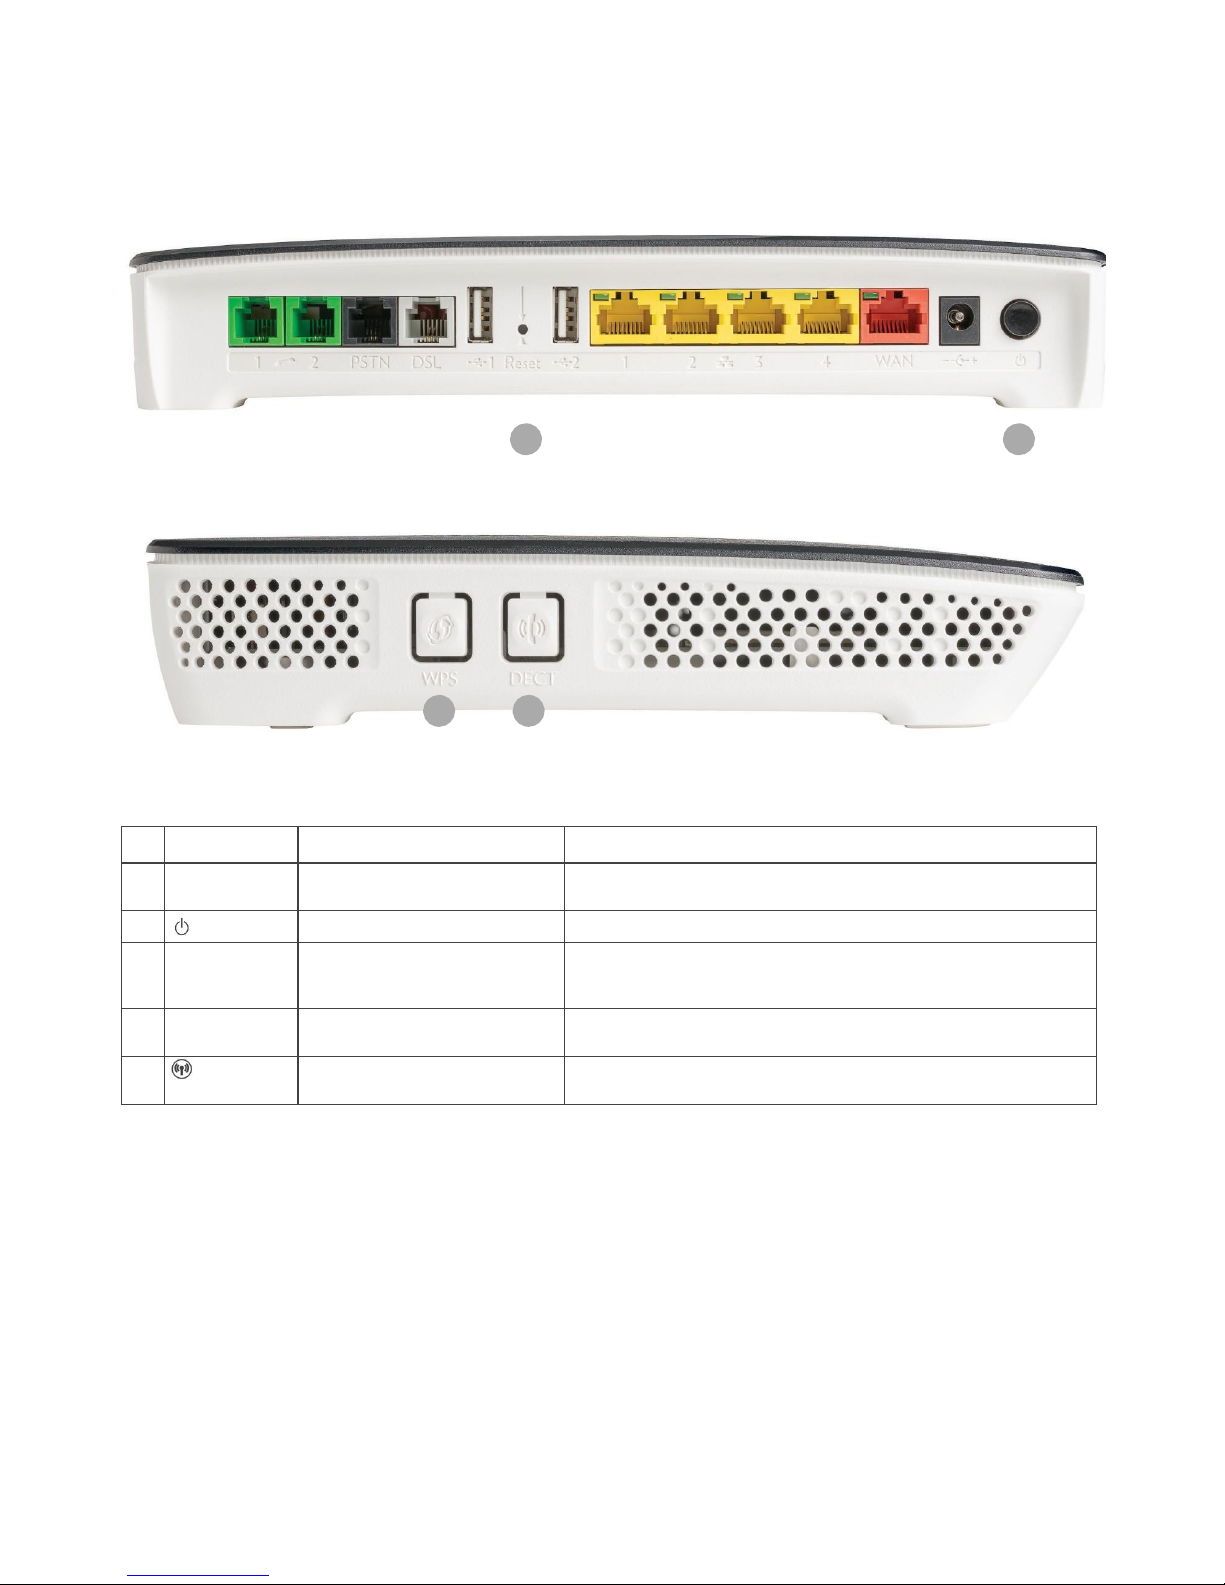
BUTTONS ON THE HNG
A B
C D
Button
Definition
Function
A
Reset
Reset Button
When pressed for more than seven seconds it will reset the HNG to its factory
settings. Any configuration changes you have made previously will be lost.
B
Power Switch
To turn the HNG on or
off
C
WPS
WPS – Wi-Fi Protected Setup
When pressed, the HNG will search for wireless devices with WPS capability and
in WPS mode to register. You will have two minutes to put the other wireless
devices in WPS mode.
D
DECT
DECT
Paging/Registration Button
When pressed briefly the HNG will page all paired
DECT cordless p
hones.
When pressed for 5 seconds the HNG enters into pairing mode.
Wi-Fi Button (on front of the HNG)
Wi-Fi can be enabled (short press) or disabled (long press) by pressing and
holding the Wi-Fi button. When Wi-Fi is disabled the Wi-Fi
LEDs
will be off.
Page 6

5
SOCKETS ON THE HNG
PSTN
Before cutover to an NBN
service, your phone line can
be connected here to enable
DECT
and the phone ports.
Ports
Connect your data devices
(PC,
laptop, smart TV) to these
Ethernet ports.
Power
Connect the Power
Supply Adaptor cable here.
Phone 1 and 2
Connect your analogue
device(s)
or home wiring
to the phone ports.
DSL
This socket is used when
your NBN service is
provided from your phone
socket.
WAN
This socket is used when your
NBN service is provided from
an NBN Connection Box.
Page 7

6
1.
2.
3.
4.
5.
6.
7.
STEP-BY-STEP GUIDE
TO INSTALLING THE HNG
Follow the connection configuration instructions given on the following pages.
The configuration will vary according to the type of NBN connection and the
existing services you have. Your service provider can provide more
information if you are unsure.
Plug the Power Supply Adaptor cable into the HNG power inlet on the back of
the device. Then, plug the adaptor into a power outlet, turn it on, and push the
ON/OFF button to turn the HNG on.
Allow up to five minutes for the HNG to power on and perform the start up
sequence. Various lights will be flashing as the device starts up
(see
the ‘Lights
on the HNG’ on page 3 to see their functions). Wait for the status light to remain
solid green before going to the next step. If the status light is not solid green,
contact your service provider for assistance.
If you have ordered a home phone service as part of your NBN connection,
you can now connect your telephone device to either of the two
GREEN
phone ports at the back of the HNG using one of the GREY telephone
cables provided.
If you have ordered a broadband service as part of your NBN connection,
you can now connect your PC or laptop to any of the four
YELLOW
LAN ports
at the back of the HNG using the Ethernet cable (with yellow ends) provided.
If you need
to
reconnect to your existing working ADSL broadband service
before the changeover to the NBN, you will need to re-activate your ADSL
broadband service using your user ID and password supplied by your current
ADSL broadband service provider.
With your home phone and/or broadband service connected to the NBN
and working, you can now connect your Wi-Fi devices.
The HNG has two Wi-Fi networks: 2.4G and 5G. The factory default
network IDs and passwords for these Wi-Fi networks can be found on
the Wi-Fi information label provided in the box, and on the label attached
to the back of the HNG device. The wireless network ID and password
can be changed via the user interface if you need.
A Wi-Fi connection can be achieved by entering the password
on your wireless device (once the wireless device detects the HNG
wireless network, identified by the network ID), or by pressing the WPS
key on your HNG. Pressing the WPS key on the HNG will put it in Wi-Fi
protected setup mode. You will have approximately two minutes to press
the WPS on the other Wi-Fi enabled device to complete the connection.
To pair your DECT cordless phones (not supplied), and to set up any
other advanced settings available on the HNG, refer to the information
on advanced features which can be found on page 15 of this guide.
Important: Your service provider will provide you with connection configuration
instructions
with your HNG that explain how to connect your device. If you have not
received these
instructions,
please contact your service provider immediately.
Page 8

7
HNG CONNECTION
CONFIGURATIONS
The following section includes co
nnectio
n configurations for
your new HNG.
If you are not sure which of these configurations apply to you,
contact your service
provider for assistance
.
I am:
Refer to:
Connecting a new NBN broadband and home phone service
(I didn’t previously have a broadband or home phone service at this address)
Page 8
* Changing my existing home phone and ADSL broadband service to an NBN broadband and home phone service
Page 9
* Changing my existing ADSL broadband service to an NBN broadband service only
Page 11
* Changing my existing home phone service to an NBN home phone service only
Page 12
Connecting a new NBN broadband service only (I didn’t previously have a broadband service at this address)
Page 13
Connecting a new NBN home phone service only (I didn’t previously have a home phone service at this address)
Page 14
* Note:
– These connection configurations assume that you previously had a home phone and/or broadband service with your service provider.
– During the changeover from your existing services to your new services on the NBN, there may be a short period of time when neither your existing
nor your new broadband and/or home phone services are available.
– Because the new NBN services will operate over the same wiring as your old services, then the old services will no longer operate after the changeover
to the NBN.
Page 9

8
FIGURE 1 – PHONE AND
BROADBAND SERVICES
(FTTB OR FTTN)
This configuration is for new home phone and broadband services delivered over an
NBN
FTTB
or FTTN connection when there are no existing working ADSL broadband
or home phone services in the premises.
1. Connect your HNG as shown in the figure below. Then follow the instructions under
‘Step-by-Step Guide to Installing the HNG’ on page 6.
2. To avoid interference and performance degradation, the HNG must be connected to the main
telephone socket in your premises, on its own, with all other internal cabling and existing
telecommunications equipment disconnected (e.g. facsimile and security alarms).
If required, a qualified licensed cable installer or
electrician
can re-connect your internal
in-home cabling as shown in the diagram with a dotted line.
Page 10

9
FIGURE 2 – NBN READY FOR
TRANSITION: PHONE AND
BROADBAND SERVICES
(FTTB OR FTTN)
The NBN-ready configuration (for existing working ADSL broadband and home phone services
before the changeover to the NBN) is relevant only if you have an existing working ADSL
broadband and home phone service and you want it to work with your new HNG device before
you change over to the NBN.
1. Connect your HNG as shown in the figure below. Then follow the instructions under
‘Step-by-Step Guide to Installing the HNG’ on page 6.
2. To avoid interference and performance degradation, the HNG must be connected to the main
telephone socket in your premises on its own, with all other internal cabling and existing
telecommunications equipment disconnected (e.g. facsimile and security
alarms).
If required,
a qualified licensed cable installer or
electrician
can re-connect your internal in-home cabling
as shown in the diagram.
3. If you want your new HNG to operate with your existing ADSL broadband service, you will need
to have your user ID and password details for your existing ADSL broadband service. If you need
assistance, contact your Service Provider.
4. After the changeover to the NBN, your new home phone and broadband service will operate directly
from the HNG. Your old ADSL broadband and home phone service will now no longer be active.
5. The filter is now no longer required so you can now connect your HNG DSL port directly to the
main telephone socket, using the same grey phone cable. The grey phone cable to the HNG
PSTN port can also now be disconnected.
Page 11

10
OTHER
SCENARIOS
Page 12

11
FIGURE 3 – NBN READY FOR
TRANSITION TO BROADBAND
SERVICE ONLY (FTTB OR FTTN)
This configuration applies if you have an existing working ADSL broadband service and
you want it to work with your new HNG device before the changeover to the NBN.
1. Connect your HNG as shown in the figure below. Then follow the instructions under
‘Step-by-Step Guide to Installing the HNG’ on page 6.
2. To avoid interference and performance degradation, the HNG must be connected
to the main telephone socket in your premises on its own, with all other internal cabling
and existing telecommunications equipment disconnected (e.g. facsimile and security
alarms). If required, a qualified licensed cable installer or electrician can re-connect
your internal in-home cabling.
3. If you want your new HNG to operate with your existing ADSL broadband service, you
will need to have the user ID and password details for your existing ADSL broadband
service. If you need assistance, contact your Service Provider.
4. After the changeover to the NBN, your new broadband service will operate directly from the HNG.
Your old ADSL broadband service will now no longer be active.
5. The filter is now no longer required so you can now connect your HNG DSL port directly to the
main telephone socket, using the same grey phone cable.
Page 13

12
FIGURE 4 – NBN READY
FOR TRANSITION TO PHONE
SERVICE ONLY (FTTB OR FTTN)
This configuration applies if you have an existing working home phone service and
you want it to work with your new HNG device before the changeover to the NBN.
1. Connect your HNG as shown in the figure below. Then follow the instructions
under ‘Step-by-Step Guide to Installing the HNG’ on page 6.
2. To avoid interference and performance degradation, the HNG must be connected
to the main telephone socket in your premises on its own, with all other internal
cabling and existing telecommunications equipment disconnected (e.g. facsimile and
security alarms). If required, a qualified licensed cable installer or electrician can
re-connect your internal in-home cabling as shown in the diagram with a dotted line.
3. After transition to the NBN, your new home phone service will operate directly from the HNG.
Your old home phone service will now no longer be active.
4. The filter is now no longer required so you can now connect your HNG DSL port directly to the
main telephone socket, using the same grey phone cable. The grey phone cable to the HNG
PSTN port can also now be disconnected.
Page 14

13
FIGURE 5 – BROADBAND
SERVICE ONLY (FTTB OR FTTN)
This configuration is for new broadband services delivered over an NBN FTTB or
FTTN connection when there are no existing working services in the premises.
1. Connect your HNG as shown in the figure below. Then follow the instructions under
’Step-by-Step Guide to Installing the HNG’ on page 6.
2. To avoid interference and performance degradation, the HNG must be connected
to the main telephone socket in your premises on its own, with all other internal
cabling and existing telecommunications equipment disconnected (e.g. facsimile
and security alarms). If required, a qualified licensed cable installer or electrician
can re-connect your internal in-home cabling.
Page 15

14
FIGURE 6 – PHONE SERVICE
ONLY (FTTB OR FTTN)
This configuration is for new phone services delivered over an NBN FTTB or
FTTN connection when there are no existing working services in the premises.
1. Connect your HNG as shown in the figure below. Then follow the instructions under
‘Step-by-Step Guide to Installing the HNG’ on page 6.
2. To avoid interference and performance degradation, the HNG must be connected
to the main telephone socket in your premises on its own, with all other internal
cabling and existing telecommunications equipment disconnected (e.g. facsimile
and security alarms). If required, a qualified electrician or licensed cable installer can
re-connect your internal in-home cabling as shown in the diagram with a dotted line.
Page 16

15
ADVANCED FEATURES
HNG Graphical User Interface
The user interface of your HNG supports a number of advanced features,
including media sharing, firewall/parental control, USB device support,
DECT cordless base station, and Wi-Fi wireless network settings for 2.4G
and 5G wireless local area networks.
To access the user interface, enter //10.0.0.138/ or //mygateway/ in your
internet browser’s address window.
DECT Cordless Phone Pairing
DECT Cordless Phone Pairing can be established without accessing the user
interface by simply pressing the DECT button continuously for five seconds.
This action puts the DECT cordless base station in pairing mode – the DECT
light will flash Orange. Next, activate the pairing on your compatible DECT
cordless phone to complete the action. Once paired the DECT light will turn a
steady green.
Pressing the DECT button briefly will page all paired DECT cordless phones –
you can pair up to five DECT cordless phones.
Note: a compatible DECT cordless phone is required to enjoy all the features
available from your HNG (DECT cordless phone is not supplied).
 Loading...