

Page 1
•Utilizes standard 9V alkaline battery (not included). NOTE: Input jack
POWER REQUIREMENTS
activates battery. To conserve energy, unplug when not in use. Power
Consumption: approx. 5mA.
•USE DC POWER SUPPLY ONLY! Failure to do so may damage the
unit and void warranty. DC Power Supply Specifications:
-9V DC regulated or unregulated, 100mA minimum;
-2.1mm female plug, center negative (-).
Optional factory power supply is available: Tech 21 Model #DC4A.
WARNINGS:
• Attempting to repair unit is not recommended and may void warranty.
• Missing or altered serial numbers automatically void warranty. For your own
protection: be sure serial number labels on the unit’s back plate and
exterior box are intact, and return your warranty registration card.
ONE YEAR LIMITED WARRANTY. PROOF OF PURCHASE
REQUIRED. Manufacturer warrants unit to be free from defects in materials and
workmanship for one (1) year from date of purchase to the original purchaser and is not
transferable. This warranty does not include damage resulting from accident, misuse,
abuse, alteration, or incorrect current or voltage. If unit becomes defective within warranty period, Tech 21 will repair or replace it free of charge. After expiration, Tech 21
will repair defective unit for a fee.
ALL REPAIRS for residents of U.S. and Canada: Call Tech 21 for Return
Authorization Number. Manufacturer will not accept packages without
prior authorization, pre-paid freight (UPS preferred) and proper insurance.
FOR PERSONAL ASSISTANCE & SERVICE:
Contact Tech 21 weekdays from 9:00 AM to 5:00 PM, EST.
Hand-built in the U.S.A. using high-quality components sourced
domestically and around the globe.
T: 973-777- 6996 • F: 97 3-777-98 99
E: info@te ch21nyc. com • W: tech21nyc. com
©20 17 Tech 2 1 USA, Inc.
OWNER’S MANUAL
Page 2

TECH 21, THE COMPANY
Tech 21 was formed by a guitarist possessing the unusual combination
of a trained ear and electronics expertise. In 1989, B. Andrew Barta made
his invention commercially available to players and studios around the world.
His highly-acclaimed SansAmp™ pioneered Tube Amplifier Emulation in
professional applications for recording direct and performing live, and created an entirely new category of signal processing. There have since been
many entries into this niche, yet SansAmp continues to maintain its reputation as the industry standard. Tech 21 takes great pride in delivering
consistent quality sound, studio to studio, club to club, arena to arena.
PRODUCT OVERVIEW
The ‘60s and ‘70s are widely recognized as the heyday for professional recording console design. The EQ and preamp sections of these near-mythical vintage
consoles are highly sought after, even to this day. Some of the most iconic guitar and bass tones in the history of recorded audio were tracked “direct”
straight into these consoles’ channel strips.
The Q\Strip was designed with sophisticated features that enable you to take
these highly-coveted tone shaping circuits with you, whether you’re heading to
a live gig or tracking in the studio or into your DAW. It’s compact, extremely
cost-effective and in an ultra-convenient DI format.
The 100% analog MOSFET circuitry in the heart of the Q\Strip provides the
warmth, girth and larger-than-life tones for which vintage consoles are
revered. Its versatility and flexibility are suitable for any instrument and multiple applications. The Q\Strip is limited only by how far you are willing to push
your creativity and how much of that juicy vintage tone you crave.
APPLICATIONS
FOR RECORDING DIRECT OR DIRECT TO P.A. SYSTEM:
Plug the XLR or 1/4” Output directly into the input of a mixer/DAW. Work with
the input trim control on the mixer/recorder and be sure not to overload its
input. If the Level of the Q\Strip is below 12 o’clock and is overloading the
board, use the respective output level switch to reduce the output:
If using 1/4-inch: +10dB disengaged (out position).
If using XLR: -20dB engaged (in position).
1
WITH AN INSTRUMENT AMP:
•As a Stomp Box: Run the 1/4” Output into the front input of your amp.
For best results, keep the Q\Strip’s Level close to unity gain so as not to
overload the amp’s input --unless that’s what you want to do!
•As a Pre-Amp: Run 1/4” Output of the Q\Strip directly into the power amp
input, a.k.a. “effects return” (if applicable) of an amp, which will bypass the
amp’s tone-coloring pre-amp section and defeat the amp’s master volume.
So, be sure your instrument’s volume knob is down, BEFORE you turn on
the amp. If a power amp input is not available, use the cleanest channel with
the amp’s EQ flat and maximum headroom. For best results, keep the
Q\Strip’s Level close to unity gain to not overload the amp’s input (which
could yield undesirable distortion).
TO DRIVE A POWER AMP: Run the 1/4” Output or XLR Output to the
corresponding input of a power amp, and adjust your stage volume with the
Level control of the Q\Strip.
NOTE: When running into the power amp input of an amp or a power amp
alone, make sure to set the Output Level Switches as follows:
If using 1/4-inch: +10dB engaged (in position).
If using XLR: -20dB disengaged (out position).
If you are so inclined, this is the time to crank it --as long as the power amp
volume is close to or at max.
WITH INSTRUMENTS: Use with acoustic and electric guitars and
basses, upright bass, keyboards, violin, drums, sax, harmonica, and even vocals.
But don’t stop there. Try your own experimentation.
WITHOUT INSTRUMENTS:
Insert the Q\Strip in your mixing board and use it as an outboard processor to
warm up a particular channel or enhance existing tracks in the mix-down
process.
2
Page 3
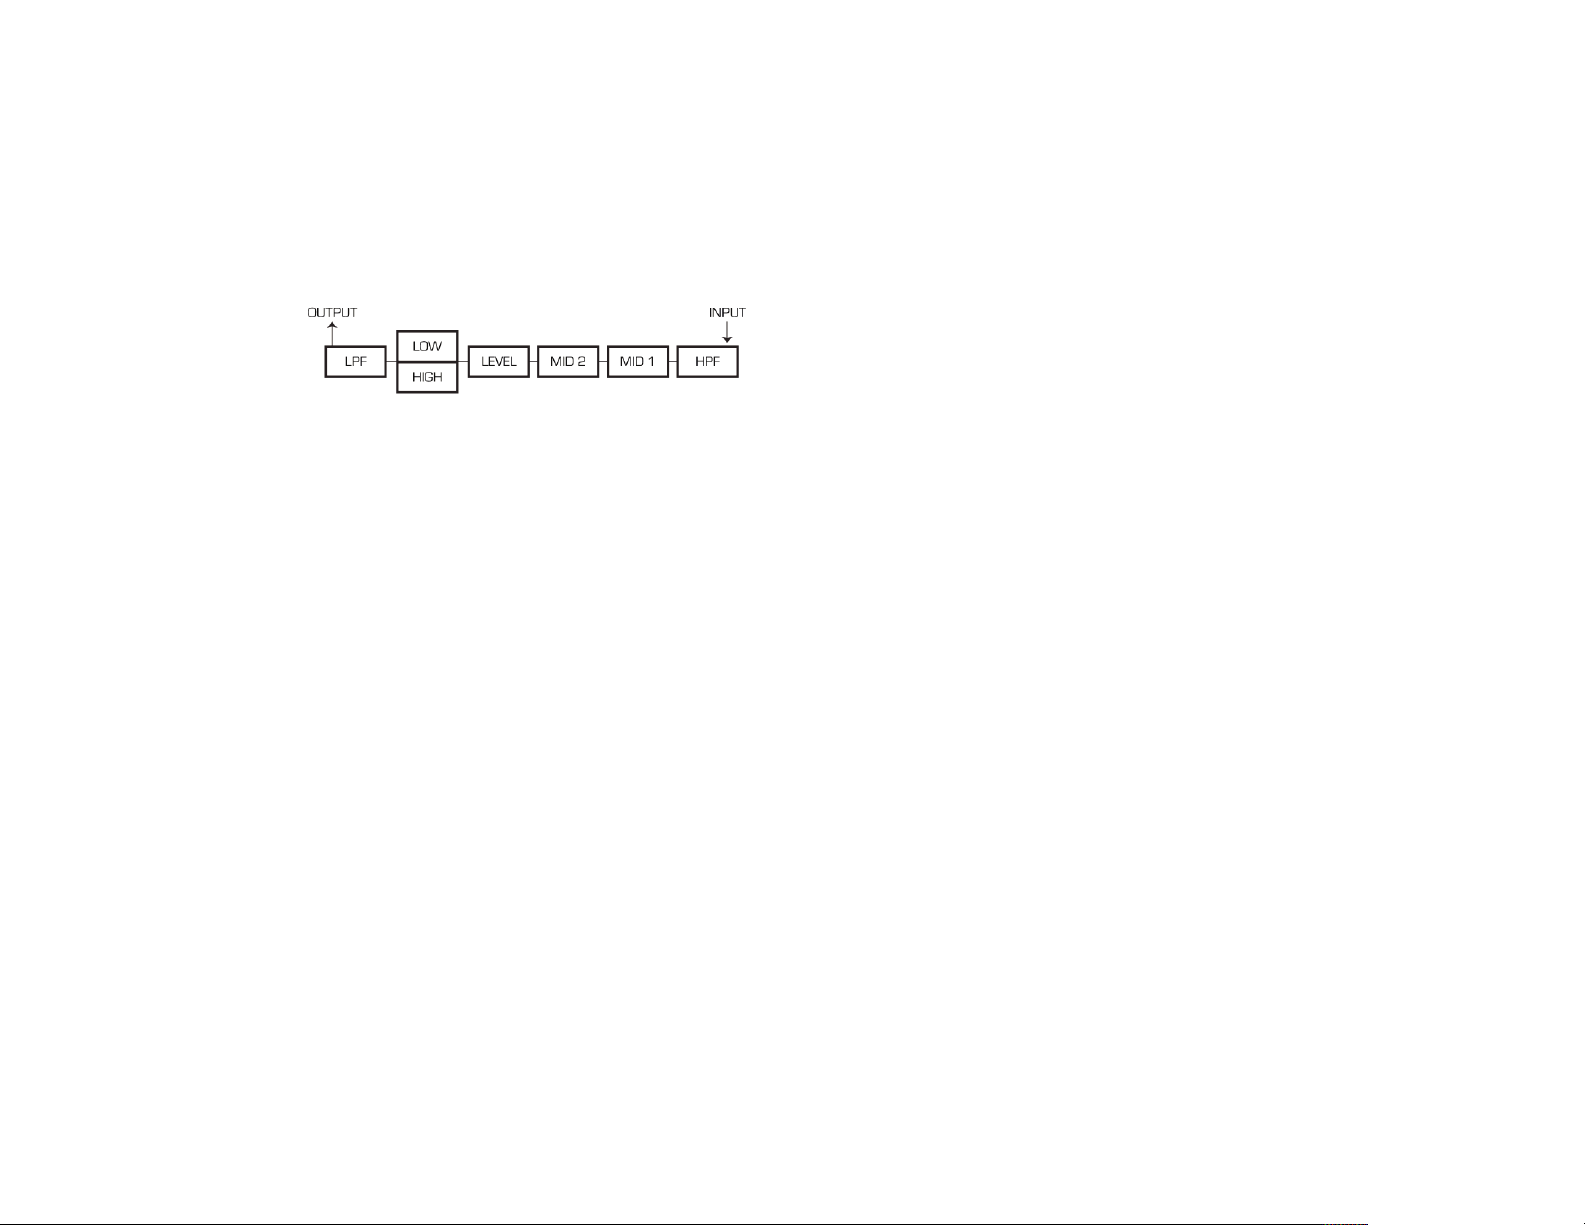
Q\STRIP SIGNAL PATH
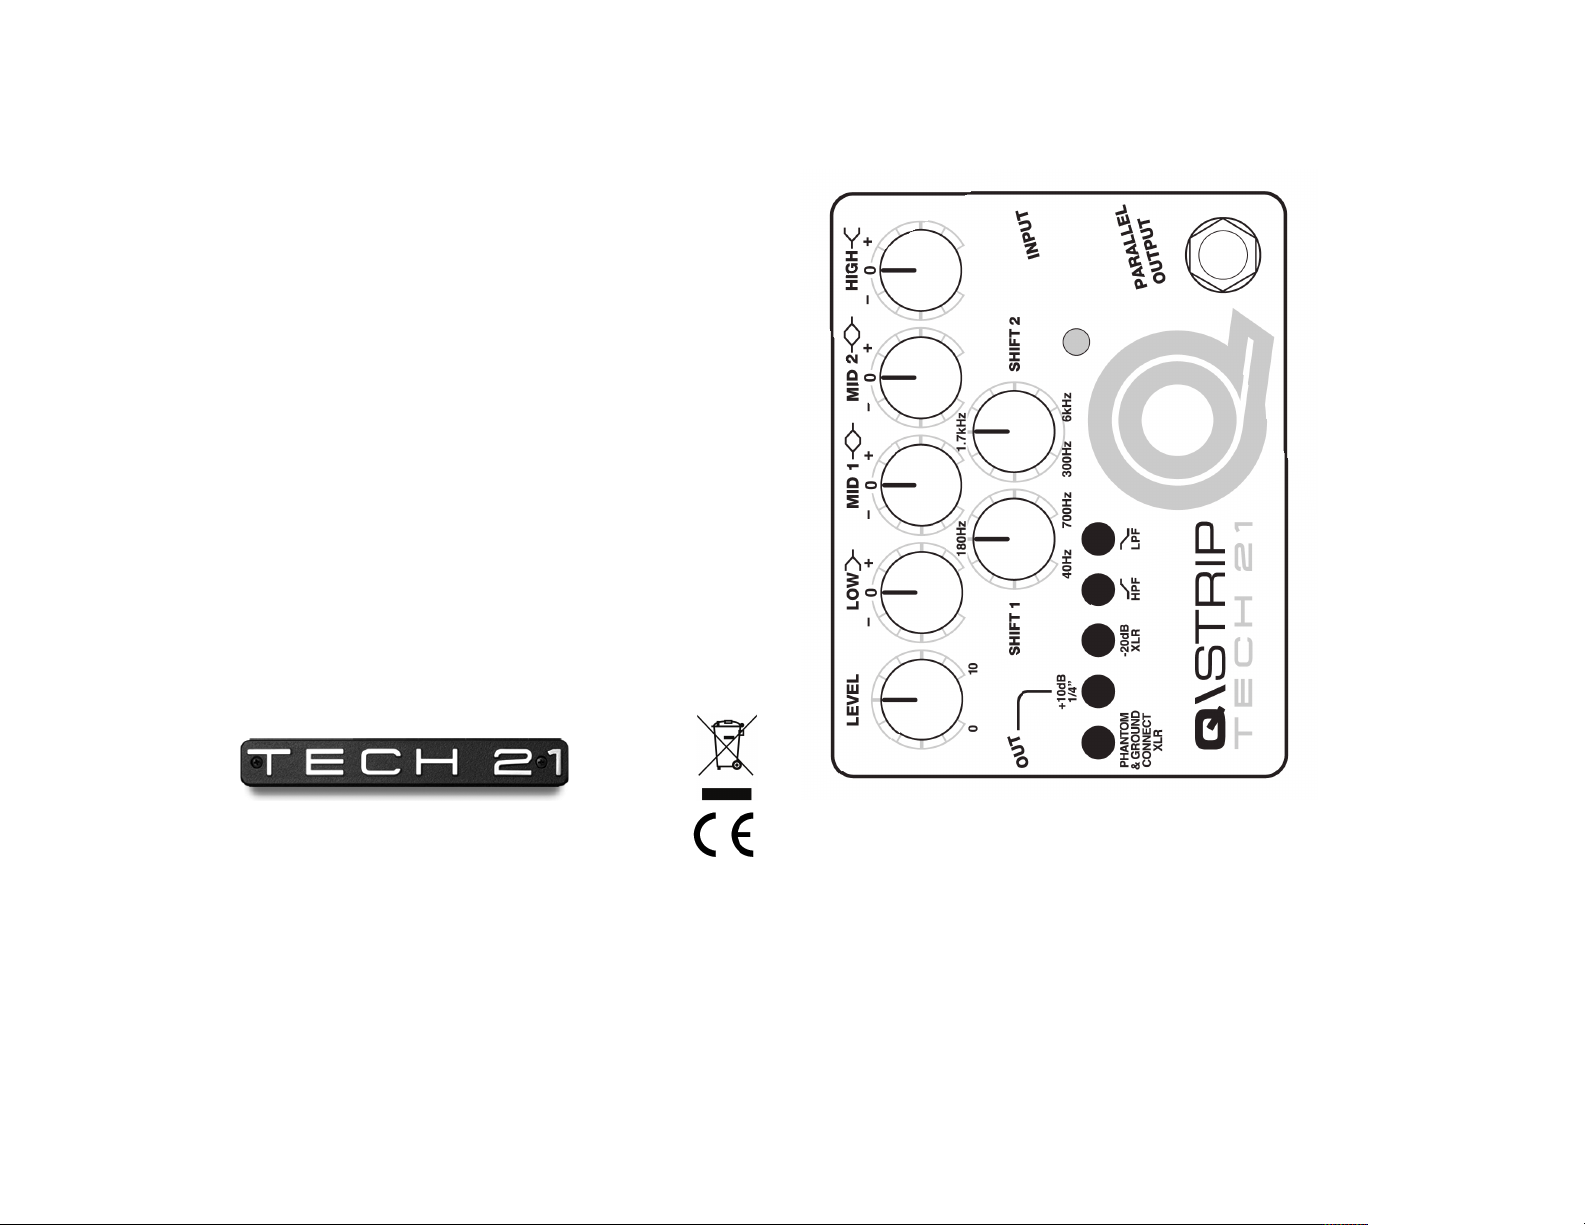
GUIDE TO CONTROLS
LEVEL: Active level control, cut or boost
hot signals or boost weak signals, as well as compensate for certain EQ settings. For example, with a significant mid-range boost, you’d cut back on the
Level. Conversely, with a significant mid-range cut, you’d boost the Level up to
unity gain, at the very least.
LOW & HIGH: Active shelving EQs, cut or boost
12 o’clock, with pivot point at 1kHz.
MID SHIFT 1 & 2 and MID 1 & 2: Cut or boost
most musical Q of 1. These sweepable, semi-parametric EQ controls range 40
Hz-700 Hz and 300 Hz-6kHz, respectively. Mid Shifts 1 and 2 select the center
frequency of the mid-range controls (MID1 and MID 2), enabling you to cut
undesirable frequencies. Note: These are overlapping.
±
20dB. This enables you to trim
±
18dB from unity gain at
±
18dB. Preset to the
HPF
High Pass Filter. Filters out rumble and low frequency artifacts of certain
instruments or vocal mics that emit unintelligible rumble. Preset point at 45 Hz;
attenuated at 12dB per octave. Engaged (in position), frequencies below the
preset point are attenuated at 12dB per octave.
LPF
Low Pass Filter. Preset point at 3 kHz; attenuated at 12dB per octave. Engaged
(in position), frequencies above the preset point are attenuated at 12dB per
octave.
When the LPF is used in conjunction with the studio-grade EQ section, you
can recreate different speaker cabinet curves so you can go direct with your
3
favorite distortion and effects pedals. Note: The combination of the Mid 2 EQ
and High EQ with the LPF, allows you to increase or decrease the per octave
slope of the filter in the cabinet simulation setting.
THE INS AND OUTS
Follow Standard Audio Procedure to avoid unwanted and potentially speakerdamaging “pops” when connecting or disconnecting any equipment:
Always mute mixing board and/or turn down amp volume
BEFORE plugging or unplugging!
IMPORTANT: TURN ON FIRST. TURN OFF LAST.
INPUT:
To avoid battery drain, unplug when not in use. (DON’T FORGET TO MUTE!)
1/4”, 4.7megOhm, instrument level. Switches battery power on/off.
PARALLEL OUTPUT: 1/4” unbalanced direct output, “hard-wired” to
Input jack. Instrument signal passes through, UNEFFECTED, to the input of
your stage amp system. NOTE: Impedance of the 1/4” Input will change and
assume the impedance of the equipment the Parallel Output is connected to. If
that equipment has a lower impedance (vintage effects, tuners, etc.), it will cause
the signal to diminish. To avoid signal degradation, we recommend not using the
Parallel Output when a high impedance is required (for instance, for piezos).
BALANCED XLR OUTPUT: Balanced to drive a low Z input. Sends
effected or uneffected signal to mixing console/recorder, depending on the orientation of the Footswitch.
XLR Output Level Switch: -20dB pad to match the output to
equipment with different input level requirements. Disengaged (out
position), the output is 0dB. Engaged (in position), the output is -20dB.
1/4” OUTPUT: Unbalanced 1KOhm low Z output. Sends effected or
uneffected signal to amp rig or power amp, as per the orientation of the
Footswitch.
1/4” Output Level Switch: +10dB boost to match the output to
equipment with different input level requirements. Disengaged (out
position), the output is -10dB. Engaged (in position), the output is 0dB.
4
Page 4

FOOTSWITCH, with corresponding LED indicator: Engages/disengages
the circuitry. Active, LED will be on. Tonality and gain structure are affected as
determined by the setting of the controls. Delivers effected signal through the
XLR Output and 1/4” Output. Inactive, LED will be off. The Q\Strip DI functions as an active transparent direct box and will not sonically alter the instrument signal.
PHANTOM POWER
Allows you to “tap into” the power of a suitably equipped mixer. As the 3conductor XLR sends the audio signal to the input of a mixer, the mixer sends
voltage back to the unit via the same 3 wires, eliminating the need for an
external power supply. Consult your mixer’s owner’s manual for set-up
instructions. For live and studio use, let the engineer know your Q\Strip is
phantom power operable.
PHANTOM & GROUND CONNECT SWITCH: When engaged,
the ground connects and unit will accept phantom power through the XLR
Output. Disengaged, the ground of your stage system and other interconnected gear is lifted (isolated) from the ground of the mixing console.
With a mixer only: If you are plugging your instrument into the Q\Strip and
taking the XLR Output to a mixer --and you don’t have any other
grounded equipment connected in the setup-- you will have to
push the switch in to connect the ground and engage the phantom power.
With a mixer and amp: If you’re going to the mixer via the XLR and using
the 1/4” Output or Parallel Output to feed an amp (with its own AC ground),
you should have the switch disengaged (in the up position) to be in “Ground
Lift” mode. If you experience hum and/or buzz with the switch in either position, there is probably a problem with the AC outlets you are plugging into.
NOTE: If using vintage equipment without proper grounds, take extra care
connecting it to modern grounded equipment. The inadequacies of the ground
in vintage gear could result in damaging anything it is connected to, at the very
least, and is potentially lethal!
NOTE: While operating under phantom power, we recommend keeping a 9V
alkaline battery installed at all times to avoid the previously mentioned “pops”
when lifting the ground (see page 4).
5
NOTEWORTHY NOTES & CONSIDERATIONS
1) The Q\Strip can be used as a lead boost pedal. It can operate pre or
post distortion for different results. (Refer to Sample Settings.)
2) The Q\Strip can be used as a cabinet simulator. (Refer to Sample
Settings.)
3) Remove master volume fizziness at low volumes. Insert the Q\Strip
into the effects loop of your amplifier and engage the LPF.
4) Overloading the internal circuitry. Could yield interesting results
because MOSFET circuitry provides pleasing harmonic distortion --much like
tubes. Increase the Level and boost both Mid circuits and stand back. It’s going
to be loud!
WARNING: NEVER EVER connect the speaker output from any amplifier
to any input on the Q\Strip. EVER!
5) Using effects. The general “rules” for placing effects in your signal chain
don’t apply to the Q\Strip, as it is “neutral,” so it can be pre or post any effect
pedal. You can place it at the beginning to buffer and tone-shape or at the end
of the chain for final shaping and driving long cables.
6) Dimmed LED. Indicates low battery or insufficient phantom power.
6
Page 5

Page 6

Page 7

Page 8

 Loading...