

Page 1

USER MANUAL FOR
GENESYS
TM
10KW/15KW
Programmable DC Power Supplies
Document: 83-530-000 Rev J
TDK-Lambda Americas Inc.
405 Essex Road, Neptune, NJ 07753
High Power Division
Tel: (732) 922-9300
Fax: (732) 922-9334
www.us.TDK-Lambda.com/HP
Page 2

Page 3

Page 4

GenesysTMManual Supplement
For units equipped with the “IEMD” option,
for IEEE-488 with Multi-drop,
also refer to IEMD manual 83030200
For units equipped with the “LAN” option
for Local Area Network with Multi-drop,
also refer to LAN manual 83034100
For units equipped with “MD” option,
Multi-drop, also refer to the respective
IEMD or LAN manuals.
Page 5

Table of Contents
WARRANTY...........................................................................................................................................3
SAFETY INSTRUCTIONS......................................................................................................................4
1. GENERAL INFORMATION.............................................................................................................21
1.1. User Manual Content...........................................................................................................................21
1.2. Introduction..........................................................................................................................................21
1.3. Accessories.........................................................................................................................................22
1.4. Model Number Format.........................................................................................................................23
2. SPECIFICATION.............................................................................................................................24
3. INSTALLATION ..............................................................................................................................30
3.1. General................................................................................................................................................30
3.2. Preparation for Use..............................................................................................................................30
3.3. Initial Inspections.................................................................................................................................30
3.4. Rack Mounting.....................................................................................................................................31
3.5. Location, Mounting and Cooling..........................................................................................................31
3.6. AC Source Requirements....................................................................................................................31
3.7. AC Input Power Connection................................................................................................................31
3.8. Turn-On Checkout Procedure..............................................................................................................32
3.9. Connecting the Load............................................................................................................................35
3.10. Local and Remote Sensing..................................................................................................................39
3.11. Repackaging for Shipment ..................................................................................................................40
4. FRONT AND REAR PANEL CONTROLS AND CONNECTORS..................................................41
4.1. Introduction..........................................................................................................................................41
4.2. Front Panel Controls and Indicators....................................................................................................41
4.3. Rear Panel SW1 Setup Switch............................................................................................................46
4.4. Rear Panel J1 Programming and Monitoring Connector .....................................................................47
5. LOCAL OPERATION......................................................................................................................49
5.1. Introduction..........................................................................................................................................49
5.2. Standard Operation .............................................................................................................................49
5.3. Over Voltage Protection (OVP)............................................................................................................50
5.4. Under Voltage Limit (UVL)...................................................................................................................51
5.5. Foldback Protection.............................................................................................................................51
5.6. Output ON/OFF Control.......................................................................................................................52
5.7. Output SHUT-OFF (SO) Control via Rear Panel J1 Connector...........................................................52
5.8. Enable/Disable Control via Rear Panel J1 Connector.........................................................................53
5.9. CV/CC Signal ......................................................................................................................................53
5.10. PS_OK Signal......................................................................................................................................53
5.11. Safe Start and Auto-Restart Modes.....................................................................................................54
5.12. Front Panel Locking.............................................................................................................................54
5.13. Over Temperature Protection (OTP)....................................................................................................55
5.14. Last Setting Memory............................................................................................................................55
1
83-530-000 Rev J
Page 6

6. SERIES AND PARALLEL SUPPLIES ...........................................................................................56
6.1. Series Operation..................................................................................................................................56
6.2. Parallel Operation................................................................................................................................59
6.3. Daisy-Chain for Shut-Off......................................................................................................................62
6.4. Advanced Parallel Operation...............................................................................................................62
7. REMOTE AND ANALOG PROGRAMMING ..................................................................................65
7.1. Introduction..........................................................................................................................................65
7.2. Local/Remote Analog Indication..........................................................................................................65
7.3. Local/Remote Analog Indication..........................................................................................................65
7.4. Remote Voltage Programming of Output Voltage and Current Limit...................................................66
7.5. Resistive Programming of Output Voltage and Current Limit ..............................................................67
7.6. Remote Monitoring of Output Voltage and Current..............................................................................68
8. RS232 &RS485 REMOTE CONTROL............................................................................................69
8.1. Introduction..........................................................................................................................................69
8.2. Configuration.......................................................................................................................................69
8.3. Rear Panel RS232/485 Connector......................................................................................................70
8.4. Connecting Power Supplies to RS232 Bus..........................................................................................71
8.5. Communication Interface Protocol.......................................................................................................72
8.6. Error Messages ...................................................................................................................................73
8.7. Command Set Description...................................................................................................................74
8.8. Global Output Commands...................................................................................................................77
8.9. Fast Queries........................................................................................................................................79
8.10. Status and Error Commands...............................................................................................................80
8.11. Status, Error, and SRQ Registers........................................................................................................81
8.12. Serial Communication Test Set-Up .....................................................................................................84
9. ISOLATED ANALOG PROGRAMMING OPTION..........................................................................86
9.1. Introduction..........................................................................................................................................86
9.2. Specifications ......................................................................................................................................86
9.3. Isolated Programming & Monitoring Connector...................................................................................87
9.4. Setup and Operating Instructions........................................................................................................88
10.MAINTENANCE ..............................................................................................................................89
10.1. Introduction..........................................................................................................................................89
10.2. Units Under Warranty..........................................................................................................................89
10.3. Periodic Maintenance ..........................................................................................................................89
10.4. Adjustments and Calibration................................................................................................................89
10.5. Parts Replacement and Repairs..........................................................................................................89
10.6. Troubleshooting...................................................................................................................................89
2
83-530-000 Rev J
Page 7

83-000-016 Rev.
F
WARRANTY
This
TDK
-
Lambda
Americas Inc.
product is warranted against defects in materials and workmanship for
a period of five years from date of shipment. During the warranty period,
TDK
-
Lambda
Americas Inc.
will, at it’s option, either repair or replace
products which prove to be defective.
LIMITATION OF WARRANTY
The warranty shall not apply to defects resulting from improper or inadequate usage or maintenance by
the buyer, buyer supplied products or
interfacing. The warranty shall not apply to defects resulting from
unauthorized modifications, or from operation exceeding the environmental specifications of the
product, or if the QA seal has been removed or altered by anyone other than
TDK
-
Lambda
Ameri
cas
Inc.
authorized personnel.
TDK
-
Lambda
Americas Inc.
does not warrant the buyer’s circuitry or
malfunctions of
TDK
-
Lambda
Americas Inc.
products resulting from the buyer’s circuitry. Furthermore,
TDK
-
Lambda
Americas Inc.
does not warrant any damage occu
rring as a result of the buyer’s circuitry
or the buyer’s
-
supplied products. THIS LIMITED WARRANTY IS IN LIEU OF, AND
TDK
-
LAMBDA
AMERICAS INC
DISCLAIMS AND EXCLUDES, ALL OTHER WARRANTIES, STATUTORY, EXPRESS
OR IMPLIED, INCLUDING, WITHOUT LIMITATION, ANY
WARRANTY OF MERCHANTABILITY OR
FITNESS FOR A PARTICULAR PURPOSE, OR OF CONFORMITY TO MODELS OR SAMPLES.
WARRANTY SERVICE
This product must be returned to an authorized
TDK
-
Lambda
Americas Inc.
service facility for repairs or
other warranty service. For p
roducts returned to
TDK
-
Lambda
Americas Inc.
for warranty service, the
buyer shall prepay shipping charges to
TDK
-
Lambda
Americas Inc
. If the unit is covered under the
foregoing warranty then
TDK
-
Lambda
Americas Inc.
shall pay the shipping charges to retu
rn the
product to the buyer. Refer to Section 3.11 for repackaging for shipment.
DISCLAIMER
The information contained in this document is subject to change without notice.
TDK
-
Lambda
Americas
Inc.
shall not be liable for errors contained in this document
or for incidental or consequential damages
in connection with the furnishing, performance or use of this material. No part of this document may be
photocopied, reproduced or translated into another language without the prior written consent of
TDK
-
Lambda
A
mericas Inc
.
TRADEMARK INFORMATION
Genesys™
power supply is a trademark of
TDK
-
Lambda
Americas Inc.
Microsoft™
and Windows
™
are trademarks of Microsoft Corporation.
THE FCC WANTS YOU TO KNOW
This equipment has been tested and found to comply with the limits for a Class A digital device,
pursuant to Part 15 of the FCC rules. These limits are designed to provide reasonable protection
against harmful interference when the equipment is operated in a commercial environment.
This equipment generates, uses and can radiate radio frequency energy
and, if not installed and used in
accordance with the instructions, may cause harmful interference to radio communications.
Operation of this equipment i
n a residential area is likely to cause harmful interference, in which case
the user will be required to correct the interference at his own expense.
FCC WARNING
Modifications not expressly approved by manufacturer could void the user authority to ope
rate the
equipment under FCC Rules.
1
Page 8

ENGLISH
SAFETY INSTRUCTIONS
CAUTION
The following safety precaution must be observed during all phases of operation, service and repair of
this equipment. Failure to comply with the safety precautions or warnings in this document violates
safety standards of design, manufacture and intended use of this equipment and may impair the builtin protections within.
TDK-Lambda Americas Inc. shall not be liable for user’s failure to comply with these requirements.
INSTALLATION CATEGORY
The GenesysTMpower supply series has been evaluated to INSTALLATION CATEGORY II.
Installation category (over voltage category) II: local level, appliances, portable equipment etc. With
smaller transient over voltage than Installation Category (over voltage category) III.
GROUNDING
This product is a Safety Class 1 instrument. To minimize shock hazard, the instrument chassis must
be connected to an electrical ground. The instrument must be connected to the AC power supply
mains through a three conductor power cable, with the ground wire firmly connected to an electrical
ground (safety ground) at the power outlet.
For instruments designed to be hard-wired to the supply mains, the protective earth terminal must be
connected to the safety electrical ground before another connection is made. Any interruption of the
protective ground conductor or disconnection of the protective earth terminal will cause a potential
shock hazard that might cause personal injury.
WARNING
OUTPUT TERMINALS GROUNDING
There is a potential shock hazard at the RS232/RS485/LAN and the IEEE
ports when using power supplies with rated or combined voltage greater
than 400V and the Positive Output of the Power Supply is grounded.
Do Not connect the Positive Output to ground when using the
RS232/RS485/LAN or IEEE.
FUSES
Fuses must be changed by authorized TDK-Lambda Americas Inc. service personnel only. For
continued protection against risk of fire, replace only with the same type and rating of fuse.
INPUT RATINGS
Do not use AC supply, which exceeds the input voltage and frequency rating of this instrument. The
input voltage and frequency rating of the GenesysTMpower supply series has three input ranges
depending on the model type ordered. Ranges are 180-253 Vac/360-440 Vac/432-528 Vac, 50-60Hz.
For safety reasons, the mains supply voltage fluctuations should not exceed above voltage range.
LIVE CIRCUITS
Operating personnel must not remove the instrument cover. No internal adjustment or component
replacement is allowed by non-TDK-Lambda Americas Inc. qualified personnel. Never replace
components with power cable connected. To avoid injuries, always disconnect power, discharge
circuits and remove external voltage source before touching components.
PARTS SUBSTITUTIONS & MODIFICATIONS
Parts substitutions and modifications are allowed by authorized TDK-Lambda Americas Inc. service
personnel only. For repairs or modifications, the instrument must be returned to an authorized TDKLambda Americas Inc. service facility.
4
83-530-000 Rev J
Page 9

SAFETY INSTRUCTIONS
ENVIRONMENTAL CONDITIONS
The GenesysTMpower supply series safety approval applies to the following operating conditions:
*Indoor use *Ambient temperature: 0°C to 50°C
*Maximum relative humidity: 80% (no condensation) *Altitude: up to 3000m
*Pollution degree 2
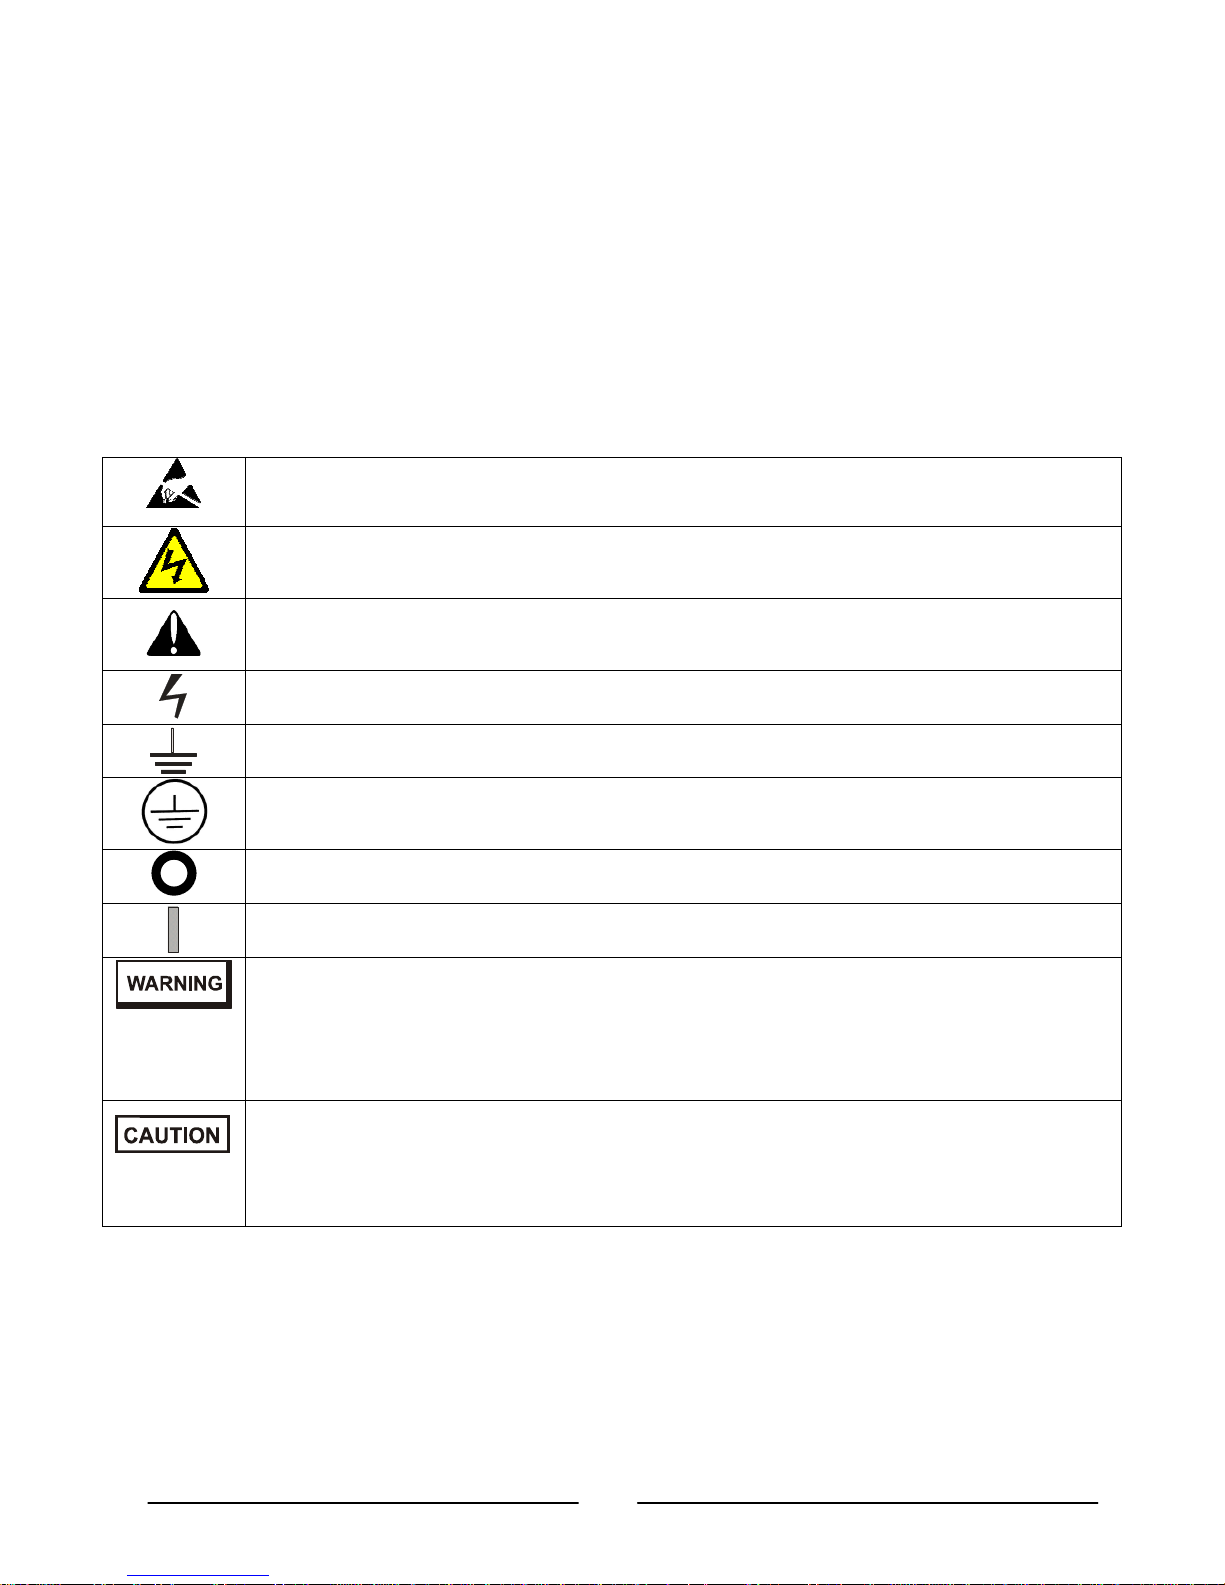
ATTENTION Observe Precautions for handling Electrostatic Sensitive Devices.
CAUTION Risk of Electrical Shock
Instruction manual symbol. The instrument will be marked with this symbol when it is
necessary for the user to refer to the instruction manual.
Indicates hazardous voltage.
Indicates ground terminal.
Protective Ground Conductor Terminal must be connected to Earth Ground.
Off (Supply)
On (Supply)
The WARNING sign denotes a hazard. An attention to a procedure is called.
Not following procedure correctly could result in personal injury.
A WARNING sign should not be skipped and all indicated conditions must be
fully understood and met.
The CAUTION sign denotes a hazard. An attention to a procedure is called. Not
following procedure correctly could result in damage to the equipment. Do not proceed
beyond a CAUTION sign until all indicated conditions are fully understood and met.
5
83-530-000 Rev J
Page 10

FCC COMPLIANCE NOTICE:
Note: This equipment has been tested and found to comply with the limits for a Class A
digital device, pursuant to part 15 of the FCC Rules. These limits are designed to
provide reasonable protection against harmful interference when the equipment is
operated in a commercial environment. This equipment generates uses, and can
radiate radio frequency energy and, if not installed and used in accordance with the
instruction manual, may cause harmful interference to radio communications. Operation
of this equipment in a residential area is likely to cause harmful interference in which
case the user will be required to correct the interference at his own expense.
6
83-530-000 Rev J
Page 11

FRENCH
CONSIGNES DE SECURITE
ATTENTION
Les consignes de sécurité suivantes doivent être observées pendant toutes les phases de l'utilisation,
entretien et réparations de cet équipement. Le non-respect des consignes de sécurité et des
avertissements dans ce document viole les normes sécurité de conception, fabrication et utilisation
prévue de cet équipement et peut compromettre les protections incorporées en lui.
TDK-Lambda Americas Inc. ne sera pas responsable des conséquences si l'utilisateur ne respecte
pas ces consignes.
CATEGORIE D'INSTALLATION
Les alimentations GenesysTMont été classées dans CATEGORIE INSTALLATION II. Catégorie
installation (catégorie surtension) II : utilisation locale, appareils, équipement portable, etc. Avec des
surtensions transitoires plus faibles que celles de la catégorie installation (catégorie surtension) III.
MISE A LA TERRE
Ce produit est un instrument Classe 1 Sécurité. Pour minimiser le risque de choc électrique, son
châssis doit être raccordé à une terre électrique. L'instrument doit être raccordé à l'alimentation
principale AC par un câble à trois conducteurs, le conducteur de terre étant raccordé à une terre
électrique (terre sécurité) sur la prise électrique.
Pour les instruments conçus pour être raccordés à l'alimentation électrique principale, la borne de
terre doit être raccordée à la terre électrique de sécurité avant d'établir une autre connexion. Si le
conducteur de terre est coupé ou si la borne de terre est débranchée, il y a un risque de choc
électrique pouvant provoquer des blessures.
ATTENTION-DANGER
MISE A LA TERRE DES BORNES DE SORTIE
Il y a un danger de choc électrique sur les ports RS232/RS485/LAN et IEEE
lorsqu'on utilise des alimentations électriques ayant à elles seules ou au total une
tension supérieure à 400 V et si la sortie positive de l'alimentation est raccordée à
la terre.
Ne raccordez pas la sortie positive à la terre si vous utilisez les ports
RS232/RS485/LAN ou IEEE.
FUSIBLES
Les fusibles ne doivent être remplacés que par des techniciens d'entretien agréés TDK-Lambda
Americas Inc. Pour assurer une protection continue contre le risque d'incendie, remplacez les fusibles
par des fusibles de même type et de même capacité.
ALIMENTATION PRINCIPALE
N'utilisez pas une alimentation AC dont la tension et la fréquence dépassent les valeurs nominales de
cet instrument. La tension et la fréquence nominales des alimentation GenesysTMcorrespondent à
trois intervalles selon le modèle commandé. Les intervalles sont 180-253 Vac/360-440 Vac/432-528
Vac, 50-60Hz. Pour des raisons de sécurité, la tension d'alimentation principale ne doit pas fluctuer en
dehors des intervalles ci-dessus.
CIRCUITS SOUS TENSION
Le personnel d'exploitation ne doit pas enlever le couvercle de l'instrument. Le réglage ou le
remplacement des composants internes ne peut être effectué que par un personnel qualifié TDKLambda Americas Inc. Ne remplacez jamais les composants lorsque le câble d'alimentation est
connecté. Pour éviter les blessures, débranchez toujours l'alimentation, déchargez les circuits et
retirez la source de tension extérieure avant de toucher les composants.
7
83-530-000 Rev J
Page 12

CONSIGNES DE SECURITE
l'utilisateur doit prendre des mesures pour les supprimer à ses propres frais.
SUBSTITUTIONS ET MODIFICATIONS DE PIECES
Les substitutions et modifications de pièces ne peuvent être effectuées que par les techniciens
d'entretien agréés TDK-Lambda Americas Inc. Pour les réparations ou les modifications, l'instrument
doit être renvoyé à un centre d'entretien agréé TDK-Lambda Americas Inc.
CONDITIONS ENVIRONNEMENTALES
L'approbation sécurité des alimentations GenesysTMs'applique aux conditions opératoires suivantes :
*Utilisation en intérieur *Température ambiante : 0°C à 50°C
*Humidité relative maximum : 80 % (sans condensation) *Altitude : 3000 m maximum
*Pollution degré 2
PRECAUTION. Observez les précautions pour manipuler les composants sensibles à
l'électricité statique.
ATTENTION. Risque de choc électrique
Symbole dans le manuel d'instructions. Ce symbole sera marqué sur l'instrument
lorsque l'utilisateur doit consulter le manuel d'instructions.
Signale une tension dangereuse.
Signale une borne de terre.
La borne du conducteur de terre de protection doit être connectée à la terre électrique.
Coupée (alimentation)
Branchée (alimentation)
Le symbole WARNING signale un danger. Il attire l'attention sur une procédure.
Si la procédure n'est pas suivie correctement, il peut en résulter des blessures.
Le symbole WARNING (Attention-danger) ne doit pas être ignoré et toutes les
conditions indiquées doivent être bien comprises et respectées.
Le symbole CAUTION (Attention) signale un danger. Il attire l'attention sur une
procédure. Si la procédure n'est pas suivie correctement, l'équipement peut être
endommagé. Ne continuez pas après avoir rencontré le symbole CAUTION tant que
vous n'avez pas parfaitement compris et respecté les conditions indiquées.
NOTE CONCERNANT LA CONFORMITE FCC :
Nota : Cet équipement a été testé et s'est avéré conforme aux limites pour un appareil
numérique Classe A selon la part 15 des règles FCC. Ces limites sont conçues pour
assurer une protection raisonnable contre les interférences dangereuses lorsque
l'équipement est utilisé dans un environnement commercial. Cet équipement génère,
utilise et peut rayonner des fréquences radio et, s'il n'est pas installé et utilisé
conformément au manuel d'instructions, il peut provoquer des interférences
dangereuses pour les communications radio. L'utilisation de cet équipement dans une
zone résidentielle provoquera probablement des interférences nocives, et dans ce cas
8
83-530-000 Rev J
Page 13

GERMAN
Sicherheitsvorschriften
VORSICHT
Die folgenden Sicherheitsvorschriften müssen in allen Phasen des Betriebs, der Wartung und der
Reparatur der Anlage eingehalten werden. Eine Missachtung der Sicherheitsvorschriften und
Warnhinweise aus diesem Handbuch führt zur Verletzung der bestehenden Sicherheitsstandards für
Design, Produktion und der zweckbestimmten Verwendung der Anlage und kann die integrierten
Schutzvorrichtungen beschädigen.
TDK-Lambda Americas Inc. ist nicht haftbar für Schäden, die durch Missachtung dieser
Sicherheitsvorschriften entstehen können.
INSTALLATIONSKATEGORIE
Die GenesysTMReihe der Netzgeräte wurde in die INSTALLATIONSKATEGORIE II eingeteilt.
Installationskategorie (Überspannungskategorie) II: die lokale Ebene, Geräte, tragbare Anlagen, etc.
mit kleineren vorübergehenden Überspannungen als die Installationskategorie
(Überspannungskategorie) III.
ERDUNGSKONZEPT
Dieses Produkt ist ein Gerät der Schutzklasse 1. Zur Vermeidung von gefährlichen Energieinhalten
und Spannungen, ist das Gehäuse des Gerätes an eine Schutzerde anzuschließen. Das Gerät muss
über ein Dreileiterstromkabel an die AC-Hauptstromversorgung angeschlossen werden, wobei das
Erdungskabel fest mit einer elektrischen Erdung (Schutzerde PE) am Stromanschluss verbunden sein
muss.
Bei Festverdrahtung der Geräte ist sicherzustellen, dass der PE-Anschluss an die elektrische
Schutzerde angeklemmt wird, bevor das Gerät an die Stromversorgung angeschlossen wird. Jede
Unterbrechung des PE-Leiters oder die Trennung der PE-Verbindung kann einen möglichen
elektrischen Schlag hervorrufen, der Personenschäden zur Folge haben kann.
WARNUNG
ERDUNG DER AUSGANGSANSCHLÜSSE
Es besteht die Gefahr von möglichen Schlägen an der RS232/RS485/LAN und den
IEEE-Anschlüssen, wenn Netzgeräte mit höheren Nenn- oder kombinierten
Spannungen als 400 V verwendet werden und die positive Ausgangsspannung der
Netzgeräte geerdet wurde.
Klemmen Sie die positive Ausgangsspannung nicht an die Schutzerde an, wenn Sie
RS232/RS485/LAN oder IEEE verwenden.
SICHERUNGEN
Sicherungen dürfen nur durch von TDK-Lambda Americas Inc. zugelassenes Personal ausgewechselt
werden. Für anhaltenden Brandschutz dürfen die Sicherungen nur mit baugleichen Sicherungen mit
der gleichen Leistung ersetzt werden.
9
83-530-000 Rev J
Page 14

SICHERHEITSVORSCHRIFTEN
EINGANGSLEISTUNG
Verwenden Sie keine AC-Spannung, die die Eingangsleistung und Frequenzrate dieses Gerätes
übersteigt. Die Eingangsspannung und Frequenzrate der GenesysTMReihe der Netzgeräte verfügt
über drei Eingangsbereiche, je nach bestelltem Bautyp. Die Bereiche sind 180-253 VAC/360-440
VAC/432-528 VAC, 50-60Hz. Aus Sicherheitsgründen sollten die Spannungsschwankungen der
Hauptstromversorgung den oberen Spannungsbereich nicht übersteigen.
SPANNUNGSFÜHRENDE TEILE
Die Geräteabdeckung darf nicht durch Betriebspersonal entfernt werden. Interne Modifikationen sowie
Bauteileaustausch sind nur durch von TDK-Lambda Americas Inc. qualifiziertes Personal erlaubt. Vor
dem Austausch von Komponenten muss immer die Versorgungsspannung getrennt werden. Um
Personenschäden zu vermeiden, muss vor dem Kontakt mit dem Gerät immer die Stromversorgung
unterbrochen, die Stromkreise entladen und externe Spannungsquellen entfernt werden.
ERSATZTEILE & MODIFIKATIONEN
Ersatzteile und Modifikationen dürfen nur durch von TDK-Lambda Americas Inc. zugelassenes
Personal durchgeführt werden. Für Reparaturen oder Modifikationen muss das Gerät an einen
autorisierten TDK-Lambda Americas Inc. Vertriebspartner geschickt werden.
UMGEBUNGSBEDINGUNGEN
Die Sicherheitsbestätigung der GenesysTMNetzteilserie gilt für die folgenden Betriebszustände:
* Gebrauch im Innenbereich *Umgebungstemperatur: 0°C bis
50°C
*Maximale relative Luftfeuchtigkeit: 80% (keine Kondensation) *Höhe: bis zu 3.000 m
* Verschmutzungsgrad 2
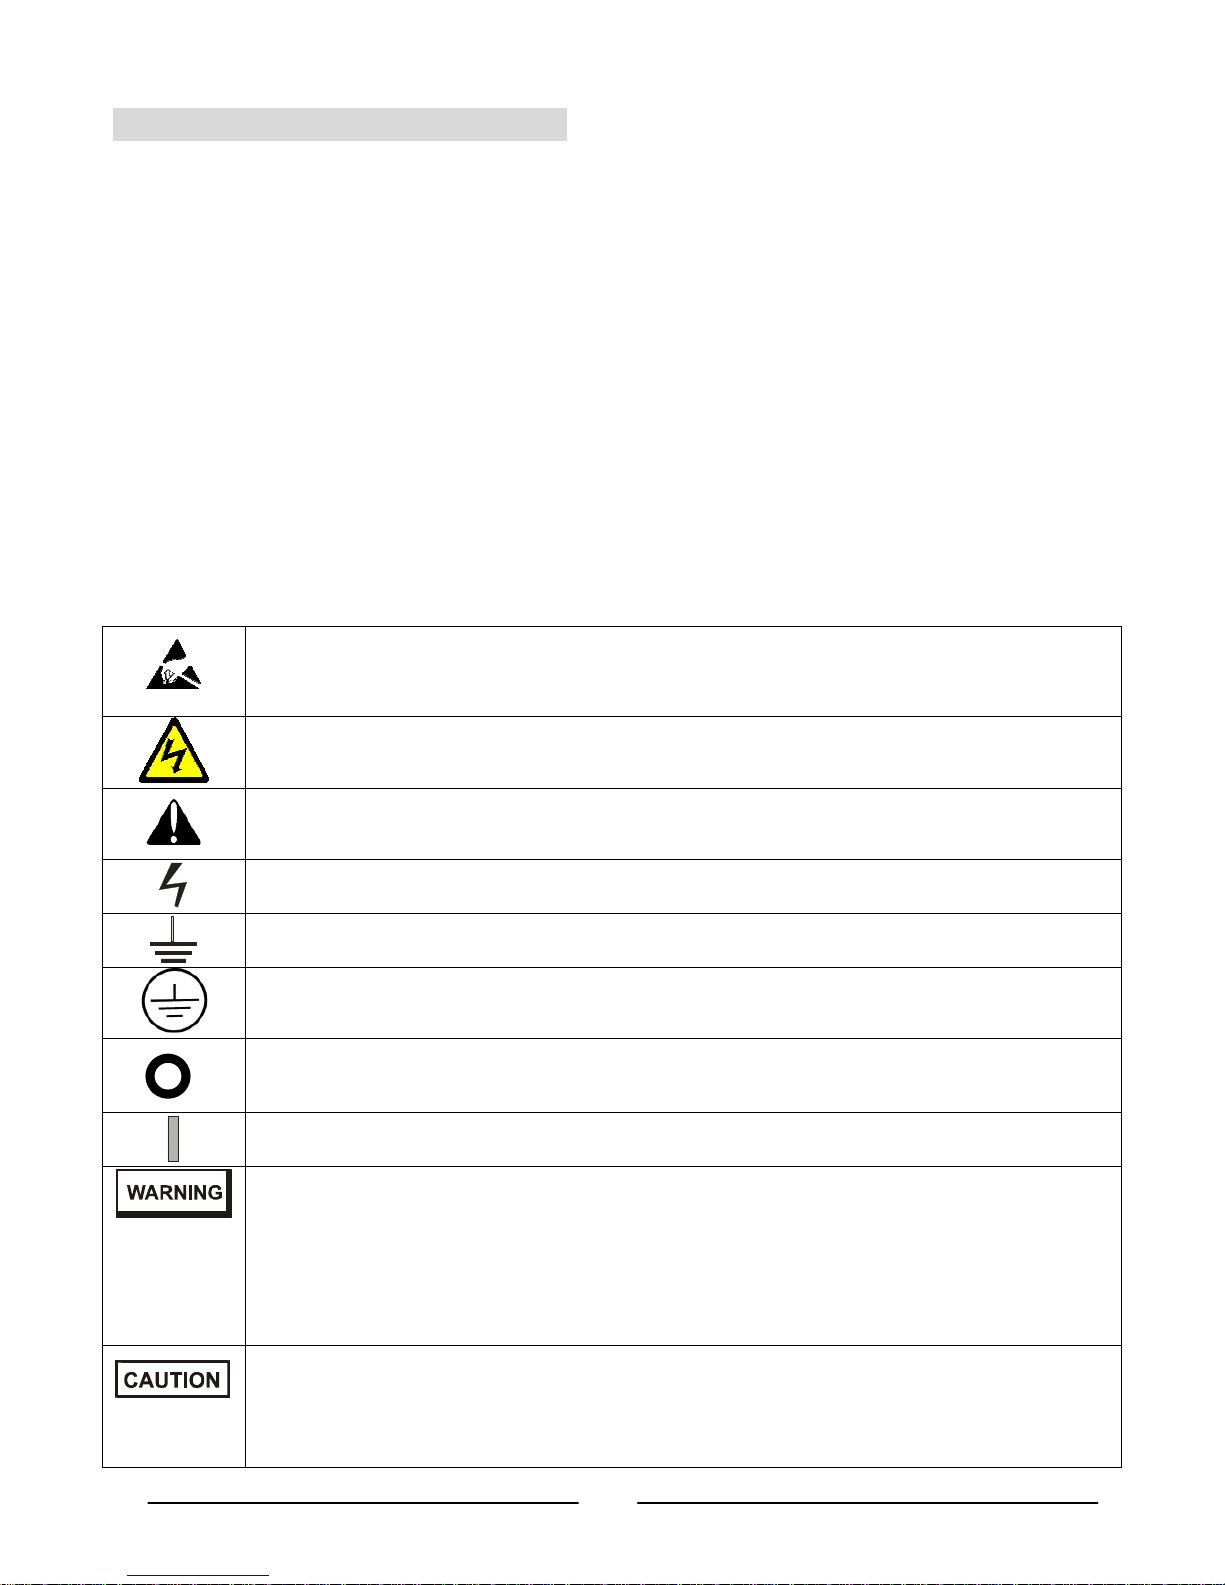
ACHTUNG Beachten Sie die Vorsichtsmaßnahmen im Umgang mit elektrostatisch
gefährdeten Bauteilen.
VORSICHT Gefahr von elektrischen Schlägen.
Symbol der Bedienungsanleitung. Dieses Symbol wird am Gerät angezeigt, wenn der
Benutzer die Bedienungsanleitung lesen soll.
Weist auf eine gefährliche Spannung hin.
Weist auf eine Erdungsklemme hin.
PE-Leiterklemme must an Erde angeschlossen werden.
Aus (Versorgung)
Ein (Versorgung)
Das WARNSYMBOL deutet auf eine Gefahr hin. Die Aufmerksamkeit wird auf ein
Verfahren gelenkt.
Eine Missachtung der Einhaltung des Verfahrens kann zu Personenschaden führen.
Eine WARNUNG darf nicht übergangen werden und alle angezeigten Umstände
müssen vollkommen verstanden und eingehalten werden.
10
83-530-000 Rev J
Page 15

SICHERHEITSVORSCHRIFTEN
Das VORSICHTSYMBOL deutet auf eine Gefahr hin. Die Aufmerksamkeit wird auf ein
Verfahren gelenkt. Eine Missachtung der korrekten Einhaltung des Verfahrens kann zu
Materialschaden führen. Ein VORSICHTSYMBOL darf nicht übergangen werden bis
alle angezeigten Umstände vollkommen verstanden und eingehalten werden.
FCC EINHALTUNGSVERMERK:
Hinweis: Das Gerät wurde geprüft und erfüllt die Grenzwerte für ein digitales Gerät der
Klasse A gemäß Teil 15 der FCC-Regeln. Diese Grenzwerte wurden definiert, um
angemessenen Schutz vor gefährlichen Störungen zu bieten, wenn das Gerät im
kommerziellen Umfeld betrieben wird. Dieses Gerät kann Funkfrequenzenergie
erzeugen, verwenden und ausstrahlen und kann, sofern es nicht gemäß dem
Benutzungshandbuch installiert wurde, gefährliche Störungen im Funkverkehr
verursachen. Es ist wahrscheinlich, dass dieses Gerät in Wohngebieten zu schädlichen
Störungen führt, die in solchen Fällen auf Kosten des Benutzers behoben werden
müssen.
11
83-530-000 Rev J
Page 16
ITALIAN
NORME DI SICUREZZA
ATTENZIONE
La seguente precauzione di sicurezza deve essere osservata a tutti gli stadi del funzionamento, della
manutenzione e della riparazione di questa apparecchiatura. L'inosservanza delle precauzioni o delle
avvertenze di sicurezza contenute in questo documento viola gli standard di sicurezza della
progettazione, della produzione e dell'uso previsto di questa apparecchiatura, e può compromettere i
dispositivi di protezione in essa incorporati.
TDK-Lambda Americas Inc. non si assume alcuna responsabilità per il mancato rispetto di questi
requisiti da parte dell'utente.
CATEGORIA DI INSTALLAZIONE
La serie di alimentatori Genesys™ è stata valutata e risulta conforme alla CATEGORIA DI
INSTALLAZIONE II. Categoria di installazione (categoria di sovratensione) II: livello locale,
elettrodomestici, apparecchiature portatili ecc. Con sovratensioni transitorie inferiori alla Categoria di
installazione (categoria di sovratensione) III.
MESSA A TERRA
Questo prodotto è uno strumento di Classe di sicurezza 1. Per minimizzare il pericolo di scosse
elettriche, il telaio dello strumento deve essere collegato a una terra elettrica. Lo strumento deve
essere collegato alla rete di alimentazione a CA mediante un cavo a tre conduttori, con il filo di terra
ben collegato a una terra elettrica (terra di sicurezza) in corrispondenza della presa di corrente.
Per strumenti progettati per il cablaggio alla rete di alimentazione, il terminale protettivo di terra va
collegato alla terra elettrica di sicurezza prima di procedere ad altri collegamenti. Eventuali interruzioni
del conduttore protettivo di terra, o scollegamenti del terminale protettivo di terra, porteranno al rischio
di scossa elettrica e di conseguente potenziale infortunio.
AVVERTENZA
MESSA A TERRA DEI TERMINALI DI USCITA
Vi è rischio di scossa elettrica in corrispondenza delle porte RS232/RS485/LAN e IEEE se
si utilizzano alimentatori con tensione nominale o combinata oltre 400 V e con l'Uscita
positiva dell'alimentatore messa a terra.
Non collegare alla terra l'Uscita positiva quando si usano le porte RS232/RS485/LAN o
IEEE.
FUSIBILI
I fusibili devono essere sostituiti unicamente da addetti autorizzati di TDK-Lambda Americas Inc. Per
una protezione continua dal rischio di incendi, sostituire sono con fusibili di tipo e di potenza nominale
identici.
POTENZE NOMINALI IN INGRESSO
Non usare un'alimentazione a CA che superi la tensione in ingresso e la potenza nominale di
frequenza di questo strumento. La tensione in ingresso e la potenza nominale di frequenza della serie
di alimentatori GenesysTMpresentano tre bande di ingressi, a seconda del tipo di modello ordinato. Le
bande sono: 180 - 253 Vac/360 - 440 Vac/432 - 528 Vac, 50-60 Hz. Per ragioni di sicurezza, eventuali
fluttuazioni nella tensione di rete non devono superare il campo di potenze nominali suddetto.
CIRCUITI SOTTO TENSIONE
Nessun addetto deve mai rimuovere il coperchio dello strumento. Le regolazioni interne e la
sostituzione dei componenti sono consentite unicamente al personale qualificato di TDK-Lambda
Americas Inc. Non sostituire mai un componente con il cavo elettrico ancora collegato. A prevenzione
degli infortuni, staccare sempre la corrente, scaricare i circuiti e scollegare le fonti di tensione esterne
prima di toccare i componenti.
12
83-530-000 Rev J
Page 17
NORME DI SICUREZZA
SOSTITUZIONI E MODIFICHE DEI COMPONENTI
I componenti devono essere sostituiti o modificati unicamente da addetti autorizzati di TDK-Lambda
Americas Inc. Per riparazioni o modifiche, restituire lo strumento al centro assistenza di TDK-Lambda
Americas Inc.
CONDIZIONI AMBIENTALI
L'approvazione della sicurezza della serie di alimentatori Genesys™ è valida in presenza delle
condizioni d'uso seguenti:
*Uso in interni *Temperatura ambiente: 0 ºC - 50 ºC
*Umidità relativa massima: 80% (zero condensa) *Altitudine: fino a 3000 m
*Inquinamento grado 2
ATTENZIONE Osservare le precauzioni su come maneggiare i dispositivi sensibili alle
scariche elettrostatiche.
ATTENZIONE Rischio di scossa elettrica
Simbolo del manuale delle istruzioni. Lo strumento sarà contrassegnato da questo
simbolo ovunque l'utente deve fare riferimento al manuale delle istruzioni.
Indica tensioni pericolose.
Indica il terminale di terra.
Il terminale del conduttore protettivo di terra deve essere collegato alla messa a terra.
Spento (Alimentazione)
Acceso (Alimentazione)
Il simbolo di AVVERTIMENTO denota un periodo. È necessario prestare attenzione alla
procedura.
Il mancato rispetto della procedura può sfociare in un infortunio.
Non ignorare alcun simbolo di AVVERTIMENTO. Tutte le condizioni indicate devono
essere pienamente comprese e rispettate.
Il simbolo di ATTENZIONE denota un pericolo. È necessario prestare attenzione alla
procedura. Il mancato rispetto della procedura può sfociare in danni per
l'apparecchiatura. Non procedere oltre un simbolo di ATTENZIONE senza prima avere
pienamente compreso e rispettato tutte le condizioni indicate.
13
83-530-000 Rev J
Page 18

NORME DI SICUREZZA
AVVISO DI CONFORMITÀ FCC:
NB: Questa apparecchiatura è stata testata ed è risultata conforme ai limiti per i
dispositivi digitali di Classe A, ai sensi della parte 15 dei Regolamenti FCC. Tali limiti
sono formulati per offrire ragionevole protezione dalle interferenze pericolose quando
l'apparecchiatura viene azionata in ambienti commerciali. Questa apparecchiatura
genera, usa e può irradiare energia a radiofrequenza; se non viene installata ed
utilizzata attenendosi al manuale delle istruzioni, può causare interferenze pericolose
per le radiocomunicazioni. È probabile che l'uso di questa apparecchiatura in zone
residenziali provochi interferenze pericolose. In tal caso, l'utente dovrà rettificare a
proprie spese tali interferenze.
14
83-530-000 Rev J
Page 19
PORTUGUESE
INSTRUÇÕES DE SEGURANÇA
CUIDADO
As seguintes precauções de segurança devem ser respeitadas em todas as fases de funcionamento,
assistência e reparação deste equipamento. A não observância dos avisos e precauções de
segurança constantes neste documento viola os padrões de segurança da concepção, fabrico e
utilização pretendida deste equipamento, podendo danificar as protecções integradas no seu interior.
A TDK-Lambda Americas Inc. não poderá ser responsabilizada pelo não cumprimento destes
requisitos por parte do utilizador.
CATEGORIA DA INSTALAÇÃO
A série GenesysTMde fontes de alimentação foi avaliada como sendo uma INSTALAÇÃO DA
CATEGORIA II. Categoria da instalação (categoria de sobretensão) II: nível local, instrumentos,
equipamento portátil, etc. Com uma sobretensão transitória provisória inferior à das instalações da
categoria (categoria de sobretensão) III.
LIGAÇÃO À TERRA
Este produto é um instrumento de Classe de Segurança 1. Para reduzir o risco de choque, o chassis
do instrumento deve ter ligação de terra. O instrumento deve ser ligado à fonte de alimentação de
corrente alternada através de um cabo de alimentação de três condutores, com o fio de terra
firmemente ligado a uma ligação de terra (sistemas de segurança por ligação à terra) na tomada de
alimentação.
Em instrumentos concebidos para serem ligados à fonte de alimentação através de cabos, o terminal
de terra de protecção deve ser ligado ao sistema eléctrico de segurança por ligação à terra antes de
se realizar qualquer outra ligação. Qualquer interrupção do condutor de terra de protecção ou corte
do terminal de terra de protecção poderá originar um risco de choque passível de provocar
ferimentos.
AVISO
LIGAÇÃO À TERRA DE TERMINAIS DE SAÍDA
Há a possibilidade de existir risco de choque nas portas RS232/RS485/LAN e IEEE
quando se utilizam fontes de alimentação com tensão nominal ou combinada
superior a 400 V e a saída positiva da fonte de alimentação está ligada à terra.
Não ligue a saída positiva à terra quando utilizar as portas RS232/RS485/LAN ou
IEEE.
FUSÍVEIS
Os fusíveis apenas devem ser substituídos por pessoal de assistência autorizado da TDK-Lambda
Americas Inc. Para obter uma protecção contínua contra o risco de incêndios, substitua sempre os
fusíveis por outros do mesmo tipo e classificação.
CLASSIFICAÇÃO DAS ENTRADAS
Não utilize fontes de alimentação de corrente alternada que excedam a tensão de entrada e a
classificação de frequência deste instrumento. A tensão de entrada e a classificação de frequência
das fontes de alimentação da série GenesysTMtêm três gamas de entrada, de acordo com o tipo de
modelo encomendado. As gamas são: 180-253 Vac/360-440 Vac/432-528 Vac, 50-60 Hz. Por
motivos de segurança, as flutuações da tensão da fonte de alimentação não devem exceder a gama
da tensão superior.
15
83-530-000 Rev J
Page 20

INSTRUÇÕES DE SEGURANÇA
CIRCUITOS SOB TENSÃO
Os operadores não devem retirar a cobertura do instrumento. A realização de ajustes internos ou
substituições de componentes só é permitida se realizada por pessoal especializado da TDK-Lambda
Americas Inc. Nunca substitua componentes com o cabo de alimentação ligado. Para evitar
ferimentos, desligue sempre a energia, descarregue os circuitos e desligue a fonte de tensão externa
antes de tocar nos componentes.
MODIFICAÇÕES E SUBSTITUIÇÕES DE PEÇAS
As modificações e substituições de peças apenas são permitidas quando realizadas pelo pessoal de
assistência da TDK-Lambda Americas Inc. Para a realização de reparações ou modificações, é
necessário devolver o instrumento a uma unidade de serviço autorizada da TDK-Lambda Americas
Inc.
CONDIÇÕES AMBIENTAIS
A aprovação de segurança das fontes de alimentação da série GenesysTMaplica-se às seguintes
condições de funcionamento:
*Utilização no interior *Temperatura ambiente: De 0 °C a 50 °C
*Humidade relativa máxima: 80% (sem condensação) *Altitude: até 3000 m
*Nível de poluição 2
ATENÇÃO: Respeitar as precauções relativas ao manuseamento de dispositivos
sensíveis a electricidade estática.
CUIDADO: Risco de choque eléctrico
Símbolo do manual de instruções. O instrumento será assinalado com este símbolo
sempre que for necessário que o utilizador consulte o manual de instruções.
Indica tensão perigosa.
Assinala um terminal de ligação à terra.
O terminal do condutor de terra de protecção deve estar ligado à terra.
Desactivado (alimentação)
Activado (alimentação)
O sinal de AVISO assinala um perigo. Solicita-se atenção para um procedimento.
Não seguir correctamente o procedimento pode resultar em ferimentos.
Não se deve ignorar um sinal de AVISO, e todas as condições indicadas devem ser
compreendidas e respeitadas.
O sinal de CUIDADO assinala um perigo. Solicita-se atenção para um procedimento.
Não seguir correctamente o procedimento pode resultar em danos no equipamento.
Quando encontrar um sinal de CUIDADO não avance até que todas as condições
indicadas tenham sido completamente entendidas e respeitadas.
16
83-530-000 Rev J
Page 21

INSTRUÇÕES DE SEGURANÇA
DECLARAÇÃO DE CONFORMIDADE FCC:
Nota: Este equipamento foi testado e considerado estar dentro dos limites necessários
para um dispositivo digital da Classe A, em conformidade com a parte 15 das normas
da FCC. Estes limites estão concebidos de forma a fornecer uma protecção razoável
contra interferências nocivas quando o equipamento é utilizado num ambiente
comercial. Este equipamento gera, utiliza, e pode emitir energia por radiofrequência e,
caso não seja instalado e utilizado de acordo com o manual de instruções, pode
provocar interferências nocivas nas comunicações por rádio. A utilização deste
equipamento numa área residencial poderá provocar interferências nocivas, situação
na qual a correcção da interferência ficará ao encargo do próprio utilizador.
17
83-530-000 Rev J
Page 22

SPANISH
SAFETY INSTRUCTIONSINSTRUCCIONES DE SEGURIDAD
PRECAUCIÓN
La siguiente precaución de seguridad debe ser respetada durante todas las fases de funcionamiento,
mantenimiento y reparación de este equipo. El incumplimiento de las precauciones o advertencias de
seguridad recogidas en este documento infringe las normativas de seguridad de diseño, fabricación y
uso previsto de este equipo y puede afectar a las protecciones incorporadas en el mismo.
TDK-Lambda Americas Inc. no asumirá responsabilidad alguna si el usuario no cumple estos
requisitos.
CATEGORÍA DE INSTALACIÓN
La serie de fuentes de alimentación GenesysTMha sido evaluada conforme a la CATEGORÍA DE
INSTALACIÓN II. Categoría de instalación (categoría de sobretensión) II: equipos de nivel local,
eléctricos, portátiles, etc. Con una sobretensión transitoria menor que la Categoría de Instalación
(categoría de sobretensión) III.
CONEXIÓN A TIERRA
Este producto es un aparato de Seguridad de Clase 1. Para minimizar el riesgo de descargas, el
chasis del aparato se debe conectar a una toma de tierra eléctrica. El aparato se debe conectar a la
toma de energía eléctrica de corriente alterna de la red de distribución a través de un cable de
alimentación de tres conductores, con el conductor de tierra firmemente conectado a una toma de
tierra eléctrica (toma de tierra de seguridad) de la toma de corriente.
En el caso de aquellos aparatos diseñados para quedar cableados a la red de alimentación, el borne
de tierra de protección se debe conectar a la toma de tierra eléctrica de seguridad antes de establecer
cualquier otra conexión. Cualquier interrupción del conductor de tierra de protección o desconexión
del borne de tierra de protección supondrá un riesgo potencial de descarga eléctrica que puede llegar
a causar daños personales.
WARNINGADVERTENCIA
OUTPUT TERMINALS GROUNDINGCONEXIÓN A TIERRA DE LOS BORNES DE
SALIDA
There is a potential shock hazard at the RS232/RS485/LAN and the IEEE ports when using
power supplies with rated or combined voltage greater than 400V and the Positive Output of
the Power Supply is grounded.El uso de fuentes de alimentación con una tensión nominal o
combinada superior a 400V y la Salida Positiva de la Fuente de Alimentación conectada a
tierra, representa un riesgo potencial de descarga en los puertos RS232/RS485/LAN e IEEE.
Do Not connect the Positive Output to ground when using the RS232/RS485/LAN or
IEEE.No conecte la Salida Positiva a tierra si va a utilizar los puertos RS232/RS485/LAN o
IEEE.
FUSIBLES
Los fusibles sólo pueden ser cambiados por el personal de servicio autorizado de TDK-Lambda
Americas Inc. Para una protección permanente contra el peligro de incendios, utilice únicamente
fusibles del mismo tipo y de la misma potencia nominal.
POTENCIAS NOMINALES DE ENTRADA
No utilice fuentes de alimentación de CA cuyos valores nominales superen los de la tensión y
frecuencia de entrada de este aparato. Los valores nominales de la tensión y frecuencia de entrada
de la serie de fuentes de alimentación GenesysTMtienen tres rangos de entrada dependiendo del tipo
de modelo elegido. Los rangos son 180-253 VCA/360-440 VCA/432-528 VCA, 50-60 Hz. Por razones
de seguridad, las fluctuaciones en la tensión de alimentación de la red no deberían superar los rangos
de tensión antedichos.
18
83-530-000 Rev J
Page 23
INSTRUCCIONES DE SEGURIDAD
CIRCUITOS ACTIVOS
El personal operativo no debe retirar la cubierta del aparato. Los ajustes internos o el reemplazo de
componentes sólo pueden ser realizados por el personal cualificado de TDK-Lambda Americas Inc.
Desenchufe siempre el cable de alimentación antes de reemplazar los componentes. Para evitar
lesiones, desenchufe siempre el cable de alimentación, descargue los circuitos y desconecte la fuente
de tensión externa antes de tocar los componentes.
SUSTITUCIÓN Y MODIFICACIÓN DE LAS PIEZAS
Las piezas sólo pueden ser sustituidas o modificadas por el personal de servicio autorizado de TDKLambda Americas Inc. Para cualquier reparación o modificación del aparato, éste debe ser enviado a
un centro de servicio autorizado de TDK-Lambda Americas Inc.
CONDICIONES MEDIOAMBIENTALES
La aprobación de seguridad de la serie de fuentes de alimentación GenesysTMes aplicable a las
siguientes condiciones de funcionamiento:
*Uso en interiores *Temperatura ambiente: 0°C a 50°C
*Humedad relativa máxima: 80% (sin condensación) *Altitud: hasta 3000 m
*Grado de contaminación 2
ATENCIÓN Observe las precauciones de manejo de dispositivos sensibles
electrostáticos
PRECAUCIÓN Riesgo de descargas eléctricas
Símbolo de manual de instrucciones. Este símbolo se pondrá en el aparato siempre
que el usuario tenga que consultar el manual de instrucciones.
Indica una tensión peligrosa.
Indica un borne de tierra.
El borne del conductor de tierra de protección debe estar conectado para poder
establecer una conexión a tierra.
Apagado (fuente de alimentación)
Encendido (fuente de alimentación)
El símbolo de ADVERTENCIA indica un peligro. Llama la atención ante un
procedimiento.
Si el procedimiento no se realiza correctamente, podrían producirse lesiones
personales.
Los símbolos de ADVERTENCIA no se pueden pasar por alto y deben comprenderse y
cumplirse todas las condiciones indicadas.
El símbolo de PRECAUCIÓN indica un peligro. Llama la atención ante un
procedimiento. Si el procedimiento no se realiza correctamente, el equipo podría sufrir
daños. Cuando encuentre un símbolo de PRECAUCIÓN, no siga hasta que no haya
comprendido y esté seguro de que se cumplen las condiciones indicadas.
19
83-530-000 Rev J
Page 24

INSTRUCCIONES DE SEGURIDAD
DECLARACIÓN DE CONFORMIDAD CON LA FCC:
Nota: Este equipo ha sido ensayado y cumple con los límites establecidos para los
dispositivos digitales de Clase A, de conformidad con lo dispuesto en el Apartado 15 de
la normativa de la FCC. Estos límites han sido diseñados para proporcionar una
protección razonable contra interferencias perjudiciales cuando el equipo se utilice en
entornos comerciales. Este equipo genera, usa y puede emitir energía de
radiofrecuencia y, si no se instala y utiliza de acuerdo con el manual de instrucciones,
puede ocasionar interferencias perjudiciales con las comunicaciones por radio. La
utilización de este equipo en un área residencial puede llegar a provocar interferencias
perjudiciales, en cuyo se le pedirá al usuario que las corrija y que se haga cargo del
gasto generado.
20
83-530-000 Rev J
Page 25

1. GENERAL INFORMATION
1.1. User Manual Content
This User’s Manual contains the operating instructions, installation instructions and
specifications of the GenesysTM15KW and 10KW power supply series. The instructions refer
to the standard power supplies, including the built-in RS232/485 serial communication. For
information related to operation with the optional IEEE programming, refer to User’s Manual
for Power Supply IEEE/IEMD Programming Interface. For information related to operation
with the optional LAN programming, refer to the User’s Manual for Power Supply LAN
Programming Interface.
1.2. Introduction
1.2.1. General Description
GenesysTMpower supplies are wide output range, high performance switching power
supplies. The GenesysTMseries is power factor corrected and operates from specified AC
voltage range continuously. Output voltage and current are continuously displayed and
LED indicators show the complete operating status of the power supply. The Front panel
controls allow the user to set the output parameters, the protections levels (Over-Voltage
protection, Under-Voltage limit and Foldback) and preview the settings. The rear panel
includes the necessary connectors to control and monitor the power supply operation by
remote analog signals or by the built-in serial communication (RS232/485). GPIB
programming and Isolated-Analog programming/monitoring are optional
1.2.2. Features and Options
Constant Voltage / Constant Current with automatic crossover.
Embedded Microprocessor Controller.
Built-in RS-232/RS-485 Interface.
Voltage & Current high resolution adjustment by digital encoders.
High accuracy programming/ readback.
Last Setting Memory.
Independent Remote ON/OFF (opto-isolated) and remote Enable/Disable.
Remote sensing to compensate for voltage drop of power leads.
External Analog Programming and Monitoring standard (0-5V or 0-10V, user
selectable).
Zero stacking
No ventilation required at the top and bottom surface of the power supply.
Option IEEE-488 (GPIB) and LAN interface are SCPI compliant.
Optional Isolated Analog programming/monitoring (0-5V or 0-10V, or 4-20mA).
1.2.3. Control via the Serial Communication Port
The following parameters can be programmed via the serial communication port:
a) Output voltage setting.
b) Output current setting.
c) Output voltage measurement.
d) Output On/Off control.
e) Output current measurement.
f) Foldback protection setting
g) Over-voltage protection setting and readback.
h) Under-Voltage limits setting and readback.
i) Power-supply start up mode (last setting or safe mode).
21
83-530-000 Rev J
Page 26

1.2.4. Analog Voltage Programming and Monitoring
GEN to PC (DB25)
Analog inputs and outputs are provided at the rear panel for analog control of the power
supply. The output voltage and the current limit can be programmed by analog voltage or
by resistor, and can be monitored by analog voltage. The power supply output can be
remotely set to On or Off and analog signals monitor the proper operation of the power
supply and the mode of operation (CV/CC).
1.2.5. Parallel Operation
GenesysTMpower supplies of the same output voltage and current rating can be paralleled
in master-slave configuration with automatic current sharing to increase power available.
1.2.6. Output Connections
Output connections are made to rear panel via bus-bars up to 300V. For greater than
300Vo via stud terminals. Either the positive or negative terminal may be grounded or the
output may be floated. Contact factory for assistance with higher float voltage applications.
Local or remote sense may be used. In remote sense, the voltage drop on the load wires
should be minimized. Refer to the specifications for the maximum voltage drop value.
1.2.7. Cooling and Mechanical Construction
The GenesysTMseries is cooled by internal fans. At the installation, care must be taken to
allow free airflow into the power supply via the front panel and out of the power supply via
the rear panel.
CAUTION
Observe all torque guidelines within this manual. Over torqueing may damage
unit or accessories. Such damage is not covered under manufacturer’s warranty.
1.3. Accessories
1.3.1. Included Accessories - The following accessories are delivered with the power supply.
1.3.1.1. Serial Link Cable:
Serial linking cable linking power supplies by RS-485 communication (GEN/RJ45).
Cable description: 0.5m Length, shielded, RJ-45 type plugs, eight (8) contacts
(P/N 15507201)
1.3.1.2. Hardware:
Strain Relief for AC Cord
Output terminal Shield
DB25 Programming Plug kit (AMP 749809-9)
1.3.2. Optional Communication Cables
RS-232 Cables to connect GEN to Serial Port on PC
GEN to PC (DB9) GEN 232/9 P/N 15-507-203
GEN 232/25 P/N 15-507-204
RS-485 Cable to connect GEN to Serial Port on PC
GEN to PC(DB9) GEN/485-9 P/N 15-507-202
1.3.3. AC cables – Not applicable.
22
83-530-000 Rev J
Page 27
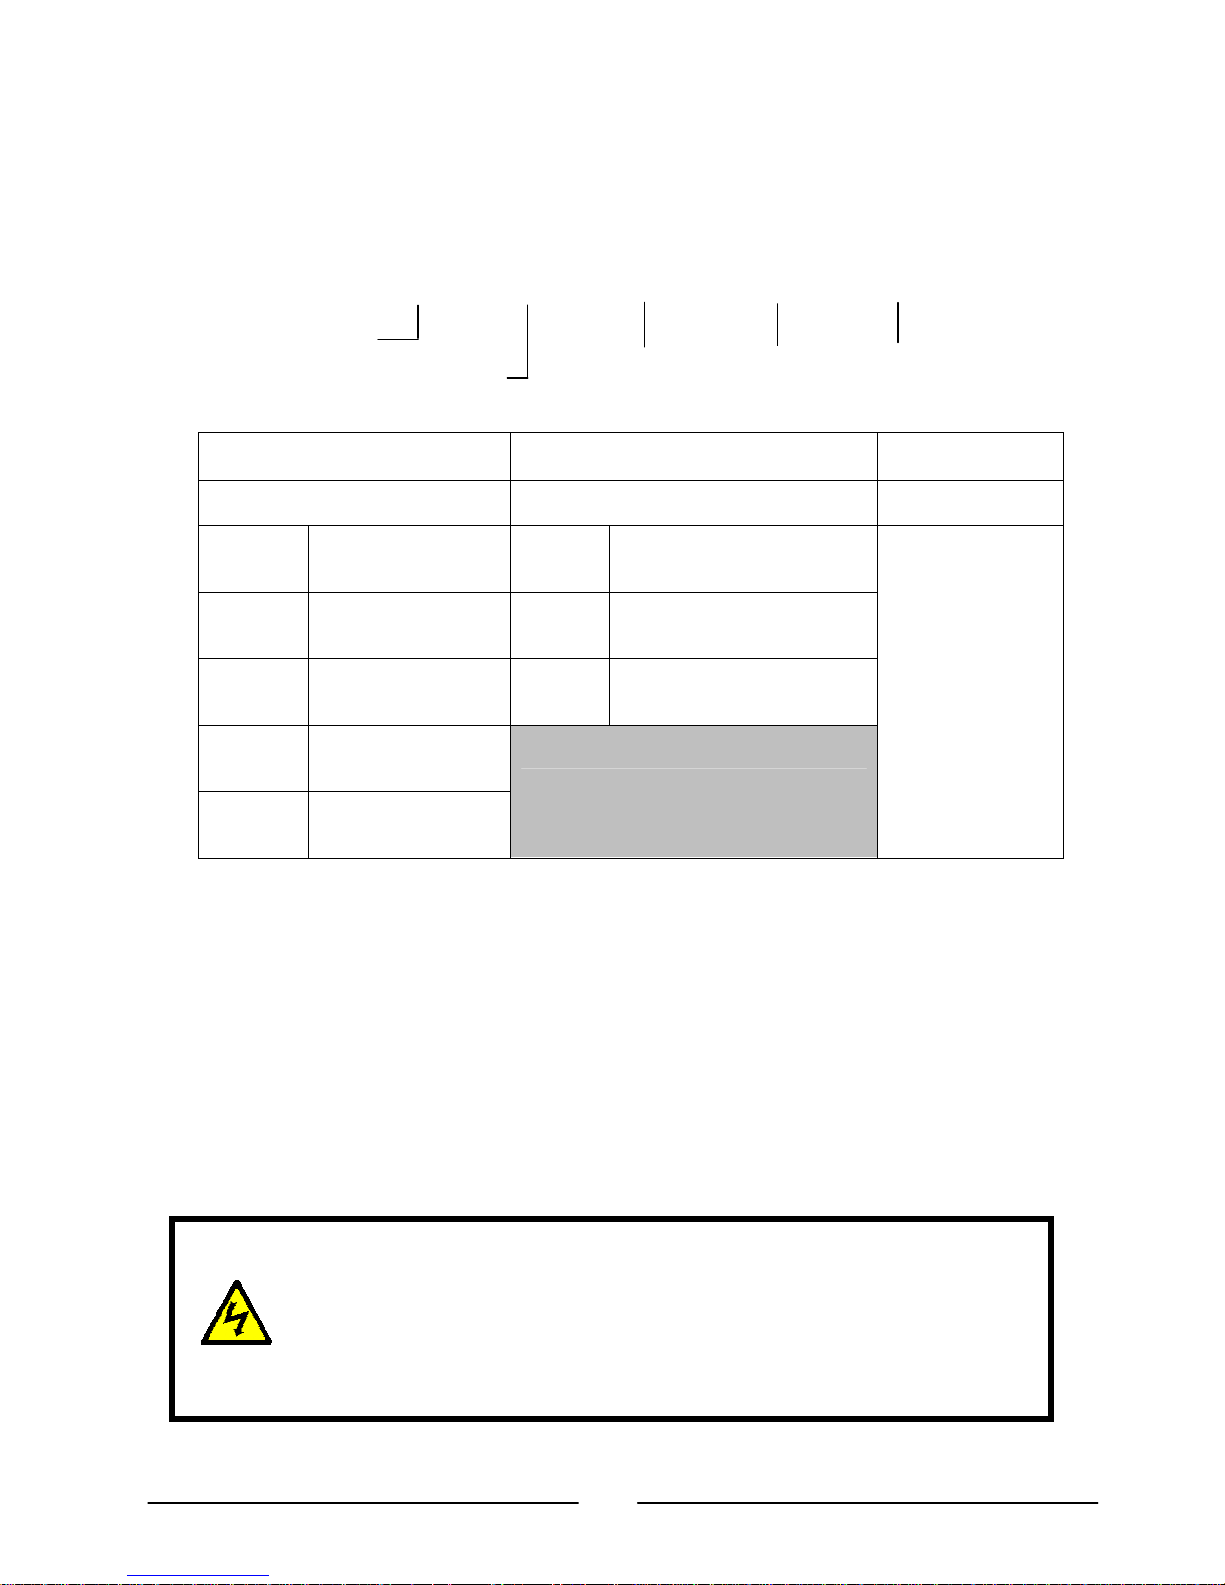
1.4. Model Number Format
The model numbering system for GenesysTMpower supply includes symbols for features and
options. They are separated by dashes.
The following chart explains the model number for the GEN Power Supply Family.
GENXXXX—XXXX—XXXXX—XXXXX—XXXX
DC OUTPUT
VOLTAGE
DC OUTPUT
CURRENT
Option AC Input Volts Factory Specials
Note 5 Note 1,2,3 Note 4
OPTIONS
AC INPUT
VOLTS
FACTORY
SPECIALS
IS510
IS420
IEMD
MD
LAN
ISOL PROG
0-5V, 0-10V
ISOL PROG
4-20mA
IEEE W/
MULTI-DROP
STANDARD W/
MULTI-DROP
LXI CERTIFIED
ETHERNET OPTION
3P208
3P400
3P480
208VAC,3Φ 47 / 63Hz
400VAC,3Φ 47 / 63Hz
480VAC,3Φ 47 / 63Hz
Blank for standard
Note 1: See Specifications for Input Range.
Note 2: CE Mark with IEMD to 400VDC Output, without IEMD to 600VDC
Note 3: All 3are four wire input = 3+ GND (No Neutral).
Note 4: Analog Meters are NOT available.
Note 5: IS510, IS420, IEMD, or LAN may not be installed together.
Factory Installed. Limit one (1) per Power Supply.
EXAMPLES: GEN10-1000-3P208
GEN10-1000-IEMD-3P400
GEN 10-1000-IEMD-3P400-1292
supplies
There is a potential shock hazard at the RS232/485/LAN and the IEEE
ports when using power supplies with rated or combined voltage greater
than 400V and the Positive Output of the Power Supply is grounded.
Do Not connect the Positive Output to ground when using the
WARNING
IEEE 488/ RS232 Option
RS232/485, LAN or IEEE.
23
83-530-000 Rev J
Page 28

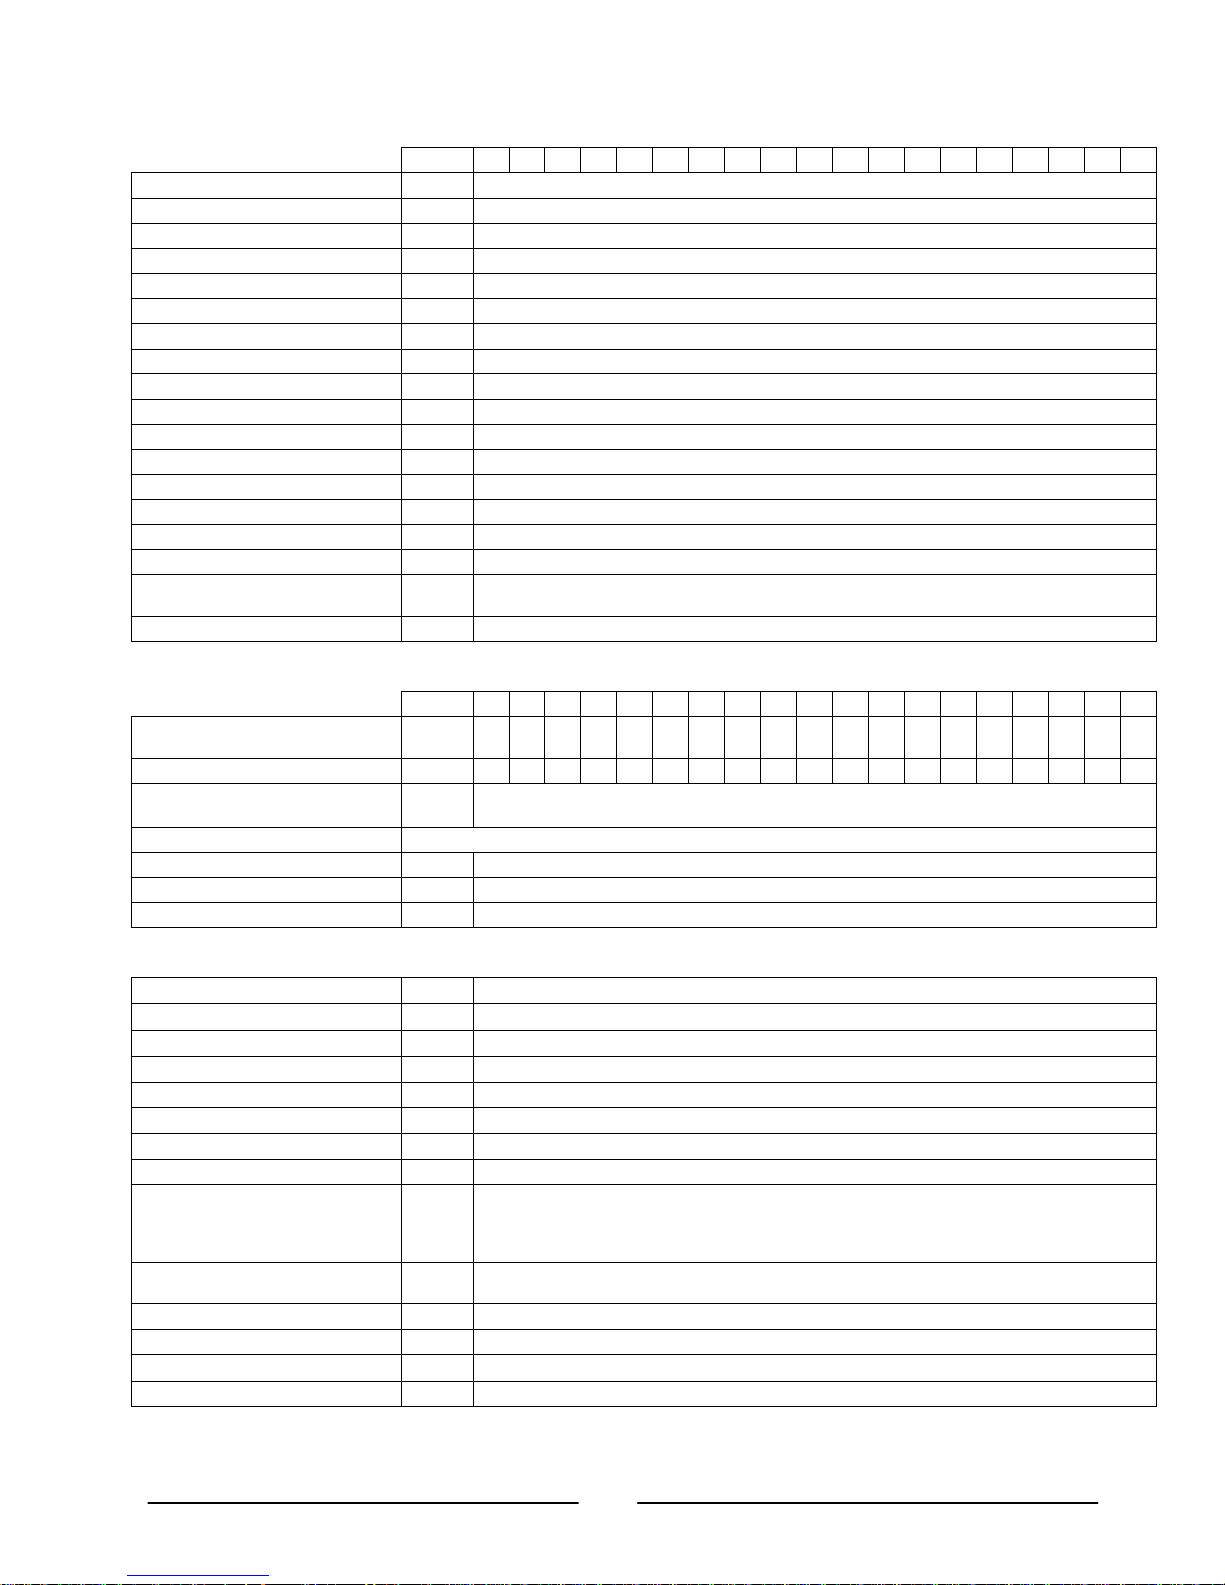
2. SPECIFICATION
All specifications are subject to change without notice.
Contact factory for specific model availability.
2.1. OUTPUT RATING (Duty Cycle Continuous Duty).
2.1.1. Standard Models – 10kW
1. Rated output Voltage V 7.5 10 12.5 20 25 30 40 50 60 80 100 125 150 200 250 300 400 500 600
2. Rated Output Current A 1000 1000 800 500 400 333 250 200 167 125 100 80 66 50 40 33 25 20 17
3. Rated Output Power kW 7.5 10.0 10.0 10.0 10.0 10.0 10.0 10.0 10.0 10.0 10.0 10.0 9.9 10.0 10.0 9.9 10.0 1.0 10.2
2.1.2. Standard Models – 15kW
1. Rated output Voltage V N/A N/A N/A N/A N/A N/A N/A N/A 60 80 100 125 150 200 250 300 400 500 600
2. Rated Output Current A 250 187.5 150 120 100 75 60 50 37.5 30 25
3. Rated Output Power kW 15.0 15.0 15.0 15.0 15.0 15.0 15.0 15.0 15.0 15.0 15.0
2.2. INPUT CHARACTERISTICS
V 7.5 10 12.5 20 25 30 40 50 60 80 100 125 150 200 250 300 400 500 600
1. Input voltage/freq. (range) --- 208VAC (180-253), 400 VAC (360-440), 480 VAC (432-528), all 47-63Hz
2. No of phase --- 3 Phase (Wye or Delta) 4 wire total (3 Phase and 1 protective earth ground)
3. Dropout voltage V 175/355/425
4. Input current 180/360/432 VAC A 10kw – 45/23/20 15kw – 64/32/27 All at full rated output power.
5. Power Factor --- 0.88 Passive
6. Efficiency at Low Line, 100% load % 77min for 7.5kw,83 min for 10kw, 88 min for 15kw
7. Inrush current A Not to exceed full rated input current See Para 2.4
8. Leakage current mA 3.5 (EN60950-1)max
9. Input Protection --- 208 Circuit Breaker, 400/480 Line Fuse
10. Fuse --- 400/480 Input Only
11. Input Overvoltage Protection Unit shall not be damaged by line overvoltage with max. durationof 100uSec. Up to 120% of nominal AC
12. Phase Imbalance % = <5% on Three Phase Input
input voltage.
2.3. STATIC CHARACTERISTICS
1. Max. line regulation c.v --- 0.1% of FS from lo min. to lo max 0.01% of FS from lo min. to lo max
2. Max. line regulation c.c --- 0.1% of FS from Vo min. to Vo max 0.05% of FS from lo min. to lo max
3. Max load regulation c.v --- 0.1% of FS from lo min. to lo max 0.02% of FS lo min. tolo max
4. Max load regulation c.c --- 0.1% of FS from Vo min. to Vo max 0.075% of FS from Vo min. to Vomax
5. Temp. drift c.v --- +/-0.05% of Full Scale over 8 hours, after 30 minute warm up, constant Line, Load & Temperature
6. Temp drift c.c --- +/-0.05% of Full Scale over 8 hours, after 30 minute warm up, constant Line, Load & Temperature
7. Stability c.v PPM/C 200 (0.02% Full Scale)/Degree C
8. Stability c.c PPM/C 300 (0.03% Full Scale)/Degree C
9. Output noise p-p (20MHz) c.v mV 60 60 60 60 60 60 60 75 75 100 100 125 135 135 200 200 200 300 350
10. Ripple r.m.s 5Hz1MHzc.v
11. Ripple r.m.s 5Hz1MHzc.c (10kW)
12. Ripple r.m.s 5Hz1MHzc.c(15kW)
*Ripple and Noise at Full Rated Voltage & Load at 25C, Nominal Line. For models not listed use the ripple limit of the next higher voltage model. Per EJ RC9002A.
13. Rem. sense compensation/wire V 1 1 1 1 1 1.5 2 3 3 4 5 5 5 5 5 5 5 5 5
V 7.5 10 12.5 20 25 30 40 50 60 80 100 125 150 200 250 300 400 500 600
mV 20 20 20 20 20 20 20 20 20 25 25 25 25 35 35 60 60 60 60
mA 5100 5100 2600 2600 1700 1700 100 80 67 50 40 32 20 20 16 13 10 8 7
mA - - - - - - - - 100 100 100 50 50 20 20 20 10 10 10
24
83-530-000 Rev J
Page 29
2.4. PROTECTIVE FUNCTIONS
In Advance parallel feature, the current of Master Unit, multiplied by number of units connected in parallel, is
V 7.5 10 12.5 20 25 30 40 50 60 80 100 125 150 200 250 300 400 500 600
1. OCP %
2. OCP Type --- Constant current
3. Knee point protection --- None,No damage at knee point operation
4. Short circuit protection --- Yes
5. Short circuit burn-in --- Yes
6. Foldback protection --- Output shut down, manual reset by front panel OUT button.
7. Foldback response time S Less than 1
8. OVP Type --- Inverter shut-down, manual reset by On/Off recycle or by OUT button.
9. OVP programming accuracy % 5% Full Scale
10. OVP adjustment method --- Adjust by front panel Voltage encoder and comm. port.
11. OVP trip point V 0.05 to (1.02 -1.05) Rated Output Voltage
12. OVP response time mS Less than 10mS for Output to begin to drop.
13. Max. OVP reset time S 7 from Turn On
14. Output under voltage limit --- Preset by front panel or communication port. Prevents from adjusting V
15. Input under voltage protection --- Yes. Power supply shut down below low line.
16. Over temp protection --- Unit shall shut down when internal temperature exceeds safe operatinglevels. (Latched in Safe mode and
17. Phase Loss Protection Yes
0100
Raises the Output good signal in case of output voltage is below limit.
unlatched in auto mode).
below limit.
out
2.5. DYNAMIC CHARACTERISTICS
V 7.5 10 12.5 20 25 30 40 50 60 80 100 125 150 200 250 300 400 500 600
1. Up-prog. Response time, 0Vomax
full-load
2. Down-prog response time full-load mS 100 100 100 100 100 100 100 100 100 100 100 100 100 100 100 100 100 100 100
3. Transient response time (cv mode)
NOTE: Properties 5.1- 5.6 with Resistive Load.
4. Time for OutputStable S 2 maximum from enable output until output stable.
5. Output fall and rise --- Overshoot limited to 125% Rated Output. Voltage at No-Load, Full-Load, Resistive Load.
6. Start-up delay S Less thank 7 (without IEEE option)
mS 100 100 100 100 100 100 100 100 100 100 100 100 100 100 100 100 100 100 100
Time for the output voltage to recover within 2% of its rated output voltage for a load change of 50 100% or
mS
100 50% of rated output set-point. Less than 3.
2.6. REMOTE ANALOG CONTROL AND SIGNALS
1. Vout voltage programming ---
2. Iout voltage programming ---
3. Vout resistor programming ---
4. Iout resistor programming ---
5. On/Off control (rear panel) --- By voltage: 0.6V = Disable, 2-15V = enable (default)or dry contact, user selectable logic
6. Output current monitor ---
7. Output voltage monitor ---
8. Power supply OK signal --- Yes. TTL high-OK, 0V (500ohm impedance)-Fail
9. Parallel operation --- Up to Four(4) identical units may be connected in Master/Slave Mode with ‘Single’ wire connection.
10. Series operation --- Possible (with external diodes), up to identical 2 units with total output not to exceed +/-600V from chassis
11. CV/CC signal ---
12. Enable/Disable --- Dry contact. Open: off, Short on. Max. voltage at Enable/Disable Contacts 6V
13. Remote/Local selection ---
14. Remote/Local signal --- Signal operating mode in use.
0 100%, 0 5V or 0 10V, userselectable. Accuracy& Linearity +/-1% of Rate Vo.
0 100%, 0 5V or 0 10V, userselectable. Accuracy& Linearity +/-1% of Rate Io.
0 100%, 0 5/10kohm full scale, user selectable. Accuracy & Linearity +/-1% of Rate Vo.
0 100%, 0 5/10kohm full scale, user selectable. Accuracy & Linearity +/-1% of Rate Io.
0 5V or 0 10V, accuracy 1%, user selectable
0 5V or 0 10V, accuracy 1%, user selectable
made available on digital interface and displayed on front panel of Master unit. Remote analog current
monitor of the Master is scaled to output current of the Master unit (only).
ground.
CV: TTL high (4 5V) source: 10mA, CC: TTL low (0 4V): 10mA
Selects Remote or Local operation by elect. Voltage: 0 0.6V/2 15V, <0.6V = Local 2-15V = Remote.
25
83-530-000 Rev J
Page 30

2.7. FRONT PANEL
1. Control functions
2. Display
3. Indications --- ADDR, OVP/UVL, V/A, FOLD, REM/LOCAL, OUT ON/OFF, LFP/UFP, IEEE, LAN, Hx (Parallel Master) or S
--- Vout/ Iout manual adjust by separate encoders.
--- OVP/UVL manual adjust by Volt. Adjust encoder.
--- Address selection by Voltage adjust encoder. No of addresses: 31
--- Go toLocal
--- Output On/Off
--- AC On/Off
--- Foldback control (CV to CC)
--- RS232/485 and IEEE488.2 selection by IEEE or LAN enable switch and DIP switch
--- Baud rate selection by Current adjust encoder.
--- Re-start modes (auto, safe)
--- Front Panel Lock/Unlock
--- Parallel Master Slave: H1 = One Master, Zero Slave
--- Vout: 4 digits, accuracy: 0.5% of rated Vout+/-1count, Green LED’s, Size:10mm
--- Iout: 4 digits, accuracy: 0.5% of rated Iout+/-1count, Green LED’s, Size:10mm
Voltmeter is user selectable to read either local voltage (at power supply) or remote voltage (at the load).
(Slave).
CC/CV: GREEN LED’s. ALRM (OVP, OTP, FOLD, AC FAIL): RED LED
H2 = One Master, One Slave
H3 = One Master, Two Slaves
H4 = One Master, Three Slaves
S = Slave
2.8. SOFTWARE SPEC.
1. Functions:
1. Voltage/current setting
2. OVP/UVL setting
3. Actual voltage/current setting readback
4. Voltage/current setting readback
5. OVP/UVL setting readback
6. Output On/Off
7. Foldback protection setting
8. Status readback (cc/cv, ovp, otp, foldback, ac fault)
9. Model identification readback
10. Self test.
11. Calibration (not user access.) (DAC-Zero and max points, Display-Zero and max.)
12. Last setting recall (at power off).
13. Re-start mode setting
14. Front Panel Lock/Unlock
1. Drivers to LabView and LabWindows2. Application software:
2. Simple operating program
26
83-530-000 Rev J
Page 31

2.9. DIGITIAL PROGRAMMING AND READBACK
1. Vout programming accuracy --- +/-0.5% of rated output voltage
2. Iout programming accuracy --- +/-0.5% of rated output current for units with Io <187.5 +/-0.7% of rated output current for Io <187.5
3. Vout programming resolution --- 0.02% of full scale (To be confirmed)
4. Iout programming resolution --- 0.04% of full scale (To be confirmed)
5. Vout readback accuracy --- 0.1% + 0.2%of rated output voltage Accuracysame as IEEE Programming Accuracy
6. Iout readback accuracy --- 0.1% + 0.4% of rated output current Accuracysame as IEEE Programming Accuracy
7. Vout readback resolution --- 0.02% of full scale
8. Iout readback resolution --- 0.02% of full scale
OV Response Time mS 20mS maximum between output V exceeding IEEE limit and supply inhibit turning on
Set Over-Voltage Limit, Set Local/RemoteOther Functions
Operating parameters and status available for display via host computer.
2.10. MECHANICAL CONSTRUCTION
V 7.5 10 12.5 20 25 30 40 50 60 80 100 125 150 200 250 300 400 500 600
1. Cooling --- Fan driven, Airflow from Front to Rear. Supplemental vents on side that shall not be blocked. EIA Rack
2. Weight Kg/Lb 43/97
3. Dimensions --- H: 3U, W: 19” Rack, See 02530000 for outline drawing.
4. Types of connectors
5. Front panel material & finish --- RAL7035 Textured finish.
6. Mounting method --- Standard 19” Rack Mount, provision for standard slides. Side/RearSupport is required; do not mount by F/P
7. Mounting positions --- Horizontal
8. Output ground connection --- M5 Stud
9. Color and finish --- Chassis Top/Sides/Bottom Clear zinc plating. Front Panel RAL 7035 painted
10. Output Terminal covers --- Standard for all models with bus-bars. Closedconnection for models with output connector.
mounting, stackable. “Zero Stackable” top and bottom. Slides or suitable rear support required.
--- 1) Input: Threaded Studs and terminal cover. Strain relief option.
2) Output: Iout =>.50A: bus-bars, Iout<37.5a threaded stud terminal.
3) Analog programming:DB25, plastic connector, AMP, 747461-5, Female on Power Supply,Male on
Mating connector 747321. Standard 25 pin D connector.
4) RS232/RS485, STD PhoneJack connector
5) Isolated analog option: refer to Isolated Analog option spec. 08030200
6) IEMD Option, refer to IEMD Option Spec. 08030100.
only.
2.11. ENVIRONMENTAL CONDITIONS
1. Operating temp C
2. Start up temp. C 0
3. Storage temp C -20C to +70C
4. Operating humidity %
5. Storage humidity %
6. Altitude --- Operating:
7. Vibration & Shock (208/400VAC) G ASTM D4169, Standard Practice for performanceTesting of Shipping Containers and Systems,Shipping
8. Audible Noise db 65dBA at Full Load, measured 1m from Front Panel
0 50C, 100% load. No operation > 50C
2080% RH Non-condensing
1090% RH Non-condensing
50oC up to 7500 ft., (2500m) 45oC from 7501 to 10,000ft (2501m – 3000m)
Non Operating 40,000 ft (12,000m)
Unit: Single Package Assurance Level: Level II; Acceptance Criteria: Criterion 1 – No product damage,
Criterion 2 – Package is intact Distribution Cycle: CyAir (intercity) and motor freight (local, single package
up to 100lbs.) (NOTE: for packages over 100 lbs, distribution cycle 12 – Air (intercity) and motor freight
(local), unitized is used)
27
83-530-000 Rev J
Page 32

2.12. EMC
2.12.1. 208 Volts Input Models
CE Mark
1. ESD --- EN61000-4-2 (IEC 801-2) Air-disch. */-8kV, contact disch. +/-4kV
2. Fast transients --- EN61000-4-4 (IEC 1000-4-3)
3. Surge immunity --- EN61000-4-5 (IEC 1000-4-5)
4. Conducted immunity --- EN61000-4-6 (IEC 1000-4-6)
5. Radiated immunity --- EN61000-4-3 (IEC 1000-4-3)
6. Power Frequency Magnetic Field --- EN61000-4-8
7. Conducted emission --- EN55011A, FCC part 15J-A
8. Radiated emission --- EN55011A, FCC part 15J-A
2.12.2. 400 Volts Input Models
CE Mark
1. ESD --- EN61000-4-2 (IEC 801-2) Air-disch. +/-8kV, contact disch. +/-4kV
2. Fast transients --- EN61000-4-4 (IEC 1000-4-3)
3. Surge immunity --- EN61000-4-5 (IEC 1000-4-5)
4. Conducted immunity --- EN61000-4-6 (IEC 1000-4-6)
5. Radiated immunity --- EN61000-4-3 (IEC 1000-4-3)
6. Power Frequency Magnetic Field --- EN61000-4-8
7. Voltage Dips, Short Interruptions and
Voltage Variations Immunity Tests
(400VAC Input Only)
8. Conducted emission --- EN55011A, FCC part 15J-A
9. Radiated emission --- EN55011A, FCC part 15J-A
--- IEC 61000-4-11
2.13. RELIABILITY SPECS
1. Electrolytic capacitors life Yrs. More than3yrs at 40C ambient, 100% load
2. Grade --- G-2, Lambda Group derating criteria & EIAJ RCR-9102A
count Reliability, Generic Failure rates, 25C
4. Warranty Yrs. 5 years
5. Shelf life Yrs. 5 years, electrolytic caps shall be reformed after 2 years
2.14. SAFETY
1. Applicable Standards --- UL/ULC 60950-1, EN60950-1 recognized.All Outputs are Hazardous. (Units with IEMD or ISOL option are
2. Withstand voltage --- Vout=<60V models: Input-Ground: 2818VDC 1 min, Input-Outputs (SELV): 4242VDC 1 min, Output –
3. Insulation resistance --- 100Mohm at 500Vdc
Recognized up to 400 volts output). CE Mark 208 & 400VAC input only (CB Scheme)
Vout≤40V: Output is SELV, IEEE/Isolated analog are SELV.
40<Vout≤400V: Output is hazardous, IEEE/Isolated analog are SELV.
400<Vout≤600V: Output is hazardous, IEEE/Isolated analog are not SELV.
Ground: 1000VDC 1 min. 60<Vout=<300V models: Input-Ground: 2828VDC 1 min, Input-Haz. Output:
3535VDC 1 min, Input-SELV: 2828VDC 1 min. Hazardous Output-SELV: 2121VDC 1 min, Hazardous
Output-Ground: 2121VDC 1 min. 300<Vout=<600V models: Input-Ground: 2828VDC 1 min, Input-Haz.
Output: 3535 1 min, Input-SELV: 2828VDC 1 min. Hazardous Output-SELV: 2688VDC 1 min, Hazardous
Output-Ground: 2688VDC 1 min.
28
83-530-000 Rev J
Page 33

2.15. J1 CONNECTOR
J1-1 ENA_IN Enable/Disable Dry Contact with J1-14
J1-2 IF_COM Isolated Interface Common. Return for SO, PS_OK
J1-3 IF_COM Isolated Interface Common. Return for SO, PS_OK
J1-4 N/C
J1-5 N/C
J1-6 N/C
J1-7 N/C
J1-8 LOC/REM Input for selecting between Local or Remote analog programming.
J1-9 VPGM Input for remote analog voltage/resistance programming of the Output Voltage
J1-10 IPGM Input for remote analog voltage/resistance programming of the Output Current
J1-11 VMON Output Voltage Monitor
J1-12 COM Control Commonfor VMON & IMON
J1-13 CV/CC Output for Constant Voltage / Constant Current mode indication
J1-14 ENA_OUT Enable/Disable Dry Contact with J1-1
J1-15 SO Input for Shut-Off control of the output.
J1-16 PS_OK Output for indication of the power supply status
J1-17 N/C
J1-18 N/C
J1-19 N/C
J1-20 N/C
J1-21 LOC/REM Signal Output for indicating if the unit is in Local or Remote analog programming mode.
J1-22 VPGM_RTN Returnfor VPGM J1-9; connected to Neg Output
J1-23 IPGM_RTN Return for IPGM J1-10; connected to Neg Output
J1-24 IMON Output for Current Monitor
J1-25 P Output for Current Balance in Parallel Operation (One wire – Reference to
Negative Output)
29
83-530-000 Rev J
Page 34

3. INSTALLATION
3.1. General
This Chapter contains instructions for initial inspection, preparation for use and repackaging
for shipment. Connection to PC, setting the communication port and linking Genesys
power supplies are described in Chapter 8.
GenesysTMpower supplies generate magnetic fields, which might affect the operation
of other instruments. If your equipment is susceptible to magnetic fields, do not
3.2. Preparation for Use
In order to be operational the power supply must be connected to an appropriate AC source.
The AC source voltage should be within the power supply specification. Do not apply power
before reading Section 3.6 and 3.7.
Table 3-1 below, describes the basic setup procedure. Follow the instructions in Table 3-1 in
the sequence given to prepare the power supply for use.
Step no. Item Description Reference
1 Inspection Initial physical inspection of the power supply Section 3.3
2 Installation Installing the power supply,
3 AC source AC source requirements
4 Test Turn-on checkout procedure. Section 3.8
5 Load
connection
6 Default setting The power supplysetting at shipment. Section 3.9.4,
NOTE
position it adjacent to the power supply.
Ensuring adequate ventilation.
Connecting the power supply to the AC source
Wire size selection. Local/Remote sensing. Single or
multiple loads.
TM
Section 3.4
Section 3.5
Section 3.6
Section 3.7
Section 3.9
4.3.1, 8.2.4
3.3. Initial Inspections
Prior to shipment this power supply was inspected and found free of mechanical or electrical
defects. Upon unpacking of the power supply, inspect for any damage, which may have
occurred in transit.
The inspection should confirm that there is no exterior damage to the power supply such as
broken knobs or connectors and that the front panel and meters face are not scratched or
cracked. Keep all packing material until the inspection has been completed. If damage is
detected, file a claim with carrier immediately and notify the TDK-Lambda Americas Inc.
sales or authorized service facility nearest you.
Table 3-1: Basic Setup Procedure
30
83-530-000 Rev J
Page 35

3.4. Rack Mounting
The GenesysTMpower supply series is designed to fit in a standard 19” equipment rack.
3.4.1. To Install the Power Supply in a Rack:
3.4.1.1. Use the front panel rack-mount brackets to install the power supply in the rack.
3.4.1.2. Use a support bar to provide adequate support for the rear of the power supply.
Do not obstruct the air exhaust at the rear panel of the unit.
3.5. Location, Mounting and Cooling
This power supply is fan cooled. The air intake is at the front panel and the exhaust is at the
rear panel. Upon installation allow cooling air to reach the front panel ventilation inlets.
Unrestricted air space at the front and the rear of the unit is necessary for proper cooling of
power supply.
3.6. AC Source Requirements
The GenesysTMseries can be operated from a nominal 208V, 400V or 480V three phase,
4 wire, 47–63 Hz. The input voltage range and current required for each model is specified in
Chapter 2. Ensure that under heavy load, the AC voltage supplied to the power supply does
not fall below the specifications described in Chapter 2.
3.7. AC Input Power Connection
CAUTION
Connection of this power supply to an AC power source should be made by
an electrician or other qualified personnel. Do not exceed the torque specified
on input stud terminals.
WARNING
There is a potential shock hazard if the power supply chassis (with
cover in place) is not connected to an electrical safety ground via the
safety ground in the AC input stud terminals.
WARNING
Some components inside the power supply are at AC/DC voltage
even when the On/Off switch is in the “Off” position. To avoid electric
shock hazard, disconnect the line and load and wait 15 minutes
before removing cover.
The customers AC line connects to the power supply through four stud type terminals. Only
use a power cable with the correct voltage and current ratings. The recommended wire
gauge is listed in the table in section 3.7.1. The ground wire must be equal to or larger than
the recommended gauge for phase. The power supply must be permanently connected to an
approved AC distribution box with suitably rated over current protection (60Amp UL Listed
fuse for 208V input, and 40 Amp UL listed fuse for 400/480 input).
31
83-530-000 Rev J
Page 36

Input Rating
NOTE: The figure shows input
connection from left side.
For connection from right side
Label
Input Terminal Block
Figure 3-1. AC Input Connections
3.7.1. Recommended Cable Size for Input Connection
INPUT VOLTAGE CURRENT RMS AMPS
PER PHASE
208 75 4 AWG
400 45 6 AWG
480 35 7 AWG
The AC input current and voltage rating is marked on the rear terminal of the power supply.
The Protective Earth Ground must be connected before applying
AC Line Power to the power supply.
3.8. Turn-On Checkout Procedure
Input Terminal Block
with cover.
reverse the input cover.
RECOMMENDED
COPPER WIRE SIZE
3.8.1. General
The following procedure ensures that the power supply is operational and may be used
as a basic incoming inspection check. Refer to Fig. 4-1 and Fig. 4-2 for the location of the
controls indicated in the procedure.
3.8.2. Prior to Operation
a) Ensure that the power supply is configured to the default setting:
On/Off switch at off position.
Dip switch: all positions at Down (“Off”) position.
Sense connector: configured to Local Sense as shown in Fig.3-2.
32
83-530-000 Rev J
Page 37

Figure 3-2: sense connector default connection
For units equipped with IEEE option, ensure that the IEEE_En switch is in the Up
(default) position (Refer to Fig. 4-2, Item 9 for location), if checkout is to be done
in IEEE mode.
b) Connect the unit to an AC source as described in Section 3.7.
c) Connect a DVM with appropriate cables for the rated voltage to the output terminals.
d) Turn the front panel ON/OFF switch to ON.
3.8.3. Constant Voltage Check
a) Turn on the output by pressing OUT pushbutton so the OUT LED illuminates.
b) Observe the power supply VOLT display and rotate the Voltage encoder. Ensure that
the output voltage varies while the VOLT encoder is rotated. The minimum control
range is from zero to the maximum rated output for the power supply model.
c) Compare the DVM reading with the front panel VOLT display to verify the accuracy of
the VOLT display. Ensure that the front panel VOLT LED is on.
d) Turn off the front panel AC power switch.
3.8.4. Constant Current Check
a) Ensure that the front panel switch is at Off position and the DVM connected to the
output terminals shows zero voltage.
b) Connect a DC shunt across the output terminals. Ensure that the shunt and the wires
current ratings are higher than the power supply rating. Connect a DVM to the shunt.
c) Turn the front panel switch to On position,
d) Turn on the output by pressing OUT pushbutton so the OUT LED illuminates.
e) Observe the power supply CURRENT display and rotate the CURRENT encoder.
Ensure that the output current varies while the CURRENT encoder is rotated. The
minimum control range is from zero to the maximum rated output for the power supply
model.
Compare the DVM reading with the front panel CURRENT display to verify the
accuracy of the CURRENT display. Ensure that the front panel CURRENT LED is on.
f) Turn off the front panel ON/OFF switch.
g) Remove the shunt from the power supply output terminals.
3.8.5. OVP Check
Refer to Section 5.3 for explanation of the OVP function prior to performing the procedure
below.
a) Turn the front panel AC power switch to On position and turn on the output by
pressing OUT pushbutton.
b) Using the VOLT encoder, adjust the output voltage to approx. 10% of the voltage
rating.
c) Momentarily press the OVP/UVL button so that the CURRENT display shows “OUP”.
The VOLTAGE display will show the last setting of the OVP level.
d) Rotate the VOLT encoder CCW to adjust the OVP setting to 50% of the unit voltage
rating.
33
83-530-000 Rev J
Page 38

e) Wait a few seconds until the VOLT display returns to show the output voltage.
f) Adjust the output voltage toward its maximum and check that the output voltage
cannot be increased more than the OVP 1.05 setting.
g) Adjust OVP limit to the maximum by repeating Step C and rotating the VOLT
encoder C.W.
3.8.6. UVL Check
Refer to Section 5.4 for explanation of the UVL function prior to performing the
procedure below.
a) Press the OVP/UVL button TWICE so that the CURRENT display shows “UUL”. The
VOLTAGE display will show the last setting of the UVL level.
b) Rotate the VOLT encoder to adjust the UVL level to approx. 10% of the unit voltage
rating.
c) Wait a few seconds until the VOLT display returns to show the output voltage.
d) Adjust the output voltage toward its minimum and check that the output voltage
cannot be decreased below the UVL x 1.05 setting.
e) Adjust the UVL limit to the minimum by repeating Step A and rotating the VOLT
encoder CCW.
3.8.7. Foldback Check
WARNING
Shorting the output may expose the user to hazardous voltages.
Observe proper safety procedures.
Refer to Section 5.5 for explanation of the FOLD function prior to performing the
procedure below.
a) Ensure that the output voltage is set to approx. 10% of the unit rating.
b) Adjust the CURRENT encoder to set the current limit to approx. 10% of the unit
rating.
c) Momentarily press the FOLD button. Ensure that the FOLD LED illuminates. The
output voltage remains unchanged.
d) Short the output terminals momentarily (approx. 0.5 sec.). Ensure that the output
voltage falls to zero, the VOLT display shows “Fb” and the ALARM LED blinks.
e) Press the FOLD button again to cancel the protection. The output voltage remains
zero.
f) Press OUT button. Ensure that the output voltage returns to its last setting.
g) Turn the output off by pressing the OUT button. The VOLT display shows “OFF”.
3.8.8. Address Setting
a) Press and hold the REM/LOC button for approx. 3 sec. The VOLT display will show
the communication port address.
b) Using the VOLT adjust encoder; the address can be set within the range of 0 to 30.
3.8.9. Baud Rate Setting (RS-232 and RS-485 only)
a) Press and hold the REM/LOC button for approx. 3 sec. The CURRENT display will
show the communication port Baud Rate.
b) Using The CURRENT adjust encoder, the Baud Rate can be set to 1200, 2400, 4800,
9600 or 19200.
34
83-530-000 Rev J
Page 39

3.9. Connecting the Load
Turn Off the AC input power before making or changing any rear
panel connection. Ensure all live circuits are discharged and that all
connections are securely tightened before applying power. There is a
potential shock hazard when using a power supply with a rated output
The load cables between the power supply outputs and the load must be a specified. The
cable connections must be secured to required torque spec. Failure to meet these
requirements could cause substantial voltage losses, terminal over-heating, and insulation
degradation.
The output styles vary depending o the output voltage range.
Platform A & B (Output Voltage Range 7.5V-80V &100V-300V).
– Vertical Bus Bar Configuration,
– 0.422 in. mtg. Hole,
– Use 3/8 in dia. Bolt.
Platform C (Output Range 400V- 600V)
– Stud configuration
– M6 x1.0 nut/washer size
The output connections are protected with a metal cover. To connect cables, remove the
cover. Connect the proper size cables with nuts and bolts.
WARNING
greater than 40V.
Proper torque (as per bolt size) should be applied to the bolts.
Typical cable sizes for load connections are shown below. Use cables that meet
requirements for current, voltage, length, temperature and termination.
CURRENT (Amps)
Io
Io ≤ 50 6 AWG.
50 < Io ≤ 100 0 AWG.
100 < Io ≤ 187.5 1 x 0000 AWG.
187.5 < Io ≤ 333 2 x 0000 AWG.
333 < Io ≤ 700 3 x 0000 AWG.
700 < Io ≤ 1000 4 x 0000 AWG.
RECOMMENDED
COPPER WIRE SIZE
Table 3-2: Recommended Cable Size for Output Connection
3.9.1. Wire Termination
The wires should be properly terminated with terminals securely attached. DO NOT use
un-terminated wires for load connection at the power supply.
CAUTION
Be careful when connecting the remote sense lines to the far end of the load
cables. Reversing the sense line polarity to the load, or leaving the +S or –S
sense lines opened, could damage the power supply.
See Section 3.10.3 for more information.
35
83-530-000 Rev J
Page 40

3.9.2. Noise and Impedance Effects
+v
-
v
Supply
-
Load
+
To minimize the noise pickup or radiation, the load wires and remote sense wires should
be twisted pairs to the shortest possible length. Shielding of sense leads may be
necessary in high noise environments. Where shielding is used, connect the shield to the
chassis via a rear panel Ground screw. Even if noise is not a concern, the load and
remote sense wires should be twisted-pairs to reduce coupling, which might impact the
stability of power supply. The sense leads should be separated from the power leads.
Twisting the load wires reduces the parasitic inductance of the cable, which could
produce high frequency voltage spikes at the load and the output of power supply,
because of current variation in the load itself.
The impedance introduced between the power supply output and the load could make
the ripple and noise at the load worse than the noise at the power supply rear panel
output. Additional filtering with bypass capacitors at the load terminals may be required to
bypass the high frequency load current.
3.9.3. Inductive Loads
Inductive loads can produce voltage spikes that may be harmful to the power supply. A
diode should be connected across the output. The diode voltage and current rating
should be greater than the power supply maximum output voltage and current rating.
Connect the cathode to the positive output and the anode to the negative output of the
power supply.
Where positive load transients such as back EMF from a motor may occur, connect a
surge suppressor across the output to protect the power supply. The breakdown voltage
rating of the suppressor must be approximately 10% higher than the maximum output
voltage of the power supply.
3.9.4. Connecting Single Loads, Local Sensing (Default).
Fig.3-10 shows recommended load and sensing connections for a single load. The local
sense lines shown are default connections at the rear panel J2 sense connector. Local
sensing is suitable for applications where load regulation is less critical.
Power
-Rem Sense
-Local Sense
+Local Sense
+Rem Sense
Load Lines, twisted pair,
shortest length possible.
Fig. 3-3: Single load connection, local sensing
36
83-530-000 Rev J
Page 41

3.9.5. Connecting Single Loads, Remote Sensing
+v
-
v
Supply
-
Load #1
+
-
Load #2
+
-
Load #3
+
+v
-
v
Supply
-
Load
+
Fig.3-4 shows recommended remote sensing connection for single loads. Remote
sensing is used when, in Constant Voltage mode, the load regulation is important at the
load terminals. Use twisted or shielded wires to minimize noise pick-up. If shielded wires
are used, the shield should be connected to the ground at one point, either at the power
supply chassis or the load ground. The optimal point for the shield ground should be
determined by experimentation.
Load Lines, twisted pair,
shortest length possible.
Power
-Rem Sense
-Local Sense
+Local Sense
+Rem Sense
Fig. 3-4: Remote sensing, single load
Sense lines.
Twisted Pair
Power
-Rem Sense
-Local Sense
+Local Sense
+Rem Sense
Load Lines, twisted pair,
shortest length possible.
Fig. 3-5: Multiple loads connection, radial distribution, local sense
37
83-530-000 Rev J
Page 42

3.9.6. Multiple Load Connection with Distribution Terminals
+V
-
V
Supply
Distribution Terminal
-
Load #1
-
Load #2
+
-
Load #3
+
+
+V
-
V
If remotely located output distribution terminals are used, the power supply output
terminals should be connected to the distribution terminals by pair of twisted and/or
shielded wires. Each load should be separately connected to the remote distribution
terminals (see Fig.3-6).
If remote sensing is required, the sensing wires should be connected to the distribution
terminals or at the most critical load.
Power
-Rem Sense
-Local Sense
+Local Sense
+Rem Sense
Fig. 3-6: Multiple loads connection with distribution terminal
There is a potential shock hazard at the sense connector when using
a power supply with a rated output voltage greater than 40V. Local
sense and remote sense wires should have a minimum insulation
rating equivalent or greater than the maximum output voltage of the
power supply. Ensure that the connections at the load end are
shielded to prevent accidental contact with hazardous voltages.
3.9.7. Grounding Outputs
Either the positive or negative output terminals can be grounded. To avoid noise probems
caused by common-mode current flowing from the load to ground, it is recommended to
ground the output terminal as close as possible to the power supply chassis ground.
Always use two wires to connect the load to the power supply regardless of how the
system is grounded.
WARNING
38
83-530-000 Rev J
Page 43

3.10. Local and Remote Sensing
The rear panel J2 sense connector is used to configure the power supply for local or remote
sensing of the output voltage. Refer to Fig.3-7 for sense connector location.
3.10.1. Sense Wiring
3.10.2. Local Sensing
The power supply is shipped with the rear panel J2 sense connector wired for local
sensing of the output voltage. See Table 3-4 for J2 terminals assignment. With local
sensing, the output voltage regulation is made at the output terminals. This method does
not compensate for voltage drop on the load wires, therefore it is recommended only for
low load current applications or where the load regulation is less critical.
Fig. 3-7: Sense Connector Location
Terminal Function
J2-1 Remote positive sense (+S)
J2-2 Local positive sense. Connected internally to the positive output terminal (+LS).
J2-3 Not connected (NC)
J2-4 Local negative sense. Connected internally to the negative output terminal (-LS).
J2-5 Remote negative sense (-S).
Table 3-3: J2 Terminals
39
83-530-000 Rev J
Page 44

3.10.3. Remote Sensing
power supply with a rated output voltage greater than 40V. Ensure
When using shielded sense wires, ground the shield in one place only. The
location can be the power supply chassis or one of the output terminals
Use remote sense where the load regulation at the load end is critical. In remote sense,
the power supply will compensate for voltage drop on the load wires. Refer to the power
supply specifications for the maximum voltage drop on load wires. The voltage drop is
subtracted from the total voltage available at the output. Follow the instructions below to
configure the power supply for remote sensing:
a) Ensure that the AC On/Off is in the Off position.
b) Remove the local sense jumpers from J2.
c) Connect the negative sense lead to terminal J2-5 (S) and the positive sense lead to
terminal J2-1(+S) of the J2 mating connector. Ensure that the J2 mating connector is
plugged securely into the rear panel sense connector, J2.
d) Turn On the power supply.
WARNING
There is a potential shock hazard at the sense point when using
that the connections at the load end are shielded to prevent
accidental contact with hazardous voltages.
CAUTION
NOTES:
1. If the power supply is operating in remote sense and either the positive or
negative load wire is not connected, an internal protection circuit will activate and
shut down the power supply. To resume operation, turn to the Off position,
connect the open load wire, and turn On the power supply.
2. If the power supply is operated without the remote sense lines or local sense
jumpers, it will continue to work, but the output voltage regulation will be
degraded. Also, the OVP circuit may activate and shut down the power supply.
3.10.4. J2 Sense Connector Technical Information
– J2 connector type: MC 1.5/5-G-3.81, Phoenix.
– Plug type: MC 1.5/5-ST-3.81, Phoenix.
– Wire AWG; 28 up to 16.
– Stripping length: 7mm (0.28 inches).
– Tightening torque: 0.22-0.25Nm (1.95-2.21Lb-Inch.)
3.11. Repackaging for Shipment
To ensure safe transportation of the instrument, contact the TDK-Lambda Americas Inc.
sales or service facility near you for Return Authorization and shipping information. Please
attach a tag to the power supply describing the problem and specifying the owner, model
number and serial number of the power supply. Refer to Warranty Information for further
instructions.
40
83-530-000 Rev J
Page 45

4. FRONT AND REAR PANEL CONTROLS AND CONNECTORS
VOLTAG E
REM/ LOC
DC AMPS
3
5618
1617151413119
7
DC AMPS
GENESYS POWER SUPP
TM
6
4.1. Introduction
The GenesysTMPower Supply series has a full set of controls, indicators and connectors that
allow the user to easily setup and operate the unit. Before starting to operate the unit, please
read the following sections for explanation of the functions of the controls and connectors
terminals.
4.2. Front Panel Controls and Indicators
19
1
DC VOLTS
FINE P REV /
ALAR M
10
2
12
TM
GENESYS POWER SUPPLY
OVP
UVL
FOL D
4
CURR ENT
OUT
1
Fig. 4-1: Front Panel Controls and Indicators.
VOLTAGE
DC VOLTS
ALARM
OVP
FINE PREV/
UVL
41
83-530-000 Rev J
Y
L
FOLD REM/LOC O UT
CURRENT
8
Page 46

Table 4-1: Front Panel Controls and Indicators
Number Control/Indicator Description Section
1 VOLTAGE control High resolution rotary encoder for adjusting the Output Voltage. Also
adjusts the OVP/UVL levels and selects the Address
2 VOLTAGE indicator Green LED, lights for constant-Voltage mode operation.
3 VOLTAGE display 4 digit, 7-segment LED display. Normally displays the output voltage.
When the PREV button is pressed, the display indicates the
programmed setting of the output voltage. Whenthe OVP/UVL button
is pressed, the Voltage display indicates the OVP/UVL setting.
4 CURRENT display 4 digit, 7 segment LED display. Normally displays the output current.
When the PREV button is pressed, the display indicates the
programmed setting of output current.
5 CURRENT indicator Green LED, lights for Constant-Current mode operation
6 CURRENT control High resolution rotary encoder for adjusting the Output Current. Also
selects the Baud-Rate of the communication port.
7 OUT button
8 OUT indicator Green LED, lights when the DC output is enabled.
9 REM/LOC button
10 REM/LOCindicator Green LED, lights when the unit is in Remote mode.
11 FOLD button Foldback protection control.
12 FOLD indicator Green LED, lights when Foldback protection is On.
Main function: Output ON/OFF control. Press OUT to set the output
On or Off. Press to reset and turn On the output after OVP or FOLD
alarm events have occurred.
Auxiliary function: Selects between “Safe-Start” and “Auto-Restart”
modes. Press and hold OUT button to toggle between “Safe-Start”
and “Auto-Restart”. The VOLT display will cycle between “SAF” and
“AUT”. Releasing the OUT button while one of the modes is
displayed, selects that mode.
Main function: Go to local. Press REM/LOC to putthe unit into Local
(REM/LOC button is disabled at Local Lockout mode).
Auxiliary function: Address and Baud Rate setting. Press and hold
REM/LOC for 3 sec. to set the Address with the VOLTAGE encoder
and the Baud Rate with the CURRENT encoder.
-Press FOLD to set Foldback protection to On.
-To release Foldback alarm even, press OUT to enable the output
and re-arm the protection.
-Press FOLD again to cancel the Foldback protection.
5.2.1
5.3.1
5.4.1
8.2.2
5.2.2
8.2.4
5.6
5.11
8.2.5
8.2.2
8.2.4
5.5
42
83-530-000 Rev J
Page 47

Table 4-1: Front Panel Controls and Indicators (Cont.)
Number Control/Indicator Description Section
13 OVP/UVL button Over Voltage Protection and Under Voltage limit setting.
-Press once to set OVP using VOLTAGE encoder (the current
display shows “OUP”)
-Press again to set the UVL using VOLTAGE encoder (the current
display shows “UUL”).
14 PREV button
15 PREV indicator Green LED, lights when PREV button is pressed
16 FINE button
17 FINE indicator Green LED, lights when the unit is in Fine mode.
18 ALARM indicator Red LED, blinks in case of fault detection. OVP, OTP Foldback,
19 ON/OFF Switch ON/OFF Switch
Main function: Press PREV to display the output voltage and
current limit setting. For 5 sec. the display will show the setting and
then it will return to show the actual output voltage and current.
Auxiliary function: Front Panel Lock. Press and hold PREV button
to toggle between “Locked front panel” and “Unlocked front panel”.
The display will cycle between “LFP” and “UFP”. Releasing the
PREV button while one of the modes is displayed selects that mode.
Main function: Voltage and Current Fine/Coarse adjustment control.
Operates as a toggle switch. In Fine mode, the VOLTAGE and
CURRENT encoders operate with high resolution and in Coarse
mode with lower resolution (approx. 6 turns).
Auxiliary function: Advanced Parallel Operation Mode Setting.
Enable and AC fail detection will cause the ALARM LED to blink.
5.3
5.4
6.4
43
83-530-000 Rev J
Page 48

Platform A Output Range 7.5V-30V
7
6
J2
SW1
5
Platform B Output Range 40V-300V
7
6
J2
SW1
5
3
4
RS 485/232
OUT
J3
IN
J1
9 8
AC IN PUT
O
3
208 VAC
52 A/ PH
50-6 0Hz
CAUT ION:
TORQ UETE RMINAL
TO 32IN -LBS.
(3.5NM )
1
Safety (PE)
AC IN PUT
3
208VAC
52A/PH
50-60Hz
O
GND must be
connected.
1
2
3
4
RS485/232
OUT
J3
IN
J1
10
9 8
Platform C Output Range 400V-600V
67
J2
SW1
5
2
CAUTION:
TORQUETERMINAL
TO32 IN-LBS.
(3.5NM)
10
2
Safety (PE)
GND must be
connected.
3
4
J1
RS485/232
INOUT
9
J3
10
8
1
AC INP UT
O
3
208VAC
52A/PH
50-60Hz
CAUTION:
TORQUETERMINAL
TO32 IN-LBS.
(3.5NM)
Safety (PE)
GND must be
connected.
Figure 4-2: Rear Panel Connections and switches
44
83-530-000 Rev J
Page 49

Table 4-2: Rear Panel Connections and Controls
Number Item Description
1 AC input connector M6 Stud terminal suitable for ring lugs. 3.7
2 DC output Bus-bars up to 300V models.
Stud terminals for models above 300V.
3 Remote-In
connector
4 Remote Out
connector
5 J1 Analog Remote
connector
6 SW1 Setup switch Nine position DIP switch for selecting remote programming and
7 J2 Remote sense
connector
8 Blank or Option
Plate
9 IEEE switch LAN
switch
10 Ground screw M5x20mm screw for chassis ground connection.
RJ-45 type connector, use for connecting power supplies to RS232
or RS485 port of computer for remote control purposes. When using
several power supplies in a power system, the first unit Remote-In is
connected to the computer and the remaining units are chained,
Remote-In to Remote-Out.
RJ-45 type connector, used for chaining power supplies to form a
serial communication bus.
Connector for remote analog interface. Includes output voltage and
current limit programming and monitoring signals, Shut-off control
(electrical signal), Enable/Disable control (dry-contact), power
supply ok (PS_OK) signal and operation mode (CV/CC) signal.
monitoring modes for Output Voltage, Current Limit and other
control functions.
Connector for making remote sensing connections to the load for
regulation of the load voltage and compensation of load wire drop.
Blank sub-plate for standard units.
Other plates and connectors for options such as Isolated Analog,
IEMD or LAN.
Two position DIP switch for selecting option mode or RS232/485
mode. The options may be IEEE or LAN.
Section
Fig. 4.2
8.3
8.4
8.3
8.4
4.4
4.3
45
83-530-000 Rev J
Page 50

4.3. Rear Panel SW1 Setup Switch
The SW1 Setup switch (see Fig.4-3) is a 9-position DIP switch that allows the user to choose
the following:
Fig. 4-3: SW1 setup DIP switch
4.3.1. SW1 Position Function
Refer to Table 4-3 for description of SW1 position functions. The factory default setting is
Down for all positions. Observe ESD precautions when setting switch positions.
Table 4-3: SW1 Positions Functions
Position Function DOWN (Factory default) UP
SW1-1 Output Voltage remote
Analog programming
SW1-2 Output Current remote analog
programming
SW1-3 Programming range select
(Remote voltage/resistive)
SW1-4 Output Voltage and
Current Monitoring Range
SW1-5 Shut-Off Logic select Off: Low (0-0.6V) or Short
SW1-6 RS232/485 select RS232 interface RS485 interface
SW1-7 Output Voltage
resistive programming
SW1-8 Output Current
resistive programming
SW1-9 Enable/Disable control Rear panel Enable/Disable
Output Voltage
Programmed by Front Panel
Output Current
programmed by Front Panel
0-5V (0-5Kohm) 0-10V (0-10Kohm)
0-5V 0-10V
On: High (2-15V) or Open
Output Voltage
programmed by Front Panel
Output Current
programmed by Front Panel
control is not active
Output Voltage
programmed by remote analog voltage
Output Current
programmed by remote analog voltage
Off: Low (2-15V) or Open
On: High (0-0.6V) or Short
Output Voltage
programmed by external resistor
Output Current
programmed by external resistor
Rear panel
Enable/Disable control is active
4.3.2. Resetting the SW1 switch
Before making any changes to the SW1 switch setting, disable the power supply output
by pressing the front panel OUT button. Ensure that the output voltage falls to zero and
OUT LED is off. Then use any small flat-bladed screwdriver to change the SW1 switch
setting.
46
83-530-000 Rev J
Page 51

4.4. Rear Panel J1 Programming and Monitoring Connector
The J1 Programming and Monitoring connector is a DB25 subminiature connector located on
the power supply rear panel. Refer to Table 4-4 for description of the connector functions.
The power supply default configuration is Local operation, which does not require
connections to J1. For remote operation using J1 signals use the plug provided with power
supply or equivalent type. It is essential to use plastic body plug to conform to Safety Agency
requirements. Shielded cable is required to maintain EMC Specification for J1 wires. Connect
the shield to a power supply chassis ground screw.
4.4.1. Making J1 Connections
J1 connector type: AMP, P/N: 747461-3
J1 plug description: AMP, P/N: 745211-2
Wire dimension range: AWG26-22
Extraction tool: AMP, 91232-1 or equivalent.
Manual Pistol grip tool:
Handle: AMP, P/N: 58074-1
Head: AMP, P/N: 58063-1
Before making any connection, turn the power switch to the Off position and wait until the
front panel display has turnedOff.
CAUTION
Connector J1 pins 12, 22 and 23 are connected internally to the negative local
sense (-LS) of the power supply. Do not attempt to bias any of these terminals
relative to the negative local sense.
Use the Isolated Analog interface option for a remote controller which is at a
different potential than the power supply negative output.
To prevent ground loops and to maintain the isolation of the power supply
when programming from J1, use an ungrounded programming source.
WARNING
There is a potential shock hazard at the output when using a power
supply with rated output greater than 40V. Use wires with minimum
insulation rating equivalent to the maximum output voltage of the
power supply.
47
83-530-000 Rev J
Page 52

Table 4-4: J1 Connector Terminals and Functions
J1 contact Signal name Function Section
J1-1 ENA_IN Enable/Disable the power supply output by dry-contact (short/open)
with ENA_OUT.
J1-2
J1-3
J1-47
J1-8 LOCAL/
J1-9 VPGM Input for remote analog voltage/resistance programming of the
J1-10 IPGM Input for remote analog voltage/resistance programming of the
J1-11 VMON Output for monitoring the power supply Output Voltage. 7.6
J1-12 COM Control Common. Return for VMON, IMON, CV/CC, LOC/REM.
J1-13 CV/CC Output for Constant-Voltage/Constant-Current mode indication. 5.9
J1-14 ENA_OUT Enable/Disable the power supply output by dry-contact (short/open)
J1-15 SO Input for Shut-Off control of the power supply output. 5.7
J1-16 PS_OK Output for indication of the power supply status. 5.10
J1-1720
J1-21 LOC/REM
J1-22 VPGM_RTN Return for VPGM input.
J1-23 IPGM_RTN Return for IPGM input.
J1-24 IMON Output for monitoring the power supply Output Current. 7.6
J1-25 P Output for current balance in parallel operation. 6.2
IF_COM Isolated Interface Common. Return for the SO control, PS_OK signal
and for the optional IEEE interface.
N/C No Connection
Input for selecting between Local or Remote analog programming of
REMOTE
N/C No Connection.
SIGNAL
output voltage and output current.
Output Voltage.
Output Current.
Connected internally to the negative local sense (-LS).
with ENA_IN.
Output for indicating if the unit is in Local or Remote analog
programming mode.
Connected internally to the “-LS”.
Connected internally to the “-LS”.
5.8
5.7
7.2
7.17.4
7.17.4
5.8
7.3
7.1
7.4
7.5
7.1
7.4
7.5
48
83-530-000 Rev J
Page 53

5. LOCAL OPERATION
5.1. Introduction
This Chapter describes the operating modes that are not involved in programming and
monitoring the power supply via its serial communication port (RS232/RS485) or by remote
analog signals. Ensure that the REM/LOC LED on the front panel is Off, indicating Local
mode. If the REM/LOC LED is On, press the front panel REM/LOC button to change the
operating mode to local.
For information regarding remote analog programming refer to Chapter 7.
For information regarding usage of the serial communication port refer to Chapter 8.
5.2. Standard Operation
The power supply has two basic operating modes: Constant Voltage Mode and Constant
Current Mode. The mode in which the power supply operates at any given time depends on
the output voltage setting, output current limit setting and the load resistance.
5.2.1. Constant Voltage Mode
a) In constant voltage mode, the power supply regulates the output voltage at the
selected value, while the load current varies as required by the load.
b) While the power supply operates in constant voltage mode, the VOLTAGE LED on
the front panel illuminates.
c) Adjustment of the output voltage can be made when the power supply output is
enabled (Output On) or disabled (Output Off). When the output is enabled, simply
rotate the VOLTAGE encoder knob to program the output voltage. When the output is
disabled, press the PREV button and then rotate the VOLTAGE encoder knob. The
VOLTAGE meter will show the programmed output voltage for 5 seconds after the
adjustment has been completed. Then the VOLTAGE meter will display “OFF”.
d) Adjustment resolution can be set to coarse or fine resolution. Press FINE button to
select between the lower and higher resolution. The FINE LED turns On when the
resolution is set to FINE.
If after completing the adjustment, the display shows a different value than the
setting, the power supply may be at current limit. Check the load condition and
The maximum and minimum setting values of the output voltage are limited by
the Over Voltage protection and Under Voltage limit setting. Refer to Sections
NOTE
the power supply current limit setting.
NOTE
5.3 and 5.4 for more details.
49
83-530-000 Rev J
Page 54

5.2.2. Constant Current Operation
a) In constant current mode, the power supply regulates the output current at the
selected value, while the voltage varies with the load requirement.
b) While the power supply is operating in constant current mode, the CURRENT LED on
the front panel illuminates.
c) Adjustment of the output current can be made when the power supply output is
enabled (Output On) or disabled (Output Off).
Disabled output (Off): Press PREV button and then rotate the Current encoder
knob. The CURRENT meter will show the programmed current for 5 seconds after
the adjustment has been completed. Then the VOLTAGE meter will display
“OFF”.
Enabled output, power supply in Constant Voltage mode: Press the PREV button
and then rotate the CURRENT encoder knob. The CURRENT meter will show the
programmed current limit for 5 seconds after the adjustment has been completed,
and then will return to show the actual load current.
Enabled output, power supply in Constant Current mode: Rotate the CURRENT
encoder knob to adjust the current limit.
d) Adjustment resolution can be set to Coarse or Fine adjustment. Press the FINE
button to select between the Coarse and Fine resolution. The FINE LED turns On
when the resolution is set to FINE.
5.2.3. Automatic Crossover
If the power supply operates in Constant Voltage mode, while the load current is
increased to greater than the current limit setting, the power supply will automatically
switch to Constant Current mode. If the load is decreased to less than the current limit
setting, the power supply will automatically switch back to Constant Voltage mode.
5.3. Over Voltage Protection (OVP)
The OVP circuit protects the load in the event of a remote or local programming error or a
power supply failure. The protection circuit monitors the voltage at the power supply sense
points and thus providing the protection level at the load. Upon detection of an Over Voltage
condition, the power supply output will shut down.
5.3.1. Setting the OVP Level
The OVP can be set when the power supply output is Enabled (On) or Disabled (Off). To
set the OVP level, press the OVP/UVL button, so that the CURRENT meter shows
“OUP”. The VOLTAGE meter shows the OVP setting level. Rotate the VOLTAGE
encoder knob to adjust the OVP level. The display will show “OUP” and the setting value
for 5 seconds after the adjustment has been completed and then will return to its previous
state.
To preview the OVP setting, press the OVP/UVL pushbutton so that the CURRENT
display will show “OUP”. At this time, the VOLTAGE display will show the OVP setting.
After 5 seconds, the display will return to its previous state.
5.3.2. Activated OVP Protection Indications
When the OVP is activated the power supply output shuts down. The VOLTAGE display
shows “OUP” and the ALARM LED blinks.
50
83-530-000 Rev J
Page 55

5.3.3. Resetting the OVP Circuit
To reset the OVP circuit after it activates:
a) Reduce the power supply Output Voltage setting below the OVP set level.
b) Ensure that the load and the sense wiring are connected properly.
c) There are four methods to reset the OVP circuit.
Press OUT button.
Turn the power supply Off using the AC On/Off switch, wait until the front panel
display turns Off, then turn the power supply On using the AC On/Off switch.
Turn the power supply output Off and then On using the SO control (Refer to
Section 5.7). In this method the power supply should be set to Auto-Restart mode.
Send OUT command via the RS232/485 communication port.
5.4. Under Voltage Limit (UVL)
The UVL prevents adjustment of the output voltage below a certain limit. The combination of
UVL and OVP functions, allow the user to create a protection window for sensitive load
circuitry.
5.4.1. Setting the UVL Level
Setting the UVL can be made when the power supply output is Enabled (On) or Disabled
(Off). To set the UVL level, press the OVP/UVL button TWICE, so that the CURRENT
meter shows “UUL”. The VOLTAGE meter shows the UVL setting level. Rotate the
VOLTAGE encoder knob to adjust the UVL level. The display will show ‘UUL” and the
setting value for 5 seconds after the adjustment has been completed and then will return
to its previous state.
UVL setting values are limited at the maximum level to approximately 5% below the
Output Voltage setting. Attempting to adjust the UVL above this limit will result in no
response to the adjustment attempt. The minimum UVL setting is zero.
5.5. Foldback Protection
Foldback protection will shut down the power supply output if the load current exceeds the
current limit setting level. This protection is useful when the load circuitry is sensitive to an
over current condition.
5.5.1. Setting the Foldback Protection
To arm the Foldback protection, the FOLD button should be pressed so that the FOLD
LED illuminates. In this condition, transition fromConstant Voltage to Constant Current
mode will activate the Foldback protection. Activation of the Foldback protection disables
the power supply output, causes the ALARM LED to blink and displays “Fb” on the
VOLTAGE meter.
51
83-530-000 Rev J
Page 56

5.5.2. Resetting Activated Foldback Protection
There are four methods to reset an activated Foldback protection.
a) Press the OUT button. The power supply output is enabled and the Output Voltage
and current will return to their last setting. In this method, the Foldback protection
remains armed; therefore if the load current is higher than the current limit setting, the
Foldback protection will be activated again.
b) Press the FOLD button to cancel the Foldback protection. The power supply output
will be disabled and the VOLTAGE display will show “OFF”. Press the OUT button to
enable the power supply output.
c) Turn the power supply output Off and then On using the SO control (Refer to Section
5.7). In this method the foldback protection remains armed, therefore if the load
current is higher than the current limit setting the Foldback protection will be
activated.
d) Turn the power supply Off using the switch, wait until the front panel display turns Off,
then turn the unit back ON again. The power supply output is enabled and the Output
Voltage and Current will return to their last setting. In this method, the Foldback
protection remains armed; therefore if the load current is higher than the current limit
setting, the Foldback protection will be activated again.
5.6. Output ON/OFF Control
The Output On/Off enables or disables the power supply output. Use this function to make
adjustments to either the power supply or the load without shutting off the ON/OFF switch.
The Output On/Off can be activated from the front panel using the OUT button or from the
rear panel J1 connector. The OUT button can be pressed at any time to enable or disable the
power supply output. When the output is disabled, the output voltage and current fall to zero
and the VOLTAGE display shows “OFF”.
5.7. Output SHUT-OFF (SO) Control via Rear Panel J1 Connector
Contacts 2, 3 and 15 of J1 (Fig.4-2, Item 5) serve as Output Shut-Off (SO) terminals. The SO
terminals accept a 2.5V to 15V signal or Open-Short contact to disable or enable the power
supply output. The SO function will be activated only when a transition from On to Off is
detected after applying AC power to unit. (Thus, in Auto-Restart mode, the output will be
enabled after applying AC power; even if SO is in Off level). After On to Off transition is
detected, the SO will enable or disable the power supply output according to the signal level
or the short/open applied to J1. This function is useful for connecting power supplies in a
“Daisy-chain” (refer to Section 6.3). The SO control can be used also to reset the OVP and
Fold Protection. refer to Section 5.3 and 5.5 for details.
When the unit is shut-off by J1 signal, the VOLTAGE display will show “SO” to indicate the
unit state. J1 contact 15 is the SO signal input and contacts 2 and 3, IF_COM, are the signal
return (connected internally). Contacts 2, 3 and 15 are optically isolated from the power
supply output.
The SO control logic can be selected by the rear panel SW1 Setup switch. Refer to Table 5-1
for SW1 setting and SO control logic.
SW1-5 setting
Down (default)
Up
SO signal level
J1-2(3), 15
2-15V or Open
0-0.6V or Short
2-15V or Open
0-0.6V or Short
Power supply
output
On
Off
Off
On
Display
Voltage/Current
“SO”
“SO”
Voltage/Current
Table 5-1: SO Logic Selection
52
83-530-000 Rev J
Page 57

5.8. Enable/Disable Control via Rear Panel J1 Connector
Contacts 1 and 14 of J1 (Fig.4-4) serve as Output Enable/Disable terminals by switch or
relay. This function is enabled or disabled by the SW1 Setup switch position 9. Refer to
Table 5-2 for Enable/Disable function and SW1 setting.
SW1-9 setting Enable/Disable
Down (Default) Open or Short On Voltage/Current Off
Up
If the Enable/Disable inputs are opened when the unit is in Safe Start mode,
it is required to short the Enable/Disable inputs and then press OUT button or
5.9. CV/CC Signal
CV/CC signal indicates the operating mode of the power supply, Constant Voltage or
Constant Current. CV/CC signal is an open collector output with a 30V parallel zener, at J113, referenced to the COM potential at J1-12 (connected internally to the negative sense
potential). When the power supply operates in Constant Voltage mode, CV/CC output is
open. When the power supply operates in Constant Current mode, CV/CC signal output is
low (0-0.6), with maximum 10mA sink current.
Power supply
inputs
Open Off “ENA” Blinking
Short On Voltage/Current Off
output
Display ALARM LED
Table 5-2: Enable/Disable function and SW1 setting
CAUTION
To prevent possible damage to the unit, do not connect any of the
Enable/Disable inputs to the positive or negative output potential.
send OUT1 command to resume operation
CAUTION
Do not connect CV/CC signal to a voltage source higher than 30VDC, always
connect CV/CC signal to the voltage source with a series resistor to limit the sink
5.10. PS_OK Signal
PS_OK signal indicates fault condition in the power supply. PS_OK is a TTL signal output at
J1-16, referenced to IF_COM at J1-2, 3 (Isolated Interface Common). When a fault condition
occurs, PS_OK level is low, with maximum sink current of 1mA; when no fault condition
occurs, PS_OK level is high with maximum source current of 2mA. The following faults will
set the PS_OK to Fault state:
*OTP*Enable/Disable open
*OVP *SO (Rear panel Shut-Off)
*Foldback *IEEE failure (With optional IEEE interface)
*AC fail *Output Off
current to less than 10mA.
53
83-530-000 Rev J
Page 58

5.11. Safe Start and Auto-Restart Modes
When turning on the power supply, it can start to its last setting of Output Voltage and
Current limit with the output enabled (Auto-restart) or start with the output disabled (Safe
mode). Press and hold the OUT button to select between Safe start and Auto-restart modes.
The VOLTAGE display will continuously cycle between “SAF” and “AUT” every 3 seconds.
Releasing OUT push-button while one of the modes is displayed, selects that mode. The
default setting at shipment is Safe mode.
5.11.1. Automatic Start Mode
In this mode, the power supply restores its last operation setting. Upon start-up, the
output is enabled or disabled according to its last setting.
5.11.2. Safe Start Mode
In this mode, the power supply restores its last operation setting and sets the Output to
Off state. At start-up, the output is disabled and the output voltage and current are zero.
To enable the output and restore the last output voltage and current limit values,
momentarily press OUT button.
5.12. Front Panel Locking
The front panel controls can be locked to protect against an operator accidentally changing
the power supply settings.
5.12.1. Changing the Locking
Press and hold the front panel PREView button. See the voltage display toggle between
locked front panel (“LFP”) and unlocked front panel (“UFP”). Select a mode by releasing
the button when the desired mode is displayed.
5.12.2. Unlocked Front Panel
This is normal operating mode. The front panel controls are enable to program and
monitor the power supply parameters.
5.12.3. Locked Front Panel
When the front panel is locked, the following controls are DISABLED:
VOLTAGE and CURRENT encoders.
FOLD button.
OUT button
The power supply will not respond to attempts to use these controls. The VOLT display
will show “LFP” to indicate that the front panel is locked.
Other buttons, such as PREView and OVP/UVLmay still be used to view settings.
54
83-530-000 Rev J
Page 59

5.13. Over Temperature Protection (OTP)
The OTP circuit shuts down the power supply before the internal components can exceed
their safe internal operating temperature. When an OTP shutdown occurs, the display show
“OTP” and the ALARM LED blinks.
Resetting the OTP circuit can be automatic (non-latched) or manual (latched) depending on
the Safe or Automatic restart mode.
a) Safe start mode: In Safe start mode, the power supply stays off after the over
temperature condition has been removed. The display continues to show “OTP” and the
ALARM LED continues to blink. To reset the OTP circuit, press OUT button (or send OUT
ON command via the serial port).
b) Auto-restart mode: In Auto-restart mode, the power supply recovers to its last setting
automatically when the over temperature condition is removed.
5.14. Last Setting Memory
The power supply is equipped with Last Setting Memory, which stores power supply
parameters at each AC turn-off sequence.
Stored Parameters:
OUT On or Off
Output voltage setting
Output current limit
OVP level
UVL level
FOLD setting
Start-up mode (Safe or Auto-restart)
Remote/Local (Local Lockout will return to Remote mode)
Address setting
Baud rate
Locked/Unlocked Front Panel
55
83-530-000 Rev J
Page 60

6. SERIES AND PARALLEL SUPPLIES
You may connect the outputs of Genesys™ power supplies together to produce:
▬ Voltages greater than any one supply rating (series connection).
▬ Plus and minus polarity (series connection).
▬ More current than any one supply rating (parallel connection).
In addition to connecting the outputs together, analog control connections are used to ensure
the supplies are properly sharing the total voltage or current. Digital remote programming
through the RS232/485, IEMD or LAN is allowed to all supplies.
When a power supply is set to remote analog control then the corresponding
voltage or current encoder, and their PREView settings, will not be affective.
Although the front panel seems like it can be used to adjust the output settings, it
is the analog control lines that actually set the programming limits.
6.1. Series Operation
Power supplies of the SAME MODEL can be connected in series to obtain increased output
voltage. Split connection of the power supplies gives positive and negative output voltage.
CAUTION
NOTE
Do not connect power supplies from different manufacturers in series
or in parallel.
Use only same models for series or parallel connection.
6.1.1. Series Connection for Increased Output Voltage
In this mode, two units are connected so that their outputs are summed. Set the current
limit of each power supply to the maximum that the load can handle without damage. It is
recommended that diodes be connected in parallel with each unit output to prevent
reverse voltage during start up sequence or in case one unit shuts down. Each diode
should be rated to at least the power supply rated output voltage and output current.
Refer to Fig.6-1 and 6-2 for series operation with local and remote sensing.
WARNING
When power supplies are connected in series, and the load or one of
the output terminals is grounded to chassis:
For models up to 60VDC Rated Output, no point may be at a greater
potential of +/-60VDC from ground
For models >60VDC Rated Output no point may be at a greater
potential of +/-600VDC from ground.
When using RS232/485 or IEEE, refer to the OUTPUT TERMINALS
GROUNDING warning, Safety Instructions.
56
83-530-000 Rev J
Page 61

+LS
-LS
+LS
POWER
+S
-S
-LS
+LS
POWER
LOAD
Fig.6-
1: Series connection, local sensing
Fig.6-2: Series connection,
remote
sensing
+S
+S
-LS
+LS
-LS
-S
+S
-S
+
(*)
-
+
(*)
-
POWER
SUPPLY
POWER
SUPPLY
Remote programming in series operation for increased output voltage:
1. Programming by external voltage:
2. Using the SO function and
PS_OK signal:
+
SUPPLY
+
LOAD
(*)
-
-S
-
(*) Diodesare
user supplied.
The analog programming circuits of this power supply are
referenced to the negative Sense (-S) potential. Therefore, the
circuits used to control each series connected unit must be
separated and floated from each other using the
Isolated Analog option.
The Shut-Off and PS_OK circuits are referenced to the isolated
interface common, IF_COM (J1-2,3). The IF_COM terminals of
different units can be connected to obtain a single control circuit
for the power supplies connected in series.
See Section 6.3 for details.
SUPPLY
+
(*)
-
+
-
3. Programming by external resistor:
4. Programming via the Serial
Communication port
(RS232/RS485):
Programming by external resistor is possible.
Refer to Section 7.5 for details.
The communication port is referenced to the IF_COM which is
isolated from the power supply output potential. Therefore power
supplies connected in series can be chained using the RemoteIn and Remote-Out connectors. Refer to Chapter 8 for details.
57
83-530-000 Rev J
Page 62

6.1.2. Series Connection for Positive and Negative Output Voltage
(*)
(*)
(*) Diodesare usersupplied.
In this mode, two units are configured as a positive and negative output. Set the current
limit of each power supply to the maximum that the load can handle without damage. It is
recommended that diodes be connected in parallel with each unit output to prevent
reverse voltage during start-up or in case one of the units shuts down. Each diode should
be rated to at least the power supply rated output voltage and output current. Refer to
Fig.6-3 for this operating mode.
+S
+LS
+LS
-S
-S-LS
+S
+
-
+
-
+
-
POWER
SUPPLY
POWER
SUPPLY
-LS
Fig 6-3: Series connection for positive/negative output voltages
Remote programming in series operation for positive and negative output voltage
1. Programming by external voltage:
2. Using the SO function and PS_OK:
The analog programming circuits of this power supply are
referenced to the negative Sense (-LS) potential. There-fore the
circuits used to control series connected unit must be separated
and floated from each other.
The Shut-Off and PS_OK circuits are referenced to the isolated
interface common, IF_COM (J1-2-3). The IF_COM terminals of
the units can be connected to obtain a single control circuit for
the power supplies connected in series.
3. Programming by external resistor:
4. Programming via the Serial
Communication port
(RS232/RS485):
Programming by external resistor is possible.
Refer to Section 7.5 for details.
The communication port is referenced to the IF_COM which is
isolated from the power supply output potential. Therefore power
supplies connected in series can be chained using the RemoteIn and Remote-Out connectors. Refer to Chapter 8 for details.
58
83-530-000 Rev J
Page 63

6.2. Parallel Operation
Up to four units of the SAME VOLTAGE and CURRENT RATING can be connected in
parallel to provide up to about four times the output current capability of one supply. One of
the units operates as a master and the remaining units are slaves. The slave units are
analog programmed by the master unit.
In remote digital operation (RS232/485, IEMD or LAN), only the master unit is programmed
by the computer although measurements and status may be read back from the slaves.
In the simplest parallel setup, the slaves output current merely follows the master’s. A
shut-off daisy chain may be added so when one supply output turns off or on, they all will.
The Advanced Parallel option is a firmware setting which adds operator convenience by
making the Master show the sum of all supply’s currents while the slave front panels are
disabled.
6.2.1. Basic Parallel Operation
In this method, setting the units as Master and Slaves is made by the rear panel J1
connections and the setup switch SW1. Each unit displays its own output current and
voltage.
Make sure that the connection between –V terminals is reliable to avoid
Disconnection may cause damage to the power supply.
CAUTION
disconnection during operation.
With local sensing it is important to minimize the wire length and resistance. Also
the positive and negative wire resistance should be close as possible to each
other to achieve current balance between power supplies.
6.2.2. Setting up the Master Unit
First understand if your load is being driven by a regulated voltage (CV mode) or a
regulated current (CC mode).
For a voltage driven load (CV): set the slaves for voltage limits that are higher
than will be reached by the master.
For a current driven load (CC): the Master unit should be programmed to the total
load current divided by the number of units in the system. The slaves must be set
to voltage limits higher than will be seen at the master.
The master may use local voltage sensing as shown in Figure 6-4. For a voltage driven
load (CV), the master may use remote voltage sensing to the load as shown in
Figure 6-5.
NOTE
59
83-530-000 Rev J
Page 64

6.2.3. Setting up the Slave Units
The slaves must always run in constant current (CC) mode. This is ensured by always
setting the slave’s voltage limit higher than the actual output voltage and letting the J1-10
IPGM signal regulate their current setting.
Failing to set the slave supply voltage setting high enough will cause
the slave to go into constant voltage (CV) mode. When this happens,
current will no longer be equally shared between the parallel supplies.
The following settings are used on the slave supply:
a) SW1 pole 2 is UP (on rear panel). This enables remote analog current programming.
b) SW1 pole 1 is DOWN. Remote voltage programming is not allowed for a slave.
c) SW1 pole 3 is DOWN. The slave current limit is a 0 to 5 volt signalfrom the master.
d) Connect short between J1-8 and J1-12 (refer to Table 4-4).
e) Connect J1-10 (IPGM) of the slave unit to J1-25 (P) of the master unit.
During operation the slave units operate as a controlled current source following
the master output current. It is recommended that the power system is designed
so that each unit supplies less than 100% of its current rating because of the
imbalance which may be caused by cabling and connections voltage drop.
6.2.4. Setting Over Voltage Protection (OVP)
WARNING
The master unit OVP should be programmed to the desired OVP level. The OVP of the
slave units should be programmed to a higher value than the master OVP. This prevents
the slave from shutting down before the master does.
Where there is a risk from over voltages, it is recommended to use a Shut-Off daisy chain
(see section TBD) so all power supplies will turn off together.
6.2.5. Setting Foldback Protection (FB)
For systems using a constant voltage (CV) regulated load, foldback protection is
recommended as a protection from accidental short circuits. The foldback protection may
only be set in the master supply. If the master shuts down, it programs the slave units to
zero output voltage.
60
83-530-000 Rev J
Page 65

6.2.6. Connection to the Load
-S+S
+V
-
V
Twisted pair
-
IPGM
+S
-
S
-
S
Twist
ed pair
J1-8 J1
-
12 J1
-
10
-V+V
-S-
LS +LS +S
Twisted pair
+
In parallel operation, power supplies can be connected in local or remote sensing. Refer
to Fig. 6-4 and 6-5 for typical connections of parallel power supplies. The figures show
connection of two units, however the same connection method applies up to 4 units.
Master
As short as possible
Power Supply
J1-25
Slave
P
IPGM
+V
Load
Power Supply
Figure 6-4 Parallel Connection with Local Sensing
With local sensing it is important to minimize the wire length and resistance. Also the
positive and negative wire resistance should be as close as possible to each other to
achieve current balance between power supplies
Master
Power Supply
J1-8 J1-12 J1-10
Slave
Power Supply
-S +S
Figure 6-5 Parallel Operation with Remote Sensing
J1-25
+V
-V
P
Slaves must Local Sense Only
As short as possible
Load
61
83-530-000 Rev J
Page 66

6.3. Daisy-Chain for Shut-Off
Fig. 6
-
6: Daisy
-
chain connection
It is possible to configure a multiple power supply system to shut down all the units when an
“Output Off” command is sent or a fault condition occurs in one of the units.
Setup switch SW1 position 5 should be set to its Down position to enable the Daisy-chain
operation. Other SW1 positions can be set according to the application requirements.
If any one supply turns off for any reason, its PS_OK signal will be set to low level and the
display will indicate “Off” or the fault. The other units will shut off and their display will indicate
a shut-off fault “SO”.
When the “Output On” command is sent or the fault condition is removed, the units will
recover to their last setting according to their Safe start or Auto-restart setting.
Fig.6-6 shows connection of three units, The same connection method applies to systems of
more supplies.
POWER SUPPLY
1
#
J1-2,3 J1-16
IF_COM
PS_OK
J1-15
SO
6.4. Advanced Parallel Operation
In this method, multiple supplies are configured as a basic parallel system but the master
supply is set to be the single-point display for the programming, measurement and status of
all the supplies. The slave supply front panels are essentially disabled.
In an Advanced Parallel system, the output current measured by the master
supply is only the master’s current multiplied by two, three or four (depending on
The total paralleled current may be different, subject to the combined output
It is required to use the shut-off daisy-chain with Advanced Parallel.
POWER SUPPLY
2
#
J1-16
J1-2,3 J1-15
SO
IF_COM
PS_OK
NOTE
the number of slaves).
errors of the slaves.
POWER SUPPLY
#3
J1-16
J1-2,3
IF_COM
PS_OK
J1-15
SO
The wiring for Advanced Parallel, including the loads, sense and J1 analog control, is
identical to the basic parallel system described above. Advanced Parallel is a firmware
feature.
62
83-530-000 Rev J
Page 67

6.4.1. Setting the Supplies for Advanced Parallel
The front panel is used to set a power supply as an Advanced Parallel master or slave.
To set the master, it is required to know how many parallel slaves will be tied to its
output.
a) Depress and hold the FINE button for 3 seconds. The default setting, “H1”, may
appear on the current display.
b) Rotate the current encoder to obtain the desired mode from the table below.
CURRENT Display Operating Mode
H1
H2
H3
H4
S
Single supply (default)
Master supply with 1 Slave supply
Master supply with 2 Slave supplies
Master supply with 3 Slave supplies
Slave supply
Table 6-1: Setting mode of operation
c) To lock in the new master or slave setting, wait a few seconds for the display to clear.
6.4.2. Master and Slave Units Default Operation
a) When a unit is programmed to Slave mode it enters the Remote mode with Local
Lockout. In this mode, the front panel controls are disabled.
b) The slave front panel display will only show “On” or a fault condition.
c) The Slave units parameters will automatically set the following:
Output voltage to ~102% of rated output voltage AST On
Programmed Current to zero OUT On
UVL to zero volts Foldback protection Off
OVP to its maximum value
d) The Master and Slave modes are stored in the power supply EPROM when the AC
power is turned off. The system will return to the Master/Slave mode upon re-
application of AC power.
6.4.3. Current Display Accuracy
In the advanced parallel mode, the Master unit does not display actual total current of all
units in parallel. In this method, the CURRENT display accuracy is 2% +/- 1 count.
In cases that higher accuracy is required, it is recommended to use the basic parallel
operation mode and get the current measurements from each supply and add them to get
the total current.
63
83-530-000 Rev J
Page 68

6.4.4. To Release From Slave Mode
Slave units can be released using the following procedure:
a) Depress FINE button for 3 seconds. The current display changes to show the
master or slave setting.
b) Select “H1” mode using the CURRENT encoder.
c) Depress FINE button again or wait 5 seconds.
d) Turn the AC power Off and On to store the new setting.
e) The front panel will be locked. Unlock it by depressing the PREView button until the
display shows “UFP”.
f) After exiting from Slave operation the unit’s parameters will be set to:
Programmed Voltage to zero AST OFF
Programmed Current to zero OUT OFF
UVL to zero volts Foldback protection OFF
OVP to its maximum value Locked Front Panel
64
83-530-000 Rev J
Page 69

7. REMOTE AND ANALOG PROGRAMMING
7.1. Introduction
The rear panel connector J1 allows the user to program the power supply output voltage and
current limit with an analog device. J1 also provides monitoring signals for output voltage and
output current. The programming range and monitoring signals range can be selected
between 0-5V or 0-10V using the setup switch SW1. When the power supply is in Remote
Analog programming, the serial communication port is active and can be used to read the
power supply parameters.
CAUTION
COM (J1-12), VPGM_RTN (J1-22) AND IPGM_RTN (J1-23) terminals of J1
connect internally to the -Sense potential (-LS). Do not connect these terminals
to any potential other than -Sense (-LS), as it may damage the power supply.
CAUTION
When the Isolated Analog Option is installed, do not apply any signals to the non-
isolated VPGM and IPGM (J1-9 and J1-10) pins. All other J1 features may be
used normally. Refer to Section 4.4 for a description of J1 features.
7.2. Local/Remote Analog Selection
Contact 8 of J1 (Fig.4-4) accepts TTL signal or Open-Short contact (referenced to J1-12) to
select between Local or Remote Analog programming of the output voltage and current limit.
In Local mode, the output voltage and current limit can be programmed via the front panel
VOLTAGE and CURRENT encoders or via the RS232/485 port. In Remote Analog mode, the
output voltage and current limit can be programmed by analog voltage or by programming
resistors via J1 contacts 9 and 10 (Refer to Sections 7.4 and 7.5). Refer to Table 7-1 for
Local/Remote Analog control (J1-8) function and Setup switch SW1-1, 2 setting.
SW1-1, 2 setting J1-8 function
Down (default) No effect Local
Up
Table 7-1: Local/Remote Analog control function
7.3. Local/Remote Analog Indication
Contact 21 of J1 (Fig. 4-4) is an open collector output that indicates if the power supply is in
Local mode or in Remote Analog mode. To use this output, connect a pull-up resistor to a
voltage source of 30Vdc maximum. Choose the pull-up resistor so that the sink current will
be less than 5mA when the output is in low state. Refer to Table 7-2 for J1-21 function.
J1-8 SW1-1 SW1-2 J1-21 signal Analog Mode
TTL “0” or short
TTL “1” or open Down or Up Down or Up Open Local
Down Down Open Local
Down Up
Up Down
Up Up
Output voltage/
Current setting
“0” or Short Remote
“1” or Open Local
00.6V
00.6V
00.6V
Remote
Remote
Remote
Table 7-2: Local/Remote Analog indication
65
83-530-000 Rev J
Page 70

7.4. Remote Voltage Programming of Output Voltage and Current Limit
CAUTION
To maintain the isolation of power supply and prevent ground loops, use an
isolated programming source when operating the power supply via remote
analog programming at J1 connector.
Perform the following procedure t o set the power supply to Remote Voltage programming:
a) Turn the power supply switch to Off.
b) Set setup switch SW1 position1and2to their UP position.
c) Set SW1 position 3 to select programming voltage range according to Table 7-3.
d) Ensure that SW1 positions 3 to select programming voltage r ange according to Table 7-3.
e) Connect a short between J1-8 and J1-12 (refer to Table 4-4).
f) Connect the programming source to the mating plug of J1 as shown in Fig.7-1. Observe
correct polarity fo
r the voltage source.
g) Set the programming sources to the desired levels and turn the power supply ON. Adjust
the programming sources to change the power supply output.
NOTES:
1. SW1 positions, 4, 5, 6 and9are not required for remote programming. Their setting
can be determined according the application.
2. The control circuits allow the user to set the output voltage and current limit up to
5% over the model-rated maximum value. The power supply will operate within the
extended range, however it is not recommended to opera
te the power supply over
its voltage and current rating and performance is not guaranteed.
SW1-3 setting
Table 7-3: SW1-3 Setting and Programming Range
Output Voltage programming
VPGM (J1-9)
J1 connector, rear panel view
OUTPUT CURRENT
PROGRAMMING
+
1012 89
13
25
23 22
Fig. 7-1: Remote voltage programming connection
OUTPUT VOLTAGE
PROGRAMMING
Current limit programming
IPGM (J1-10)
+
1
14
(Use shielded cable Refer to Section 4.4.)
V01-0V01-0PU
V5-0V5-0NWOD
66
83-530-000 Rev J
Page 71

7.5. Resistive Programming of Output Voltage and Current Limit
For resistive programming, internal current sources, for output voltage and/or output current
control, supply 1mA current through external programming resistors connected between J1-9
& 22 and J1-10 & 23. The voltage across the programming resistors is used as a
programming voltage for the power supply. Resistance of 05Kohm or 010Kohm can be
selected to program the output voltage and current limit from zero to full scale.
A variable resistor can control the output over its entire range, or a combination of variable
resistor and series/parallel resistors can control the output over restricted portion of its range.
Perform the following procedure to set the power supply to Resistive programming:
a) Turn the switch to off.
b) Set setup switch SW1 positions 1 and 2 to their UP position.
c) Set SW1 position 3 to select programming resistor range according to Table 7-4.
d) Set SW1 positions 7 and 8 to their UP position to enable resistive programming mode.
e) Connect a short between J1-8 and J1-12 (referto Table 4-4).
f) Connect the programming resistors to the mating plug of J1 as shown in Fig.7-2.
g) Set the programming resistors to the desired resistance and turn the power supply ON.
Adjust the resistors to change the power supply output.
NOTES:
1. SW1 positions 4, 5, 6 and 9 are not required for remote programming. Their setting
can be determined according to the application requirements.
2. The control circuits allow the user to set the output voltage and current limit up to
5% over the model-rated maximum value. The power supply will operate within the
extended range, however it is not recommended to operate the power supply over
its voltage and current rating and performance is not guaranteed.
3. To maintain the temperature stability specification of the power supply, the resistors
used for programming should be stable and low noise resistors, with temperature
coefficient of less than 50ppm.
4. When resistive programming is used, front panel and computer control (via serial
communication port) of output voltage and current are disabled.
SW1-3 setting
UP 0-10Kohm 0-10Kohm
DOWN 0-5Kohm 0-5Kohm
Table 7-4: SW1-3 setting and programming range
Output Voltage programming
VPGM (J1-9)
67
83-530-000 Rev J
Current limit programming
IPGM (J1-10)
Page 72

1
OUTPUT VOLTAGE
J1 connector, rear panel view
PROGRAMMING
OPTIONAL SETS
OPTIONAL SETS
UPPER LIMIT
OPTIONAL SETS
UPPER LIMIT
PROGRAMMING
8
PROGRAMMING
RESISTOR
OUTPUT CURRENT
PROGRAMMING
12
10 9
13
25
OPTIONAL SETS
LOWER LIMIT
23 22
Fig 7-2: Remote resistive programming
7.6. Remote Monitoring of Output Voltage and Current
The J1 connector, located on the rear panel provides analog signals for monitoring the output
voltage and output current. Selection of the voltage range between 0-5V or 0-10V is made by
setup switch SW1-4. The monitoring signals represent 0 to 100% of the power supply output
voltage and output current. The monitor outputs have 500 ohm series output resistance.
Ensure that the sensing circuit has an input resistance of greater than 500 Kohm or accuracy
will be reduced.
Refer to Table 7-5 for required J1 connection, SW1-4setting and monitoring voltage range.
RESISTOR
14
LOWER LIMIT
name
VMON V
IMON I
VMON V
IMON I
Signal function
monitor J1-11
out
monitor J1-24
out
monitor J1-11
out
monitor J1-24
out
Table 7-5 Monitoring signals setting
Notes:
1. Radiated emissions, fcc requirements:
2. Front panel encoders operation:
3. Front panel prev button:
4. Communication:
J1 connectionSignal
Signal (+) Return (-)
Range SW1-4
J1-12 0-5V Down
J1-12 0-10V Up
FCC requirements for radiated emissions use shielded cable for
the analog control signals and connect shield to chassis (As
stud is provided near J1).
In Remote analog mode the output voltage and current can’t be
set by the VOLTAGE and CURRENT encoders.
Use PREV button to display the output voltage and current
setting defined by the encoders or communication.
Remote analog mode, power supply parameters can be
programmed and readback via the communication port except
output voltage and current setting.
68
83-530-000 Rev J
Page 73

8. RS232 & RS485 REMOTE CONTROL
8.1. Introduction
This chapter describes the operation of the GenesysTM10kw and 15kw power supplies via
the serial communication port. Details of the initial set-up, operation via RS232 or RS485, the
command set and the communication protocol are described in this chapter.
8.2. Configuration
8.2.1. Default setting
The power supply is shipped with the following setting:
-Address 6 -Output Off
-Baud-rate 9600 -Start up mode Safe start
-RS232/485 RS232 -OVP Maximum
-V
setting 0 -UVL 0
out
-I
setting Maximum -Foldback Off
out
8.2.2. Address Setting
The power supply address can be set to any address between 0 and 30. Follow the
instructions described below to set the address.
a) If the unit is in Remote mode (front panel REM/LOC LED illuminates), press
REM/LOC button to put the unit into Local mode.
b) Press and hold for approximately 3 sec. the REM/LOC button. The VOLTAGE display
will indicate the communication port address.
c) Using the VOLTAGE adjust encoder, select the address.
-Front panel Unlocked (UFP)
To preview the address at any time, press and hold the REM/LOC button for approx. 3
sec. The VOLTAGE display will indicate the power supply address.
8.2.3. RS232 or RS485 Selection
To select between RS232 or RS485 set the rear panel setup switch SW1-6 position to:
Down for RS232
Up for RS485
8.2.4. Baud Rate Setting
Five optional rates are possible: 1200, 2400, 4800, 9600 and 19200. To select the
desired rate, the following steps should be taken:
a) If the unit is in Remote mode (front panel REM/LOC LED illuminates), press
REM/LOC button to put the unit into Local mode.
b) Press and hold for approx. 3 sec. the REM/LOC button. The CURRENT display will
show the communication port baud Rate.
c) Using the CURRENT adjust encoder, select the desired Baud Rate.
69
83-530-000 Rev J
Page 74

8.2.5. Setting the Unit into Remote or Local Mode
+++
+
IN
8 7 6 5 4 3 2 1
8 7 6 5 4 3 2 1
Shield
Fig8-
1: Rear panel J3 IN/OUT connectors pinout
The unit will be put into Remote mode only via serial communication command.
Commands that will put the unit into Remote mode are:
RST PV n RMT n
OUT n PC n
(for n values see Tables 7-4, 7-5 and 7-6)
There are two Remote modes:
a) Remote: In this mode, return to local can be made by the front panel REM/LOC or via
serial port command RMT 0. Set the unit into Remote mode via serial port RMT 1
command.
b) Local Lockout: In this mode the unit can be returned to Remote mode via the serial
port RMT 1 command or by turning off the AC power until the display turns off and
then recycling AC power. In local Lockout mode, the front panel REM/LOC button is
not active. Set the unit into Local Lockout mode via serial port RMT 2 command.
8.2.6. RS232/485 Port in Local Mode
When the power supply is in local mode, it can receive queries or commands. If a query
is received, the power supply will reply and remain in Local mode. If a command that
affects the output is received, the power supply will perform the command and change to
Remote mode.
8.2.7. Front Panel in Remote Mode
Front panel control in Remote mode is disabled except for:
1. PREV: use to preview the Voltage and Current limit setting.
2. OVP/UVL: use to preview the OVP/UVL setting.
3. LOC/REM: use to set the unit into Local mode.
In Local Lockout mode, only PREV and OVP/UVL are active.
8.3. Rear Panel RS232/485 Connector
The RS232/485 interface is accessible through the rear panel RS232/485 IN and RS485
OUT connectors. The connectors are 8 contact RJ-45. The IN and OUT connectors are used
to connect power supplies in a RS232 or RS485 chain to a controller. Refer to Fig. 8-1 for
IN/OUT connectors.
SG
NC
TXD
-
RXD
NC
TXD
NC
-
TXDRXD
RXD
RX
TX
-
RXD
-
TXD
NC
SG
(connector enclosure)
Tx and Rx are used for RS232 communication. Txd +/- and Rxd +/- are used for RS485
communication. Refer to RS232 and RS485 cable description for connection details.
OUT
70
83-530-000 Rev J
Page 75

8.4. Connecting Power Supplies to RS232 Bus
25 CONNECTOR
TWISTED
9 CONNECTOR
TWISTED
8 PIN CONNECTOR
Fig.8
-
2: RS232 cable with DB25 connector (P/N: GEN/232
-
25)
Fig.8
-
3: RS232 cable with DB9 connector (P/N: GEN/232
-9)Fig.8
-
4: RS485 cable with DB9 connector (P/N: GEN/485
-
9)
8.4.1. Single Power Supply
a) Select the desired interface RS232 or RS485 using rear panel setup switch SW1-6
(Section 0).
RS232: Down position
RS485: Up position
b) Connect rear panel IN connector to the controller RS232 or RS485 port using a
suitable shielded cable.
Refer to Figures 8-2, 8-3 and 8-4 for available RS232 and RS485 cables.
13
1
Sockets
DB-
PIN NO.
1
2
3
7
SHIELD
TX
RX
SG
L=2m typ.
8 PIN CONNECTOR REMARKS
PIN NO.NAME
8
7
1
NAME
SHIELD
RX
TX
SG
PAIR
8
1
L=2m typ.
5
1
Sockets
DB-
PIN NO.
HOUSING
2
3
5
SHIELD
RX
TX
SG
8 PIN CONNECTOR
PIN NO.NAME
HOUSING
7
8
1
NAME
SHIELD
TX
RX
SG
REMARKS
PAIR
8
1
5
1
Sockets
DB-9 CONNECTOR
PIN NO.
HOUSING HOUSING
9
8
1
5
4
SHIELD
-
TXD
+
TXD
SG
-
RXD
+
RXD
PIN NO.NAME NAME
6
3
1
5
4
71
83-530-000 Rev J
L=2m typ.
SHIELD
-
RXD
+
RXD
SG
-
TXD
+
TXD
REMARKS
TWISTED
PAIR
TWISTED
PAIR
8
1
Page 76

8.4.2. Multi Power Supply Connection to RS232 or RS485 Bus
IN
IN
IN
IN
POWER SUPPLY
+++
+
Fig.8
-
6: Serial link cable with RJ
-
45 shielded connectors (P/N: GEN/RJ
-
45)
Up to 31 units can be connected to RS232 or RS485 bus. The first unit connects to the
controller via RS232 or RS485 and the other units are connected with RS485 bus.
a) First unit connection: Refer to Section 8.4.1 for connecting the first unit to the
controller.
b) Other units connection: The other units on the bus are connected via their RS485
interface.
Refer to Figure 8-5 for typical connection.
Set rear panel setup switch SW1-6 to its UP position.
Using the Linking cable (Refer to Fig. 8-6), connect each unit OUT connector to
the next unit IN connector.
8.5. Communication Interface Protocol
RS232/RS485
RS485 RS485
RS485
1
8
8.5.1. Data format
Serial data format is 8 bit, one start bit and one stop bit. No parity bit.
The address (“ADR n”) command must return an “OK” response before any other
8.5.2. Addressing
OUT
POWER SUPPLY
#1
POWER SUPPLY
OUT
POWER SUPPLY
#2
OUT
#3
Fig 8-5: Multiple power supply RS232/485 connection
L=0.5m typ.
PIN NO.
HOUSING HOUSING
SHIELD
SG
1
6
3
5
4
TXD
TXD
RXD
RXD
-
-
PIN NO.NAME
NAME
SHIELD
SG
1
6
3
5
4
RXD
RXD
TXD
TXD
-
-
NOTE
commands are accepted.
OUT
#31
8
1
The Address is sent separately from the command. Refer to section 8.7.3 for details.
8.5.3. End of Message
The end of message is the Carriage Return character (ASCII 13). The power supply
ignores the Line Feed (ASCII 10) character.
8.5.4. Command Repeat
The backslash character “\” will cause the last command to be repeated.
72
83-530-000 Rev J
Page 77

8.5.5. Checksum
The user may add a checksum (optional) to the end of the command. This ensures no
data bits are corrupted by bad wires or noise. The checksum is “$” followed by two hex
characters. If a command or a query has a checksum, the response will also have one.
There is no CR between the command string and the “$” sign.
Example: STT?3A
STAT?$7B
8.5.6. Acknowledge
The power supply acknowledges received commands by returning an “OK” message. If
an error is detected the power supply will return an error message. The rules of
checksum apply also to the acknowledge.
8.5.7. Error Message
If an error is detected in command or query, the power supply will respond with an error
message. Refer to Section 8.6 for details.
8.5.8. Backspace
The backspace character (ASCII 8) clears the last character sent to the power supply.
8.6. Error Messages
The power supply will return error messages for illegal commands and illegal programming
parameters. Refer to Table 8-1 for programming error messages and Table 8-2 for
commands error messages.
Table 8-1: Programming Error Messages
Error Code Description
E01 Returned when program voltage (PV) is programmed above acceptable range.
Example: PV above ‘105% of supply rating’
E02 Returned when programming output voltage below UVL setting.
E04 Returned when OVP is programmed below acceptable range.
Example: OVP less than 5% of supply voltage rating’ plus ‘voltage setting’.
E06 Returned when UVL is programmed above the programmed output voltage.
E07 Returned when programming the Output to ON during a fault shut down.
Table 8-2: Commands Error Messages
Error Code Description
C01
C02 Missing parameter
C03
C04 Checksum error
C05 Setting out of range
Illegal command or query
Illegal parameter
73
83-530-000 Rev J
Page 78

8.7. Command Set Description
8.7.1. General Guide
1. Any command or argument may be in capital letters or small letters.
2. In commands with an argument, a space must be between the command and the
argument.
3. For any command that sets a numeric value, the value may be up to 12 characters
long.
4. Carriage Return: If the CR character (ASCII 13) is received by itself, the power supply
will respond with “OK” and CR.
8.7.2. Command Set Categories
1. Initialization control
2. ID control
3. Output control
4. Status control
8.7.3. Initialization Control Commands
# Command Description
1 ADR n
2 CLS
3 RST
4 RMT
5 RMT?
6 MDAV?
7 \
ADR is followed by address, which can be 0 to 30 and is used to access the power supply.
Clear status. Sets FEVE and SEVE registers to zero (refer to Section 8.12).
Reset command. Brings the power supply to a safe and known state:
Output voltage: zero, Remote: non-lockout remote,
Output current: zero, Auto-start: Off,
Output: Off, OVP: maximum,
FOLD: Off, UVL: zero
The conditional registers (FLT and STAT) are updated, the other registers are not
changed.
Sets the power supply to local or remote mode:
1. RMT 0 or RMTLOC, sets the power supply into Local mode.
2. RMT 1 or RMTREM, sets the unit into remote mode.
3. RMT 2 or RMTLLO, sets the unitinto Local Lockout mode (latched remote mode).
Returns to the Remote mode setting:
1. “LOC” - The unit is in Local mode.
2. “REM” - The unit is in Remote mode.
3. “LLO” - The unit is in Local Lockout (latched remote) mode.
Returns if the Multi-drop option is installed. 1 indicates installed and 0 indicates not
installed.
Repeat last command. If \<CR> is received, the power supply will repeat the last
command.
8.7.4. ID Control Commands
# Command Description
1 IDN? Returns the power supply model identification as an ASCII string: TDK-Lambda, GENX-Y
2 REV?
3 SN?
4 DATE?
Returns the software version as an ASCII string.
Returns the unit serial number. Up to 12 characters.
Returns date of last test. Date format: yyyy/mm/dd
74
83-530-000 Rev J
Page 79

8.7.5. Output Control Commands
# Command Description
Sets the output voltage value in Volts. The range of voltage value is described in Table 7-
1 PVn
2 PV?
3 MV?
4 PCn
5 PC?
6 MC?
7 DVC?
8 STT? Reads the complete power supply status.
9 FILTERnn
10 FILTER? Returns the A to D Converter filter frequency: 18,23 or 46 Hz (default is 18)
11 OUT n
12 OUT?
13 FLD n
14 FLD?
15 FBD nn
16 FBD ?
17 FBDRST
18 OVP n
19 OVP?
20 OVM
21 UVL n
3. The maximum number of characters is 12. See the following examples for PV n format:
PV 12, PV 012, PV 12.0, PV 012.00, etc…
Reads the output voltage setting. Returns the string “n” where “n” is the exact string sent
in the PV n command. When in Local mode, returns the PREVIEW (front panel) settings
in a 5 digits string.
Reads the actual output voltage. Return 5 digits string.
Example: 60V supply sends 01.150, 15.012, 50.000, etc…
Set the output current value in Amperes. The range of current values is described in
Tables 7-4 and 7-5. The maximum number of characters is 12. See the following
examples for PC n format PC 10, PC 10.0, PC 010.00, etc…See Note 1
Reads the output current setting. Returns the string “n” where “n” is the exact string sent
in the PC n command. When in Local mode, returns the PREVIEW (front panel) settings
in a 5 digits string.
Reads the actual output current. Returns 5 digits string.
Example: 200A supply sends 000.50, 110.12, 200.00, etc…See Note 2
Display Voltage and Current data. Data will be returned as a string of ASCII characters. A
comma will separate the different fields. The fields, in order, are: Measured Voltage,
Programmed Voltage, Measured Current, Programmed Current, Over Voltage Set Point
and Under Voltage Set Point.
Example: 5.9999,6.0000,010.02,010.00,7.500,0.000
Returns ASCII characters representing the following data, separated by commas:
MV<actual (measured) voltage> PC<programmed (set) current>
PV<programmed (set) voltage> SR<status register, 2-digit hex>
MC<actual (measured) current> FR<fault register, 2-digit hex>
Example response: MV(45.201),PV(45), MC(4.3257), PC(10), SR(30), FR(00)
Set the low pass filter frequency of the A to D Converter for Voltage and Current
Measurement where nn = 18, 23 or 46 Hz (default is 18)
Turns the output to ON or OFF. Recover from Safe-Start, OVP or FLD fault.
OUT 1 (or OUT ON)-Turn On.
OUT 0 (or OUT OFF)-Turn Off
Returns the output On/Off status string.
ON - output On. OFF - output Off.
Sets the Foldback protection to ON or OFF.
FLD 1 (or FOLD ON) - Arms the Foldback protection
FLD 0 (or FOLD OFF) - Cancels the Foldback protection.
When the Foldback protection has been activated, OUT 1 command will release the
protection and re-arm it, while FLD 0 will cancel the protection.
Returns the Foldback protection status string:
“ON” - Foldback is armed. “OFF” - Foldback is cancelled.
Add (nn x 0.1) seconds to the Fold Back Delay. This delay is in addition to the standard
delay. The range of nn is 0 to 255. The value is stored in eprom at AC power down and
recovered at AC power up.
Supply returns the value of the added Fold Back Delay.
Reset the added Fold Back Delay to zero.
Sets the OVP level. The OVP setting range is given in Table 8-4. The number of
characters after OVP is up to 12. The minimum setting level is approximately 105% of the
Output Voltage setting, or the value in Table 8-4, whichever is higher. The maximum OVP
setting level is shown in Table 5-1. Attempting to program the OVP below this level will
result in an execution error response (“E04”). The OVP setting stays unchanged.
Returns the setting “n” where “n” is the exact string in the user’s “OVP n”. When in Local
mode, returns the last setting from the front panel in a 4 digit string.
Sets OVP level to the maximum level. Refer to Table 8-4.
Sets Under Voltage Limit. Value of “n” may be equal to PV setting, but returns “E06” if
higher. Refer to Table 8-5 for UVL programming range.
75
83-530-000 Rev J
Page 80

# Command Description
22 UVL?
23 AST n
24 AST?
25 SAV
26 RCL
27 MODE?
28 MS?
Returns the setting “n” where “n” is the exact string in the user’s “UVL n”. When in Local
mode, returns the last setting from the front panel in a 4 digit string.
Sets the Auto-restart mode to ON or OFF.
AST 1 (or AST ON): Auto restart On.
AST 0 (or AST OFF): Auto restart Off.
Returns the string auto-restart mode status.
Saves present settings. The settings are the same as power-down last setting. These
settings are erased when the supply power is switched Off and the new “last settings” are
saved.
Recalls last settings. Settings are from the last power-down or from the last “SAV”
command.
Returns the power supply operation mode. When the power supply is On (OUT 1) it will
return “CV” or “CC”. When the power supply is OFF (OUT 0 or fault shutdown) it will
return “OFF”.
Returns the Master/Slave setting. Master: n= 1, 2, 3, or 4 Slave: n=0
NOTES:
1. In Advance parallel mode (refer to Sec. 6.2.1), “n” is the total system current.
2. In Advanced parallel mode, “MC?”returns the Master unit current multiplied by the number
of slave units +1.
76
83-530-000 Rev J
Page 81

8.8. Global Output Commands
8.8.1. Description
Global commands are a way to quickly set all power supplies on the RS-232/485 bus to
the same setting. For example, sending “GOUT OFF” is one way to turn a whole group of
supplies OFF at nearly the same time.
After sending a global command, it is important that the controller wait
200 mSec before sending any more RS-232/485 messages.
If the command contains an error, such as incorrect syntax or range
values, NO error response will be returned by any power supply.
Table 8.5: Global Output Commands
1 GRST Reset. Brings the power supply to a safe and known state:
Output voltage: 0V, output current: 0A, OUT: Off, Remote: RMT 1,
AST: Off OVP: Max, UVL: 0.
The conditional register (FLT and STAT) are updated. Other registers are not
changed.
Non-Latching faults (FB, OVP, SO) are cleared, OUT fault stays
2 GPV n Sets the output voltage value in volts. The range of voltage values is shown in Table
8-7. ‘n’ may be up to 12 char plus dec. pt
CAUTION
3 GPC n Program the output current value in amperes. The range of current values is shown
in Table 8-6. ‘n’ may be up to 12 char plus dec. pt
4 GOUT
5 GSAV
6 GRCL Recall last settings. Settings are from last power-down or from last ‘SAV’ or ‘GSAV’
Turns the output to ON or OFF:
“OUT 1/ON” = turn on
“OUT 0/OFF” = turnoff, clears CV and CC bits in the Status Condition (STAT).
OUT ON will respond with “E07’ if the output cannot be turned on because of a
latching fault (OTP, AC, ENA, SO) shutdown.
Save present settings. Same settings as power-down last settings listed in Error!
Reference source not found. Except the address and Baud rate are not saved
Saves to the RAM. These settings are erased when the supply power is switched off
and the new ‘last settings’ are saved.
command. Address and Baud rate are not recalled so communication is not
interrupted.
77
83-530-000 Rev J
Page 82

Table 8-6: Current programming range
Minimum
Minimum
Maximum
imum
Maximum
Model
(A)
7.5-1000 0.0 1000.0
10-1000 0.0 1000.0
12.5-800 0.0 800.0
20-500 0.0 500.0
25-400 0.0 400.0
30-333 0.0 333.0
40-250 0.0 250.0
50-200 0.0 200.0
60-167 0.0 167.0
80-125 0.0 125.0
100-100 0.0 100.0
125-80 0.0 80.0
150-66 0.0 66.0
200-50 0.0 50.0
250-40 0.0 40.0
300-33 0.0 33.0
400-25 0.0 25.0
500-20 0.0 20.0
Table 8-7: OVP Programming Range Table 8-8: UVL Programming Range
Model
Rated Output Voltage
(V)
7.5-1000 0.75 8.25 7.5-1000 0 7.125
10-1000 1 11 10-1000 0 9.5
12.5-800 1.25 13.75 12.5-800 0 11.875
20-500 2 22 20-500 0 19
25-400 2.5 27.5 25-400 0 23.75
30-333 3 33 30-333 0 28.5
40-250 4 44 40-250 0 38
50-200 5 55 50-200 0 47.5
60-167 6 66 60-167 0 57
80-125 8 88 80-125 0 76
100-100 10 110 100-100 0 95
125-80 12.5 137.5 125-80 0 118.75
150-66 15 165 150-66 0 142.5
200-50 20 220 200-50 0 190
250-40 25 275 250-40 0 237.5
300-33 30 330 300-33 0 285
400-25 40 440 400-25 0 380
500-20 50 550 500-20 0 475
600-17 60 660 600-17 0 570
(V)
(V)
Maximum
(A)
Model
Rated Output Voltage
(V)
Min
(V)
(V)
78
83-530-000 Rev J
Page 83

8.9. Fast Queries
These are commands that read a response very quickly from the power supply. They use
unprintable character codes. They allow the power supply to avoid the normal command
processing delays.
The processing time for these queries is typically 2 mSec, so total query speed is 2 mSec
plus the RS-232/485 transmission time.
Since these queries embed the power supply address (0 to 30), there is no need to first send
the “ADR n” addressing command.
8.9.1. Fast Test for Connection
This is an addressed query that is good for scanning to see what supplies are “on line”. If
no response is returned within 10 mSec, your control program has determined that no
power supply is connected at that address.
Query Format:
Send two bytes of unreadable characters. First:
Byte 1 = 1010 1010 = AA hex
Byte 2 = 000x xxxx (where xxxxx is the address of the supply in binary)
Query Response:
The power supply returns 5 characters:
First a “1” = 31 hex if Multi-drop is enabled
or a “0” = 30 hex if Multi-drop is not enabled
Then four printable characters:
Dollar sign “$”
Checksum (two ASCII hex characters) = “30” or “31”
Carriage-return terminator
8.9.2. Fast Read Registers
This query allows fast polling of the status and error registers for many power supplies on
a RS-232/485 link. It is useful for checking many supplies to verify they are all operating
as expected.
Query Format:
Send two bytes of unreadable characters. First:
100x xxxx (where xxxxx is the address of the supply in binary)
And send it a second time:
100x xxxx send 2 characters sequentially
Query Response:
The power supply returns 16 characters including the contents of the status and
fault registers (see section TBD and Figure TBD).
First twelve bytes contain binary data from six registers:
STAT? SENA? SEVE? FLT? FENA? FEVE?
Then four printable characters:
Dollar sign “$”
Checksum (two ASCII hex characters)
Carriage-return terminator
79
83-530-000 Rev J
Page 84

8.9.3. Read Power-On Time
This query allows you to read how many minutes the power supply has been running
since it was built. The accuracy, in minutes, is not guaranteed for time critical
applications.
Query Format:
Send two bytes of unreadable characters. First:
Byte 1 = 1010 0110 = A6 hex
Byte 2 = 000x xxxx (where xxxxx is the address of the supply in binary)
Query Response:
The power supply returns 12 characters:
First is the minutes as a 32 Bit integer as 8 ASCII Hex bytes
Then four printable characters:
Dollar sign “$”
Checksum (two ASCII hex characters) = “30” or “31”
Carriage-return terminator
8.9.4. Service Request Messages
A Genesys power supply can automatically send messages over the RS-232/485 lines
when there is a change in operating mode or if a fault occurs. These messages are called
Service Requests or SRQs. They are setup with the RS-232/485 status registers (see
Section 8.11 and 8.12).
Since the SRQ messages may be sent from any supply at any time, there is a chance
they can collide with other messages from other supplies. Your controller software has to
be developed enough to read messages that may come at any time, and to recover if
messages are corrupted by collisions.
If you need Service Request messaging, please contact TDK-Lambda for assistance. We
can provide several special communication commands and settings that will help with
this.
8.10. Status and Error Commands
The following commands operate on the power supply status and error registers. They are
used to read operating conditions and fault conditions, they can be set to latch changes in
these conditions, and masks can be set up to send service requests messages if the
conditions change.
Refer to Section 8.11 and Figure 8-7 for more instructions on using these register
commands.
# Command Description
2 FLT? Reads Fault Conditional Register. Returns 2-digit hex.
3 FENA Set Fault Enable Register using 2-digit hex.
4 FENA? Reads Fault Enable Register. Returns 2-digit hex.
5 FEVE? Reads Fault Event Register. Returns 2-digit hex. Clears bits of Fault Event
6 STAT? Reads Status Conditional Register. Returns 2-digit hex.
7 SENA Sets Status Enable Register using 2-digit hex.
8 SENA? Reads Status Enable Register. Returns 2-digit hex.
9 SEVE? Reads Status Event register. Returns 2-digit hex. Clears bits of Status Event
Table 8-9
80
83-530-000 Rev J
Page 85

8.11. Status, Error, and SRQ Registers
Auto Start
AC Fail
8.11.1. General Description
This Section describes the structure and operation of the six status, error, and SRQ
registers. The registers can be set or read via the RS232/RS485 commands.
Refer to Fig. 8-7 for the Status and Error Registers Diagram.
NOTE: these registers operate in a way that is similar to the IEEE-488 and SCPI
registers (as used by the Genesys™ with the “-IEMD” option), but the structure and
command set is different.
Constant Voltage
Constant Current
No Fault
Fault
Fold Enabled
Spare
Local Mode
Spare
Over Temperature
Foldback (tripped)
Over Volt Prot
Shut Off (rear panel)
Output Off (front panel)
Enable Open
Command Error (”Cnn”)
Execution Error (”Enn”)
Query Response (”message”)
Command Response (”OK”)
Status Registers
LSB
MSB
Condition
0
1
CC
2
NFLT
3
FLT
4
AST
5
FDE
6
7
LCL
“STAT?”
Enable
CV
0
“SENA xx”
“SENA?”
Fault Registers
Condition
LSB
0
0
1
AC
2
OTP
3
FLD
4
OVP
5
SO
6
7
ENA
“FLT?”
OFF
MSB
0
0
0
Enable
“FENA xx”
“FENA?”
Event
CV
CC
NFLT
FLT
0
0
0
LCL
“SEVE?”
Event
0
AC
OTP
FLD
OVP
SO
OFF
ENA
“FEVE?”
Response
messages
SRQ
Messages
One response for every command
or query received.
Serial
TXD
“Inn” and CR
One SRQ when SEVE goes
from all zeroes to any bitset.
Setting more SEVE bits does
not cause more SRQs.
Positive Logic:
0 = NoEvent
1 = Event Occured
Fig.8-7: Status and Error Registers Diagram
81
83-530-000 Rev J
Page 86

Conditional Registers
The fault Condition Register and the Status Condition Register are read only registers
that the user may read to see the condition of the supply. Refer to Table 8-8 for
description of the Fault Condition Register bits and Table 8-9 for the Status Condition
register bits.
Table 8-10: Fault Condition Register (FLT?)
BIT Fault name Fault symbol Bit Set condition Bit Reset condition
0 (LSB) Spare bit SPARE Fixed to zero Fixed to zero
1 AC Fail AC AC fail has occurred. The AC input returns to normal.
2 Over
temperature
3 Foldback FOLD Foldback shutdown has
4 Over voltage OVP OVP shutdown has
5 Shut Off SO Rear panel J1 “Shut Off”
6 Output Off OFF Front panel OUT button
7(MSB) Enable ENA Rear panel J1 Enable
OTP OTP shutdown has
occurred.
occurred
occurred.
condition has occurred.
pressed to Off.
terminal (J1-1&J1-14)
opened.
The power supply cools down.
The supply output is turned On by
front panel button or OUT 1 command.
The supply output is turned ON by
front panel button or OUT 1 command.
Rear panel J1 “Shut Off” condition
removed.
The supply output is turned On by
front panel button or OUT 1 command.
Rear panel J1 Enable terminals
closed.
Table 8-11: Status Condition Register (STAT?)
BIT Fault name Fault symbol Bit Set condition Bit Reset condition
0 (LSB) Constant
Voltage
1 Constant
Current
2 No Fault NFLT
3 Fault active FLT One or more faults are
4 Auto-Restart
Enabled
5 Fold
Enabled
6 Spare bit SPARE Fixed to zero. Fixed to zero.
7(MSB) Local Mode LCL Supply in Local mode. Supply in Remote mode or Local-
CV Output is On and the
supply in CV.
CC Output is ON and the
supply in CC.
The power supply is
operating normally or
fault reporting is not
enabled.
See “OUT n” command
in Section 8.7.5.
enabled and occur.
AST Supply is in Auto-Restart
mode (from Front Panel
or serial command).
FDE Fold protection
enabled (from Front
Panel or serial
command).
Output is ON and the supply is not in
CV.
Output is ON and the supply is not in
CC.
One or more faults are active and fault
reporting is enabled (using “FENAxx”).
Fault Event Register cleared (FEVE?).
Supply is in Safe-Start mode (from
Front Panel or serial command).
Fold protection disabled (from Front
Panel or serial command).
Lockout mode.
8.11.2. Service Request: Enable and Event Registers
The conditional Registers are continuously monitored. When a change is detected in a
register bit, which is enabled, the power supply will generate an SRQ message.
The SRQ message is: “Inn” terminated by CR, where the nn is the power supply address.
The SRQ will be generated either in Local or Remote mode.
Refer to Tables 8-10 to 8-13 for details of the Enable and Event registers.
82
83-530-000 Rev J
Page 87

A. Fault Enable Register (FENA nn, FENA?)
The Fault Enable Register is set to the enable faults SRQs.
Table 8-12: Fault Enable Register
BIT
0 (LSB) Spare bit SPARE
1 AC Fail AC
2 Over Temperature OTP
3 Foldback FOLD
4 Over Voltage OVP
5 Shut Off SO
6 Output Off OFF
7(MSB) Enable ENA
Enable
bit name
Fault symbol Bit Set condition Bit reset condition
B. Fault Event Register (FEVE?)
The Fault Event will set a bit if a condition occurs and it is enabled. The register is
cleared when FEVE?, CLS or RST commands are received.
Table 8-13: Fault Event Register
BIT
0 (LSB) Spare bit SPARE
1 AC Fail AC
2 Over Temperature OTP
3 Foldback FOLD
4 Over Voltage OVP
5 Shut Off SO
6 Output Off OFF
7(MSB) Enable ENA
Enable
bit name
Fault symbol Bit Set condition Bit reset condition
User command:
“FENA nn” where nn is
hexadecimal
Fault condition occurs
and it is enabled.
The fault can set a bit,
but when the fault
clears the bit remains
set.
User command: “FENA nn” where
nn is hexadecimal (if nn=”00”, no
fault SRQs will be generated).
Entire Event Register is cleared
when user sends “FEVE?”
command to read the register.
“CLS” and power-up also clear
the Fault Event Register.
C. Status Enable Register (SENA nn, SENA?)
The Status Enable Register is set by the user to enable SRQs from changes in power
supply status.
BIT Status name Status symbol Bit Set condition Bit reset condition
0 (LSB)
1
2
3
4
5
6
7 (MSB)
Constant Voltage
Constant Current
No Fault
Fault active
Auto-Restart enabled
Fold enabled
Spare
Local Mode
Table 8-14: Status Enable Register
CV
CC
NFLT
FLT
AST Always zero Always zero
FDE Always zero Always zero
Spare Always zero Always zero
LCL
User command:
“SENA nn” is
received, where nn is
hexadecimal bits.
“SENA nn”
command
User command: “SENA nn” is
received, where nn is
hexadecimal bits.
If “nn”=00, no SRQ is sent when
there is a change in Status
Condition Register.
“SENA nn” command
83
83-530-000 Rev J
Page 88

D. Status Event Register (SEVE?)
The Status Event Register will set a bit if a change in the power supply status occurs
and it is enabled. The register is cleared when the “SEVE?” or “CLS” commands are
received. A change in this register will generate SRQ.
Table 8-15: Status Event Register (SEVE?)
BIT Status name Status symbol Bit Set condition Bit reset condition
0 (LSB)
1
2
3
4
5
6
7 (MSB)
Constant Voltage
Constant Current
No Fault
Fault active
Auto-Restart enabled
Fold enabled
Spare
Local Mode
CV
CC
NFLT
FLT
0 Always zero
0 Always zero
0 Always zero
LCL Unit is set to Local
Changes in status
occurs and it is
enabled.
The change can set a
bit, but when the
change clears the bit
remains set.
Entire Event Register is cleared
when user sends “SEVE?”
command to read the register.
“CLS” and power-up also clear
the Status Event Register.
8.12. Serial Communication Test Set-Up
Use the following instructions as basic set-up to test the serial communication operation.
8.12.1. Equipment: PC with Windows Hyper Terminal, software installed, Genesys
Power supply, RS232 cable.
8.12.2. PC set-up: 2.1 Open Hyper Terminal…………………….New Connection
2.2 Enter a name
2.3 Connect to…………………………………Direct to Com 1 or Com 2
2.4 Configure port properties: Bits per second……9600
Data bits……………8
Parity……………….None
Stop bits……………1
Flow control……….None
2.5 Open Properties in the program File…………………Properties
2.6 Setting: ASCII Set Up
Select Echo characters locally, select send line ends with line
feed.
TM
8.12.3. Power Supply Set-Up:
Connect the power supply to the PC using the RS232 cable.
Set via the front panel: Baud Rate: 9600, Address: 06 (default).
Set via the rear panel: RS232/485 to RS232 (refer to Section 8.2.3).
84
83-530-000 Rev J
Page 89

8.12.4. Communication Test:
Select a power supply at address 6:
PC: write: ADR 6
Power supply response: “OK”
Command test:
PC write: OUT 1
Power supply response: “OK”
PC write: PV 5.0
Power supply response: “OK”
PC write: PC 10.0
Power supply response: “OK”
The power supply should turn on and the display will indicate the actual output voltage
and the actual output current.
85
83-530-000 Rev J
Page 90

9. ISOLATED ANALOG PROGRAMMING OPTION
9.1. Introduction
Isolated Analog Programming is an internal option card for analog programming of the
GenesysTMpower supply series. The option is factory installed and cannot be obtained with
IEMD or LAN Interfaces. Output Voltage and Current Limit can be programmed and read
back through optically isolated signals which are isolated from all other ground references in
the power supply.
There are two types of Isolated Analog programming cards:
a) 0-5V/0-10V option (PN: IS510): Using 0-5V or 0-10V signals for programming and
readback.
b) 4-20mA option (PN: IS420): Using current signals for programming and readback.
9.2. Specifications
9.2.1. 0-5V/0-10V Option (PN: IS510)
Programming
Inputs
Monitoring
Outputs
Output voltage programming accuracy % +/-1
Output current programming accuracy % +/-1
Output voltage programming temperature coefficient PPM/°C +/-100
Output current programming temperature coefficient PPM/°C +/-100
Input impedance Ohm 1M
Absolute maximum voltage Vdc 0-15
Max. voltage between program inputs and supply outputs Vdc 600
Output voltage monitoring accuracy % +/-1.5
Output current monitoring accuracy % +/-1.5
Output Impedance (see Note) Ohm 100
Max. voltage between monitoring outputs and supply outputs Vdc 600
NOTE:
Use 100Kohm minimum input impedance for the monitoring circuits to minimize the readback error.
9.2.2. 4-20mA Option (PN: IS420)
Programming
Inputs
Monitoring
Outputs
Output voltage programming accuracy % +/-1
Output current programming accuracy % +/-1
Output voltage programming temperature coefficient PPM/°C +/-100
Output current programming temperature coefficient PPM/°C +/-100
Input impedance Ohm 1M
Absolute maximum input current Vdc 0-15
Max. voltage between program inputs and supply outputs Vdc 600
Output voltage monitoring accuracy % +/-1.5
Output current monitoring accuracy % +/-1.5
Maximum load impedance Ohm 100
Max. voltage between monitoring outputs and supply outputs Vdc 600
86
83-530-000 Rev J
Page 91

9.3. Isolated Programming & Monitoring Connector
Fig.9-
1: Isolated Programming & Monitoring connector
Refer to Table 9-1 for detailed description of the rear panel Isolated Programming &
Monitoring connector. To provide the lowest noise performance, it is recommended to use
shielded-twisted pair wiring.
Refer to Fig.9-1 for description of the connector.
Isolated programming plug P/N: MC1.5/8-ST-3.81, Phoenix.
+VPROG_ISO
+IPROG_ISO
GND_ISO
1
Shield
3
2
4
6
5
8
7
Shield
+IMON_ISO
+VMON_ISO
GND_ISO
Table 9-1: Detailed Description of Isolated Programming & Monitoring Connector
Terminal Signal name Function
1 SHLD
Shield, connected internally to chassis
of the supply.
Range 0-5/0-10V
IS510 option
Chassis ground
2 +VPROG_ISO Output voltage programming input 0-5/0-10V 4-20mA
3 +IPROG_ISO Output current programming input 0-5/0-10V 4-20mA
4 GND_ISO Ground for programming signals. Ground Ground
Range 4-20mA
IS420 option
5 GND_ISO Ground for programming signals. Ground Ground
6 +VMON_ISO Output voltage monitoring output 0-5/0-10V 4-20mA
7 +IMON_ISO Output current monitoring output 0-5/0-10V 4-20mA
8 SHLD
Shield, connected internally to chassis
of the supply.
Chassis ground
87
83-530-000 Rev J
Page 92

9.4. Setup and Operating Instructions
CAUTION
To prevent damage to the unit, do not program the output voltage and current to
higher then the power supply rating.
9.4.1. Setting up the power supply for 0-5/0-10V Isolated Programming and Monitoring
Perform the following procedure to configure the power supply.
a) Turn the power supply AC power switch to Off.
b) Connect a short between J1-8 and J1-12 (referto Table 4-4).
c) Set the Setup switch SW1 positions 1 and 2 to their Up position.
d) Set SW1 position 3 to select the programming voltage range: Down=0-5V, Up=0-10V.
e) Set SW1 position 4 to select the monitoring range: Down=0-5V, Up=0-10V.
f) Ensure that SW1 positions 7 and 8 are in their down position.
g) Connect the programming sources to the mating plug of the Isolated Programming
connector. Observe for correct polarity of the voltage source.
NOTE
J1-8 and J1-12 must be shorted together with a jumper.
h) Set the programming sources to the desired levels and turn the power supply ON.
9.4.2. Setting up the power supply for 4-20mA Isolated Programming and Monitoring
Perform the following procedure to configure the power supply:
a) Turn the power supply AC power switch to Off.
b) Connect a short between J1-8 and J1-12 (referto Table 4-4).
c) Set the Setup switch SW1 positions 1 and 2 to their Up position.
d) Set SW1 position 3 to its Up position.
e) Set SW1 position 4 to its Up position.
f) Ensure that SW1 positions 1 and 2 to their Up position.
g) Connect the programming source to the mating plug of the Isolated Programming
connector. Observe for correct polarity of the voltage source.
NOTE
J1-8 and J1-12 must be shorted together with a jumper.
h) Set the programming sources to the desired levels and turn the power supply ON.
CAUTION
When the Isolated Analog Option is installed, do not apply any signals to the
non-isolated VPGM and IPGM (J1-9 and J1-10) pins. All other J1 features may
be used normally. Refer to Section 4.4 for a description of J1 features.
NOTE
SW1 position 3 and 4 must be in their Up position for operation with 4-20mA
Isolated Programming and Monitoring.
88
83-530-000 Rev J
Page 93

10. MAINTENANCE
10.1. Introduction
This Chapter provides information about maintenance, calibration and troubleshooting.
10.2. Units Under Warranty
Units requiring repair during the warranty period should be returned to a TDK-Lambda
Americas Inc. authorized service facility. Refer to the addresses listing on the back cover of
this manual. Unauthorized repairs performed by other than the authorized service facilities
will void the warranty.
10.3. Periodic Maintenance
No routine maintenance of the power supply is required except for periodic cleaning. To
clean, disconnect the unit from the AC supply and allow 60 seconds for discharging internal
voltage. The front panel and the metal surfaces should be cleaned using a damp cloth
containing a mild solution of detergent and water. The solution should be applied onto a soft
cloth, and not directly to the surface of the unit. Do not use aromatic hydocarbons or
chlorinated solvents for cleaning. Use low pressure compressed air to blow dust from the
unit.
10.4. Adjustments and Calibration
No internal adjustment or calibration is required. There is NO REASON to open the power
supply cover. This will void the warranty.
10.5. Parts Replacement and Repairs
As repairs are made only by the manufacturer or by authorized service facilities, no parts
replacement information is provided in the manual. In case of failure, unusual or erratic
operation of the unit, contact a TDK-Lambda Americas Inc. sales or service facility nearest
you. Please refer to the TDK-Lambda Americas Inc. sales offices addresses listing on the
back cover of this user manual.
10.6. Troubleshooting
If the power supply appears to be operating improperly, use the troubleshooting guide to
determine whether the power supply, load or external control circuit are the cause.
Configure the power supply for basic front panel operation and perform the tests of Section
3.8 to determine if the problem is with the supply.
Table 10-1 provides the basic checks that can be performed to diagnose problems, and
references to Sections of this manual for further information.
89
83-530-000 Rev J
Page 94

Table 10-1: Troubleshooting Guide
SYMPTOM CHECK ACTION REF
Is the AC power cord defective? Check continuity, replace if
No output. All displays and indicators
are blank.
Output is present momentarily but
shuts off quickly. The display
indicates “AC”.
Output is present momentarily but
shuts off quickly.The display indicates
“OUP”.
Output voltage will not adjust. Front
panel CC LED is on.
Output voltage will not adjust Front
panel CV Led is on.
Output current will not adjust. Front
panel CV LED is on.
Large ripple present in output. Is the power supply in remote
No output. Display indicates “OUP” Over Voltage Protection circuit is
No output. Front panel ALARM LED
is blinking.
Poor Load regulation. Front
panel CV LED is on.
The front panel controls are
nonfunctional.
Is the AC input voltage within
range?
Does the AC source voltage sag
when load is applied?
Is the power supply configured to
Remote sense?
Is the unit in constant current
mode?
Check if output voltage is adjusted
above OVP setting or below UVL
setting.
Is the unit in constant voltage
mode?
sense?
Is the voltage drop on the load
wire high?
tripped.
Display indicates “SO” Check rear panel J1 Output
Display indicates “OTP” Check if air intake or exhaust
Display indicates “Fb” Check Foldback setting and
Are sensing wires connected
properly?
Is the power supply in
Local-Lockout mode?
3.7
necessary.
Check input AC voltage.
Connect to appropriate voltage
source.
Check input AC voltage.
Connect to appropriate voltage
source.
Check if the positive or
negative load wire is loose.
Check current limit setting and
load current.
Set OVP or UVL so they will
not limit the output.
Check current limit and voltage
setting
Check load and sense wires
connection for noise and
impedance effects. Minimize
the drop on the load wires.
Turn off the AC power switch.
Check load connections. If
analog programming is used,
check if the OVP is set lower
than the output.
Check rear panel J1 ENABLE
connection.
Setup switch SW1 setting. 5.8
Shut-Off connection.
are blocked. Check if the unit
is installed adjacent to heat
generating equipment.
load current.
Connect the sense wires
according to User’s Manual
instructions.
Turn Off the AC power and
wait until the display turns off.
Turn on the AC power and
press front panel REM/LOC
button.
3.6
3.7
3.6
3.9.6
3.10.3
5.2.1
5.2.2
5.3
5.4
5.2
3.9.4
3.10.3
5.3
5.8Display indicates “ENA”
5.7
5.5
3.10.3
8.2.5
90
83-530-000 Rev J
 Loading...