How it Works
Log In / Sign Up
Buy Points
How it Works
FAQ
Contact Us
Questions and Suggestions
Users
TC Helicon
Loading...
A
ADJUSTABLE TIRE RACK
B
BLENDER
4
C
Correct
Create
CRITICAL MASS
6
D
Ditto
2
DITTO MIC LOOPER
7
Double
DUPLICATOR
2
F
FX150
G
Go Guitar
2
GO Guitar PRO
5
GO SOLO
4
GO TWIN
4
Go Vocal
4
GO XLR
5
GoXLR MIC
2
GoXLR MINI
5
H
H1
Harmony 4
HarmonyControl Guitar
2
Harmony-G
2
Harmony-G XT
2
Harmony-M
2
Harmony Singer
HARMONY SINGER 2
6
HARMONY V100
2
M
MCA100
4
MCA 100MIC
Mic Mechanic
MIC MECHANIC 2
5
MIC MECHANIC II
MP-60
3
MP-70
2
MP-75
MP-76
7
MP-85
2
P
Perform-V
11
Perform-ve
4
Perform-VG
5
PERFORM-VK
4
Play Acoustic
11
Play Electric
8
POWERPLUG 12
Q
Quintet
2
Quintet Sysex
R
Reveal 802
S
SINGTHING.
5
T
TALKBOX SYNTH
6
TC-Helicon Perform-VE
TC-Helicon Perform-VK
TC-Helicon VoiceLive 2
2
TC-Helicon VoiceLive 3
TC-Helicon VoiceLive Play GTX
TC-Helicon VoiceLive Touch
TC HELICON VOICEONE
TC-Helicon VoicePrismPlus
TC-Helicon VoiceTone E1
TC-Helicon VSM-200 XT
TC-Helicon VSM-300 XT
V
VL3X
3
VoiceCraft
VoiceDoubler
2
VoiceDoubler Addendum
Voicejam
VOICE JAM STUDIO
4
VoiceLive
2
Voice Prism
2
Loading...
Loading...
Nothing found
H1
User manual
2 pgs
1.4 Mb
0
Table of contents
Loading...
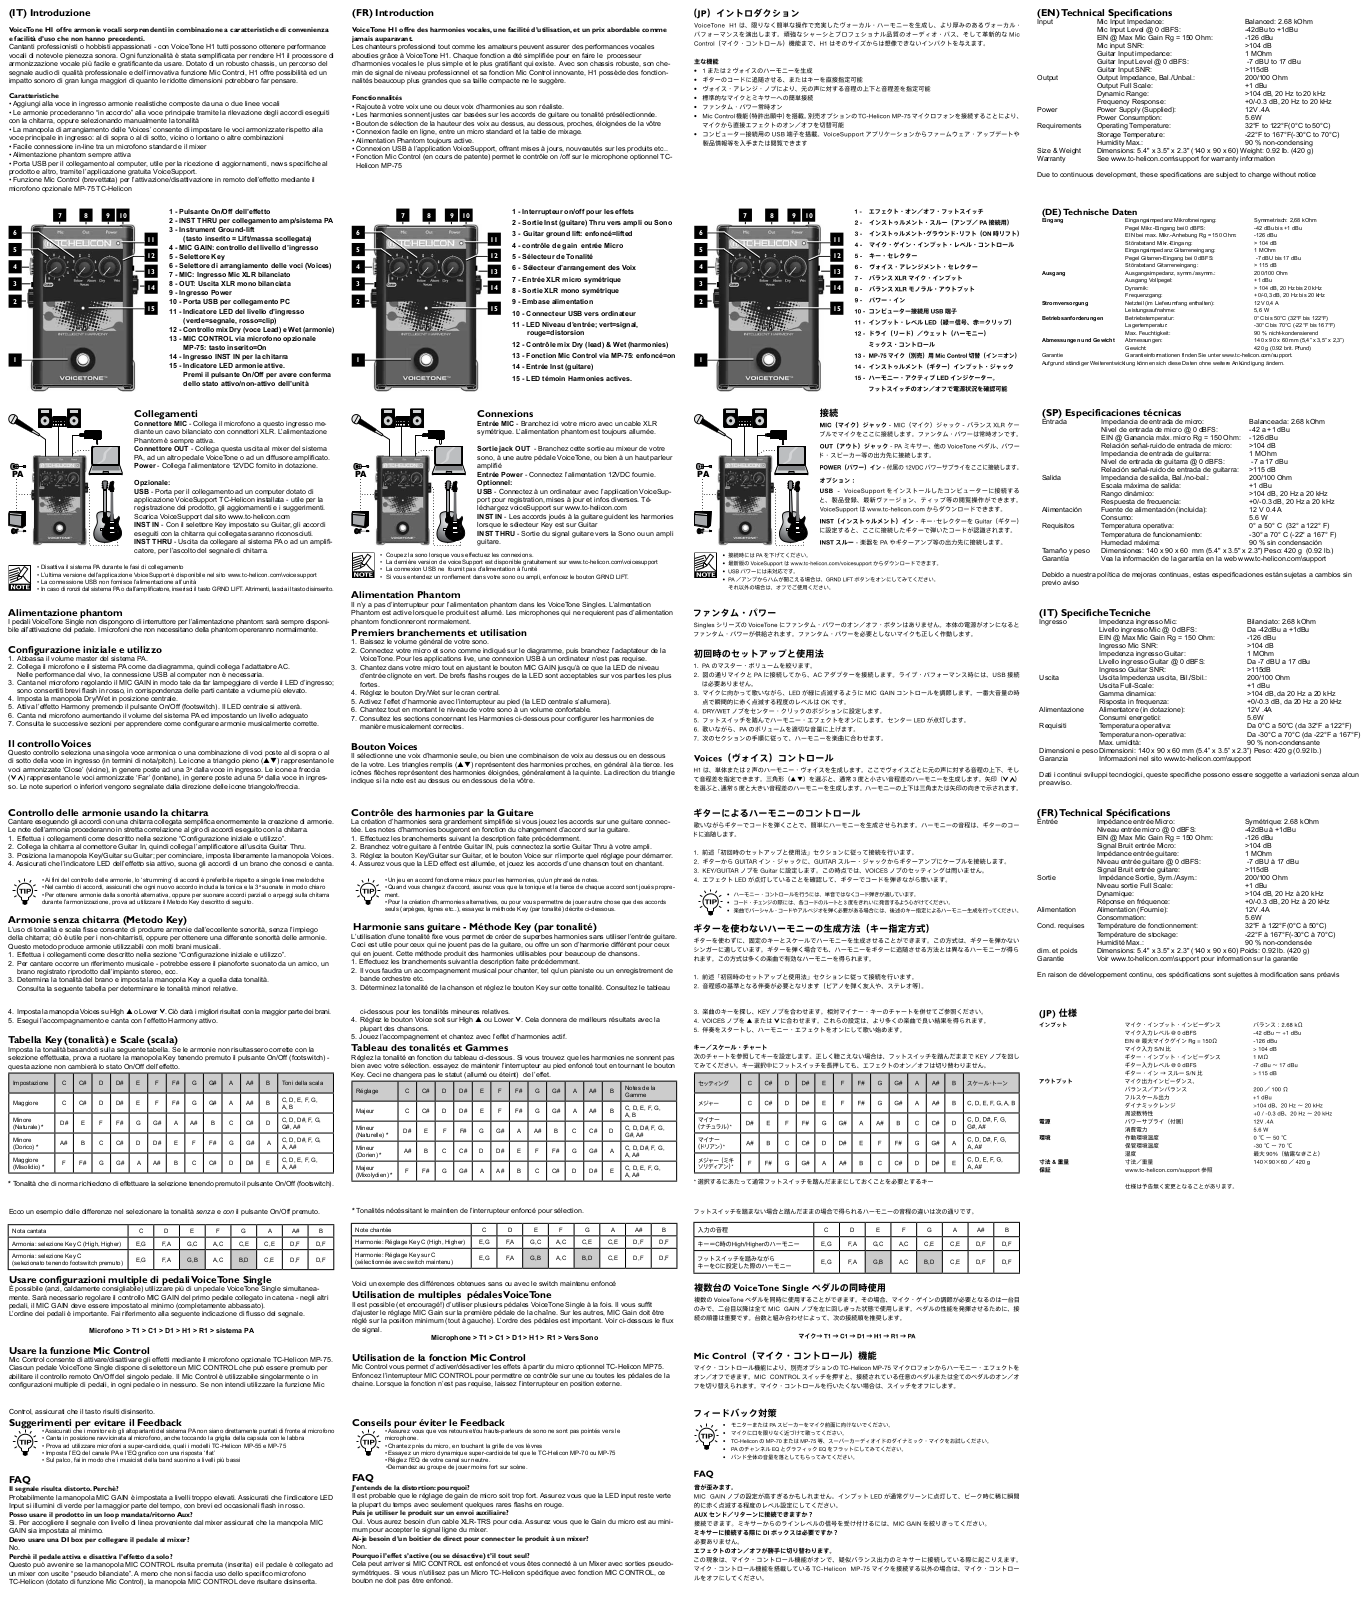
TC Helicon H1 User manual
...
TC Helicon User manual
Download
Text View
Picture View
Page 1
Page 2
Loading...
+
hidden pages
Unhide
You need points to download manuals.
1 point = 1 manual.
You can buy points or you can get point for every manual you upload.
Buy points
Upload your manuals
 Loading...