

Page 1
Master X3 for PowerCore Manual English
Manual
Master X3 for PowerCore
Page 2

SUPPORT AND CONTACT DETAILS . . . . . . . . . . . . . . . . . . . . . . . . . . . . . . . .2
TABLE OF CONTENTS . . . . . . . . . . . . . . . . . . . . . . . . . . . . . . . . . . . . . . . . .3
INTRODUCTION . . . . . . . . . . . . . . . . . . . . . . . . . . . . . . . . . . . . . . . . . . . . .4
GENERAL INFORMATION . . . . . . . . . . . . . . . . . . . . . . . . . . . . . . . . . . . . . .5
GENERIC CONTROLS . . . . . . . . . . . . . . . . . . . . . . . . . . . . . . . . . . . . . . . . .6
MASTER X3 – OVERVIEW . . . . . . . . . . . . . . . . . . . . . . . . . . . . . . . . . . . . .8
MASTER X3 – PARAMETERS . . . . . . . . . . . . . . . . . . . . . . . . . . . . . . . . . .10
MASTER YOUR MIX WITH TC MASTER X3 . . . . . . . . . . . . . . . . . . . . . . . . . .16
PRESET HANDLING . . . . . . . . . . . . . . . . . . . . . . . . . . . . . . . . . . . . . . . . .20
TABLE OF CONTENTS
32
SUPPORT AND CONTACT DETAILS
TTCC SSUUPPPPOORRTT IINNTTEERRAACCTTIIVVEE
The TC Support Interactive website www.tcsupport.tc is designed as an online support
and information center. At the site you can find answers to specific questions regarding
TC software and hardware. All known issues are stored in a database searchable by
product, category, keywords, or phrases. Under the section “My Stuff” you can login to
check the status of your questions, download materials such as product manuals,
software updates and new presets.
This site has been specifically designed to meet the needs of our users. We constantly
update the database and you will find the site to be a huge resource of information.
Browse through Q&A’s and discover new aspects of your TC product.
If you can’t find an answer online, you have the option of submitting a question to our
technical support staff who will then reply to you by e-mail. The TC Support Team is on
constant alert to help you in any way they can.
Contact D
etails:
Alternatively, you may contact the TC Electronic distributor in your area, or write to:
www.tcelectronic.com
© BY TC ELECTRONIC A/S 2007. ALL PRODUCT AND COMPANY NAMES ARE TRADEMARKS OF
THEIR RESPECTIVE OWNERS. VST IS A TRADEMARK OF STEINBERG AG, AUDIO UNITS IS A
TRADEMARK OF APPLE COMPUTER, INC.
ALL SPECIFICATIONS SUBJECT TO CHANGE WITHOUT NOTICE.
ALL RIGHTS RESERVED. TC Electronic is a TC Group company.
UUSSAA::
TTCC EElleeccttrroonniicc,, IInncc..
55770066 CCoorrssaa AAvveennuuee,, SSuuiittee 110077
WWeessttllaakkee VViillllaaggee,, CCAA 9911336622
TTCC EELLEECCTTRROONNIICC AA//SS
C
Cuussttoommeerr SSuuppppoorrtt
SSiinnddaallssvveejj 3344
RRiisssskkoovv DDKK--88224400
DDeennmmaarrkk
Page 3

KKnnoocckk oouutt PPuunncchh ffoorr aannyy mmiixxeess oorr mmaasstteerrss.. PPeerriioodd.. MMaasstteerr XX33 iiss tthhee vviirrttuuaall iinnccaarrnnaattiioonn ooff
tthhee TTCC EElle
eccttrroonniicc FFiinnaalliizzeerr™™,, tthhee ssttaannddaarrdd mmaasstteerriinngg pprroocceessssoorr iinn tthhee pprroo aauuddiioo ffiieelldd..
Master X3 expedites the mastering process by integrating several phases of mastering
into a single, easy to use interface. It features multiband processing with expansion,
compression and limiting separately for each band. High quality uncorrelated dithering is
included as well.
The intuitive user interface features many new ideas to make the critical mastering
process faster and easier. The overall processing characteristics are controlled via “Target
Curves” that simplify the handling by providing a global processing style for all bands in
all modules.
The interaction between the bands can be fine tuned by applying “Target Factors” which
determine the frequency focus of each processing module, significantly reducing the
number of required user parameters to set this complex process up. “Soft Clipping” even
provides “analog” sound whenever desired.
And now put on your musical pair of glasses – and ENJOY!
TC Electronic
WELCOME TO TC MASTER X3
54
GENERAL INFORMATION
GGEETTTTIINNGG SSTTAARRTTEEDD
SSccrroollll WWhheeeell SSuuppppoorrtt
If you are using a host application that supports this feature, all parameters support
scrolling on both Windows XP and Mac OS X. Simply place the mouse over a parameter
value field and use the Scroll Wheel to increment/decrement the associated parametervalue.
KKeeyy CCoommmmaannddss
In most host applications, Plug-Ins support keyboard commands for certain functions.
The following key commands are available for all Plug-In parameters.
KKeeyy CCoommmmaannddss iinn MMaacc OOSS KKeeyy CCoommmmaannddss IInn WWiinnddoowwss
Reset To Default = [Alt] Reset To Default = [Shift] & [Control]
@@4444.. 11 kkHHzz::
mono 21%
stereo 21%
@@4
488 kkHHzz::
mono 23%
stereo 23%
@@8888.. 22 kkHHzz::
mono 44%
stereo 44%
@@9966 kkHHzz::
mono 48%
stereo 48%
DDSSPP UUSSAAGGEE
For each open instance of the Master X3 on PowerCore devices (X8, FireWire, Compact,
Express, mkII, Unplugged), the following DSP usage applies:
Page 4

FFAACCTTOORRYY PPRREESSEETTSS
TC Master X3 comes with factory presets. These presets were designed by audio
professionals who created them in real-life sessions. The presets are extremely useful to
get started quickly, and some users might even feel no need to edit them!
PPLLUUGG--IINN AAUUTTOOMMAATTIIOONN
The TC Master X3 parameters can be automated, in case your host application supports
automation. Please refer to your host application’s manual to check if and how Plug-In
automation works.
GGEENNEERRIICC CCOONNTTRROOLLSS
Before we get into details, here are some basic methods for operating TC Master X.
FFiinnee TTrriimm MMooddee
If you press the [CONTROL] key while you’re moving a fader, you will get into a Fine Trim
Mode. This mode allows you to edit values with extra-high accuracy!
RReesseett
If you want to reset a parameter to its default value, hold the [OPTION (ALT)] key while
clicking on the fader.
GGrroouupp//UUnnggrroouupp
To group/ungroup faders, for example the band levels or the input faders, hold the [Shift]
key while moving the fader(s).
IInnaaccttiivvee CCoonnttrroollss//UUssee ooff ccoolloorr
Inactive controls are grayed out, color signals active controls! In bypass mode all controls
are grayed out.
USING PRESETS / GENERIC CONTROLS
76
Page 5

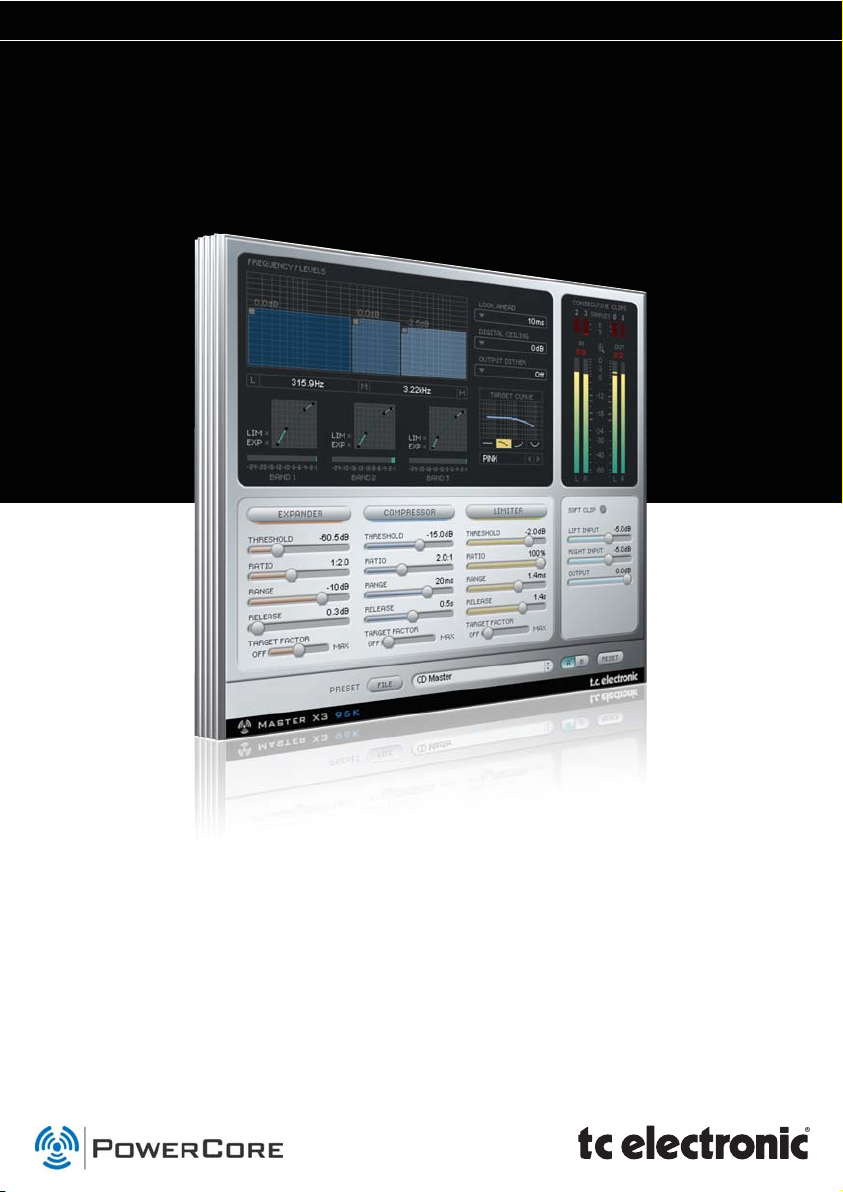
OVERVIEW OVERVIEW
98
Consecutive Clipping Indicator
Band levels
Crossover Frequencies
Input/Output PPM Meters
Limiter Soft Clip Indication
Input Level
Output Level
3-Band Compressor Controls3-Band Expander Controls Preset Manager
Look-ahead Delay Output Dithering
Target Curve
Compressor reduction meters
3-Band Limiter Controls
Meter zoom
Page 6

OOUUTTPPUUTT
Sets the Output level. Make sure you set the OUTPUT LEVEL properly, i.e. make sure
there are no clips displayed in the OUTPUT METERS.
Output-Clips are only displayed, if DIGITAL CEILING is set to 0 dB.
FFRREEQQUUEENNCCYY//LLEEVVEELLSS
Here you set the crossover frequencies
and compressor gains for the 3 bands.
You could adjust the crossovers by
clicking/holding in the numerical fields
and moving the mouse to left/right. A
third possibility is to click into one of
the three blocks and move the mouse
to left/right.
TC MASTER X3 – PARAMETERS
11
MMEETTEERRSS && CCOONNSSEECCUUTTIIVVEE CCLLIIPPPPIINNGGSS
MMeetteerrss
These PPM meters (Peak Program Meters) include a very accurate
Peak Hold function. Set your levels as close to 0 dB as possible,
without distorting the signal. The numerical peak display gives
you the exact reading you require for that.
Clicking on the meters will bring up a pop-up display with a
variety of meters options.
MMeetteerr ZZoooomm
By clicking on the magnifying glass the meter range will change
from -60 dB / 0 dB to -18 dB to 0 dB
TC MASTER X3 – PARAMETERS
10
The minimal bandwidth of a band is 2 octaves. The gains are adjusted by clicking
into one of the 3 blocks and simultaneously moving the mouse up or down.The
exact gain is displayed numerically right above the block.
Holding [Shift] while dragging, will allow for simultaneous level editing when
moving the mouse up or down.
Holding the [Option] key while clicking on a band block, will reset its gain value to
0 dB.
Holding the [Option] key while clicking on the background, will reset all bands.
DDIISSPPLLAAYYSS
BBAANNDD 11//22//33
These displays give you a visual
feedback on the dynamics processing
applied to each band. Clicking on the
display will activate the SOLO function,
clicking again will deactivate it again.
The LEDs below the display show if the band’s Expander or Limiter section are
active. The Gain Reduction Meter displays how much the compressor is working on
the signal.
LLEEFFTT && RRIIGGHHTT IINNPPUUTT
Adjust the signal so you leave the smallest possible headroom and get the compressor
working. The separate faders for left and right channel assist you
fixing level differences between the channels.
To ungroup the faders, hold the <SHIFT> key on your
computer keyboard while moving a channel fader.
CCoonnsseeccuuttiivvee CClliippppiinnggss
The CONSECUTIVE CLIPPINGS display is a highly accurate tool which will display any and
all clips in your material. The numerical reading even counts single clips. The meters give
you an additional visual feedback after the 3rd consecutive clip.
Like in the METERS display, clicking on the clipping meters will bring up a menu with a
variety of options.
Page 7

RRaattiioo
Determines the amount of compression, the higher the ratio the “stronger” the
processing and the lower the remaining dynamics range.
RRaannggee//AAttttaacckk
The Compressor’s attack time determines how fast the compressor will react on signals
exceeding the threshold. Shorter attack times will compress harder but might introduce a
“pumping” sound.
RReelleeaassee
The Release time determines how fast compressed signal returns to unprocessed,
whenever the level falls below the set Threshold.
LLIIMMIITTEERR
OOnn--SSwwiittcchh
3-Band Limiter On/Off
TThhrreesshhoolldd
Whenever the signal surpasses the set Threshold, the Limiter
processes it with a ratio of “infinite-to-one” (?:1) to limit the
possible maximal level.
RRaattiioo//SSooffttcclliipp
Softclip affects the way the Limiter works. In Off position, the signal will be limited
“hard” whenever the Threshold is surpassed. With Softclip active, limiting starts slightly
before the set Threshold and then glides into limiting using a much softer curve, making
the limiting process less audible. The Softclip LED beneath the Meters will indicate that
Softclip is working.
RRaannggee//AAttttaacckk
The Limiter’s attack time determines how fast the limiter will react on signals exceeding
the threshold.
RReelleeaassee
The Release time determines how fast the limited signal returns to unprocessed,
whenever the level falls below the set Threshold.
TC MASTER X3 – PARAMETERS
13
EEXXPPAANNDDEERR
OOnn--SSwwiittcchh
3-Band Expander on/off
TThhrreesshhoolldd
Sets the Expander’s threshold. Values below the threshold
will be lowered in volume according to the ratio set and
for the defined range.
RRaattiioo
The Ratio determines how much the output signal will be lowered in proportion to the
original signal.
RRaannggee
Range defines how far the Expander is able to lower the part of the signal which is
below the set Threshold value.
Example: When you set the Threshold to -40 dB, the Ratio to 1:2.0 and the Range to -10
dB, the Expander will only work when your input signal exceeds -50 dB and doesn’t go
over -40 dB.
RReelleeaassee
Release determines the time the Expander takes to return to the original signal level.
This parameter only has an effect, when the Threshold and Range parameters are set in
a way that the Expander is actually active.
CCOOMMPPRREESSSSOORR
OOnn//OOffff
3-Band Compressor on/off.
TThhrreesshhoolldd
Sets the Compressor’s threshold i.e. above what level it starts
processing. Values exceeding the threshold will be compressed.
TC MASTER X3 – PARAMETERS
12
Page 8

TTaarrggeett FFaaccttoorr
The Target Factor allows fast editing of the relation between the
3 bands, separately for each module. For example: With just one
move of the Target Factor in the Limiter block, you can increase
the focus of the Limiter block on the hi frequency spectrum.
In OFF position, the Target Factor is deactivated for the module – all 3 bands will be
processed with the setting you see on screen. In MAX position, the selected Target Curve
will be applied to the maximum – and the 3 bands will be processed differently.
So in a way you could say: The Target Factor determines the amount of differences
between the bands.
TTaarrggeett CCuurrvveess
The Target Curves determine how the 3 bands work together:
LLiinneeaarr
All 3 bands are processed equally. The Target Factor has no effect.
(Imagine the frequency characteristics of white noise)
PPiinnkk
The Hi band will be processed less.
(Imagine the frequency characteristics of pink noise)
HHyyppeedd
The Hi band will be processed more.
SSmmiilleeyy
Lo and Hi band are processed more.
TC MASTER X3 – PARAMETERS
15
LLOOOOKK--AAHHEEAADD DDEELLAAYY
Master X3 can look into the future, whenever this parameter is active!
This won’t help you fortune-telling, but it’ll help Master X3 to be
prepared for sudden peaks in your material, thus ensuring a much
better quality processing!
DDIIGGIITTAALL CCEEIILLIINNGG
Digital Ceiling will let you define a marginally lower level than 0 dB as
maximal value, so you can ensure that you definitely don’t have
any values reaching 0 dB.
This can be important for mastering – as some devices already
show a clip or overload, when 0 dB is reached for one single
sample – others take up to 5 or more consecutive clips before
they display an overload.
Do not activate Digital Ceiling before you have adjusted the setting to your liking – Master X3
won’t display clips with Digital Ceiling active!
TTAARRGGEETT CCUURRVVEE && TTAARRGGEETT FFAACCTTOORRSS
The Target Curves and Target Factors simplify the handling of Master X3 significantly, by
reducing the amount of parameters necessary to control the Plug-In by approximately
2/3. Thanks to these innovative parameters it will be easy for you to keep an overview of
all relevant settings at all times – and get to a result fast anyway!
Although you are using a 3-Band solution you only have one set of parameters for each
module. This is possible due to the use of the Target Meta-Parameters:
The displayed values are always referring to the center band, with Target Curves you
define the basic “focus” (like “all equal” or “less treble” etc.) as displayed by the little
curve in the Target Curve display – and with the Target Factor you can edit that “focus”,
move the target elsewhere in the frequency spectrum.
TC MASTER X3 – PARAMETERS
14
Page 9

Let’s set the Attack and Release Times to remove the “pumping” from the sound. We
start with small values for both parameters. If the attack time is too short, we may
remove some “kick” from the material. That’s certainly not what we want, so if it
happens, try a greater value. Heavy peaks can be smoothed using the limiter section.
If the release-time is too fast, it will result in a terrible “pumping”, because the
compressor returns to the uncompressed signal immediately whenever the signal falls
below the compressor’s threshold setting. Increase the value of the release time until you
are satisfied with the result. In our example, we have chosen an Attack time of 1ms and
a Release time of 0.2 s. If you don’t get the desired result, try some different crossover
frequencies. Keep in mind that you have three independent bands – why should a bass
drum signal affect the mid and high bands when its peak is in the low end? (We chose
125 Hz and 2.5 kHz as the settings for our example.)
Sometimes it’s easier to adjust the Attack and Release times and the Crossover frequencies
by using extreme values for Threshold and Ratio during setup. This will make the effect of
your settings much easier to hear. Additionally, the band SOLO-Function helps to focus on a
single band.
Now we will adjust the compressor’s threshold and ratio. Set these parameters to the
desired values. In most cases, you would use a low threshold in combination with a
small ratio and vice-versa. Let’s choose a low threshold of -20 dB and a small
compression ratio of 2.5:1 to be satisfied.
Satisfied? Why be satisfied? We have now set the compressor – but with identical
settings for all three bands! With identical settings, we are not taking full advantage of
the multiband capabilities. This is where the famed Target Curves and the Target Factor
come in.
The Target Curves create different settings for each of the three bands. The displayed
values in each fader section are always the mid-band settings. If the Target Curve is set
to “Linear” (or if the Target Factor is set to “Off”), the values will be identical for all
three bands. If you select the “Hyped” curve, for example, the high band will be
compressed more than the others.
The Target Factor defines how much the target curve characteristics will influence the hi
or low band. To set the Target Curve and Factor properly, we recommend that you
compare the processed signal with the uncompressed, because you can use it to change
the overall sound impression. Does your mix lack treble? Use the “Hyped” curve and
adjust the target factor to your liking. Too bright? Select “Pink” and adjust the target
factor. Not enough treble and bass?
Go for “Smiley” and you’ll be smiling too!
MASTER YOUR MIX WITH MASTER X3
17
MMaasstteerr yyoouurr mmiiXX wwiitthh MMaasstteerr XX33!!
...or six easy steps to ultimate happiness! The following chapter introduces the various
modules and features of Master X3 in a “hands-on” tutorial.
Let’s imagine we’re working with some rock music. It’s the final mix from that very
expensive recording studio down the road, but for some reason there is 5.0 dB of
headroom left, wasting precious volume reserves. No compression was applied to the
stereo mix. (Actually, we are happy about this because it leaves all options open).
11.. SSeettuupp
Before we start, let’s set up Master X3 as follows:
LOOK AHEAD DELAY: 3 ms
DIGITAL CEILING: 0 dB
3 BAND LEVELS: 0 dB
OUTPUT: 0 dB
EXPANDER: OFF
COMPRESSOR: OFF
LIMITER: OFF
TARGET CURVE: LINEAR
22.. IInnppuutt LLeevveell AAddjjuussttmmeenntt
Set the input level for both channels to +5.0 dB. In our example, this will bring the input
level up to an optimal value of 0 dB. Adjust this value until no clipping is indicated (i.e.,
until there are no Consecutive Clips in the input). For this example, set it to +4.9 dB.
Remember: as long as you don’t alter any settings in the signal chain before Master X3,
you won’t get any changes in the input level, so there is no risk of clipping once you’ve
set the level correctly!
33.. TTuurrnn oonn tthhee CCoommpprreessssoorr b
blloocckk
The FREQUENCY/LEVELS display in the upper-half of the Plug-In window, the three
displays beneath them, and the Compressor’s parameter faders come to life! The music
has probably come up in volume already, and the sound has changed a little too – and
perhaps some “pumping” is evident. So, let’s set the Compressor properly to get rid of
the pumping, beef up the overall sound, and, yes – we want it louder!
MASTER YOUR MIX WITH MASTER X3
16
Page 10

Use the Expander carefully. The modulated noise of the ground floor level is much more
audible than a higher ground floor level without such modulation.
The Expander’s threshold must be lower than the compressor’s threshold. If you raise it
too much, you might cut into low parts of the signal, such as reverb tails.
The Expander’s range parameter determines the width of the level range. Also, the target
Factor enables you to determine whether to apply different settings to all three bands,
and if so, just how different the settings should be!
66.. AAddjjuusstt tthhee OOuuttppuutt LLeevveell
We are almost finished – just one parameter left: the Digital Ceiling. Set this parameter
to a value lower than 0 dB to prevent unwanted clipping.
The most common value is -0.01 dB. With this setting, the maximum output level is -0.01
dB. No portion of your signal will be able to pass this absolute setting. Now you can be
absolutely sure that there is no clipping – and the difference from 0 dB will be
imperceptible.
If you want to further edit your settings, please make sure that you first switch the Digital
Ceiling back to 0 dB. Otherwise, you won’t be able to tell if there are internal clips!
MASTER YOUR MIX WITH MASTER X3
19
To get a better impression of how the sound – as opposed to the output volume – is
influenced by Master X3, reduce the output level so the bypassed and processed signals
are equally loud – but don’t forget to bring the output level back up in the end!
The band levels in the upper display supply you with an additional tool for easily
adjusting the sound of your mix. Use them like a low, mid, treble EQ!
44.. AAccttiivvaattee tthhee LLiimmiitteerr
We’ve pumped up the volume and reduced the dynamics to optimize the sound and to
make it more compact and “punchy”.
But there’s something really nasty that can happen when you work with digital audio:
digital clipping. If you have more than one tiny sample clip, your whole master will be
worthless for serious use – such as putting the music on CD.
That’s why there is a Limiter block in Master X3. It ensures that you get only the levels
you want, and eliminates the ones that would not only spoil your day but also your
whole mix!
You should use the Limiter carefully, as a limiter is always a somewhat “drastic” tool to
apply to your audio. Just a couple dB should be enough to limit strong peaks. Softclip
will help the limiter work even more smoothly.
For our example we have chosen a threshold of -4 dB. The Attack time is short (50 ms),
so the Limiter is capable of preventing clips. The release time is set to a value that
avoids unwanted pumping (0.3 s).
Set the target factor in the same way you set the compressor. Trust your ears (and the
Consecutive Clips meters) to judge whether a band needs more limiting.
55.. EExxppaanndd!!
By compressing the signal we made it sound louder. However, an unwanted side effect is
that the ground floor level is also brought up - which may cause you to remark: “Where
did all that noise come from?”. The noise will be most evident in the pauses.
The Expander is one possible cure for this. (Obviously, the Expander can’t replace
broadband noise reduction – but it will reduce audible noise when applied to vocal
tracks, for example.)
MASTER YOUR MIX WITH MASTER X3
18
Page 11

2120
IInnttrroodduuccttiioonn
We recommend using the dedicated PowerCore file handling system that, apart from
recall; store and compare facilities, allows for easy exchange of entire preset folders with
other users, between Windows/Mac platforms and also between different host
applications.
FFiillee
Click “File” to open the File menu.
Load P
reset: Select to load presets from the default preset location.
Save Preset: Select to save the preset in My Presets folder.
M
y Presets: Via “My Presets” you are able to load you own presets.
If you chose to store presets in other locations than the “My Preset” folder, these
presets will not appear in the “My Preset” drop down menu. However, you can still
navigate to, and load these presets via the Load Preset function.
PPrreesseett nnaammee
This is the name of the preset.
UUpp//ddoowwnn
The [UP]/[DOWN] arrow keys can be used to browse through all presets.
AA//BB
With the A/B compare function you can easily compare different parameter settings when
working with the plug-in.
When you start working with your preset, the A/B button is grayed out. This state
indicates that the settings in both memory locations A and B are identical - so there is
actually nothing to compare.
PRESET HANDLING
As soon as you touch one of the parameters, the memory location “A” will be active. All
parameter changes will be applied to memory location “A”. If you switch to memory
location “B”, you go back to the starting point, and all further changes will now be
applied to memory location “B”.
Every time you press the A/B button, you will toggle between these two memory
locations.
The A/B memory locations are temporary settings only! Saving a preset, will save the currently
selected memory location only. The setting of the other (hidden) memory location will not be
saved!
RReesseett
Click “Reset” to clear memories A/B and return to the originally recalled preset.
DDEEFFAAUULLTT PPRREESSEETT LLOOCCAATTIIOONNSS
The following locations will describe where you can find the presets, which are stored in
a folder unique to each plug-in:
MMaacc OOSS XX pprreesseett ppaatthhss::
F
actory presets:
<Macintosh HD>/Library/Application Support/TC Electronic/<plug-in name>/Presets/
User pr
esets:
/Users/<user name>/Library/Application Support/TC Electronic/<plug-in name>/Presets/
WWiinnddoowwss pprreesseett ppaatthhss::
F
actory presets
:
C:\Program Files\TC Electronic\<plug-in name>\Presets
U
ser presets:
C:\Documents and Settings\<your user name>\My Documents\TC Electronic\<plug-in
name>\Presets
• To delete a preset file, simply move it to the “Trash” or “Recycle bin”.
• To create a new sub-folder that appears in the plug-in menu, simply create a new
folder in the plug-in folder that resides in the PRESETS folder of the plug-ins default
preset location.
A folder will not appear in the Preset File Menu unless it has at least one preset inside!
PRESET HANDLING
 Loading...