

Page 1
MANUAL
TDM PLUG-IN
VSS3
STEREO SOURCE REVERB
FROM THE LEGENDARY SYSTEM 6000
Page 2
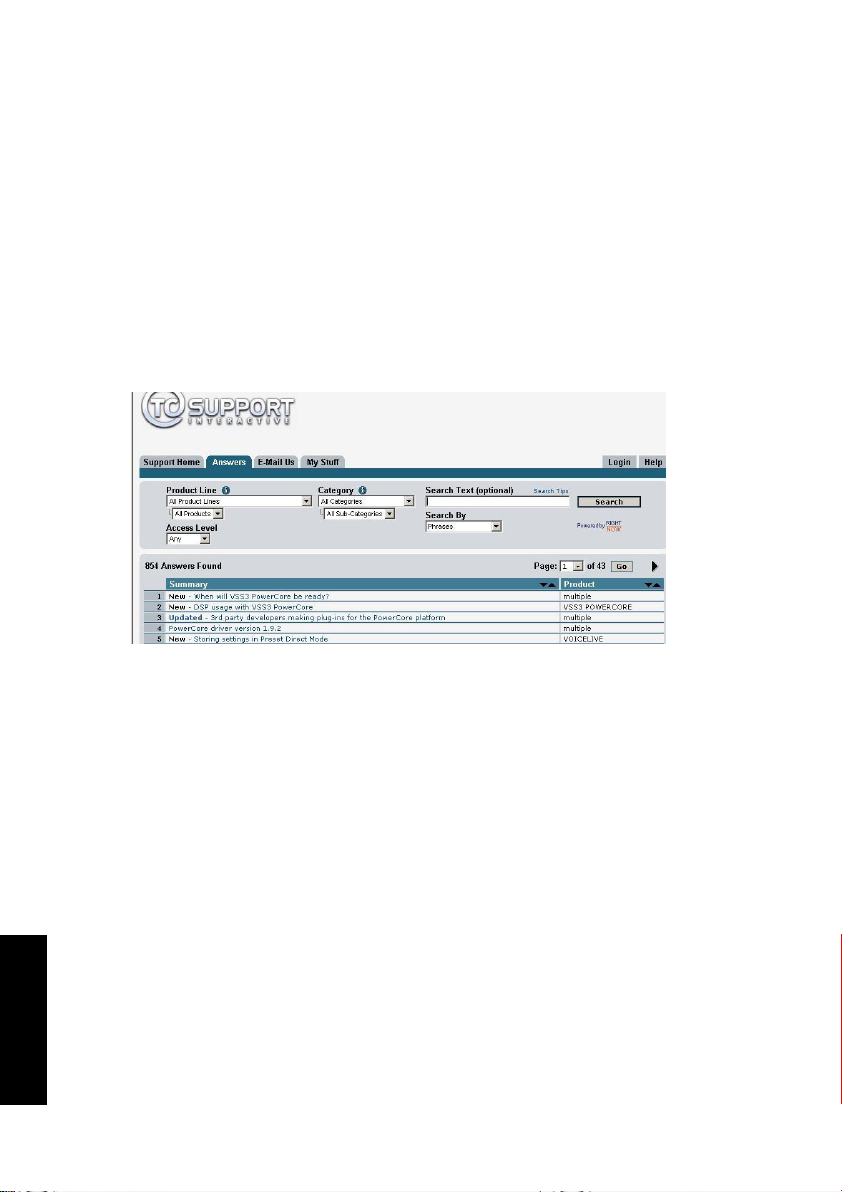
TC Support Interactive
The TC Support Interactive website www.tcsupport.tc is designed as an online support
and information center. At the site you can find answers to specific questions regarding TC software and hardware. All known issues are stored in a database searchable by
product, category, keywords, or phrases. Under the section "My Stuff" you can login to
check the status of your questions, download materials such as product manuals, software updates and new presets.
This site has been specifically designed to meet the needs of our users. We constantly
update the database and you will find the site to be a huge resource of information.
Browse through Q&A's and discover new aspects of your TC product.
If you can't find an answer online, you have the option of submitting a question to our
technical support staff who will then reply to you by e-mail. The TC Support Team is
on constant alert to help you in any way they can.
Contact Details
Alternatively, you may contact the TC Electronic distributor in your area, or write to:
TC ELECTRONIC A/S
Customer Support
Sindalsvej 34
Risskov DK-8240
Denmark
USA:
TC Electronic, Inc.
5706 Corsa Avenue, Suite 107
Westlake Village, CA 91362
www.tcelectronic.com
© BY TC ELECTRONIC A/S 2004. ALL PRODUCT AND COMPANY NAMES ARE
TRADEMARKS OF THEIR RESPECTIVE OWNERS. VST IS A TRADEMARK OF STEINBERG AG, AUDIO UNITS IS A TRADEMARK OF APPLE COMPUTER, INC. ALL SPECIFICATIONS SUBJECT TO CHANGE WITHOUT NOTICE.ALL RIGHTS RESERVED.
TC Electronic is a TC Group company.
EE NN GG LL II SS HH
Page 3

TABLE OF CONTENTS
Contact & Support Information . . . . . . . . . . . . . . . . . . . . . . . . . . . . . . . . . . . . . . . . .2
Table Of Contents . . . . . . . . . . . . . . . . . . . . . . . . . . . . . . . . . . . . . . . . . . . . . . . . . . .3
VSS Introduction . . . . . . . . . . . . . . . . . . . . . . . . . . . . . . . . . . . . . . . . . . . . . . . . . . .4
Global Plug-In Controls . . . . . . . . . . . . . . . . . . . . . . . . . . . . . . . . . . . . . . . . . . . . . .7
System Requirements . . . . . . . . . . . . . . . . . . . . . . . . . . . . . . . . . . . . . . . . . . . . . . . .7
The Plug-In Parameters . . . . . . . . . . . . . . . . . . . . . . . . . . . . . . . . . . . . . . . . . . . . . .9
Preset Management . . . . . . . . . . . . . . . . . . . . . . . . . . . . . . . . . . . . . . . . . . . . . . . .18
Converting VSS3 Presets from System 6000 and Reverb 4000 . . . . . . . . . . . . . . . .19
Compare settings with A/B Mem . . . . . . . . . . . . . . . . . . . . . . . . . . . . . . . . . . . . . . .20
Locking Parameter values using the Parameter Lock . . . . . . . . . . . . . . . . . . . . . . . .21
VSS3
/
3
EE NN GG LL II SS HH
Page 4

EE NN GG LL II SS HH
4/
VSS3
VSS3™ Stereo Source Reverb
Congratulations with the purchase of your new Virtual Space Simulation plug-in for
Pro Tools|HD.
With this plug-in, you now have one of the best sounding, most versatile and easy-touse professional reverbs for music and film/post applications available directly within
your Digital Audio Workstation. Combining ultimate control of directivity in the early
reflections with a transparent and harmonically magnificent diffused field, the art of
reverberation is brought to a new and higher level.
The VSS™3 enables you to add the softest and cleanest ambience to your work that
you have ever heard. With the wide range of presets it will give you the exact post production reverb you are looking for: The VSS™3 Reverb algorithm incorporates dedicated Early Reflection types for motion picture use, e.g. Car, Bathroom and Conference
Rooms.
The VSS3 plug-in runs on Pro Tools|HD and Pro Tools|HD Accel hardware, including
the Venue console, at sample rates from 44.1 kHz to 96kHz, with Pro Tools software
6.9 or higher.
Enjoy!
Page 5

VSS3
/
5
EE NN GG LL II SS HH
VSS Introduction
Constructing a Reverb Preset with the VSS™ algorithm
The following few paragraphs are thoughts about the usage of the VSS™ (Virtual
Space Simulation) algorithm. They should be taken as guidelines rather than fact.
The relationship of Early Reflections and the Reverb tail is very important in this algorithm. Adjusting the balance between the Early Lev and the Rev Lev parameters is one
of the easier ways to make a HUGE difference in the sound of your reverb!
When you start building your preset you should try this:
First turn the Rev Lev all the way down and also turn the Dry level a little down (or all
the way down if you are in a send/return configuration). In a send/return configuration,
push up the return level. You should now hear Early Reflections, a little of the Dry signal and no Reverb Tail.
Then begin changing the Early Type and Early Size parameters until you select a room
shape that compliments the program material.
Re-adjust the wet/dry balance until it is pleasing, then bring up the Rev Lev until the
tail of the reverb becomes audible. Add just enough tail to make it work together.
Adjust the Decay time accordingly.
On some presets you may choose to have very little Early Reflections or none at all.
Certain "ambience" style presets might have little or no "tail". That is up to you.
The VSS3 was designed to have the smoothest Reverb tail ever developed but it is the
Early Reflections that define the "personality" of the room, so try to experiment with
this relationship! By using these parameters correctly you can create a BIG sound
without having a mix swimming in reverb wash.
Note: When using small room sizes and short Decay times on percussive signals, the
Reverb level and Early level must have an approx. level difference of 4dB in order to
prevent a slap effect.
Getting the most out of the Early Reflection Patterns
Early Reflections define the actual feel of the room, where the Reverb tail is the less
defined "bowl" of reflections that follows. The major part of the Early Reflection patterns of the VSS3 are simulations of existing rooms and are based on a large number
of reflections (40-100), which have been processed through an advanced algorithm.
There are a number of different types and sizes covering a lot of different acoustic
spaces that you need for music and post production. As the patterns are simulations
of real rooms, the delay times of the first reflections are sonic and spatially "connected" to the direct signal. Using Pre Delay together with Early Reflections should therefore be considered very carefully, as the acoustic space created by the pattern tends to
"collapse" if too much Pre Delay is added. If you want the well known slap back reverb
effect, you should use Rev Delay on the Reverb tail instead and reduce the level of
the Early Reflections.
Page 6

EE NN GG LL II SS HH
6/
VSS3
Finding the right Early Type & Size for your track :
• Select Early Type and Early Size on the Early page.
• Turn the Rev Level to -100dB.
• Turn the EarlyLevel to 0dB.
• Select an appropriate size. (Note that some sizes of the different types may overlap,
e.g. Church Small is bigger than Conc Hall medium etc.)
Switch between the different types until it matches the signal and the illusion that
you wish to create.
Generally it is advisable to use small room sizes for drums and perc; medium sizes for
piano, guitar & horns and large sizes for vocals & strings. Large Church and Venue
simulate very big rooms and can therefore be used to create an "echo like" effect if
turned up loud. Many of the patterns can be used as a "Doubling" effect if the Reverb
tail is not added.
Using the Hi Color and Lo Cut parameter on the Early Reflection-page
Once you have selected the desired type and size you can use the Hi Color and the Lo
Cut controls to filter the Early Reflections. The Hi Color parameter is an advanced Hi
Cut function. Please note that in most real rooms the reflections are generally much
softer than the direct signal.
Often it can be advisable to use the Hi Color parameter in the range between -4 to -9
to make the Early Reflections blend properly with the direct signal rather than competing with it. The Lo Cut filter is very useful if you want to reduce the Early
Reflections in the area between 125-400Hz. Try this if the Early Reflections seem to
make the sound too full.
We hope that you will enjoy working with the VSS3 !
Page 7

VSS3
/
7
EE NN GG LL II SS HH
Global Plug-In Controls
Keyboard Commands
In most host applications, the VSS3 Stereo Source Reverb supports keyboard commands for certain functions. The following key commands are available for all plug-in
parameters:
Key Commands in Mac OS X:
Fine Adjust = Apple key + mouse movement
Reset To Default = Option + mouse click
Key Commands in Windows:
Fine Adjust = Ctrl + mouse movement
Reset To Default = Alt + Control + mouse click
Automation
Please be aware that automation of certain parameters, like Reverb Type or
the modulation parameters can cause audible artifacts.
In case you need to automate these parameters, you should take care that
changes only take place in parts where no audio is sent to the plug-in.
This is especially valid for the following parameters: Early Type, Early
Size, Reverb Type, Reverb Width and all parameters on the Modulation page.
SYSTEM REQUIREMENTS
• Mac OS X (10.4 or higher) / Windows XP
• Pro Tools TDM 7.2.1 software (or higher)
• Pro Tools HD or HD Accel hardware
• iLok USB key
• iLok.com account and internet access required for product authorization
• System must meet Digidesign’s system requirements for Pro Tools TDM systems!
Page 8

EE NN GG LL II SS HH
8/
VSS3
Focus Fields
You can place your own set of parameters in the 6 focus fields at the bottom
of the plug-in.
Making use of the focus fields can give you a better workflow, since you will not have
to switch pages all the time to find the parameters that you work with.
You can assign any parameter to the focus fields, and the focus fields are stored with
the session as well as when you save your presets.
To change the assignment:
• Press the Assign button. The Assign button as well as one of the Focus Fields will
be highlighted.
• Select the Focus Field you wish to link a parameter to, by clicking on that field.
• Click on the parameter you wish to link to the selected Focus Field.
• To get an unassigned (empty) Focus Field, click again on the selected parameter.
• Once you have finished the assignments, click again on the Assign button to leave
the assign mode.
Overload Indication (O/L)
The two LEDs in the metering section, between the input and output meters, will light
up in case internal DSP overloads are detected. You should lower the input level to
avoid these overloads. To reset the indication, click on the O/L LED.
Tool Tips
Each control on the plug-in user interface (UI) will show a small help text when you
move the mouse over it, called “Tool Tip”. In case you do not want to have these Tool
Tips showing up, click on the question mark icon on the “Main” UI page. The Tool Tip
setting is kept globally for this plug-in.
Page 9

VSS3
/
9
EE NN GG LL II SS HH
The Plug-In Parameters
The plug-in parameters are spread amongst 4 User Interface pages. They are grouped
into the most important parameters on the Main page, the parameters relevant for the
Early Reflections, the Reverb Tail and finally for Modulation.
Main
On the VSS3 Main page, we have grouped the most important parameters of the
VSS3. Also, on this page you can find the plug-ins preset handling. More about the
preset handling can be found in the section "Preset Handling" later in this manual.
Decay
Range: 0.1 to 20s
The Decay time of the Reverb. Usually associated with the time it takes the Reverb
Tail to decay 60dB. This is the overall Master Decay for the four band Decay parameters (found in the REVERB section below) which are multiples of this base Reverb
time.
Rev Delay
Range: 0 to 200ms
A delay to the diffuse field part of the Reverb. Adds additional time between the Early
Reflections and the onset of the "diffuse field" of the Reverb.
Page 10

EE NN GG LL II SS HH
10 /
VSS3
Pre Delay
Range: 0 to 100ms
A delay placed at the input of the algorithm. This parameter defines how long after
the dry sound the Early Reflections and the diffuse field will begin.
Hi Cut
Range: 20Hz to 20kHz
Rolls off the top end as it enters the Reverb. Used in conjunction with Hi Soften and
Hi Decay to "darken" a room.
Hi Decay
Multiplier Range: 0.01 to 2.5
Sets the Decay time for the High-end frequencies of the Reverb diffuse field.
Levels
Rev Level
Range: Off, -97dB to 0dB
The output level of the diffuse field part of the algorithm. When Rev Level is set to
"Off", the effect will consist entirely of Early Reflections.
Early Level
Range: Off, -97dB to 0dB
The output level of the Early Reflections. When Early Level is set to "Off" the Reverb
effect will consist entirely of Reverb Tail.
Dry Level
Range: Off, -97dB to 0dB
Attenuates the Dry signal level on the output of the plug-in, thus leaving the Reverb
and Early Levels unaffected. "Off" equals a "kill-dry" setting.
The lock in the lower right corner of the control will prevent this parameter from being
updated by preset changes initiated from within the plug-in UI. All other actions (like
preset changes and automation data from the host) will pass and re-open the lock.
In Level
Range: Off, -97dB to 0dB
Sets the Input Level for the algorithm.
Out Level
Range: Off, -97dB to 0dB
The overall Output level of the Reverb. Use this parameter to adjust the output level
to fit for following effects in your host application.
Page 11

VSS3
/
11
EE NN GG LL II SS HH
Early
On this page, you can find all the important parameters for the Early Reflections generated by the VSS3.
Early Type
Several types are available - e.g. Airport, Bathroom, Car, Street, etc.
Pick the type that best compliments your material or best represents the effect you
are going for.
Early Color
Range: -40 to +40 (0 = default)
Adjusts the spectral balance in the high end frequencies. This is actually a simple way
of adjusting a complex selection of frequencies.
Early Pos
Here you can select between a Close and a Distant setting. This enables you to
change the distance between the listening position and the source in the same Early
Reflection pattern.
Please note that some of the Early Types only have one position available. The Early
Pos parameter field will be grayed out and show the text "<Fixed Pos>".
Page 12

EE NN GG LL II SS HH
12 /
VSS3
Early Size
Range/Type: Small, Medium or Large
Changes the size of the Early Type parameter.
Some of the Early Types have only a fixed size. For these Early Types, the Early Size
parameter field will be grayed out and show the text "<Fixed Size>".
Early Lo Cut
Range: Off, 25 to 400Hz
Sets the Lo Cut frequency for the Early Reflections.
Early Balance
Range: -100dB R, Center, -100dB L
The left/right balance of the Early Reflections. Allows you to offset the Early
Reflections from the normal center position by attenuating the Early Reflections on
the right or left channel.
Page 13

VSS3
/
13
EE NN GG LL II SS HH
Reverb
On this page, you can find all the important parameters for the Reverb Tail generated
by the VSS3, including the setup of the crossover frequencies and decay time multipliers for the individual frequency bands.
Reverb
Rev Type
Range: Smooth, Natural, Alive, Fast, Alive Wide, Fast Wide
Adjust this parameter with the Early Level turned all the way off and the Rev Level all
the way up. Change the type to get a feel of what each one sounds like.
Rev. Width
Range: Mono, Center, Stereo or Wide
With this parameter you can change the width of the diffuse field. The Mono setting is
where the left and right Reverb Tails are completely identical, the Center setting opens
a bit up in the middle, Stereo is the normal stereo image width and Wide covers the
outside of the stereo image.
Note: The Rev Types Fast Wide and Alive Wide only have one width, indicated as
"<Xtra Wide>" (extremely wide).
Page 14

EE NN GG LL II SS HH
14 /
VSS3
Lo Cut
Range: 20 to 200Hz
Adjustable filter that allows you to remove low frequencies from the Reverb Tail. The
Lo Cut frequency can be perceived as a Threshold frequency. The cut will be performed according to the Lo Damp parameter.
Lo Damp
Range: -18dB to 0dB
Sets the amount of cut in dBs. (See Lo Cut description above).
Hi Cut
Range: 20Hz to 20kHz
Rolls off the top end of the signal as it enters the Reverb. Used in conjunction with Hi
Soften and Hi Decay to "darken" a room.
Hi Soften
Range: -50 to +50 (0 = default)
Hi Soften is a special filter used to "soften" the high frequencies of Reverb. This is not
a simple Hi Cut filter but a complex set of filters working together to remove those frequencies that make a Reverb sound "brittle" or harsh. Hi Soften is scaled/linked to the
Hi Cut and Hi Decay.
Rev Balance
Range: -100dB R, center, -100dB L
The left/right balance of the Reverb. Allows you to offset the diffuse field from the
normal center position by attenuating the Reverb Tail level on the right or left channel.
Diffuse
Range: -50 to +50 (0 = default)
This parameter gives you more or less diffusion than the algorithm designer intended
for the given Decay time. For optimum performance the diffusion is automatically
adjusted behind the scenes whenever you change Decay times. This parameter gives
you the added control to vary the diffusion around this automatic setting.
Decay/Crossover
Lo Decay
Multiplier Range: 0.01 to 2.5
Multiplier for the frequencies below the Lo Xover frequency.
Example: If the Main Decay parameter is set to 2.0sec and the Lo Decay parameter is
set to 1.5, frequencies below the Lo Xover will decay for 3.0 sec. (=1.5 x 2.0sec).
Conversely if this parameter is set to 0.5 the Decay time below the Lo Xover point will
be only 1 sec.
Lo Xover
Range: 20Hz to 500Hz
Sets the frequency at which the transition from the low to the low-mid frequencies
takes place.
Page 15

VSS3
/
15
EE NN GG LL II SS HH
Lo Mid Decay
Multiplier Range: 0.01 to 2.5
The Ratio control multiplier for the low-mid frequencies.
Mid Xover
Range: 200Hz to 2kHz
Sets the frequency at which the transition from the low-mid to the mid frequencies
takes place.
Hi Mid Decay
Multiplier Range: 0.01 - 2.5
The Ratio control multiplier for the mid frequencies. This parameter is normally set to
1.0 as it is the main parameter adjusted by the main Decay parameter. This mid-range
decay control would normally be omitted, however, TC Engineers felt you could use
this parameter as a fine adjustment tool to "tweak" a preset to sound just right without
having to adjust the master Decay parameter.
Hi Xover
Range: 500Hz to 20kHz
Sets the frequency at which the transition from the mid frequencies to the high frequencies takes place.
Hi Decay
Range: 0.01 to 2.5
Multiplier for the frequencies above the Hi Xover frequency.
Example: If the main Decay parameter is set to 2.0sec and the Hi Decay parameter is
set to 1.5, frequencies above the Hi-Xover will decay for 3.0 sec. Conversely if this
parameter is set to 0.5 the Decay time above the Hi Xover point will be 1 sec.
Page 16

EE NN GG LL II SS HH
16 /
VSS3
Modulation
The VSS3 offers intense modulation facilities and to control these, the Modulation
page gives you an extensive series of parameters. All these parameters are condensed
into 2 easy to use modulation sections, where you control different assets of the modulation.
The modulation part of the VSS3 has an in-built set of randomization methods. Every
room in this world sounds different from one second to the next, and with the "random" feature this is perfectly simulated.
Reverb Modulation
The reverb modulation type is a set of very complex LFO patterns that modulates various parts of the reverb, and these patterns are developed based on the many years of
experience and knowledge of the TC crew.
RevMod Type
Off, Smooth 1, Smooth 2, Perc, Wow, Vintage, Wild
Selects the type of modulation.
RevMod Rate
Range: -100, default, +100
Allows you to offset the speed of the LFO from the factory default assigned to each
Type.
Page 17

VSS3
/
17
EE NN GG LL II SS HH
RevMod Width
Range: 0% to 200%
Sets the Width of the modulation.
Space Modulation
The space modulation part imitates the air movement of a room, and this is one of the
things that make the VSS3 very good at simulating the complex patterns of natural
rooms. You can adjust the modulation type's rate, width and depth.
SpcMod Type
(Off, Normal, Fast, Slow, MidFreq, Sync)
Selects the type of Space Modulation.
SpcMod Rate
Range: -100, default, +100
Allows you to offset the speed of the LFO from the factory default assigned to each
type.
SpcMod Width
Range: 0 to 100%
Sets the width of the modulation.
SpcMod Depth
Range: -50, default, +50
Allows you to offset the amount of space modulation from the factory default.
Page 18

EE NN GG LL II SS HH
18 /
VSS3
Preset Management
TC's comprehensive file based preset architecture makes archiving presets a simple
process. This allows you to organize your presets the way you find most comfortable
for your workflow, and to exchange presets with other users, no matter the platform or
application. Presets are saved as discrete files on your hard drive. Once a preset is
saved into the default location, it will automatically appear in the 'File' menu every
time you use the plug-in. The files can then be organized into subfolders, where you
can delete, rearrange or create your own sub-folders to accommodate your needs.
NOTE: A folder will appear in the Preset File Menu if it contains at least one preset.
Next/Previous Presets
From the plug-in's Main page, you can directly jump from one preset to the next (or
previous) by clicking on the up/down arrows right from preset name.
All presets available at the default plug-in preset location will be considered, so you
could in theory reach every preset this way. Direct access to specific presets is done
via the "File" button:
Preset File Menu
Pressing the 'File' button will open the plug-in's File menu. The following options are
available from the File menu.
Loading a Preset
By selecting 'Load', you can navigate to any folder on the system that you have read
access to, including any shared folder. By default, these will be loaded from the
default location for VSS3 presets. Only presets located in the default file location will
appear in the VSS3 pop-up preset menu.
Naming a Preset
• Double click on the name field
• Type in the new name
• Press Enter
Saving a Preset
By selecting 'Save', you can save your preset to any folder on the system that you have
write access to, including any shared folder. By default, presets are saved to the
default location for the VSS3 presets.
Page 19

VSS3
/
19
EE NN GG LL II SS HH
Default Preset Locations
The following locations will describe where you can find the VSS3 presets. The presets
are stored in a folder that is unique to each plug-in:
The plug-in’s own preset handling is storing the presets in the following locations:
Mac OS X:
/Users/Shared/TC Electronic/VSS3/Presets/
W
indows: (System Drive):\Documents and Settings\All Users\Shared Documents\TC
Electronic\VSS3\Presets\
• To delete a file, simply move it to the 'Trash' or 'Recycle bin'.
• To create a new subfolder that appears in the plug-in menu, simply create a new
folder in the plug-in folder that resides in the PRESETS folder of the VSS3 default
preset location.
NOTE: A folder will not appear in the Preset File Menu unless it has at least one preset inside.
Converting VSS3 Presets from System 6000 and
Reverb 4000
In case you are the happy owner of the VSS3 algorithm for System 6000 or the
Reverb 4000, here is something to get you in an even better mood: The VSS3 plug-in
is able to read your System 6000/Reverb 4000 presets.
In order to convert presets from System 6000/Reverb 4000 to VSS3, you need to
store the System 6000/Reverb 4000 presets in a preset file. The file extension has to
be either ".syx" (for example: MyPresets.syx) or .mid for a MIDI file.
The easiest way to export System 6000/Reverb 4000 presets is to use the "export to
file" function from the Icon Editor for Mac/Windows (requires version 3.5 or higher).
Alternatively, you can save a bank to a floppy disk (System 6000 only) or do a SysExDump to a MIDI file in your sequencer.
NOTE: For details regarding the export of presets from System 6000 or Reverb 4000,
please refer to your System 6000/Reverb 4000 and Icon Editor documentation.
The generated SysEx/MIDI preset file needs to be placed in the default VSS3 Preset
folder (at the root level; subfolders are not considered). The file needs to have either
the extension ".syx" (for example: MyPresets.syx) or .mid for a MIDI file.
Note: In case you are running the Icon Editor on the same computer as the VSS3
plug-in, the VSS3 will automatically search for preset files in the default locations for
Reverb 4000 and System 6000 files. You do not need to copy the files!
Once your preset file has been placed in the default VSS3 Preset folder, it will show
up the next time you click the "File" button. At the top of the pop-up list you'll find a
section called "Convert", and the name of your preset file will be listed here.
Page 20

EE NN GG LL II SS HH
20 /
VSS3
To convert your preset file to VSS3 presets, simply select the name of the preset file.
The conversion will only take a few seconds and only needs to be done once.
When the conversion is done, all presets from your preset file will be available in a
subfolder that has the same name as the preset file had. The presets will show up in
the same bank structure as on the System 6000, and presets that are not based on
the VSS3 algorithm will not be converted.
The preset file will disappear from the Convert section of the file menu.
Compare settings with A/B Mem.
With the A/B compare function you can easily compare different parameter settings
when you work with your music.
You have two buttons: the "Mem" and the "A/B" button.
Page 21

EE NN GG LL II SS HH
VSS3
/
21
When you start working with your preset, the A/B button is grayed out. This state indicates that the settings in both memory locations A and B are identical - so there is
actually nothing to compare.
As soon as you touch one of the parameters, the memory location "A" will get active,
and the "A"-part of the A/B button will light up. All parameter changes will be applied
to memory location "A". If you switch to memory location "B", you get back to your
starting point, and all further changes will now be applied to memory location "B".
Every time you press the A/B button, you will toggle between these two memory locations.
NOTE: The A/B memory locations are temporary settings only! Saving a preset (e.g. via
the File button or with your session) will only save the currently selected memory location. The setting of the other (hidden) memory location will not be saved!
The "Mem" button will reset the A/B memory locations to the current setting.
Locking Parameter values
- using the Parameter Lock
The parameter lock function allows you to lock the Dry Level, In Level and Out Level,
from changing when you change preset.
By using the parameter lock, you can easily browse through the extensive set of presets that comes with the VSS3, without having to change the Dry Level, In Level or
Out Level all the time.
To lock a parameter, simply click on the small lock in the parameter field. To unlock
it, click again.
The parameter lock only affects parameter changes made with the mouse. The parameter lock does not affect automation data or preset changes initiated from the host
application. These changes will always pass.
An example:
You have inserted the VSS3 on a channel.
When you use the VSS3 as an insert effect, you would probably like the dry part of the
signal to go trough the VSS3, and therefore you'd probably turn up the "Dry Level".
Page 22

EE NN GG LL II SS HH
22 /
VSS3
Now, if you try to browse through a couple of presets, using the up and down arrows
on the right side of the preset name, you will see that most of the presets have the
Dry Level set to "Off". In other words, the Dry Level goes to "Off" all the time - which
is quite annoying.
And here comes the Parameter Lock. Simply press the small lock in the Dry Level
parameter field, and the Dry Level will stay at the value that you've set it to - no matter what is saved with the preset you choose.
 Loading...