

Page 1

POLYTUNE 3
Ultra-Compact Polyphonic Tuner with Multiple Tuning Modes
and Built-In BONAFIDE BUFFER
User Manual
Page 2
2 POLYTUNE 3 User Manual 3 POLYTUNE 3 User Manual
Table of Contents
Important Safety Instructions ...................................... 3
Legal Disclaimer ............................................................. 3
Limited warranty ............................................................ 3
1. About this Manual ..................................................... 4
2. Introduction ...............................................................4
2.1 Unpacking ............................................................................. 4
2.2 Setting up .............................................................................. 4
2.3 Get ready for a new tuning experience! ................... 4
2.4 True Bypass ........................................................................... 5
2.5 Brighter than a thousand suns ...................................... 5
2.6 Strobe tuning ...................................................................... 5
2.7 Total recall ............................................................................. 5
3. Operation – Inputs, Outputs
and Controls ................................................................... 5
4. Operation – Tuning with POLYTUNE 3 ..................... 6
4.1 Chromatic vs. polyphonic tuning ................................ 6
4.2 Display modes ..................................................................... 6
4.3 Needle mode ....................................................................... 6
4.4 Strobe mode........................................................................ 7
4.5 Polyphonic tuning.............................................................. 7
4.6 Drop D tuning ...................................................................... 7
4.7 4.7 Alternate tunings and capos .................................. 7
4.8 Changing the reference pitch ........................................ 7
5. Frequently Asked Questions (FAQ) .......................... 8
6. Operation – Bypass Mode .........................................8
6.1 True Bypass and Bu ered Bypass explained ............ 8
6.2 Switching between True Bypass and
Bu ered Bypass ........................................................................... 8
7. Maintenance ............................................................... 8
7.1 Updating the rmware ...................................................... 8
7.2 Changing the battery ........................................................ 9
8. Links ............................................................................9
9. Speci cations .............................................................9
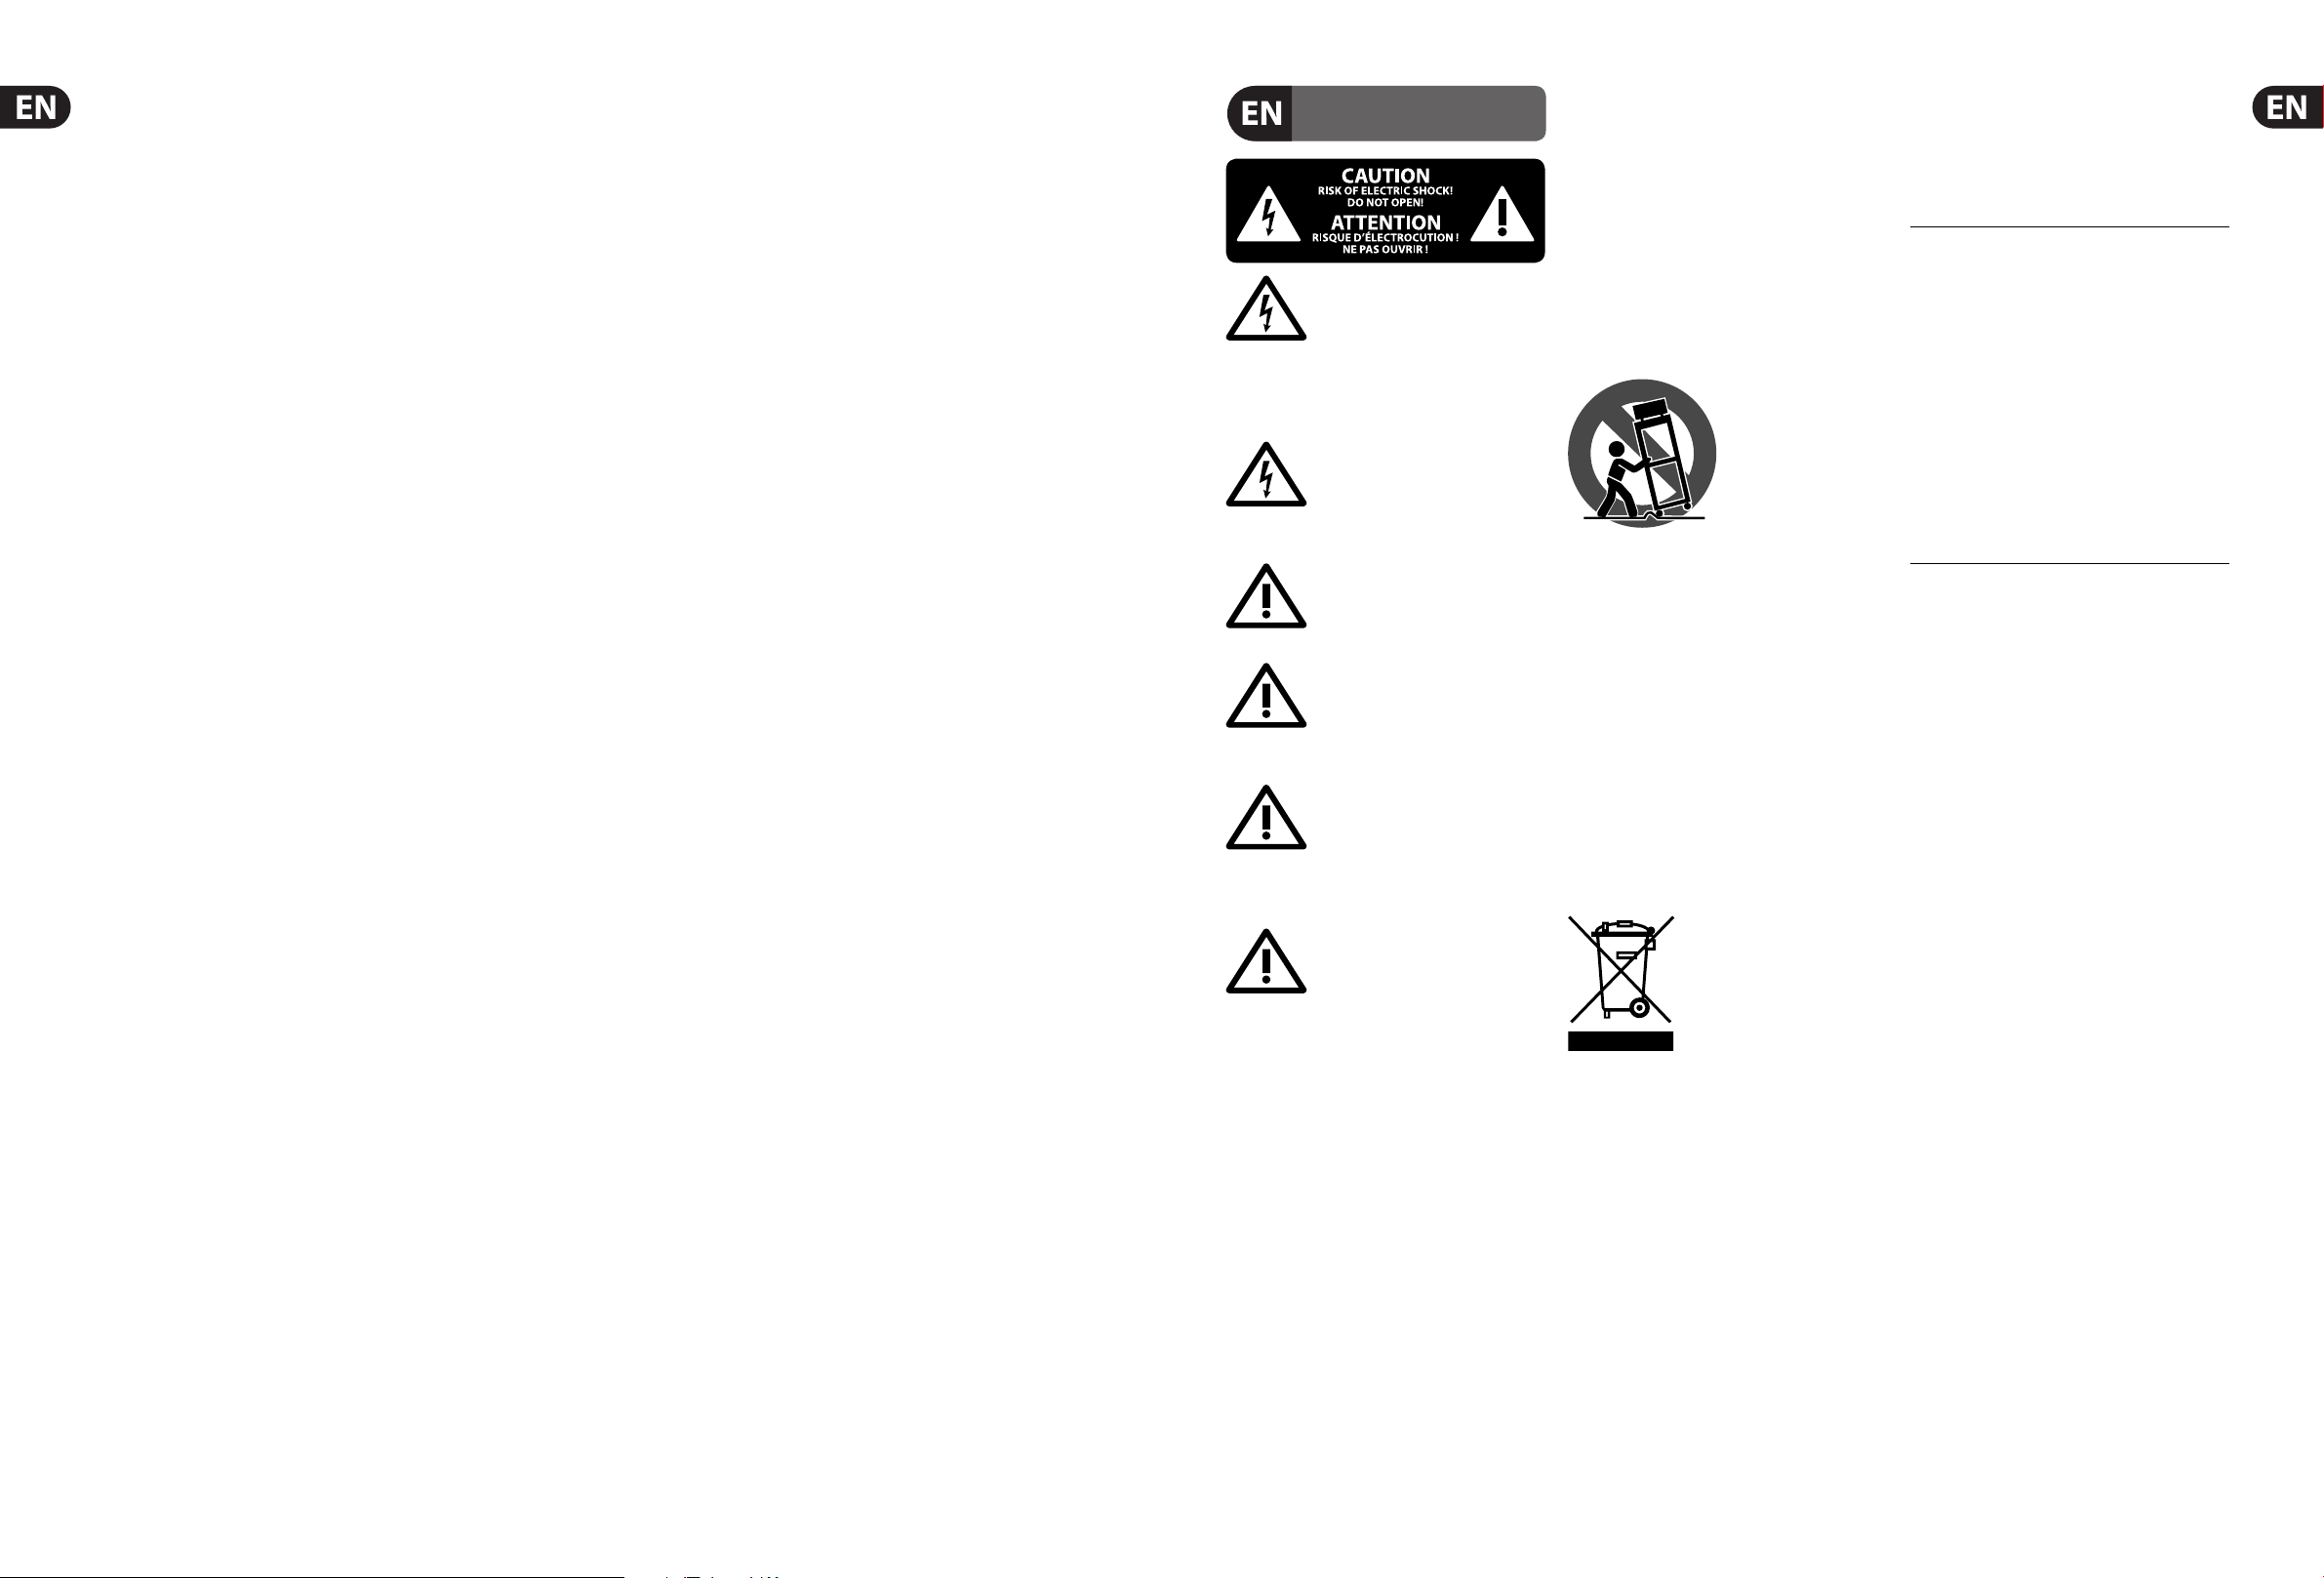
Important Safety
Instructions
LIMITED WARRANTY
LEGAL DISCLAIMER
Terminals marked with this symbol carry
electrical current of su cient magnitude
to constitute risk of electric shock.
Use only high-quality professional speaker cables with
¼" TS or twist-locking plugs pre-installed. Allother
installation or modi cation should be performed only
by quali edpersonnel.
This symbol, wherever it appears,
alertsyou to the presence of uninsulated
dangerous voltage inside the
enclosure-voltage that may be su cient to constitute a
risk ofshock.
This symbol, wherever it appears,
alertsyou to important operating and
maintenance instructions in the
accompanying literature. Please read the manual.
Caution
To reduce the risk of electric shock, donot
remove the top cover (or the rear section).
No user serviceable parts inside. Refer servicing to
quali ed personnel.
Caution
To reduce the risk of re or electric shock,
do not expose this appliance to rain and
moisture. The apparatus shall not be exposed to dripping
or splashing liquids and no objects lled with liquids,
suchas vases, shall be placed on the apparatus.
Caution
These service instructions are for use
by quali ed ser vice personnel only.
Toreduce the risk of electric shock do not perform any
servicing other than that contained in the operation
instructions. Repairs have to be performed by quali ed
servicepersonnel.
1. Read these instructions.
2. Keep these instructions.
3. Heed all warnings.
4. Follow all instructions.
5. Do not use this apparatus near water.
6. Clean only with dry cloth.
7. Do not block any ventilation openings. Install in
accordance with the manufacturer’s instructions.
8. Do not install near any heat sources such as
radiators, heat registers, stoves, or other apparatus
(including ampli ers) that produce heat.
9. Do not defeat the safety purpose of the polarized
or grounding-type plug. A polarized plug has two blades
with one wider than the other. A grounding-type plug
has two blades and a third grounding prong. The wide
blade or the third prong are provided for your safety. Ifthe
provided plug does not t into your outlet, consult an
electrician for replacement of the obsolete outlet.
10. Protect the power cord from being walked on or
pinched particularly at plugs, convenience receptacles,
and the point where they exit from the apparatus.
11. Use only attachments/accessories speci ed by
themanufacturer.
12. Use only with the
cart, stand, tripod, bracket,
or table speci ed by the
manufacturer, orsold with
the apparatus. When a cart
is used, use caution when
moving the cart/apparatus
combination to avoid
injury from tip-over.
13. Unplug this apparatus during lightning storms or
when unused for long periods of time.
14. Refer all servicing to quali ed service personnel.
Servicing is required when the apparatus has been
damaged in any way, such as power supply cord or plug
is damaged, liquid has been spilled or objects have fallen
into the apparatus, the apparatus has been exposed
to rain or moisture, does not operate normally, or has
beendropped.
15. The apparatus shall be connected to a MAINS socket
outlet with a protective earthing connection.
16. Where the MAINS plug or an appliance coupler is
used as the disconnect device, the disconnect device shall
remain readily operable.
17. Correct disposal of this
product: This symbol indicates that
this product must not be disposed
of with household waste,
according to the WEEE Directive
(2012/19/EU) and your national
law. This product should be taken
to a collection center licensed for the recycling of waste
electrical and electronic equipment (EEE). The
mishandling of this type of waste could have a possible
negative impact on the environment and human health
due to potentially hazardous substances that are generally
associated with EEE. At the same time, your cooperation
in the correct disposal of this product will contribute to
the e cient use of natural resources. For more
information about where you can take your waste
equipment for recycling, please contact your local city
o ce, or your household waste collection service.
18. Do not install in a con ned space, such as a book
case or similar unit.
19. Do not place naked ame sources, such as lighted
candles, on the apparatus.
20. Please keep the environmental aspects of battery
disposal in mind. Batteries must be disposed-of at a
battery collection point.
21. Use this apparatus in tropical and/or
moderate climates.
MUSIC Group accepts no liability for any loss which
may be su ered by any person who relies either
wholly or in part upon any description, photograph,
or statement contained herein. Technical speci cations,
appearances and other information are subject to
change without notice. All trademarks are the property
of their respective owners. MIDAS, KLARK TEKNIK,
LAB GRUPPEN, LAKE, TANNOY, TURBOSOUND,
TC ELECTRONIC, TC HELICON, BEHRINGER, BUGERA
and DDA are trademarks or registered trademarks
of MUSIC Group IP Ltd. © MUSIC Group IP Ltd.
2017 All rights reserved.
For the applicable warranty terms and conditions
and additional information regarding MUSIC Group’s
Limited Warranty, please see complete details online at
music-group.com/warranty.
Page 3
4 POLYTUNE 3 User Manual 5 POLYTUNE 3 User Manual
1. About this Manual
Thank you for spending your hard-earned money on this TC ELECTRONIC product!
We have done our best to ensure that it will serve you for many years to come,
and we hope that you will enjoy using it.
This manual is available as a PD
F download from the TC ELECTRONIC website.
Please read this manual in full, or you may miss
important information.
Please do not operate your TC device before you have made all connections
to external equipment as described in the “2.3 Setting Up” section. In the
subsequent sections of the manual, we assume that all connections are made
correctly and that you are familiar with the previous sections.
We reserve the right to change the contents of this
manual at any time.
To download the most current version of this manual, view the product warranty,
and access the growing FAQ database for this product, visit the web page
tcelectronic.com/support/
2. Introduction
As the world’s first polyphonic tuner, the original POLYTUNE took the hearts
of guitarists by storm. Features such as the MonoPoly technology (which
automatically detects whether you want to tune a single string or all strings)
made tuning a bass or guitar faster and easier than ever before.
So how do you make the best-selling polyphonic tuner even better? You take
it to the next level by: providing multiple tuning modes, including polyphonic,
chromatic, strobe and a variety of altered tunings; adding an onboard BONAFIDE
BUFFER to preserve your tone over long cable runs and pedal board signal paths;
and upgrading the LED display for even higher tuning accuracy.
Enter POLYTUNE 3.
2.1 Unpacking
Your TC ELECTRONIC effect pedal box should contain the following items:
• • Your TC ELECTRONIC e ect pedal
• • 1 TC ELECTRONIC sticker
• • 1 Quick Start Guide for quick information about the pedal’s controls
Inspect all items for signs of transit damage. In the unlikely event of transit
damage, inform the carrier and supplier.
If damage has occurred, keep all packaging, as it can be used as evidence of
excessive handling force.
2.2 Setting up
Connect a 9 V power supply with the following symbol to the DC input socket of
your TC ELECTRONIC effect pedal.
This product does not come with a power supply. We recommend using
TC ELECTRONIC’s PowerPlug 9 (sold separate
ly).
• • You can also power POLYTUNE 3 using a standard 9V battery (not included),
but if you intend to power additional pedals using the power out jack, you
need to use a power supply.
• • Plug the power supply into a power outlet.
• • Connect your instrument to the in jack on the right side of the pedal using a
¼ " jack cable.
• • Connect the out jack on the left side of the pedal to your ampli er using a
¼ " jack cable.
• • If you have another 9 V guitar pedal that you want to power, connect it to the
power out socket on the rear of the pedal.
2.3 Get ready for a new tuning experience!
Tuning your instrument with POLYTUNE 3 is fast and intuitive. If you don’t feel
like reading the manual, just strum your instrument and watch the display.
We think you’ll like what you see.
If you want to learn more – read on!
2.4 True Bypass
Here at TC ELECTRONIC, we have a simple philosophy: When you are using one of
our products, you should hear something great – and if you don’t, you shouldn’t
hear it at all. This is why this pedal sports True Bypass. When it
is bypassed, it is
really o and has zero in uence on your tone, resulting in optimum clarity and
zero loss of high end.
POLYTUNE 3 lets you switch between True Bypass and Bu ered Bypass modes,
the latter giving you an “always on” option that keeps the tuner in full operation
– even when your signal is not muted. Tuning made simple and more e cient
than ever.
Sometimes, it is advisable to switch an e ect pedal from True Bypass to Bu ered
Bypass mode. For more information, see “6.2 Switching between True Bypass to
Bu ered Bypass”.
2.5 Brighter than a thousand suns
When you need to tune, you need to tune. And the last thing you want to worry
about at that moment is a display that is either too bright for the club stage or
unusable in the bright sun of a late afternoon gig. The display on POLYTUNE 3 is
primed with some of the brightest LEDs you have ever laid your eyes on. And the
ambient light sensor makes sure you get just the right amount of brightness. It’s
the best of/for both worlds!
2.6 Strobe tuning
TC has received many requests from the guitar community for a strobe tuner, so
we added a strobe mode, which is both lightning fast and ultra precise. And with
a pitch detection accuracy of ±0.1 Cent, (that’s 1/1000 of a semitone!) this is the
right tool for ne-tuning your precious instrument – wherever you may be.
2.7 Total recall
POLYTUNE 3 stores your preferences. From pitch reference to selected tuning
mode, it hangs on to this information even after it is powered down – making
sure you only have to set these parameters once. And just to be safe, it will
display the current settings when you plug in your instrument.
One less thing to worry about!
Of course, POLYTUNE 3 still has all the features from the original POLYTUNE that
users know and love.
• • POLYTUNE®: Tune all strings simultaneously
• • For guitars and basses
• • Supports Drop-D and capo tuning modes
• • True bypass with silent tuning
• • Bu ered bypass to compensate for long cable runs
• • DC output for powering other pedals
POLYTUNE 3 will allow you to tune your instrument faster and easier than ever
before, so you can go back to doing the one thing we know you care about:
playing your music.
Enjoy!
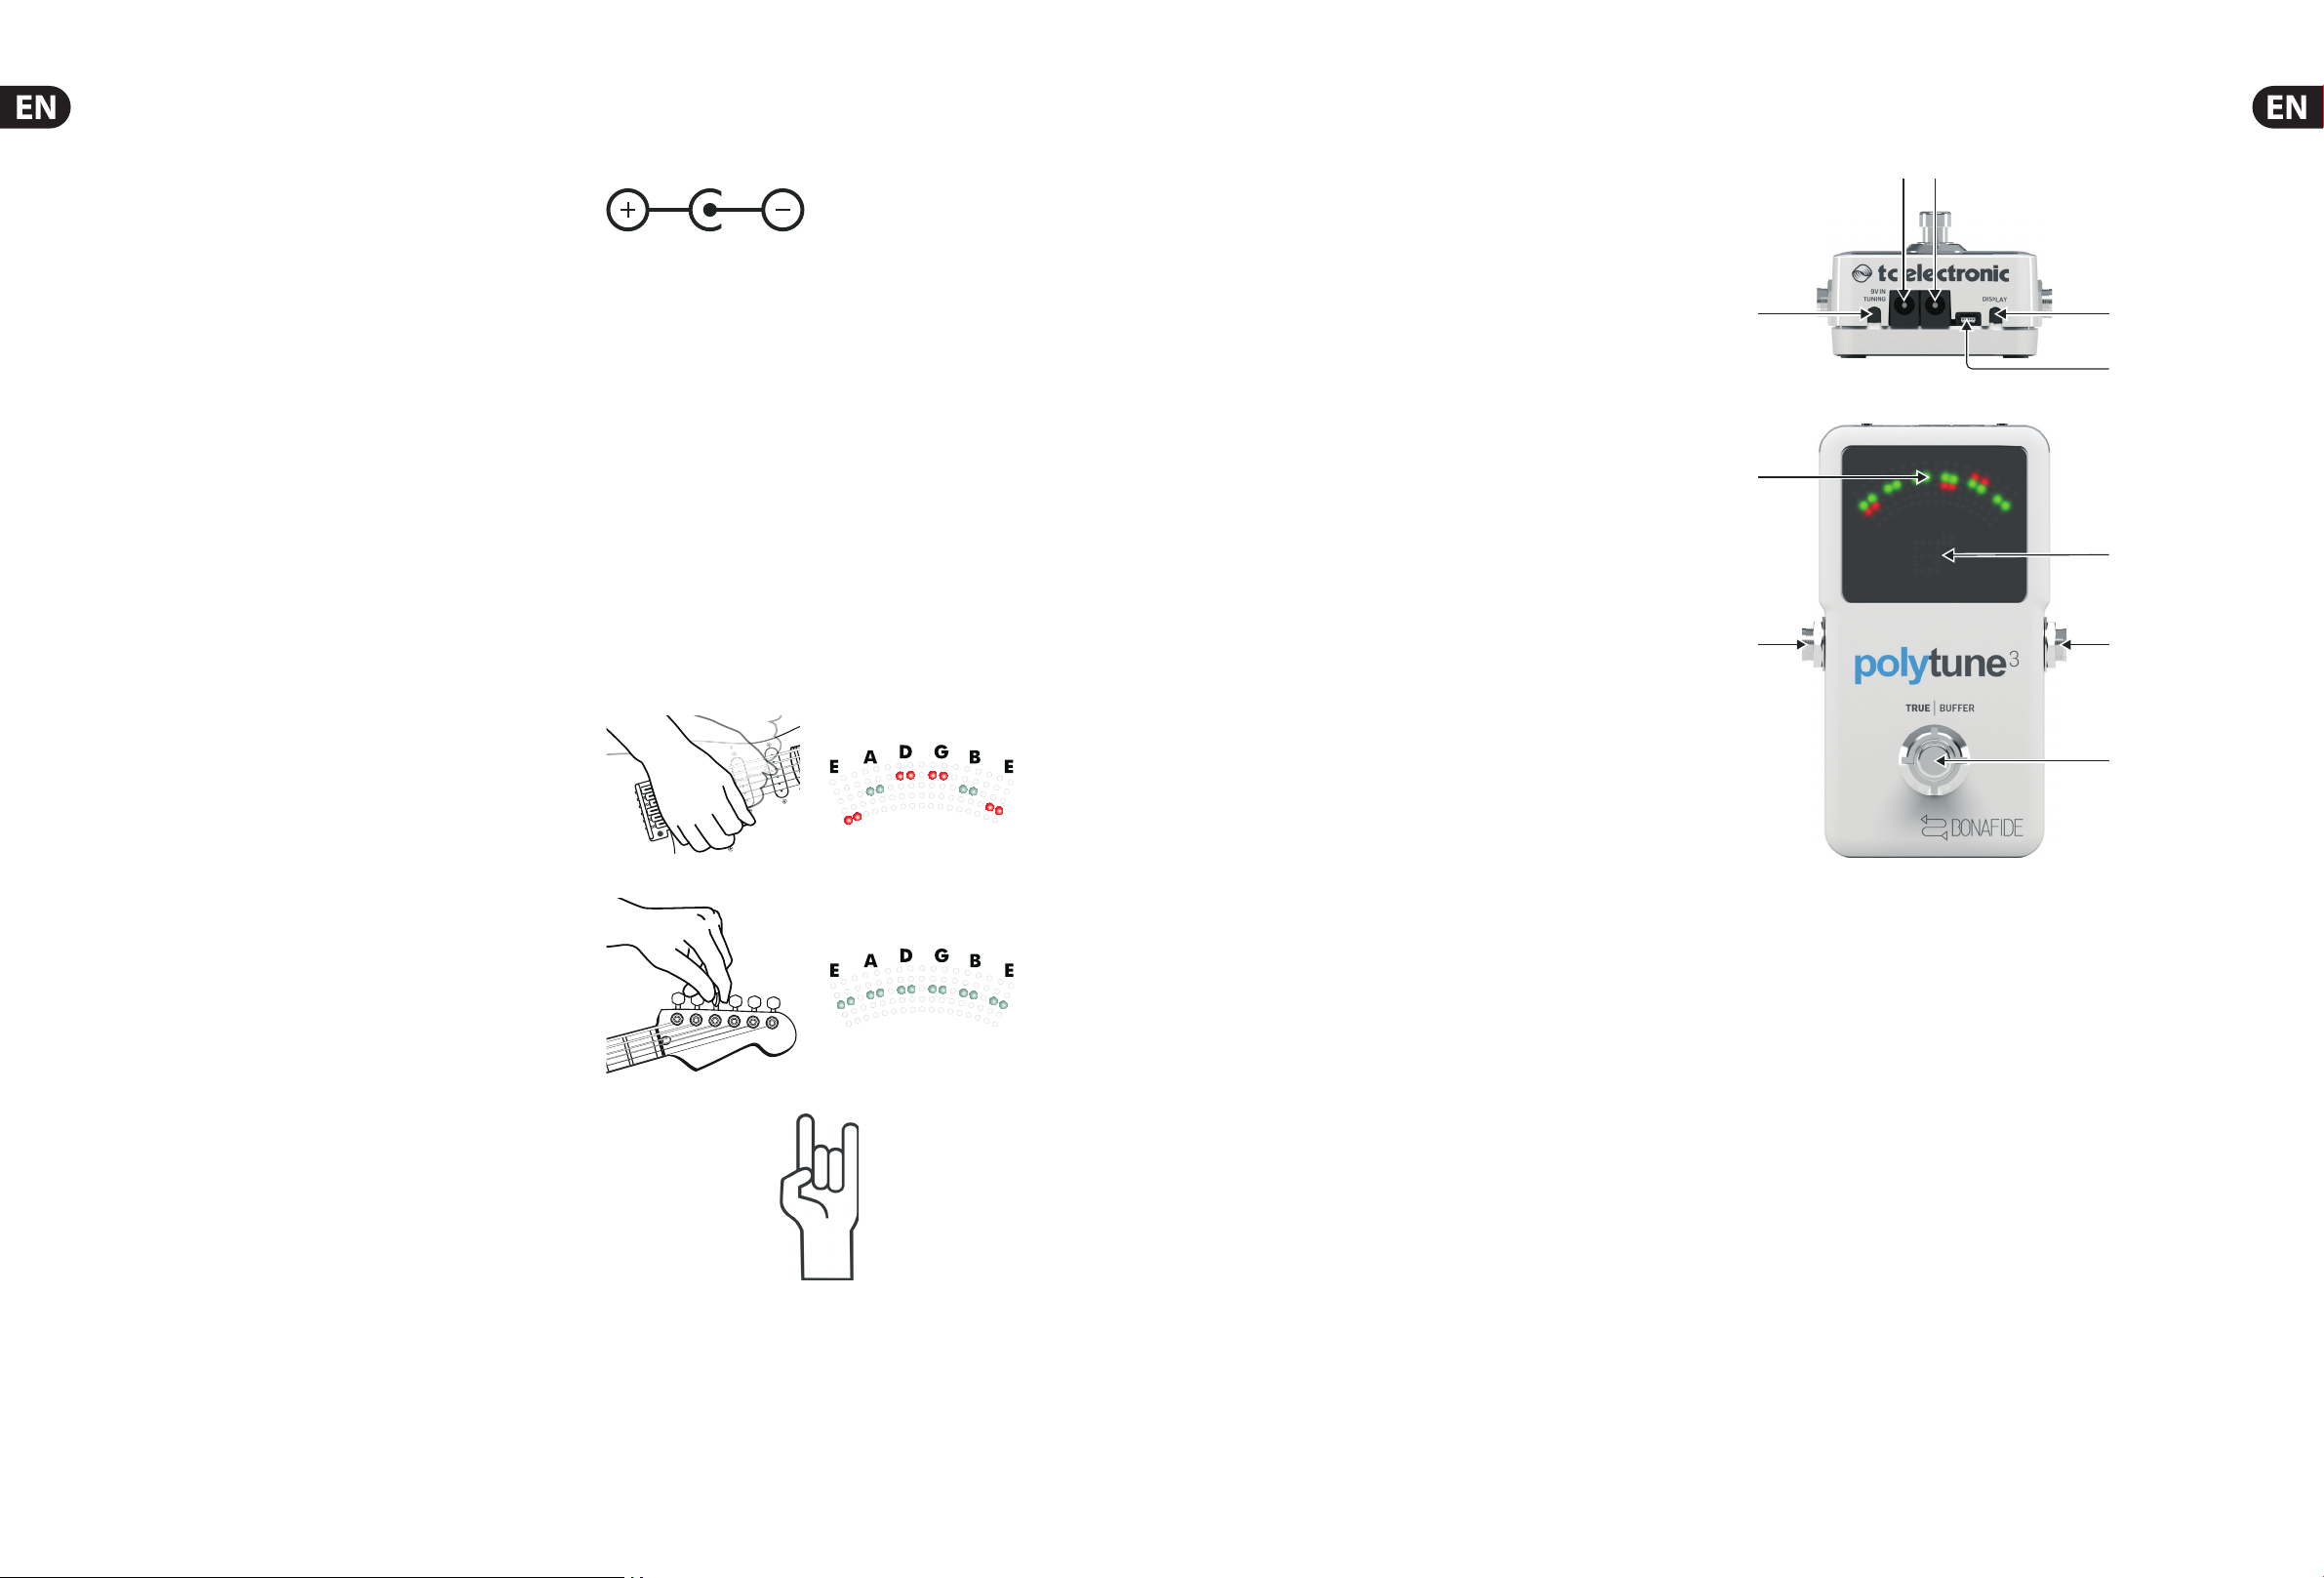
3. Operation – Inputs, Outputs
and Controls
(1) POWER input To power up your pedal, connect a power supply to its power
input socket. POLYTUNE 3 requires a 9V power supply providing 100 mA or
more (not supplied). To minimize hum, use a power supply with
isolated outputs.
The power input of this pedal is a standard 5.5/2.1 mm DC plug
(centre = negative).
(2) POWER output If you use are using an external power supply to power
POLYTUNE 3, you can use the power out jack of POLYTUNE 3 to provide power
to other, daisy-chained guitar pedals.
• • Make sure that your power supply delivers su cient power to cover the
power consumption of all connected pedals.
• • Current draw on pedals daisy-chained to the power out jack may not
exceed 2A.
(3) TUNING MODE button Set the tuning mode button according to the
instrument’s tuning. Use either standard (“e”) or one of the several dropped
tuning or capo modes.
Tuning modes are explained in the following section of this manual (“How to
use POLYTUNE 3”).
The selected tuning mode is stored and will be recalled when you power on
POLYTUNE 3 again.
(4) USB port If there should be rmware updates for this pedal, they can be
installed by connecting it to your computer using this port.
)
(1) (2)
(3)
(6)
(9)
(5)
(4)
(7)
(8
(10)
Page 4
6 POLYTUNE 3 User Manual 7 POLYTUNE 3 User Manual
(5) DISPLAY MODE button Use the display mode button to switch between the
various display modes.
The various display modes are explained in the following section of this
manual (“How to use POLYTUNE 3”).
The selected display mode is stored and will be reca
lled when you power on
POLYTUNE 3 again.
(6) DISPLAY The LEDs of the POLYTUNE 3 display are extremely bright; ensuring
a clear readout even in broad daylight.
The various display modes are explained in the following section of this
manual (“How to use POLYTUNE 3”).
(7) AMBILIGHT sensor In the lower right corner of the display is an ambient
light sensor that detects the strength of the surrounding light and
automatically adjusts the display brightness accordingly. This ensures you
can see and correct your instrument’s tuning under all conditions. This
feature even extends battery life by reducing display brightness to what is
required in a given situation.
(8) AUDIO INPUT Connect your instrument to the IN jack on the right side
of the pedal.
The audio input of this pedal is a standard ¼" jack (mono/TS).
When you connect your instrument to the audio input, the following
information will be displayed:
• • Standard (“STD”) or Drop D tuning mode
• • the currently selected display mode (Needle / Strobe, Guitar / Bass)
• • the currently selected tuning mode
• • the reference pitch.
For best results, place POLYTUNE 3 in your signal chain before your drive,
distortion and vibrato pedals. A distorted or modulated signal is
harder to analyze.
If the pedal runs on battery power, we recommend removing your
instrument from the audio input to preserve battery power when you
don’t play.
(9) AUDIO OUTPUT Connect the OUT jack of POLYTUNE 3 to the input jack of the
next device in the signal chain.
The audio output of this pedal is a standard ¼" jack (mono/TS).
(10) FOOTSWITCH To turn the tuner on or o , just tap the footswitch.
Notes regarding tuning and signal output:
• • When the tuner is active, the output will automatically be muted for
silent tuning.
• • When the tuner is active and no signal is detected, four red LEDs will
light on the bottom of the display, indicating that POLYTUNE 3 is ready
for tuning.
• • POLYTUNE 3 features a true bypass circuit that leaves your beloved tone
unaltered when the tuner is bypassed.
4. Operation – Tuning with
POLYTUNE 3
4.1 Chromatic vs. polyphonic tuning
A very simple guitar tuner will only allow you to tune open strings, one string at a
time – e.g., E-A-D-G-B-E for the standard tuning of a guitar.
POLYTUNE 3 is a chromatic tuner – meaning it will detect and allow you to tune
all twelve notes of the scale.
But that’s not all. Other than a traditional tuner, POLYTUNE 3 allows you to play
all of your instrument’s string simultaneously when tuning. POLYTUNE 3 will
detect which strings need to be tuned and indicate those strings in its display.
This allows you to tune your instrument much faster.
Finally, you may have tuned one or all strings on your instrument di erently from
standard tuning, or you may be using a capo to change the playable length
of the strings.
In all of these situations, POLYTUNE 3 has you covered.
4.2 Display modes
If you press the display mode button on the rear of POLYTUNE 3 once, the
currently selected display mode will be shown. Pressing the display mode button
repeatedly will cycle through these modes:
• • Guitar / Needle mode (indicated by a “G” and the center LED column
lighting up).
• • Guitar / Strobe mode (indicated by a “G” and the middle row of LEDs
lighting up).
• • Bass / Needle mode (indicated by a “B” and the center LED column
lighting up).
• • Bass / Strobe mode (indicated by a “B” and the middle row of LEDs
lighting up).
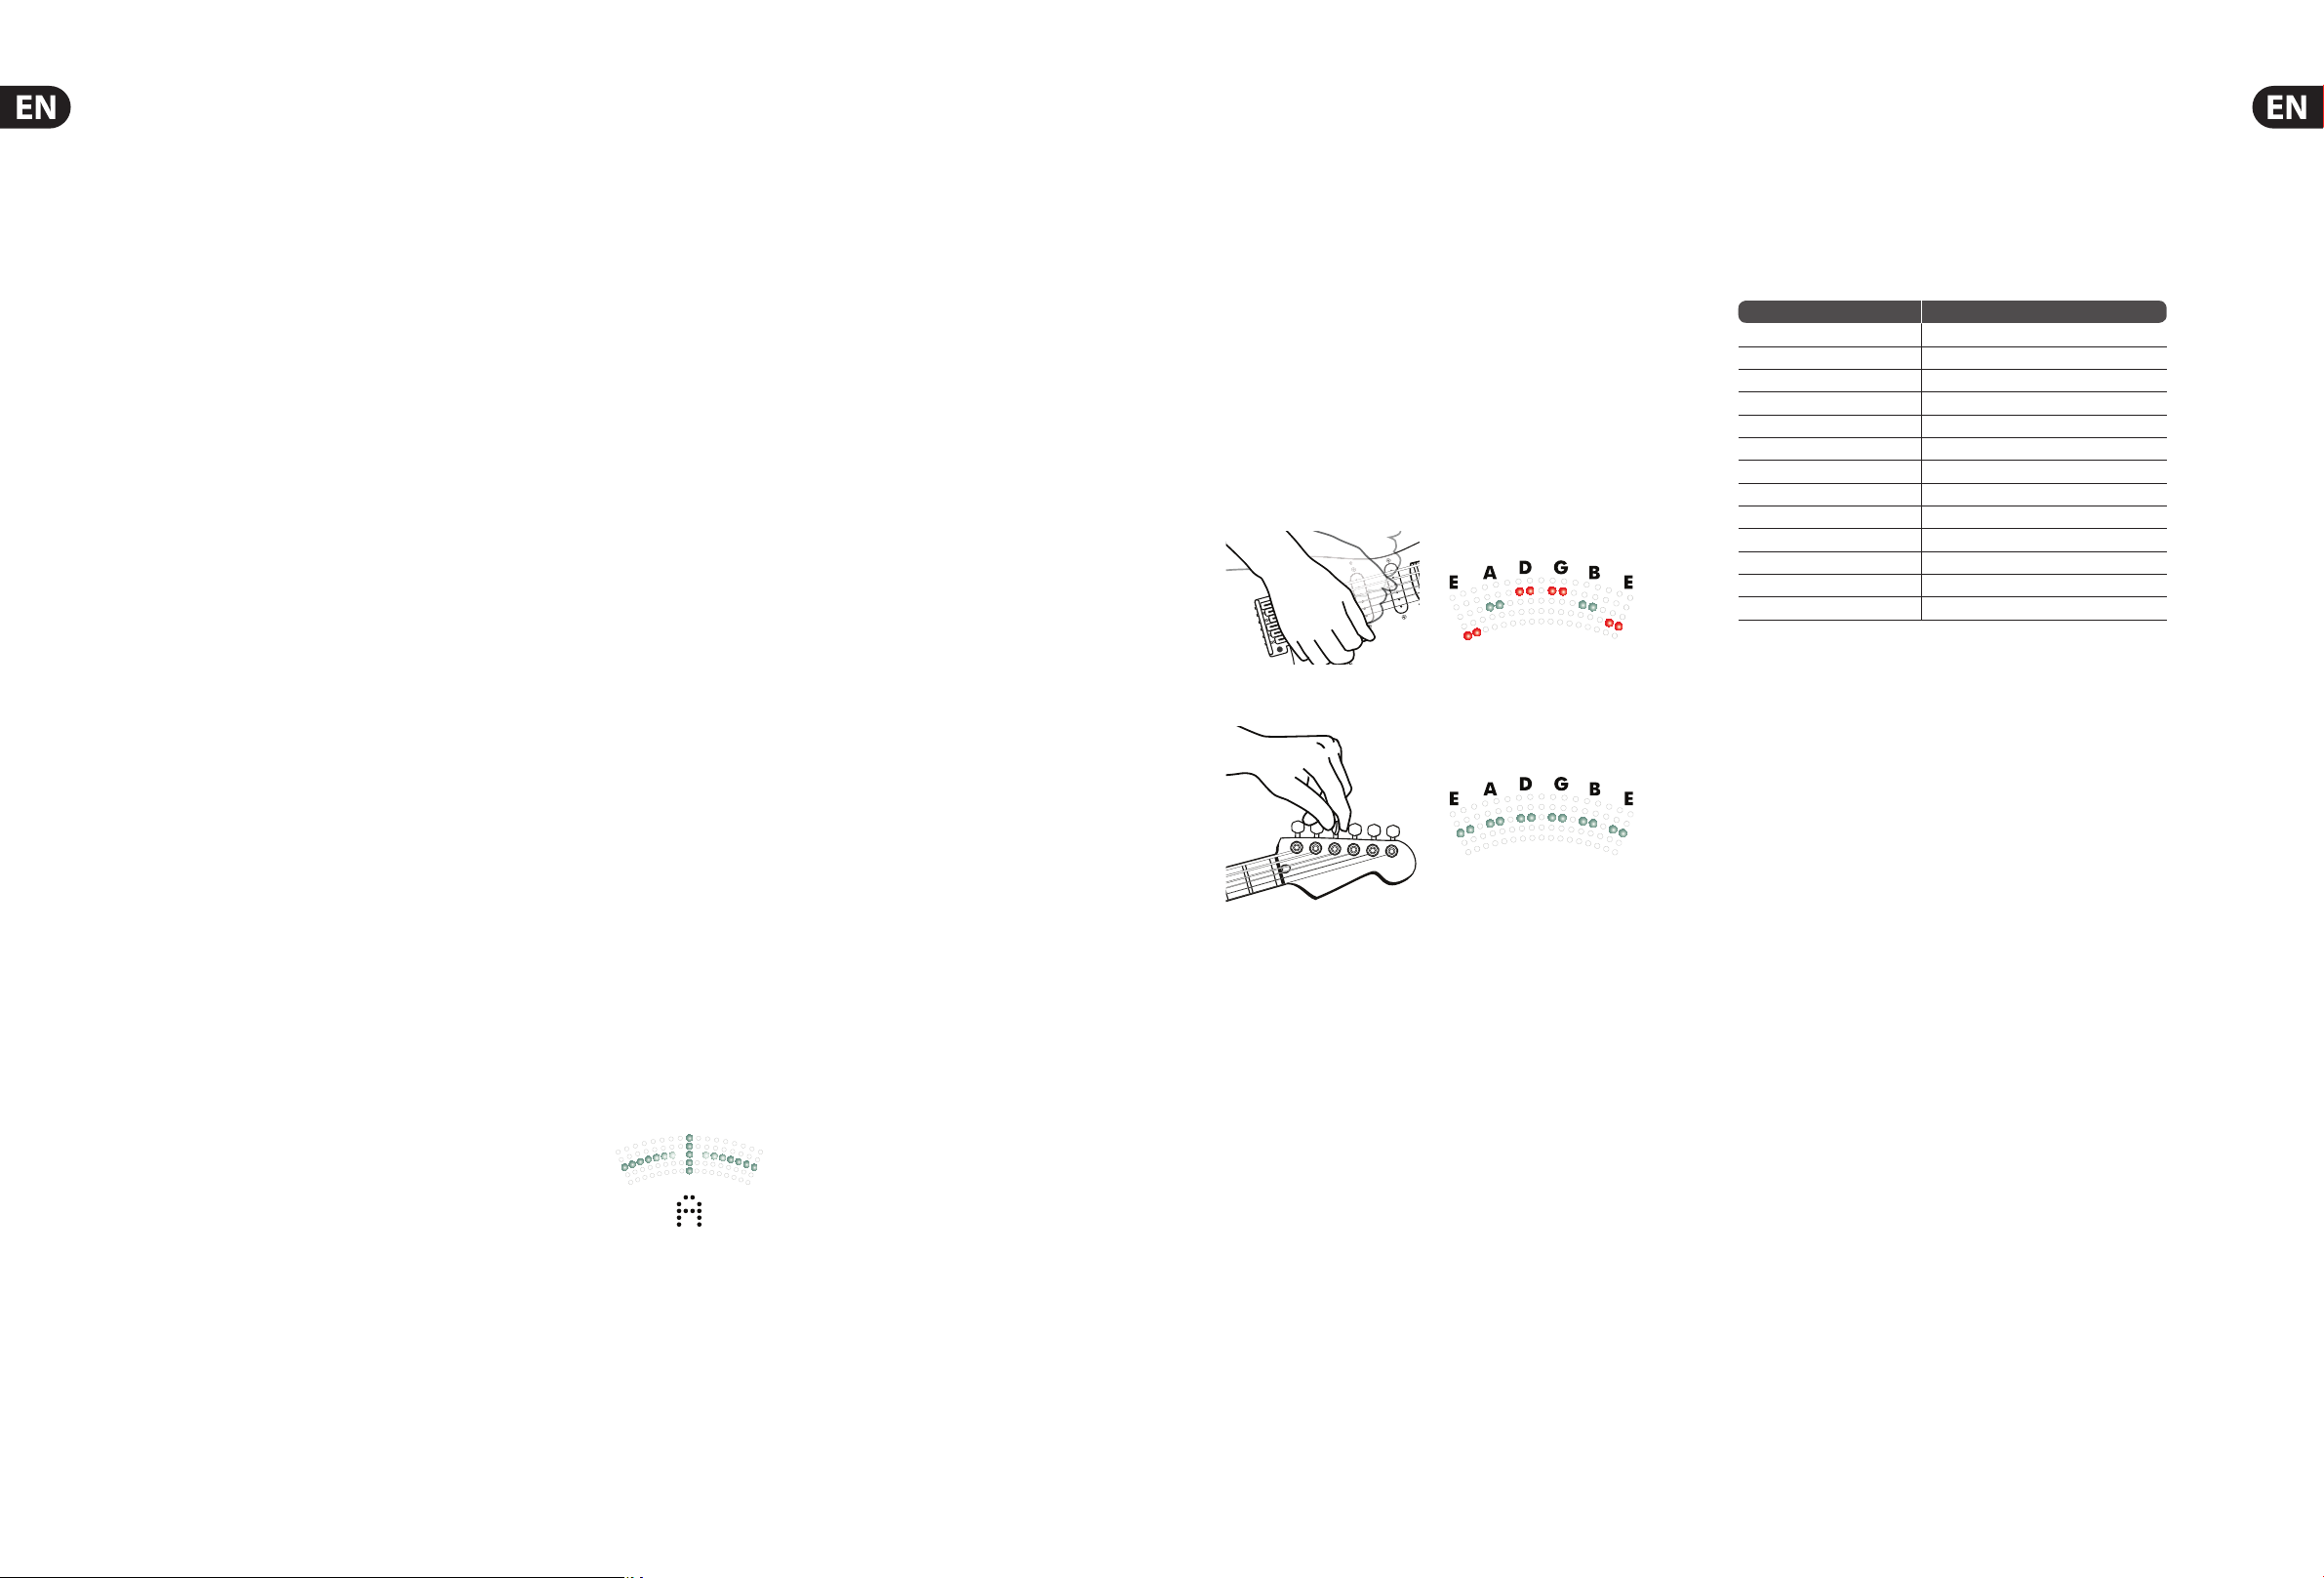
4.3 Needle mode
In Needle mode, when you tune a single string, pitch is indicated by a column
of ve LEDs in the upper part of the display, and the name of the target note is
displayed at the bottom of the display.
If the string you are tuning is too low, LEDs to the left of the center column will
light up. If the string is too high, LEDs to the right of the center column will
light up.
Tune the string until the middle column and the middle row of green LEDs lights
up. This means you are “on target”.
Needle mode – A string in tune
4.4 Strobe mode
In Strobe mode, the di erence between the correct (target) frequency and the
actual detected frequency is displayed by two indicators simultaneously:
1. Red LEDs to the left (pitch too low) or to the right (pitch to high) of the center
LED column
2. Rotating
segments in the display. The closer the detected frequency is to the
target frequency, the slower the rotation.
Tune the string until the rotating pattern has come to a stop and only the middle
column of green LED lights up.
4.5 Polyphonic tuning
As you know by now, POLYTUNE 3 is a polyphonic tuner. You can strum your
instrument, and POLYTUNE 3 will analyze and display the tuning of all strings.
So how do you activate polyphonic tuning mode?
You don’t – it just works. Strum, tune, rock on!
Strum your guitar. Strings that are in tune will be represented by two green LEDs. Strings that need
tuning are represented by two red LEDs below ( at) or above (sharp) the middle row.
Tune your guitar and strum again. Your instrument is in tune when all strings are represented
by two green LEDs in the middle row.
Of course, only the strings that are actually present and played will be shown in
the display. So if you tune a four string bass, only four LED columns will light up.
4.6 Drop D tuning
“Drop D” is a popular tuning (also known as D-A-D-G-B-E) in which the lowest
string of a guitar is tuned down (“dropped”) from E to D.
If you want to tune an instrument set to “Drop D”, follow these steps:
1. Press and hold the POLYTUNE 3 footswitch for about three seconds.
2. The word “DROP” will be displayed brie y, and the default “ready for tuning”
indicator at the bottom of the display will change from a small
square to a “d”.
3. If you want to switch POLYTUNE 3 back to standard tuning, press and hold
the footswitch for three seconds again.
4. “STD” will be displayed brie y, and the “ready for tuning” indicator will go
back to a small square.
4.7 Alternate tunings and capos
There’s more to life than standard E-A-D-G-B-E tuning! You may have tuned
all strings of your instruments down, or you may be using a capo. In that case,
tell POLYTUNE 3 about your instrument’s tuning by pressing the TUNING MODE
button.
If you press the TUNING MODE button
once, the current tuning will be displayed
(“-- E --” for Standard Tuning). Pressing the tune button repeatedly will cycle
through the following tunings:
Display Mode
--- E --- Standard Tuning
EbAll strings tuned down 1 semitone
DAll strings tuned down 2 semitones
Db All strings tuned down 3 semitones
CAll strings tuned down 4 semitones
B All strings tuned down 5 semitones
F 1Capo at rst fret
Gb 2 Capo at second fret
G 3 Capo at third fret
Ab 4 Capo at fourth fret
A 5 Capo at
fth fret
Bb 6 Capo at sixth fret
B 7 Capo at seventh fret
If you do not touch the TUNING MODE button for two seconds, the display will
blink twice, and the selected tuning will be used.
The selected tuning mode is stored and will be recalled when you power on
POLYTUNE 3 again.
4.8 Changing the reference pitch
In most cases, you may want to tune to standard pitch, where the A above the
middle C has a frequency of 440 Hz. However, you and your band may prefer a
di erent pitch, or you may have to tune to an acoustic instrument that cannot
easily be retuned.
In that case, you need to change the reference pitch.
To change the reference pitch, follow these steps:
1. Press the DISPLAY MODE button and the TUNING MODE button (3)
simultaneously.
2. The display will show the current reference pitch (e.g., “440” for 440 Hz).
3. To increase the reference pitch in 1 Hz steps, press the TUNING MODE button.
4. To decrease reference pitch in 1 Hz steps, press the DISPLAY MODE button.
5. To accept the currently displayed reference pitch and return to normal
operation, do not press either button for two seconds.
The selected reference pitch is stored and will be recalled when you power on
POLYTUNE 3 again.
Page 5

8 POLYTUNE 3 User Manual 9 POLYTUNE 3 User Manual
5. Frequently Asked Questions (FAQ)
“I’m not hearing anything!”
When the tuner is active, the output will be muted for silent tuning.
“The pedal has power supply, but pressing the footswitch doesn’t
do anything!”
To operate POLYTUNE 3, you need to connect an instrument to the pedal’s audio
input jack.
“The display shows a red ‘#’ – what does this mean?”
This is the symbol of the Secret Brotherhood of the Tune-O-Calypse of Doom –
and it
is telling you that you are not playing loud enough…
Just kidding. This symbol shows that your POLYTUNE 3 is not bypassed and
ready to display the pitches of your instrument’s strings. Please note that this
also means that POLYTUNE 3’s audio output is muted. To unmute, press the
footswitch.
“How do I get the best (most accurate) results?”
We have found that you will achieve the most accurate tuning of electric guitars
in polyphonic mode by selecting the guitar’s neck pickup and using the thumb to
strum the strings.
6. Operation – Bypass Mode
6.1 True Bypass and Bu ered Bypass explained
True Bypass mode is a hard-wire bypass that gives absolutely no coloration of
tone when the pedal is bypassed. This is the default mode for your e ect pedal.
Using True Bypass on all pedals is a perfect choice in setups with a few pedals and
relatively short cables before and after the pedals.
If...
• • you use a long cable between your guitar and the rst pedal or
• • if you use many pedals on your board or
• • if you use a long cable from your board to the amp,
... then the best solution will most likely be to set the rst and the last pedal in
the signal chain to Bu ered Bypass mode.
Can you hear the di erence between a pedal in True Bypass or Bu ered
Bypass mode?
Maybe, maybe not – many factors apply: active vs. passive pick-ups, single-coil
vs. humbucker, cable quality, amp impedance and more. We cannot give a single
ultimate answer. Use your ears and nd the best solution for your setup!
6.2 Switching between True Bypass and
Bu ered Bypass
To set the bypass mode, proceed as follows:
• • Disconnect the pedal and turn it on its back.
• • Unscrew the back plate of the pedal and look for the two small DIP-switches
in the upper left corner.
• • These two DIP switches o er three modes:
Switch con guration Mode
Both switches set to the left True Bypass
Top switch set to the right
Lower switch set to the left
Bu ered Bypass
Both switches set to the right Bu ered Bypass Display Always On
• • Set the DIP switch to the desired position.
• • Remount the back-plate.
7. Maint e n a n c e
7.1 Updating the rmware
TC may provide updates for the built-in software of your pedal, the rmware.
Updating your TC pedal’s rmware requires...
• • A computer running Microsoft Windows or OS X with a standard
USB interface
• • The speci ed DC power supply for your pedal.
Preparing the rmware update
• • Download the newest rmware from the “Support” page for your TC pedal.
There are updaters for Microsoft Windows (these are ZIP archives containing
the rmware installer) and for OS X (these are disk image les containing the
rmware installer).
• • Unplug all cables (including the power supply) from your TC pedal.
• • Connect the pedal to your computer using a USB cable.
• • Press and hold the footswitch on your TC pedal. If your TC pedal has more
than one footswitch, press and hold the leftmost footswitch.
• • Insert the DC power supply plug.
• • The LED on your pedal should turn green. If your TC pedal has more than
one LED, the leftmost LED should turn green. This indicates that the pedal is
ready to receive the software update.
• • Release the footswitch.
Applying the rmware update
• • Quit all MIDI-related applications (e.g., your DAW) on your computer and
launch the rmware updater you have downloaded in step 1.
• • In the rmware updater app, select your TC pedal from the drop-down list
under the “STEP 1” heading.
• • When the “Update” button under the “STEP 2” heading turns green, click it.
• • The updated rmware will now be transferred to your TC pedal. Wait for the
progress bar to reach 100%. When the update procedure is complete, the
pedal will automatically restart.
7.2 Changing the battery
If you need to change the battery of your TC ELECTRONIC e ect pedal,
proceed as follows:
• • Unscrew the thumb-screw on the back of the pedal and detach
the backplate.
• • Unmount the old battery and attach the new battery to the battery clip
making sure the polarity is correct.
• • Remount the back-plate.
Notes regarding batteries
• • Batteries must never be heated, taken apart or thrown into re or water.
• • Only rechargeable batteries can be recharged.
• • Remove the battery when the pedal is not being used for a longer period of
time to save battery life.
Always dispose batteries according to local laws and regulations.
8. Links
Support resources
• • TC ELECTRONIC Support: tcelectronic.com/support/
• • TC ELECTRONIC – product software: tcelectronic.com/support/software/
• • TC ELECTRONIC – all product manuals: tcelectronic.com/support/manuals/
• • TC ELECTRONIC user forum: forum.tcelectronic.com/
TC ELECTRONIC on...
• • the Web: tcelectronic.com/
• • Facebook: facebook.com/tcelectronic
• • Google Plus: plus.google.com/+tcelectronic/
• • Twitter: twitter.com/tcelectronic
• • YouTube: youtube.com/user/tcelectronic
9. Technical Speci cations
Bypass mode True Bypass (default) /
Buffered Bypass / Buffered Bypass
Display Always On, switchable
Input connector 1 x ¼ " TS, unbalanced, mono
Input impedance 1 MΩ
Output connector 1 x ¼ " TS, unbalanced, mono
Output impedance 100 Ω
Power input Standard 9 V DC, centre negative,
>100 mA
Battery option 9 V (battery not included)
USB port Mini USB connector for
firmware updates
Dimensions (H x W x D) 72 x 122 x 50 mm (2.8 x 4.8 x 2.0")
Page 6

10 POLYTUNE 3 User Manual 11 POLYTUNE 3 User Manual
FEDERAL COMMUNICATIONS
COMMISSION COMPLIANCE
INFORMATION
Responsible Party Name: Music Group Services NV Inc.
Address: 5270 Procyon Street
Las Vegas, NV 89118
USA
Phone Number: +1 702 800 8290
POLYTUNE 3
EMC/EMI This equipment has been tested and found to comply with the limits
for a Class B Digital device, pursuant to part 15 of the FCC rules. These limits
are designed to provide reasonable protection against harmful interference in
residential installations.
This equipment generates,
uses and can radiate radio frequency energy and,
if not installed and used in accordance with the instructions, may cause harmful
interference to radio communications. However, there is no guarantee that
interference will not occur in a particular installation. If this equipment does cause
harmful interference to
radio or television reception, which can be determined
by turning the equipment o and on, the user is encouraged to try to correct the
interference by one or more of the following measures:
• • Reorient or relocate the receiving antenna.
• • Increase the separation between the equipment and receiver.
• • Connect the equipment into an outlet on a circuit di erent from that to which the
receiver is connected.
• • Consult the dealer or an experienced radio/ TV technician for help.
For customers in Canada This Class B digital apparatus complies with
Canadian CAN ICES-3B.
POLYTUNE 3
TC ELECTRONIC
Page 7

 Loading...