

Page 1
816
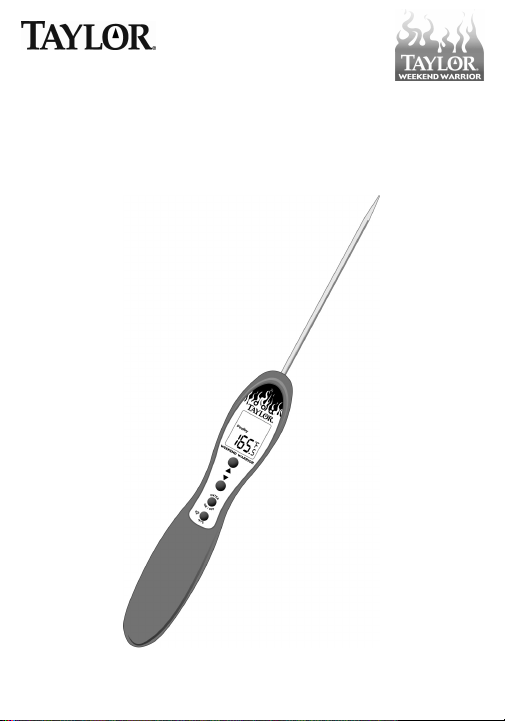
Grilling Thermometer
with Folding Probe
Instruction Manual
Page 2

This product helps to eliminate over-cooking or under-cooking foods.
Presetting the thermometer to the recommended cooking temperatures
and/or cooking times is simple and ensures that food will be cooked to
your preferred taste.
Please read this instruction manual carefully before use. Keep these
instructions handy for future reference.
Battery Information
The thermometer operates on 2 AAA batteries (installed). If readings
grow dim or irregular, the batteries may need to be replaced. To replace
the batteries:
1. Use 2- AAA batteries. Always replace both batteries at the same time;
do not combine old and new batteries. Do not mix Alkaline, carbonzinc (standard) or Nickel- Cadmium (rechargeable) batteries.
2. Unscrew the 2 screws securing the battery compartment cover, located on the back of the unit. Take care not to misplace the screws.
3. Place the batteries into the compartment as indicated by the polarity
symbols marked inside the battery compartment.
4. Replace the battery compartment cover and screws.
General Operation
1. Preheat the grill or oven to desired cooking temperature. Place the
food in the preheated grill or oven.
2. Sterilize the metal probe by inserting it into an appropriate solution
such as boiling water for several minutes.
3. Press the “Enter” button to turn the unit on. The LCD screen will turn
on and display the current probe temperature.
4. Your thermometer is preset to read temperatures in Fahrenheit. To
switch to Celsius, press and hold the “°F/°C” button for 3 seconds.
5. Press the “Enter” button to access the Meat Selection screen. The
default setting “Beef Rare140.0°F” appears. The temperature digits
flash.
6. Press the ▲ or ▼ button to scroll though the 16 meat types and their
preprogrammed target temperatures. (See Meat/Temperature Chart.)
Page 3

7. Press “Enter” to select the displayed meat type. The LCD screen
returns to the current temperature display. The name of the selected
meat appears above the temperature reading.
8. To test the internal temperature of the food, unfold the metal probe
and insert it into the thickest part of the food. Do not come in contact
with bone, fat or gristle, as these areas will not provide accurate temperature readings. Take care when moving the probe into position to
avoid injury or damage. DO NOT LEAVE THE THERMOMETER IN
THE GRILL OR OVEN WHILE COOKING, AND DO NOT TOUCH
THE HOT PROBE WITH BARE HANDS.
9. The current internal temperature of the food appears on the LCD
screen.
10. Color coded lights behind the Taylor® logo indicate if the current
temperature is lower, higher, or within 5 degrees of the target temperature.
• If the temperature is lower than the target temperature, a blue LED
light flashes.
• When the temperature reaches the target temperature, a green LED
light flashes.
• If the temperature is higher than the target temperature, a red LED
light flashes.
(Note: the temperature must be within 30 degrees of the target temperature for the LED lights to activate. Thus, the blue light may not flash,
even if the current temperature is lower than the target temperature.
The current temperature will still appear on the screen.)
11. When the food is ready, remove it from the grill or oven with a heat
resistant glove. DO NOT TOUCH THE HOT PROBE OR FOOD
WITH YOUR BARE HANDS!
12. The LCD screen has a convenient backlight feature for easy temperature viewing. While the unit is on, press the “°F/°C” button to turn on
the backlight for 10 seconds.
13. Press and hold the “Enter” button for 3 seconds to turn the unit off.
Otherwise, the unit will turn off automatically after 10 minutes if no
buttons are pressed and there is no change in temperature.
Page 4

Note: when the thermometer turns off, its memory will return to the
default setting “Beef Rare 140.0°F”. If the unit turns off before cooking is done, repeat the Meat Selection steps listed above to reprogram the desired target temperature.
14. Wash the metal probe with hot soapy water. Fold the probe into the
closed position for storage. Take care when moving the probe into
position to avoid injury or damage. Clean the thermometer unit by
hand. Do not completely immerse the thermometer in water.
Meat/Temperature Chart
Following is a chart listing the 16 types of meat and their preset temperatures.
Meat Type Doneness Level Preset Temperatures
Beef Rare* 140°F
Med Rare 145°F
Med 160°F
Med Well 165°F
Well 170°F
Hamburger Well 160°F
Pork Med 160°F
Well 170°F
Poultry White Meat 165°F
Dark Meat 165°F
Lamb Rare* 140°F
Med Rare 145°F
Med 160°F
Med Well 165°F
Well 170°F
Ham Well 140°F
*The USDA does NOT recommend RARE 140ºF as a safe eating temperature.
Page 5

Specifications:
Temperature Range: 16º to 302ºF or -9º to 150ºC
Resolution: 0.1ºF or ºC full range
16 Preprogrammed Meat Types
Battery: 2 AAA (installed)
Auto Shut-Off: After 10 minutes of nonuse
Response Time: 1 second
Care and Precautions
1. Always read instructions thoroughly to ensure that you have the full
benefit of all the unit's features.
2. Sterilize thermometer probe each time before use.
3. Use caution while handling the thermometer. Take care when moving
the probe into position to avoid injury or damage. Always wear a heat
resistant glove when touching the thermometer during or just after
use. DO NOT TOUCH PROBE WITH BARE HANDS!
4. DO NOT immerse the thermometer unit in liquid, or pour liquid direct-
ly on the thermometer unit, as doing so will cause damage to internal
components and void the warranty. If you spill liquid on it, dry it
immediately with a soft, lintfree cloth.
5. DO NOT wash in a dishwasher. This unit is not dishwasher safe.
Damage will void warranty. Wipe clean with a damp cloth. Grease or
other hard-to remove soil can be removed with a scouring pad. DO
NOT clean the unit with abrasive or corrosive materials. This may
scratch the plastic parts and corrode the electronic circuits.
6. DO NOT use this thermometer in a microwave oven.
7. DO NOT tamper with the unit's internal components. Doing so will
invalidate the warranty on this unit and may cause damage. Other
than replacing the batteries, the unit contains no user-serviceable
parts.
8. DO NOT subject the unit to excessive force, shock, dust, temperature
or humidity. This may result in malfunction, shorter electronic life
span, damaged battery and distorted parts.
9. Do not expose the thermometer unit to: water, direct heat, a hot sur-
face or direct sunlight. This may cause damage to the plastic casing
or the electric circuits and components inside.
Page 6

10. Do not dispose of batteries in fire. Batteries may explode or leak.
Remove the batteries if the thermometer will not be used for a long
period of time.
11. Over- or under- temperature range displays: If the measured tem-
perature is outside the unit’s temperature range of 16º to 302ºF or -9º
to 150ºC, the LCD will show “HH.H” (higher than the temperature
range) or “LL.L” (lower than the temperature range).
One Year Limited Warranty
Taylor® warrants this product to be free from defects in material or
workmanship for one (1) year for the original purchaser from date of
original purchase. It does not cover damages or wear resulting from
accident, misuse, abuse, commercial use, or unauthorized adjustment
and/or repair.
If service is required, do not return to retailer. Should this product
require service (or replacement at our option), please pack the item
carefully and return it prepaid, along with store receipt showing the date
of purchase and a note explaining reason for return to:
Taylor Precision Products
2220 Entrada Del Sol, Suite A
Las Cruces, New Mexico
There are no expressed warranties except as listed above. This warranty gives you specific legal rights, and you may have other rights which
vary from state to state.
© 2010 Taylor Precision Products and its affiliated companies, all rights
reserved. Taylor® and Leading the Way in Accuracy® are registered
trademarks of Taylor Precision Products and its affiliated companies. All
88001
USA
rights reserved.
Made to our exact specifications in China.
www.taylorusa.com
816 9.10
Page 7

816
Termómetro digital
para parrilla con sonda plegable
Manual de Instrucciones
Page 8

Este producto ayuda a evitar cocinar de más o de menos los alimentos. Predefinirlo el termómetro para las temperaturas y/o tiempos de
cocción recomendados es simple y asegura que la comida se cocinará
según el gusto que usted prefiera.
Antes de usar, sírvase leer con atención este manual de instrucciones.
Guarde estas instrucciones en un lugar de fácil acceso para referencia
futura.
Información de las baterías
El termómetro funciona con 2 baterías AAA (instaladas).
Si las lecturas se volverán borrosas o irregulares, si debe reemplazar
las baterías.Para instale las baterías:
1. Use 2 baterías AAA. Siempre cambie ambas baterías a la vez; no
combine baterías nuevas y viejas. No mezcle baterías alcalinas, carbón-cinc (normales) o níquel-cadmio (recargables).
2. Desatornille los 2 tornillos que aseguran la tapa del compartimiento
de la batería, se encuentra en la parte trasera de la unidad. Tenga
cuidado de no perder los tornillos.
3. Retire las baterías viejas del compartimiento de las baterías.
3. Coloque las baterías en el compartimiento como indican los símbolos
de polaridad que se encuentran dentro del compartimiento de las
baterías.
4. Vuelva a colocar la tapa del compartimiento de las baterías y los
tornillos.
Page 9

Funcionamiento General
1. Precaliente la parrilla o el horno hasta la temperatura de cocción
deseada. Coloque el alimento en la parrilla o el horno.
2. Esterilice la sonda de metal introduciéndola en una solución adecua-
da, tal como agua hirviendo, durante varios minutos.
3. Presione el botón “Enter” (Entrar) para encender la unidad. La pan-
talla LCD se encenderá y mostrará la temperatura ambiente actual
de la sonda.
4. Su termómetro está definido para leer las temperaturas en grados
Fahrenheit. Para cambiar a Celsius, presione sin soltar el botón
“°F/°C” durante 3 segundos.
5. Presione el botón “Enter” para acceder a la pantalla selección de
carne. La definición predeterminada “Beef Rare140.0°F” (res un poco
cruda a 140.0°F) aparece. Los dígitos de temperatura destellarán.
6. Presione el botón ▲ ó ▼ para ver los 16 tipos de carnes y sus tem-
peraturas objetivo preprogramados. (Consulte la tabla de
carne/temperatura)
7. Presione “Enter” para seleccionar el tipo de carne mostrada. La pan-
talla LCD vuelve a la pantalla de temperatura actual. El nombre de la
carne seleccionada aparece encima de la lectura de la temperatura.
8. Para medir la temperatura interna de la comida, despliegue la sonda
de metal e introdúzcala en la parte más gruesa. No la ponga en contacto con hueso, grasa ni cartílago, ya que estas áreas no proporcionarán lecturas precisas de la temperatura. Tenga cuidado al colocar la sonda en posición para evitar lesiones o daños. NO DEJE EL
TERMÓETRO DENTRO DE LA PARILLA O DEL HORNO MIENTRAS COCINA Y NO TOQUE LA SONDA CALIENTE CON LAS
MANOS EXPUESTAS.
9. La temperatura interna actual de la comida aparece en la pantalla
LCD.
10. Las luces codificadas por color detrás del logotipo de Taylor® indi-
can si la temperatura actual es menor, superior, o está dentro de los
5 grados de la temperatura deseada.
Page 10

• Si la temperatura es menor que la temperatura deseada, parpadeará
una luz LED de color azul.
• Cuando la temperatura alcance la temperatura deseada, parpadeará
una luz LED de color verde.
• Si la temperatura es mayor que la temperatura deseada, parpadeará
una luz LED de color rojo.
(Nota: La temperatura debe estar dentro de los 30ºF (17ºC) de la temperatura deseada para que se activen las luces LED. Por lo tanto, es
posible que la luz azul no se encienda, incluso si la temperatura actual
es menor que la temperatura deseada. La temperatura actual aparecerá
en la pantalla.)
11. Cuando la comida esté lista, retírelo de la parrilla o del horno con
guantes resistentes al calor.¡NO TOQUE LA SONDA NI EL COMIDA
CON LAS MANOS EXPUESTAS!
12. La pantalla LCD tiene una práctica característica de iluminación
posterior para ver fácilmente la temperatura. Mientras la unidad esté
encendida, presione el botón “°F/°C” para encender la luz posterior
durante 10 segundos.
13. Presione sin soltar el botón “Enter” durante 3 segundos para apagar
la unidad.De otro modo, la unidad se apaga automáticamente
después de 10 minutos si no se presiona ningún botón y si no hay
cambio en la temperatura.
Nota: Cuando el termómetro se apaga, la memoria vuelve a la defini-
ción predeterminada de “Beef Rare 140.0ºF” (res un poco cruda a
140.0ºF). Si la unidad se apaga antes de terminar de cocinar, repita
los pasos de selección de carne que aparecen anteriormente para
volver a programar la temperatura deseada.
14. Lave la sonda de metal con agua jabonosa caliente. Cierre la sonda
plegándola con cuidado para guardar. Tenga cuidado al colocar la
sonda en posición para evitar lesiones o daños. Limpie la unidad de
termómetro a mano. No sumerja el termómetro en el agua de man-
era total.
Page 11

Tabla de carne/temperatura
A continuación se enumeran 16 tipos de carne y las temperaturas predefinidas.
Tipos de carne Nivel de cocción Temperaturas predefinidas
Res Algo crudo* 140°F/60°C
Algo cocido 145°F/62°C
Cocido 160°F/71°C
Medio cocido 165°F/73°C
Muy cocido 170°F/76°C
Hamburguesa Muy cocido 160°F/71°C
Porcina Cocido 160°F/71°C
Muy cocido 170°F/76°C
Aves de corral Carne blanca 165°F/73°C
Cordero Algo crudo* 140°F/60°C
Jamón Muy cocido 140°F/60°C
*El Departamento de Agricultura de los Estados Unidos (USDA) NO
recomienda ALGO CRUDO 140ºF (60ºC) como temperatura segura
para comer.
Parte oscura de la
carne blanca 165°F/73°C
Algo cocido 145°F/62°C
Cocido 160°F/71°C
Medio cocido 165°F/73°C
Muy cocido 170°F/76°C
Especificaciones
Rango de Temperatura: 16º a 302ºF o -9º a 150ºC
Resolución: Gama completa de 0.1°F y °C
16 tipos de carne preprogramados
Batería: 2 AAA (se incluyen)
Apagado automático: después de 10 minutos de no usarla
Tiempo de respuesta: 1 segundo
Page 12

Cuidado y precauciones
1. Lea siempre las instrucciones por completo para asegurarse de disfru-
tar del beneficio completo de todas las funciones de esta unidad.
2. Esterilice la sonda del termómetro cada vez antes de usarla.
3. Tenga precaución al manejar el termómetro. Tenga cuidado al colocar
la sonda en posición para evitar lesiones o daños. Use siempre
guantes resistentes al calor cuando toque el vástago del termómetro
durante o después de usarla. ¡NO LOS TOQUE LA SONDA CON LAS
MANOS EXPUESTAS!
4. NO sumerja la unidad del termómetro en líquido ni vierta líquido direc-
tamente en la unidad del termómetro puesto que eso causaría daño a
los componentes internos y anularía la garantía. Si derrama líquido
sobre la misma, séquela inmediatamente con un paño suave, sin
pelusas.
5. No lo lave en un lavaplatos. Esta unidad no puede lavarse en la
lavavajillas. El daño anulará la garantía. Limpie con un paño húmedo.
La grasa u otras suciedades rebeldes pueden removerse con una
esponjilla metálica. No limpie la unidad con materiales abrasivos ni
corrosivos. Esto puede rayar las piezas plásticas y corroer los circuitos
electrónicos.
6. No use este termómetro en un horno de microondas.
7. No manipule los componentes internos de la unidad. Hacerlo invalidará
la garantía de este producto y puede causar daños. Aparte del cambio
de batería, esta unidad no contiene piezas que necesiten servicio por
parte del usuario.
8. No exponga la unidad a fuerza, choques, polvo, temperatura ni
humedad en exceso. Esto puede hacerla funcionar mal, acortar la vida
útil electrónica, dañar las baterías o deformar las piezas.
9. No exponga el termómetro a: agua, calor directo, una superficie
caliente ni luz solar directa. Esto puede causar daño en la carcasa
plástica o en los circuitos eléctricos y componentes electrónicos del
interior.
10. No tire las baterías al fuego. Las baterías pueden explotar o tener
pérdidas. Retire las baterías si el termómetro no se utilizará por un
largo tiempo.
11. El rango de temperatura por encima o por debajo aparece: si la tem-
peratura medida está fuera del rango de temperatura de la unidad de
16º a 302ºF o -9º a 150ºC, la LCD mostrará “HH.H” (mayor que el
rango de temperatura ) o “LL.L” (menor que el rango de temperatura).
Page 13

Garantía limitada por un año
Taylor® garantiza este producto contra defectos en los materiales y en
la mano de obra durante 1 (un) año para el comprador original, a partir
de la fecha de compra original. No cubre daños ni desgastes que sean
consecuencia de accidentes, uso inadecuado, abuso, uso comercial, ni
ajustes y/o reparaciones no autorizadas.
Si necesita mantenimiento, no la devuelva al vendedor minorista. Si
este producto requiere mantenimiento (o cambio a nuestro entender),
sírvase empacar el artículo cuidadosamente y envíelo con el franqueo
pagado, junto con el recibo de la tienda en el que aparezca la fecha de
compra y una nota explicando el motivo de la devolución a:
Taylor Precision Products
2220 Entrada Del Sol, Suite A
Las Cruces, New Mexico 88001
No existen garantías expresas excepto las enunciadas anteriormente.
Esta garantía le otorga derechos legales específicos y es posible que
usted tenga otros derechos que varíen de un estado a otro.
©2010 Taylor Precision Products y sus compañías afiliadas, todos los
derechos reservados. Taylor® y Leading the Way in Accuracy® son
marcas registradas de Taylor Precision Products y sus compañías afili-
adas. Todos los derechos reservados.
USA
Fabricado en China según nuestras especificaciones exactas.
www.taylorusa.com
816 9.10
 Loading...