

Page 1

Tayama Appliance USA Inc.
www.tayama-usa.com
TAYAMA
R
User Manual
Stainless Steel
Rice Cooker
Model TRSC-10
Ple ase rea d all inst ructi ons car efull y before o perati ng the ap plian ce and ke ep for fu ture re feren ce.
Page 2

2
1
When using electrical appliances, basic safety precautions
should always be followed, including the following:
1. Read all instructions carefully.
2. Do not touch hot surfaces. Use handles or knobs. Use pot
holders when removing lid or handling hot containers.
3. To protect against electric shock, do not immerse cord,
plug or base in water or other liquid.
4. Close supervision is necessary when any appliance is
used by or near children.
5. Turn unit off and unplug from outlet when not in use and
before cleaning. Allow to cool before putting on or taking
off parts, and before cleaning the appliance.
6. Do not operate any appliance with a damaged cord or
plug or after the appliance malfunctions, or has been
damaged in any manner. Return appliance to the nearest
authorized service facility for examination, repair or
adjustment.
7. The use of attachments not recommended or sold by the
manufacturer may cause fire, electric shock, or injury and
voids warranty.
8. Do not use outdoors.
IMPORTANT SAFEGUARDS
9.
touch hot surfaces, including the stove.
10. Do not place on or near a hot gas or electric burner, or in
a heated oven.
11. Do not use appliance for other than intended use.
12. Extreme caution must be used when moving an
appliance containing hot oil or other liquids.
13. To reduce the risk of electric shock cook only in
removable container.
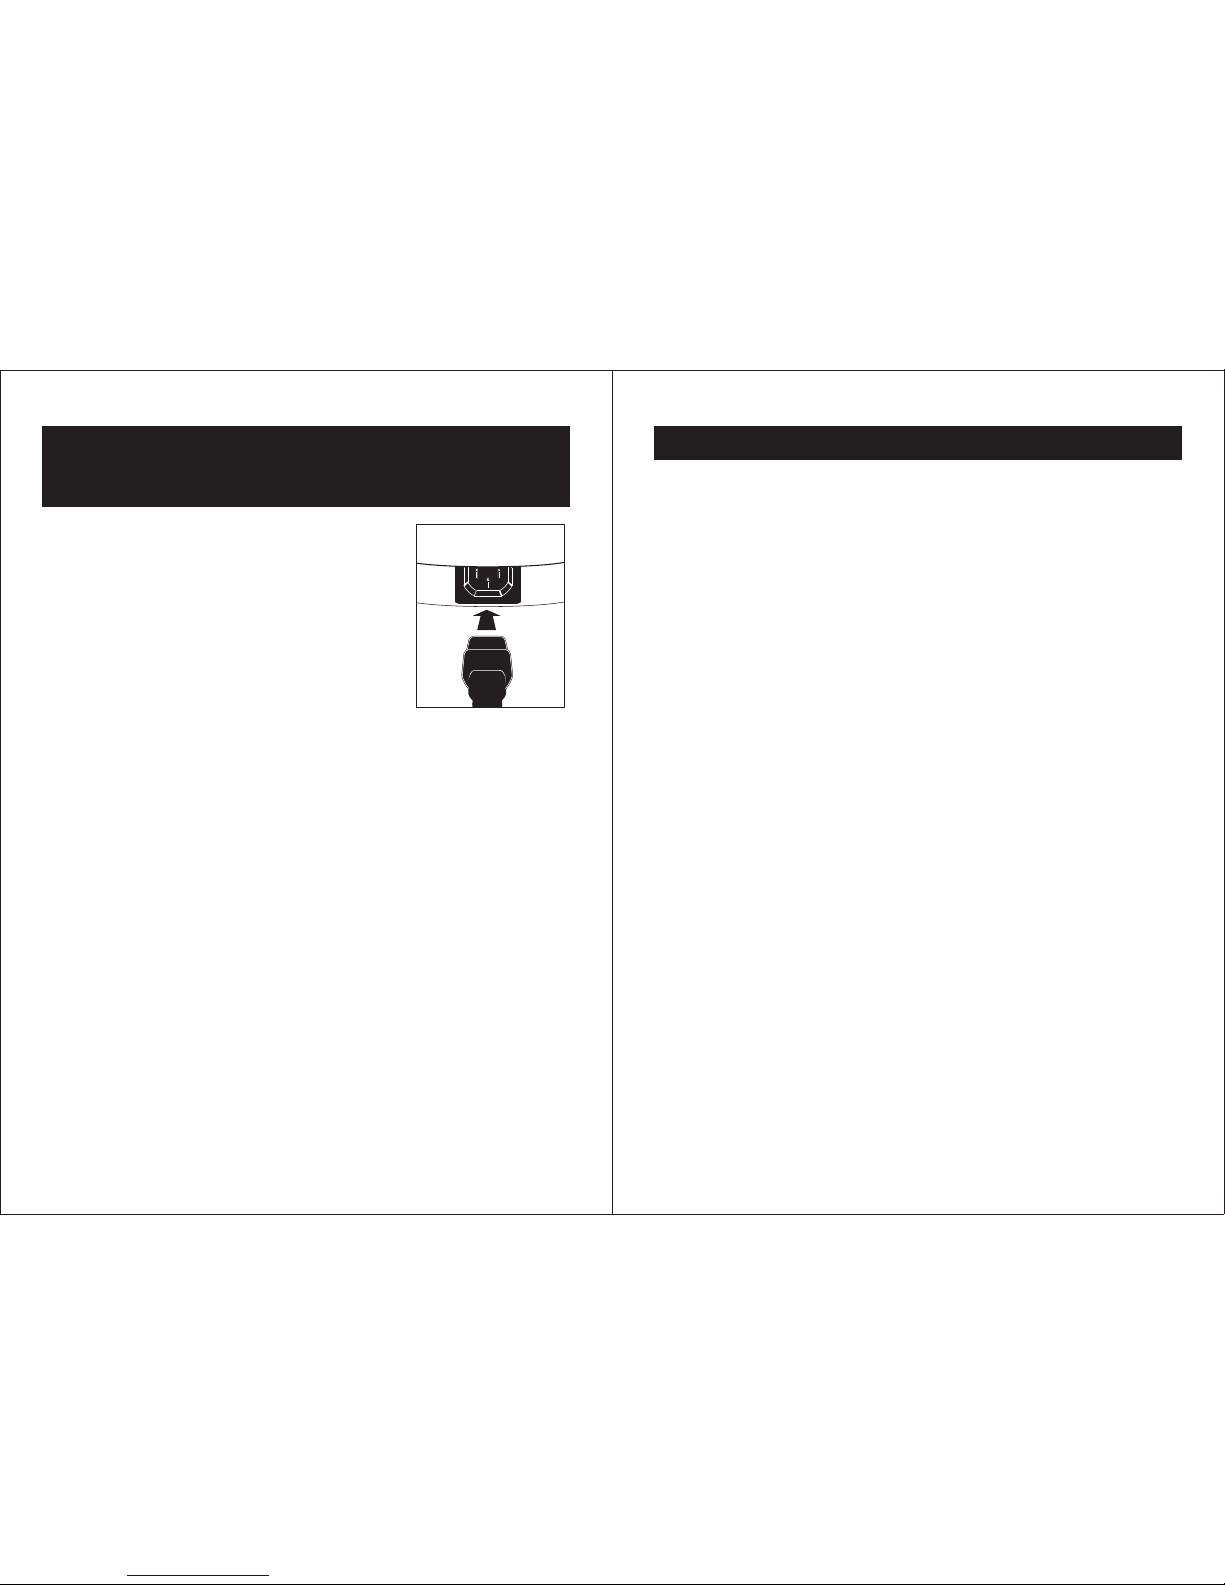
14. Always attach plug to appliance first, then plug cord into
the wall outlet. To disconnect, turn all controls to OFF,
then remove the plug. Always hold the plug – never pull
the cord.
15. To ensure continued protection against risk of electric
shock, connect to properly grounded outlets only.
Do not let cord hang over edge of table or counter, or
SAVE THESE INSTRUCTIONS
HOUSEHOLD USE ONLY
Page 3
CONSUMER SAFETY
INFORMATION
Improper use of the
grounded wire can result in a risk of electric shock. Consult a
qualified electrician if necessary. Do not atte mp t to d ef ea t
this safety feature by modifying the plug.
A short power-supply cord is provided to reduce the hazards
resulting from entanglement or tripping over a long cord. An
extension cord may be used with care. If it is necessary to use
an extension cord, it should be positioned so that it does not
drape over the counter or tabletop where it can be pulled on
by children or tripped over and:
a)Use only 2-wire extension cord with 2-blade plug.
b)The marked rating of extension cord must be equal to or
greater than the rating of this appliance. Electrical rating is
listed on the bottom of this unit.
WARNING:
GROUNDING INSTRUCTIONS
This appliance must be grounded. It is
equipped with a 2-wire detachable
cord with grounded plug. The plug
must be plugged into an outlet that is
properly installed and grounded.
BEFO RE YOUR FIRST USE
Carefully u np ack the rice co ok er and remove a ny p ackaging
materials . To remove any dus t that may have a cc umulated du ri ng
packaging , wa sh the rice bow l, l id, measuri ng c up, steamin g
basket and sp at ula in warm, so ap y water. Rinse a nd d ry
thoroughl y. Wipe the ba se w ith a clean, da mp c loth. Dry
thoroughl y. Do not use ha rs h detergent s or a brasive cle an sers on
any part of the r ic e cooker.
CAUTION: D o no t im me rs e the base, cord or plug in
water or other liquid.
4
3
Page 4
Handle the rice bowl carefully. Scratching or de nt ing the bowl
might cause u ns atisfacto ry p erformanc e.
Before usin g, b e sure that the o ut side of the ric e bowl is clean
and dry. Be su re that the hea t se nsor in the cen te r on the
inside of the u ni t is clean, dry a nd c ool.
Making Rice
It is advised t ha t you careful ly rinse your ric e
before cook in g. Do not rinse f la voured or
enriched ri ce o r if the packag e cl early state s
not to rinse. R in se under cold r un ning water in
a strainer un ti l the water run s clear. Do not rins e
rice in rice bo wl , as you may dama ge t he non
-stick coat in g. To measu re r ice using the
included ma rk ings in the ric e bo wl (see fig.1 ),
follow dire ct ions below.
USING THE I NCLUDED SCO OP :
Measure the d es ired quanti ty o f rice with the
included me as uring scoop . Ri nse the rice in
cold water, if r eq uired, and pu t in to the rice bow l. Add cold wate r,
filling to th e co rrespondi ng m arking unde r (cup) on the insi de of
the rice bowl . Fo r example: if y ou a re using 6 scoo ps o f rice, add
enough wate r to r each the “6” ma rk i n the rice bowl u nder
NOTE: These markings correspond t o the included
measuring scoop, not to standard measuring cup
amounts.
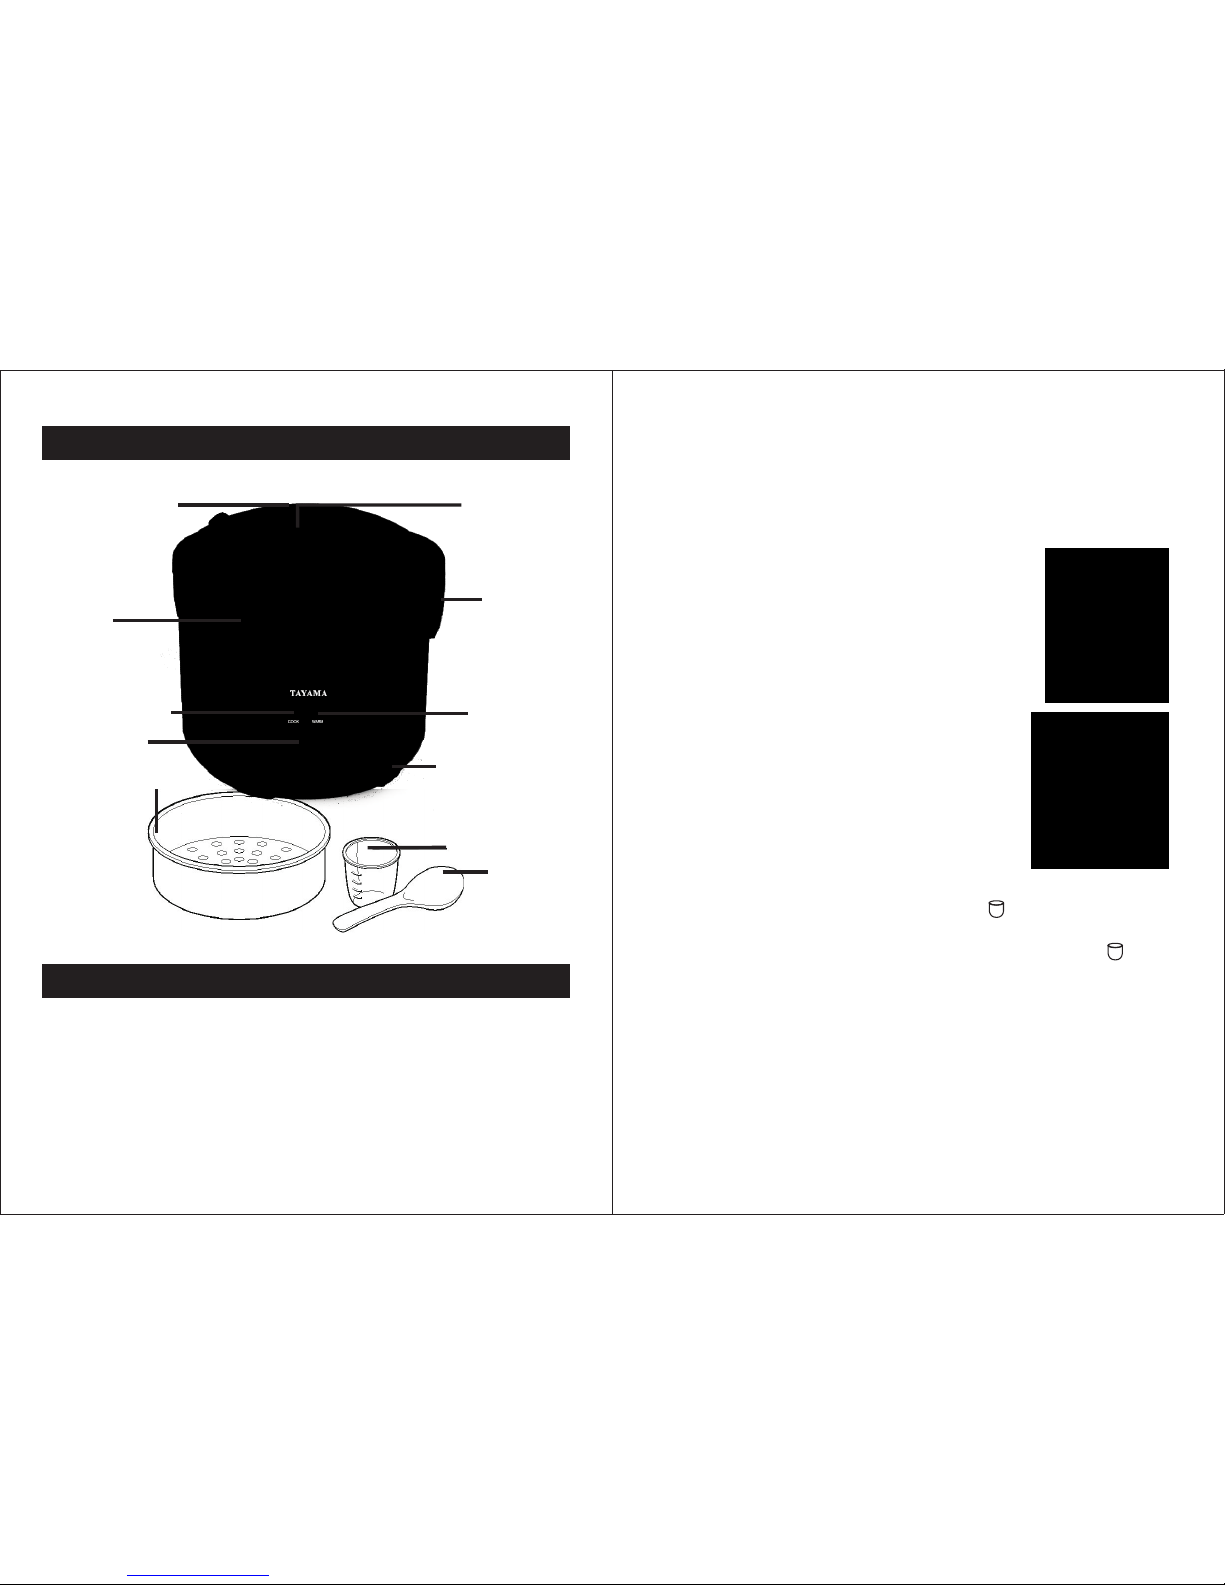
stay co ol l id and
handl e
rice bo wl
cooki ng i ndica tor
on/of f sw itch
steam er b asket
steam v en t
conde ns ation
colle ct or
keep- wa rm
indic at or
detac ha ble cor d
measu ri ng cup
spatu la
GETTIN G TO KNOW YOUR RICE COOKE R
6
5
USIN G YOUR RICE COOKER
Caution: When openin g, always open lid away from
face, to avoid steam bur ns.
Page 5

9.Aft er cookin g, fluff rice wi th spat ula, cl ose lid a nd k eep in Warm mo de
for 10 mi nu tes. Any e xcess m oistu re w ill be ab sorbe d durin g th is time .
Fluff r ice aga in and us e the spatu la to ser ve. Thi s techn ique re sults i n
fluff ier, bet ter tas ting rice . Be care ful to av oid ste am w hen ope ning th e
rice co ok er. Alway s turn of f and unp lug the r ice coo ke r befor e remov ing
the ric e bo wl. Alwa ys wear pro tecti ve oven m itts wh en t ouchi ng the ho t
rice bo wl .
NOTE: Your rice cooker will remain in the WARM function
until it is manually turned off. For best res ul ts , th e au to ma ti c
keep -warm cycle should be left on no longer than 5 hours at
a time. To stop the automatic keep-warm cycle, you must
unplug the appliance.
IMPORTAN T: If yo u wo ul d li ke t o be gi n another cook cycle
after your cook mode is completed, you must ensure that the
heat sensor on the inside of the base is clean, dry and cool.
Beginning a cook cycle with a cool heat sensor will ensure
your rice cooker will cook properly. If you wish to co ol t he
heat sensor down quickly, remove the rice bowl fro m th e un it
and leave the lid open. Allow the unit to cool down while you
are preparing the food or rice for your next cook cycle. Th e
cool-down process may take up to 30 minutes to complete.
NOTE: Follow the cleaning instructions, located on page 10,
after each use.
Pleas e no te: These ar e on ly sugg ested r atios . Diffe rent ty pes of ri ce
requi re d iff erent r atios of ri ce to wat er. Brow n rice and wi ld rice b lends w il l
requi re m ore wat er. It is ad visab le t o adjus t the rat ios to su it you own
taste s an d prefe rence s.
TO USE STAND AR D ME AS UR IN G CU PS
Refer t o th e cooki ng inst ructi on s on the pa ckage o f rice yo u ar e using .
Follo w th e ratio s, and ad just ac co rding ly to sui t your pr ef erenc es.
Ca ution : To ensur e that your r ice cooker does not
boil over, never pour water into the rice bowl
exceeding the "MAX" level marking.
Cooki ng R ice
1.Mea su re desi red amo unt of ri ce .
2.If re qu ired, r inse ri ce in col d wa ter unt il wate r runs cl ea r.
3.Pla ce w ater an d rice in to rice b ow l.
4.Pla ce r ice bow l into ri ce cook er b ase.
5.Clo se r ice coo ker lid , ensur in g that it " click s" into p la ce.
6.Plu g co rd into a 1 20V 60H z AC only ou tl et.
7.Pus h On /Off lever d own to begi n cooki ng.
NO TE : For sof ter ric e, a llow th e rice to s oak in th e wa ter for 1 0 to 20
minut es p rior to c ookin g.
8.Whe n co oking i s compl ete, th e ri ce cook er will a utoma ti cally s witch
into Warm mo de. Thi s featu re will k ee p your ri ce at ser ving te mperatu re.
The kee p wa rm indi cator l ight wi ll i llumi nate.
TYPE OF R ICE
AMOUN T OF RICE
AMOUN T OF WATER
COOKED YI ELD
250mL / 8 oz c ups
Short g rai n white r ice
2 scoop s
4 scoop s
8 scoop s
Line 2
Line 4
Line 8
4 cups
7 cups
14 cups
8
7
Page 6

Usin g the Steamer basket
1.Mea su re wate r into ri ce bowl . Pl ace foo ds to be st eamed i nto the
steam er b asket ; place b asket i n the rice bo wl.
2.Pla ce r ice bow l with ba sket in to b ase and c lose th e lid.
3.Plu g co rd into a 1 20V 60 Hz AC o nly out le t.
4.Pus h le ver dow n to star t cooki ng . Cook ac cordi ng to tim es i ndica ted
in reci pe s.
It is adv is ed that y ou clea n your ri ce c ooker a nd all of t he used
acces so ries af ter eac h use. En su re the ri ce cook er is unplu gged be fore
clean in g. NEVE R clean t he rice c oo ker whi le it is st ill plu gg ed in.
Do not us e ha rsh or ab rasiv e cleanse rs on any p art of th e rice cook er. Do
not imm er se the ma in body i n water. R em ove the r ice bow l, and th e
steam er b asket ( if used ) from th e ma in body. Wa sh thes e items i n wa rm
soapy w at er alon g with th e spatu la a nd meas uring s coop. Do no t use any
scour in g pads on t he rice b owl as th ey w ill dam age
the non - st ick coa ting. I f rice ha s "baked" o n the
rice bo wl a nd regu lar was hing will n ot remo ve it,
place h ot s oapy wa ter int o the bow l an d let it si t.
After a ll owing t he bowl t o soak, t he r ice sho uld be
loose ne d enoug h to remo ve. If th is d oes not w ork,
conti nu e to let th e rice bo wl soak .
After e ve ry use, a r esidu e will bu il d up on the
under si de of the l id plat e. To clean , wipe th e lid and
the lar ge s ilico ne ring ( being car eful no t to remo ve
it) wit h a wa rm, dam p cloth . We reco mmend
remov in g the sil icone g asket by tu rning c ounte r
clock wi se to unl ock fro m the lid p la te.
● Try u sing be ef, pou lt ry or veg etabl e stock i ns tead of w ater fo r more
flavo ur ful ric e.
● Exper im ent wit h different ki nds of ri ce. Your ri ce cooker i s perfe ct for
many ki nd s of rice i nclud ing Wil d Ri ce blen ds, Jas mine Ri ce , Brown
Rice an d Ba smati R ice.
● Rinsi ng y our ric e washe s away ex ce ss star ch and ma kes flu ffier r ice.
Do not wa sh f lavor ed or enr iched r ic e; it wil l wash aw ay flav ou rs and
valua bl e nutri ents.
● Do not op en l id duri ng cook ing or co ok w ith lid o pen. He at and
moist ur e will es cape an d affec t the fin al outc ome.
● Alway s en sure th at the ou tside o f yo ur rice b owl and t he insi de o f the
rice co ok er body a re clea n and dry bef ore sta rting a ny cook in g mode.
● When co ok ing ric e, ensu re that t he r ice is we ll dist ribut ed a round t he
rice bo wl t o allow f or even c ookin g.
CLEA NING YOUR RICE COOKER
10
9
HELPFUL HI NTS
Wipe th e ga sket an d the ste am vent w ith a warm, d amp clo th. Ens ure the
silic on e gaske t is prop erly inse rted in to the li d plate b ef ore usi ng.
Be sure t o cl ean the c onden satio n ch amber l ocate d on the si de o f the ric e
cooke r bo dy. To clean, rem ove the c hambe r by p ressi ng on the s ides of t he
plast ic c over an d remov ing by pu ll ing out wards . Clean by ru nning t he
plast ic c over un der war m runni ng w ater. Dr y thoro ughly a nd r eplac e by
pushi ng t he cove r back in to the gr oo ve on the r ice coo ker body.
To clean th e in side of y our ric e cooke r, en sure it h as cool ed down . Us e a
damp cl ot h to clea n the ins ide rem ov ing rem ainin g food an d mo istur e. Dry
thoro ug hly.
To clean th e ma in body o f the ric e cooke r, wi pe the ex terio r inclu di ng the
lid wit h a da mp clot h. NEVER im merse a ny p art of th e main bo dy in wat er
or liqu id . Polis h the ext erior o f th e rice co oker wi th a dry, so ft clot h.
 Loading...