

Page 1
R
TAYAMA
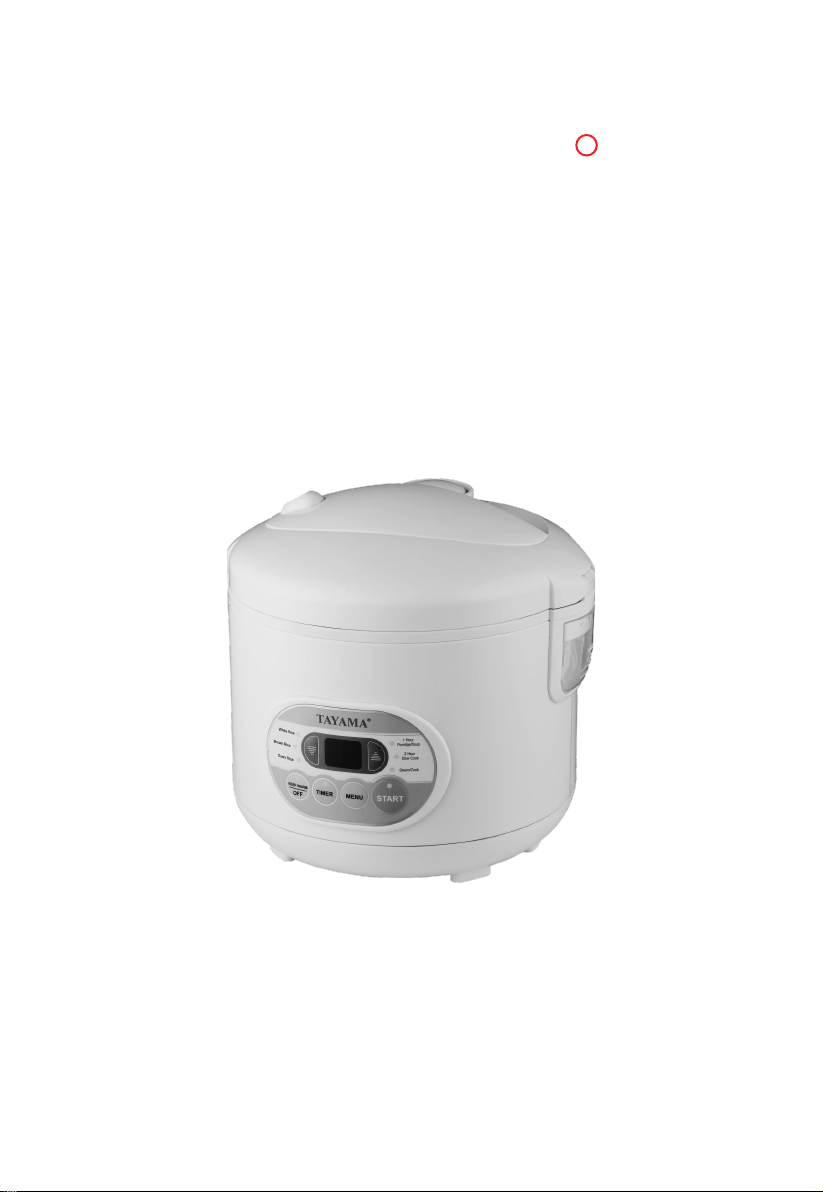
10-Cup Rice Cooker
and Food Steamer
Instruction Manual
Model:MB-YC50D
Page 2

Congratulations on your purchase of the Rice Cooker & Food
It will surely become one of the most useful and versatile appliances
in your modern kitchen.
Rice Cooker can automatically control heating power with the capability
of multiple functions, such as cooking rice, quick cook, making porridge and
soup, heating cold rice and cooking small portions of rice. This rice cooker is
easy to operate and will yield perfect results during every use.
Please read the following instructions carefully before your first use.
Steamer.
Page 3

IMPORTANT SAFEGUARDS
Basic safety precautions should always be followed when using electrical appliances,
including the following:
Basic safety precautions should always be followed when using electrical
appliances, including the following:
1. Important: Read all instructions carefully before first use.
2. Make sure the appliance is unplugged when not in use, before putting on or taking
off parts, and before cleaning.
3. To protect against electrical shock, do not immerse cord, plug or the appliance itself
in water or other liquid.
4. Close supervision is necessary when the appliance is used near children.
5. Do not operate any appliance with a damaged cord or plug or after the appliance
malfunctions or has been damaged in any manner. Return appliance to the
nearest authorized service facility for examination, repair or adjustment.
6. Do not use attachments or accessories other than those supplied or recommended
by the manufacturer. Incompatible parts create a hazard.
7. Do not use outdoors.
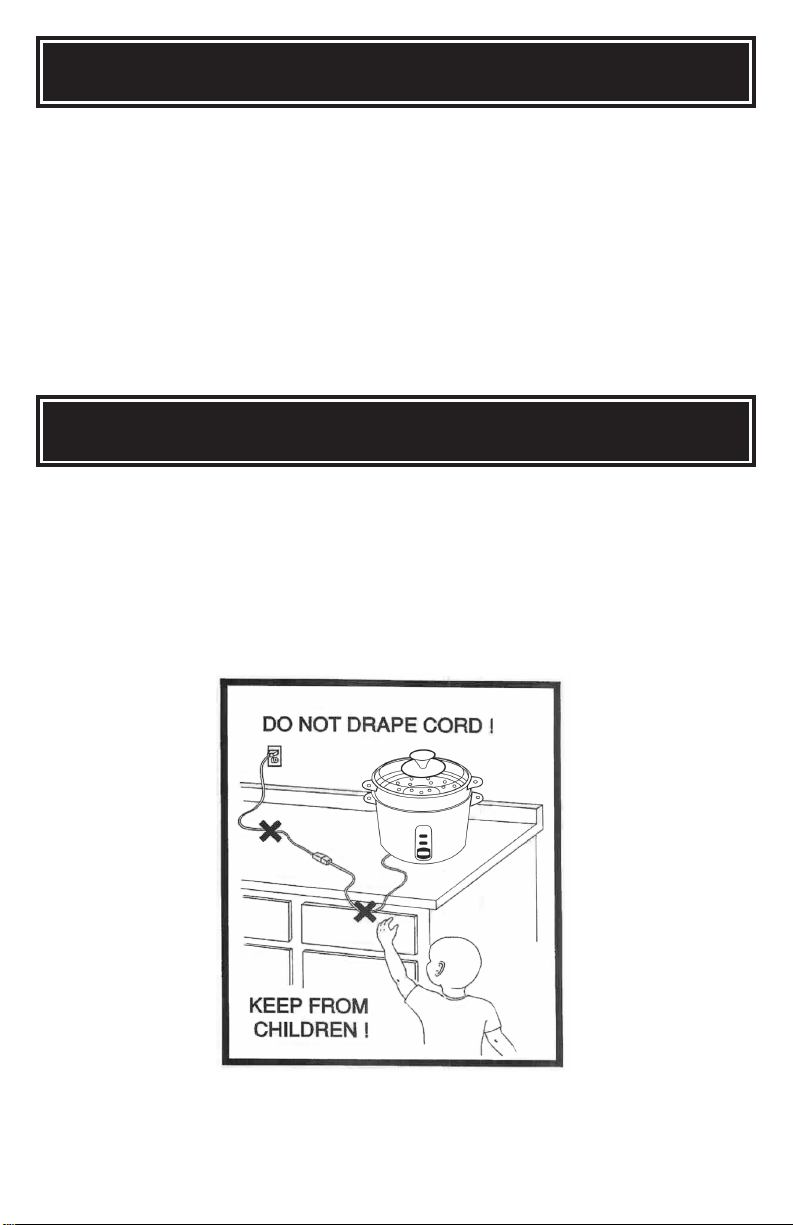
8. Do not let cord hang over the edge of a table or counter, or touch hot surfaces.
9. Do not place on or near a hot gas, electric burner or in a heated oven.
10. Do not use the appliance for other than the intended use.
11. Extreme caution must be used when moving the appliance containing hot rice or
other hot liquids.
12. Always unplug from the base of the wall outlet. Never pull on the cord.
13. The rice cooker should be operated on a separate electrical circuit from other
operating appliances. If the electric circuit is overloaded with other appliances, this
appliance may not operate properly.
14. Avoid sudden temperature changes when using the rice cooker.
15. Use only with 120V AC power outlet.
16. Always make sure the outside of the inner cooking pot is dry prior to use. If
cooking pot is returned to cooker when wet, it will damage this product causing it to
malfunction.
17. Use extreme caution when opening the lid during or after cooking. Hot steam will
escape and could cause burns.
18. During the cooking, you may see steam coming from the vents on the lids. This is
normal. Do not cover, touch or obstruct steam vent.
19. Do not touch hot surfaces. Use handles or knobs.
20. Store rice cooker in a cool, dry place.
21. Use appliance on a level, dry, and heat-resistant surface.
SAVE THESE INSTRUCTIONS
1
Page 4
SHORT CORD INSTRUCTION
1. A short power-supply cord is provided to reduce risk resulting from becoming
entangled in or tripping over a longer cord.
2. Longer extension cords are available and may be used if care is exercised in their
use.
3. If a longer extension cord is used:
a. The marked electrical rating of the extension cord should be at least as great as
the electrical rating of the appliance.
b. The longer cord should be arranged so that it will not drape over the counter top
or tabletop where it can be pulled by children or tripped over unintentionally.
POLARIZED PLUG
This appliance has a polarized plug (one blade is wider than the other); follow the
instructions below:
To reduce the risk of electric shock, this plug is intended to fit into a polarized outlet
only one way. If the plug does not fit fully into the outlet, reverse the plug. If it still does
not fit, contact a qualified electrician. Do not attempt to modify the plug in any way.
This appliance is for household use only.
2
Page 5
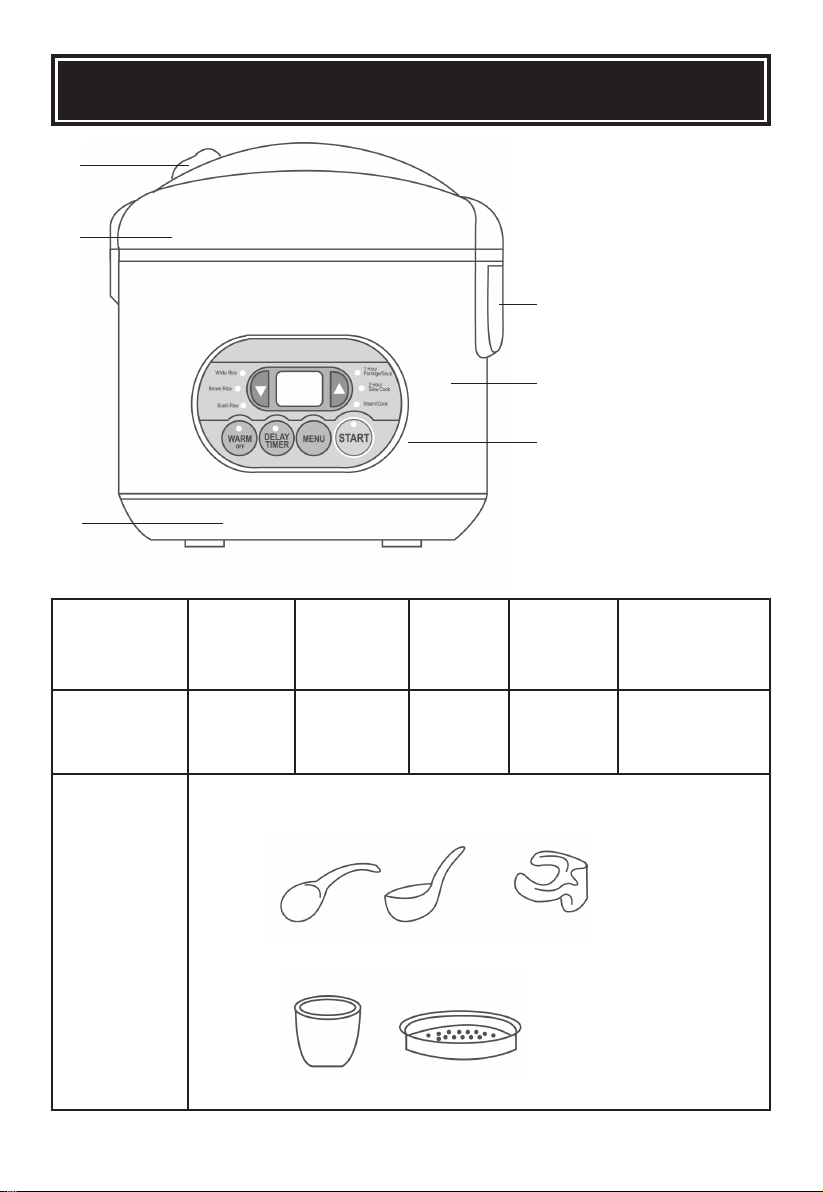
PARTS IDENTIFICATION
1. Release Button
1
2
3
2. Cover
3. Base
4. Water Case
5. Outer Body
6. Control Panel
4
5
6
(see page 4)
Model
MB-YC50D 120V/60Hz 650 2-10
Power
Supply
Rated
Power(W)
Quantity
(Cup)
Rice Paddle Soup Ladle Spoon Shelf
Accessories
Measuring Cup Steamer
3
Rice
Cooking
Mode
Direct
Heating
LxWxH (mm)
280x261x281
Page 6

CONTROL PANEL & OPERATION
“Reduce Timing” Key
“White Rice”
Indicator Light
“Brown Rice”
Indicator Light
“Sushi Rice”
Indicator Light
Time Display
“Warm/Off” Key
“Delay Timer” Key
“Increase Time” Key
“1 Hour Porridge/Soup”
“2 Hour Slow Cook”
Menu Key:
• Press the “Function Selection” keys to select one of the six functions:
Steam/Cook
2 Hour
Slow Cook
1Hour
Porridge/Soup
White Rice
Sushi Rice
Indicator Light
Indicator Light
“Steam/Cook”
Indicator Light
“Start” Key
“Menu” Key
Brown Rice
Warm/Off Key:
• At standby, when the “Warm/Off” key is pressed, the “Warm” indicator light will
illuminate, indicating the warming function is selected.
• In operating condition or warming condition, when the “Warm/Off” key is pressed, the
indicator light goes off and the “Start” indicator light flickers, switching to standby
mode.
Delay Timer Key:
• At standby, press the “Delay Timer” key to select the time you want your rice to finish
cooking. Use the “Increase Timing” key and “Reduce Timing” key to adjust the time in
15 minute intervals.
• When timing is not required, exit the timing function by pressing the “Warm/Off” key.
Start Key:
• After selecting the desired function, press the “Start” key to begin cooking.
4
Page 7

HOW TO USE
Before First Use:
1. Read all instructions and important safeguards.
2. Remove all packaging materials and make sure items are received in good condition.
3. Tear up all plastic bags, as they can pose a risk to children.
4. Wash accessories in warm soapy water. Rinse and dry thoroughly.
5. Remove inner pot from rice cooker and clean with warm soapy water. Rinse and dry
thoroughly before returning to cooker.
6. Wipe body clean with a damp cloth.
• Do not use abrasive cleaners or scouring pads.
• Do not immerse the rice cooker base, cord or plug in water at any time.
To Cook Rice:
1. Using the measuring cup provided, measure and add rice to
the pot. One full level cup equals one cup.
2. Rinse rice in a bowl until water becomes relatively clear. Do
not rinse in inner pot to avoid damaging the nonstick surface.
3. Add rice to the inner pot.
4. Using the water measurement lines inside or the measuring
cup, add appropriate amount of water. A rice/water
measurement chart has been included on page 7.
5. Dry outer surface of pot and place into rice cooker body,
pressing down until you hear a click.
6. Select cooking function, and press start. For helpful tips on
functions, see page 6.
7. After cooking, allow rice to stand for 5-10 minutes without removing lid. This will
ensure that rice is cooked thoroughly.
YES NO
To Steam Food:
1. Place steam rack inside rice cooker.
2. Place food on rack if it fits without falling through, or you may place food in a
heat-proof bowl and place bowl on the rack inside the rice cooker.
3. Add the desired amount of water to the inner pot. A convenient steaming guide has
been included on page 8.
4. When steaming is complete, the rice cooker will automatically shut off.
CAUTION:
• Do not open lid when in use.
• If cooking pot is returned to cooker when wet, it will damage this product, causing it
to malfunction.
5
Page 8

HOW TO USE & HELPFUL TIPS
To Keep Warm:
1. To reheat cooked rice, add rice to the inner pot, plug in power cord, and select the
“Warm/Off” function.
2. To keep rice warm after cooking, allow rice to sit in the rice cooker after process is
complete and the rice cooker will automatically switch to “Warm/Off” function.
Water Holder:
1. Pull water holder toward you until you hear a click.
2. Slowly remove water holder by pulling upward.
3. Empty and wash water holder, then dry thoroughly.
4. Replace water holder by pushing down until you hear a click.
Helpful Tips:
1. The “Start” indicator light will illuminate, signaling the start of the cooking process.
2. After cooking is complete, it is best to loosen the rice within 30 minutes to keep rice
from sticking together.
3. After cooking rice or steaming, the “Warm/Off” indicator light will illuminate, and all
other lights will go out, signaling automatic warming is functioning.
4. When using the Porridge/Soup functions, the “Warm/Off” indicator light will flicker and
shutdown will begin automatically.
5. To cook soft porridge, it is recommended to use the “2 Hour” function. For white
porridge, it is recommended to use the “1 Hour” function.
6. After cooking porridge, do not let it sit in rice cooker for any length of time.
7. When ladling out rice, use the spoon accessory included. Never use a metal spoon to
avoid damaging the nonstick surface.
8. When using the “Delay Timer” function, be sure to plan ahead what time you want
your rice to be done. For example, if it is 2:00 p.m. and you want your rice to be done
at 8:00 p.m., set the timer for six hours.
6
Page 9

COOKING GUIDE
Rice/Water Measurement Chart:
UNCOOKED RICE WATER WITH
MEASURING
CUP
2 Cups
3 Cups
4 Cups
5 Cups
6 Cups
7 Cups
8 Cups
9 Cups
10 Cups
2-1/2 Cups
3-1/2 Cups
4-1/2 Cups
5-1/2 Cups
6-1/2 Cups
7-1/2 Cups
8-1/2 Cups
9-1/2 Cups
10-1/2 Cups
WATERLINE
INSIDE POT
Line 2
Line 3
Line 4
Line 5
Line 6
Line 7
Line 8
Line 9
Line 10
APPROX COOKED
RICE YIELD
4 Cups
6 Cups
8 Cups
10 Cups
12 Cups
14 Cups
16 Cups
18 Cups
20 Cups
NOTE:
• When cooking brown or wild rice, add an additional 3/4 cup water.
• The measuring cup included is not an exact cup. Chart refers to cups of rice/water
based on the measuring cup provided with this appliance.
HELPFUL HINTS:
1. Rinse rice to remove excess bran and starch. This will help reduce browning and
sticking to the bottom of the pot, but it may also reduce nutrients in rice.
2. If you have experienced any sticking due to the type of rice you are using, try adding
a light coating of vegetable oil or non-stick spray to the bottom of the inner pot before
adding rice.
3. This is only a general measuring guide. As there are many different kinds of rice
available (see About Rice on page 8), rice/water measurement may vary slightly.
7
Page 10

COOKING GUIDE
Steaming Chart:
VEGETABLE AMOUNT OF WATER STEAMING TIME
Asparagus 1/2 Cup 20 Miinutes
Broccoli 1/4 Cup 15 Minutes
Cabbage 1 Cup 25 Miinutes
Carrots 1 Cup 25 Miinutes
Cauliflower 1 Cup 25 Miinutes
Corn 1 Cup 25 Miinutes
Eggplant 1-1/4 Cup 30 Miinutes
Green Beans 1 Cup 25 Miinutes
Peas 1/2 Cup 20 Miinutes
Spinach 1/2 Cup 20 Miinutes
Squash 1/2 Cup 20 Miinutes
Zucchini 1/2 Cup 20 Miinutes
HELPFUL HINTS:
1. Since most vegetables only absorb a small amount of water, there is no need to
increase the amount of water with a larger serving of vegetables.
2. Always keep the lid closed during the entire steaming process. Opening the lid
causes a loss of heat and steam, resulting in a slower cooking time. If you find it
necessary to open the lid, you may want to add a small amount of water to help
restore the cooking time.
3. Altitude, humidity and outside temperature will affect cooking times.
4. The steaming chart is for reference only. Actual cooking time may vary.
8
Page 11

STEAM VALVE
The steam valve should be washed frequently
To Disassemble Steam Valve:
1. Rotate the steam valve back and forth while pulling up (Fig. 1).
2. If first method is difficult, gently push the steam valve from underneath (Fig. 2).
3. To open, rotate clockwise, following the arrowhead, and pull forward (Fig. 3).
Fig. 1 Fig. 2 Fig. 3
To Install Steam Valve:
1. Twist cap back on by matching up the triangle marks on the cover of the steam valve
(Fig. 4).
2. Rotate it until you hear a click.
3. Insert it into the steam valve opening in lid. Make sure the steam valve is securely in
place before operating (Fig. 5).
Fig. 4 Fig. 5
9
Page 12

HOW TO CLEAN
Always unplug unit and allow to completely cool before cleaning.
1. Remove the inner cooking pot. Wash it in warm, soapy water using a sponge or
dishcloth.
2. Rinse and dry thoroughly.
3. Repeat process with steam rack, and other provided accessories.
4. Wipe the body of the rice cooker clean with a damp cloth.
• Do not use harsh abrasive cleaners.
• This appliance is NOT dishwasher safe. Inner pot is NOT dishwasher safe.
10
Page 13

ABOUT RICE
Rice is a valuable source of lowfat, complex carbohydrates and is abundant in thiamin,
niacin and iron. It is an essential ingredient for a healthy diet.
There are many different varieties of rice available in the market. Your Tayama Rice
Cooker can cook any type, perfectly, every time. Below are the commonly available
varieties of rice and their characteristics:
Long Grain Rice:
Typically, this rice is not starchy and has loose, individual grains after cooking. The
“California” rice is soft; “Carolina” is a little firmer, and “Jasmine” is the firmest of the long
grain variety and is flavorful and aromatic.
Short Grain Rice
Short grain is characteristically soft, sticky and chewy. this is the rice used to make
sushi. “California Rice” is soft; “Sweet Rice”, often called “pearl” rice for its round shape,
is extra sticky and is excellent for making rice pudding.
Brown Rice
Brown rice is often considered the most healthy variety. It has bran layers on the rice
grains and contains more B-complex vitamins, iron, calcium and fiber than polished
(white) rice. the most popular brown rice is long grain and has a chewy texture.
Wild Rice
Wild rice comes in
rice for its firmer texture and rich brown to black color. Wild rice makes wonderful
stuffing for poultry when cooked with broth and mixed with your favorite dried fruits.
many delicious varieties and mixes. Often, it is mixed with long grain
11
Page 14

TROUBLESHOOTING
Problem Possible Causes Solutions
Indicator light is
not bright and/or
electric tray is not
warm.
Electric tray is hot.
Indicator light is
bright and/or
electric tray is not
warm.
Rice is not
properly cooked
and/or cooking
time is too long.
Rice is burnt
and/or cannot
keep warm
automatically.
• Power supply is not connected
to circuit.
• Power wiring board is damaged.
• Circuit connection broke down.
• Master circuit board is
damaged.
• Temperature controller has
malfunctioned.
• Electric-thermal tube is burnt
out.
• Circuit board is disconnected.
• Power circuit board is
damaged.
• Keep warm time is insufficient.
• Electric tray is damaged.
• Interior pot is not in place
properly.
• There is foreign matter between
the inner pot and electric tray.
• Inner pot is damaged.
• Master circuit board is damaged.
• Temperature control is damaged.
• Master circuit board is damaged.
• Temperature control is damaged.
1. Inspect the switch, plug and
socket to ensure that they are
all properly connected and on.
2. Send to designated service
technician.
Send to designated service
technician.
1. Adjust inner pot to make sure
it is placed properly.
2. Make sure inner pot and
components are clean.
3. Contact Aroma’s customer
service to order a new inner
pot.
4. Send rice cooker to
designated service technician.
Send to designated service
technician.
Overflow occurs
when making
porridge.
Rice or porridge
does not boil after
a great length of
time.
Huarun Appliance Inc.
2660 River Ave.
Rosemead, CA 91770
Tel: (626) 280-6679 Email: info@huarun.us
Fax: (626)280-8589 Website: http://www.tayama.us
Toll Free: 1-866-9TAYAMA or 1-866-982-9262
• Master circuit board is damaged.
• Temperature control is damaged.
• There is foreign matter in the
steam valve.
• Master circuit board is damaged.
• Temperature control of cover is
damaged.
12
1. Wash the steam valve.
2. Send to designated service
technician.
Send to designated service
technician.
 Loading...