

Page 1
46-060675 / 46-114375 / 46-114500/
40-060675 / 40-114675
Page 2
Page 3
Page 4
Page 5
Page 6

Page 7

Flanges fit under accessory tray when attached.
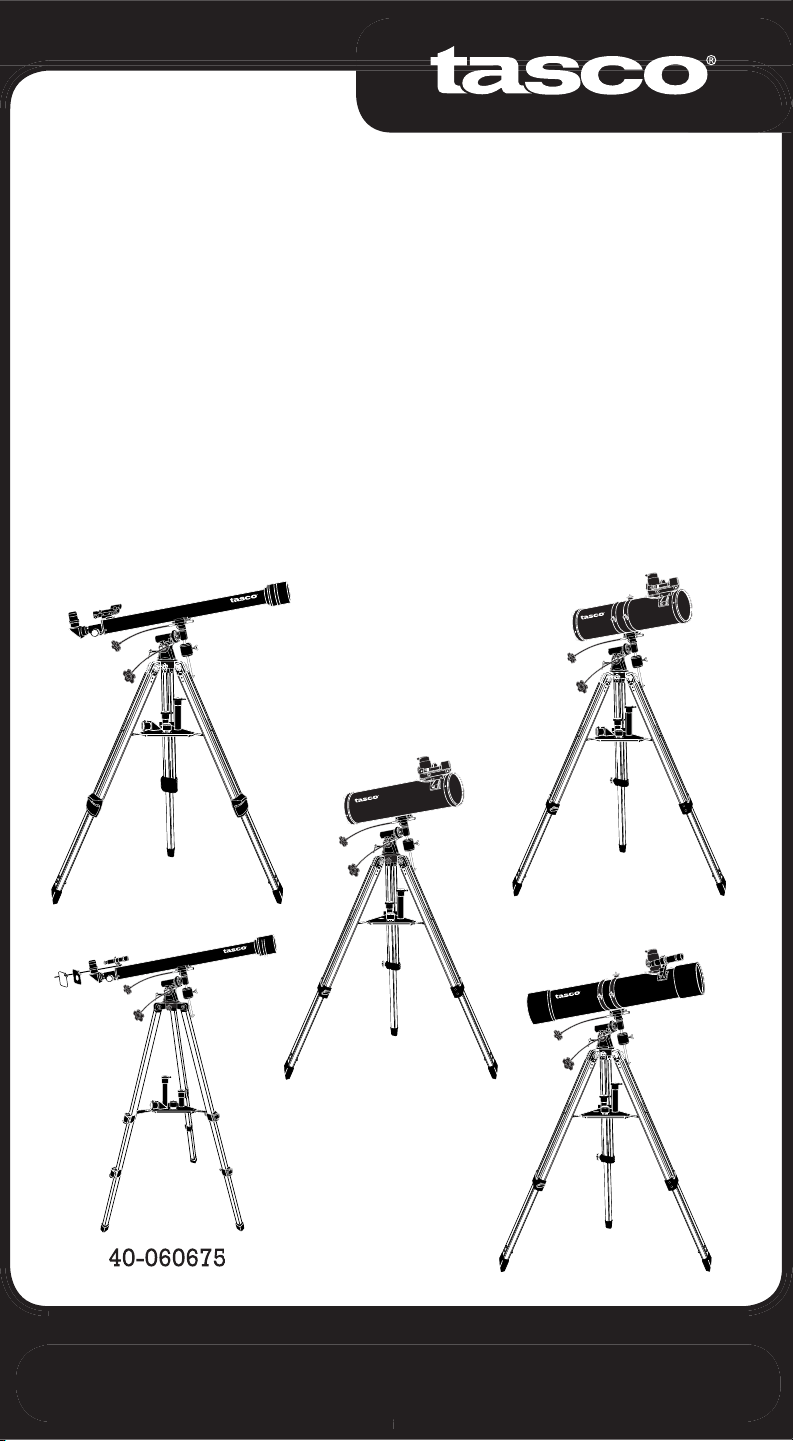
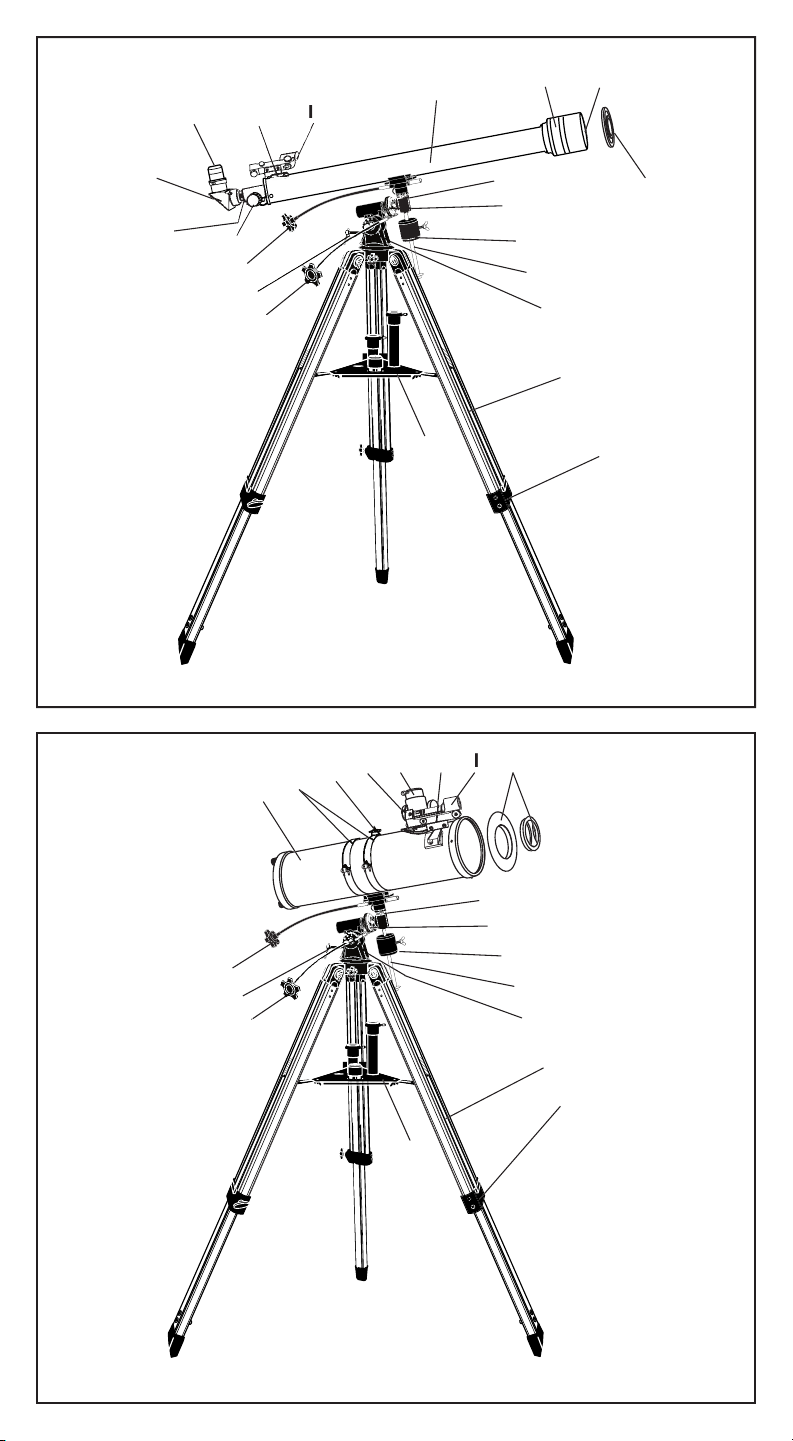
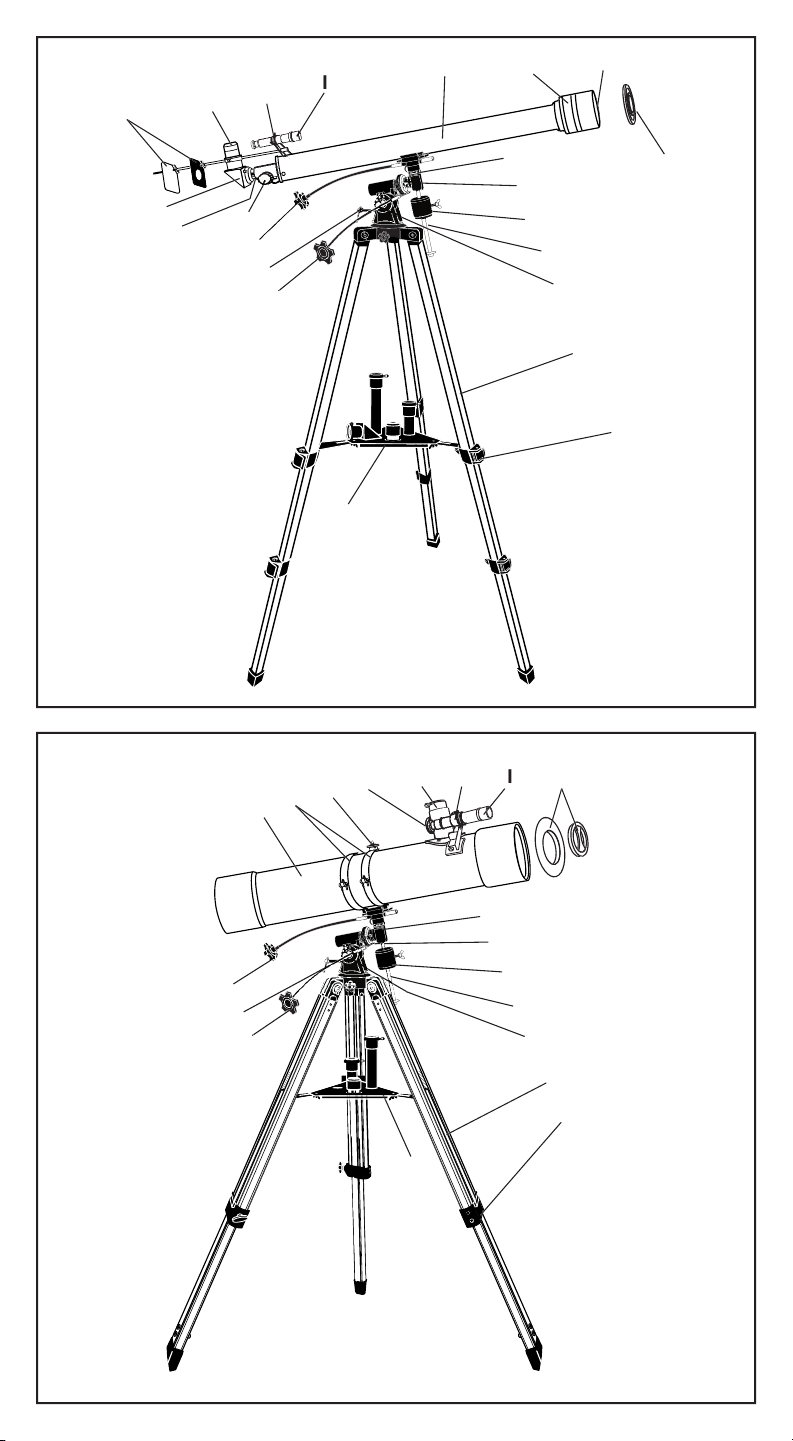
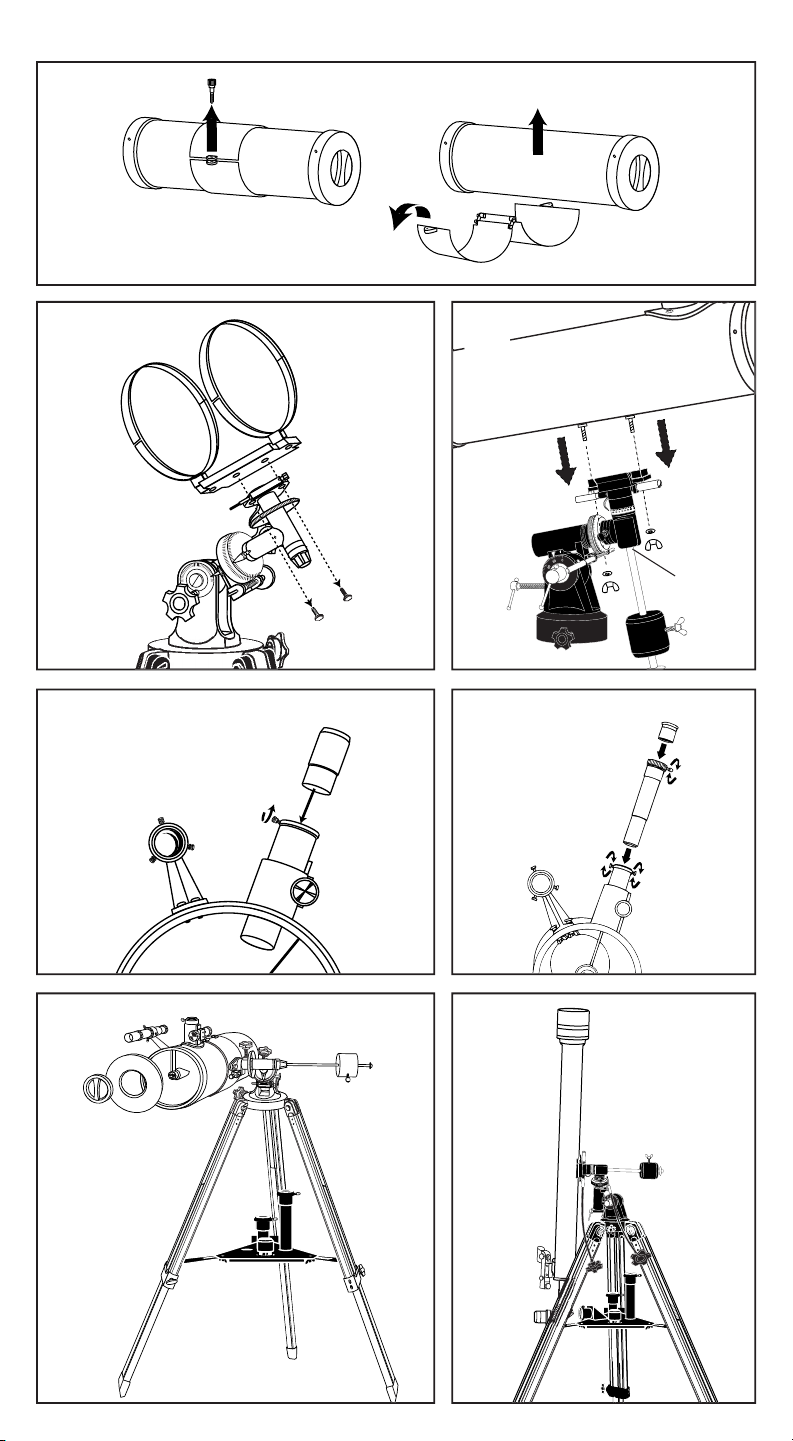
Remove telescope main body (J), counterweight
Remove the finderscope with finderscope bracket (H) attached
Remove the StarPointer finderscope with finder-
Diagonal is only to be used in combination with the eyepieces (oculars). Never use
In all astronomical telescopes, the image appears upside down. With the use of the
Page 8

BALANCING YOUR TELESCOPE
until it stops.
Page 9
Page 10
Page 11

Flanges fit under accessory tray when attached.
Sortez le corps principal (J) du télescope, le con-
Sortez le télescope chercheur avec support (H) de la boîte.
Page 12

jusquʼà ce que lʼimage se trouve bien au centre de lʼoculaire. Serrez tous les boutons sur le
jusquʼà ce que le point rouge se trouve sur lʼétoile.
Page 13

jusquʼà lʼobtention dʼune image nette.
Page 14

900mm
Page 15

Sacar el telescópico buscador con la abrazadera del mismo
Sacar el telescópico buscador StarPointer con la
jeros en la base de la abrazadera queden alineados con los agujeros expuestos en el cuerpo
Page 16

Page 17

FL (telescópico) en mm
Page 18

Page 19

46-060675
Page 20

Rimuovete dal contenitore il corpo principale del
Rimuovete dal contenitore il cercatore con il relativo supporto
Rimuovete dal contenitore il cercatore StarPointer
Page 21

fino a che si fermi.
Page 22

FL (oculare) in mm
Page 23

Page 24

Page 25

jedem Bein. Ergreifen Sie die äquatoreale Montierung und heben Sie sie an. Ziehen Sie die
Die Flansche passen unter das Zusatztablett, wenn es befestigt ist.
Nehmen Sie den Teleskopkörper (J), das
Nehmen Sie den Sucher mit anhängender Sucherklammer
Nehmen Sie den StarPointer Sucher mit anhän-
Der Diagonalspiegel ist nur in Verbindung mit den Okularen zu verwenden.
Page 26

Page 27

Page 28

Page 29

(hohe Vergrößerung)
Page 30

juiste evenwicht. Zet de schroeven van de wieg vast (Fig. 11a). Bevestig de controlekabels aan
Neem de telescoopbuis (H), het tegengewicht
Neem de zoeklens en de klem van de zoeklens (F) die eraan
Neem de StarPointer-zoeklens met de klem van
jnd zijn met de gaten in de telescoopbuis. Breng de gekartelde duimschroeven opnieuw aan en
Page 31

jnd met de telescoop. Eens u de procedure kent en wat hebt geoefend is het vrij eenvoudig.
Page 32

FL (oogstuk) in mm
Page 33

Page 34

ooglens
ooglens
ooglens
ooglens
Page 35

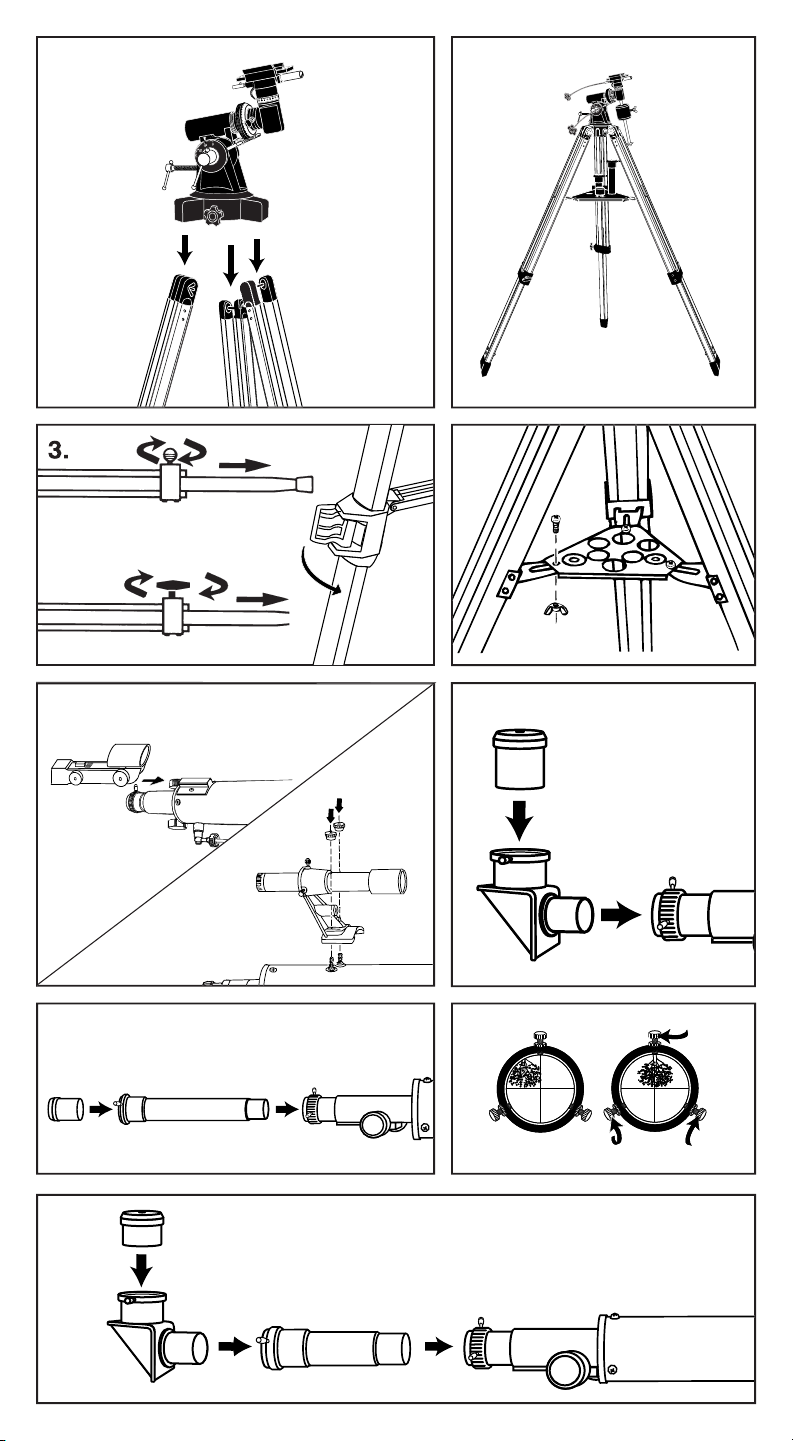
Retire as três pernas do tripé (U) da caixa. Para fixar as pernas do tripé à cabeça do tripé
Coloque o tripé na vertical e estenda as pernas. Desaperte o fecho de ajuste existente em
Utilize os pequenos parafusos de máquina e as porcas de orelhas fornecidas e fixe o tabuleiro
Retire o corpo principal do telescópio (J), o contrapeso (R), a haste do contrapeso (S), e os
Retire o dispositivo Finderscope com o
Retire o dispositivo
Introduza o espelho diagonal (E) no tubo de focagem (Fig. 5a) e fixe-o apertando o pequeno
Introduza a ocular (G) no espelho diagonal (Fig. 5b) e fixe-a apertando o pequeno parafuso de
Page 36

Page 37

Page 38

junto do écran solar deslize completamente através do suporte do dispositivo Finderscope.)
Page 39

Page 40

 Loading...