

Page 1
»
RC-898
Remote Control Unit
D00376100A
O WNER’ S MANUAL
Page 2

TO THE USER
This equipment has been tested and found to
comply with the limits for a Class A digital device,
pursuant to Part 15 of the FCC Rules. These limits
are designed to provide reasonable protection
against harmful interference when the equipment
is operated in a commercial environment. This
equipment generates, uses, and can radiate radio
frequency energy and, if not installed and used in
accordance with the instruction manual, may
cause harmful interference to radio
communications.
Operation of this equipment in a residental area is
likely to cause harmful interference in which case
the user will be required to correct the interference
at his own expense.
CAUTION
Changes or modifications to this equipment not
expressly approved by TEAC CORPORATION for
compliance could void the user's authority to
operate this equipment.
For the consumers in Europe
WARNING
This is a Class A product. In a domestic environment, this
product may cause radio interference in which case the
user may be required to take adequate measures.
Pour les utilisateurs en Europe
AVERTISSEMENT
Il s'agit d'un produit de Classe A. Dans un environnement
domestique, cet appareil peut provoquer des interférences
radio, dans ce cas l'utilisateur peut être amené à prendre
des mesures appropriées.
Für Kunden in Europa
Warnung
Dies is eine Einrichtung, welche die Funk-Entstörung nach
Klasse A besitzt. Diese Einrichtung kann im Wohnbereich
Funkstörungen versursachen ; in diesem Fall kann vom
Betrieber verlang werden, angemessene Maßnahmen
durchzuführen und dafür aufzukommen.
For U.S.A
i – 1.00
Page 3

Table of Contents
1 –Introduction
1.1 Key features
1.2 Unpacking
1.3 About this manual
1.4 Precautions and recommendations
1.4.1 Environmental conditions.. .. ......... .. ... ......... . 1-2
1.4.2 Battery backup......... .. ......... .. ... ......... .. .. .... 1-2
1.4.3 Digital au dio cables....... ... .................. .. .. .... 1-2
1.4.4 Referenc e clock in a digital stud io ........ .. ...... 1-3
1.5 Accessories
.............................................. 1-1
................................................. 1-1
.................................... 1-1
........ 1-2
............................................... 1-3
2 –RC-898 features
2.1 Front panel
[1] REC FUNCTION keys ........ ................... ........... 2-2
[2] INPUT MONITOR keys..................................... 2-2
[3] ALL SAFE key ............................................... 2-2
[4] ALL INPUT key and indicator ........... ................ 2-2
[5] AUTO MON key and indicator........................... 2-2
[6] CLOCK indicators (INT, WORD and VIDEO) ........ 2-2
[7] TC indicators (24, 25, 29, 30, DF)....................... 2-2
[8] MACHINE number indicators (1 through 6, E1, E2)2-3
[9] LOCK STATUS indicators................................ 2-3
[10] OFFSET, PULL UP/DN, CONFIDENCE, DELAY,
TC REC, VARI indicators................. ......... ......... 2-3
[11] LCD display screen ...................................... 2-3
[12] Time Mode indicators.................................... 2-3
[13] TAPE TIME display ....................................... 2-3
[14] MEMORY NO. display........... .................. ....... 2-3
[15] LOCATE TIME/VALUE display ........................ 2-3
[16] Numeric keypad........................................... 2-3
[17] ST R ke y........ .. ... .. ..... .. .. ... .... .. ... .. .. ..... .. .. ... .. 2-3
[18] RCL key........................ ......... .......... ......... .. 2-3
[19] CANCEL key................................ ................ 2-3
[20] ENTER/LOAD key.... .......... .................. ......... 2-4
[21] PRESET key................................................ 2-4
[22] F1 through F10 function keys.................. ....... 2-4
[23] SHIFT key ................................................... 2-4
[24] ESCAPE key................................................ 2-4
[25] Cursor keys................................................. 2-4
[26] SELECT key ................................................ 2-4
[27] DATA INC/DEC key and indicator.................... 2-4
[28] JOG dial and SHUTTLE wheel......... ......... ....... 2-4
[29] CAPTURE key....................................... ....... 2-4
[30] REPEAT key and indicator ............................. 2-4
[31] MACHINE key ................................ ......... ..... 2-4
[32] CHASE key.................................... .............. 2-4
[33] AUTO PLAY key and indicator........................ 2-5
[34] PRRL key and indicator...... .................. ......... 2-5
[35] RHSL key and indicator...... .................. ......... 2-5
[36] AUTO PUNCH key and indicator...................... 2-5
[37] MARK IN key ...................... .................. ....... 2-5
[38] MARK OUT key... ......... ......... ......... ......... ..... 2-5
[39] C U E STR key.......... ... .. .. ... .... .. ... .. .. ... .... .. ... .. 2- 5
[40] Transport controls................................... ..... 2-5
[41] L OC ke y. ... .. .. .. ..... .. ... .. ..... .. .. .. ... .... ... .. .. ..... .. 2- 5
2.2 Rear Panel
[42] EXT 1 – parallel and GPI port.......................... 2-5
[43] EXT 2 - serial port......................................... 2-5
[44] REMOTE OUT connector . ......... ................... .. 2- 5
[45] DIP switches (1 & 2)...................................... 2-6
[46] C o n t ra st ......... ... .... ... .. .. ..... .. .. ... .. ..... .. .. .. ..... 2- 6
................................................ 2-2
................................................. 2-5
3 –Connections
3.1 Connection to DTRS units
3.1.1 Machine IDs... ... .................. .. ... ......... .. ...... 3-1
3.2 Connections (parallel units)
3.2.1 Connections (GPI event units)..... .. .. ......... ... . 3-2
3.2.2 Parallel control/GPI pinout....... ... .. ......... .. .... 3- 2
....................... 3-1
.................... 3-2
3.3 Connections (RS-422 units)
3.4 A note on system clocks
3.5 Memory and batteries
.....................3-2
.......................... 3-2
...............................3-3
4 –Menu and basic operations
4.1 Navigation
4.1.1 Invalid operations ...................................... 4-1
4.2 Data entry
4.2.1 Resett in g values to zero.............................. 4-2
4.2.2 Fast setting of values.................................. 4-2
4.2.3 Setting values using the VALUE display......... 4-2
4.2.4 “Fin e-tuning” values................................... 4-3
4.3 Selecting the unit controlled by the
menus
4.4 Commonly-used menus
4.4.1 Assi gning menus to function keys ................ 4-4
4.4.2 Recalling menus using the function keys ....... 4-4
4.5 Storing and recalling user setups
4.5.1 Saving the current setup ............................. 4-4
4.5.2 Recalling a user setup or restoring factory
settings
.................................................. 4-1
.................................................. 4-2
............................................................ 4-3
........................... 4-3
...........4-4
......................................................... 4-5
5 –Basic DTRS operations
5.1 Transport controls
5.1.1 Selecting the unit to which operations refer.... 5-1
5.1.2 Formatting tapes........................................ 5-1
5.1.3 Arming tracks............................................ 5-2
5.1.4 ALL SAFE ................................................. 5-2
5.1.5 Transport controls...................................... 5-2
5.1.6 Shuttle mode............................................. 5-2
5.2 Monitoring
5.2.1 ALL INPUT ................................................ 5-3
5.2.2 INPUT MONITOR keys................................. 5-3
5.2.3 Shuttle monitoring...................................... 5-3
5.2.4 Shuttle muting ........................................... 5-3
5.2.5 Monitoring flowchart................................... 5-4
5.2.6 Monitoring tables ....................................... 5-5
.................................................5-2
.................................... 5-1
6 –Location functions
6.1 Reference modes
6.2 Setting the precisi on
6.3 Setting a relative time reference
6.3.1 “Return-to-zero” ........................................ 6-2
6.4 ABS setting
6.4.1 A note on ABS frame rate ............................ 6-2
6.4.2 Selecting Time Mode .................................. 6-2
6.5 Location operations
6.5.1 Setting the location pre-roll value.................. 6-3
6.5.2 Auto play .................................................. 6-3
6.5.3 “Instant” location ....................................... 6-3
6.5.4 Manual entry of a location point.................... 6-4
6.5.5 Edit in g a loc at ion ....................................... 6-4
6.5.6 Stor ing the location in a memory .................. 6-4
6.5.7 Recalling a location memory........................ 6-4
6.5.8 Repeated entry of location points.................. 6-5
6.5.9 Edit in g a loc at ion memo ry ........................... 6-5
6.6 Repeating a section
6.7 Punch operations
6.7.1 Setting punch points .................................. 6-6
6.7.2 Checking punch points ............................... 6-6
6.7.3 Editing punch points .................................. 6-6
6.7.4 Undo function............................................ 6-6
6.7.5 Setting pre-roll and post-roll times ................ 6-7
6.7.6 Crossfade times......................................... 6-7
6.7.7 Rehearsing the punch recording................... 6-7
6.7.8 Performing the punch recording ................... 6-7
......................................6-1
................................6-1
..............6-1
................................................6-2
.................................. 6-3
.................................. 6-5
......................................6-6
TOC-i
Page 4

Table of Contents
7 –Making settings on the DTRS units
7.1 Track operations
7.1.1 Track delay.............. .. .. ......... ... .. ......... .. ... . 7-1
7.1.2 Track copying ..... .. ................... .. .. ......... ... . 7-1
7.1.3 Rec Mute function......... .. ... ......... .. ... ......... . 7-2
7.2 Unit-related functions
7.2.1 Chasing to ABS sync..... ................... .. ........ 7-2
7.2.2 Key Mode......... .. ......... .. ... ......... .. ............. 7-2
7.2.3 Chasing with an offset ... .. ................... .. ...... 7-3
7.2.4 Auto Offset functi on............... ... .. ......... .. ... . 7-3
7.2.5 Checking the offset... ......... .. .. .......... .. .. ...... 7-4
7.2.6 Clock selection.... .. ... ......... .. .................. ... . 7-4
7.2.7 Output timing...... .. ................... .. .. ......... ... . 7-4
7.2.8 Varispeed (pi t ch control)....... ......... ... .......... 7-5
7.2.9 Input selection................ ... .................. .. ... . 7-5
7.2.10 Word length................ .. ... ......... .. ... ......... . 7-5
7.2.11 Dither........................ .. ... ......... .. ............. 7-5
7.2.12 Confidence mode........ ......... ... ................. 7-6
7.2.13 Referen ce levels........ .. ......... ... .. ......... .. ... . 7-6
7.2.14 Meter modes...................... .. ................... . 7-6
7.2.15 Sine osci llator...... ... ......... .. .. .......... .. .. ...... 7-6
....................................... 7-1
............................... 7-2
8 –Timecode functions
8.1 Primary timecode functions
8.1.1 Selecting the timecode source ...... .. ... ......... . 8-1
8.1.2 Synthesizing timecode from ABS times ......... 8-1
8.1.3 Selecting a timecode type............. ......... .. ... . 8-2
8.1.4 Setting the gener ator start time ................ ... . 8-2
8.1.5 Starting and stopping the generator.... .. ........ 8-3
8.1.6 Checking the generator progress.............. ... . 8-3
8.1.7 Recording the timecode on a DTRS
timeco de trac k .... ................... .. .................. ... . 8-3
8.1.8 Chasing to external timecode....................... 8-4
8.1.9 Chasing with a timecode offset............... .. ... . 8-4
8.1.10 Auto Timecode Offset function ...... ... ......... . 8-5
8.1.11 Independe n t clock settings ....... .. ............... 8-5
8.2 Advanced timecode functions
8.2.1 Timecode output source ............ .. .. ......... ... . 8-5
8.2.2 Synchronization of timecode.... .......... .. .. ...... 8-6
8.2.3 Pull up and pull down .................... ... .. ........ 8-6
8.2.4 Error bypass......... ... .................. .. ............. 8-6
8.2.5 Rechase mode................ ... .. ......... ... .......... 8-6
8.2.6 Fast LTC........... .. .. ......... ... .. ......... ... .. ........ 8-7
8.2.7 MIDI Timecode output................ .. ............... 8-7
8.2.8 Park positio n.............. .. ......... ... .. ......... .. ... . 8-7
8.2.9 Individual recording status while chasing
timecode
8.2.10 Video resolve....... ... .. ......... .. ... ......... .. .. .... 8-8
........ .. ......... ... .. ......... .. ... ......... .. .. .... 8-8
.................... 8-1
................. 8-5
9.4.8 Cue-up tally............................................... 9-6
9.4.9 MM C I D..................................................... 9-6
10 –Menu and parameter reference
10.1 Menu groups
10.1 Menu group 0 ........................................... 10-1
10.1 Menu group 1 .......................................... 10-2
10.1 Menu group 2 ........................................... 10-2
10.1 Menu group 3 ........................................... 10-3
10.1 Menu group 4 ........................................... 10-3
10.1 Menu group 5 ........................................... 10-4
10.1 Menu group 6 ........................................... 10-4
10.1 Menu group 7 ........................................... 10-5
10.1 Menu group 8 ........................................... 10-5
10.1 Menu group 9 ........................................... 10-6
10.1 Menu group A........................................... 10-6
10.1 Menu group E........................................... 10-6
10.1 Menu group F........................................... 10-7
10.2 Alphabetical list of menu items
10.3 Specifications
10.4 Dimensions
......................................... 10-1
...........10-8
.......................................10-9
...........................................10-9
9 –External control and settings
9.1 Controlling the parallel por t device
9.2 Controlling GPI devices
9.2.1 Setting up GPI devices... .. .......... .. .. ......... ... . 9-1
9.2.2 Setting the trigger points....... ......... ... .. ........ 9-1
........................... 9-1
9.3 Controlling the serial port (9-pin)
9.3.1 Selecting the serial port device........ ... ......... . 9-2
9.3.2 Location pre-roll on the serial unit ................ 9-2
9.3.3 Serial unit timing source ............ .. .. ......... ... . 9-3
9.3.4 Split mode on the serial unit ........... ......... ... . 9-3
9.3.5 Controlling recording operations on the serial
unit ........ .. ................... .. .. ......... ... ................. 9-3
9.4 Other DTRS control functions
9.4.1 Choosing a control protocol .................. .. ... . 9-4
9.4.2 Track mapping f unctions....... .. .......... .. .. ...... 9-4
9.4.3 Timecode track mapping.. .......... .. .. ......... ... . 9-5
9.4.4 Remote track arming.............. ... .. ......... .. ... . 9-5
9.4.5 Device emulation ... ... ......... .. .. .......... .. .. ...... 9-5
9.4.6 Recording delay............................... .. .. ...... 9-5
9.4.7 Fast wind speed........................ .. ............... 9-6
TOC-ii
........ 9-1
........... 9-2
................. 9-4
Page 5

Section 1.1 - Key features
1 – Introduction
The RC-898 is a fully-featured remote control
unit, which allows you to control up to six DTRS
units (DA-98, DA-88 or DA-38 units) with a single cable, as well as units implementing the Sony
P2 protocol, or using parallel control. As an alternative to parallel control, up to five GPI eventcontrolled units can be connected.
In addition to providing almost all functions available from the front panels of the DTRS units, the
RC-898 in some cases actually extends the capabilities of the basic DTRS system.
1.1 Key features
• DTRS units controlled b y the RC-898 are
locked to sample accuracy, providing you with
a “virtual” digital multitrack recorder, with up
to 48 tracks.
• Up to 99 location memori es may be entered (o r
captured) and edited to frame accuracy, for
marking important points in a recording
project.
• Timecode values are entered and edited using a
positive- feel numeri c ke ypad.
• The DTRS units’ transport functions, including
the shuttle control, are duplicated on the RC-
898. These transport controls may also be used
to control the RS-422 or parallel external
machine.
• The RC-898 also features a jog dial, allowing
frame-by-frame manual location.
• The jog dial can a lso be used as a data entr y
control for the entry of location point and other
values.
• Auto-punch operations are fully supported. The
RC-898 provides one-ke y operation for
rehearsal and recording with automated punch
points.
• System settings, for the DTR S units an d for the
RC-898 itself, are made using a conv enient
menu system, and displayed on a clear backlit
20-character x 4-line display.
• The most frequently-accessed setting menus
can be assigned to function keys, so that they
may be easily recalled.
• Lighted indicators give an instant indication of
the status of the most import ant functions.
• All timecode formats are supported, as well as
pull-up/pull-dow n, making the RC-898 the
ideal choice for po st-production work in both
the movie and vide o fields.
• Up to ten diffe rent setups can be stored and
recalled, allowing instant re-conf iguration, not
only of the RC-898, but also of all DTRS units
connected to it.
1.2 Unpa cking
The box contains the following.
• RC-898 Remote Control Unit (x 1)
• Accessories:
• Remote/sync connection cable (x 1)
• Remote/sync terminator (x 1)
• This manual (x 1)
• Warranty card ( x 1)
1.3 About this manual
This manual is written in sections according to the
function that you will be performing.
• Section 1 - “Introduction”: This section.
• Section 2 - “RC-898 f eatures”: The front and
rear panel features of the RC-898.
• Section 3 - “Connections”: How to hook up the
RC-898 with other equipment.
• Section 4 - “Menu and basic operations”: How
to use the men u sys tem , and th e bas ic p ri nci ples of operating the RC-898.
• Section 5 - “Basic DTRS operations”: The
main everyday transport and other operations
that you will perform when using the RC-898
with DTRS u nit s.
• Section 6 - “Location functions”: Using the
location functions of the RC-898.
• Section 7 - “Making settings o n the DTRS
units”: more advanced DTRS settings, that you
will probably not need to make every day.
• Section 8 - “Timecode function s”: Functions
related to timecode and DTRS units.
• Section 9 - “External control and settings”:
Other control functions, and control of units
other than DTRS (P2, GPI, etc.).
• Section 10 - “ Menu and parameter reference”:
A guide to the menu items, together with
parameters and default values.
Please check both the Table of Contents and the
Index when you are searching for a particular
function or operation. There is also a guide to the
different menu screens available on the RC-898
(10, “Menu and parameter reference”).
When descri bing a control, display or connector,
the name of the control is emphasized, as: “Press
the
STR
key [17]”, or “the
CONFIDENCE
indi-
1-1
Page 6
Section 1.4 - Precautions and recommendations
cator [10] will light”. The number in brackets following the name of the control is the number of
the control as shown on the front panel illustration, as well as that used in the appropriate sections describing the front and rear panels.
A special font is used for showing the messages
that appear on the LCD display screen [11], for
example:
When describing a value as shown on the
TIME
TIME/VALUE
used:
9Pin Locate Preroll.
MEMORY NO
[13],
[14], or
LOCATE
[15] displays, the following font is
00:23:45:12
or on.
TAPE
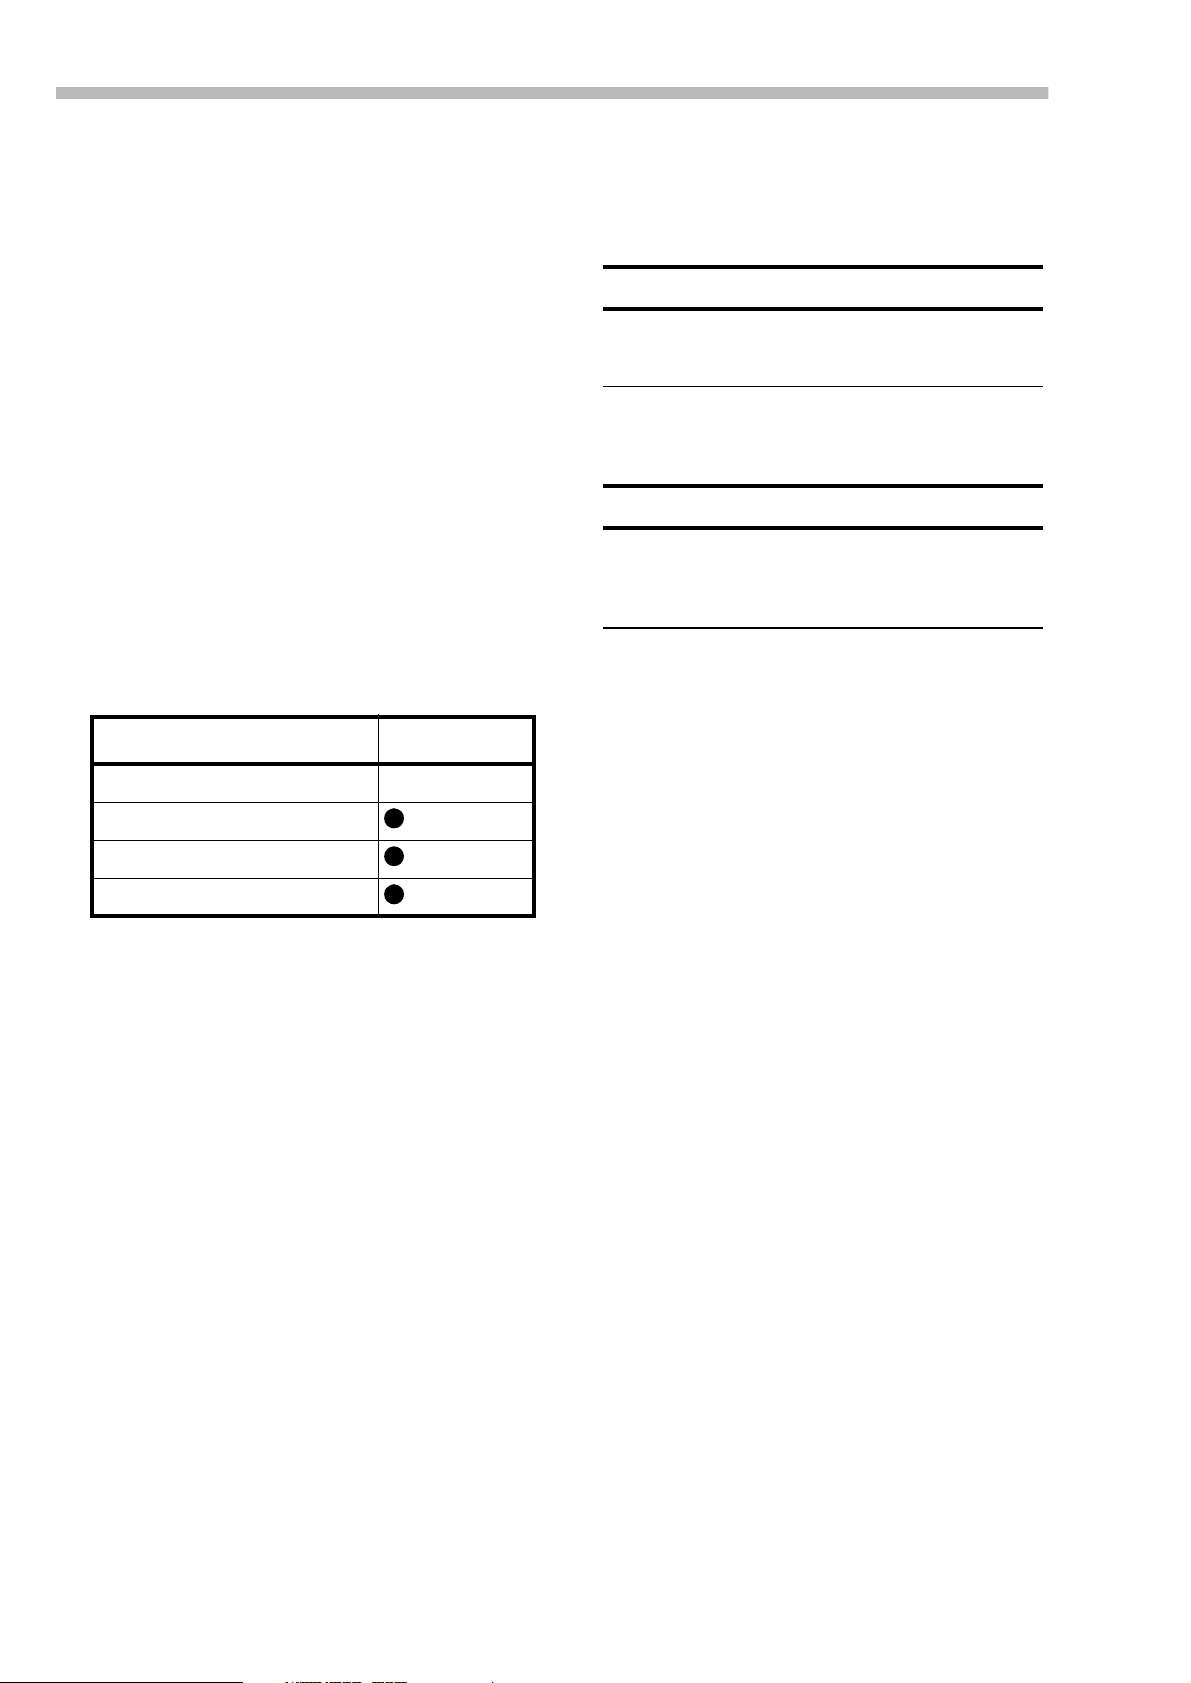
Some functions of the RC-898 apply to all DTRS
recorders, some only to DA-98 u nits, s ome to DA38 units and some to DA-88 units with the SY-88
synchronizer board fitted. Wherever appropriate,
this manual will use combinations of the following symbols t o show what operations may be performed with the different units in the DTRS range:
• Relativ e humidity should be between 30% a nd
80% non-condensing
• Avoid spraying polish, insecti cides, etc. near
the RC-898.
WARNING
If you need to clean the unit, use a soft cloth, moistened if
necessary with a little detergent and water. Do not use abrasive cleaners or solvents such as alcohol or thinner.
• Avoid subjecti ng the RC-898 to jolts, sudden
shocks, etc.
WARNING
If you have to return the unit for service or repair, use the
original packing materials if possible. If the unit is to be
transported to a recording location, etc., use a suitable trans port case with sufficient shock protection.
TASCAM does not accept responsibility for damage resulting from neglect or accident.
Unit Symbol in text
All units No symbol
DA-88 with SY-88
DA-38
DA-98
88
38
98
This manual may also make references to the
manuals of the DTRS units and the SY-88. In the
case of the DA-98 and DA-38, these references
will be made in terms of section numbers (e.g.
“4.2” and “4-5” respectively). In the case of the
DA-88 and SY-88, page numbers will be provided
(e.g. “p16” and “p5-7” respectively).
1.4 Precautions and recommendations
As with every precision piece of electronic equipment, common-sense precautions apply with the
RC-898.
However, you should note the following points in
particular with regard to the operation of the unit:
1.4.2 Battery backup
The RC-898 requ i res no power su pp l y of i ts own,
drawing its power from the DTRS units to which
it is connected.
Location memories and configuration settings are
stored using a battery backup system. The battery
should provide power for sev eral years of use.
When the battery eventually degrades to the point
where it cannot provide enough power to retain
settings, the message
Memory Error will
be shown on the display screen (this can be
removed by pressing the
ESCAPE
key).
When this message appears, all memories (location memories and configuration settings) are
cleared and reset to the default settings.
If you see this message, contact your TASCAM
dealer for details of battery replacement. Do not
attempt to replace the battery by yourself.
1.4.3 Digital audio cables
When making connections between TASCAM
digital audio units, always use genuine TASCAM
cables. This applies particularly to any T-DIF dig-
1.4.1 Environmental conditions
The RC-898 can be operated in most environments, but we suggest that you keep the environmental conditions within the following limits:
• Ambient temperature between 5° and 35° C
(41° and 95° F).
1-2
Page 7

ital audio connections between DTRS recorders,
DTRS recorders and digital mixing consoles, etc.
WARNING
Only use TASCAM-supplied and TASCAM-approved
cables when making such connections. Though the cables
and connectors may resemble computer cables, they serve
different purposes, and meet a dif f erent set of s pecifications .
The use of cables other than T ASCAM cables will at best
cause the equipment to work erratically, and at worst cause
damage to the equipment.
If the use of cables other than TASCAM cables causes or
results in damage, the warranty is voided.
1.4.4 Reference clock in a digital studio
It is likely that the RC-898 will be operated in an
environment where there is more than one digital
audio source available.
If this is the case, you must make sure that all digital audio sources in the setup are driven by the
same reference clock signal (“word clock” or
“Word sy nc”).
Section 1.5 - Accessories
If different clock sources are used throughout a
setup, it is actually possible to damage speakers,
etc. because of mismatches.
1.5 Accessories
Despite the powerful range of functions which
may be controlled from the RC-898, the unit is
relatively compact. It may be found convenient to
mount the RC-898 on a roll-around stand, available as CS-898.
Should you need extension meters from the tape
decks, this can be achieved usi ng MU-8824 meter
units and appropriate mounting hardware (MK-
8924).
1-3
Page 8

Section 1.5 - Accessories
1-4
Page 9

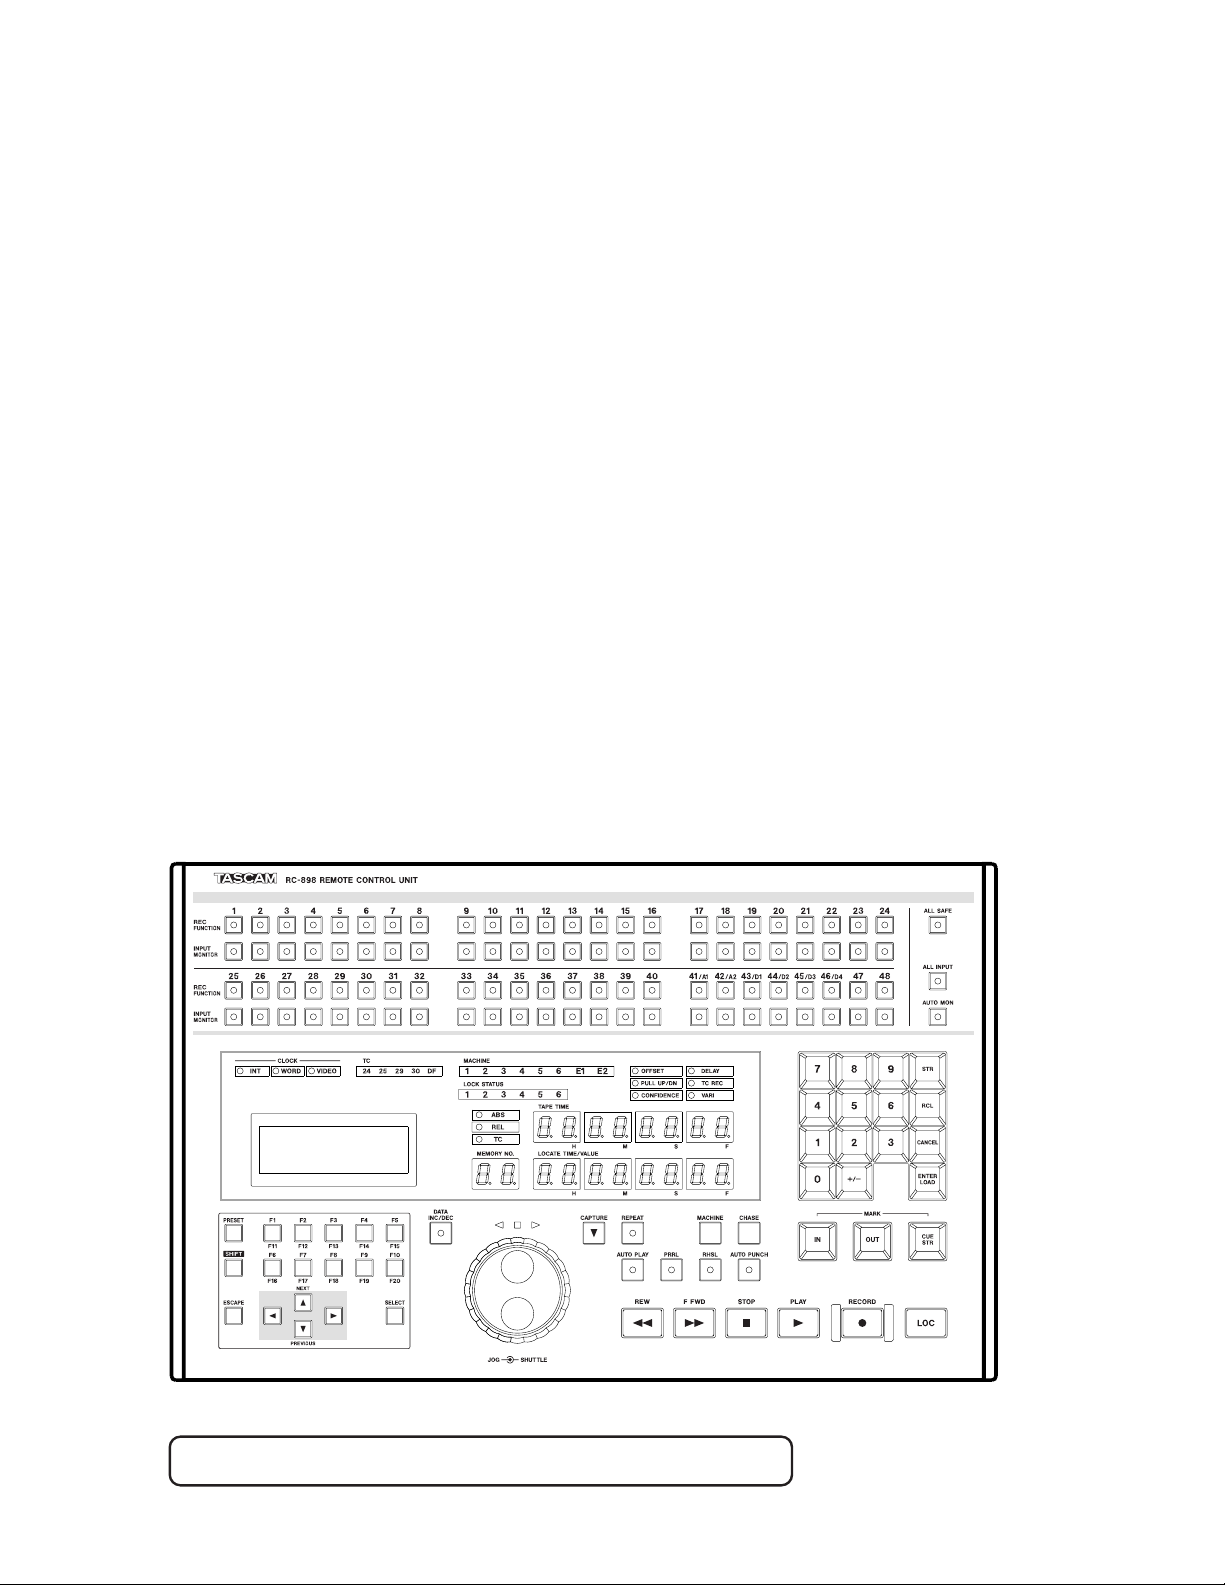
2 – RC-898 features
2 - RC-898 features
2-1
Page 10

Section 2.1 - Front panel
This section gives a brief ov erview of the front
and rear pane l co ntrols and their functions.
2.1 Front panel
[1] REC FUNCTION keys
These keys with integral indicators allow you to
set and view the track arming status of up to six
DTRS units attached to the RC-898, or f i v e DTRS
units and another recorder.
Trac ks 1 through 8 apply to the first unit, 9
through 16 to the second, and so on.
The last eight are used to control tracks 41
through 48 (the sixth DT RS unit) or may be used
for the two analog and four digital tracks of a P2
recorder, as marked (A1, A2, and D1 through
D4
). These keys are only available for this purpose when recording is enabled for the P2 unit
(see 9.3.5, “Controlling recording operations on
the serial unit”). When used to control the P2 unit
in this way, the last two
are unused.
[2] INPUT MONITOR keys
These keys with integral indicators allow you to
set and view the input monitoring status of the
tracks of any D A-98 units attached to the RC-898.
See section 7.1 of the DA-98 manual for details of
the operation of these keys, which function in the
same way a s t he keys on t he RC-898.
When the RC-898 is used to control DA-88 and
DA-38 units, the keys cannot be used, but the indicators still reflect the current monitoring status, on
a track-by-track basis, of the connected units.
[3] ALL SAFE key
This key (with integral indicator) is equivalent to
turning off all the
When all tracks are safed in this way, the
SAFE
indicator lights. When the
mode is tur ned of f (the indicator goes ou t), the
previous track arming status will be restored.
[4] ALL INPUT key and indicator
This key (with integral indicator) performs the
function of the
DTRS units. The indicator lights when the function is active.
ALL INPUT
REC FUNCTI ON
REC FUNCTI ON
ALL SAFE
key on the connected
keys [1].
keys
ALL
ual tracks when
Start recording or re-set the
ALL INPUT
is turned off again.
REC FUNCTION
keys to restore this.
[5] AUTO MON key and indicator
This key performs the same function as the AUT O
MON key on a DA-98. However , the DA-88 and
DA-38 are not equipped with a key with this label,
so the function is slightly different when controlling one of these units.
Pressing this key is the equivalent of pressing the
INSERT
both the
key on a c onn e cted DA-38, and p res s ing
AUTO INPUT
and
INSERT
keys on a
DA-88. It is used in punch modes to switch automatically between tape and source when punching
in and out automatically. The indicator lights
when this function is active.
Note that the status of the
keys on a DA-98 will be overridden by the
MON
key. Howe ver, when
INPUT MONITOR
AUTO
AUTO MON
is turned
off again, the original status of these keys will be
restored.
Changing the
tracks while
tionship between the
INPUT MONITOR
AUTO MON
when
recording or re-set the
REC FUNCTION
AUTO MON
is on will lose the rela-
REC FUNCTION
status for individual tracks
is turned off again. Start
REC FUNCTI ON
status of DA-98
and
keys t o
restore this.
[6] CLOCK indicators (INT, WORD and
VIDEO)
These indicators correspond to the indicators with
the same names on the currently-selected DTRS
unit.
To use the RC-898 to change the clock source on a
DTRS unit , see 7.2.6, “Clock selection”.
[7] TC indicators (24, 25, 29, 30, DF)
These indicators correspond to the system timecode type of the currently-selected DTRS unit.
Here, the
tion for “29.97” . The DF indicator will light if the
timecode is in drop-frame format.The supported
timecode types are therefore:
29
on the RC-898 panel is an abbrevia-
INPUT MONITOR
The
keys on a DA-98 also
affect the switching between source and tape.
Changing the
tracks while the
lose the relationship between the
TION
and
2-2
REC FUNCTI ON
ALL INPUT
INPUT MONITOR
status of any
function is on will
REC FUNC-
status for individ-
24
25
29
29 DF
30
30 DF
24fps (cine)
25fps (PAL/SECAM)
29.97 (NTSC color non-drop)
29.97 (NTSC drop-frame)
30fps (NTSC mono)
30fps drop-frame (NTSC color)
Page 11

Section 2.1 - Front panel
NOTE
30 fps drop-frame is only supported by DA-98 units.
To change the timecode type used by the system,
see 8.1.3, “Selecting a timecode type” .
[8] MACHINE number indicators (1
through 6, E1, E2)
This indicator shows the machine currently
selected for control with the transport keys. , using
MACHINE
the
key [31]. 1 through 6 refer to
DTRS units. E1 and E2 refer to VTRs, etc. which
may be connected to the RC-898. E1 is connected
to the parallel port, and E2 to the 9-pin RS-422
port
[9] LOCK STATUS indicators
These indicators show the current lock status of
the DTRS units as they chase to external synchronization sources. For units 2 through 6, the external synchronization master will typically be the
first DTRS unit (1) in the chain.
There are four modes displayed by these
indicators:
On
Fast flashing
Slow flshing
Off
The slave unit is chasing the master and is
locked to it.
The slave unit is in chase mode, is in fast forward or rewind mode, and is not locked to the
sync master.
The slave unit is in chase mode, stopped, and
is not locked to the sync master.
The unit is not in chase mode.
[10] OFFSET, PULL UP/DN,
CONFIDENCE, DELAY, TC REC,
VARI indicators
These indicators are used to show the status of the
appropriate mode on the currently-selected unit.
The status is changed using the menus on the display screen.
In addition, changing the values from the front
panel of a DTRS unit connected to the RC-898
will change the status of this indicator, if the unit’s
number corresponds to the current
MACHINE
number [8].
[11] LCD display screen
This 20-character x 4-line backlit display screen is
used to show and set the different parameters
available with the RC-898.
[12] Time Mode indicators
Only one of these indicators will be lit at any one
time. They indicate the timecode reference (time-
code; TC, or absolute time;
ABS
) in use by the
currently-selected DTRS unit and shown on the
TAPE TIME
REL
The
indicat or [13].
indicator, when lit, shows that the current time, relative to a user-defined reference
point, as explained in 6.3, “Setting a relative time
reference”, is currently being displayed.
[13] TAPE TIME display
This display shows the current tape time on the
currently-selected unit. The time reference is
shown by the indicators a t [12].
[14] MEMORY NO. display
This 2-digit counter shows the location memory
which is currently in use (for storage, recall or
location).
[15] LOCATE TIME/VALUE display
This display shows the time of the location memory currently referenced by the
MEMORY NO.
indicator [14] or entered using the numeric keypad
[16].
It is also used to show time values which are set as
control parameters in various menu screens.
[16] Numeric keypad
The ten number keys are used for direct entry of
values for location memories, etc., to select location memories for store, recall, etc., or for the
entry of time values into LCD display menu
parameters. The
+/–
key is used to change a posi-
tive to a negative value, or vice versa.
+/–
The
key is also used with relative times, as
explained in the relative time setting section in see
6.3, “Setting a relative time reference”.
[17] STR key
This key is used to start the process for storing a
timecode value to a location memory . See 6.5.6,
“Storing the location in a memory” for details.
[18] RCL key
This key is used to start the process for recalling a
timecode value from a location memory. See
6.5.7, “Recalling a location memory” for full
details.
[19] CANCEL key
This key is used to cancel the selection of a location memory with the number keys, before storing
a time to it or recalling a time. It may also be used
to cancel the setting of a numerical value if it has
been wrongly entered.
2-3
Page 12

Section 2.1 - Front panel
[20] ENTER/LOAD key
This key is used to confirm the entry of numerical
values of location times or memories or when
used with the
shown in the
[15] to the parameters being set in the display
screen.
SHIFT
LOCATE TIME/VALUE
key [23], transfers the data
display
[21] PRESET key
This key is used to assign sp ecif ic softw are menus
to the function keys [22]. See 4, “Menu and basic
operations” for details of menu operations.
[22] F1 through F10 function keys
These keys are used with frequently-used menus,
so that one keypress will bring up these menus.
The keys may be “shifted” [23] to provide a second bank of 10 less frequently-used menu keys.
[23] SHIFT key
This key is used to provi de a second ba nk of ten
function keys for quick access to frequently-used
menus.
It is also used with the UP and
to use them as
the selection of machines in the display screen
menus.
It is also used in conjunction with the
LOAD
parameters being set in the display screen.
key [20] to transfer entered values to the
NEXT
and
DOWN
PREVIOUS
keys [25]
keys for
ENTER/
[24] ESCAP E key
This key is used to move “up” through the menu
tree to the preceding menu screen.
[25] Cursor keys
The cursor keys are represented in this manual by
the words:
• up key
• down key
•left key
• right key
These keys are used to navigate through the menu
system and the parameters available.
UP
DO W N
LEFT
RIGHT
[26] SELECT key
This key is used as an “enter” key, to select an
item or to confirm the entry of a value.
[27] DATA INC/DEC key and indicator
This key, with its integral indicator, is used to
change the function of the
controlling the transport (indicator is unlit) and
incrementing or decrementing the values being
edited in the
[15] (indicator is lit).
LOCATE TIME/VALUE
JOG
dial [28] between
display
[28] JOG dial and SHUTTLE wheel
These controls work with DTRS units and with
units connected to the
They are used to simulate the “rock and roll” of an
open-reel tape deck, allowing precise positioning
of the controlled units. The indicators above the
controls show the current direction of the
medium’s movement.
When the
the
least significant f ield of the value shown in the
LOCATE TIME/VALUE
DAT A INC/DEC
JOG
dial acts as a data editing control for the
EXT 2
control port [43].
indicator [27] is lit,
display [15 ] .
[29] CAPTURE key
When this is pressed, the current time is displayed
LOCATE TIME/VALUE
on the
where it may be edited and stored as a location
memory, or used f or “one-shot” loc ation pu rposes.
display [15]
[30] REPEAT key and indicator
This key serves the same function as the REPEAT
key on the DTRS units, repeating playback
between the memory locations assigned for repeat
(see 6.6, “Repeating a section”).
The integral indicator will light steadily when
repeat mode is selected and the current time is
between these two locations, and flash when
repeat mode is selected, and the current time is
outside these locations.
[31] MACHINE key
Pressing this key repeatedly will cycle the
machine number indicators [8]. The indicator
which is lit shows which machine will be controlled by the transport controls of the RC-898.
The UP and
SHIFT
which the menu operation will be performed
(when shif t ed, t hey are known as the
PREVIOUS
screen. For details of menu operations, see 4,
“Menu and basic operations”.
2-4
DOWN
key [23] to choose the connected unit on
keys, repsectively). within each
keys are also used with the
NEXT
and
[32] CHASE key
Pressing this
number toggles the chase mode of the appropriate
unit.
See 7.2.1, “Chasing to ABS sync” and 8.1.8,
“Chasing to external timecode” for further details.
CHASE
key together with the unit
Page 13

Section 2.2 - Rear Panel
It is also possible to select “Machine 0” (only with
CHASE
this
(first slave) DTRS unit, and toggle the chase status
of this unit, with all other slave units in the chain
then changing to reflect the chase status of this
first slave unit.
key). This will control the second
[33] AUTO PLAY key and indicator
This key with its integral indicator works with
DTRS units. It allows the units to start playing
back automatically when a location point is
reached.
[34] PRRL key and indicator
This key with its integral indicator works with
DTRS units. It is used to locate the tape to the
punch-in position, minus the pre-roll time set for
punch operations (see 6.7.5, “Setting pre-roll and
post-roll times”).
For instance, if the punch pre-roll value is set to 5
seconds, and the punch-in point is “00:55:12:12”,
the unit will finish locating at 00:55:07:12.
of this key will store the current position to a location memory, and automatically increment the
location memory number, ready for the next store
operation. The memories can later be “fine-tuned”
using the jog dial [28] in the appropriate mode.
[40] Transport controls
These transport controls duplicate those available
on DTRS units. They may also be used to control
units connected to the E1 (parallel) and E2 (9-pin
serial) ports when the appropriate machine is
select ed ([8] and [31]).
[41] LOC key
This key provides one-touch operation to allow
location to the memory position shown on the
LOCATE TIME/VALUE
tion pre-roll time has been set (see 6.5.1, “Setting
the location pre-roll value”) the pre-roll offset will
be subtracted from the location value, and the
location will be to that new calculated value.
display [15]. If a loca-
[35] RHSL key and indicator
This key allo ws you to rehearse auto-punch operations on the units connected to the RC-898. For
full details, see 6.7, “ Punch operations”.
[36] AUTO PUNCH key and indicator
This key allows you to perform auto-punch operations on the units connected to the RC-898. For
full details, see 6.7, “ Punch operations”.
NOTE
The two keys above do not work in the same way as the
rehearsal and auto punch keys on DTRS units. Even if you
are an experienced user of DTRS equipment, we recommend that you read 6.7, “Punch operations” to get a full
understanding of punch operations when using the RC-898
to control recording operations.
[37] MARK IN key
This key allows you to set and check the punch-in
point for automatic punch operations. For full
details of how to use this key, see 6.7.1, “Setting
punch points”.
[38] MARK OUT key
This key allows you to set and check the punchout point for automatic punch operations. For full
details of how to use this key, see 6.7.1, “Setting
punch points”.
[39] CUE STR key
This key is used to capture a series of location
points (a cue list) “on the fly”. Successive presses
2.2 R ear Panel
[42] EXT 1 – parallel and GPI port
This port provides parallel control and tally signals or GPI control for event control, which may
be triggered from a small “cue list” in the RC-898 .
The pinout for this 15-pin ’D’-sub connector is
given in 3.2, “Connections (parallel units)”. You
will need to make your own cabl e, referr ing to the
the table above, and to the equivalent table in the
manual of the other equipment if you wish to control an external unit through parallel control, or if
you wish to send GPI events from the RC-898.
[43] EXT 2 - serial port
This 9-pin ‘D’-sub connector is used for the control of devices implementing the Sony P2 protocol. A cable designed for P2 connections may be
used with this port.
[44] REMOTE OUT connector
This connector is used for the control of the DTRS
units. It should be connected to the REMOTE I N/
SYNC IN of the first DTRS unit in the chain.
Only use a TASCAM cable, as supplied with the
RC-898, to make this connection. If your DTRS
units are at a greater distance than the cable provided (e.g. your machine room is som e distance
from your control roo m), consult your TASCAM
dealer for details of the availability of longer
DTRS control cables.
2-5
Page 14

Section 2.2 - Rear Panel
[45] DIP switches (1 & 2)
The two DIP switches are both on when in the
down position. As shipped from the factory,
switch 1 is off (up) and switch 2 is on (dow), and
you probably will not need to change them.
However, when a passive device is connected to
EXT 1
the
from the device to the tally supply pin, this switch
TALLY POWER
1 (
(down) position, allo wing the RC-898 to use its
own power for this purpose.
connector and power is not provided
) should be set to the on
Switch 2,
isolation of the ground of the RC-848/DTRS system from the ground of devices attached to the
EXT 1
the on (down) positio n, but y ou may need to turn it
off (up) if your system suffers from hum problems. However, a full discussio n of ground loo ps
and their associated problems is outside the scope
of this manual, and we recommend that you consult one of the many reference works on this subject if necessary.
GND LIFT
EXT 2
and
(ground lift) controls the
ports. Usually this switch is in
[46] Contrast
This control alters the contrast on the backlit LCD
display screen [11]. Use it to set the screen so that
it is easil y vi sible from your preferred viewing
angle.
2-6
Page 15

Section 3.1 - Connection to DTRS units
3 – Connections
This section describes not only the connection of
the RC-898 to other equipment, but also provides
some information on setting up a digital audio
system using the RC-898.
WARNING
All connections to the RC-898 should be made with the
power to all units turned off. If this is not done, the operation of the units may become unstable, and damage may
possibly occur.
3.1 Conne ction to DTRS units
The RC-898 and DTRS units form a “daisychain”, with the RC-898 being at the head, and the
“tail” unit being terminated with the terminator
supplied with the RC-898.
NOTE
When you connect a number of DTRS units which are of
different types, including DA-98s, the DA-98 units should
be at the head of the chain immediately following the RC-
898. Any DA-38 and DA-88 units s hould then be connected
following the DA-98s. If there is more than one DA-98 in
the chain, they should be connected together, before the DA38s and DA-88s. The order of the DA-38 and DA-88 units is
not important.
If a DTRS unit other than a DA-98 is used as a master unit,
the automatic Output TC Source function and Timecode
Offset functions of the DA-98 may not work correctly (see
the DA-98 Owner’ s Manual, 10.5 and 13.2). In additoin,
remote control operation may not work correctly.
If the DTRS units are DA-88s and DA-38s only, they may
be connected in any order.
However, if you are operating a mixed set of DA-38s, and
DA-88s fitted with the SY-88 synchronizer board, we suggest that the SY-88-equipped DA-88 should follow the RC898, allowing it to serve as a timecode slave, and a DTRS
chase master for the DA-38s.
Use the suppled cable to connect the RC-898 to
the REMOTE IN/SYNC IN of the first DTRS
unit, and a PW-88S cable to connect the SYNC
OUT of the first unit to the REMOTE IN/SYNC
IN of the next unit, and so on, until the terminator
is connected to the SYNC OUT of the last unit in
the chain.
RC-898 DA-38DA-98 DA-88
OUT OUT OUT
Cable su p pl i ed
with RC-898
WARNING
Turn of f po wer to all units when making connections. If you
do not do this, there is a possibility that the RC-898 will
malfunction or even be damaged.
The RC-898’s
MONITOR
IN IN IN
PW-88S PW-88S
REC FUNCTI ON
and
Terminator
INPUT
keys 1 through 8 now control the first
unit, K eys 9 through 16 control the next unit in
the chain, and so on (regardless of the actual
Machine IDs of the units).
Tighten the screws holding the cable connector to
the RC-898 and to the DTRS unit. This will prevent accidental disconnection of the RC-898 in the
middle of a session.
WARNING
Use only TASCAM cables to connect the RC-898 to the first
DTRS unit, and to connect the DTRS units to each other. If
the use of cables other than TASCAM cables causes or
results in damage to the units, the warranty is voided.
No power connection is needed for the RC-898.
All power for the operation of the RC-898 is supplied by the first DTRS unit.
NOTE
The TASCAM TM-D8000 digital mixing console also
allows the control of DTRS units. However, it is not possible to use a TM-D8000 and RC-898 for control of DTRS
units in the same setup. Naturally, however, a TM-D8000
console can be used to mix the audio to and from DTRS
units controlled by an RC-898 unit.
3.1.1 Machine IDs
Set the machine IDs of the DTRS units so that the
IDs run in a sequence from the unit at the “head”
of the chain, closest to the RC-898 (lowest possible ID) to the “tail” unit (highest ID). There
should be no gaps in this sequence.
A DA-88 uses a rotary switch to set the ID and
uses 0 as the lowest ID, and a DA-38 or DA-98
uses software to make this setting, and uses 1 as
3-1
Page 16

Section 3.2 - Connections (parallel units)
the lowest ID. Refer to the units’ manuals for full
details of setting the ID.
How the ID is
Unit
DA-98 1 1 Menu system (see
DA-88 0 1 Rotary switch on
DA-38 1 1 Tape counter menu
NOTE
When you set the machine IDs, you can set the ID of any
machine first, but we recommend doing this in a standard
sequence, working from the head of the chain to the tail.
set (see the
unit’s manual
for details)
ON
9.2)
OFF
rear panel (see p23–
24)
ON
system (see 7-2)
3.2 Conne ctions (parallel units)
The RC-898 allows transport control of a unit connected to the
this connection, check the specifications of the
other unit to ensure that the control pins available
match those provided by the RC-898, as sho wn
below in 3.2.2, “Parallel control/GPI pinout”.
NOTE
The RC-898 provides only transport control for a unit connected to the parallel port. Functions such as track arming,
etc. are not possible when using the
If a passive unit that does not supply power to the
tally supply pin (8) is being used, switch 1
T A LLY POWER
(
on (down) to allow the RC-898 to provide this
power.
3.2.1 Connections (GPI event units)
EXT 1
The
purpose of controlling up to five GPI event-controlled devices.
The way in which these devices may be triggered
from the RC-898 is explained in 9.2, “Controlling
GPI devices”.
EXT 1
parallel port. Before making
EXT 1
parallel port.
) of the RC-898 [45] must be set
parallel port may also be used for the
3.2.2 Parallel control/GPI pinout
The following table gives the pin assignments for
the parallel/GPI connector (
EXT 1
). GPI connec-
tions are shown in square brackets:
1
STOP/[Event 1]
2
PLAY/[Event 2]
3
FF/[Event 3]
4
REW/[Event 4]
5
REC/[Event 5]
6
N/C
7
Common
8
Tally supply
9
PLAY tally
10
FF tally
11
REW tally
12
STOP ta lly
13
REC tally
14
REC COMMAND tally
15
GND
3.3 Connections (RS-422 units)
The RC-898 allows control of a unit implementing
the Sony P2 protocol. This connection is made
through the
EXT 2
serial p o rt [43], u s ing a seria l
cable designed for this purpose. The pinout for
this connector is as follows:
1
Shield
2
RX+
3
TX–
4
GND
5
—
6
GND
7
RX–
8
TX+
9
Shield
Make the connection using a cable designed for
RS-422 connection (check the pinout of your P2
device before making the connection). This
machine may now be controlled by the RC-898
when the
E2 MACHINE
indicator [8] is lit.
3.4 A note on sy stem clocks
When working with many digital audio units, all
these un i ts must be fed from the same cl ock
source (either word or video). If this is not done,
there is a risk that speakers, etc. may be damaged.
Note that this clock master is entirely different
from the timecode master in a studio setup. It is
perfectly possible for a clock slave to be a timecode master and vice versa.
3-2
Page 17

3.5 Memory and batteries
As you have noticed, the RC-8 98 requires no
power supply of its own, drawing its power fr om
the DTRS units to which it is connected.
Location memories and configuration settings are
stored using a battery backup system. The battery
should provide power for several years of use.
When the battery eventually degrades to the point
where it cannot provide enough power to retain
settings, the message
be shown on the diaply screen (this can be
removed by pressin g t he
When this message appears, all memories (location memories and configuration settings) are
cleared and reset to the default settings.
If you see this message, c ontact your TASCAM
dealer for details of battery replacement. Do not
attempt to replace the battery by yourself.
Memory Error will
ESCAPE
key).
Section 3.5 - Memory and batteries
3-3
Page 18

Section 3.5 - Memory and batteries
3-4
Page 19

Section 4.1 - Navigation
4 – Menu and basic operat ions
The RC-898 sets parameters on the connnected
units using a menu system, with the parameters
and their values displayed on the LCD display
screen and selected and entered using cursor and
data entry keys.
4.1 Navigation
The menus are arranged hierarchically , from a top
(master ) menu, through to individual parameters.
The master “top” menu appears like this:
Select Menu Group
>01234567
89A EF
Dly/Tr.C/Vari /Loct
The cursor is represented here by the
Use the
LEFT
and
RIGHT
keys to move the cursor along a row, and the UP and
move it between rows.
> symbol.
DOWN
keys to
enter. F or the purposed of this example, we will
examine the
Vari Speed
Vari Spd
Machine 1
Fix + 0.0%
menu.
In this menu, there are two editable fields, as you
will see if you move the cursor with the
RIGHT
cursor keys. The cursor changes so that
LEFT
and
the field which is currently to be edited is highlighted by an underline cursor.
The first editable field is the
may be changed between the values of
Vari. The second field is the numerical field
Fix field, which
Fix and
which sets the amount of the varispeed as a percentage of normal speed. The values of both f ields
are set with the UP and
DOWN
cursor keys.
As soon as a value is changed, it is set. There is no
need to press any key to confirm the entry.
As the cursor moves over the menu group numbers, the bottom line of the screen will change to
show an abbreviated summary of the contents of
the menu group. In the example above, the contents of the
0 menu group are: track delay, track
copy settings, varispeed and the location pre-roll
setting.
When the cursor is over the menu group which
you wish to enter, press the
SELECT
key to enter
the menu group (menu group 0 is shown here):
>Delay Trk Copy
Vari Spd Loc Pre
1 0000 sample
Again, the bottom line of the display shows an
abbreviated version of some or all of the settings
made in the menu to which the cursor points.
When in a menu group, use the cursor keys to
move between options, and press
SELECT
when
the cursor is to the left of the menu you wish to
To return to a level above the current level, press
ESCAPE
the
ESCAPE
NOTE
Note that the
being controlled) cannot be set in this way (this is explained
in 4.3, “Selecting the unit controlled by the menus”).
key. You can continue pressing the
key until the top menu is reached.
Machine
value (i.e. which machine is
4.1.1 Invalid operations
Some operations are only possible on certain
models of DTRS recorder. For instance, timecode
functions are only available on the DA-98 and
DA- 88 units equipped with the SY-88 board, and
dithering is only possible with DA-38 and DA-98
units. If you attempt to perform an operation on a
unit where this operation is impossible, the message
Not available! will be shown on
the display screen to let you know that you cannot
perform this operation on the connected DTRS
unit.
Another ki nd of i n v al id ope rati on is whe n a DT RS
unit can perform a certain operation, but the
selected operation cannot be performed under the
current set of conditions (e.g. TDIF word length
cannot be set while analog inputs are selected). In
these cases, the word
shown on the displ ay.
Inoperable will be
4-1
Page 20

Section 4.2 - Data entry
4.2 Data entry
Typically, the UP and
the values in the display screen menus. However,
there are one or two additional features regarding
data entry which are explained here.
4.2.1 Resetting values to zero
In the case of large numerical values, it is sometimes tedious to keep pressing the cursor keys
until the value returns to zero.
Accordingly , to reset a v alue to zero:
1) Press and hold down either the UP or
key.
2) While holding down this key, press the other
DOWN
(i.e.
if you are holding the UP key, and
vice versa).
4.2.2 Fast setting of values
In addition to being able to reset large values to
zero, it also sometimes necessary to input large
values. This can be done easily in the following
way:
DOWN
keys are used to set
DOWN
2) With the cursor as shown (next to the Machine
Offset menu item), press
Machine Offset
Machine 1
+00:00:00:00 ABS
SELECT
again:
3) Use the numeric k eypad to enter the offset time
(use the
+/–
key to change between positive and
negative offset).
The value s enter ed using the key pad will app ear in
LOCA TE TIME/VALUE
the
up” from the right. For instance, if the time to be
entered is 01:23:07:10, the following keys should
be pressed:
Key Display shows
1
00:00:00:01
2
00:00:00:12
3
00:00:01:23
0
00:00:12:30
7
00:01:23:07
1
00:12:30:71
0
01:23:07:10
display [15] , and “f ill
1) Press and hold down the UP or
DOWN
key (as
appropriate).
2) While holding down this key, press and hold
down the
SELECT
key. As long as this key is
held down, the values will change quicker than
if this UP or
DOWN
key on its own is held
down.
4.2.3 Setting values using the VALUE display
As well as using the LCD display, the
TIME/VALUE
LED display [15] and numeric
keypad [16] may be used for entry of time values
into certain parameters which are set through the
menu system.
The machine offs et value from menu group 3,
which is e xpr esse d in ho urs, m inu tes, sec onds and
frames, is a useful example of this operation.
1) In the top level menu, mo ve the cursor to menu
group 3 and press
SELECT
:
LOCATE
The displa y wi ll f l ash while the number s ar e being
entered, to show that the value has not yet been
confirmed.
Negative va lues are sho w n on the
VALUE
digit of the display.
NOTE
If you enter the wrong number by mistake, you can press the
CANCEL
the previous value.
4) Press and hold down the
then press the
If the value is a valid one (i.e. you do not attempt
to enter 71 frames in a second, etc.), it will be
transferred from the LED display, which will stop
flashing, to the LCD display screen:
Machine Offset
display by a per iod aft er the las t “f ra mes”
key of the numeric keypad to reset the number to
SHIFT
ENTER/LOAD
Machine 1
LOCATE TIME/
key [23 ] and
key [20].
>McnOffset Ctrl Prt
TimeMode Trk Arm
+00:00:00:00 ABS
4-2
+01:23:07:10 ABS
Invalid values will be rounded down to the nearest
valid value (e.g. a value of 78 seconds will be
rounded down to 59 seconds).
Page 21

Section 4.3 - Selecting the unit controlled by the menus
4.2.4 “Fine-tuning” values
JOG/SHUTTLE
The
controls [28] may also be
used to “fine-tune” the values entered and displayed on the LED
1) Press the
DATA INC/DEC
VALUE
display.
key [27] so that the
indicator lights.
2) Use the jog dial to change the value shown on
VALUE
the
display in the same way as you
would use them to locate a tape (i.e. the jog dia l
increments (clockwise) or decrements (counterclockwise) the numbers.
NOTE
The jog dial can only be used for data entry and editing of
values which may be entered through the
not for values which may be entered only on the LCD display screen.
VALUE
display,
4.3 Selecting the unit controlled by the menus
As explained above, the Machine parameter
which appears in many menus cannot be changed
directly using the UP or
The DTRS units connected to the RC-898 are
numbered in order, starting at 1. The machine with
the lowest logical number (see 3.1.1, “Machine
IDs”), i.e. the one connected directly to the RC898, is Machine 1, the next in the chain is
Machine 2, and so on.
Howev er, as you can see from the front panel of
the RC-898, the UP and
another meaning when used in combination with
SHIFT
the
NEXT
key [23], and they change to being
PREVIOUS
and
select the next unit in the chain, or the previous
one, respectively.
NOTE
This selection has no effect on the transport or location section of the RC-898 and
MACHINE
[31] is independent of any settings made on the LCD display screen to select the unit whose parameters are to be set.
indicator [8] selected with the
DO W N
DOWN
keys .
keys have
keys, allowing you to
vice versa
. The unit shown on the
MACHINE
key
the unit co ntrolled by the menu’s other
parameters, as in the example menu below.:
TC Frame Mode
Machine 1
30DF
1) Press and hold down the
2) While holding down the
UP
DO W N (NEXT
or
increment or decrement the
SHIFT
SHIFT
PREVIOUS
or
key
key, press the
) key to
Machine
number.
The machine number can be set from 1 through
6
.
Other menus will present the 6 units on one screen
(where there is only an on/off parameter). In these
cases, use the
LEFT
machine, and the UP and
and
RIGHT
DOWN
keys to s elect the
keys to enable
or disable the function:
Shuttle Mute
on » »»»
off » »
Machine123456
4.4 C om m only-used m enus
The F1 through
used to recall the ten functions (menu screens)
that you use most often.
When the
keys can be used as an additional ten function
F11
keys;
NOTE
The menu-to-key assignments made on the RC-898 are
entirely independent of any menu-to-key assignments made
on the RC-898.
F10
SHIFT
through
function keys [22] may be
key [23] is held down, these
F20
.
If the display screen shows a menu with a
Machine parameter, and you want to change
4-3
Page 22

Section 4.5 - Storing and recalling user setups
If you have not assigned a menu to a function key,
the defa ult (factory) menu-to-key assignments
will be used as follows:
Key Menu
F1
Track Delay Time
F2
Track Copy
F3
Vari Speed
F4
Locate Preroll
F5
Machine Offset
F6
Time Mode
F7
Timecode Offset
F8
TC Frame Mode
F9
Generate Start Time
F10
Generate Mode
F11
Crossfade Tome
F12
Confidence Mode
F13
Output TC Source
F14
Repeat Start/End
F15
Analog In/Out
F16
Ext TC
F17
Abs Diff
F18
Tape TC
F19
Rel Diff
F20
Gen TC
Menu
group
0
0
0
0
3
3
4
5
8
8
1
9
5
3
2
E
E
E
E
E
4.4.1 Assigning menus to function keys
To assign a menu to a function key:
1) Use cursor keys and the
see the menu you want to assign to a function
key.
SELECT
key until you
4.4.2 Recalling menus u sing the functio n keys
1) Simply press the function key where you have
previously assigned the menu you want to
recall.
If you have not assigned a menu to the function
key that you press, the display will remain
unchanged.
2) If yo u used the
menu to
the
F11
SHIFT
SHIFT
throu gh
key [23] to assign th e
F20
, press and hold down
key befor e pr essing the function key
to recall the “shifted” menu.
4.5 Storing and re ca lling user setups
The RC-898 allows you to store and recall almost
all parameters set using the menu system, so the
same remote control unit can be used with a variety of different equipment setups with the minimum of reconfiguration.
This is a great time-saver, as not only are the RC898’s parameters stored and recalled, but the settings for the DTRS units connected to the RC-898
are also stored and recalled. In this way, up to six
DTRS units can be reconfigured to preset configuration patterns with the press of one key.
4.5.1 Saving the current setup
2) Press the
Shuttle Monitor
PRESET
Function Preset
Push Function Key
The “Shuttle Monitor” screen is an example only.
The current menu title will be displayed on the
bottom line of the display.
key [21]:
3) Press the function key to which you wish to
assign the m enu.
To use the second “bank” of function keys, press
and hold do wn t he
the function key.
SHIFT
key [23] bef ore pressi ng
1) From the top menu, move the cursor to menu
group F, and press
Key Mode FrameDisp
DispTime >Setup
Setup
2) Move the cursor to
and press
Setup
SELECT
Load 0123456789F
As you can see, there are 10 user se tups, n umbered
0
from
rally, you can reload the factory settings, but you
cannot o ver write them wit h yo ur o wn set tings ; you
must choose one of the 10 user areas.
through 9, and a factory setup (F). Natu-
SELECT
Setup (as shown above),
:
:
4-4
Page 23

Section 4.5 - Storing and recalling user setups
3) Highlight the Load f ield, and change it so that
it reads
4) Use the
Save, using the
LEFT
and
RIGHT
UP
key.
keys to highlight the
user memory into which you wish to store the
current settings, and press the UP key.
Setup
Are you sure?
0
Save 123456789F
5) Press
SELECT
the following:
RIGHT
keys to cancel.
The display will briefly show Execut-
ing..., and the current settings wil l be saved
into the user setup.
to confi rm the save, or any of
ESCAPE, DOWN, LEFT
or
4.5.2 Recalling a user setup or restoring factory settings
Any of the ten user setups, as well as the factory
defaults, can be recalled, using the screen above.
4) Press
the following:
RIGHT
The selected user setup will replace the current
settings.
If you try to load from a setup into which data has
not been sa v ed, the display wi ll br ie fl y show
Data, and the load opera tion wil l not take pla ce.
SELECT
to confirm the load,or any of
ESCAPE, DOWN, LEFT
keys to cancel
or
No
1) From the top screen, select menu gro up F, and
select the
Setup
Setup menu:
Load 0123456789F
2) Make sure that the left parameter shows
Load by moving the cursor under it, and the
DOWN
Save.
key to change its valu e to
Load from
3) Move the cursor under the user area (or
factory setting, represented by
F), and press
the UP key to recall the setup.
Setup
Are you sure?
0
Load 123456789F
4-5
Page 24

Section 4.5 - Storing and recalling user setups
4-6
Page 25

Section 5.1 - Transport controls
5 – Basic DTRS operations
This section covers the basic operations of controlling the DTRS units connected to the RC-898.
For details of how to make parameter settings, etc.
and timecode operations, see 4, “Menu and basic
operations”, 7, “Making settings on the DTRS
units” and 10, “Menu and parameter reference”.
5.1 Transport controls
The transport controls on the RC-898 replicate
those on the DTRS units.
The logic of the transport controls is such that any
mode can be entered from any other mode. There
is no need to go through
5.1.1 Selecting the unit to which
operations refer
Generally speaking, the unit controlled by the
transport keys will be the first unit in the chain
(the other units in the chain are assumed to be
using the ABS chase protocol through DTRS
synchroniz ation.
STOP
.
1) Insert a new tapeor tapes into the DTRS unit
or units. Make sure that it is rewound to the
beginning of the tape.
NOTE
Do not use a tape which has previously been used for
recording video.
2) From menu group 9, move the cursor to
Format, and press
Format
Machine 1
off 44.1 k
3) In this menu, as well a s using the
+ UP) and
PREVIOUS (SHIFT
SELECT
:
NEXT (SHIFT
DOWN
+
) keys
to select an individual unit, all DTRS units
connected to the RC-898 can be selected to
format tapes together.
4) Move t he cursor to the sampling frequency
field, and use the UP and
between
44.1 and 48 (kHz).
DO WN
keys to choose
However, transport operations, etc. can also be
performed on individually-selected machines
other than the first one:
1) Press the
MACHINE
The word
LOCATE TIME/VALUE
MACHINE
key [31 ].
will start to flash in the
display [15].
2) Use the numeric keypad to enter the
number(one digit only) of the machine that you
want to control .
This number will be s hown in the
VALUE
MAC HINE
If you enter a machine number of 0, this is equivalent to setting all DTRS units except the first into
slave mode, to follow the first unit.
Machin e 7 is equivalen t to a unit attached to the
parallel port [42], and machine 8 is equivalent to a
unit attached to the serial port [43].
display [15], and the appropriate
number indicator[8] will light.
LOCATE TIME/
NOTE
If a digital signal is received at the
of the DTRS unit, and digital input has been selected (see
7.2.9, “Input selection”), the sampling frequency is decided
by the frequency of the incoming signal and cannot be
changed.
DIGITAL IN
connector
5) Move the cursor to the “control” field and use
the UP key to ch an ge the settin g from
ready
6) Press the UP key again to change
on.
FORMAT
The
unit will light.
The three values for this parameter prevent accidental formatting of a tape.
7) Press and hold the
PLAY
key.
The tap e w ill start to be formatted.
indicator on each selected DTRS
RECORD
key and press the
off to
ready to
5.1.2 Formatting tapes
The Hi8 tapes used in DTRS units must be formatted. This can be done either from the DTRS
units themselves, or from the RC-898.
It is possible to record audio and format a tape at
the same time. This is done by arming the tracks
before step 5 above. However, if you do this, you
should not interrupt the formatting proces s half way through a tape. Once you start formatting a
5-1
Page 26

Section 5.2 - Monitoring
tape from the beginning, you should wait until the
end of the tape before rewinding and ejecting it.
NOTES
The display shows a negative ABS time for a few seconds at
the beginning of the tape. While a negative time is shown,
no audio can be recorded on the tape.
We suggest that you leave a blank header of at least 30 seconds at the beginning of the tape. This can be marked as a
virtual “zero point” if you like (see 6.3, “Setting a relative
time reference”).
5.1.3 Arming tracks
The tracks of the DTRS units are armed using the
REC FUNCTION
These keys and indicators only work for tracks of
units that are actually connected.
NOTE
Before recording, you should make sure that eit her di gital or
analog inputs, as required, have been selected (see 7.2.9,
“Input selection”) and the appropriate clock settings have
been made (see 7.2.6, “Clock selection”).
keys with their indicators.
5.1.5 Transport controls
The RC-898 shares a common interface with all
DTRS units with regard to transport functions
(including entering end exiting record mode).
Consult the relevant portions of the DTRS unit
manual if you are unsure of the way in which
transport operations are carried out.
One exception to this is the
LOC
key [41] which
does not appear on the front panel of DTRS units.
It is used to locate the tape to the value shown on
LOCATE TIME/V AL UE
the
display [15]. For full
details of how this key is used and the location
facilities av ailable fr om the RC-898, see 6, “Location functions”.
5.1.6 Shuttle mode
The RC-898 incorporates a jog dial and shuttle
wheel to allow precise positioning of the tape in
the DTRS units.
When the
lit, moving either of these controls will control the
selected unit(s) appropriately.
DAT A INC/DEC
indicator [27] is not
Armed tracks, i.e. those which are ready for
recording, are shown by their indicators flashing.
Tracks which are actually recording are shown by
their indicators being steadily lit.
When a DA-88 or DA-38 track is recording, the
INPUT MONITOR
indicator will light, showing
that the monitoring for the tracks is from the input
source, rather than being off-tape. The
MONITOR
keys are not o perational with a DA-88
INPUT
or DA -38 unit.
When operating a DA-98 unit, the
TOR
keys are operational, and can be used to
INPUT MONI-
change between off-tape and source monitoring.
5.1.4 ALL SAFE
ALL SAFE
The
ing of tracks. When lit, all
cators go out, and the keys of both the RC-898 and
the DTRS unit or units (see 7.2.2, “Key Mode”
below) are locked (pressing them will not arm
tracks).
When the
the safe operation, the arming status of all tracks
will return to what it was before the
key w a s pressed.
key [3] prevents accidental arm-
REC FUNCTION
ALL SAFE
key is pressed to turn off
ALL SAFE
indi-
NOTE
When the currently-selected unit is recording, the jog and
shuttle controls are disabled (this prevents accidental interruption of a take).
The indicators will go out 10 seconds after the
jog/shuttle controls are last used.
The shuttle wheel allows forward motion at the
following speeds (relative to normal speed): 8 x,
4 x, 2 x, 1 x, 1/2, 1/4. The same speeds, except for
1 x, are available in reverse mode. The further the
shuttle wheel is turned away from the center position in either the clockwise or counterclockwise
direction, the faster the tape will be moved.
The jog dial allows very precise positioning of the
tape to frame accuracy .
Monitoring during shuttling is explained below
(see 5.2.3, “Shuttle monitoring”).
5.2 Monitoring
The monitoring of off-tape and in put source signals is complex, and varies a little between the
DA-88 and DA-38 units, and the DA-98 units, due
to the latter being provided with track-by-track
switching facilities between source and off-tape
monitoring, as well as the confidence mode
method of off-tape monitoring while recording
(see 7.2.12, “Confidence mode”).
5-2
Page 27

Section 5.2 - Monitoring
Use the flowchart (5.2.5, “Monitoring flowchart”
and tables (5.2.6, “Monitoring tables”) for reference to the monitoring modes available.
AUTO MON
The
key [5] is used in punch recording, providing automatic switching between
source and off-ta pe monitori ng as the punch-in
recordin g progre sse s. See 6. 7, “Pun ch ope ratio ns”
for full details.
5.2.1 ALL INPUT
ALL INPUT
The
key [4] allows the switching of
monitoringso that the output from all tracks on the
currently-selected unit, or all units if the Key
Mode has been enabled (see 7.2.2, “Key Mode”)
is from the input source.
5.2.2 INPUT MONITOR keys
These keys [2] are only operational when controlling a DA-98 unit. They are used to select off-tape
or source monitoring on a track-by-track basis.
For full details of how these keys are used, see
section 7 of t he DA-98 manual.
1) From menu group 9, move the cursor to
StlMon and press
Shuttle Monitor
on
off»»»»»»
Machine123456
2) Use the UP and
monitoring
on and off on a per-machine
SELECT
DOWN
:
keys to switch shuttle
basis.
5.2.4 Shuttle muting
DA-98 units incorporate a shuttle muting fea-
98
ture. The shuttle muting for DA-98 is enabled or
disabled from the RC-898 in the following way:
1) From menu group 2, move the cursor to
Mute, and press
Shuttle Mute
on
off»»»»»»
Machine123456
SELECT
:
Shtl
However, these indicators will always show the
track monitoring status, regardless of the model of
DTRS unit connected to the RC-898. This can be
seen most clearly in punch-in mode (see 6.7,
“Punch operations”), when in conjunction with
AUTO MON
the
key [5], these indicators automatically change to show the monitoring status of
the tracks as the punch operations proceed.
Using the RC-898
REC FUNCTI ON
keys to
change the status of any tracks while the
INPUT
between the
MONITOR
INPUT
set the
function is on will lose the relationship
REC FUNCTI ON
and
INPUT
status for individual tracks when
is turned off again. Start recording or re-
REC FUNCTION
keys to restore this
5.2.3 Shuttle monitoring
Shuttle monitoring can be enabled or dis-
38 98
abled on a per-machine basis for DA-38 and DA98 units connected to the RC-898.
ALL
ALL
2) Use the UP and
DOWN
keys to ch an ge the
setting between on and off for each machine.
For a full explanation of shuttle muting, see section 8.6. 2 of the DA-98 man ual.
Briefly, the shuttle monitoring, when turned on,
mutes the replay from unarmed tracks, and monitors the input source of armed tracks when the
machine is in shuttle mode. A fuller explanation
of shuttle monitoring is given in section 9.1 (4) of
the DA-38 manual, and section 7.1.3 of the DA-98
manual.
5-3
Page 28
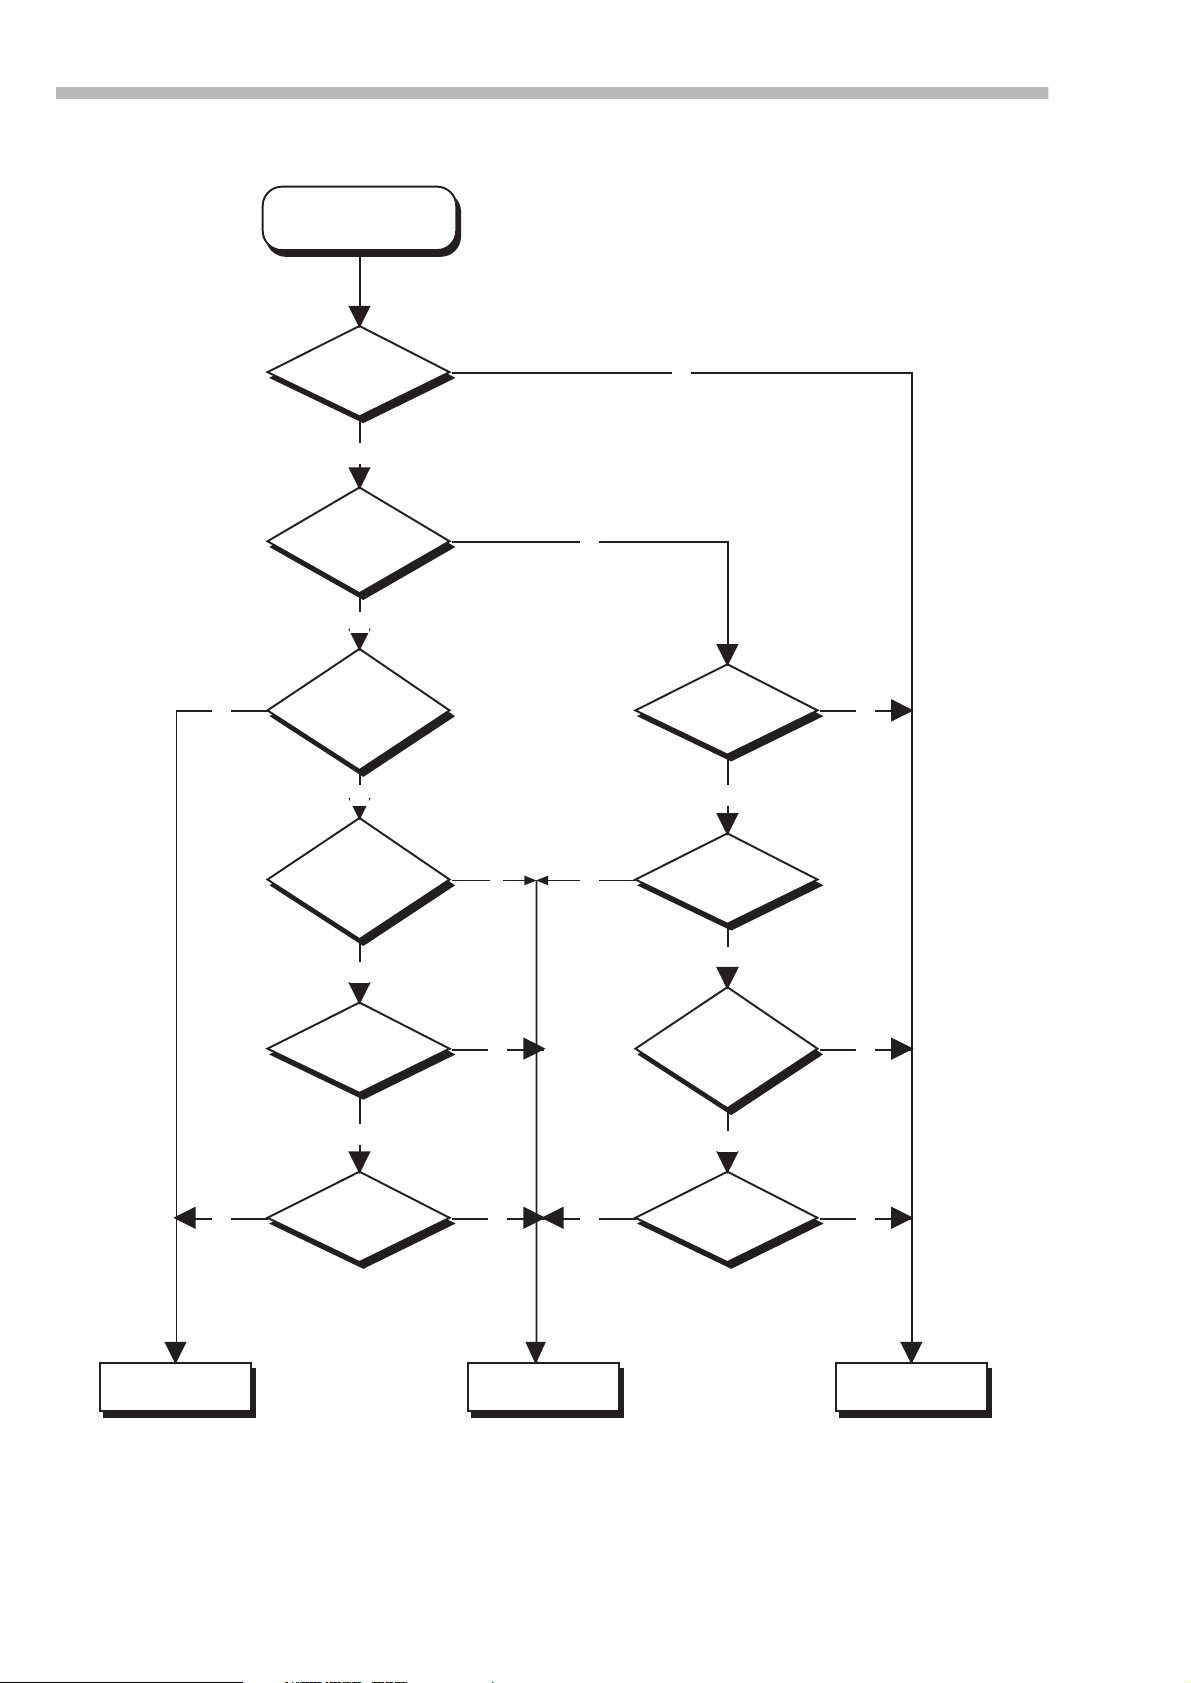
Section 5.2 - Monitoring
5.2.5 Monitoring flowchart
What do I listen to ?
ALL INPUT ?
N
REC
FUNCTION ?
N
Y
STOP
FF,REW ?
N
JOG/
SHUTTLE ?
N
Y
Y
Y
AUTO MON ?
Y
PLAY ?
N
N
JOG/
SHUTTLE ?
Y
SHTL MON ?
N
Y
MUTE
Y
AUTO MON ?
Y
Y N N
SHTL MON ?
N
TAPE SOURCE
This flowchart is applicable to DA-98 operations, provided that you hav e not made any manual monitor settings using the
INPUT MONITOR
keys, and that confidence mode is off.
5-4
Page 29
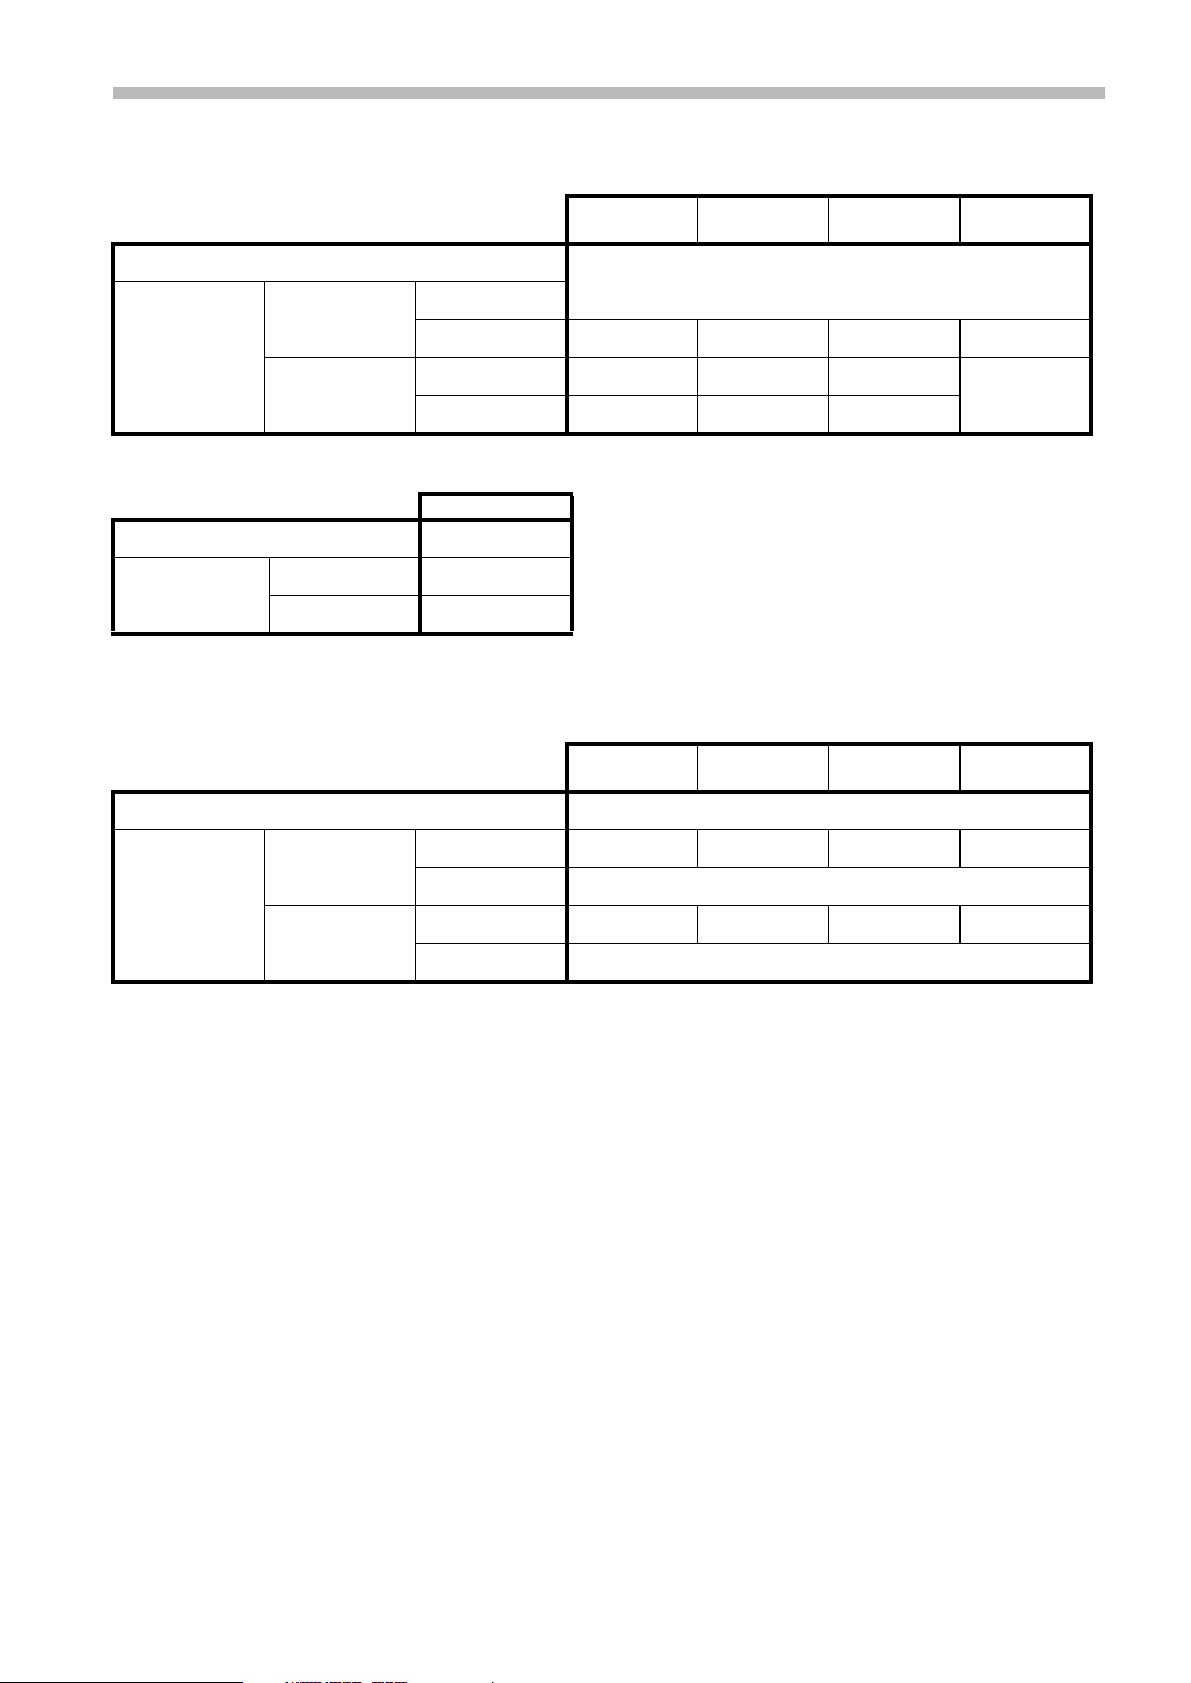
5.2.6 Monitoring tables
5.2 - Monitoring
Ta ble 1: DA-88 and DA-38
PLAY REC
ALL INPUT on
Source
ALL INPUT off AUTO MON off REC FUNCTION on
REC FUNCTION off Tape Tape Mute Tape
AUTO MON on REC FUNCTION on Tape Source Source
REC FUNCTION off Tape Tape Mute
Ta ble 2: DA-88 and DA-38 shuttle modes (ALL INPUT off, AUTO MON on)
JOG/SHUTTLE
JOG/ SHTL MON off Tape
JOG/SHTL MON on REC FUNCTION on Source
REC FUNCTION off Mute
Table 3: DA-98
PLAY REC
ALL INPUT on Source
ALL INPUT off AUTO MON off REC FUNCTION on Selectable
REC FUNCTION off Selectable
AUTO MON on REC FUNCTION on Tape Source Source See below
REC FUNCTION off Selectable
a
Source Selectable Selectable
STOP, FF.
REW
STOP, FF.
REW
b
b
JOG/
SHUTTLE
See below
JOG/
SHUTTLE
b
bc
a. “Selectable” means that when confidence mode is in operation, the
INPUT MONITOR
keys can be used to switch between
source and off-tape monitoring.
b. When the shuttle mute function is active (see 8.6.2 in the DA-98 manual), output is muted in these modes
c. When shuttle monitoring is turned off here, monitoring is off-tape, and when it is turned on, the input source is monitored
5-5
Page 30

Section 5.2 - Monitoring
5-6
Page 31

Section 6.1 - Reference modes
6 – Location functions
The RC-898 can store and recall up to 100 location memory positions, allowing you to find key
points in a recording project easily.
The contents of location memories (timecode values) are di splaye d on the
LOCA TE TIME/VALUE
LED display [15], and the number of the current
location memory is displayed on the
NO
. 2-digit LED display [14].
MEMORY
6.1 Refer ence modes
Before proceeding with an explanation of the way
in which location operations are carried out, it is
necessary to examine the way in which times are
displayed on the RC-898.
The RC-898 can use one of three time reference
modes to show the tape times of the DTRS units
connected to it, as shown on the timecode indicators [12]:
ABS
from the servo track of the DTRS tape.
TC
track of the DTRS unit. However, since the RC898 does not accept timecode directly, this need
not be actual timecode, but in the case of a DA-98
or DA-88, may be pseudo-timecode, “synthesized” from the ABS values (see 8.1.2, “Synthesizing timecode from ABS times”).
REL
defined reference point (see 6.3, “Setting a relative
time reference”).
Cue points may be set “on-the-fly” or entered
manually , and copied from a cue list. All cue
points may be edited and “trimmed” to frame
accuracy.
For faster entry and editing, cue points may
optionally be displayed and edited to second accuracy, ignoring the “frames” field.
ABS, REL
and TC.
refers to the absolute time, as determined
refers to timecode read from the timecode
refers to the time value, relative to a user-
little time by ignoring the “frames” field when
entering and locating to location memories.
NOTE
The location and synchronization accuracy is not affected
by this function.
Accordingly, the RC-898 provides you with a way
to do this:
1) From the F menu group, mov e the cursor to
FrameDisp and press
Frame Display
2) Use the
to
UP or DO W N
off.
When frame display is set on, the last two digit s
of the display will be used for the frames field of
location memories , and the RC- 898 exp ects fra mes
to be entered as part of time values. When set to
off
, the frames field is ignored (i.e. always
assumed to be zero).
SELECT
on
key to change from
6.3 Setting a relati ve time
refere nce
This operation is equivalent to pressing the “reset”
button on a numerical tape counter to set the v alue
to “0000”. When the RC-898 is in relative mode,
the time shown on the
becomes relative to a zero point which you set.
This zero point is referenced to the first DTRS
unit in the chain.
1) From the F menu group, mov e the cursor to
DispTime and press
Display Time
TAPE TIME
SELECT
display [1 3]
:
:
on
6.2 Setti ng the precision
The RC-898 typically displays to frame-based
precision (although in fact, the location and synchronization is to sample precision).
Howe ver , it is not al ways necessary to wo rk to this
degree of accuracy, and you may want to save a
Absolute
2) Use the UP or
Absolute to Relative.
REL
The
RC-898 is now displaying times in relative mode.
DOWN
indicator [12] will light to show that the
key to change
6-1
Page 32

Section 6.4 - ABS setting
3) When the tape is at the time you want to make
the “zero” point, press the
The current time value from the first DTRS unit
will be displayed on the
display [15].
4) Press the
STR
MEMOR Y NO
The
key [17].
CAPTURE
LOCATE TIME/VALUE
. display [ 14] wil l st ar t t o flash.
key [29].
5) Press th e numeric ke ypad’s 0 key, and then
press the
current time into the
ENTER/LOAD
TAPE TIME
The
00:00:00:00
relative to the time you have just captured.
If the display shows something other than
00:00:00:00
a position other than the point where you captured
the time (i.e. the tape was playi ng or recording).
, showing that it is now at zero,
, this means that th e tape is no w at
key [20] to enter the
00
location memory.
display will now show
All times now are relative to this time. Any locations will now be shown on the
play relative to the new
00
TAPE TIME
dis-
memory. For example ,
if the relative “zero point” is set to
00:30:00:00
location of
TAPE TIME
the
, when the tape is at the absolute
00:45:00:00
display will be
, the value shown on
00:15:00:00
(45 – 30). However, even though the value shown
on the
TAPE TIME
display changes, neither the
actual tape position nor values show n on the
LOCATE TIME/VALUE
Absolute settings
display are affected.
00:00:00:00 00:45:00:00
2) Press the 0 key on the numeric keypad,
ENTER/LOAD
LOCATE TIME/VALUE
LOC
key [41].
TAPE TIME
.
.
display will show
3) Press the
followed by
The
show the actual time value of the “zero point”.
The tape will return to the nominal “zero point”
and the
00:00:00:00
6.4 ABS sett ing
The ABS setting allows y ou to use the su bcode on
the servo track of the DTRS unit as the time reference of the RC-898. Usually, this starts at
00:00:00:00
the tape.
However, there are some options available with
the ABS mode, which increase the flexibility of
the system. These are described in 8.1.2, “Synthesizing timecode from ABS times”, and allow you
to start with an offset, etc. when synsthesizing
timecode.
6.4.1 A note on ABS frame rate
When ABS is selected, the number of frames per
second is different from that in any timecode
mode. For details of setting SMPTE/EBU frame
rates, see 8.1.3, “Selecting a timecode type”.
Timecode (whether SMPTE or EBU) contains a
fixed number of frames per second. However, the
ABS method of timing works in a slightly different way.
, and continues for the length of
displa y will now
Relative settings
00:00:00:00
.00:30:00:00
New
“zero”
point
00:15:00:00
TAPE TIME display
A minus value is shown on the displays either
with a leading minus sign (
) on the
–
display, or with a leading period (
LOCATE TIME/VALUE
display.
TAPE TIME
) on the
.
6.3.1 “Return-to-zero”
Since the RC-898 works on time-based, rather
than counter-based, references, there is no dedicated “RTZ” control. However, you can return to
the zero point using the following procedure:
1) Press the
6-2
RCL
MEMORY NO
The
key [18 ].
. indicator will start to flash.
In three seconds of time, there are 100 frames.
These frames are allocated as follows:
Second
00 – 01 33 32
01 – 02 33 32
02 – 03 34 33
This pattern is repeated every three seconds, as
Numbe r o f
frames
you will notice when you set frame values using
the menu system in ABS mode. When multiple
DTRS units are connected together in DTRS sync
mode, the master unit always outputs ABS timings to the slave unit(s).
6.4.2 Selecting Time Mode
98 88
using timecode (i.e. DA-98 and DA-88/SY-88
units) can be changed to use either timecode or
ABS timing.
Each DTRS unit in the chain capable of
Maximum frame
value displayed
Page 33

Section 6.5 - Location operations
The time mode selected here is the reference time
mode for punch operations, location operations,
etc.
1) From menu gr ou p 3, move the c ursor to
TimeMode and press
Time Mode
TC
ABS»»»»»»
Machine123456
In the abo v e screen, all mach ines are refer enc ed t o
the ABS time.
2) Use the UP and
ABS and TC settings.
NOTES
Note that these settings show the way in which the position
on the DTRS unit is shown on the
may also be used to control the chase mode of the DTRS
units as described in 8.1.8, “Chasing to external timecode”.
DOWN
SELECT
:
keys to select between
TAPE TIME
display and
6.5 Lo cation operations
Location transport operations on the RC-898 are
mainly controlled using the
key, which has no equivalent on the DTRS units,
allows the instant location of the tape to the value
shown in the
LOCATE TIME/VALUE
However, it is also possible to set a locate pre-roll
time, and if this is set to a non-zero v alu e, locating
to a position will move the tape to the time shown
in the display, minus the pre-roll va lue.
LOC
key [41]. This
display.
1) From menu group 0, move the cursor to
Loc Pre, and press
Locate Pre-roll
00min00sec
2) Use the
LEFT
and
SELECT
RIGHT
:
keys to move
between the min and sec fields, and set the
values using the UP and
It is also possible to use the numeric keypad here.
The “hours” and “frames” digits of the value
shown in the
be ignored, and only the “minutes” and “seconds”
used.
The maximum value that may be set here is
59min59sec
00min00sec
negative pre-roll time.
NOTES
The values set here apply to the RC-898 location functions,
and are not affect settings made on the DTRS units connected to the RC-898.
The values set here do not apply to t he auto-punch operation
pre-roll time, which is set using a separate menu (see 6.7.5,
“Setting pre-roll and post-roll times”).
LOCATE TIME/VALUE
DOWN
, and the minimum value is
. It is not possible to have a
keys.
display will
6.5.2 Auto play
When the DTRS unit reaches the location point, it
will normally go into stop mode.
Howev er, if the
the unit will automatically start playing when the
location point is reached.
AUTO PLAY
indicator [33] is on,
For example, if the pre-roll time is set to 5 seconds, and the time shown in the
VALUE
LOC
01:22:58:02
display is
01:23:03:02
key is pressed, the tape will locate to
. This allows time for cueing,
LOCATE TIME/
, when the
slave unit lock-up, etc.
NOTE
In the following explanations, in the interests of clarity and
brevity, we will refer to the units locating to the location
time. This should always be assumed to be the location time
minus the location offset, unless specifically mentioned
otherwise.
6.5.1 Setting the location pre-roll value
To set the pre-roll value which will be used by
location operations:
6.5.3 “Instant” location
If you are playing back or recording, and you wish
to mark a point for later one-time location:
1) Press the
where you wish to return.
2) At any point following the captur e, pr ess the
LOC
just been captured.
CAPTURE
key [29] at the point
key to return to the locat ion point that has
It is not necessary to stop the tape before pressing
LOC
. Location can be performed while the unit’s
transport is in any mode, including fast forward
and rewind.
You can no w “f in e-tun e” thi s time v a lue (s ee 6 .5.5,
“Editing a location”). This lo cat ion point may al so
be stored in a locat ion memor y (see 6.5.6, “ Stori ng
6-3
Page 34

Section 6.5 - Location operations
the location in a memory”) and recalled for later
use.
6.5.4 Manual entry of a location point
You can also use the numeric keypad to enter a
time value manually from a cue list, etc. to which
you can locate.
Time valu es are entered from the right of the display , which is cleared as soon as a number key is
pressed. For instance, to enter a value of
01:25:34:12
, the following keys should be
pressed:
1
2
5
3
4
1
2
ENTER/LOA D
Note that the
00:00:00:01
starts flashing)
00:00:00:12
00:00:01:25
00:00:12:53
00:01:25:34
00:12:53:41
01:25:34:12
(stops display flashing and enters the
value)
ENTER/LOAD
(display is cleared and
key [20] is used to
confirm the entry.
If you make a mistake entering the value, you can
stop the entry procedure with the
CANCEL
[19]. The display will stop flashing.
This time value can now be used for “instant”
location (simply press the
LOC
key [41]) or
stored in a location memory for further use (see
6.5.6, “Storing the location in a memory”).
6.5.5 Editing a location
When a location has been captured or entered as
described above, it can be edited using the jog dial
[28].
key
6.5.6 Storing the location in a memory
There are 100 memories into which location time
values may be stored, numbered from
The location memory which is currently in used is
shown in the 2-digit
MEMORY NO.
As mentioned above (6.3, “Setting a relative time
reference”), location
is used for special pur-
00
poses, such as storing the “zero” reference point in
relative time mode. We therefore suggest that you
do not use location memory
as a general loca-
00
tion point.
NOTE
Location memories stored on the RC-898 are completely
independent of either the MEMO 1 and MEMO 2 points
stored in the DTRS units, or of the 10 extra memory locations which may be stored in a DA-98 unit.
1) Enter or capture a location time (you do not
need to press
2) Press the
The
flashing, and the
start to flash.
ENTER
STR
key [17 ].
LOCATE TIME/VALUE
in this case).
MEMORY NO
displa y will st op
. display [14] will
3) Use the numeric keypad [16] to enter the
number of the location memory into which you
want to store the value.
The number will “fill up” from the right. If you
want to store the time valu e in memo ry 03, for
example, you only need to press the 3 key, but if
you want to stor e it in me mory
followed by the 3 key.
You can also use t he
DAT A INC/DEC
the
the location memory.
JOG
indicator [27] is lit) to select
13
dial as a data di al ( when
to 99.
00
display [14].
, press the 1 key,
1) Ensure that the
DATA INC/DEC
indicator [27]
is lit.
If this indicator is not lit, the
the tape transport.
2) Use the
JOG
dial to adjust the value of the
JOG
dial will control
location point.
3) To confirm this edited value, either locate to the
position that you have just edited, or store the
edited value into the location memory.
4) To use the
again, press the
JOG
dial as a transport control
DAT A INC/DEC
key so that the
indicator goes out.
6-4
4) Press the
ENTER/LOAD
MEMOR Y NO .
The
the value is stored in the location memory.
key [20].
display will stop f lashing, and
If you enter the wrong location memory, press the
CANCEL
[19] key . The
MEMORY NO.
will stop flashing and will return to its previous
value.
6.5.7 Recalling a location memory
To recall and locate to a time value stored in a
location memory:
1) Press the
RCL
MEMORY NO
The
key [18].
. display [14] will start to flash.
display
Page 35

Section 6.6 - Repeating a section
2) Use the numeric keypad [16] to enter the
number of the location memory you want to
recall.
The number will “fill up” from the right. If you
want to recall memory 03, for example, you only
need to press the 3 key, but if yo u want to recall
13
memory
key.
3) Press the
MEMORY NO.
The
the time value stored in that memory will appear
on the
4) Press the
The tape will locate to the location point that has
just been recalled.
, press the 1 key, followed by the 3
ENTER/LOAD
LOCATE TIME/VALUE
LOC
key [41].
key [20].
display will stop fla shing, and
display.
If you enter a location memory in which nothing
has been stored, this is not an error, but the
LOCATE TIME/VALUE
00:00:00:00
.
display will show
If you enter the wrong location memory, press the
CANCEL
[19] key. The
MEMORY NO.
display
will stop flashing and return to its previous value..
6.5.8 Repeated entry of location points
You can also use the
series of location points as a tape is played.
1) Recall a location memory.
The location memory immediately af ter the
recalled memo ry will be ov e rwrit ten, so make sure
that it is a location you do not want to keep.
2) Start playing (or recording) the tape.
The order of steps 1) and 2) can be reversed.
CUE STR
key [39] to stor e a
which may have been entered accidentally. See
6.7.4, “Undo function” for details. Note that there
is no “redo” function available.
6.5.9 Editing a location memory
When a memory has been recalled, it is possible to
edit it, either by replacing the contents with a
value entered from the numeric keypad or using
the jog/shuttle controls:
1) Use the
DATA INC/DEC
key [27] to set the jog/
shuttle controls into data editing mode.
2) Use the
displayed on the
JOG
dial [28] to “nudge” the values
LOCATE TIME/VALUE
display [15].
The value will flas h.
3) Confirm the entry with the
LOCATE TIME/VALUE
The
flashing, and the
start to flash.
4) Pr e s s th e
ENTER/LOAD
MEMORY NO.
STR
key [17].
display will stop
display [14] will
key to store the edited
value to the same location memory, or the
numeric keypad, followed by the
LOAD
key to store the edited value to a
ENTER/
different location.
6.6 R epeating a section
You can set two points, independently of the location memor i es, which allow you to repea t pl a y back continuously between them.
3) Press the
The
CUE STR
The current tape location will be stored into the
location memory following the one you have just
recalled. No confirmation is necessary.
LOCATE TIME/VALUE
key.
display will now
show the value of the time just stored in the location memory , and the
MEMORY NO.
display will
show the memory number in which it has been
stored.
Pressing the
CUE STR
key again will store the
new tape location into the next memory location.
These location memories can be recalled and
edited in the same way as location memories
entered in any other way. There is also one le vel of
undo available to replace one location memory
NOTE
The points that are set here using the RC-898 are independent of any repeat points set on the DTRS units. When
repeat times are set using the RC-898, the repeat function is
not available from the DTRS front panel.
1) From menu group 3, move the cursor to
Repeat, and press
Repeat Start/End
Machine 1
Start 00:00:00:00
2) Use the
DOWN
key to select the
SELECT
:
30ND
Start
parameter if it is not already visible.
6-5
Page 36

Section 6.7 - Punch operations
3) Move the cursor to the time fields, and use the
UP
DOWN
and
Alternatively, you can use the numeric keypad to
set the time value.
keys to set the time value.
4) M ove t he cursor to the Start parameter,
and press the UP key to select the
End
parameter.
5) Set the time values for the
6) Pr ess the
REPEA T
key (the indicator will light)
End point.
to start the repeat between the two points.
The
Start
and
times must be at least 5
End
seconds apart, otherwise repeat play cannot take
place.
If the
set to a time after the
REPEAT
be swapped, so that the
End
time is set, and the
End
End
Start
time, when the
key is pressed, the two time points will
Start
comes before the
.
time is
When you are editing the repeat times, the DTRS
unit tries to take into account the fact that the
should follow the
End
Start
, and automatically attempts to adjust the entries as they are
made so that they are consistent.
6.7 Punch operations
Automatic punch recording operations are closely
linked to location memory , and so are described
here.
6.7.2 Checking punch points
The punch points can be checked and recalled in
the same way as any other location memory.
1) Press the
2) Press either the IN or the
appropriate.
•The
•The
In addition to checking the actual punch positions,
you can also check the length of the punch time:
1) Press the
2) Press and hold down the IN key.
3) While holding down the IN key, press the
key .
RCL
key.
MEMORY NO.
The
The time value of the punch-in or the punch-out
point will be shown on the
VALUE
display.
LOC
key can be now be used for instant
display will start to flash.
OUT
key, as
LOCATE TIME/
location to the punch-in or punch-out point.
PRRL
key [34] will also locate to the pre-
roll time minus the punch pre-roll time (see
6.7.5, “Setting pr e-roll and post-roll times” for
details of setting this value). This is independent of the location pre-roll t ime (see 6.5.1,
“Setting the location pre-roll value”).
RCL
key.
MEMORY NO.
The
The time between the two punch points will be
shown on the
display will start to flash.
LOCATE TIME/VALUE
display.
OUT
6.7.1 Setting punch points
To set the punch-in and punch-out points:
• While the tape is playing, press the IN and
OUT
keys as appropriate at the right time.
• Alternativ ely, you can use the numeric keypad
to enter a tim e value for the in or out point.
• While the
flashing, press the IN or
ate. The display wil l stop flashing, and the
MEMORY NO .
depending on whether the value has been
stored as the punch-in or punch-out point.
NOTE
Setting a punch-out time which comes before the punch-in
time is meaningless, and will not be automatically corrected
by the RC-898. If you try to perform a punch operation with
the punch points set in this way, the tape will locate to the
punch-in point (minus the punch pre-roll time) and then
stop.
LOCATE TIME/VALUE
OUT
key as appropri-
display will show
display is
in
or ot,
6.7.3 Editing punch points
1) Press the
RCL
key, followed by the IN or
key .
The punch-in or punch-out value (as appropriate)
will be shown on the
display.
2) If the
press the
DATA INC/DEC
DATA INC/DEC
LOCATE TIME/VALUE
indicator [27] is not lit,
key so that the
indicator is lit.
3) Use the
JOG
dial to adjust the value of the
punch-in or punch-out point.
4) After adjusting the value, press the IN or the
OUT
key as appropriate to store the new value
into the punch memory.
OUT
6.7.4 Undo function
If you have stored a punch in or out value and
overwritten it in er ror, there is an “undo” function,
6-6
Page 37

Section 6.7 - Punch operations
which allows you to restore the previous version.
Only one level of undo is allowed, and if no value
has been stored in the in or out memory prior to
the wrong value being entered, no undo is possible. To undo the wrong entry:
1) Press and hold down the
press either the IN or the
CANCEL
OUT
key, depending
key, and
on the memory store operation that you want
to undo.
The previously-stored memory value will be
shown on the
LOCA TE TIME/VALUE
display.
This undo function can also be used with the “onthe-fly” location memory store function (see
6.5.8, “Repeated entry of location points”)to
delete a cue point entered in error. In this case, the
CUE STR
key, rather than the IN or
should be pressed while the
CANCEL
OUT
key,
key is held
down.
Please note that there is no “redo” function.
6.7.5 Setting pre-roll and post-roll times
These times used for punch operations only , and
are independent of the pre-roll time described in
6.5.1, “Setting the location pre-roll value”.
The PRRL key can be used to locate to the punchin time, minus the punch pre-roll time set here.
1) From menu g roup 1, move the cursor to
Post, and press
Preroll Postroll
Pre Post
00m05s 00m03s
SELECT
Machine 1
:
Pre/
1) From menu group 1, move the cursor to
X-fade and press
Crossfade Time
Machine 1
SELECT
060 ms
:
2) On DA-98 units, the time can be set from
10ms to 200ms in 10ms increments. On DA-
38 and DA-88 units, the increments are still
10ms, but the time can be set from
90ms.
Use the UP and
or the l ast digits of a value e ntered with the
numeric keypad.
DOWN
keys to change the value,
10ms to
6.7.7 Rehearsing the punch recording
1) Arm the track(s) which will be used for
recording.
REC FUNCTION
The
tracks will flash, and the
cators [2] will light.
2) Press the
3) Press the
AUTO MON
This corresponds to pressing the
of a DA-9 8 unit o r the
pressing the
together on a DA-88 unit.
AUTO INPUT
RHSL
key [35].
• The tape will locate to the punch pre-roll point
and start playing. The
indicators of the armed t racks will go out,
showing that monitoring is of f-tape.
• When the tape reaches the punch-in point, the
RECORD
key [40] will start to flash. The
INPUT MONITOR
ing that source monitoring is now enabled.
indicators [1] of these
INPUT MONITOR
key [5].
AUTO MON
INSERT
key of a DA-38, or
INSERT
and
keys
INPUT MONITOR
indicators will light, show-
indi-
key
2) The times may be set up to a maximum of 59
minutes, 59 seconds, using the cursor keys or
the numerical keypad.
The values shown abov e ( 5 seconds and 3 sec onds)
are the factory default values for pre-roll and postroll, re spectively.
These values are also the minimum values. Any
attempt to s et a value l ess than these wi ll cause the
setting to revert to the minimum value.
6.7.6 Crossfade times
Crossfading is used in digital recording to pro vide
a “seamless” punch operation.
• When the tape reaches the pu nch-out point, t he
RECORD
ITOR
key will go out. The
indicators will also go out .
INPUT MON-
• When the tape reaches the post-r oll point, it
will stop.
• To repeat the rehearsal, press the
RHSL
key
again.
• The rehearsal can be interrupte d at an y time by
pressing the
STOP
key.
6.7.8 Performing the punch recording
1) With the tracks armed, and the
indicator lit, press the
AUTO PUNCH
AUTO MON
key [36 ].
6-7
Page 38

Section 6.7 - Punch operations
• The tape will locate to the punch pre-roll poi nt
and start playing. The
indicators of the ar med tracks will go out,
showing that monitoring is off-tape.
• When the tape reaches the punch-in point, the
RECORD
key [40 ] will light, and the
RECORD FUNCTION
armed tracks will also light steadily.
INPUT MONITOR
indicators of the
•The
INPUT MONITOR
indicators will light ,
showing that source monitoring is now
enabled.
• When the tape reaches the punch-out poi nt, the
RECORD
FUNCTION
key will go out and the
indicators of the ar med tracks
will start to flash. The
INPUT MONITOR
RECORD
indicators will also go out .
• When the tape reaches the post-roll point, it
will stop.
• To repeat the ta ke, press the
AUTO PUNCH
key again.
• The take can be interrupted at any time by
pressing the
STOP
key.
• Check the punched material by pressing the
PRRL
key and locating to the punch pre-roll
point . If the
AUTO PLAY
indicator is lit while
the pre-roll location is taking place, playbac k
will start automatically when the pre-roll point
is reach ed.
NOTE
When you are satisfied with the take, remember to turn off
AUTO MON
the
setting and unarm the tracks.
6-8
Page 39

Section 7.1 - Track operations
7 – Making settings on the
DTRS units
This section covers the operations which relate to
the DTRS units, other than those specifically
related to timecode.
7.1 Track operations
The following series of operations relate to individual tracks of the DTRS units connected to the
RC-898.
7.1.1 Track delay
When recording or playing back, tracks on a
DTRS unit may be delayed by up to 7200 samples, or advanced relative to other tracks up to a
value of 200 samples.
This is possible due to the design of the recording
and monitoring heads in the DTRS mechanism.
1) From menu gr ou p 0, move the c ursor to
Delay and pres s
Track Delay Time
01 000 msec
SELECT
:
delay times for different DTRS units in the chain
easily (to slip times, etc.).
When track 48 is shown on the display, pressing
the UP key will select tracks 41-48. Subsequent
presses of the UP key will select the other DTR S
units in order, working towards the head of the
chain.
4) Move the cursor to the numerical value field
and use the UP and
DOWN
keys or the numeric
keypad to enter a value.
+/–
The
enter negative values here, as shown by the period
after t he last digit in the
display.
key of the numeric keypad allows you to
LOCATE TIME/VALUE
5) If you prefer to work in sample values, rather
than milliseconds, move the cursor to the
msec field and change it to sample with
DOWN
the
The delay v a lu e i s now convert ed t o samples at t he
current sampling frequency, and is up to 4 digits
long.
key.
7.1.2 Track copying
This operation allows the assignment of
38 98
inputs (either digital or analog) on a track-by-track
basis. This facility is not available on D A-88 units.
This means that a patchbay is not required to
reroute input signals
2) Use either the UP key or the numeric keypad to
change the track number by individual track.
NOTE
The track number here may be set from 01 to 48. Tracks
refer only to DTRS units, not to any other equipment which
may be using the
through 46.
REC FUNCTION
switches of tracks 41
3) When track 1 is shown, you can press the
DOWN
DTRS unit. Continue pressing the
key to select the eight tracks of the first
DOWN
key
to select the tracks in groups of eight for the
subsequent DTRS units (i.e.
9-16, 17-24,
etc.):
Track Delay Time
1-8 000 msec
Any changes to t he delay time made when a group
fo eight tracks is shown will affect the delay time
of all tracks on the unit. This allows you to set the
As well as external inputs, tracks which have
already been recorded can be used as recording
sources. This feature therefore allows tracks to be
copied within a unit.
It does not allow routing or copying of tracks
between machines, nor does it allow the combination (“ping-pong” of tracks). For these operations,
an external patching or mixing system is required.
For further details of this feature, consult section
8.11 of the DA-98 manual, or 4-7 of the DA-38
manual.
1) From menu group 0, move the cursor to
Copy and press
Track Copy Mcn 1
Input 12345678 (Ana)
Tape
Track 12345678 off
SELECT
:
Trk
7-1
Page 40

Section 7.2 - Unit-related functions
2) To enable track copying on the selected
machine, move the cursor to
UP
key to change it to
In the screen above, analog inputs 1 through 8 are
routed to destination tracks 1 through 8 (shown on
the bottom line of the display)on a “one-to-one”
basis.
off and use the
on.
3) To change the routing of the inputs, use the UP
DOWN
and
keys to select the different inputs
or tape tracks to be used as recording sources.
The screen below shows tracks 1 thr ough 4 accepting digital inputs 1 through 4, while the signals
previously recorded on these tracks are copied to
tracks 5 through 8.
Track Copy Mcn 1
Input 1234 (Dig)
Tape 1234
Track 12345678 on
7.1.3 Rec Mute function
The rec mute function allows you to prevent
98
any input signals from reaching armed tracks,
which wo ul d ot h erw is e be r eco r din g. Thi s m ay b e
used to record periods of silence, etc. This muting
is available on a track-by-track basis.
1) From menu group 1, move th e cursor to
Mute, and press
Rec Mute Mcn 1
On
Off »»»»»»»»
Trk 12345678
SELECT
:
Rec
“daisy-chain” described in 3.1, “Con nection to
DTRS units”
To set sync chase mode on or off for a particular
DTRS unit:
1) Press the
CHASE
The word
LOCATE TIME/VALUE
CHASE
key [31].
will start to flash in the
display.
2) Use the numeric keypad to enter the number of
the DTRS unit that you want to set.
This will toggle the chase status of the DTRS unit
between on and off.
The appropri ate
now show the chase status of the DTRS unit, as
will the CHASE indicators on the DTRS units..
on
fast flash
slow flash
off
Chase mode is enabled, and the slave is now
locked to the master.
Chase mode is enabled, but the slave unit is not
yet locked (the slave unit is in fast forward,
rewind , e tc. ).
Chase mode is enabled, but the slave unit is not
yet locked (unit is in stop mode)
Chase mode is disabled ( or the unit is turned off
or not connected).
LOCK STATUS
indicator [9] will
When the master unit (ID 1) is controlled, the
slave units which have their chase mode set will
chase the master unit. As they lock, the
STATUS
CHASE
NOTE
If the
pad 0 key , this will toggl e the chase status of all sla v e DTRS
units.
indicators will light steadily, as will the
indicators on the DTRS units.
CHASE
key is pressed followed by the numeric key-
LOCK
2) Use the
LEFT
a track, and the UP and
and
RIGHT
cursor keys to select
DOWN
keys to t urn
the muting on and off.
7.2 Unit-related functions
The following functions affect the settings of the
whole unit, on a unit-by-unit basis.
7.2.1 Chasing to ABS sync
Units which are not the first unit in the chain will
typically chase the first unit in the chain using the
ABS synchronization facility.
This is different from chasing to timecode, which
is described in 8.1.8, “Chasing to external timecode”. Chasing to a DTRS master requires that
there is a properly-terminated sync and control
7-2
Remember that DA-88 units, although their ID
numbering starts at 0, should be regarded as starting at 1. The IDs for DA-38 and DA-98 units start
at 1 in any case.
7.2.2 Key Mode
Using this function, you can select either all
DTRS units connected to the RC-898, or just one
unit, to be controlled by the
INPUT
[4] and
AUTO MON
ALL SAFE
[5] keys.
[3],
ALL
Page 41

Section 7.2 - Unit-related functions
1) From menu group F, move the cursor to Key
Mode, and press
Key Mode
2) Use the UP or
All and Individual.
If you select
SELECT
All
DOWN
Individual, only that unit cur-
:
key to select between
rently selected for control (see 5.1.1, “Selecting
the unit to which operations refer”) will be controlled by the thr ee keys ment i on ed a bove. If you
select
All, then all DTRS units connected will
respond to the commands of the
INPUT
AUTO MON
and
ALL SAFE, ALL
keys.
7.2.3 Chasing with an offset
It is not always required that the DTRS units are in
perfect synchronization with each other.
For instance, it may be that three DTRS units are
being used for video post-prod uction purposes.
The dialog and F ol ey tra cks of a proje ct ha v e been
recorded on one DTRS tape (up to eight tracks),
and the backing music has been recorded on two
more tapes (16 tracks). Obviously, the units
replaying the two music tapes should be synchronized to each other, but the music may need to be
“slipped” relative to the dialog and Foley unit
(which is, in turn, synchronized to the timecode
on the video, as described in 8.1.8, “Chasing to
external timecode”).
Once the dialog and Foley is synchronized to the
video timecode, “slipping” the two music units is
accomplished in the following way:
3) Use the numeric keypad to enter an offset value
which is shown on the
display. The
+/-
key of the numeric keypad is
LOCA TE TIME/V ALUE
used to change between positive and negative
values.
The offset value may be ±2 hours relative to the
mast er t ime.
You can also use the cursor keys to ent er a value
directly on the display screen.
NOTE
There is an “invisible” field immediately to the right of the
frames field. If you place the cursor there and increment or
decrement the value, you can change the time as a whole (as
the frame field passes its maximum value, the seconds field
will increment).
The Auto Offse t func tion d escri bed bel o w can al so
be used to set the offset.
4) Transfer the value to the display screen by
pressing and holding down the
and pressing the
5) Use the
SHIFT
ENTER/LOAD
and UP (
NEXT
SHIFT
key [23]
key [20].
) keys to select
any other units which will chase with an offset.
When the master DTRS unit plays, the slave u nits
should now chase at the offset value you have set
up.
If an offset value is set on any unit or units, and
the Time Mode is set to ABS, the
OFFSET
indi-
cator [10] will light.
If you need to “fine-tune” these values, you can
use the UP and
DO W N
keys to adjust the value of
the offset while monitoring the playback of the
units.
1) From menu group 3, move the cursor to
Offset and press
Machine Offset
Machine 2
+00:00:00:00 ABS
SELECT
:
Mcn
2) Choose the first machine which will take the
chase offset (in the illustration above, we show
machine 2) by using the
SHIFT
and UP (
NEXT
keys.
If adjustment finer than a frame is required, it is
suggested that you use the Track Delay function
(see 7.1.1, “Track delay”).
7.2.4 Auto Of fset function
In addition to the manual offset entry, it is also
possible to set an offset automatically by following the procedure below:
1) From menu group 3, move the cursor to
McnOffset and press
)
SELECT
.
7-3
Page 42

Section 7.2 - Unit-related functions
2) Use the RIGHT key to move the cursor to a
second “invisible” field to the right of the
frames field. The display will appear as f o llows:
Machine Offset
Machine 2
AUTO OFFSET
3) Locate the two tapes (master and slave) so that
they have the right offset.
You can play up the tapes and pause them once
they have been lined up, or carry out the next step
while either or both of the tapes is being replayed.
4) Press either the UP or DOWN key at the
correct offset time to capture and store the
offset.
NOTES
1) From menu group E, move the cursor to either
Abs Diff (absolute) or Rel Diff
(relative).
There is no need to press
SELECT
here.
2) The appropriate difference value will be
displayed on the bottom line of the display
screen.
7.2.6 Clock selection
The word clock (as opposed to the timecode clock
source) of a DTRS unit is usually selected using
the
CLOCK
RC-898 can be used to select the input clock.
• In ABS time mode, the clocks of all DTRS
units will be set together, following the setting
of the first machine in the chain.
• However, as explaine d below in 8.1.11, “Inde-
pendent clock settings”. they can also be set
independently.
key on the front panel. However, the
e value entered in this way can be edited later
Th
using the techn
fsets cannot be set from unformatted tapes, nor
Of
f either tape is displaying a negative ABS valu e.
i
ique des cr ibed abo ve.
7.2.5 Checking the offset
The offset of a slav e DTRS unit relative to its master may be checked (“absolute” difference), as
well as the difference (if any) between the
intended offset and the actual offset (“relative”
difference). In practice, usually there will be no
difference between the intended and actual offset,
resulting in a relative difference of zero.
As an example, consider the following:
A slave machine has its offset set to +00:10:00:00,
and while chasing, the two machines’ tape
counters read as follows:
Master
Slave
10:15:12:12
10:05:12:08
1) From menu group 9, move the cursor to
Clock, and press
Clock
Machine 1
2) Use the UP and
Int and Word and (in the case of SY-88-
equipped DA-88s and DA-98 units)
SELECT
Int
DOWN
:
keys to select between
Video.
7.2.7 Output timing
88
On the DA-88, regardless of whether an SY-88
synchronizer board is fitted or not, there is a facility to use either Digital or Analog output mode for
exact synchronization when dubbing between
DTRS units, etc.
Note that while it is possible to output both digital
and analog signals simultaneously, there two sets
of signals will be out of sync with each other.
Here, the difference between the master and the
slave times (the “absolute difference” is now
00:10:00:04, and this is what is shown if we examine the absolute difference.
However, the result of subtracting the intended
offset from the absolute difference is 4 frames,
and this is the “relative difference”, which may
also be examined as described below:
7-4
1) From menu group 9, move the cursor to
OutputTim (output timing) and press
SELECT
Output Timing
Digital »»»»»»
Analog
Machine123456
:
Page 43

Section 7.2 - Unit-related functions
2) Use the
and the UP and
setting between
See p15 and pp25-26 of the DA-88 manual for further information regarding this facility.
LEFT
RIGHT
and
DOWN
Digital and Analog.
keys to select a unit,
keys to change the
7.2.8 Varispeed (pitch control)
The DTRS design allows for ±6.0% speed control,
in 0.1% increments.
1) Fr om menu gr oup 0, mo ve the c ursor to
Spd, and press
Vari Speed
2) Use the UP key to change
DOWN
the
VARI
The
selected, even if the setting is
out if Fix is selected, even if the setting is no t
zero.
SELECT
Machine 1
Fix + 0.0%
key to c hange
indicator [10] will light if Vari is
:
Fix to Vari, or
Vari to Fix.
0.0%, and will go
Vari
3) Move the cursor to the right (numeric) field,
and use the UP and
DOWN
keys to set the
value.
NOTE
The varispeed function is only available if the unit clo ck has
been set to internal (see 7.2.6, “Clock selection”) and the
video resolve function (
off.
see 8.2.10, “Video resolve”
) is
7.2.9 Input selection
DTRS units can accept either digital or analog
inputs. The choice of which inputs are to be used
for each machine is made in the following way:
1) From menu gr ou p 9, move the c ursor to
InputSel and press
Input Select
Digital » »
Analog »»»»
Machine123456
2) Use the UP and DOWN keys to select between
the digital and analog input sources for each
unit.
In the screen above, units 1 through 4 are accepting analog signals, while 5 and 6 are using TDIF 1 digital inputs.
SELECT
:
7.2.10 Word length
The DA-38 and DA-98 units are able to
38 98
accept digital data at their digital I/O connectors at
either 16-bit, 20-bit or 24-bit word lengths. These
settings are made in the following way:
1) From menu group 2, move the cursor to
Len, and press
TDIF Word Length
2) Use the UP and
16, 20 and 24 bit word length of incoming
SELECT
Machine 1
16 bit
DOWN
:
keys to select between
data, which will be converted to 16 bits for
recording purposes.
If you select a value higher than 16, you may
want to experiment with the Dither settings (see
7.2.11, “Dither”, bel ow), as this may help with distortion, though a little may be lost from the signalto-noise ratio.
7.2.11 Dither
Dithering, in digital audio, is the tech-
38 98
nique of adding a known noise signal to a lowlevel input signal, especially when converting
from a word length with a higher number of bits
than the destination (see 7.2.10, “Word length”
above).
Paradoxically, this technique removes quantization noise and improves overall distortion figures,
though at t he slight e xpense of t he signal-t o-noise
ratio. The DA-38 implements an “on/off” dither
function, and the DA-98 allows two “shapes” of
dither. See se ction 4-8 of the DA-38 manual or
8.13 of the DA-98 manual for further details.
1) From menu group 1, move the cursor to
Dither and press
Dither
Machine 1
2) Allowable values for DA-38 units are
off. The DA-98 allows the following settings
to be made:
rectangular.
See the section 8.13 of the DA-98 manual for a
discussion of rectangular vs. triangular dither
modes.
off, triangular and
SELECT
off
:
on and
Word
7-5
Page 44
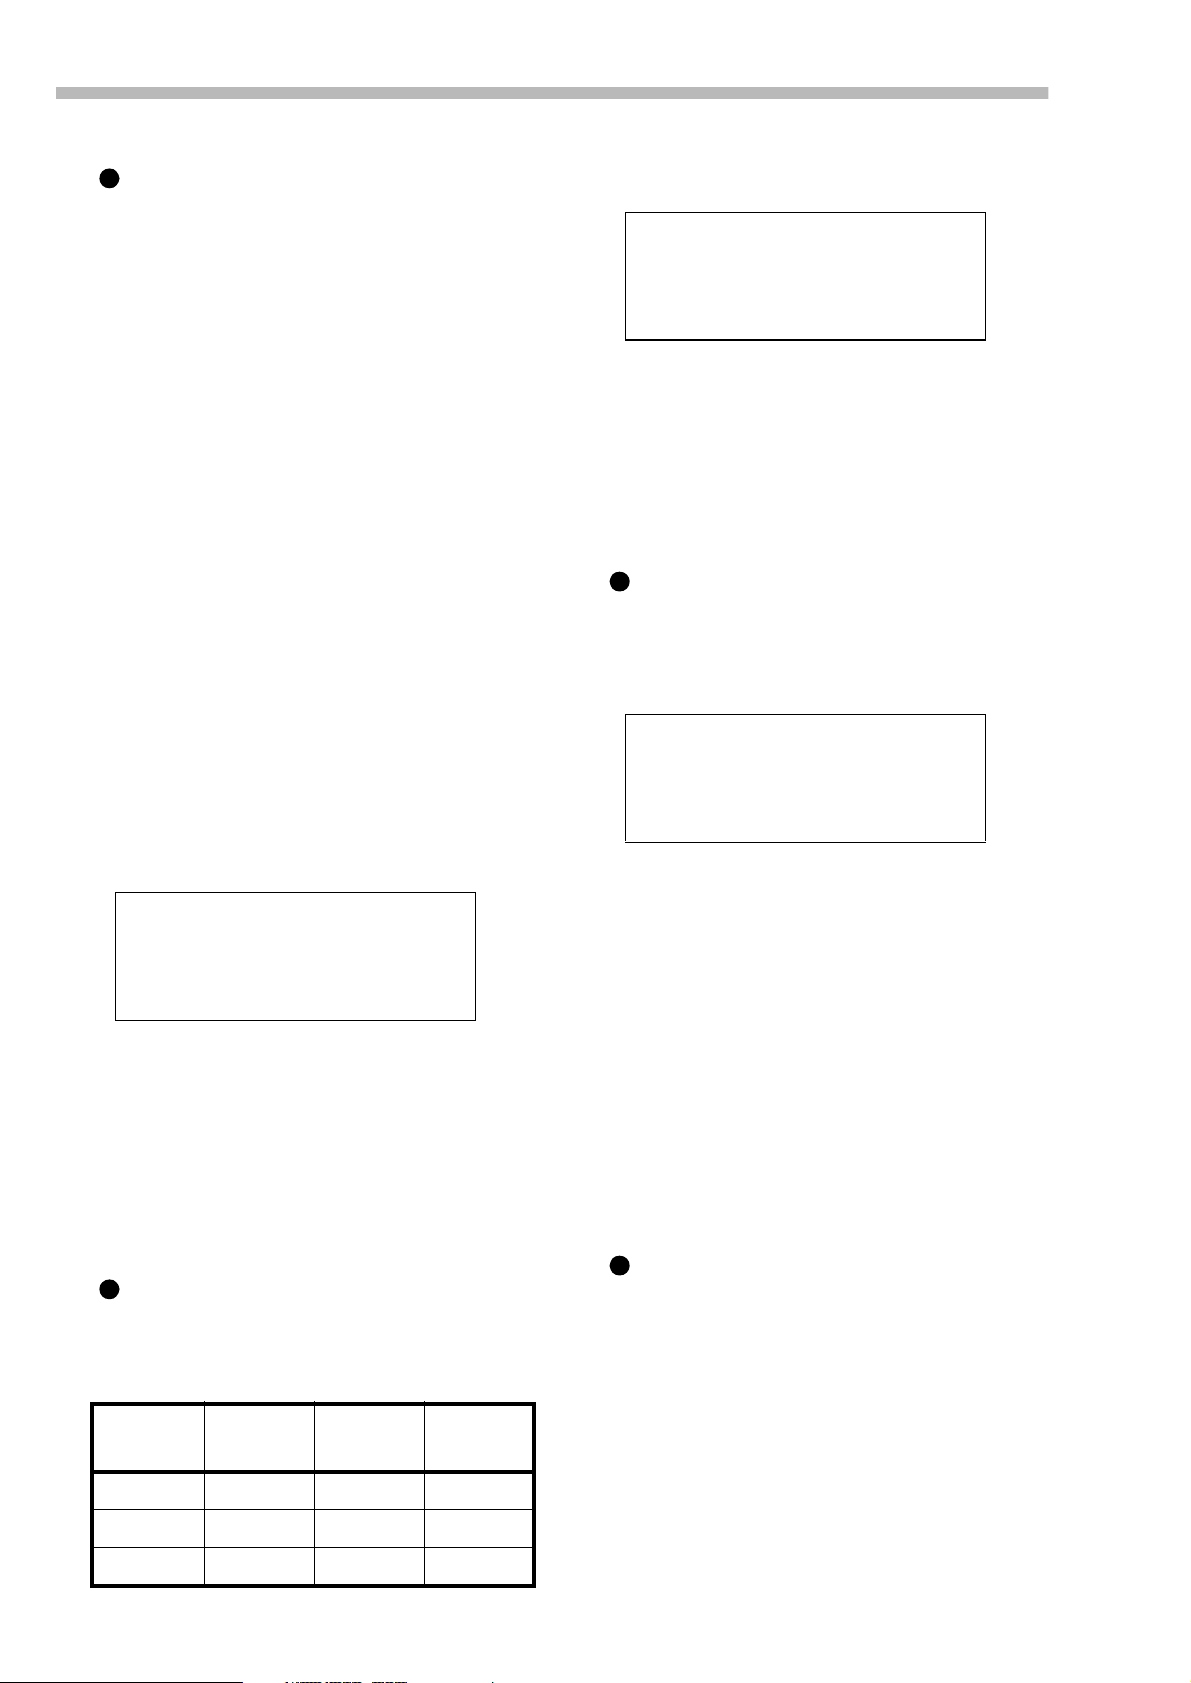
Section 7.2 - Unit-related functions
7.2.12 Confidence mode
The DA-98 allows of f -tape monitoring while
98
recording (confidence mode). This can be
switched on or off on a per-machie basis.
However, since there is a slight delay between the
input signal and its replay in confidence mode,
you should not use confidence mode in the following circumstances:
• When making punch recordings, as you will
not be able to hear the exact timings for punch
operations.
• When operating a mix ed chain of DA-98s and
other units. The delay introduced by conf idence mode on the DA-98 will make these
tracks appear to be out of time with the other
tracks.
Howev er, confidence mode can be very useful
when making test recordings so that you can
instantly hear the effects of different dither settings (see 7.2.11, “Dither”), or to monitor possible
clipping at high recording levels on a test take,
allowing you to “back off” the lev el a little before
making a final recording.
1) From menu group 9, move the cursor to
ConfdMod and press
Confidence Mode
Machine 1
2) Use the UP and
the three states:
Confidence mode is selected using this three-state
switch to prevent accidental switching of the unit
into confidence mode, which might otherwise
cause confusion when performing monitoring
operations.
DOWN
off, ready and on.
SELECT
off
:
keys to select between
7.2.13 Reference levels
The reference level for analog I/O on the DA-
98
98 can be set to one of three standard values:
European, T ASCAM and SMPTE. These levels
correspond to:
1) From menu group 2, move the cursor to
Level and press
Analog In/Out
Reference Level
Machine 1
-16 dB
SELECT
:
Ref
2) Use the UP and DOWN keys to select between
-16, -18 and -20 dB.
The appropri ate ref erenc e l e vel indic ator( s) ne x t to
the meters on the DA-98 unit will light. Se e section 8-7 of the DA-98 manual for further detai ls of
reference levels.
7.2.14 Meter modes
On the DA-98, the peak hold time and the
98
decay ballistics of the meters can be changed.
1) From menu group 2, move the cursor to
MeterMode and press
Level Meter Mode
Machine 1
Peak Hold Release
0 sec Fast
2) Move the cursor to the
and choose between the following values:
through
and
9 seconds (in 1-second increments)
continue.
continue
The
hold time. The peak levels can be reset by setting
0
the time to
seconds.
SELECT
Peak Hold setting,
setting sets an infinite peak
:
0
3) Move the cursor to the Release setting, and
choose between the following release times:
Fast, Medium and Slow.
The meter funct ions ar e descri bed in sec tion 8.8 of
the DA-98 manual.
7.2.15 Sine oscillator
The DA-98 incorporates a sine oscillator for
98
line-up purposes at either 440Hz or 1kHz. The
lev el of the oscillator is a full bit +16dBu (but cannot be compared to transient signals, on account
of the co nstant nature of a sine-wave oscillator).
Standard Reference
level
TASCAM –16dBFS +4dBu +20dBu
European –18dBFS +4dBu +22dBu
SMPTE –20dBFS +4dBu +24dBu
7-6
Nominal
level
Maximu
m level
Page 45

1) Fr om menu gr oup 2, mo ve the c ursor to Sine
Osc. and press
Sine Oscillator
SELECT
Machine 1
.
off
Section 7.2 - Unit-related functions
2) Use the UP and
off, 440 Hz and 1 kHz.
DOWN
keys to select between
All other inputs will be o verri dden b y the oscil lator
when it is turned on.
WARNING
When using the oscillator, turn down the levels of all monitoring equipment in the control room and studio to avoid
possible damage to your ears (and speakers, etc.).
7-7
Page 46

Section 7.2 - Unit-related functions
7-8
Page 47

Section 8.1 - Primary timecode functions
8 – Timecode functions
98 88
functions available through the RC-898. Note that
while the RC-898 contains no timecode generator
or reader of its own, it is able to control the timecode generators and synchronization facilities of
DA-98 and DA-88/SY-88 units. Since the DA-38
does not have any timecode facilities, this section
does not have any relevance if you are using a
setup composed of only DA-38 units.
Note that in this section, we use the term “timecode” to refer to SMPTE/EBU timecode rather
than to ABS timecode.
When using a chain of DTRS units which are to
be synchronized to external timecode, you will
usually need to synchronize the first unit in the
chain. The other units should then chase to the
first, using the DTRSABS synchronization facility. For information related to this and to other
non-timecode-related synchronization features,
see 9, “External control and settings”.
This section describes the timecode-based
8.1 Primary timecode
synthesized timecode (as described in 8.1.2, “Synthesizing timecode from ABS times” below).
8.1.2 Synthesizing timecode from ABS times
98 88
does not necessarily ha ve to be striped on a tape
for the DTRS unit to be able to use the TC setting.
The subcode can be used to synthesize timecode,
eliminating the need to pre-stripe the tape for
timecode-based work.
98
ABS value, so that the timecode values can start at
any desired position, or can create a repeating
timecode pattern for tracks of nominal 10 or 20
minutes’ duration. See also 10.2.3 and 10.2.4 of
the DA-98 manual for further details.
1) From menu group 5, move the cursor to
Tape TC, and press
As mentioned earlier, linear timecode
In addition, the DA-98 can add offsets to the
SELECT
Tape TC Mode
Machine 1
:
Mode
ABS
functions
These functions cover the basic timecode setup
when synchronizing DTRS units to timecode.
8.1.1 Selecting the timecode source
98
When using a DA-98 unit, the timecode used
for recording can be from one of three different
sources: external, from the internal generator, or
off-tape (“synthesized” timecode—see 8.1.2,
“Synthesizing timecode from ABS times”). See
section 10.5 of the DA-98 manual for further
details regarding this function.
1) From menu gr ou p 8, move the c ursor to
TcRec Src and press
TC Record Source
Machine 1
External TC
2) Use the UP and
External TC, Generator TC and
Tape.
If you select
eter shown which will correspond to the timecode
type select ed in 6.4 , “ABS setting”. This sho ws the
kind of timecode on the tape: striped timecode or
DOWN
Tape
SELECT
:
keys to select between
, there will be another param-
2) Use the
and
SHIFT
PREVIOUS
values you will change.
3) Use the UP and
the following:
•
TC Track: The timecode is read from the
timecode track striped on the tape. Full details
of these operations are given in 8.1.7, “Recording the timecode on a DTRS timecode track” ..
•
ABS: The timecode is “synthesized” from the
ABS time (i.e. the ABS values are read and
used as timecode).
98
•
ABS-Ofs: You can add or subtract an
offset from the ABS values to arrive at the final
synthesized timecode value. If you select
ABS-Ofs, use the numeric keypad [16 ] t o
enter an o ffset value on the
VALUE
display [15] and enter it into the offset
value on the display scr een usi ng the
ENTER/LOAD
and
98
•
ABS-13 and ABS-23: pro vi de a con -
venient way of dividing a tape into “sessions”.
Timecode is synthesized with a pre-roll time of
xx:57:00:00
start at
xx:00:00:00
xx:10:00:00
ed UP and
DOWN
keys (
NEXT
) to select the DTRS unit whose
DOWN
keys to choose between
LOCATE TIME/
SHIFT
keys [23]+[20].
, the session is assumed to
, and fini s hes at
or
xx:20:00:00
, depend-
8-1
Page 48

Section 8.1 - Primary timecode functions
ing on whether ABS-13 or ABS-23 has
been selected. The value of
xx
varies, depend-
ing on the starting “hour” chosen.
Timecode values
0 3 13 2926 3916
Absolute time in minutes from start of tape (ABS-13 setting)
If you select
UP
and
ABS-13 or ABS-23, use the
DOWN
keys to select the starting hour.
In the illustration a b ove, the starting hour is 0.
8.1.3 Selecting a timecode type
The RC-898 can work with a number of different
timecode types, as shown by the TC indicators
[7].
29
The
“29.97”. The DF indicator will light if the timecode is in drop-frame format.The supported types
are therefore:
24 24fps (cine)
25 25fps (PAL/SECAM)
29 29.97 (NTSC color non-drop)
29 DF 29.97 (NTSC drop-frame)
30 30fps (NTSC mono)
30 DF 30fps drop-frame (NTSC color)
on the RC-8 98 pane l is an abbre vi atio n for
98
etc…
•30 DF
•30 NDF
98
• 29.97 DF
• 29.97 NDF
•25F
•24F
These types will not, of course, affect the type of
any timecode which has already been used to
stripe a tape.
They are used for the type of timecode which will
be produced by the internal timecode generator of
a DTRS unit (DA-98 or SY-88) or the synthesis
from ABS timecode of these units.
8.1.4 Setting the generator start time
The DTRS unit’s internal generator can be set in
the following way:
1) From menu group 8, move the cursor to
Start, and press
Generate Start Time
Machine 1
00:00:00:00 30DF
2) Enter the generator start time using the
numeric keypad [16].
SELECT
:
Gen
NOTE
30 fps drop-frame is only supported by DA-98 units.
To select or change the timecode type used by a
DTRS unit:
1) From menu group 5, move the cursor to
TC Frame and press
TC Frame Mode
Machine 1
2) Use the
and
SHIFT
ed UP and
PREVIOUS
30DF
) to select the unit where you
SELECT
DOWN
:
keys (
will make settings.
3) Use the UP and
DOWN
keys to change between
the following settings:
NEXT
3) Press and hold down
LOAD
to transfer the value to the display
screen.
You can also use the cursor keys and the display
screen t o set the value here.
NOTES
The frame value at the bottom right of the screen is not set
here. The procedure for setting this is described in detail in
8.1.3, “Selecting a timecode type”, and is accessed from
menu group 5.
If the timecode source is synthesized ABS timecode, the
timecode type may be changed by changing the timecode
type of the ABS “timecode”. It is not possible to receive one
type and convert it for recording, however. If timecode is
being recorded from an external source, thetype cannot be
changed.
We suggest that you choose a value such as
00:57:00:00
in on the tape before the program material starts.
SHIFT
and press
ENTER/
, allowing a few minutes of lead-
8-2
Page 49

Section 8.1 - Primary timecode functions
8.1.5 Starting and stopping the generator
1) From menu group 8, move the cu rsor to Gen
Mode and press
Generate Mode Mcn 1
00:57:00:00 30DF
Run/Stop Mode
Stop Continue
2) Use the
LEFT
between the
3) Use the UP and
SELECT
RIGHT
and
Run/Stop and Mode fields.
DOWN
:
cursor keys to move
keys in the
Mode field
to determine whether the generator will
Continue from the last point where it was
stopped, or whether it will be
Reset to the
starting value as set above when restarted.
4) When the cursor is on the
Run/Stop field,
use the UP key to start the generator, and the
DOWN
key to stop it agai n.
8.1.6 Checking the generator progress
While the generator screen above is visible, the
generator’s output can be viewed in the display
screen. However, there is also another way to
check the generator:
1) From menu gr o up E, mo v e the cur so r to
TC (there is no need to press
Ext TC Abs Diff
Tape TC Rel Diff
>Gen TC
01:02:34:12 30DF
SELECT
Gen
):
1) From menu group 8, move the cursor to
TcTrkRec and press
TC Track Record
enable »
disable »»»»»
Machine123456
2) U se the UP and
DOWN
SELECT
:
keys to arm the
timecode track on the required DTRS unit(s).
Make sure that all other units’ timecode tracks
are disabled.
NOTE
Remember, as mentioned earlier, that it is usually necessary
to record timecode on only one unit; the other units in the
chain can use the DTRS chase facility. Ho wever , it may be
necessary, if dubbing audio tracks, etc. between DTRS
units, to transfer timecode simultaneously with the audio
tracks.
When a unit’s timecode track is armed for recording, and that machine is selected, as shown by the
MACHINE
[10] on the RC-898 (as well as the
cator on the DTRS unit) will light.
indicators [8], the
TC REC
TC REC
indicator
3) Rewind the tape to the beginning.
It is possible to start recording timecode halfway
through the tape, but it can make later synchronization difficult. For this reason, we advise recording timecode al l the wa y t hrough the tape f rom t he
start (unless you use th e ABS-13 or ABS-23 pr eset
functions to convert ABS time into synthesized
timecode, as described in 8.1.2, “Synthesizing
timecode from ABS times”).
indi-
The bottom line of the display shows the current
timecode value being output by the generator. If
the generator is stopped, it will show the value at
which it was stopped.
8.1.7 Recording the timecode on a DTRS timecode track
This procedure applies to all timecode recording,
regardless of the timecode source used.
The dedicated timecode tracks of any DTRS units
can be armed and safed on a per-machine basis:
4) Start the timecode source.
If the timecode source is an external source (see
8.1.1, “Selecting the timecode source”), start the
source so that timecode is transmitted from it.
If the timecode source is the DTRS internal generator, start the generator as described in 8.1.5,
“Starting and stopping the generator”.
If the timecode source is the ABS timing, used to
synthesize timecode, no separate operation is necessary to start the timecode source.
5) Press and hold down the
press the
PLAY
key.
TC REC
The
DTRS unit is selected) as well as the DTRS units,
will light steadily.
indicator on the RC-898 (if the
RECORD
key and
8-3
Page 50

Section 8.1 - Primary timecode functions
6) T o check the off-tape timecode as it is being
recorded, from menu group E, move the cursor
to
Tape TC (there is no need to press
SELECT
>Tape TC Rel Diff
)):
Ext TC Abs Diff
Gen TC
01:01:22:03 30DF
The bottom line of the display shows the current
timecode value being output from the tape. If the
tape is stopped, the last timecode read from ta pe
will be shown.
External timecode, if it is being used for recording
or for synch ron iz ati on purposes, can be read in the
same way, except that the cursor should be moved
Ext TC in menu group E.
to
8.1.8 Chasing to external timecode
When chasing to an external timecode source
(remember that you cannot chase to MTC), there
are two cases to be considered. The first is when
the DTRS unit which will be chasing timecode is
the first unit in the chain. In this case, there is no
DTRS sync signal received at the
SYNC IN
nector (of course, the RC-898 provides control
signals), and hence, pressing the
CHASE
will automatically synchronize the DTRS unit to
the incoming timecode.
The reference to which the incoming timecode is
matched, however, depends on the
Mode
settings of the DTRS unit with regard to
Time
ABS or timecode (see 6.4.2, “Selecting Time
Mode”).
In the case of a unit which is connected to the
master DTRS unit in the chain, the situation is a
little more complex, as the unit must be set up to
slave to incoming timecode rather than the DTRS
sync signals. Here, the
Time Mode
used once again (6.4.2, “Selecting Time Mode”),
but here it determines the chase sync source; timecode or ABS sync.
Note that it is unlikely that you will need to synchronize a slave unit with timecode—typically,
only the first unit in the chain will be a timecode
slave, and this will act as a DTRS sync master for
the other units in the chain.
con-
key [32]
menu is
8.1.9 Chasing with a timecode offset.
NOTE
This procedure described here should be us ed when chasing
to timecode. When slave machines are chasing to DTRS
sync from a master DTRS unit, use the procedure described
in 7.2.3, “Chasing with an offset”.
If the timecode on the DTRS unit matches the
timecode coming from the master unit (e.g. the
DTRS tapes contain a video soundtrack and have
been striped either concurrently with, or from the
video tape), there is no need for an offset.
If, howe ver, the DTRS tracks are not linked in this
way with the master source, an offset is required.
The offset can be
timecode. Timecode “wraps” in a 24-hour clock
format, so th at 12 h ours in adv a nce o f 13:0 0:00:0 0
is 01:00:00:00, and 12 hours behind 02:00:00:00
is 14:00:00:00.
1) From menu group 4, move the cursor to
Offset and press
Timecode Offset
+00:00:00:00.00 30DF
Note that this setting is made to sub frame ac curacy. The timecode type will be shown in the bottom right of the display screen.
2) Use the numeric keypad to set the offset (use
+/-
the
key to change values between positive
and negative).
The value will be s hown in the
VALUE
will light.
If an offset value is se t on any unit or units and the
Time Mode is set to TC, the
[10] will light.
As an alter nat ive to us in g t he nume ri c k eypad, you
may also use the cursor keys to enter values
directly into the LCD display.
display and the
12 hours from the received
±
SELECT
Machine 1
:
LOCATE TIME/
OFFSET
OFFSET
TC
indicator [10]
indicator
8-4
Page 51

Section 8.2 - Advanced timecode functions
3) Transfer the value from the
VALUE
down the
LOAD
NOTE
98
synthesize timecode, the DA-98 allows you to set an ABS
offset, which may be used in place of this function (see
8.1.2, “Synthesizing timecode from ABS times” and also
10.2.3 of the DA-98 manual.
display to the LCD display by holding
SHIFT
key and pressing the
key.
If you are using a DA-98 with ABS timing used to
LOCATE TIME/
ENTER/
If you need to “fine-tune” this value, you can use
the UP and
DO WN
keys to adjust the value of the
offset while monitoring the playback of the units.
NOTE
There is an “invisible” fie ld immedia te ly to the rig ht of the
frames field. If you place the cursor there and increment or
decremennt the value, you can change the time as a whole
(as the frames field passes its maximum value, the seconds
field will increment).
8.1.10 Auto Timecode Offset function
In addition to the manual offset entry, it is also
possible to set a timecode offset automatically by
following the procedure below:
8.1.11 Independent clock settings
98
It is sometimes useful to be able to reference
different clock timings for the different DTRS
units in the chain (if one unit is recording digital
input from another digital source and another is
referenced to video, for example).
To allow independent settings (this function is
only available if the time mode is set to timecode,
and the DA-98 is acting as a slave):
1) From menu group A, move the cursor to
ClkMode (clock mode), and press
Clock Mode
Indv »
Auto » » »
Machine123456
2) U se the UP and
automatic (
(
Indv) clock settings.
In the example above, the first three DTRS units
have their clocks set automatically according to the
first clock setting (i.e. units 2 and 3 cannot have
their clocks set using the function described in
7.2.6, “Clock selection”), and the fourth unit can
have its clock set independently of the other three.
DOWN
Auto) and individually-selectable
keys to select between
SELECT
:
1) From menu group 4, move the cursor to
Offset and press
SELECT
.
TC
2) Use the RIGHT key to move the cursor to a
second “invisible” field to the right of the
frames field. The display will appear as f o llows:
Timecode Offset
Machine 2
AUTO OFFSET
3) Locate the two tapes (master and slave) so that
they have the right offset.
You can play up the tapes and pause them once
they have been lined up, or carry out the next step
while either or both of the tapes is being replayed.
4) Press either the UP or DOWN key at the
correct offset time to capture and store the
offset.
NOTE
In a system with multiple digital audio devices, the same
clock should be used by all units which are to perform digital audio transfer (e.g. dubbing, etc.). If units have different
reference clocks, you cannot transfer digital audio between
them.
8.2 Advanced timecode functions
The following functions are designed to extend
the capabilities of the DTRS system under various
circumstances when working with timecode-based
setups. These functions are described more fully
in the DTRS manuals. Refer to the appropriate
sections of these manuals for further information,
if required.
8.2.1 Timecode output source
98
The DA-98 is able to output timecode from a
variety of sources.
NOTE
e value entered in this way can be edited later
Th
using the techn
ique described above.
8-5
Page 52

Section 8.2 - Advanced timecode functions
1) From menu group 5, move the cursor to
OutTc Src and press
Output TC Source
Machine 1
Tape (TC Track)
2) Use the UP and
DOW N
SELECT
:
keys to select between
the four options ava ilable:
TAPE (TC
Track)
TAPE
(ABS)
External
(reGen)
External
(reshape)
Outputs the timecode as recorded on
the dedicated timecode track.
Outputs the timecode as synthesized
from the ABS subcode, with all offsets, etc. as set up in 8.1.2, “Synthesizing timecode from ABS times”.
Timecode received at the timecode
input is regenerated and output.
Timecode received at the timecode
input is filtered and retransmitted.
8.2.2 Synchronization of timecode
88
When timecode (including MTC) is output
from a DTRS unit, it may be synchronized to
either the analog or digital outputs, depending on
which is in used at the time. This is necessary
because of the nature of the digital-to-analog circuitry employed in the DTRS units.
1) From menu group 8, move the cursor to
Shift and press
Fs Shift Mode
Machine 1
2) Use the UP and
SELECT
off
DOW N
:
keys to select one of the
following settings:
off
Pull Down 30NDF
Pull Up 29.97NDF
Pull Up29.97DF
98
Pull Down 30DF
If this setting is anything other than
or more DTRS unit, the
[10] of the RC-898 will ligh t whe n t he appropriate
machine is selected, as will the indicator on the
DTRS unit(s).
NOTE
If you want to use the Fs Shift function, make sure that the
reference clock is set to
“Clock selection”). If the reference clock is
PULL UP/DN
Video
or Int
although the setting can be made,
tion will not be enabled.
off
indicat or
(see 7.2.6,
Word
the Fs Shift func-
Fs
on one
,
1) From menu group5, move the cursor to
OutTc Tmg, and press
Output TC Timing
Digital »»»»»»
Analog
Machine123456
2) Use the UP and
DOW N
SELECT
:
keys to select either
digital or analog synchronization fo r the output
timeco de.
8.2.3 Pull up and pull down
When using DTRS units in NTSC telecine situations, it may be necessary to adjust the sampling
frequency fractionally, as the NTSC frame rate of
29.97 and the cinema frame rate of 24 do not form
a neat mathematical ratio.
The sampling frequencies of 44.1kHz and 48kHz
are therefore affected when the material is transferred back to film.
8.2.4 Error bypass
When a DTRS unit is chasing timecode from an
external source, the source timecode may drop out
for a fe w frames or be otherw ise dis continu ous. To
allow for this, a “flywheel” facility is provided,
which allows the DTRS unit to continue for a set
period until timecode is received again. The flywheel period may be set for either 10 frames or 30
frames, in the following way:
1) From menu group 4, move the cursor to
ErrByPass and press
Error Bypass
Machine 1
10 Frame
2) Use the UP and
10 and 30 frames for the “flywheel” period.
DOWN
SELECT
:
keys to select between
Accordingly , the pull up and pull down functions
are provided to allow the adjustment of sampling
frequenci es to drop-f rame environments.
8-6
8.2.5 Rechase mode
98
The DA-98 provides another facility which is
used when chasing to timecode.
Page 53

Section 8.2 - Advanced timecode functions
When the DA-98 is chasing timecode, it can be set
to lock to timecode once and run freely , or it can
constantly monitor the timecode, and issue
“speed-up” and “slow-down” messages to its
transport to stay in sync. However, if an external
or video clock is used as the clock source, the
playback output will be muted while the DA-98 is
adjusting the speed. If you select the rechase mode
(which you may wish to do if there are gaps in the
timecode), you can select a “window”. Only if the
difference between the received timecode and the
DA-98 position falls outside this window, the DA98 will rechase. However, the D A-98’s timekeeping is almost always good enough for you not to
need to rechase. See 10.7.9 of the DA-98 manual
for further details of this facility.
1) From menu group 4, move the cursor to
RechsMode and press
Rechase Mode
Machine 1
Mode Window
rechase 1 sec
2) Use the UP and
rechase or free as the mode, as
DOWN
SELECT
:
keys to select either
explained above.
3) If you have selected
cursor to the
1 or 2 seconds and the window period.
This setting has no effect if
selected as the mode.
Window field, and select either
rechase, move the
free
has been
8.2.6 Fast LTC
98
The DA-98 allows you to select three modes
in which linear timecode (LTC) will be output
when the unit is in a fast transport mode (forward
or rewind).
1) From menu group 5, move the cursor to
LTC and press
Fast LTC Mode
2) U se the UP and
05 Frame, Leap and off.
SELECT
Machine 1
05 Frame
DOW N
:
keys to select between
8.2.7 MIDI Timecode output
Both the DA-88 and DA-98 output MIDI Timecode (MTC) from their MIDI OUT jacks, which
echoes the linear timecode output from the timecode outputs.
98
However, the DA-98 allows you to choose
under what circumstances MTC will be output.
You can choose not to output MTC at all, to output
while fast winding as well as during placyback
and recording, or to output MTC while the tape is
stopped (this is possible because MTC is indirectly derived from an off-tape signal). For further
details of this facility, see section 10.4.5 of the
DA-98 manual.
1) From menu group 7, move the cursor to
Out, and press
MTC Output
Output Fast Stop
on off off
2) Use the
LEFT
the field to be set, and select
the UP and
SELECT
Machine 1
RIGHT
and
DOW N
keys.
:
cursor keys to select
on or off using
Fast
MTC
Firstly , there is a 5 frame option in which fiv e consecutive frames are output, the tape is then read
again, and five further consecutive frames are output, starting at the frame which has just been read.
Secondly , you can choose a “leap” option, in
which timecode is continuously output, but not
consecutively (the va lues between frames will
leap as the tape is read). The last mode is “off”, in
which case, no timecode will be output in fast
transport modes. See section 10.4.3 of the DA-98
manual for further details of this facility.
NOTE
Output
If the
settings will have any effect.
field is set to
off
, neither of the other
8.2.8 Park position
98 88
roll position automatically on a D A- 98 slaved to a
master timecode source. This giv es the master unit
time to start playing timecode after starting to
play , and provides optimal lock-up when locating
and chasing external timecode. See sections
10.7.6 an d 10 . 7. 7 o f the DA-9 8 ma nu al fo r fu rth er
details of this function.
The park position allows you to set a pre-
8-7
Page 54

Section 8.2 - Advanced timecode functions
The park position can be viewed, and set manually
in the following way:
1) From menu gr oup 4 , move th e cursor t o
Posi, and press
Park Position
TEST
off 00s00f 30DF
SELECT
Machine 1
.
Park
2) If the cursor is moved to the time field, it ca n be
edited with the UP and
Alternatively, the numeric keypad can be used to
enter a numerical value directly, and ente red with
SHIFT
the
values for hours and minutes which are entered
will be discarded.
The maximum value for the park posit ion setting is
2 seconds minus 1 frame.
ENTER/LOAD
+
DOW N
keys.
combination. Any
As well as the manual setting described above, it
is also possible to test the system and set this value
automatically:
1) From menu gr oup 4 , move th e cursor t o
Posi, and press
Park Position
TEST
off 01s13f 30DF
SELECT
Machine 1
.
Park
2) Play and stop the master unit.
3) If chase mode is off on the slave DA-98, turn it
on.
4) Use the UP or
from
off to on.
The DA-98 wi ll now start to rewind so that the relative di ff erence is zero.
has stopped before proceeding with the next
step.
DOW N
key to turn the
Wa it unti l the D A-98 tap e
TEST
5) Play the master unit.
The park position value shown in the display
screen will change as the park position is calcu-
Wait until the value has stabilized before
lated.
proceeding to the next step.
6) Turn the TEST parameter from on to off
using the UP or
The value which has just been calculated will be
stored as the new park position. Lockups to timecode should now take place quickly and easily.
DOWN
key.
8.2.9 Individual recording status while
chasing timecode
98
The default action for slave DTRS units is to
follow the recording status of the master. However, if DA-98s are being used as slave units, and
they are chasing using timecode rather than ABS
sync, it is possible to set them so that their recording statu s can be turned on and off individually.
For further details regarding this function, see section 10.7.11 of the DA-98 ma nual.
1) From menu group 4, move the cursor to
TcChs Rec, and press
TC Chase Indiv. Rec
enable
disable »»»»»»
Machine123456
2) Use th e curs or key s to
SELECT
enable (allow
:
individual recording while chasing timecode)
or
disable this facility (the slave follows
the master status for each machine in the
chain).
8.2.10 Video resolve
98
The timecode clock of a DA-98 may be set to
resolve to a video signal received at the unit’s
VIDEO IN terminal. This means that the timecode frame boundaries will be aligned with the
frame boundaries as received in the video signal.
This is a completely different function to the synchroniza tio n of th e word cloc k to v ideo ( se e 7 .2. 6,
“Clock selection”).
In addition, if video resolve is enabled, the unit
can be set to track the frame boundaries constantly
and rechase if it drops out of sync (re-sync), or can
be set to a “lock and forget” mode (free), in a similar way to the rechase options available for timecode (see 8.2.5, “Rechase mode”). In re-sync
mode, output will be muted while the unit changes
speed to match frame boundaries.
See section 10.6 of the DA-98 manual for further
details regarding this function.
8-8
Page 55

1) From menu group 5, move the cu rsor to Vid
Rslv and press
Video Resolve
on/off Mode
off free
SELECT
Machine 1
:
Section 8.2 - Advanced timecode functions
2) Use the UP and
resolve feature
DOWN
on or off.
keys to switch the video
3) If video resolve is on, select the synchronization
mode from between
NOTE
The video resolve capability is also available on DA-88 fitted with the SY-88 , but it is controlled by a DIP switch on
the synchronizer board. It therefore cannot be controlled
using the RC-898.
free and re-sync.
8-9
Page 56

Section 8.2 - Advanced timecode functions
8-10
Page 57

Section 9.1 - Controlling the parallel port device
9 – External control and
settings
This section covers the control of DTRS and other
units.
9.1 Controlling the parallel
port device
When a unit is connected to the
of the RC-898, the transport may be controlled
usig the RC-898 transport controls. The pinouts
for these transport controls are given in 3.2.2,
“Parallel control/GPI pinout”.
To select the “parallel” unit for control:
1) Press the
MACHINE
LOCATE TIME/VALUE
The
SELECT
.
key [31].
2) Press 7 on the numeric ke ypad.
The E1 indicator on the machine number indicators [8] will light, showing that the parallel port
unit is now selected for control.
NOTE
The RC-898 provides only transport control for a unit connected to the parallel port. Functions such as track arming,
etc. are not possible when using the
EXT 1
displa y will show
EXT 1
port [42]
parallel port.
9.2.1 Setting up GPI devices
The polarity of the GPI devices, and the pulse
width necessary to trigger an event, may be set up
individually for each GPI device.
1) From menu group 1, move the cursor to
Setup and press
GPI Setup
Pol Width
open 010 mS
2) Holding down the
(UP) and
PREVIOUS (DOWN
SELECT
GPI 1
SHIFT
:
key, use the
) keys to select
the required GPI unit.
3) Move the cursor to the
and use the UP and
open or close for the polarity of the unit’s
Pol (polarity) field,
DOWN
keys to select either
event trigger.
open
When
when the circuit is open (i.e. it is a “push-tobreak”-type circuit. When
the event is triggered when the circuit is closed
(i.e.it is a “push-to-make”-type circuit).
is selected, the event is triggered
close
4) Move the cursor to the Width field and use
the UP and
DOW N
keys to select the pulse
width of the event trigger.
The minimum value for the pulse width is 0 ms,
and the maximum is 990 ms, settable in 10ms
increments.
GPI
NEXT
is selected,
9.2 Controlling GPI devices
Up to five GPI devices may be connected to the
EXT 1
port. These devices may be triggered at set
times, based on the times received for display on
TAPE TIME
the
Refer to the documentation supplied with any
units to be controlled by GPI to find out whether
the unit requires the controlling circuit to be
closed or open in order to trigger the event, and
the time of the pulse needed to act as a trigger.
The wiring for the parallel port when used with
GPI devices is given in 3.2.2, “Parallel control/
GPI pinout”.
NOTE
Since the GPI event timings are based on the information
transmitted from the DTRS recorders connected to the RC898, the timing may “slip” by up to one frame.
display of t he RC-898.
Most GPI units require a trigger width of 200 ms.
If you are unsure of the trigger width for a particular device, we suggest that you try this value first
of all.
NOTE
Note that the polarity setting here is also used as the pol arity
setting for transport control signals sent to the E1 parallel
port device (
device”
see 9.1, “Controlling the parallel port
. In this case, the pulse width is fixed at 500 ms.)
9.2.2 Setting the trigger points
The location memories also serve as GPI trigger
points, when GPI devices are connected to the
EXT 1
port.
Since up to 10 GPI events can be associated with
location memories, we suggest the following
method of working:
• Use a “block” of location m emories fo r this
purpose, starting at a number such as 80 or 90.
9-1
Page 58

Section 9.3 - Controlling the serial port (9-pin)
• Enter the starting memory number of your
“block” minus one in the
MEMORY NO.
display.
• While playing back t he program material
which will be used with the GPI events, use the
CUE STR
key [39] to add repeated cue points
to the list, as described in 6.5.8, “Repeated
entry of location poi nts”.
• Alternativ ely, key in the s e c ue points manually
from a cue list.
• Adjust the fine timi ng of these trigger points
using the jog dial, if necessary.
Of course, there is nothing to prevent you from
using existing location memories for GPI triggers,
but you may find it easier to work with a series of
events dedicated to this purpose.
1) From menu group 1, move the cursor to
Event and press
Event
GPI Memo 30DF
1 92 01:02:13:21
SELECT
Event 1
:
You can also use the UP and
choose the location memory.
NOTE
Location memory 00 is a special case. If this location memory is selected, the event will be turned off.
DOWN
keys to
9.3 Controlling the serial port (9-pin)
EXT 2
The
898 is used for RS-422 control of suitablyequipped devices (Sony P2 protocol). As an example of how this may be used, if you connect the
master VTR to the EXT 2 port, you can use the
RC-898 to control the whole system.
The menus in menu group 7 whose titles start with
“9-pin” refer to devices which are controlled
through this connector.
9.3.1 Selecting the serial port device
When you want to control the device attached to
the RS-422 port using the transport keys of the
RC-898, follow the proce dure below:
9-pin serial connector [43] of the RC-
2) Select which event you will be editing (from
through
10) using the
PREVIOUS (SHIFT
the value of the
Event field.
3) Move t he cursor to the
UP
and
DOW N
keys to select the GPI device
associated with this event (from
4) Move t he cursor to the
memory) field, and use the UP and
NEXT (SHIFT+UP
DOW N
+
GPI field, and use the
Memo (location
) keys to ch an ge
1 through 5).
DOW N
) and
keys
to select the location memory for the GPI event.
Alternatively, you can enter the number of the
memory location using the numeric keypad, and
hold down
to transfer the memory number to the display
screen.
The time value of this location memo ry will be
shown on t he d is pla y sc reen. Howe ver , you cannot
adjust this value from here. You must edit the lo cation memory (see 6.5.5 , “Edi ting a locat ion”) to do
this—the time value will automatically be updated.
SHIFT
and then press
ENTER/LOAD
1
1) Press the
MACHINE
LOCATE TIME.VALUE
The
SELECT
.
key [31].
display will show
2) Press 8 on the numeric keypad.
The E2 indicator on the machine number indicators [8] will light, showing th at the parallel port
unit is now selected for control.
NOTE
The exact level of control possible by using the RC-898
depends on the implementation of the P2 protocol by the
device. Refer to the unit’ s documentation for details of what
control is possible through the serial connection.
When a device is selected for control in this way, the REC
FUNCTION keys can be used to arm the two analog and
four digital tracks, as defined b y the P2 protocol, depending
on the settings made in 9.3.4, “Split mode on the serial unit”
and 9.3.5, “Controlling recording operations on the serial
unit”. The mapping of these tracks to the actual tracks of the
unit is determined by the implementation of the protocol by
the unit.
9.3.2 Location pre-rol l on the serial uni t
The unit controlled by the serial port may have a
pre-roll time which is set independently of the
pre-roll time used by DTRS units. This allows the
unit to be parked optimally for lockup when locating to cue points:
9-2
Page 59

Section 9.3 - Controlling the serial port (9-pin)
1) From menu group 7, move the cursor to
9pinLocPr and press
9pin Locate Preroll
00min00sec
SELECT
:
2) Use the numeric keypad to enter a time in
minutes and seconds between
59:59
.
3) Press and hold down the
ENTER/LOAD
the
key to transfer the value to
00:00
SHIFT
and
key and press
the display screen.
Alternatively, you can use the UP and
keys to alt er t he values of the mi nut es a nd se conds
fields.
DOWN
9.3.3 Serial unit timing source
The RS-422 device can be set to accept its timing
signals from either external timecode, or from the
Timer 1 internal time source (the video CTL subcode track).
1) From menu group 7, move the cursor to
9pinTimMod (9-pin time mode) and press
SELECT
9pin Time Mode
2) Use the UP and
Timecode or the Timer 1 timing source
(subcode timing).
:
Timecode
DOWN
If the timecode option is selected and the VTR
does not includ e a ti mec ode r eade r, or the t ape ha s
not been striped with timecode, the RC-898 tape
counter will show all hyphens:
keys to select either
--:--:--.--
In normal mode, the following RC-8 98 keys perform these P2 functions:
ALL SAFE
ALL INPUT
AUTO MON
PRRL
RHSL
AUTO PUNCH
Standby
FULL EE
SEL EE
Preroll
Preview
AUTO EDIT
Howev er, in a video post-production situation, it is
quite likely that you will need to control the transport of a VTR, which acts as a timecode master
for the DTRS slaves. These DTRS slaves will be
used for recording, but the VTR will not (otherwise the worktape will be erased!). The RC-898
therefore provides you with a “split mode” in
which all transport keys except the
and the
REC FUNCTION
keys control the VTR,
RECORD
key
and the recording keys control the DTRS units.
In this way, all recording operations, including
auto-punch operations, can be carried out on the
DTRS units without the risk of accidentally erasing the VTR tape.
However, there is one function where operation is
slightly different, and this is “on-the-fly” punching. Usually , when DTRS tracks have been armed,
and the tape is be ing played, pr ess i n g
RECORD
will drop the tracks into record mode, and press-
PLAY
ing
split mode, this is not possible, since the
will drop them out into play mode. In
PLAY
key controls the VTR.
To punch in and out of armed tracks on the fly in
split mode
RECORD
, press
only
to drop out again.
RECORD
to drop in, and
To change between normal and split mode:
1) From menu gropup 7, move the cursor to
9pinCtlMd (9-pin control mode) and press
.
SELECT
:
9.3.4 Split mode on the serial unit
There are two ways of operating the E2 unit with
the RC-898 transport controls. Firstly , all transport
controls, including the record (
REC FUNCTION
keys 41 through 46) can be
used to control the VTR acting as the E2 unit connected to the RS-422 port. This is referred to as
“normal” mode.
REC
key and the
9pin Control Mode
Split
2) U se the UP and
Split and Normal.
DOW N
keys to select between
9.3.5 Controlling recording operations on the serial unit
If split mode has been selected (see 9.3.4, “Split
mode on the serial unit” above), the following
9-3
Page 60

Section 9.4 - Other DTRS control functions
function allows toggling the serial unit recording
capability.
1) From menu group 7, move the cursor to
9pinRecAc (9-pin recording acceptable)
and press
9pin Rec Acceptable
2) Use the UP and
on and off.
When this parameter is set to on, the
FUNCTION
SELECT
:
off
DOWN
keys to choose between
REC
keys which usually control tracks 41
through 48 (DTRS 6) will now control the E2
device logical analog and digital tracks (no matter
what the tracks actually are) as marked.
The following chart explains the relationship
between the serial unit, the split/normal mode, and
this function:
1) From menu group 3, move the cursor to
Prt (control protocol) and press
Control Protocol
Machine 1
9Pin
2) Use the UP and
9Pin, MIDI, Bus and off.
Even when a control protocol is selected, the RC898 and DTRS sync protocol can still be used to
address and control the DA-98.
DOWN
keys to select between
SELECT
9.4.2 Track mapping functions
When the track arming and recording of a
98
DA-98 unit is controlled by an external controller ,
you can specify which tracks on the DA-98 correspond to the tracks controlled by the controller
(for arming and recording purposes). The standard
video co ntroller protocol (P 2 protocol ) allows for
control of up t o eig ht digi tal an d fou r anal og aud io
tracks. This function allows you to map DA-98
tracks to the “logical” tracks.
Ctrl
:
Control
mode
Normal off
Normal on
Split off
Split on
Rec
Acceptable
Tracks
41–46 refer
to:
Serial unit Serial unit
Serial unit Serial unit
DTRS (uit 6) DTRS
Serial unit Serial unit
RECORD
key controls:
9.4 Other DTRS control functions
98
The following fu nctions described DTRS f ea-
tures which relate to control, but ar e not timecoderelated. The RC-898 can only perform these functions on D A-98 units. Some of these functions are
available on DA-88 units, but they cannot be controlled from the RC-898.
9.4.1 Choosing a control protocol
98
The DA-98 can be controlled from a variety of
external sources as well as the RC-898. These
sources are: P2 protocol (9 pin), MIDI Machine
Control, and a bus protocol carried over the RS422 cable and produced by, for example, the TASCAM ES-61 editing controller. See section 11.0.1
of the DA-98 manual for further details relating to
this function.
This mapping of DA- 98 tracks to controller tracks
does not imply any correspondence between the
user interface of the controller and the DA-98
tracks. It refers, rather, to the relationship between
the command signals transmitted by the controller
and the DA-98 tracks.
1) From menu group 6, move the cursor to
Map and press
Track Mapping Mcn 1
Ana 1234
Dig 1234
Trk 12345678
SELECT
:
Trk
2) Use the UP and DOWN k eys to select the track
mapping, according to pre-set options as shown
in the table below.
Note that while there are no user-settable track
mappings, the pre-set mappings are designed to
cover every set of circumstances.
9-4
Page 61

Section 9.4 - Other DTRS control functions
DA-98
track
Analog
Digital
Analog
Digital
Analog
Digital
Analog
Digital
Analog
Digital
Analog
Digital
12345678
⇒
1234
1234
12345678
12341234
11223344
12341234
11223344
9.4.3 Timecode track mapping
This function is related to the track mapping
98
function described above. Analog track 3 in the
controller mapping is traditionally used as the
timecode track. To map this track to the audio
track selected above (see 9.4.2, “Track mapping
functions”) or to the dedicated timecode track of
the DA-98:
1) From menu group 6, move the cursor to
Rec EN, and press
TC Record Enable
enable
disable »»»»»»
Machine123456
2) Use the UP and
SELECT
DOWN
:
keys to select the
appropriate setting for each connected DTRS
unit.
Selecting
referred to by the controller’s commands as “analog 3” will be the DTRS track designated as “analog 3” in the table above (9.4.2, “Track mapping
functions”). Selecting
DA-98’s dedicated timecode track will be controlled by commands addressed by the controller
to the “analog 3” track.
disable
here means that the track
enable
means that the
9.4.4 Remote track arming
98
It is sometimes useful to be able to disable
track arming of a DA-98 unit from a remote controller, especially when that controller is a video
editor which only allows for the arming and con-
TC
trol of four tracks. Accordingly, you can disable
the remote arming of tracks on a DA-98 unit (they
can still be armed from the unit itself ). See section
11.1.8 of the DA-98 manual for full details of this
function.
1) From menu group 3, move the cursor to
Arm (track arming) and press
Remote Track Arming
enable » » » » »
disable »
Machine123456
2) U se the
LEFT
and
RIGHT
SELECT
cursor keys to move
between machines, and the UP and
Trk
:
DOW N
keys to enable or disable track arming from
remote controllers.
9.4.5 Device emulation
98
The DA-98 can emulate a variety of other
devices, for example video recorders, etc., when
controlled by an editor (i.e. this setting determines
the way in which the DA-98 responds to a DeviceID request).
See section 11.1.2 of the DA-98 manual for full
details regarding this function.
1) From menu group 6, move the cursor to
Dev (emulation device) and press
Emulation Device
Machine 1
PCM-7050
Eml
SELECT
:
2) Use the UP and DO WN keys to select the device
to be emulated from the following list:
•
PCM-7050
•
BVH-3000
•
BVU-950
•
BVW-75
•
PCM-800
•
BVH-2000
•
DVR-10
•
TASCAM
TASCAM
should be selected if you do not need to emulate
any other device from this list.
is the nati ve fo rmat of the D A -98, and
9.4.6 Recording delay
98
When a DA-98 is remotely controlled by an
editor, it is sometimes useful to be able to program
a delay in recording, in order to emulate a VCR,
9-5
Page 62

Section 9.4 - Other DTRS control functions
which typically begins recording a few frames
after the command is received from the editor (the
DA- 98 begins recording immediately). Many editors allow for this delay, and so the DA-98 can
compensate for this.
1) From menu g roup 6, mo v e the curso r to
Dly ( recording delay), and press
Record Delay
Machine 1
Auto (3 Frame)
2) Use the UP and
from between
value of the
DOW N
0 and 9 frames, or Auto. The
Auto setting depends on the
keys to select a value
SELECT
emulation selected (see 9.4.5, “Device
emulation”) as shown below:
Emulation Frames
PCM-7050
BVH-3000
BVU-950
BVW-75
PCM-800
BVH-2000
DVR-10
TASCAM
3
4
6
3
0
4
5
0
Rec
:
1) From menu group 6, move the cursor to
Spd (fast speed) and press
Fast Wind Speed
Machine 1
x 100
2) Use the UP and
x 100 and x 8 speeds.
DOWN
SELECT
:
keys to select between
9.4.8 C ue -up tally
98
When locati ng in 9-pin command mode, the
DA-98 will locate to the required position and
then enter pause mode.
What is then returned to the controller can be
either a Stop message, for use with controllers
who will only issue their next command when a
Stop signal is received, or a Still message for use
with controllers which make a distinction between
pause and Stop (e.g. LYNX II and Microlynx synchronizers).
See section 11.1.5 of the DA-98 manual for further details regarding this function.
1) From menu group 6, move the cursor to
Cueup Tly (cueup tally), and press
SELECT
:
Fast
NOTE
See section 11.1.3 of the DA-98 manual for further details
of this function, including the way in which frame boundaries are calculated and recognized.
9.4.7 Fast wind speed
98
When a controller locates on a slave device,
there are two ways in which this is achieved: a
“locate” command, and a series of fast wind and
shuttle commands.
To determine which command is used by your
controller, and for further details regarding this
function, follow the instructions in section 11.1.5
of the DA-98 man ual.
The high (1 00 x) wind speed of the DA-98 means
that if the second method is used, the tape will
almost invariably overshoot each time and lever
locate correctly. Accordingly, a slower (8 x) wind
speed is provided which allows for location using
the “wind and shuttle” mode.
Cueup Tally
Machine 1
Stop
2) Use the UP and
Stop and Still, as explained above.
DOWN
keys to select between
9.4.9 MMC ID
98
You can set a MMC ID (which also serves as
the bus ID) for each DA-98 unit. This is not a
MIDI channel number. The v alue may be between
001 and 127 or may be a universal
Receive All setting.
See secti on 11.2.1 of the DA-98 manual for further details regarding this function.
9-6
Page 63

1) From menu gr oup 7, mo ve the cu rsor to MIDI
ID, and press
MIDI/Bus ID
SELECT
Machine 1
Receive All
:
Section 9.4 - Other DTRS control functions
2) Use the UP and
DOWN
keys to select the
required ID number, taking care that each unit
has a different value.
9-7
Page 64

Section 9.4 - Other DTRS control functions
9-8
Page 65

10.1 - Menu groups
10 – Menu an d pa rameter referenc e
10.1 Menu groups
This section provides a quick guide to the menus and their functions, providing a list of menus in each menu
group, the parameters available in each menu, and the values that each parameter can take (factory values are
underlined). There is also, wherever appropriate, a reference to the section of the manual in which the function is described. Wherev er a me nu function is ap plicable to only a certain ty pe or types of DTRS u nit, this is
indicated.
Please also note the section 10.2, “Alphabetical list of menu items”, which allows you to find menu functions
from an alphabetically-sorted list.
Menu group 0
D e l a y T r k C o p y
V a r i S p d L o c P r e
Menu item Parameter(s) Values Reference
Track Delay Time
Vari Speed
Track Copy
Locate Pre-roll
Track
Delay time
Unit
Enabled
Amount
Track source Input (digital or analog) 1 through 8 or
Enabled Turns track copy operations on or
Minutes and
seconds
1
25-32, 33-40, 41-48
-200
-4
-4
default
sample
Fix, Vari
-6.0%
38 98
track 1 through 8. Default is straight-through input
to tracks assignment
00min00sec
59min59sec
through
through
through
through
0
4 8, 1-8,9-16, 17-24,
7200
(samples)
150
(msec)@ 48kHz
163
(msec) @ 44.1kHz
msec
,
through
+6.0%
through
(defau lt is
0.0%
off
7.1.1, “Track delay”
7.2.8, “Varispeed
(pitch control)”
)
7.1.2, “Track copying”
6.5.1, “Setting the
location pre-roll
value”
10-1
Page 66

Section 10.1 - Menu groups
Menu group 1
G P I S e t u p X - f a d e
E v e n t D i t h e r
P r e / P o s t R e c M u t e
Menu item Parameter(s) Values Reference
GPI Setup
Event
Pre-roll
Post-roll
Crossfade Time
Dither
Rec Mute
Menu group 2
Polarity
Width
GPI Event Number 1 through 10
Minutes and
seconds
Milliseconds 10ms through 200ms in 10m s st e p s
T ype of dither or
on and off
Track muting on or off for each track 7.1.3, “Rec Mute
open, close
through 990 ms (in 10ms steps)
000
GPI “channel” 1through 5
(off) through 99
00
Pre-roll time: 00min05sec through
59min59sec
Post-roll time: 00min03sec through
59min59sec
98
10ms through 90ms in 10 m s steps
38 88
38
off, Rectangular (=on),
Triangular
98
98
98
9.2.1, “Setting up
GPI devices”
9.2.2, “Setting the
trigger points”
6.7.5, “Setting preroll and post-roll
times”
6.7.6, “Crossfade
times”
7.2.11, “Dither”
function”
S h t l M u t e M e t e r M o d e
W o r d L e n S i n e O s c .
R e f L e v e l
Menu item Parameter(s) Values Reference
Shuttle Mute
TDIF Word Length
Analog In/Out
Reference Level
Level Meter Mode
Sine Oscillator
Enabled off or on 5.2.4, “Shuttle mut-
Length in bits,
of incoming
data
Reference level,
in dB
Hold time
Release rate
Enabled off, 440 Hz, 1 k Hz 7.2.15, “Sine oscilla-
98
ing”
16 bit, 20 bit, 24 bit 7.2.10, “Word
38 98
length”
98
-16dB, -18dB, -20dB 7.2.13, “Reference
levels”
98
0 through 9 seconds, or Continue
(default is 1)
Slow, Fast or Medium
98
7.2.14, “Meter
modes”
tor”
10-2
Page 67

10.1 - Menu groups
Menu group 3
M c n O f f s e t C t r l P r t
T i m e M o d e T r k A r m
R e p e a t
Menu item Parameter(s) Values Reference
Machine Offset
Time Mode
Time value to
frame accuracy
Time referen ce ABS or TC 6.4.2, “Selecting
+02:00:00:00 7.2.3, “Chasing with
an offset”
9888
Time Mode”
Control Protocol
Remote Track
Arming
Repeat Start/
End
Type 9Pin, MIDI, Bus, off 9.4.1, “Choosing a
Enabled enable, disable 9.4.4, “Remote track
Start or end
Time values to
98
control protocol”
98
arming”
Any valid time entries 6.6, “Repeating a
section”
frame accuracy
Menu group 4
T c C h s R e c T C O f f s e t
R e c h s M o d e P a r k P o s i
E r r B y P a s s
Menu item Parameter(s) Values Reference
TC Chase Indiv.
Rec.
Enabled or disabled for each
DTRS unit
98
enabled, disabled 8.2.9, “Individual
recording status
while chasing timecode”
Rechase Mode
Error Bypass
Timecode Offset
Park Position
Mode
Window
Time in frames 10 frame
Time value to
subframe
98
rechase, free
1 sec
±
, 2 sec
9888
9888
Any valid time value in the range
12:00:00:00.00
accuracy
Test
Manual entry to
98
off, on
00s00f
through 2 seconds minus 1 frame
frame accuracy
8.2.5, “Rechase
mode”
30 frame 8.2.4, “Error bypass”
,
8.1.9, “Chasing with
a timecode offset.”
8.2.8, “Park position”
10-3
Page 68

Section 10.1 - Menu groups
Menu group 5
T C F r a m e F a s t L T C
O u t T c T m g V i d R s l v
O u t T c S r c T a p e T C
Menu item Parameter(s) Values Reference
TC Frame Mode
Output TC Timing
Output TC Source
Fast LTC Mode
Timecode type 30 DF(), 30 NDF, 29.97 DF,
29.97 NDF, 25F, 24F
Output refer-
98
98
Analog, Digitalfor each unit 8.2.2, “Synchroniza-
ence
Timecode
source
Linear time-
98
Tape (ABS or TC Track),
External (reGen), External (reshape)
98
05 Frame, Leap, off 8.2.6, “Fast LTC”
8.1.3, “Selecting a
timecode type”
tion of timecode”
8.2.1, “Timecode
output source”
code in f ast
wind
Video Resolve
Tape TC Mode
Enabled
Mode
Mode TcTrack, ABS, ( only)
98
on, off
free, re-sync
9888
ABS-Ofs
a
, ABS-13, ABS-23
98
8.2.10, “Video
resolve”
8.1.2, “Synthesizing
timecode from ABS
times”
a. If the ABS-Ofs (absolute timing with offset) option is selected, the bottom line of the display changes to allow direct
entry of the desired offset value.
Menu group 6
E m l D e v T C R e c E n
R e c D l y F a s t S p d
T r k M a p C u e u p T l y
Menu item Parameter(s) Values Reference
Emulation
Device
Record Delay
Track Mapping
TC Record Enable
Fast Wind Speed
Cueup Tally
Device name
Time in frames 0 through 9 frames or Auto (in Auto,
Track maps Various mappings of DA-98 tracks to analog/
Enabled disable, enable 9.4.3, “Timecode
Referenced to
play speed
P2 tally output
after locating
98
PCM-7050, BVH-3000, BVU-
950
, BVW-75, PCM-800, BVH-
2000, DVR-10, TASCAM
98
the number of frames depends on the selected
9.4.5, “Device emulation”
9.4.6, “Recording
delay”
emulation)
98
digital. Default is DA tracks 1 through 4 mapped to
9.4.2, “Track map-
ping functions”
analog 1 through 4, and DA-98 tracks 5 through 8
mapped to digital tracks 1 through 4
98
track mapping”
98
x 100, x 8
9.4.7, “Fast wind
speed”
Stop, Still 9.4.8, “Cue-up tally”
98
10-4
Page 69
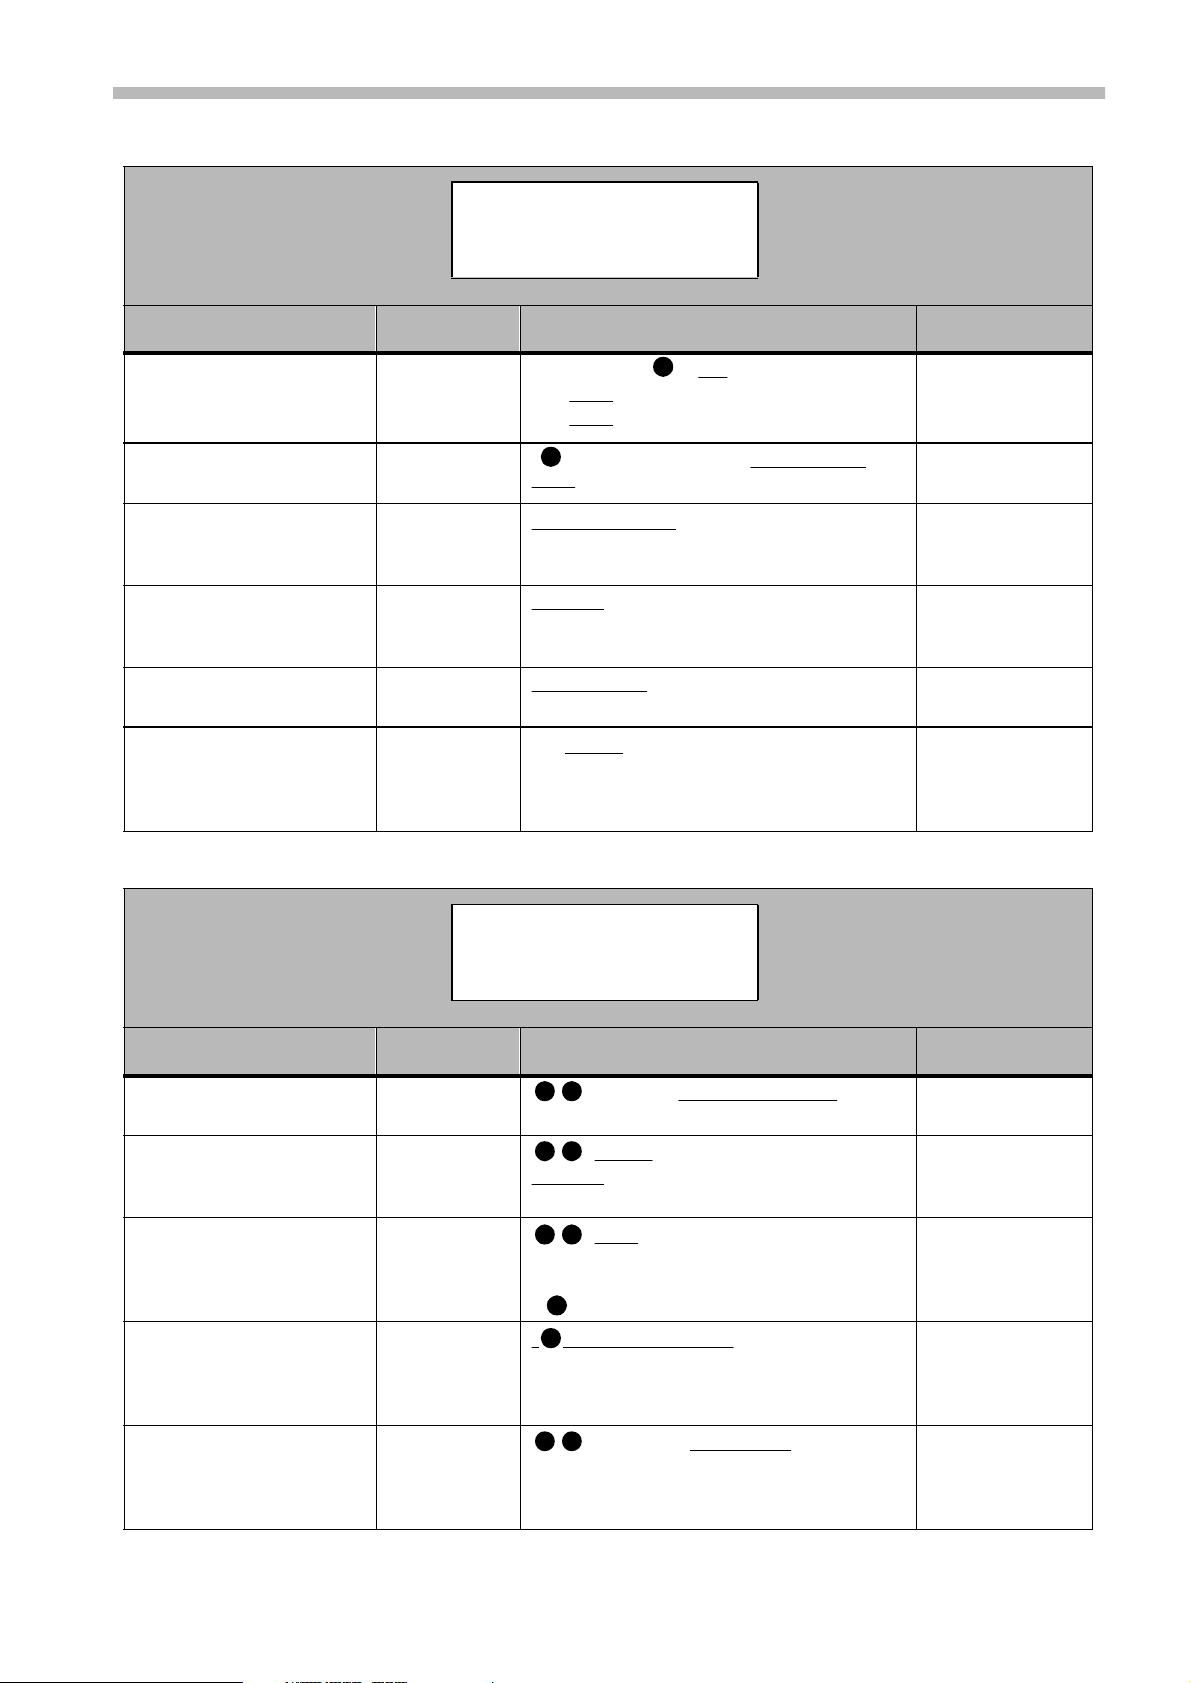
10.1 - Menu groups
Menu group 7
M T C O u t M I D I I D
9 p i n L o c P r 9 p i n C t l M d
9 p i n T i m M d 9 p i n R e c A c
Menu item Parameter(s) Values Reference
MTC Output
MIDI/Bus ID
9pin Locate Preroll
9pin Control
Mode
9pin Time Mode
9pin Rec Acceptable
Menu group 8
Output
Fast wind mode
Stop
ID for MMC
and bus control
Preroll time for
P2 device
Recording status
when using P2
device
Time source for
P2 device
Record enable
for P2 device
G e n S t a r t F s S h i f t
G e n M o d e T c R e c S r c
T c T r k R e c
(All parameters ) on, off
on
, off
on, off
98
001 through 127 or Receive
All
00min00sec through 59min59sec in
1 second increments
98
8.2.7, “MIDI Timecode output”
9.4.9, “MMC ID”
9.3.2, “Location preroll on the serial
unit”
Split, Normal
9.3.4, “Split mode
on the serial unit”
Timecode, Timer 1
9.3.3, “Serial unit
timing source”
On, Off 9.3.5, “Controlling
recording operations on the serial
unit”
Menu item Parameter(s) Values Reference
Generate Start
Time
Generate Mode
Time value
Run/Stop
Mode
Fs Shift Mode
Pull up/down
parameters
TC Record Source
Source to be
used for recording on the timecode track
TC Track Record
Arming the
timecode track
a. If Tape is selected, another parameter will automatically be appended, depending on the setting made in the appropriate
menu, as described in 8.1.1, “Selecting the timecode source”
9888
Defaults to 00:00:00:00
9888
Stop, Run
Reset
Pull Up 29.97NDF, Pull Up
29.97 DF
( only)
TC
, Continue
9888
off, Pull Down 30NDF,
, Pull Down 30 DF
98
98
External TC,
, Tape
9888
a
enable, disable
Generator
8.1.4, “Setting the
generator start time”
8.1.5, “Starting and
stopping the generator”
8.2.3, “Pull up and
pull down”
8.1.1, “Selecting the
timecode source”
8.1.7, “Recording
the timecode on a
DTRS timecode
track”
10-5
Page 70

Section 10.1 - Menu groups
Menu group 9
S t l M o n C o n f d c M o d
I n p u t S e l O u t p u t T i m
C l o c k F o r m a t
Menu item Parameter(s) Values Reference
Shuttle Monitor
Input Select
Clock
Confidence Mode
Output Timing
Format
Menu group A
Enabled or disabled for each
unit
Input source
W ord clock
source
3-state switch
Output timing
3-state switch
Frequency
C l k M o d e
on, off
38 98
5.2.3, “Shuttle moni-
toring”
Digital, Analog
7.2.9, “Input selec-
tion”
Int, Word, Video ( ) 7.2.6, “Clock selec-
9888
tion”
off → ready → on
7.2.12, “Confidence
mode”
88
Digital, Analog
7.2.7, “Output tim-
ing”
off → ready → on
44.1k, 48k
5.1.2, “Formatting
tapes”
Menu item Parameter(s) Values Reference
Clock Mode
DTRS clock setting for each
unit
98
Individual, Auto
8.1.11, “Indepen-
dent clock settings”
Menu group E
E x t T C A b s D i f f
T a p e T C R e l D i f f
G e n T C
Menu item Parameter(s) Values Reference
Ext TC
Tape TC
Gen TC
Abs Diff
Rel Diff
There are no user-se ttable values in this menu. Moving the cursor to the
menu item will display the appropriate value on the bottom line of the
display.
8.1, “Primary time-
code functions”
7.2.5, “Checking the
offset”
10-6
Page 71
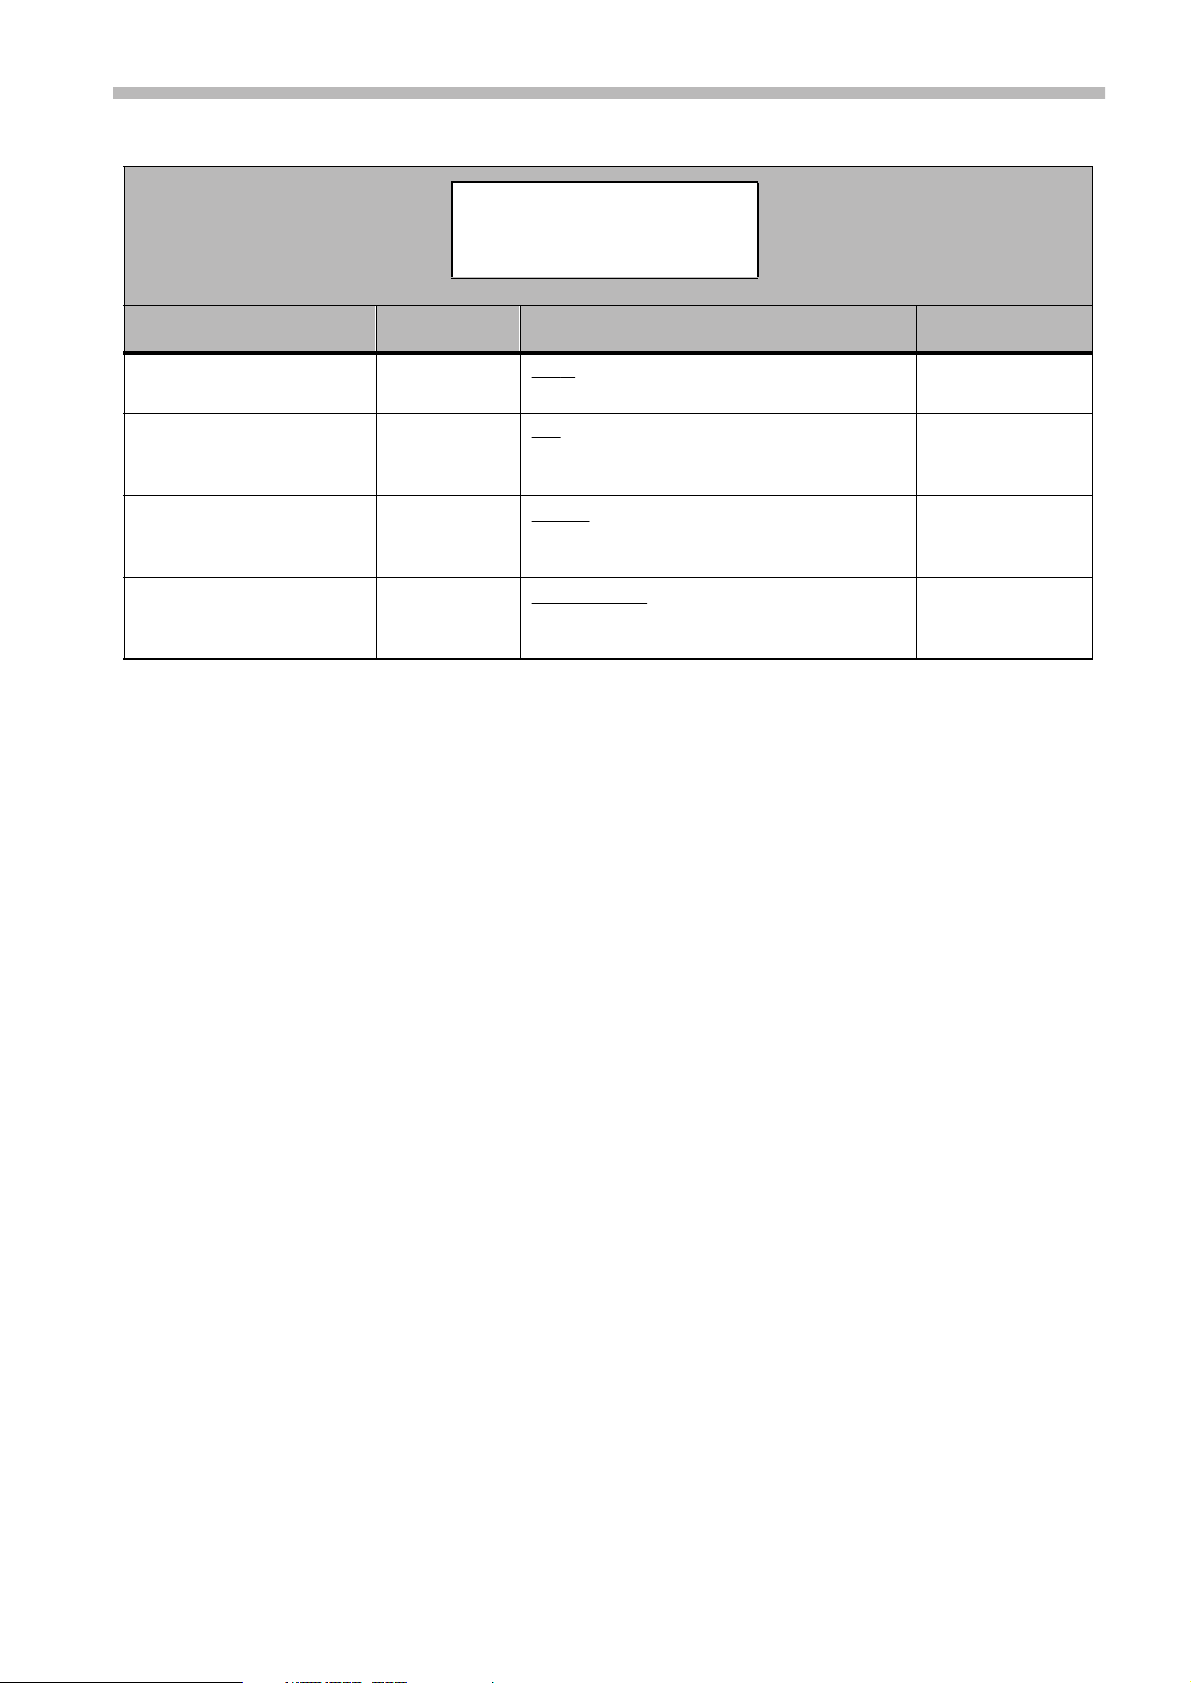
10.1 - Menu groups
Menu group F
K e y M o d e F r a m e D i s p
S e t u p
Menu item Parameter(s) Values Reference
Key Mode
Frame Display
Setup
DispTime
Enables control
of all or one unit
Shows or hides
the “frames”
fields
Load or sa ve
Memory bank
Absolute or relative time display
All, Individual
on, off
7.2.2, “Key Mode”
6.2, “Setting the precision”
Load, Save
, 1, 2, 3, 4, 5, 6, 7, 8, 9, F (factory)
0
4.5, “Storing and
recalling user setups”
Absolute, Relative 6. 3, “Setting a rela-
tive time reference”
10-7
Page 72

Section 10.2 - Alphabetical list of menu items
10.2 Alphabetical list of menu items
In this table, if a menu item is assigned to a function key as a factory default, the function key name is shown
in following the menu time name (e.g. F4).
Menu Item Menu
group
9pin Control Mode
9pin Locate Preroll
9pin Rec Acceptable
9pin Time Mode
Abs Diff F17
Analog In/Out F15
Clock
Clock Mode
Confidence Mode F12
Control Protocol
Crossfade Time F11
Cueup Tally
Dither
Emulation Device
7
7
7
7
E
2
9
A
9
3
1
6
1
6
Menu Item Me nu
group
MTC Output
Output TC Source F13
Output TC Timing
Output Timing
Park Position
Pre-roll Post-roll
Rec Mute
Rechase Mode
Record Delay
Rel Diff F19
Remote Track Arming
Repeat Start/End F14
Setup
Shuttle Monitor
7
5
5
9
4
1
1
4
6
E
3
3
F
9
Error Bypass
Event
Ext TC F16
Fast LTC Mode
Fast Wind Speed
Format
Frame Display
Fs Shift Mode
Gen TC F20
Generate Mode F10
Generate Start Time F9
GPI Setup
Input Select
Key Mode
Level Meter Mode
Locate Pre-roll F4
4
1
E
5
6
9
F
8
E
8
8
1
9
F
2
0
Shuttle Mute
Sine Oscillator
Tape TC F18
Tape TC Mode
TC Chase Indiv. Rec
TC Frame Mode F8
TC Record Enable
TC Record Source
TC Track Record
TDIF Word Length
Time Mode F6
Timecode Offset F7
Track Copy F2
Track Delay Time F1
Track Mapping
Vari Speed F3
2
2
E
5
4
5
6
8
8
2
3
4
0
0
6
0
Machine Offset F5
MIDI/Bus ID
10-8
3
Video Resolve
5
7
Page 73

10.3 Specifications
Connections:
D-sub 15-pin DTRS recorder control
D-sub 9-pin Sony P2 control
D-sub 15-pin Parallel control and tally, or up to 5
GPI-controlled units
Size (w x h x d) 404 x 63 x 253 (mm) 15.9 x 2.7 x
10.0 (in)
W e ight 2.5 kg (5.5 lbs)
Power Supplied from DTRS recorder
Supplied accessories Remote cable (5m), Terminator
Optional accessories CS-898 roll-around stand
MK-8924 meter bridge mounting
kit
10.4 Dimensions
404mm
Section 10.3 - Specifications
69.3mm
255mm
10-9
Page 74

Section 10.4 - Dimensions
10-10
Page 75

A
ABS time
as reference
frame rate
selection vs timecode
synthesizing timecode
with offset
Accessories
ALL INPUT
ALL SAFE
Ambient temperatur e
Analog audio input
Arming tracks
remotely on DA-98
Audio input
dithering
reference lev el
selection
word length
AUTO MON
Auto Offset function
AUTO PLAY
AUTO PUNCH key
2-3, 6-1, 10-3
6-2
8-1
1-3
2-2, 5-3
2-2, 5-2
1-2
7-5, 10-6
2-2, 5-2, 9-5, 10-3
9-5
7-5, 10-2
7-6, 10-2
7-5, 10-6
7-5, 10-2
2-2, 5-3
7-3, 8-5
2-5, 6-3
2-5
6-2
8-1
B
Ballistics (meter) 7-6
9-6
1-2, 3-3
Battery backup
Bus control
Bus ID
9-6
C
Cancelling input 2-3
CAPTURE key
Chase
DTRS sync
error bypass (timecode)
individual recording status
lock indicators
offset
park position
rechase (timec ode)
to external timecode
Checking punch points
Clock
independent cl ocks
selecting clock sour ce
source
Confidence mode
Confirming menu entries
Connection to DTRS recorders
Continuous playback of a section
CONTRAST control
Control mode for se ri al port uni t (s pl it mode)
Control protocol for DA-98
Controller locate command
Controlling DTRS units through menus
2-4, 6-3
7-2
2-3
2-3, 7-3–7-4
8-7, 10-3
1-3, 2-2, 10-6
2-3, 7-6, 10-6
8-6, 10-3
6-6
8-5, 10-6
2-6
8-6
8-4
7-4
2-4
9-4, 10-3
9-6
8-8
3-1
6-5
4-3
9-3, 10-5
Copying tracks 7-1, 10-1
Crossfade times
CUE ST R ke y
Cue-up tally
Cursor keys
6-7
2-5
9-6, 10-4
2-4
D
DA-88 output timing 7-4
Data entry with the jog di al
DATA INC/DEC key
Default function key assignments
Delay time
Device emulation
Digital audio cables
Digital audio input
Display screen
Dither settings
Drop-frame
DTRS
DTRS internal timecode generator
2-3, 7-1, 10-1
Cables
1-2
contrast
setting values with the numeric keypad
2-6
2-2, 8-2
arming tracks
formatting tapes
generator
internal generator
internal timecode generator
machine IDs
monitoring modes
selecting unit for control
striping tapes with timecode
sync and control
synchronization
10-6
2-4, 4-3
9-5
7-5, 10-6
2-3
7-5, 10-2
5-2
5-1, 10-6
3-1
2-5
7-2–7-4
10-5
5-2–5-5
E
Earth lift (ground loops) 2-6
6-6
10-5
2-4
9-2
2-6
8-1, 10-6
Editing location memories
Editing punch points
Emulation of other devices by DA-98
enabling recording
Enabling recording on serial port
ENTER/LOAD key
Environmental cond it io ns
Error bypass when chasing timecode
ESCAPE key
EXT 1 port
EXT 2 port
External control
GPI devices
P2 devices
parallel port
serial (P2) co ntrol
serial port
tally power (parallel)
External timecode source
2-4
2-5, 3-2, 9-1
2-5, 3-2, 9-2–9-4
2-5, 3-2, 9-1
2-5
2-5, 3-2, 9-1
2-5
2-4
5-1, 10-7
6-4–6-5
1-2
Index [ A–E]
4-4
8-1–8-3
8-3, 10-5
8-2
9-5, 10-4
10-5
8-6, 10-3
4-2
Index-i
Page 76

Index [ F–O]
F
Factory settings 4-5, 10-7
Fast wind speed setting (DA-98)
2-5
FF
Flowchart of monitoring modes
6-2, 8-2
2-4, 4-3
5-1, 10-6
8-6, 10-5
4-4
5-1
Formatting tapes
Frame rate
ABS
pull up/down
Fs (sampling frequency)
Fs shift
see "Pull up/down"
Function keys
default assignments
9-6, 10-4
5-4
G
GPI devices 2-5, 3-2, 9-1
9-1, 10-2
setup
2-6
9-1, 10-2
triggering
Ground lift
I
ID (DTRS Machine ID) 3-1
Individual r ecordi ng stat us when cha sing ti mecode
10-3
6-3
5-2
2-2
INPUT MONITOR
INSERT
see "AUTO MON"
"Instant" location
INT clock
7-4
J
Jog an d shuttle controls 2-4
Jog dial
2-4
L
LCD display screen
7-6
6-4
2-3, 6-4
1-2
6-3
6-5
2-5
2-5
2-4
6-3
2-3
Displ ay screen
see also "display screen"
Line-up oscillator
LOC key
Location memory
2-5, 6-3
"on-the-fly" capt ure
"instant" location
capturing "on-the-fly"
editing
location procedure
manual entry
"on-the-fly" capt ure
playback after location
recalling
storing
undo
6-4, 6-5
6-4
6-5
8-8
Location memory display 2-3, 6-4
Location pre-roll
9-2
6-3
6-3
10-1
2-3
2-3, 4-2
8-7, 10-4
10-2
explanation
parameters
RS-422
setting
Location time display
LOCK indicators
LTC in fast modes
Lune-up oscillator
M
Machine ID (DTRS) 3-1
2-4
9-4, 10-4
2-4, 4-3
4-1
4-3
2-2
5-5
5-3, 10-6
2-3
6-4
2-4, 4-3
2-4
2-3, 7-6, 10-6
5-2, 5-3
5-3
8-7, 10-5
7-2, 10-2
6-4
4-4
MACHINE indicators
MACHINE key
Manual entry of location memories
Mapping tracks
MEMORY NO. display
Menu items
Menus
commonly-used menus
confirming entries
editing values
navigation
recalling commonly-used menus
selecting units
,
top menu
Meter bridge
Meter modes
MIDI ID
Monitoring
AUTO MON
confidence mode
flowchart
INPUT MONITOR
source
source/tape on DA-98
table of modes
while shuttling
MTC (MIDI Timecode) output
Muting recording inputs
10-8
4-1
1-3
7-6, 10-2
9-6, 10-5
5-2
5-4
2-2
N
NEXT and PREVIOUS keys 4-3
NEXT key
NTSC
Numeric keypad
2-4, 4-3
2-2, 8-2
2-3, 4-2
O
Offset 10-6
8-4, 10-3
7-6, 10-2
7-4, 10-6
8-1
7-3–7-4
2-5, 6-5
ABS offset
in chase mode
timecode
"On-the-fly" capture of location memories
Oscillator
Output timing
Index-ii
Page 77

Index [ P–T ]
Output timing (DA-88)
Outputting timecode
8-6
P
PAL/SECAM 2-2, 8-2
Parallel port
pinout
Park position
Peak hold(meters)
Pitch shift
PLAY
Playback after location
Polarity (GPI de vices)
Pre-roll
in auto punch mode
location
serial port unit
PRESET keys
PREVIOUS key
PRRL key
Pull up/down
Pulse width (GPI event triggers)
Punch operations
checking punch points
crossfade times
editing punch points
IN and OUT points
pre-roll and post-roll
recording
rehearsal
setting punch points
undo
2-5, 9-1
3-2
8-7, 10-3
2-3, 7-5, 10-1
2-5
6-3, 10-1
6-7
2-3, 8-6, 10-5
2-5, 6-7
6-6
7-6
9-2, 10-5
2-4
2-4, 4-3
6-7
2-5, 6-7
R
REC 2-5
7-2
10-3
9-5, 10-4
2-3, 6-1
6-1
6-2
2-5, 3-1
6-5, 10-3
1-3
2-2, 5-2
8-6
7-6
6-1
1-2
REC FUNCTION
Rec muting
Recalling a location memory
Rechase (timecode)
Rechase mode
Recording
reference lev el s
Recording delay
Recording in punch mode
Reference levels for recording
Reference modes
Rehearsal (punch operations)
Relative humidit y
Relative time
setting
zero point
REMOTE OUT
Remote track arming on DA-98
Repeat play
"RTZ" (return-to-zero)
2-5
REW
Roll-around cart
7-4
6-3
9-1
2-5, 6-7, 10-2
6-6
6-6
2-5
6-7
6-6
6-4
6-7
7-6, 10-2
2-5, 6-7
6-2
9-1
9-5
RS-422
control
enabling and disabling recording
location pre-roll
9-2
9-2
S
Safing tracks 2-2, 5-2
2-4
2-3
4-3
10-5
10-5
9-3
4-4
5-3
2-4, 5-2
5-2
5-3, 10-6
7-6, 10-2
2-3, 7-1
2-5, 3-2, 9-2
2-2
10-9
8-3
5-1
6-6
4-2
2-3
8-1
5-1
7-5
2-4
6-1
9-6, 10-4
Sampling frequency
5-2
10-5
3-2
9-2, 10-5
2-4
5-3, 10-2
2-3
SELECT key
Selecting audio input sources
Selecting timecode sour ce
Selecting units
for transport operations
in menus
NEXT and PREVIOUS keys
using the MACHINE key
Serial port
control mode
pinout
pre-roll
time mode
timing mode
Setting punch points
Setting relativ e time reference
Setting values to zero
Settings (user)
SHIFT key
Shuttle
monitoring
muting
Shuttle control
Shuttle mode
Shuttle monitoring
Sine oscillator
Slipping tracks
Sony P2 protocol
Source monitoring
Specifications
"Stop" & "still" tally messages
Storing timecode values
STR key
"Striping" tapes
Synchronizing output timecode with audio
Synthesizing timecode from ABS
T
Table of monitoring modes 5-5
8-5
3-1
2-3
10-4
9-6, 10-4
10-6
5-1
7-5, 10-2
8-6, 10-5
Tally for cue-up
Tally messages
Tape counter
Tape timecode
Tapes (formatting)
TC REC
TDIF word length
Telecine frame rates
Terminator
Timecode
2-3
9-3
2-4
8-1, 10-4
8-6
Index-iii
Page 78

Index [ U–Z]
as reference
auto offset function
chasing to external so urce
contro lling the generator
display to frame accuracy
dividing a tape into "sessions"
drop-frame
enabl ing recording
error bypass
generator
individual recording status
LTC in fast modes
MTC output
offset
"on-the-fly" capt ure
output source
output synchronization with audio
park position
rechase
recording
selecting source
selection vs ABS timing
source of output
striping tapes
synthesizing from ABS
timecode types
video resolve
Timing referen ce
Track arming
remote on DA-98 9-5, 10-3
Track delay
Tracks
arming
copying
making safe
mapping
remote arming on DA-98
Transport controls
Trigger points (GPI events)
2-3, 6-1, 10-3
2-2, 8-2
8-6, 10-3
8-1, 8-2, 10-5, 10-6
8-7, 10-5
8-4, 10-3
8-6, 10-4
8-7, 10-3
8-6, 10-3
2-3, 8-3, 10-5
8-1, 10-5
8-6
8-3
2-2, 8-2, 10-4
8-8, 10-4
2-3, 6-1
2-3, 7-1, 10-1
2-2
7-1, 10-1
2-2
9-4, 10-4
2-5, 5-1
8-5
10-4
8-7, 10-4
2-4
8-4
8-3
6-1, 10-7
8-8, 10-3
6-2
8-1, 10-4
9-5, 10-3
9-1
8-1
8-6, 10-4
Z
"Zero point" 6-2
U
Undo (punch and location) 6-6
User setups
4-4, 10-7
V
Varispeed 2-3, 7-5, 10-1
VIDEO clock
Video resolve
7-4
8-8, 10-4
W
Word clock 2-2
selection
Word length
Index-iv
7-4, 10-6
7-5, 10-2
Page 79

»
RC-898
TEAC CORPORATION
TEAC AMERICA, INC. 7733 Telegraph Road, Montebello, California 90640 Phone: (213) 726-0303
TEAC CANADA LTD. 5939 Wallace Street, Mississauga, Ontario L4Z 1Z8, Canada Phone: 905-890-8008 Facsimile: 905-890-9888
TEAC MEXICO, S.A. De C.V Privada De Corina, No.18, Colonia Del Carmen Coyoacon, Mexico DF 04100 Phone: 5-658-1943
TEAC UK LIMITED 5 Marlin House, Marlins Meadow, The Croxley Centre, Watford, Herts. WD1 8YA, U.K. Phone: 01923-819699
TEAC DEUTSCHLAND GmbH Bahnstrasse 12, 65205 Wiesbaden-Erbenheim, Germany Phone: 0611-71580
TEAC FRANCE S. A. 17 Rue Alexis-de-Tocqueville, CE 005 92182 Antony Cedex, France Phone: 01.42.37.01.02
TEAC BELGIUM NV/SA P.A. TEAC Nederland BV, Perkinsbaan 11a, 3439 ND Nieuwegein, Netherlands Phone: 0031-30-6048115
TEAC NEDERLAND BV Perkinsbaan 11a, 3439 ND Nieuwegein, Netherlands Phone: 030-6030229
TEAC AUSTRALIA PTY., LTD.
A.C.N. 005 408 462
TEAC ITALIANA S.p.A. Via C. Cantù 11, 20092 Cinisello Balsamo, Milano, Italy Phone: 02-66010500
3-7-3, Nakacho, Musashino-shi, Tokyo 180-8550, Japan Phone: (0422) 52-5082
106 Bay Street, Port Melbourne, Victoria 3207, Australia Phone: (03) 9644-2442
PRINTED IN JAPAN 0298U0.5 M-1360A
 Loading...