

Page 1

N2953
410-2197-001A / AMM04US / AMM04TBUS
1 YEAR LIMITED WARRANTY: We pride ourselves on the
quality of our products. For complete warranty details and a list
of our worldwide ofces, please visit www.targus.com. Features
and specications are subject to change without notice. All
trademarks and registered trademarks are the property of their
respective owners. All rights reserved. ©2011 Manufactured
or imported by Targus Group International, Inc. (for U.S. sales:
1211 North Miller Street, Anaheim, CA 92806 USA) whose
Australian sales representative is Targus Australia Pty. Ltd.,
117-119 Bowden Street, Meadowbank, NSW 2114 Australia
User Guide
3-in-1
STYLUS
Page 2
Targus 3-in-1 Stylus
2
Targus 3-in-1 Stylus
3
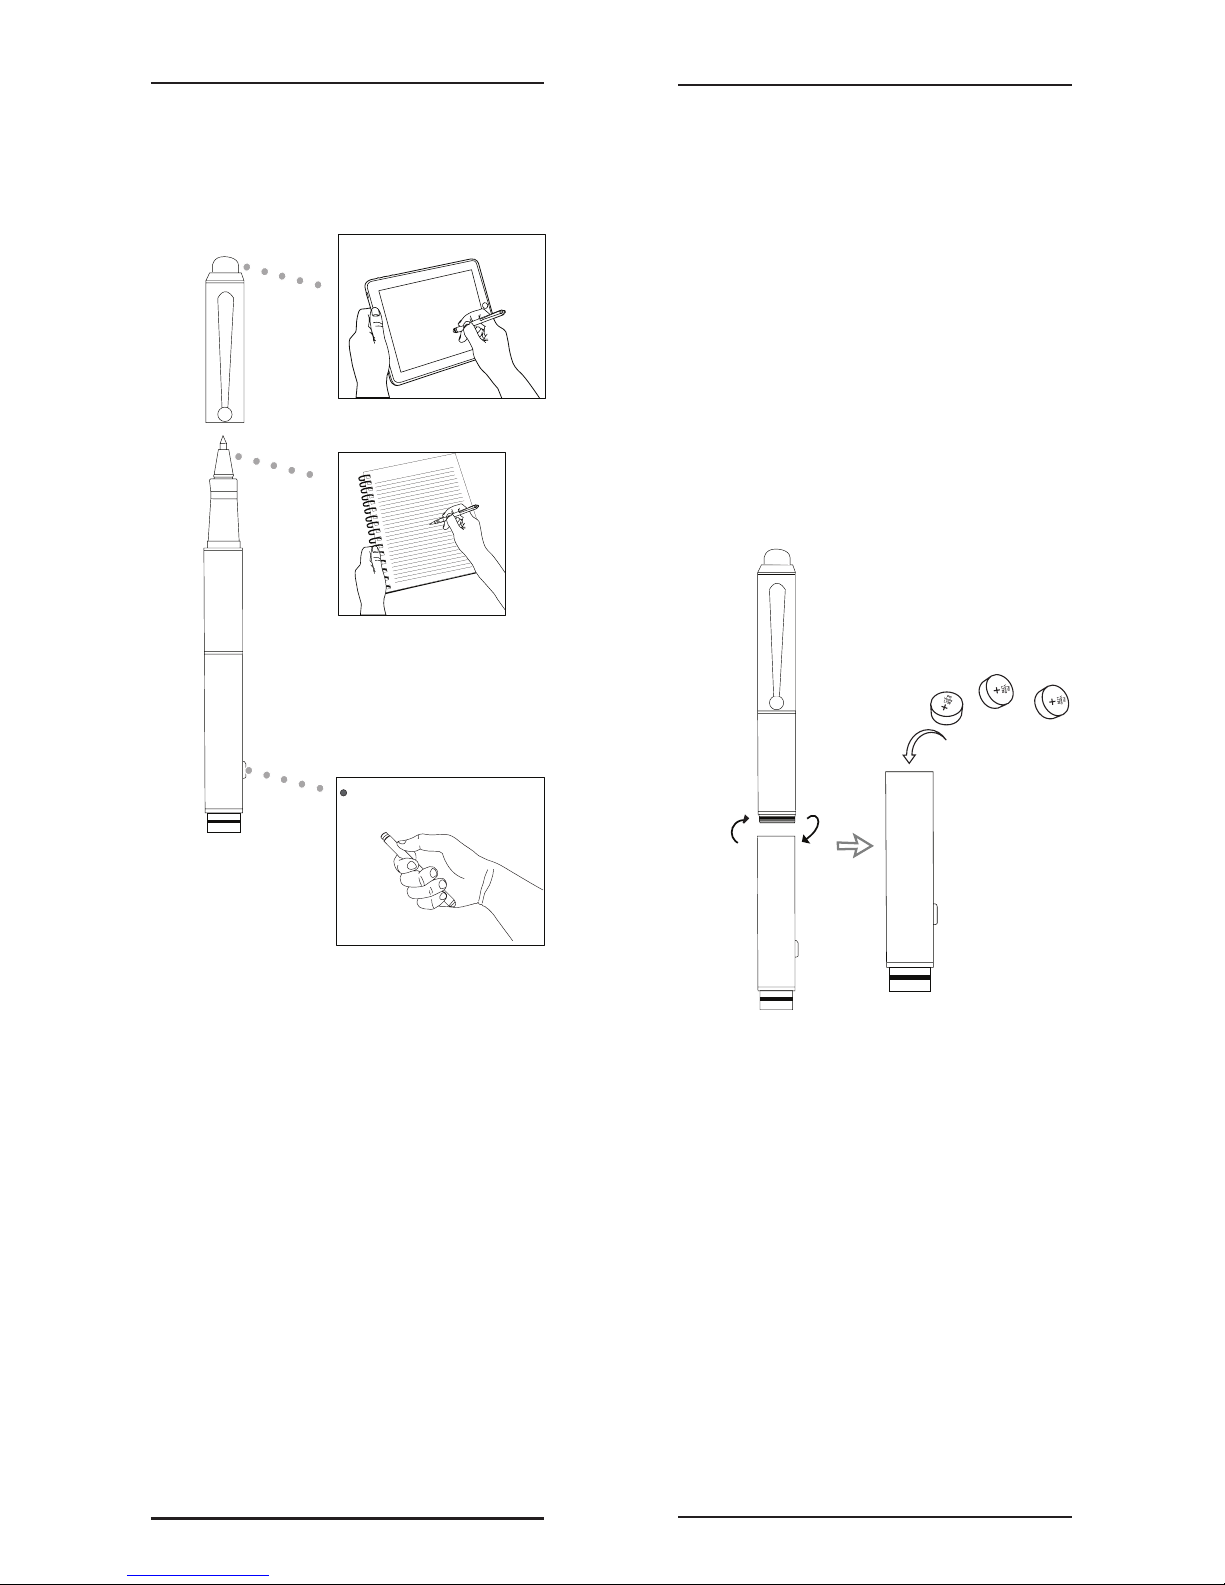
Installing and
Replacing Batteries
1. Open stylus, if replacing batteries
remove and safely discard old
batteries
2. Insert three alkaline button cell
batteries (LR41 / L736), ensuring
that that positive (+) side is facing up
3. Reassemble stylus
Before using the 3-in-1 Stylus for the
rst time, you must install the included
batteries.
M
A
D
E
I
N
C
H
I
N
A
M
A
D
E
I
N
C
H
I
N
A
M
A
D
E
I
N
C
H
I
N
A
Page 3

Targus 3-in-1 Stylus
4
Targus 3-in-1 Stylus
5
Changing the Rell
Pen
The Targus Laser Pen Stylus uses a D1
rell. The stylus comes with one installed
as well as one additional rell. A small
screwdriver is required to remove and
install the rell. To change the rell:
1. Open stylus.
2. Use the screwdriver to remove the
old rell
3. Carefully remove the small plastic base
from the rell. Attach to the base of the
new rell
4. Insert the new rell and gently tighten
using the screwdriver
5. Reassemble stylus
AVOID EXPOSURE--HAZARDOUS
ELECTROMAGNETIC RADIATION EMITTED FROM
THIS APERTURE.
LASER RADIATION. DO NOT STARE INTO THE BEAM
OR VIEW DIRECTLY WITH OPTICAL INSTRUMENTS.
CLASS 2 LASER PRODUCT.
NEVER POINT A LASER BEAM INTO A PERSON’S
EYES OR VIEW A LASER BEAM DIRECTLY, AS
PROLONGED EXPOSURE CAN BE HAZARDOUS
TO THE EYES. MOMENTARY EXPOSURE FROM
A LASER POINTER, SUCH AS AN INADVERTENT
SWEEP OF THE LIGHT ACROSS A PERSON’S EYES,
MAY CAUSE TEMPORARY FLASH BLINDNESS
SIMILAR TO THE EFFECT OF A CAMERA
FLASH BULB. ALTHOUGH THIS CONDITION IS
TEMPORARY, IT CAN BECOME MORE DANGEROUS
IF THE EXPOSED PERSON IS ENGAGED IN A
VISION-CRITICAL ACTIVITY SUCH AS DRIVING.
CAUTION: ANY CHANGES OR MODIFICATIONS
NOT EXPRESSLY APPROVED BY THE PARTY
RESPONSIBLE FOR COMPLIANCE COULD VOID
THE USER’S AUTHORITY TO OPERATE THE
EQUIPMENT.
THIS DEVICE AND ITS ANTENNA(S) MUST NOT BE
CO-LOCATED OR OPERATING IN CONJUNCTION
WITH ANY OTHER ANTENNA OR TRANSMITTER.
YOUR DEVICE CONTAINS A LOW POWER
TRANSMITTER. WHEN DEVICE IS TRANSMITTED
IT SENDS OUT RADIO FREQUENCY (RF) SIGNAL.
NOTE: THE MANUFACTURER IS NOT RESPONSIBLE
FOR ANY RADIO OR TV INTERFERENCE CAUSED
BY UNAUTHORIZED MODIFICATIONS TO THIS
EQUIPMENT. SUCH MODIFICATIONS COULD
VOID THE USER’S AUTHORITY TO OPERATE THE
EQUIPMENT.
Page 4

Targus 3-in-1 Stylus
6
Targus 3-in-1 Stylus
7
Technical Support
For technical questions, please visit:
Product Registration
Targus recommends that you register your
Targus accessory shortly after purchasing
it. Go to:
http://www.targus.com/registration.
asp
You will need to provide your full name,
email address, country of residence and
product information.
Warranty
Targus warrants this product to be free
from defects in materials and workmanship
for one year. If your Targus accessory is
found to be defective within that time, we will
promptly repair or replace it. This warranty
does not cover accidental damage, wear
and tear, or consequential or incidental
loss. Under no conditions is Targus liable
for loss of, or damage to devices; nor loss
of, or damage to, programs, records, or
data; nor any consequential or incidental
damages, even if Targus has been
informed of their possibility. This warranty
does not affect your statutory rights.
US
Internet: www.targus.com/support.asp
Australia
Internet: www.targus.com/au
Email: infoaust@targus.com
Telephone: 1800-641-645
New Zealand
Telephone: 0800-633-222
All trademarks and registered trademarks are the
property of their respective owners. All rights reserved.
Features and specications are subject to change without
notice. © 2011 Targus Group International, Inc. and
Targus, Inc.
 Loading...