

Page 1

USER GUIDE
mobile
docking station
with video
Page 2

2
Table of Contents
Targus Mobile Docking Station with
Video - - - - - - - - - - - - - - - -7
Introduction - - - - - - - - - - - - - - - - - 7
Installing the Device and Drivers - - - - - - - - 9
Connecting New Devices - - - - - - - - - - 11
Video Menu Options - - - - - - - - - - - - 14
Global Suspend Mode - - - - - - - - - - - 15
Targus Always On - - - - - - - - - - - - - 15
Using USB Devices That Require More Power 16
Product Limitations - - - - - - - - - - - - - 16
Troubleshooting - - - - - - - - - - - - - - 16
Technical Support - - - - - - - - - - - - - 19
Warranty - - - - - - - - - - - - - - - - - - 20
Targus Mobile Dockingstation mit Video - - - - - - - - - - - - - - - - - 22
Einführung - - - - - - - - - - - - - - - - - 22
Gerät und Treiber installieren - - - - - - - - 24
Neue Geräte anschliessen - - - - - - - - - 27
Videomenüoptionen - - - - - - - - - - - - - 30
Universaler Pausemodus - - - - - - - - - - 31
Targus Always On - - - - - - - - - - - - - 31
Einsatz von USB-Geräten, die eine höhere Strom-
stärke erfordern - - - - - - - - - - - - - - 32
Page 3

3
Produktbeschränkungen - - - - - - - - - - 32
Fehlersuche - - - - - - - - - - - - - - - - 33
Technische Unterstützung - - - - - - - - - - 36
Garantie - - - - - - - - - - - - - - - - - - 37
Estación móvil de acoplamiento con video de Targus - - - - - - - - - - - - - 40
Introducción - - - - - - - - - - - - - - - - 40
Cómo instalar el dispositivo y los controladores 42
Cómo conectar nuevos dispositivos - - - - - 45
Opciones del menú de video - - - - - - - - 48
Modo de inactividad general - - - - - - - - - 50
Función Always On de Targus - - - - - - - - 50
Cómo usar dispositivos USB que necesiten más
energía - - - - - - - - - - - - - - - - - - 51
Limitaciones del producto - - - - - - - - - - 51
Resolución de problemas - - - - - - - - - - 51
Soporte técnico - - - - - - - - - - - - - - - 54
Garantía - - - - - - - - - - - - - - - - - - 56
Page 4

4
Station d'accueil mobile avec vidéo de
Targus - - - - - - - - - - - - - - - 58
Introduction - - - - - - - - - - - - - - - - 58
Installation de l'appareil et des pilotes - - - - 60
Connexion de nouveaux périphériques - - - - 63
Options du menu vidéo - - - - - - - - - - - 67
Mode veille - - - - - - - - - - - - - - - - - 68
Targus Always On - - - - - - - - - - - - - 68
Utilisation de périphériques USB qui nécessitent plus
d'alimentation 66
Limites du produit - - - - - - - - - - - - - - 69
Dépannage - - - - - - - - - - - - - - - - - 69
Support technique - - - - - - - - - - - - - 72
Garantie - - - - - - - - - - - - - - - - - - 74
Docking Station Portatile Targus con
Video - - - - - - - - - - - - - - - 76
Introduzione - - - - - - - - - - - - - - - - 76
Installazione del sistema e dei drivers - - - - 78
Connessione di nuovi dispositivi - - - - - - - 81
Opzioni del menu' video - - - - - - - - - - - 84
Modalita' Globale Suspend - - - - - - - - - 85
Targus Always On - - - - - - - - - - - - - 86
Utilizzo di dispositivi USB che richiedono piu' po-
tenza - - - - - - - - - - - - - - - - - - - 86
Page 5

5
Limiti del prodotto - - - - - - - - - - - - - - 86
Risoluzione dei problemi - - - - - - - - - - 87
Assistenza tecnica - - - - - - - - - - - - - 90
Garanzia - - - - - - - - - - - - - - - - - - 91
Targus mobiel basisstation met video
- - - - - - - - - - - - - - - - - - - 93
Inleiding - - - - - - - - - - - - - - - - - - 93
Installatie van het toestel en de stuurprogramma's
- - - - - - - - - - - - - - - - - - - - - - 95
Nieuwe toestellen aansluiten - - - - - - - - 98
Videomenuopties - - - - - - - - - - - - - - 101
Modus Globaal onderbreken - - - - - - - - -103
Targus Always On - - - - - - - - - - - - -103
Gebruik van USB-toestellen die meer stroom nodig
hebben - - - - - - - - - - - - - - - - - - - 103
Productbeperkingen - - - - - - - - - - - - 104
Problemen oplossen - - - - - - - - - - - - 104
Technische ondersteuning - - - - - - - - -107
Garantie - - - - - - - - - - - - - - - - - - 108
Page 6

6
Estação móvel de Acopulamento com
Vídeo - - - - - - - - - - - - - - - 111
Introdução - - - - - - - - - - - - - - - - -111
Instalação do Dispositivo e Drivers - - - - - 113
Conexão de Novos Dispositivos - - - - - - -116
Opções de Menu de Vídeo - - - - - - - - - 119
Modo de Suspensão Global - - - - - - - - - 121
Sempre Ligado da Targus - - - - - - - - - - 121
Utilização de Dispositivos USB Que Requerem
Mais Energia - - - - - - - - - - - - - - - - 122
Limitações do Produto - - - - - - - - - - -122
Resolução de Problemas - - - - - - - - - -123
Assistência Técnica - - - - - - - - - - - - -126
Garantia - - - - - - - - - - - - - - - - - - 127
Page 7

7
TARGUS MOBILE
DOCKING STATION
WITH VIDEO
Introduction
Congratulations on your purchase of the Targus Mobile
Docking Station with Video. This portable expansion
module allows you to connect through a single USB
connection up to 4 USB devices, monitor, network
(Ethernet/LAN) connection, speakers, microphone and a
serial device.
The docking station also offers Targus Always On
technology, Targus Power Port providing twice the USB
spec for high power devices, and USB ports that are
widely spaced for larger adapters. Targus Always ON
provides power to the USB ports even when the
notebook is shut-down, disconnected from the docking
station or in hibernate/stand-by mode. This allows USB
devices that charge via the USB port to keep charging
under any circumstance.
Featu res
Heat dissipation by natural convection:
Place the back edge of your laptop on the rubber pads of
the Docking Station. Most laptops dissipate heat through
the bottom and the more air that’s allowed to flow under
the bottom, the better chance that heat will dissipate by
natural convection.
Comfort
The raised platform provides a more comfortable position
for hands and increased airflow for better cooling.
Page 8

4ARGUSÖ-OBILEÖ$OCKINGÖ3TATIONÖWITHÖ6IDEO
The Docking Station provides the
following ports:
• 15-pin VGA (Supports 1280 x 1024 at 16 bit colour)
• Two 3.5 mm Audio: (1) stereo out and (1) microphone
in
• RS232 Serial
• RJ-45 Ethernet 10/100
• Two USB 2.0 (White)
• Two USB Power Ports (Black) - Providing up to 1Amp
Package Contents
In addition to this user’s guide, the package contains:
• Targus Mobile Docking Station with Video
• High-speed USB 2.0 upstream cable
• Driver software CD
• AC power adapter (Required)
System Requirements
Hardware
• PC with an Intel®Pentium® processor or equivalent
•CD-ROMdrive
• USB version 2.0 port
• AC power source (AC adapter required)
NOTE: When connected to a USB version 1.1 port on your
computer, the Docking Station’s performance level will be less
than optimal and the video port will not function properly. For
best results, connect it to a USB version 2.0 port.
Operating System
• Windows® 2000 - Service Pack 2 or greater
• Windows
®
XP - Service Pack 1 or greater
• Windows Vista
TM
Page 9

9
Targus Mobile Docking Station with Video
NOTE: To download latest service packs, please visit your
computer manufacturer’s website or Microsoft’s download
centre:
http://support.microsoft.com/
default.aspx?scid=fh%3BEN-US%3Bsp
Installing the Device and
Drivers
To use the Targus Docking Station, you must first install
the driver onto your computer. Connect the docking
station to your computer and Windows plug-and-play will
install the hardware drivers for each port.
WARNING: You must install the Docking Station software
BEFORE connecting it to your computer. Otherwise, the
Docking Station will not work properly.
Installing the Docking Station Driver
Installing the docking station driver enables your
operating system to recognize the docking station and its
ports once it’s connected.
1 Turn on your computer.
2 Insert the driver software CD into your computer’s CD-
ROM drive.
3 If setup does not begin automatically, click Start, Run,
then enter D:\Setup.exe (where D: is the path of your
CD-ROM drive) and then click OK.
4 Follow any on-screen instructions to complete the
installation.
5Click Finish and restart your computer when
prompted.
Page 10

10
Targus Mobile Docking Station with Video
Connecting the Docking Station to Your
Computer
After installing the docking station software, you are
ready to connect the docking station to your computer. To
do this:
1 Connect the supplied AC power adapter to the AC
power jack on the docking station.
2 Connect one end of the USB cable to the docking
station and the other end into an available USB 2.0
port on your computer.
NOTE: The docking station will not function properly without
the AC adapter plugged into an AC outlet.
Do not connect any devices to the docking station until the
installation is completed.
Installing the Default Device Drivers
Once you connect the docking station to your computer,
the default drivers begin installing for each of the ports.
Some hardware devices may prompt you to install the
drivers.
To install the drivers:
1 Select Install the software automatically (Recom-
mended) and click Next.
The Found New Hardware Wizard program begins
installing the hardware drivers.
The Completing the Found New Hardware Wizard
screen appears.
2Click Finish and repeat as needed for each device.
3 Restart your computer.
Page 11

11
Targus Mobile Docking Station with Video
LED Status Indicator Lights
Once all device drivers are installed, the USB LED status
indicator lights on the back of the docking station glow
and you can connect devices to the docking station.
• Green Tx light illuminates when connected to a
network and the yellow Rx light flashes when data is
transmitting to or from the network.
NOTE: The docking station supports hot swapping of the
network cable.
• USB lights will glow when the docking station is
connected to your computer.
• Always ON LED glows green when button is
depressed.
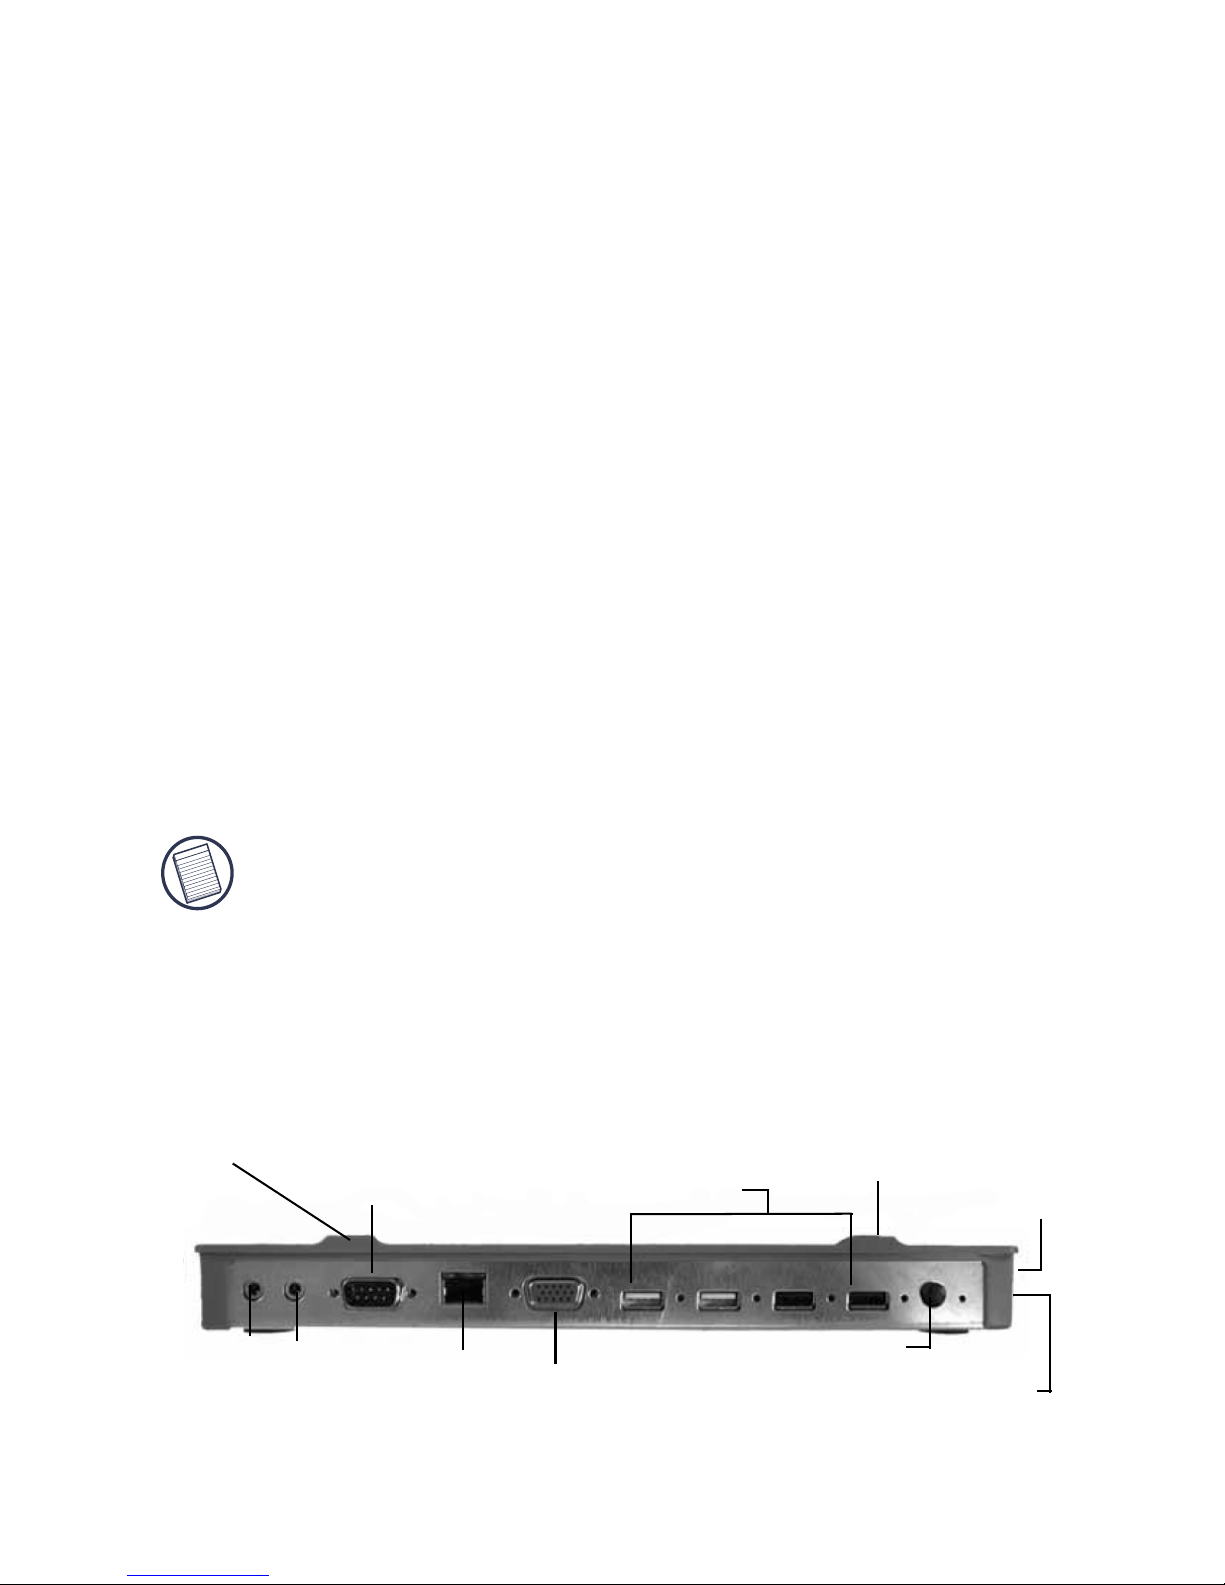
USB Ports
Serial
Audio Audio
In Out
VGA
Always On
AC Adapter
Laptop Support
Network
USB to PC
connection
Laptop Support Pad
Pad
DOCKING STATION PORTS
Connecting New Devices
To avoid possible damage when connecting a new
device, do not force the cable connector into the port on
the docking station. If the cable connector does not
attach smoothly, turn the connector over and try attaching
it again.
Page 12

12
Targus Mobile Docking Station with Video
Connecting a Serial Mouse
To connect a serial mouse, attach the cable connector to
the serial port on the docking station.
Connecting and Configuring a Serial
Modem
To connect a serial modem:
1 Attach the cable connector to the serial port on the
docking station.
2 Install the modem software driver according to the
instructions that come with the device.
3 When prompted to select the port, choose the Serial
USB (COMx), where x is the COM port number
assigned by your operating system.
Connecting a PDA
1 Attach the cable connector to the serial port on the
docking station.
2 Verify that the COM port setting, in either your
HotSync
®
or ActiveSync® software, matches the
setting on the docking station.
To verify the COM port setting on the docking station,
refer to “Verifying Devices are Installed” on page 17.
To verify the COM port setting on your PDA, refer to the
documentation that came with it.
Connecting to a Local Area Network
To connect an ethernet cable with RJ-45 connect, attach
the cable connector to the ethernet/network port on the
docking station. Additional procedures to connect to an
actual network depend on the type of network you are
using. Contact your network administrator for detailed
instructions.
Page 13

13
Targus Mobile Docking Station with Video
Connecting a USB Device
To connect a USB device, plug it into a USB port on the
docking station and follow the additional instructions
provided with the device.
All four USB ports meet USB hi-speed requirements by
providing 480Mbps through-put and 500mA of power.
However, the two black USB ports have two unique
features. See “Targus Always On” on page 15 for more
details.
The white USB ports are high-speed ports that provide
standard 500mA of power. The black USB power ports
are high-speed ports that provide up to 1Amp.
Connecting and Configuring an Audio
Device
1 Plug your headphones or speakers into the green
3.5mm Audio Out port on the docking station.
2 To connect a microphone, plug it into the mono Audio
In port.
3 To enable your headphones or speakers, you must
first choose USB Audio in the Properties Settings.
a For Windows
®
2000, click Start, Settings, Control
Panel, and then open the Sounds and Multimedia
folder. Select the Audio tab. Under Sound Play-
back, change Preferred Device to USB Audio from
the drop down list.
› Click Apply, then click OK.
b For Windows
®
XP, go to the Control Panel and
choose Sound and Audio. Select the Audio tab.
Under Sound Playback, change Preferred Device
to USB Audio from the drop down list.
Page 14

4ARGUSÖ-OBILEÖ$OCKINGÖ3TATIONÖWITHÖ6IDEO
j #LICKÖ!PPLYÖTHENÖCLICKÖ/+
4 Make sure the volume is not set to MUTE.
NOTE: Audio devices will not work simultaneously on the port
station and the host computer.
CAUTION: All audio or multimedia applications must be
terminated before switching between the port station audio
output and the host computer audio output.
Connecting to a Monitor or LCD
Any monitor or LCD connected to the video port of the
docking station will be limited to a maximum resolution of
1280 x 1024, 16-bit colour.
Video Menu Options
6IDEOÖMENUÖOPTIONSÖCANÖBEÖACCESSEDÖBYÖRIGHTCLICKINGÖONÖ
THEÖ 4ARGUSÖ $ISPLAYÖ ICONÖ INÖ THEÖ SYSTEMÖ TRAYÖ ORÖ THROUGHÖ THEÖ
7INDOWSÖ$ISPLAYÖ0ROPERTIES
The only menu option not accessible through Windows
Display Properties is Mirror. This must be accessed
through the Targus Display icon.
Primary: 9OUÖ AREÖ USINGÖ AÖ MONITORÖ ORÖ ,#$Ö NOTÖ YOURÖ
NOTEBOOKÖSCREENÖASÖYOURÖPRIMARYÖSCREEN
Extended: 9OUÖ AREÖ USINGÖ YOURÖ NOTEBOOKÖ SCREENÖ ASÖ
YOURÖ PRIMARYÖ DISPLAYÖ ANDÖ YOURÖ MONITORÖ ORÖ ,#$Ö ISÖ AÖ
SECONDARYÖSCREEN
Mirror: 9OUÖ AREÖ USINGÖ YOURÖ NOTEBOOKÖ SCREENÖ ASÖ YOURÖ
PRIMARYÖ DISPLAYÖ ANDÖ YOURÖ MONITORÖ ORÖ ,#$Ö REPLICATESÖ YOURÖ
NOTEBOOKÖSCREEN
Off: 9OUÖAREÖUSINGÖYOURÖNOTEBOOKÖSCREENÖASÖYOURÖPRIMARYÖ
DISPLAYÖANDÖYOURÖMONITORÖORÖ,#$ÖISÖTURNEDÖOFF
Page 15
15
Targus Mobile Docking Station with Video
Resolution: Changing resolution from the Targus
utility will only affect the monitor connected to the docking
station video port.
NOTE: Some LCDs have been optimised for a specific
resolution. If the optimum resolution is not 1280 x 1024, the
results may not be as desired.
Close: Removes the Targus video utility icon from the
system tray. The icon can be replaced from the Start
Menu or from the shortcut on your desktop.
Global Suspend Mode
When your computer is in suspend mode, the docking
station also enters suspend mode to avoid power
consumption. When your computer wakes up, the
docking station wakes up automatically.
Targus Always On
Press the Targus Always On button to enable the black
USB ports to continue providing power even when the
laptop is powered down or disconnected from the
docking station. This allows you to charge the batteries of
any USB rechargeable accessory you may have
connected.
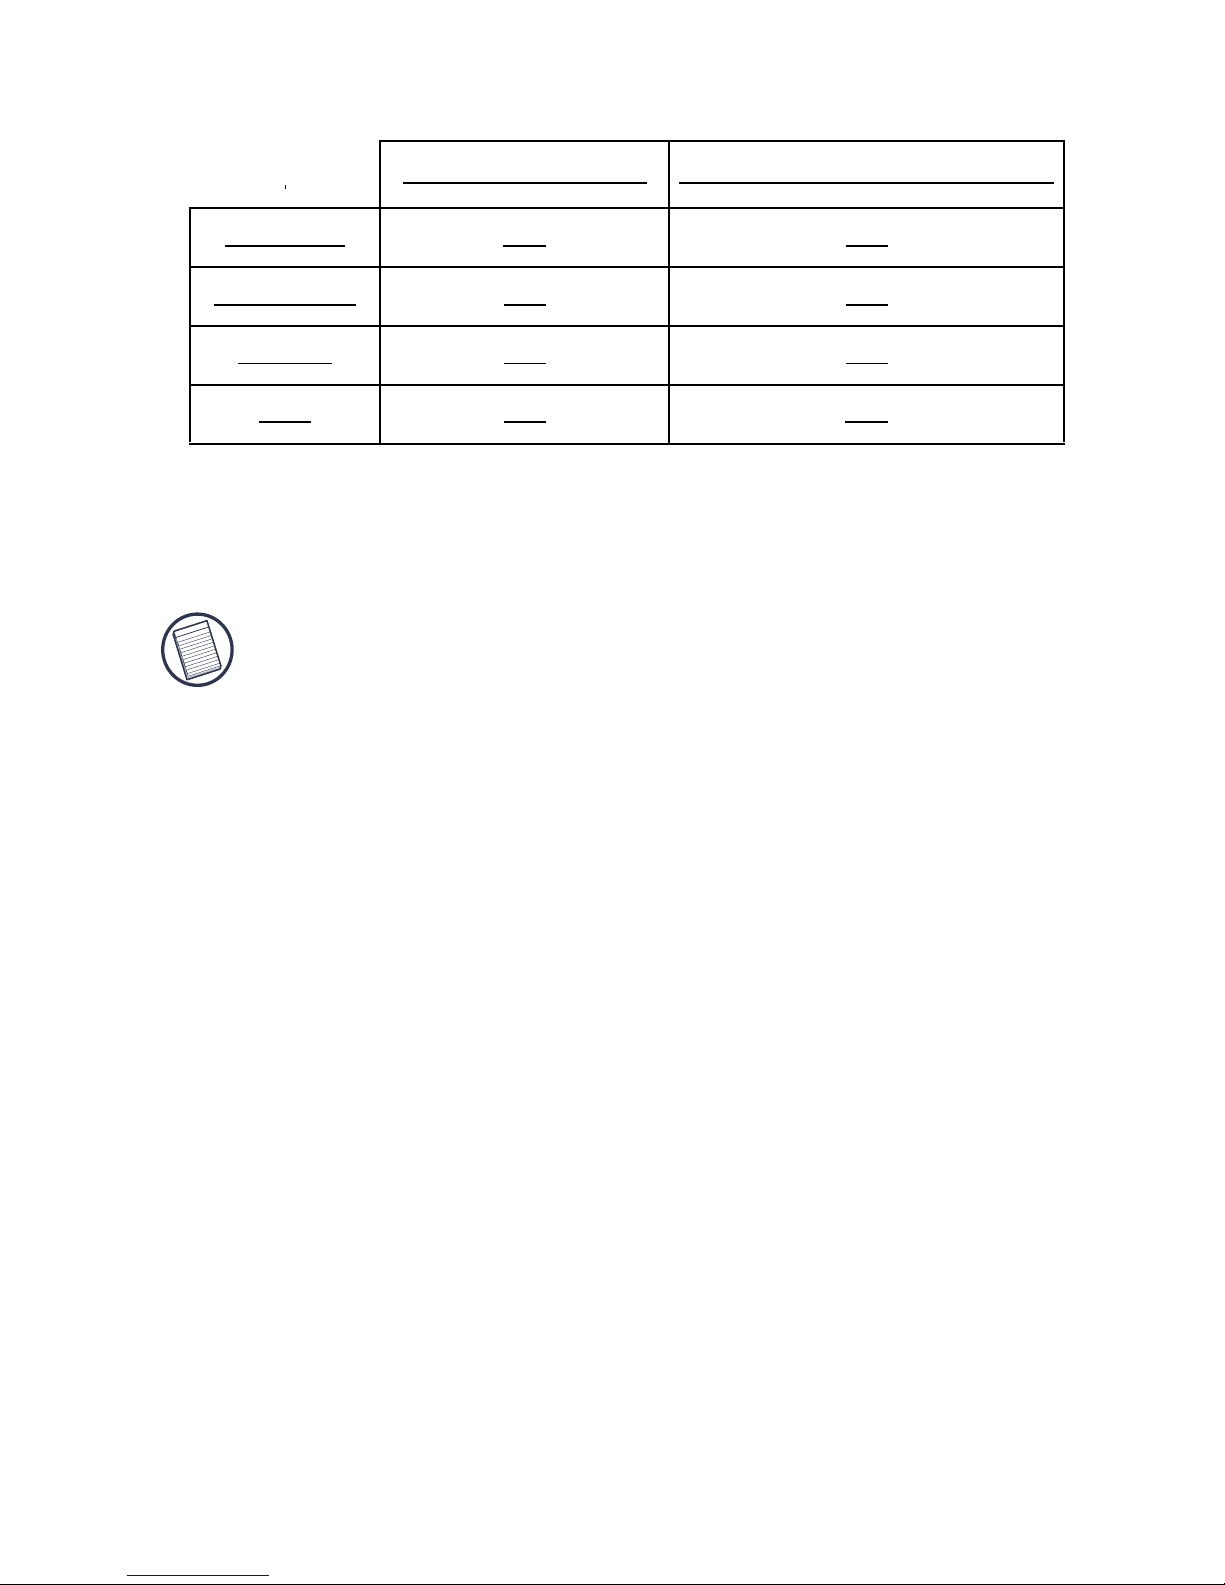
Notebook Screen Secondary Monitor or LCD
Primary: Off On
Extended: On On
Mirror: On On
Off: On Off
Page 16

16
Targus Mobile Docking Station with Video
Using USB Devices That
Require More Power
Some devices, which use large amounts of power, such
as printers and optical drives, should be plugged into the
USB Power Ports. These ports will provide up to 1000mA
of power - double the power on standard USB ports.
Product Limitations
Some devices may halt temporarily when a high data
transfer is occurring. For example, your mouse may
respond slowly while a graphic print job is printing or
while you are experiencing heavy network traffic.
We recommend the following guidelines:
• Do not transfer data to or from multiple high-speed
devices, such as a digital camera or scanner, at the
same time.
• If speed degradation does occur, close other programs
that use a USB device to improve device performance.
Troubleshooting
Device Not Working
• Make sure that the device is fully inserted into the
correct port on the docking station.
• Plug the device into a different port on the docking
station. If it still doesn’t work, test the device by
connecting it directly to your computer.
• Verify that you ran the Setup or Install program for the
device.
• Make sure that the device appears in Device Manager.
For more information refer to “Verifying Devices are
Installed” on page 17.
Page 17

17
Targus Mobile Docking Station with Video
• Disconnect all devices from the docking station and
reconnect them, one at a time. Check that each device
works before plugging in the next one.
• Each USB port is equipped with over-current
protection. Should a USB device draw more current
than the USB port can supply, the port will shut down.
To re-enable the port, unplug the device and go to
Device Manager or to the message in the system tray
and choose the Reset option. You can then plug the
device back into the USB port. If a shut down reoccurs,
check the power requirements of the device.
Verifying Devices are Installed
You can view the devices installed on the docking station
from the Device Manager window in System Properties.
Right-click My Computer, Properties, then click the
Hardware tab, and then the Device Manager button.
From the Device Manager window, expand the following:
• Display Adapters — displays Targus USB 2.0 VGA
dock device
• Human Interface Devices — displays keyboards and
pointing devices: mice, trackballs, and joysticks
• Network Adapters — displays ADM851X USB to fast
ethernet adapter
• Ports (COM & LPT) — Serial on USB [COM x]
• Sound, Video and Game Controllers — displays USB
audio device
• Universal Serial Bus controllers — displays the other
devices installed for the docking station and generic
hub.
Page 18

4ARGUSÖ-OBILEÖ$OCKINGÖ3TATIONÖWITHÖ6IDEO
Verifying a Serial Modem Connection
When attaching a modem to the serial (RS232) port,
verify that the port assigned to your modem is Serial USB
(COMx), where x is the number of the COM port.
If the operating system does not detect automatically that
your modem is assigned to Serial USB (COMx), run the
Hardware Wizard again and choose 3ELECT from the list
instead of !UTODETECT. Then, select 3ERIALÖ 53"Ö#/-X
as the COM port.
Error Message on Your PDA
If the error message “Connection Not Established”
appears on your PDA, check that the COM port setting in
either your HotSync or ActiveSync software matches the
setting on the docking station. See “Verifying Devices
are Installed” on page 17 to verify the COM port setting
on the docking station.
Some older versions of the Palm
®
Desktop software are
not compatible with the USB to Serial conversion. Please
contact your PDA vendor for software updates.
Video
Can I get a higher resolution on my
monitor?
• No, resolution is set at 1280 x 1024, 16-bit colour.
Can disk I/O functions such as,
extensive reading and writing to an
external hard drive or DVD, degrade
video functionality?
• Yes. Since all data has to pass through a single USB
connection, you may notice some degradation of your
video performance. Video performance will return
when disk read/write decreases or stops.
Page 19

4ARGUSÖ-OBILEÖ$OCKINGÖ3TATIONÖWITHÖ6IDEO
Technical Support
For technical questions, please visit:
Internet http://www.targus.com/support.asp
English http://www.targus.com/uk/support.asp
French http://www.targus.com/fr/support.asp
German http://www.targus.com/de/support.asp
Spanish http://www.targus.com/sp/support.asp
Italian http://www.targus.com/it/support.asp
Our knowledgeable staff is also available to answer your
questions through one of the following telephone
numbers.
Austria 01 795 676 42
Belgium 02-717-2451
Denmark 45 35-25-87 51
Finland 922948016
France 01-6453-9151
Germany 0211-6579-1151
Italy 02-4827-1151
Netherlands 02 0504 0671
Norway 022577729
Portugal +351 21 415 4123
Spain 91 745 6221
Sweden 08-751-4058
Switzerland 01-212-0007
United Kingdom 020-7744-0330
Eastern Europe & others +31 0 20 5040671
Page 20

4ARGUSÖ-OBILEÖ$OCKINGÖ3TATIONÖWITHÖ6IDEO
Product Registration
Targus recommends that you register your Targus accessory
shortly after purchasing it. To register your Targus accessory, go
to: http://www.targus.com/registration.asp
You will need to provide your full name, email address, phone
number, and company information (if applicable).
Warranty
Targus warrants this product to be free from defects in materials
and workmanship for two years. If your Targus accessory is found
to be defective within that time, we will promptly repair or replace
it. This warranty does not cover accidental damage, wear and
tear, or consequential or incidental loss. Under no conditions is
Targus liable for loss of, or damage to a computer; nor loss of, or
damage to, programs, records, or data; nor any consequential or
incidental damages, even if Targus has been informed of their
possibility. This warranty does not affect your statutory rights.
Regulatory Compliance
This device complies with Part 15 of the FCC Rules. Operation is
subject to the following two conditions: (1) This device may not
cause harmful interference, and (2) This device must accept any
interference received, including interference that may cause
undesired operation.
FCC Statement
Tested to Comply
This equipment has been tested and found to comply with the
limits of a Class B digital device, pursuant to Part 15 of the FCC
Rules. These limits are designed to provide reasonable protection
against harmful interference in a residential installation. This
equipment generates, uses, and can radiate radio frequency
energy and if not installed and used in accordance with the
instructions, may cause harmful interference to radio
communications. However, there is no guarantee that
interference will not occur in a particular installation.
If this equipment does cause harmful interference to radio or
television reception, which can be determined by turning the
Page 21

4ARGUSÖ-OBILEÖ$OCKINGÖ3TATIONÖWITHÖ6IDEO
equipment off and on, the user is encouraged to try to correct the
interference by one or more of the following measures:
• Reorient or relocate the receiving antenna;
• Increase the separation between the equipment and receiver;
• Connect the equipment into an outlet on a circuit different from
that to which the receiver is connected;
• Consult the dealer or an experienced radio/TV technician for
help.
Declaration of Conformity
Hereby, Targus, declares that this device is in compliance with the
essential requirements and other relevant provisions of Directive
1999/5/EC.
Targus Recycling Directive
At the end of this product’s useful life please dispose at an
appropriate recycling collection point provided in your country.
Targus recycling policy is available for viewing at:
www.targus.com/recycling
Changes or modifications not authorized by the party responsible
for compliance could void the user’s authority to operate this
product
Microsoft, Windows, and Windows Vista are either registered trademarks or trademarks of
Microsoft Corporation in the United States and/or other countries. All trademarks and
registered trademarks are the properties of their respective owners. All rights reserved.
Page 22

22
TARGUS MOBILE
DOCKINGSTATION MIT
VIDEO
Einführung
Wir gratulieren zum Kauf Ihrer mobilen Dockingstation
mit Video von Targus. Dieses tragbare
Erweiterungsmodul ermöglicht den Anschluss von bis zu
4 USB-Geräten, Bildschirm, Netzwerk (Ethernet/LAN),
Lautsprecher, Mikrofon und einem seriellen Gerät über
ein einziges USB.
Die Dockingstation besitzt außerdem die Targus Always
On Technologie, den Targus Power Port mit den
doppelten USB Kennwerten für leistungsstarke Geräte
und USB Anschlüsse, die weiter auseinander liegen, um
größere Adapter aufnehmen zu können. Targus Always
ON versorgt die USB-Anschlüsse auch dann mit Strom,
wenn das Notebook ausgestellt ist, von der
Dockingstation getrennt ist oder sich im
Bereitschaftsmodus befindet. USB Geräte, die über
einen USB-Anschluss geladen werden, sollten unter
keinen Umständen am Laden gehindert werden.
Merkmale
Wärmeabführung durch natürliche
Konvektion:
Stellen Sie die rückwärtige Kante des Laptops auf die
Gummiunterlagen der Dockingstation. Die meisten
Laptops geben Wärme durch den Boden ab und je mehr
Luft unter dem Boden strömen kann, desto größer ist die
Page 23

23
Targus Mobile Dockingstation mit Video
Möglichkeit, dass die Wärme durch natürliche Konvektion
abgeführt wird.
Komfort
Die angehobene Plattform bietet eine bequemere
Handstellung und einen erhöhten Luftfluss für eine
bessere Kühlung.
Die Dockingstation bietet die
folgenden Anschlüsse:
• 15-Stift VGA (unterstützt 1280 x 1024 bei 16 Bit Farbe)
• Zwei 3,5 mm Audio: (1) Stereo aus und (1) Mikrofon ein
• RS232 Seriell
• RJ-45 Ethernet 10/100
• Zwei USB 2.0 (Weiss)
• Zwei USB Power Ports (Schwarz) - Bieten bis zu 1 A
Verpackungsinhalt
Neben der Bedienungsanleitung enthält diese
Verpackung:
• Targus Mobile Dockingstation mit Video
• Hochgeschwindigkeits-USB 2.0-Anströmkabel
• Treibersoftware CD
• AC-Stromadapter (erforderlich)
Systemanforderungen
Hardware
• PC mit einem Intel® Pentium® Prozessor oder
gleichwertig
• CD-ROM Laufwerk
• USB Version 2.0 Port
• AC-Stromquelle (AC-Adapter erforderlich)
Page 24

4ARGUSÖ-OBILEÖ$OCKINGSTATIONÖMITÖ6IDEO
HINWEIS: Wenn die Dockingstation an einen USB-Anschluss der
Version 1.1 angeschlossen ist, wird ihre Leistung nicht optimal
sein und der Videoanschluss wird nicht richtig funktionieren. Um
optimale Ergebnisse zu erzielen, sollte sie an einen USBAnschluss der Version 2.0 angeschlossen werden.
Betriebssystem
• Windows® 2000 - Service Pack 2 oder höher
• Windows
®
XP - Service Pack 1 oder höher
HINWEIS: Um die neusten Service Packs herunterzuladen,
besuchen Sie bitte die Webseite Ihres Computerherstellers oder
das Download Centre von Microsoft:
http://support.microsoft.com/
default.aspx?scid=fh%3BEN-US%3Bsp
Gerät und Treiber
installieren
Bevor die Targus Dockingstation verwendet werden
kann, muß zuerst der Treiber auf dem Computer
installiert werden. Die Dockingstation an Ihren Computer
anschliessen, damit Windows Plug-and-Play die
Hardwaretreiber für jeden Anschluss installieren kann.
ACHTUNG: Die Software für die Dockingstation muss installiert
werden, BEVOR sie an den Computer angeschlossen wird.
Andernfalls funktioniert die Dockingstation nicht richtig.
Den Treiber für die Dockingstation
installieren
Wenn der Treiber für die Dockingstation installiert ist,
kann das Betriebssystem die Dockingstation und ihre
Anschlüsse nach deren Anschluss erkennen.
1 Schalten Sie den Computer ein.
2 SteckenSiedieTreibersoftware CD in das CD-ROM
Laufwerk Ihres Computers.
• Windows Vista
TM
Page 25

25
Targus Mobile Dockingstation mit Video
3 Falls die Einrichtung der Software nicht automatisch
beginnt, klicken Sie Start, Run, geben D:\Setup.exe ein
(wobei D: der Pfad des CD-ROM Laufwerks ist) und
klicken dann auf OK.
4 Die eingeblendeten Hinweise befolgen, um die Installation
abzuschliessen.
5 Klicken Sie Beenden und starten Sie Ihren Computer bei
Aufforderung neu.
Anschluss der Dockingstation
an den Computer
Nach der Installation der Software der Dockingstation
kann die Dockingstation an den Computer
angeschlossen werden. Dazu:
1 Den mitgelieferten AC-Stromadapter an die AC-
Strombuchse an der Dockingstation anschliessen.
2 Ein Ende des USB-Kabels an die Dockingstation und das
andere Ende an einen freien USB-2.0-Anschluss am
Computer anschliessen.
HINWEISE: Die Dockingstation wird nicht richtig funktionieren,
wenn der AC-Adapter nicht an eine AC-Buchse angeschlossen ist.
Es wenn die Installation abgeschlossen ist, dürfen Geräte an die
Dockingstation angeschlossen werden.
Standardgerättreiber
installieren
Wenn die Dockingstation an den Computer
angeschlossen ist, werden die Standardtreiber für jeden
Anschluss automatisch installiert.
Einige Hardwaregeräte könnten Sie zur Installation der
Treiber auffordern.
Zur Installation der Treiber:
1 Wählen Sie Automatische Softwareinstallation (emp-
fohlen)
und klicken Sie dann Weiter.
Page 26
26
Targus Mobile Dockingstation mit Video
Das Wizardprogramm "Neue Hardware gefunden"
beginnt mit der Installation der Hardwaretreiber.
Der zum Wizardprogramm "Neue Hardware gefunden"
gehörende Bildschirm erscheint.
2 Klicken Sie Beenden, und wiederholen Sie den Vorgang
für jedes Gerät.
3 Starten Sie Ihren Computer neu.
LED-Statusanzeigeleuchten
Wenn alle Gerättreiber installiert sind, leuchten die USBLED-Statusanzeigeleuchten auf der Rückseite der
Dockingstation, und Sie können Geräte an die
Dockingstation anschliessen.
• Die grüne Tx-Leuchte ist an, wenn ein
Netzwerkanschluss hergestellt ist, und die gelbe RxLeuchte ist an, wenn Daten vom oder zum Netzwerk
gesandt werden.
HINWEIS: Die Dockingstation unterstützt Hot-Swapping von
Netzwerkkabeln.
• USB-Leuchten sind an, wenn die Dockingstation an
den Computer angeschlossen ist.
•Die Always ON LED leuchtet grün, wenn eine Taste
bzw. ein Knopf gedrückt wird.
USB Anschlüsse
Seriell
Audio Audio
An Aus
VGA
Immer an
Netzwerk
USB an PC
Anschluss
AC Adapter
Laptop-Stützunterlage
L
aptop-Stützunterlage
Anschlüsse der Dockingstation
Page 27

27
Targus Mobile Dockingstation mit Video
Neue Geräte anschliessen
Um mögliche Schäden beim Anschluss eines neuen
Geräts zu vermeiden, darf der Kabelkonnektor nicht mit
Gewalt in den Anschluss der Dockingstation gesteckt
werden. Wenn der Kabelkonnektor nicht einfach
einzustecken ist, drehen Sie ihn um und versuchen das
Einstecken erneut.
Eine serielle Maus anschliessen
Um eine serielle Maus anzuschliessen, muss der
kabelkonnektor an den Serienanschluss an der
Dockingstation angeschlossen werden.
Anschluss und Konfiguration
eines seriellen Modems
Anschluss eines seriellen Modems:
1 Den Kabelkonnektor an den Serienanschluss der
Dockingstation anschliessen.
2 Den Modemsoftwaretreiber laut zum Gerät gehörender
Anleitung installieren.
3 Wenn Sie aufgefordert werde, einen Anschluss zu
wählen, wählen Sie Serieller USB (COMx), wobei x die
Nummer des COM-Anschlusses, wählen Sie Serieller
USB (COMx), wobei x die Nummer des COMAnschlusses ist, die von Ihrem Betriebssystem
zugewiesen wurde.
PDA anschliessen
1 Den Kabelkonnektor an den Serienanschluss der
Dockingstation anschliessen.
2 Vergewissern Sie sich, dass die Einstellung des COM-
Anschlusses in der HotSync® oder ActiveSync® Software
mit der Einstellung auf dem Dockingsystem
übereinstimmt.
Page 28

28
Targus Mobile Dockingstation mit Video
Zur Verifizierung der Einstellung des COM-Anschlusses
am Dockingsystem siehe “Überprüfen, ob Geräte
installiert sind” auf Seite 34.
Zur Verifizierung der Einstellung des COM-Anschlusses
an Ihrem PDA siehe die zum PDA gehörende
Dokumentation.
Anschluss an ein lokales
Netzwerk (LAN)
Um ein Ethernetkabel mit RJ-45 Verbindung
anzuschliessen, muss der Kabelkonnektor an den
Enthernet/Netzwerkanschluss an der Dockingstation
angeschlossen werden. Weitere Methoden für einen
Anschluss an ein tatsächliches Netzwerk hängen von der
von Ihnen verwendeten Netzwerkart ab. Detaillierte
Anweisungen können Sie bei Ihrem
Netzwerkadministrator erfragen.
Anschluss eines USB-Gerätes
Um ein USB-Gerät anzuschliessen, muss es an einen
USB Anschluss an der Dockingstation angeschlossen
werden. Befolgen Sie dann die mit dem Gerät gelieferten
Anweisungen.
Alle vier USB Anschlüsse erfüllen USB-Hochgeschwindigkeitsanforderungen durch Bereitstellung von
480 Mbps Durchsatz und 500 mA Stromstärke. Die
beiden schwarzen USB-Anschlüsse verfügen jedoch
über zwei besondere Merkmale. Schauen Sie unter
“Targus Always On” auf Seite 31 für weitere Einzelheiten.
Die weißen USB-Anschlüsse sind hochgeschwindigkeitsanschlüsse, die einen regulären 500-mA-Strom liefern.
Die schwarzen USB-Anshlüsse sind
Hochgeschwindigkeits-anschlüsse, die bis zu 1 A liefern.
Page 29

4ARGUSÖ-OBILEÖ$OCKINGSTATIONÖMITÖ6IDEO
Anschluss und Konfiguration eines
Audiogerätes
1 Schliessen Sie Ihre Kopfhörer oder Lautsprecher an die
grüne 3,5 mm Audio Out-Buchse an der Dockingstation
an.
2 Ein Mikrofon kann an die Mono-Audio-In-Buchse
angeschlossen werden.
3 Um Kopfhörer oder Leutsprecher zu aktivieren, muss
zuerst unter Merkmalseinstellung USB-Audio aufgerufen
werden.
a "Bei Windows® 2000 auf Start, Einstellungen, Sys-
temsteuerung klicken und dann das Sound &
Audiogeräte-Verzeichnis öffnen. Den Audio-Reiter
auswählen. Unter Klangplayback das Vorzugsgerät
auf USB-Audio aus der Drop-down-Liste ändern.
•Zuerst Anwenden und dann OK klicken.
b Bei Windows®XP zum "EDIENERFELD gehen und
+LANGÖ UNDÖ !UDIO auswählen. Den
!UDIO-Reiter
auswählen. Unter
+LANGPLAYBACK das 6ORZUGSGER¦T
auf 53"!UDIO aus der Drop-down-Liste ändern.
•Zuerst Anwenden und dann OK klicken.
4 Vergewissern Sie sich, dass die Lautstärke nicht auf
Stumm gestellt ist.
HINWEIS: Audiogeräte funktionieren nicht an der Portstation und
am Hostcomputer gleichzeitig.
VORSICHT: Alle Audio- und Multimediaanwendungen müssen
geschlossen werden, bevor Sie vom Audio-Output der Portstation
zum Hostcomputer wechseln.
Page 30

30
Targus Mobile Dockingstation mit Video
Anschluss an einen Bildschirm
oder eine LCD-Anzeige
Jeder Bildschirm bzw. jede LCD-Anzeige, der/die an den
Videoanschluss der Dockingstation angeschlossen ist, ist
auf eine maximale Auflösung von 1280 x 1024, 16-BitFarbe beschränkt.
Videomenüoptionen
Die Videomenüoptionen können durch Rechtsklicken des
Targus Display-Symbols in der Systemleiste oder über die
Windows Anzeigeeigenschaften bedient werden.
Die einzige Menüoption, die nicht über die Windows
Anzeigeeingeschaften genutzt werden kann, ist
Abbilden. Sie muss über das Targus Display-Symbol
bedient werden.
Primär: Sie benutzen einen Monitor oder eine LCDAnzeige (nicht den Bildschirm des Notebooks) als Ihren
Hauptbildschirm.
Erweitert: Sie benutzen Ihren Notebookbildschirm als
Hauptanzeige und Ihren Monitor oder Ihre LCD-Anzeige als
einen Zweitbildschirm.
Abbilden: Sie benutzen Ihren Notebookbildschirm als
Hauptanzeige und Ihr Monitor oder Ihre LCD-Anzeige
kopieren den Bildschirm Ihres Notebooks.
Aus: Sie benutzen Ihren Notebookbildschirm als
Hauptanzeige und Ihr Monitor oder Ihre LCD-Anzeige ist
ausgeschaltet.
Page 31

31
Targus Mobile Dockingstation mit Video
Auflösung: Die Änderung der Auflösung im Targus
Hilfsprogramm beeinflusst nur den an den Videoanschluss
der Dockingstation angeschlossenen Bildschirm.
HINWEIS: Einige LCD-Anzeigen sind für eine spezifische
Auflösung optimiert. Wenn die optimale Auflösung nicht 1280 x
1024 ist, könnten die Ergebnisse nicht wie gewünscht aussehen.
Schliessen: Entfernt das Symbol des
Videohilfsprogramms von Targus aus der Systemleiste.
Das Symbol kann über das Startmenü oder über die
Schnelltaste auf dem Desktop wieder eingeblendet
werden.
Universaler Pausemodus
Wenn Ihr Computer sich im Pausemodus befindet, stellt
sich auch die Dockingstation in den Pausemodus, um
einen Stromverbrauch zu vermeiden. Wenn Ihr Computer
wieder eingesetzt wird, wird auch die Dockingstation
automatisch einsatzbereit.
Targus Always On
Drücken Sie die Targus Always On Taste, damit die
schwarzen USB-Anschlüsse weiterhin Strom liefern
können, auch wenn der Laptop heruntergefahren ist oder
von der Dockingstation getrennt wurde. Sie können so
Notebookbildschirm
Zweitmonitor oder -LCD-
Anzeige
Primär: Aus An
Erweitert: An An
Abbilden: An An
Aus: An Aus
Page 32

32
Targus Mobile Dockingstation mit Video
die Batterien von aufladbaren USB-Geräten, die
angeschlossen sind, laden.
Einsatz von USB-Geräten, die
eine höhere Stromstärke
erfordern
Einige Geräte, die große Strommengen verbrauchen, wie
Drucker und optische Geräte, sollten an die USB-PowerPorts angeschlossen werden. Diese Anschlüsse liefern
bis zu 1000 mA Strom, das ist doppelt so viel Strom wie
von normalen USB-Anschlüssen geliefert wird.
Produktbeschränkungen
Einige Geräte könnten zeitweilig anhalten, wenn große
Datenmengen gesendet werden. Beispielsweise könnte
Ihre Maus langsamer reagieren, während eine Grafik
ausgedruckt wird oder wenn das Netzwerk voll
ausgelastet ist.
Wir empfehlen folgendes:
• Senden Sie keine Daten zur selben Zeit an oder von
mehreren Hochgeschwindigkeitsgeräten wie
Digitalkameras oder Scannern.
• Wenn es zu einer Verlangsamung kommt, schliessen
Sie bitte andere Programme, die ein USB-Gerät
verwenden, um die Leistungsfähigkeit des Gerätes zu
erhöhen.
Page 33

33
Targus Mobile Dockingstation mit Video
Fehlersuche
Gerät funktioniert nicht
• Sichergehen, dass das Gerät ganz in die richtige
Buchse an der Dockingstation eingesetzt ist.
• Schliessen Sie das Gerät an eine andere Buchse der
Dockingstation an. Funktioniert es immer noch nicht,
muss das Gerät durch direktes Anschliessen den den
Computer getestet werden.
• Sichergehen, dass Sie das Einrichtungs- oder
Installationsprogramm für das Gerät ausgeführt haben.
• Sichergehen, dass das Gerät im Gerätmanager
aufgeführt ist. Für weitere Informationen siehe
“Überprüfen, ob Geräte installiert sind” auf Seite 34.
• Trennen Sie alle Geräte von der Dockingstation und
schliessen Sie sich nacheinander wieder an.
Überprüfen Sie, dass jedes Gerät funktioniert, bevor
Sie das nächste anschliessen.
• Jeder USB-Anschluss ist mit einem Überstromschutz
ausgerüstet. Sollte ein USB-Gerät mehr Strom ziehen
als vom USB-Anschluss geliefert werden kann, wird
sich der Anschluss selber abschalten. Um ihn neu zu
aktivieren, muss das Gerät entfernt werden und Sie
müssen zum Gerätmanager oder zur Mitteilung in der
Systemleiste gehen und die Option Reset wählen. Das
gerät kann dann wieder an den USB-Anschluss
angeschlossen werden. Wenn es zum Abschalten
kommt, überprüfen Sie die Stromanforderungen des
Geräts.
Page 34

34
Targus Mobile Dockingstation mit Video
Überprüfen, ob Geräte installiert
sind
Sie können vom Fenster des Gerätmanagers unter
Systemeigenschaften die an der Dockingstation
installierten Geräte ansehen.
Gehen Sie wie folgt vor: Rechtklicken auf Arbeitsplatz,
Eigenschaften, dann den Hardware-Reiter, gefolgt von
der Device Manager Schaltfläche klicken.
Im Fenster des Gerätmanagers folgendes erweitern:
• Anzeigeadapter — zeigt Targus USB 2.0 VGA Dockvorrichtung an
• Humane Schnittstellengeräte — zeigt Tastaturen und
Zeigegeräte an: Mäuse, Trackbälle und Joysticks
• Netzwerkadapter — zeigt ADM851X USB zum
schnellen Ethernetadapter an
• Anschlüsse (COM & LPT) — Seriell an USB [COM x]
• Sound-, Video- und Spielsteuergeräte — zeigt das
USB Audiogerät an
• Universelle serielle Bus-Steuergeräte — zeigt die
andere Geräte an, die für die Dockingstation installiert
wurde, sowie den generischen Hub.
Überprüfung der Anschlusses
eines seriellen Modems
Wenn ein Modem an den seriellen (RS232) Anschluss
angeschlossen wird, ist zu prüfen, dass der dem Modem
zugewiesene Anschluss ein serieller USB (COMx) ist,
wobei x die Nummer des COM-Anschlusses ist.
Wenn das Betriebssystem nicht automatisch erkennt,
dass das Modem dem seriellen USB (COMx)
zugewiesen ist, lassen Sie den Hardware Wizard
nochmals laufen und wählen Sie aus der Liste
Page 35

35
Targus Mobile Dockingstation mit Video
Selektieren anstatt Automatisch erkennen aus. Wählen
Sie dann Serieller USB (COMx) als COM-Anschluss aus.
Fehlermeldeung auf dem PDA
Wenn auf dem PDA die Fehlermeldung "Verbindung nicht
hergestellt" erscheint, überprüfen Sie, dass die
Einstellung für den Com-Anschluss Ihrer HotSync oder
ActiveSync Software mit der Einstellung der
Dockingstation übereinstimmt. Schauen SIe unter
“Überprüfen, ob Geräte installiert sind” auf Seite 34 to
verify the COM port setting on the docking station.
Einige ältere Versionen der Palm
®
Desktop Software sind
mit der Konvertierung von USB nach seriell nicht
kompatibel. Bitte setzen Sie sich mit Ihrem PDAVerkäufer zwecks Softwareaktualisierungen in
Verbindung.
Video
Kann ich eine höhere Auflösung auf
meinem Bildschirm erhalten?
• Nein, die Auflösung ist auf 1280 x 1024, 16-Bit-Farbe
eingestellt.
Können Disketten-I/O-Funktionen wie
ausgedehntes Lesen und Schreiben
auf ein externes Festplattenlaufwerk
oder DVD die Videofunktion
verschlechtern?
• Ja. Da alle Daten eine einzige USB-Verbindung
passieren müssen, könnte es zu einer gewissen
Verschlechterung der Videoleistung kommen. Die
Videoleistung wird hergestellt werden, wenn das
Lesen/Schreiben abnimmt oder stoppt.
Page 36

4ARGUSÖ-OBILEÖ$OCKINGSTATIONÖMITÖ6IDEO
Technische Unterstützung
Wenn Sie technische Fragen haben, besuchen Sie bitte:
Internet http://www.targus.com/support.asp
Englisch http://www.targus.com/uk/support.asp
Französisch http://www.targus.com/fr/support.asp
Deutsch http://www.targus.com/de/support.asp
Spanisch http://www.targus.com/sp/support.asp
Italienisch http://www.targus.com/it/support.asp
Unser Expertenteam steht Ihnen auch telefonisch zur
Beantwortung Ihrer Fragen zur Verfügung.
Belgien 02-717-2451
Dänemark 45 35-25-87 51
Finnland 922948016
Frankreich 1-6453-9151
Deutschland 0211-6579-1151
Italien 02 4827-1151
Niederlande 02 0504 0671
Norwegen 022577729
Österreich 01 795 676 42
Portugal +351 21 415 4123
Spanien 91-745-6221
Schweden 08-751-4058
Schweiz 1-212-0007
Großbritannien 020-7744-0330
Osteuropa & sonstige Länder +31 (0) 20-5040671
Page 37

4ARGUSÖ-OBILEÖ$OCKINGSTATIONÖMITÖ6IDEO
Produktregistrierung
Targus empfiehlt die Registrierung des Targus-Zubehörs sofort
nach dem Kauf. Die Registrierung von Targus-Zubehör erfolgt
unter: http://www.targus.com/registration.asp
Geben Sie bitte Ihren vollständigen Namen, Ihre E-Mail-Adresse,
Telefonnummer und Firmeninformationen an (falls zutreffend).
Garantie
Targus garantiert zwei (2) Jahre lang, dass Zubehör von Targus
frei von Fehlern im Material und in der Verarbeitung ist. Erweist
sich Ihr Targus-Zubehör während dieser Zeit als fehlerhaft, wird
es umgehend repariert oder ersetzt. Diese Garantie deckt weder
zufällige oder mittelbare Schäden, noch Abnutzung oder
Verschleiß ab. Unter keinen Umständen haftet Targus für Verlust
oder Schäden an Computern bzw. für Verlust oder Schäden an
Programmen, Aufzeichnungen oder Daten. Targus haftet auch
nicht für mittelbare oder zufällige Schäden, selbst wenn Targus
über deren Möglichkeit informiert wurde. Diese Garantie hat
keinen Einfluss auf Ihre gesetzlichen Rechte.
Behördliche Genehmigungen/
Zulassungen
Dieses Gerät erfüllt die Voraussetzungen von Teil 15 der FCCRegeln. Der Betrieb unterliegt den folgenden beiden
Bedingungen: (1) Dieses Gerät darf keine störenden
Interferenzen verursachen, und (2) dieses Gerät muss alle
empfangenen Interferenzen aufnehmen, einschließlich
Interferenzen, die ein unerwünschtes Betriebsverhalten
verursachen können.
FCC-Bescheinigung
Auf Konformität getestet
Dieses Gerät wurde getestet und ist mit den Grenzwerten eines
digitalen Geräts der Klasse B (gemäß Teil 15 der FCC-Regeln)
konform. Diese Grenzwerte wurden zur Gewährleistung eines
angemessenen Schutzes gegen störende Interferenzen bei einer
Installation in Wohngebieten erstellt. Dieses Gerät erzeugt und
nutzt RF-Energie und kann diese abstrahlen. Bei
Page 38

4ARGUSÖ-OBILEÖ$OCKINGSTATIONÖMITÖ6IDEO
unsachgemäßer Installation und einer Verwendung, die nicht
gemäß den Anweisungen erfolgt, können störende Interferenzen
in der Radiokommunikation auftreten. Es liegt jedoch keine
Garantie vor, dass bei bestimmten Installationen keine
Interferenzen auftreten.
Falls dieses Gerät beim Radio- oder Fernsehempfang störende
Interferenzen verursacht, was durch ein Aus- und Einschalten
des Geräts festgestellt werden kann, sollte der Benutzer
versuchen, die Interferenzen anhand einer oder mehrerer der
folgenden Maßnahmen zu beseitigen:
• Die Distanz zwischen Ausrüstung und Empfänger vergrößern.
• Die Ausrüstung an eine Steckdose mit einem anderen
Stromkreis als dem des Empfängers anschließen.
• Für persönliche Unterstützung wenden Sie sich bitte an Ihren
Händler oder einen erfahrenen Radio/TV-Techniker.
Konformitätserklärung
Hiermit erklärt Targus, dass sich das Gerät in Übereinstimmung
mit den grundlegenden Anforderungen und den übrigen
einschlägigen Bestimmungen der Richtlinie 1999/5/EG befindet.
Dieses Gerät hat einen niedrigen Energiebedarf. Gerät ist nur für
Büro und häuslichen Bereich bestimmt. Dieses Produkt kann in
allen CE Ländern verwendet werden.
Targus Recycling Richtlinie
Bitte werfen Sie das Gerät nicht in den normalen Hausmüll!
Entsorgen Sie es bei denIhnen bekannten Recyclingstellen in
Ihrer Nähe. In jedem Ort werden Ihnen diese Sammelstellen zu
Verfügung gestellt. Die Targus Recycling-Richtlinien können Sie
einsehen unter: www.targus.com/recycling
• Die Empfangsantenne neu ausrichten oder an einem ande ren Ort.
Änderungen oder Modifikationen, die nicht von der für die
Konformität verantwortlichen Partei genehmigt wurden, können
zum Verlust des Benutzerbetriebsrechts führen
Page 39

4ARGUSÖ-OBILEÖ$OCKINGSTATIONÖMITÖ6IDEO
Microsoft, Windows und Windows Vista sind eingetragene Marken der Microsoft Corporation in
den USA und/oder in anderen Ländern. Alle eingetragenen Marken sind das Eigentum des
jeweiligen Eigentümers. Alle Rechte vorbehalten.
Page 40

40
DOCKING STATION
PORTÁTIL CON PUERTO
DE VIDEO DE TARGUS
Introducción
Felicidades por su compra de la Docking Station portátil
con puerto de video de Targus. Este módulo de
expansión portátil le permite conectar hasta 4
dispositivos USB tales como: monitor, conexión para red
(Ethernet/LAN), altavoces, micrófono y un dispositivo en
serie, por medio de una sola conexión USB.
La docking station también le ofrece la tecnología Always
On (siempre activa) de Targus, un puerto de suministro
eléctrico de Targus que le ofrece el doble de las
especificaciones de USB para los equipos con gran
consumo de energía, y puertos USB con suficiente
espacio entre sí para permitir la conexión de
adaptadadores grandes. La tecnología Always On de
Targus suministra energía a los puertos USB incluso
cuando el ordenador portátil está apagado,
desconectado de la docking station o en modo inactivo o
en espera. Esto permite que los dispositivos USB que
reciben su carga del puerto USB, sigan recibiendo esa
carga en todo momento.
Características
Disipación del calor por convección
natural:
Coloque el borde posterior de su ordenador portátil
sobre las almohadillas de caucho de la Estación de
acoplamiento. La mayoría de los ordenadors portátiles
despiden calor por la parte inferior, de modo que,
Page 41

41
Docking Station portátil con puerto de video de Targus
mientras más aire pueda pasar por la parte inferior,
habrá una mayor disipación del calor, gracias a la
convección natural.
Comodidad
La plataforma elevada permite que sus manos reposen
en una posición más cómoda e incrementa el paso de
aire para un mejor enfriamiento.
La docking station ofrece los
siguientes puertos:
• Puerto para VGA de 15 clavijas (permite la
visualización a 1280 x 1024 con colores de 16 bits)
• Dos puertos de audio de 3,5 mm: (1) salida
estereofónica y (1) entrada para micrófono
• Puerto en serie RS232
• Puerto Ethernet 10/100 RJ-45
• Dos puertos USB 2.0 (de color blanco)
• Dos puertos de suministro eléctrico USB (de color
negro) - Suministran hasta 1 amperio
Contenido del paquete
Además de esta guía para el usuario, este paquete
contiene:
• Estación móvil de acoplamiento con video, de Targus
• Cable USB 2.0 de flujo superior, de alta velocidad
• Disco compacto con software con los drivers
• Transformador de c.a. (necesario)
Requisitos del sistema
Hardware
• PC con un procesador Pentium®de Intel® o
equivalente
• Unidad de disco CD-ROM
Page 42

$OCKINGÖ3TATIONÖPORT©TILÖCONÖPUERTOÖDEÖVIDEOÖDEÖ4ARGUS
• Puerto USB 2.0
• Suministro de corriente alterna (se requiere un
transformador de c.a.)
NOTA: Cuando la docking station está conectada a un puerto
USB 1.1 en su ordenador, su rendimiento no es óptimo y el
puerto de video no funciona debidamente. Para un mejor
resultado, conéctela a un puerto USB 2.0.
Sistema operativo
• Windows® 2000 - Con paquete de servicio 2 o mayor
• Windows
®
XP - Con paquete de servicio 1 o mayor
NOTA: Para descargar los paquetes de servicio más recientes,
visite el portal Web del fabricante de su ordenador o el centro
de descargas de Microsoft, en:
http://support.microsoft.com/
default.aspx?scid=fh%3BEN-US%3Bsp
Cómo instalar el dispositivo
y los drivers
Para usar la docking station de Targus, primero debe
instalar el controlador en su ordenador. Conecte la
docking station a su ordenador y el sistema de
instalación "plug-and-play" de Windows instalará los
drivers de hardware para cada puerto.
ADVERTENCIA: Debe instalar e l software de la docking station
ANTES de conectarla a su ordenador. De lo contrario, la
docking station no funcionará bien.
• Windows Vista
TM
Page 43

43
Docking Station portátil con puerto de video de Targus
Cómo instalar el controlador de
la docking station
La instalación con los drivers de la docking station
permite que su sistema operativo reconozca la estación
y sus puertos cuando esté conectada.
1 Encienda su ordenador.
2 Inserte el CD-ROM con el software con los drivers en
la unidad de disco compacto de su ordenador.
3 Si la instalación no comienza automáticamente, pulse
Inicio, Ejecutar, luego, ingrese D:\Setup.exe (donde
D: es la dirección a su unidad de disco duro) y, luego,
pulse Aceptar.
4 Siga todos los procedimientos que aparezcan en
pantalla para completar la instalación.
5Pulse Finalizar y vuelva a encender su ordenador
cuando se le indique.
Cómo conectar la docking station
a su ordenador
Una vez instalado el software de la docking station, ya
está listo para conectar la docking station a su
ordenador. Para hacerlo:
1 Conecte el transformador de c.a., suministrado, a la
toma de c.a. de la docking station.
2 Conecte un extremo del cable USB a la docking
station, y el otro extremo a un puerto USB 2.0 que
esté disponible en su ordenador.
NOTAS: La docking station no funcionará bien si el
transformador de c.a. no está enchufado a una toma de c.a.
Page 44

44
Docking Station portátil con puerto de video de Targus
No conecte ningún dispositivo a la docking station hasta
haber terminado de instalarla.
Cómo instalar los drivers
predeterminados del
dispositivo
Cuando conecte la docking station a su ordenador, se
comenzará a instalar los drivers predeterminados para
cada uno de los puertos.
Ciertos dispositivos para hardware le pueden indicar que
instale los drivers.
Cómo instalar los drivers:
1 Elija Instalar el software automáticamente (es lo
recomendado) y pulse Siguiente.
El programa del Asistente de búsqueda de nuevo
hardware comienza a instalar los drivers de hardware.
Aparece la pantalla de instalación en curso del
Asistente de búsqueda de nuevo hardware.
2Pulse Finalizar y repita este paso según sea
necesario para cada dispositivo.
3 Reinicie su ordenador.
Diodos indicadores de
condición
Cuando todos los drivers de dispositivos están
instalados, se encienden los diodos electroluminiscentes
(LED) que indican la condición del USB, ubicados en la
parte posterior de la docking station, y en ese momento
puede conectar dispositivos a la docking station.
Page 45

45
Docking Station portátil con puerto de video de Targus
• La luz verde de transmisión (Tx) se enciende al estar
conectado a una red, y la luz amarilla de recepción
(Rx) parpadea cuando se transmite o se recibe datos
de la red.
NOTA: La docking station permite el intercambio activo del
cable de la red.
• Cuando la docking station está conectada a su
ordenador, se encienden las luces USB.
• El diodo Always On se enciende de color verde al
pulsar el botón.
Puertos USB
Serial
Entrada Salida
de audio de audio
VGA
Always On
Adaptador
Almohadilla de apoyo de
el ordenador portátil
Red
Conexión de
USB a CP
de c.a.
Almohadillad
e apoyo de
el ordenador portátil
Puertos de la docking station
Cómo conectar nuevos
dispositivos
Para evitar el riesgo de daños cuando se conecta un
dispositivo nuevo, no conecte el cable al puerto de la
docking station a la fuerza. Si el conector del cable no se
acopla fácilmente, voltéelo e intente conectarlo de nuevo.
Cómo conectar un ratón en serie
Para conectar un ratón en serie, enchufe el cable en el
puerto en serie de la docking station.
Page 46

46
Docking Station portátil con puerto de video de Targus
Cómo conectar y configurar un
módem en serie
Cómo conectar un módem en serie:
1 Enchufe el cable al puerto en serie de la docking
station.
2 Instale el controlador de software del módem
siguiendo las instrucciones que vienen con el
dispositivo.
3 Cuando se le indique que debe elegir el puerto, elija el
USB en serie (COMx), donde x es el número del
puerto COM asignado por su sistema operativo.
Cómo conectar un Asistente
digital (PDA)
1 Enchufe el cable al puerto en serie de la docking
station.
2 Verifique que la configuración del puerto COM de su
programa HotSync
®
o ActiveSync® corresponda a la
configuración de la docking station.
Para verificar la configuración del puerto COM de la
docking station, lea “Cómo verificar la instalación de los
dispositivos” en la página 52.
Para verificar la configuración del puerto COM de su
Asistente digital, consulte los documentos que vienen
con el mismo.
Cómo conectarse a una red
local
Para conectar un cable Ethernet con enchufe RJ-45,
conecte este enchufe al puerto de Ethernet/red de la
docking station. Los procedimientos adicionales
Page 47

47
Docking Station portátil con puerto de video de Targus
necesarios para conectarse a una red existente
dependerán del tipo de red que use. Solicite
instrucciones detalladas al administrador de su red.
Cómo conectar un dispositivo
USB
Para conectar un dispositivo USB, enchúfelo a un puerto
USB de la docking station y siga las instrucciones
adicionales suministradas con el dispositivo.
Los cuatro puertos USB cumplen los requisitos para
transmisión a alta velocidad, ya que permiten una
transmisión de 480 Mbps y suministran 500 mA de
energía. Sin embargo, los dos puertos USB de color
negro tienen dos características exclusivas. Lea “Función
Always On de Targus” en la página 50 para mayor
información.
Los puertos USB de color blanco son puertos de alta
velocidad que suministran una energía nominal de 500
mA. Los puertos USB de color negro son puertos de alta
velocidad que suministran hasta 1 amperio.
Cómo conectar y configurar un
dispositivo de audio
1 Enchufe sus audífonos o sus altavoces al puerto
verde de salida de audio de 3,5 mm en la docking
station.
2 Conecte el micrófono en el puerto Mono de entrada
de audio.
3 Para activar sus audífonos o sus altavoces, primero
debe elegir Audio USB en las configuraciones de
propiedades.
Page 48

$OCKINGÖ3TATIONÖPORT©TILÖCONÖPUERTOÖDEÖVIDEOÖDEÖ4ARGUS
a En Windows®2000, pulse )NICIOÖ!JUSTESÖ0ANELÖDEÖ
CONTROL, y luego abra el directorio de 3ONIDOSÖ YÖ
MULTIMEDIOS. Elija la lengüeta de !UDIO.En2EPRO
DUCCINÖDELÖSONIDO cambie el $ISPOSITIVOÖPREFER
IDO a !UDIOÖ53"Ö del menú desplegable.
•Pulse Aplicar, luego pulse Aceptar.
b En Windows
®
XP, diríjase al 0ANELÖ DEÖ CONTROL y
elija 3ONIDOÖ YÖ !UDIO . Elija la ficha de !UDIO.En
2EPRODUCCINÖ DELÖ SONIDO cambie el $ISPOSITIVOÖ
PREFERIDO a !UDIOÖ53"Ö del menú desplegable.
•Pulse Aplicar, luego pulse Aceptar.
4 Verifique que no se haya silenciado (Mute) el sonido.
NOTA: Los dispositivos de Audio no funcionan
simultáneamente con la port station y el ordenador huésped.
PRECAUCIÓN: Todas las aplicaciones multimedia de sonido
deben estar completamente apagadas antes de conectar el
puerto de audio de la port station y el puerto de audio del
ordenador huésped.
Cómo conectar un monitor o
una pantalla de cristal líquido
La resolución de todo monitor o pantalla de cristal líquido
conectados al puerto de video de la docking station se
limitará a una resolución máxima de 1280 x 1024, con
color de 16 bits.
Opciones del menú de
video
,ASÖOPCIONESÖDELÖMENÖDEÖVIDEOÖSEÖPUEDENÖVERÖPULSANDOÖELÖ
BOTNÖDERECHOÖDELÖ RATNÖSOBREÖ ELÖ ICONOÖDEÖ DESPLIEGUEÖ DEÖ
Page 49

49
Docking Station portátil con puerto de video de Targus
Targus en la bandeja del sistema, o mediante las
propiedades de visualización de Windows.
La única opción del menú a la que no hay acceso
mediante las propiedades de visualización de Windows
es la opción de pantalla tipo espejo. La misma se debe
activar mediante el icono de despliegue de Targus.
Principal: Está usando un monitor o una pantalla de
cristal líquido (distintos a la pantalla de su ordenador
portátil) como su pantalla principal.
Secundaria: Está usando la pantalla de su ordenador
portátil como su pantalla principal, y el monitor o la pantalla
de cristal como una pantalla secundaria.
Tipo espejo: Está usando la pantalla de su ordenador
portátil como su pantalla principal, y el monitor o la pantalla
de cristal duplica la pantalla de su ordenador portátil.
Apagada: Está usando la pantalla de su ordenador
portátil como su pantalla principal, y el monitor o la pantalla
de cristal están apagados.
Pantalla del
ordenador portátil
Monitor o pantalla de
cristal líquido
secundarios
Principal: Apagado Encendido
Secundaria: Encendido Encendido
Tipo espejo:
Encendido Encendido
Apagado: Encendido Apagado
Page 50

50
Docking Station portátil con puerto de video de Targus
Resolución: El cambio de la resolución del aparato
de Targus sólo afectará al monitor conectado al puerto de
video de la docking station.
NOTA: Algunas pantallas de cristal líquido se optimizan para
una resolución específica. Si la resolución óptima no es de
1280 x 1024, es posible que los resultados no sean los que se
espera obtener.
Cerrar: Retira de la bandeja del sistema el icono del
programa de video de Targus. El icono puede ser vuelto
a colocar desde el menú de inicio o desde el botón de
activación rápida del escritorio.
Modo de inactividad
general
Cuando su ordenador está en modo inactivo, la docking
station también entra en modo inactivo para evitar el
gasto de energía. Al activarse el ordenador, la docking
station se activa automáticamente.
Función Always On de
Targus
Oprima el botón Always On de Targus para permitir que
los puertos USB de color negro sigan suministrando
energía aun cuando el ordenador portátil esté apagado o
desconectado de la docking station. Esto le permite
cambiarle las pilas a cualquier accesorio recargable USB
que tenga conectado.
Page 51

51
Docking Station portátil con puerto de video de Targus
Cómo usar dispositivos
USB que necesiten más
energía
Algunos dispositivos que usan gran cantidad de energía,
como las impresoras y las unidades de memoria ópticas,
deben conectarse a los puertos USB con suministro de
energía. Estos puertos suministran hasta 1000 mA de
energía; el doble de la energía de los puertos USB
comunes.
Limitaciones del producto
Algunos dispositivos se pueden detener temporalmente
cuando se está realizando un intercambio masivo de
datos. Por ejemplo, su ratón puede funcionar más
lentamente cuando se está imprimiendo un trabajo con
gráficos o si hay mucho tráfico en la red.
Le recomendamos que siga estos lineamientos:
• No transfiera al mismo tiempo datos hacia o desde
varios dispositivos de alta velocidad, tales como una
cámara digital o un escáner.
• Si disminuye la velocidad, cierre los demás programas
que usen un dispositivo USB, para mejorar su
desempeño.
Resolución de problemas
El dispositivo no funciona
• Verifique que el dispositivo esté bien conectado al
puerto correcto de la docking station.
• Enchufe el dispositivo en un puerto distinto de la
docking station. Si sigue sin funcionar, verifique el
dispositivo conectándolo directamente a su ordenador.
Page 52

52
Docking Station portátil con puerto de video de Targus
• Verifique haber ejecutado el programa de
configuración o de instalación del dispositivo.
• Verifique que el dispositivo aparezca en el
Administrador de dispositivos. Consulte “Cómo
verificar la instalación de los dispositivos” en la
página 52 para mayor información.
• Desconecte todos los dispositivos de la docking station
y vuélvalos a conectar uno por uno. Verifique que cada
dispositivo funcione antes de conectar el siguiente.
• Cada puerto USB está equipado con un protector de
sobrecorriente. Si un dispositivo USB consume más
energía de la que puede suministrar el puerto USB,
éste se desactivará. Para reactivar el puerto,
desconecte el dispositivo y entre al Administrador de
dispositivos o al mensaje en la bandeja del sistema, y
elija la opción Reposicionar. Ahora puede volver a
enchufar el dispositivo al puerto USB. Si este se vuelve
a desactivar, verifique los requisitos de suministro
eléctrico del dispositivo.
Cómo verificar la instalación de
los dispositivos
Puede ver los dispositivos instalados en la docking
station, en la ventana del Administrador de dispositivos
del menú de Propiedades del sistema.
Pulse el botón derecho del ratón sobre Mi ordenador,
Propiedades, luego pulse la lengüeta Hardware, y luego
el botón de Administrador de dispositivos.
En la ventana del Administrador de dispositivos, expanda
lo siguiente:
• Adaptadores de visualización — Muestra el dispositivo
de acoplamiento Targus USB 2.0 VGA
Page 53

53
Docking Station portátil con puerto de video de Targus
• Dispositivos de interfase humana — Muestra los
teclados y dispositivos apuntadores: Ratones, bolas de
guía y palancas de mando
• Adaptadores para redes — Muestra desde el USB
ADM851X hasta el adaptador Ethernet de alta
velocidad
• Puertos (COM y LPT) — Puertos en serie con sistema
USB [COM x]
• Drivers de sonido, video y juegos — Muestra el
dispositivo USB de audio
• Drivers de Bus serie universal (USB) — Muestra los
demás dispositivos instalados para la docking station y
el replicador genérico.
Cómo verificar la conexión del
módem en serie
Cuando conecte un módem al puerto en serie (RS232),
verifique que el puerto asignado a su módem sea un
puerto USB en serie (COMx), donde x es el número del
puerto COM.
Si el sistema operativo no detecta automáticamente que
su módem está asignado a un USB en serie (COMx),
vuelva a ejecutar el Asistente de hardware e indique
Elegir de la lista, en vez de elegir Autodetección. Luego,
elija USB en serie (COMx) como el puerto COM.
Mensaje de error en su
Asistente digital (PDA)
Si en su Asistente digital aparece el mensaje de error
"Conexión no establecida", verifique que la configuración
del puerto COM de su software HotSync o ActiveSync
coincida con la configuración de la docking station. Lea
“Cómo verificar la instalación de los dispositivos” en la
Page 54

$OCKINGÖ3TATIONÖPORT©TILÖCONÖPUERTOÖDEÖVIDEOÖDEÖ4ARGUS
página 52 para verificar la configuración del puerto COM
en la docking station.
Algunas versiones más antiguas del programa Desktop
de Palm
®
no son compatibles con la conversión del
sistema USB al sistema en serie. Solicite el software
actualizado del vendedor del Asistente digital.
Video
¿Puedo obtener una resolución mayor
en mi monitor?
• No, la resolución se ha fijado en 1280 x 1024, con color
de 16 bits.
¿Las funciones de entrada y salida del
disco, tales como lectura y escritura
extendida a una unidad de disco duro
o de DVD externa pueden degradar el
funcionamiento del video?
• Sí. Puesto que todos los datos deben pasar por la
misma conexión USB, podrá observar algo de
degradación en el funcionamiento del video. El
funcionamiento del video volverá a la normalidad
cuando la función de lectura/escritura del disco
disminuya o se detenga.
Page 55

$OCKINGÖ3TATIONÖPORT©TILÖCONÖPUERTOÖDEÖVIDEOÖDEÖ4ARGUS
Soporte técnico
Si tiene preguntas técnicas, por favor visite:
Internet http://www.targus.com/support
Inglés http://www.targus.com/uk/support.asp
Francés http://www.targus.com/fr/support.asp
Alemán http://www.targus.com/de/support.asp
Español http://www.targus.com/sp/support.asp
Italiano http://www.targus.com/it/support.asp
Nuestro personal experto también puede contestarle sus
preguntas a través de uno de los siguientes números
telefónicos.
Alemania 0211-6579-1151
Austria 01 795 676 42
Bélgica 02-717-2451
Dinamarca 45 0 35-25-87 51
España 91 745 6221
Finlandia 922948016
Francia 0 1-6453-9151
Italia 02-4827-1151
Noruega 022577729
Países Bajos 02 0504 0671
Portugal +351 21 415 4123
Suecia 08-751-4058
Suiza 01-212-0007
El Reino Unido 20-7744-0330
Europa Oriental y otros +31 0 20-5040671
Page 56

$OCKINGÖ3TATIONÖPORT©TILÖCONÖPUERTOÖDEÖVIDEOÖDEÖ4ARGUS
Registro del producto
Targus le recomienda registrar su accesorio Targus
inmediatamente después de adquirirlo. Para registrar su
accesorio Targus, visite: http://www.targus.com/registration.asp
Quizás deba indicar su nombre completo, su dirección de correo
electrónico, su número de teléfono e información de su empresa
(si corresponde).
Garantía
Targus garantiza que este producto no tendrá defectos en los
materiales ni la mano de obra durante dos años. Si dentro de ese
lapso se determina que el accesorio Targus está defectuoso, lo
repararemos o reemplazaremos sin demora. Esta garantía no
cubre daños accidentales, el uso y desgaste natural ni las
pérdidas resultantes o incidentales. Targus no es responsable,
bajo circunstancia alguna, por pérdidas o daños al ordenador ni
por pérdida de programas, registros o datos ni daños a los
mismos, así como tampoco por daños resultantes o incidentales
algunos, incluso si a Targus se le informó de la posibilidad que
existieran. La presente garantía no afecta los derechos que la ley
le otorga.
Conformidad con las normas
Este dispositivo cumple con la Parte 15 de las Normas de FCC.
Su uso está sometido a las dos condiciones siguientes: (1) Este
dispositivo no debe causar interferencia nociva, y (2) este
dispositivo debe aceptar toda interferencia que reciba,
incluyendo aquella que ocasione un funcionamiento indeseado.
Declaración de FCC
Prueba de cumplimiento
Este equipo fue sometido a prueba y se ha determinado que
cumple los límites indicados para un dispositivo digital de Clase
B, en virtud de la Parte 15 de las Normas de FCC. Estos límites
se han impuesto para ofrecer una protección razonable contra la
interferencia nociva en una instalación en el hogar. Este equipo
genera, usa y puede irradiar energía de radiofrecuencia y, si no
se instala y usa de acuerdo a las instrucciones, puede causar
una interferencia nociva a las comunicaciones radiales. Sin
Page 57

$OCKINGÖ3TATIONÖPORT©TILÖCONÖPUERTOÖDEÖVIDEOÖDEÖ4ARGUS
embargo, no se garantiza que en una instalación específica no se
produzca interferencia.
Si este equipo causa interferencia nociva a la recepción de radio
o de televisión, lo que se puede determinar encendiendo y
apagando el equipo, se anima al usuario a que trate de corregir la
interferencia aplicando una o más de las siguientes medidas:
• Reorientar o reubicar la antena receptora
• Aumentar la distancia que separa al equipo del receptor
• Conecte el equipo a un enchufe de circuito diferente a aquel al
que esté conectado el receptor
• Consulte al distribuidor o a un técnico de radio/televisión para
más ayuda.
Declaración de Conformidad
Por medio de la presente Targus declara que al equipo cumple
con los requisitos esenciales y cualesquiera otras disposiciones
aplicables o exigibles de la Directiva 1999/5/CE. Este dispositivo
es de baja potencia. Dispositivo diseñado para uso profesional y
domestico únicamente. Este producto puede utilizarse en
cualquier país de la CE.
Directiva de reciclaje de Targus
Al final de la vida útil de este producto le rogamos lo disponga en
un punto de recogida para reciclaje situado en su país. La política
de reciclaje de Targus está disponible para su consulta en:
www.targus.com/recycling
Los cambios o modificaciones no autorizados por la parte responsable del cumplimiento podrían anular la autoridad del usuario para
utilizar este producto.
Microsoft, Windows y Windows Vista son marcas registradas o marcas comerciales de Microsoft
Corporation en los Estados Unidos y/o en otros países. Todas las marcas comerciales y marcas
registradas son propiedad de sus titulares respectivos. Todos los derechos reservados.
Page 58

58
STATION D'ACCUEIL
MOBILE AVEC
VIDÉO DE TARGUS
Introduction
Nous vous félicitons d'avoir acheté la station d'accueil
mobile avec vidéo de Targus. Ce module d'extension
portable vous permettra de connecter par le biais de la
prise USB jusqu'à quatre périphériques munis d'une
prise USB, un moniteur, une connexion réseau (Ethernet
ou LAN), des HP, un micro et un appareil en série.
La station d'accueil vous permet également de
bénéficier de la technologie Targus Always On,
proposant à la fois la spécification USB pour les
appareils à forte puissance et les ports USB avec la
place nécessaire pour des adaptateurs plus grands.
Targus Always On fournit l'alimentation aux ports USB
même lorsque le portable est éteint, déconnecté de la
station d'accueil ou en mode veille. Ceci permet aux
périphériques qui se chargent par le port USB de garder
la charge en continu.
Caractéristiques
Dissipation de la chaleur par convection
naturelle :
Placez le bord arrière de votre portable sur le support en
caoutchouc de la station d'accueil. La plupart des
ordinateurs portables émettent de la chaleur par le bas,
Page 59

59
Station d'accueil mobile avec vidéo de Targus
et plus l'air a de la place pour circuler, meilleures sont les
conditions pour la dissipation par convection naturelle.
Confort
La plate-forme surélevée procure une position plus
confortable pour les mains et un flux d'air supérieur pour
une meilleure aération.
La station d'accueil possède les ports
suivants :
• VGA à 15 broches (pour écrans 1280 x 1024 couleurs
16 bits)
• Deux audio à 3,5 mm : (1) sortie stéréo et (1)
microphone incorporé
• Série RS232
• Ethernet 10/100 RJ-45
• Deux USB 2.0 (Blancs)
• Deux ports d'alimentation USB (Noirs) - Fournissant
jusqu'à 1 ampère
Contenu du boîtier :
En plus du présent mode d'emploi, le boîtier contient :
• Une station d'accueil mobile avec vidéo de Targus
• Un câble haute vitesse entrant USB 2.0
• Le CD d'installation du logiciel
• Un adaptateur secteur (nécessaire)
Configuration requise :
Matériel
• Ordinateur avec processeur Intel® Pentium® ou
équivalent
• Lecteur de CD-ROM
• Un port USB version 2.0
Page 60

3TATIONÖDfACCUEILÖMOBILEÖAVECÖVID¢OÖDEÖ4ARGUS
• Une source d'alimentation secteur (adaptateur secteur
nécessaire)
NOTE : lorsque la station d'accueil est connectée à votre
ordinateur via un port USB version 1.1, le niveau de ses
performances sera moindre que son potentiel optimal, et le
port vidéo ne fonctionnera pas c orrectement. Pour de
meilleurs résultats, connectez-la à un port USB version 2.0.
Système d'exploitation
• Windows® 2000 - Service Pack 2 ou supérieur
• Windows
®
XP - Service Pack 1 ou supérieur
NOTE : pour télécharger les derniers Service packs, veuillez
consulter le site web du fabricant de votre ordinateur ou le
centre de téléchargement de Microsoft :
http://support.microsoft.com/
default.aspx?scid=fh%3BEN-US%3Bsp
Installation de l'appareil et
des pilotes
Pour utiliser la station d'accueil de Targus , vous devez
d'abord installer le pilote sur votre ordinateur. Connectez
la station d'accueil à votre ordinateur et Windows
procédera à l'installation des pilotes pour chaque port.
AVERTISSEMENT : vous devez installer la station d'accueil
AVANT de connecter celle-ci à votre ordinateur, sinon, elle ne
fonctionnera pas correctement.
• Windows Vista
TM
Page 61

61
Station d'accueil mobile avec vidéo de Targus
Installation du pilote de la
station d'accueil
L'installation du pilote de la station d'accueil permettra à
votre système d'exploitation de reconnaître celle-ci ainsi
que ses ports une fois la connexion effective.
1 Mettez l'ordinateur en marche.
2 Insérez le CD-ROM d'installation dans le lecteur CD
de l'ordinateur.
3 Si l'installation ne commence pas automatiquement,
cliquez sur Démarrer, Exécuter, puis tapez
« D:\Setup.exe » (si D: désigne votre lecteur de CD),
puis cliquez sur OK.
4 Suivez les instructions qui s'affichent à l'écran pour
terminer l'installation.
5 Cliquez sur Terminer et redémarrez votre ordinateur.
Connexion de la station
d'accueil sur votre ordinateur
Après avoir installé le logiciel de la station d'accueil, vous
êtes prêt à connecter celle-ci à votre ordinateur. Pour
cela :
1 Raccordez l'adaptateur secteur à la prise secteur de
la station d'accueil.
2 Raccordez une extrémité du câble USB à la station
d'accueil et l'autre à un port USB 2.0 disponible de
votre ordinateur.
NOTES : la station d'accueil ne fonctionnera pas si
l'adaptateur secteur n'est pas raccordé à la prise secteur.
Ne connectez aucun périphérique à la station d'accueil tant
que vous n'avez pas terminé l'installation.
Page 62

62
Station d'accueil mobile avec vidéo de Targus
Connexion des pilotes des
périphériques par défaut
Une fois que la station d'accueil est connectée à votre
ordinateur, les pilotes des périphériques par défaut pour
chacun des ports commencent à s'installer.
Certains périphériques exigeront l'installation de pilotes.
Pour installer les pilotes :
1 Sélectionnez l'option Installer le logiciel automatique-
ment (recommandé) et cliquez sur Suivant.
Le programme de détection automatique procédera à
l'installation des pilotes des périphériques.
L'assistant vous préviendra de l'avancée de la
procédure.
2 À la fin, cliquez sur Terminer et recommencez aussi
souvent que nécessaire pour chaque périphérique.
3 Redémarrez votre ordinateur.
Indicateur d'état par diodes
électroluminescentes
Lorsque l'ensemble des pilotes de périphériques sont
installés, les diodes électroluminescentes des prises
USB situées à l'arrière de la station d'accueil s'allument,
et vous pouvez alors connecter les périphériques à la
station.
• La lumière verte (émetteur) s'allume lorsque la station
est connectée à un réseau et la rouge (récepteur)
clignote lorsque des données sont transmises depuis
le réseau ou vers lui.
NOTE : la station d'accueil supporte le branchement à chaud
du câble réseau.
Page 63

63
Station d'accueil mobile avec vidéo de Targus
• Les diodes des prises USB s'allument lorsque la
station d'accueil est connectée à votre ordinateur.
• La lumière verte de l'indicateur Always On s'allume
lorsque le bouton est relâché.
Ports USB
Port série
Entrée Sortie
Audio Audio
VGA
Always On
Adaptateur
Réseau
Connexion
USB vers PC
secteur
Support pour le portable
Support pour le portable
Ports de la station d'accueil
Connexion de nouveaux
périphériques
Afin d'éviter tout dommage éventuel lorsque vous
connectez un nouveau périphérique, ne forcez pas le
connecteur de câble dans le port de la station d'accueil.
Si le connecteur de câble ne s'ajuste pas en douceur,
tournez le connecteur et essayez à nouveau.
Connexion d'une souris de port
série
Pour connecter une souris de port série, branchez le
connecteur de câble au port série de la station d'accueil.
Connexion et configuration d'un
modem de port série
Pour connecter un modem de port série :
Page 64

64
Station d'accueil mobile avec vidéo de Targus
1 Branchez le connecteur de câble au port série de la
station d'accueil.
2 Installez le pilote du modem en suivant les
instructions qui vous ont été fournies avec cet
appareil.
3 Lorsque l'ordinateur vous demande de sélectionner
un port, choisissez le port USB en série (COMx), x
représentant le numéro de port assigné par votre
système d'exploitation.
Connexion d'un assistant
numérique
1 Branchez le connecteur de câble au port série de la
station d'accueil.
2 Vérifiez que les paramètres du port COM
correspondent aux paramètres de la station d'accueil,
soit dans le logiciel HotSync
®
ou dans ActiveSync®.
Pour vérifier les paramètres du port COM sur la
station d'accueil, veuillez consulter “Vérifier que les
périphériques sont bien installés” à la page 70.
Pour vérifier les paramètres du port COM de votre
assistant numérique, référez-vous à la documentation
qui est fournie avec lui.
Connexion à un réseau local
d'entreprise
Pour connecter un câble Ethernet avec une connexion
RJ-45, branchez le connecteur de câble au port Ethernet
ou réseau de la station d'accueil. En fonction du type de
réseau que vous utilisez, il se peut que vous deviez
procéder à d'autres manipulations. Contactez votre
Page 65

65
Station d'accueil mobile avec vidéo de Targus
administrateur de réseau pour obtenir des instructions
détaillées.
Connexion d'un périphérique
USB
Pour connecter un périphérique USB, branchez-le dans
le port USB de la station d'accueil et suivez les
procédures fournies avec l'appareil en question.
L'ensemble des quatre ports USB répondent aux normes
USB haute-vitesse en fournissant un débit de 480
mégabits par seconde et une puissance de 500
milliampères. Cependant, les deux ports USB noirs
possèdent deux caractéristiques spécifiques. Voir
“Targus Always On” à la page 68 pour davantage de
détails.
Les ports USB blancs sont des ports à haute-vitesse qui
fournissent une puissance de 500 milliampères. Les
ports USB noirs sont des ports à haute-vitesse qui
fournissent une puissance allant jusqu'à 1 ampère.
Connexion et configuration d'un
périphérique audio
1 Branchez les haut-parleurs ou le casque dans le port
vert de 3,5 mm Audio Out sur la station d'accueil.
2 Pour brancher un micro, connectez-le au port mono
Audio In.
3 Pour activer les haut-parleurs ou le casque, vous
devez d'abord choisir l'option USB Audio dans le
paramétrage des propriétés.
a Pour Windows
®
2000, cliquez sur Démarrer,
Paramètres, Panneau de Configuration, puis
Page 66

3TATIONÖDfACCUEILÖMOBILEÖAVECÖVID¢OÖDEÖ4ARGUS
cliquez sur l'icône du dossier 3ONSÖ ETÖ 0¢RIPH
¢RIQUESÖ AUDIO. Sélectionnez l'onglet !UDIO. Dans
,ECTUREÖAUDIO changez 5NIT¢ÖPARÖD¢FAUT par 53"
!UDIO dans la liste déroulante.
› Cliquez sur Appliquer, puis sur OK.
b Sous Windows
®
XP, allez dans le 0ANNEAUÖ DEÖ
#ONFIGURATION et choisissez 3ONSÖETÖ0¢RIPH¢RIQUESÖ
AUDIO. Sélectionnez l'onglet !UDIO. Dans ,ECTUREÖ
AUDIO changez 5NIT¢Ö PARÖ D¢FAUT par 53"Ö !UDIO
dans la liste déroulante.
› Cliquez sur Appliquer, puis sur OK.
4 Assurez-vous que le volume n'est pas sur MUET.
REMARQUE : Les appareils audio ne pourront pas être utilisés
simultanément sur la station d’accueil et le ser veur.
ATTENTION : Toutes les applications audio et multimédia
doivent être fermées avant de passer du périphérique de
sortie audio de la station d’accueil au serveur.
Connexion d'un moniteur ou
d'un écran ACL
Les moniteurs ou écrans ACL connectés au port vidéo de
la station d'accueil verront leur résolution limitée à 1280 x
1024, couleurs 16 bits.
Page 67

67
Station d'accueil mobile avec vidéo de Targus
Options du menu vidéo
Il est possible d'avoir accès aux options du menu vidéo
avec un clic droit sur l'icône Targus figurant sur la barre
d'état système, ou en ouvrant les Propriétés d'affichage
Windows.
Mirror est la seule option du menu qui ne soit pas
accessible dans les Propriétés d'affichage Windows. En
revanche, vous pouvez y accéder par l'icône Targus.
Primary : vous utilisez un moniteur ou un écran ACL (pas
l'écran de votre portable) comme écran principal.
Extended : vous utilisez l'écran de votre portable comme
afficheur principal et votre moniteur ou écran ACL comme
écran secondaire.
Mirror : vous utilisez l'écran de votre portable comme
afficheur principal et votre moniteur ou écran ACL reproduit
l'écran de celui-ci.
Off : vous utilisez l'écran de votre portable comme afficheur
principal et votre moniteur ou écran ACL est éteint.
Écran du portable
Moniteur ou ACL
secondaire
Primary : Arrêt Marche
Extended : Marche Marche
Mirror : Marche Marche
Off : Marche Arrêt
Page 68

68
Station d'accueil mobile avec vidéo de Targus
Résolution : modifier la résolution du programme
Targus n'affectera que le moniteur connecté au port vidéo
de la station d'accueil.
NOTE : certains écrans ACL ont été optimisés pour une
résolution spécifique. Si la résolution optimale n'est pas 1280
x 1024, il se peut que les résultats ne soient pas ceux désirés.
Close : retire l'icône Targus de la barre d'état système.
L'icône peut être replacée à partir du menu Démarrer ou
avec le raccourci sur votre bureau.
Mode veille
Lorsque votre ordinateur est en mode veille, la station
d'accueil se met également en mode veille afin d'éviter
de consommer de l'électricité inutilement. Lorsque votre
ordinateur revient en mode actif, la station d'accueil fait
de même.
Targus Always On
Pressez le bouton Targus Always On pour permettre aux
ports USB noirs de continuer à produire une
alimentation, même lorsque l'ordinateur portable est
éteint ou déconnecté de la station d'accueil. Cela vous
permettra de recharger les batteries de tous les
périphériques USB rechargeables qui sont connectés.
Utilisation de périphériques
USB qui nécessitent plus
d'alimentation
Certains périphériques qui ont besoin de beaucoup de
puissance électrique, comme les imprimantes ou les
Page 69

69
Station d'accueil mobile avec vidéo de Targus
lecteurs optiques, doivent être connectés aux ports USB.
Ces ports peuvent fournir jusqu'à 1000 milliampères, soit
le double de la puissance des ports USB classiques.
Limites du produit
Certains périphériques peuvent s'arrêter temporairement
lorsqu'un important transfert de données s'effectue. Par
exemple, votre souris peut réagir plus lentement
lorsqu'une impression graphique est en cours ou lorsque
le trafic sur le réseau est intense.
Nous vous recommandons de suivre les procédures
suivantes :
• Ne lancez pas en même temps des transferts de
données à partir de plusieurs périphériques hautevitesse, ou vers ceux-ci, comme un appareil-photo
numérique ou un scanner.
• Si vous constatez une baisse de la vitesse, fermez
d'autres programmes qui utilisent un périphérique USB
afin d'améliorer la performance du périphérique en
question.
Dépannage
Le périphérique ne marche pas
• Assurez-vous qu'il est bien inséré dans le bon port de
la station d'accueil.
• Connectez le périphérique à un autre port de la station
d'accueil. S'il ne fonctionne toujours pas, testez le
périphérique en le connectant directement à votre
ordinateur.
• Vérifiez que vous avez bien suivi la procédure
d'installation pour ce périphérique.
Page 70

70
Station d'accueil mobile avec vidéo de Targus
• Assurez-vous que ce périphérique apparaît bien dans
le Gestionnaire de périphériques. Pour plus
d'informations, veuillez consulter “Vérifier que les
périphériques sont bien installés” à la page 70.
• Débranchez l'ensemble des périphériques de la station
d'accueil, puis rebranchez-les un à la fois. Vérifiez que
chaque périphérique fonctionne avant de brancher le
suivant.
• Chaque port USB est équipé d'un dispositif de
protection contre la surtension. Si un port USB
consomme plus de courant que ce port peut produire, il
se fermera. Pour le réactiver, débranchez le
périphérique et allez dans le Gestionnaire de
périphériques ou dans les options de la barre d'état
système et choisissez Reset. Vous pouvez rebrancher
le périphérique dans le port USB. Si une coupure se
reproduit, vérifiez la puissance nécessaire du
périphérique.
Vérifier que les périphériques
sont bien installés
Vous pouvez voir les périphériques installés sur la station
d'accueil à partir de la fenêtre du Gestionnaire de
périphériques dans les Propriétés système.
Faites un clic droit sur Mon ordinateur, Propriétés
système, puis cliquez sur l'onglet Matériel, puis sur le
bouton Gestionnaire de périphériques.
À partir de la fenêtre du gestionnaire de périphériques,
affichez les informations suivantes :
• Adaptateurs d’affichage — L'ordinateur affiche
Périphérique Targus USB 2.0 VGA
• Périphériques interface humaine — L'ordinateur affiche
les claviers et les dispositif de pointage : souris, boules
de commande et manettes de jeu
Page 71

71
Station d'accueil mobile avec vidéo de Targus
• Adaptateurs réseau — L'ordinateur affiche ADM851X
USB pour adaptateur ethernet rapide
• Ports (COM et LPT) — Port série sur USB [COM x]
• Contrôleurs de son, de la vidéo et de jeux —
L'ordinateur affiche le périphérique audio USB
• Contrôleurs de bus — L'ordinateur affiche les autres
périphériques installés sur la station d'accueil et le
concentrateur géréral.
Vérifier une connexion de
modem de port série
Lorsque vous branchez un modem de port série au port
série (RS232), vérifiez que le port assigné à votre
modem est bien le port série USB, (COMx), x
représentant le numéro du port COM.
Si le système d'exploitation ne détecte pas
automatiquement l'affectation de votre modem à la prise
série USB (COMx), utilisez à nouveau l'assistant et
choisissez Sélectionner dans la liste à la place de
Détection automatique. Puis, choisissez Port USB série
(COMx) comme port COM.
Message d'erreur sur votre
assistant numérique
Si le message d'erreur « Connexion non établie »
apparaît sur votre assistant numérique, vérifiez que les
paramètres du port COM du logiciel HotSync ou
ActiveSync correspondent aux paramètres de la station
d'accueil. Voir le paragraphe “Vérifier que les
périphériques sont bien installés” à la page 70 afin de
vérifier les paramètres du port COM sur la station
d'accueil.
Page 72

3TATIONÖDfACCUEILÖMOBILEÖAVECÖVID¢OÖDEÖ4ARGUS
Certaines versions anciennes du logiciel Palm®Desktop
ne sont pas compatibles avec le port USB pour la
conversion en série. Veuillez contacter le revendeur de
votre assistant numérique pour vous procurer les
dernières mises à jour.
Vidéo
Puis-je obtenir une meilleure résolution
sur mon moniteur ?
• Non, la résolution est paramétrée à 1280 x 1024,
couleurs 16 bits.
Les fonctions disques E/S, telles que la
lecture ou l'écriture extensives vers un
disque dur ou un DVD externe peuventelles dégrader les fonctionnalités
vidéo ?
• Oui. Comme l'ensemble des données doivent passer
par une connexion USB unique, il se peut que vous
constatiez des dégradations dans vos performances
vidéo. Celles-ci reviendront lorsque la lecture ou
l'écriture du disque diminuera ou s'arrêtera.
Page 73

3TATIONÖDfACCUEILÖMOBILEÖAVECÖVID¢OÖDEÖ4ARGUS
Support technique
Pour les questions techniques, merci de visiter :
Internet http://www.targus.com/support
Anglais http://www.targus.com/uk/support.asp
Français http://www.targus.com/fr/support.asp
Allemand http://www.targus.com/de/support.asp
Espagnol http://www.targus.com/sp/support.asp
Italien http://www.targus.com/it/support.asp
Nos employés qualifiés sont également disponibles aux
numéros de téléphone ci-dessous pour répondre à vos
questions.
l'Autriche 01 795 676 42
Allemagne 0211-6579-1151
Belgique 02-717-2451
Danemark 45 0 35-25-87 51
Espagne 91-745-6221
Finlande 922948016
France 01-6453-9151
Italie 02-4827-1151
Hollandes 02 0504 0671
Norvège 022577729
Le Portugal +351 21 415 4123
Royaume-Uni 020-7744-0330
Suède 08-751-4058
Suisse 01-212-0007
Europe de l'Est et autres pays +31 0 20-05040671
Page 74

3TATIONÖDfACCUEILÖMOBILEÖAVECÖVID¢OÖDEÖ4ARGUS
Enregistrement du produit
Targus vous conseille vivement d'enregistrer votre accessoire
Targus dans les plus brefs délais après son achat. Pour
l'enregistrer connectez-vous à :
http://www.targus.com/registration.asp
Vous serez invité à fournir votre nom complet, votre adresse de
courriel et des renseignements sur votre entreprise (le cas
échéant).
Garantie
Targus garantit ce produit contre tout défaut de matériel ou de
fabrication pour une durée de deux ans. Si votre accessoire
Targus s'avère défectueux sous cette garantie, nous veillerons à
le remplacer ou à le réparer au plus vite. Cette garantie ne couvre
pas les dommages résultant d'accidents, l'usure normale ou les
pertes consécutives ou accessoires. En aucun cas, Targus ne
pourra être tenu responsable de la perte matérielle ou de
l'endommagement d'un ordinateur, ni de la perte de programmes,
d'enregistrements ou de données ou de leur endommagement, ni
de tout autre dommage indirect ou accidentel, même si Targus a
été préalablement informé de cette possibilité. Cette garantie n'a
aucun effet sur vos droits statutaires.
Respect de la réglementation
Cet appareil est conforme à la section 15 des règlements de la
FCC (Federal Communication Commission). Son utilisation est
soumise aux deux conditions suivantes : 1) Cet appareil ne peut
provoquer de brouillage préjudiciable. 2) Cet appareil doit
absorber toute interférence réceptionnée, même si cela provoque
des effets indésirables sur son fonctionnement.
Déclaration de la FCC
Te st é e t co nfo rm e
Cet appareil a été testé et déclaré conforme aux limites des
appareils numériques de Classe B, selon la section 15 des
règlements de la FCC (Federal Communication Commission).
Ces limites sont conçues pour assurer une protection raisonnable
contre un brouillage préjudiciable lorsque l'appareil est utilisé
Page 75

3TATIONÖDfACCUEILÖMOBILEÖAVECÖVID¢OÖDEÖ4ARGUS
dans un milieu résidentiel. L'appareil génère, utilise et peut
diffuser de l'énergie sur les fréquences radio et, s'il n'est pas
installé et utilisé conformément au mode d'emploi, il peut brouiller
les communications radio. Il n'y a aucune garantie qu'un
brouillage ne se produira pas dans un milieu particulier.
Si cet appareil brouille les communications radio ou télévision,
comme cela peut être confirmé en éteignant puis en allumant
l'appareil, l'utilisateur peut tenter de corriger toute interférence en
essayant une ou plusieurs des méthodes suivantes :
• Réorienter l'antenne réceptrice ou la placer à un autre endroit;
• Éloigner davantage l'appareil du récepteur;
• Brancher l'appareil sur une autre prise de courant ou un circuit
électrique différent de celui auquel le récepteur est connecté;
• Pour toute aide, consulter le distributeur ou un technicien
expérimenté radio/TV.
Conformément à la directive
Cet appareil se situe au-dessous de la classification Class 1
conformément à la R&TTE Directive (99/5/EC). Cet appareil
fonctionne en faible puissance. L'appareil est prévu pour un
usage au bureau ou à la maison. Cet accessoire peut être utilisé
dans tous les pays européens.
Politique de recyclage TARGUS
Lorsque ces produits ne sont plus utilisables, merci de les
apporter à un centre de recyclage approprié dans votre pays. La
politique de recyclage TARGUS est consultable à l'adresse
www.targus.com/recycling
Toute modification non autorisée par les autorités responsables de
la conformité peut entraîner la révocation du droit d'utilisation de ce
produit.
Microsoft, Windows et Windows Vista sont des marques déposées ou commerciales de Microsoft
Corporation aux États-Unis et/ou dans d'autres pays. Toutes les marques commerciales et
déposées sont les propriétés de leurs détenteurs respectifs. Tous droits réservés.
Page 76

76
DOCKING STATION
PORTATILE TARGUS
CON VIDEO
Introduzione
Congratulazioni per aver acquistato la Docking Station
Portatile Targus con Video. Questo modulo di
espansione portatile consente di collegare tramite
un'unica connessione USB fino a 4 dispositivi USB, il
monitor, la connessione di rete (Ethernet/LAN), gli
altoparlanti, il microfono ed un dispositivo seriale.
Inoltre, la docking station offre la tecnologia Targus
Always On, la porta di alimentazione Targus che fornisce
il doppio delle specifiche USB per dispositivi ad alta
potenza, e porte USB che sono situate a distanza per
adattatori piu' grandi. Targus Always ON alimenta le
porte USB anche quando il notebook e' spento, e'
scollegato dalla docking station o si trova in stato di
ibernazione o di attesa. Questo consente ai dispositivi
USB che si caricano tramite la porta USB di mantenersi
sotto carica in qualunque momento.
Caratteristiche
Dissipazione del calore per convezione
naturale:
Collocare il margine posteriore del vostro notebook sui
cuscinetti di gomma della Docking Station. La maggior
parte dei notebooks dissipano il calore dal di sotto e piu'
aria riuscira' a passare dal di sotto, migliore e' la
Page 77

77
Docking Station Portatile Targus con Video
possibilita' che il calore si dissipera' per convezione
naturale.
Comfort
La piattaforma elevata offre una posizione piu' comoda
per le mani e fa aumentare il passaggio dell'aria per
consentire un miglior raffreddamento.
La docking station fornisce le seguenti
porte:
• VGA 15-pin (Supporta 1280 x 1024 colore 16 bit )
• Due Audio 3.5 mm: (1) stereo out e (1) microfono in
• Seriale RS232
• Ethernet RJ-45 10/100
• Due USB 2.0 (Bianche)
• Due porte di alimentazione USB (Nere) - Forniscono
fino ad un massimo di 1Amp
Contenuto della confezione
In aggiunta a questo manuale dell'utente, la confezione
contiene:
• Docking Station Portatile Targus con Video
• Cavo upstream USB 2.0 ad alta velocita'
• CD con il software del driver
• Adattatore AC (necessario)
Requisiti di sistema
Hardware
• PC con processore Intel® Pentium® o equivalente
• CD-ROM drive
• Porta USB versione 2.0
• Fonte di alimentazione AC (adattatore AC necessario)
Page 78

$OCKINGÖ3TATIONÖ0ORTATILEÖ4ARGUSÖCONÖ6IDEO
NOTA: Quando e' collegata ad una porta USB versione 1.1 del
computer, il livello di prestazione della docking station sara'
meno che ottimale e la porta video non funzionera'
correttamente. Per ottenere un migliore risultato, collegarla ad
una porta USB version 2.0.
Sistema operativo
• Windows® 2000 - Service Pack 2 o superiore
• Windows
®
XP - Service Pack 1 o superiore
NOTA: Per scaricare i service packs piu' recenti, si prega di
visitare il sito web della casa produttrice del vostro computer
od il centro di download Microsoft:
http://support.microsoft.com/
default.aspx?scid=fh%3BEN-US%3Bsp
Installazione del
sistema e dei drivers
Per usare la docking station Targus, si deve anzitutto
installare il driver sul computer. Connettere la docking
station al computer e Windows plug-and-play installera' i
drivers dell'hardware per ciascuna porta.
AVVERTIMENTO: Si deve installare il software della docking
station PRIMA di connetterla al computer. Altrimenti, la
docking station non funzionerà correttamente.
Installazione del driver della
docking station
L'installazione del driver della docking station consente al
vostro sistema operativo di riconoscere la docking station
e le sue porte non appena avviene la connessione.
1 Accendere il computer.
• Windows Vista
TM
Page 79

79
Docking Station Portatile Targus con Video
2 Inserire il CD con il software del driver nel CD-ROM
drive del computer.
3 Se la procedura non inizia automaticamente, cliccare
su Start, Esegui, poi inserire D:\Setup.exe (in cui D: è
il percorso al CD-ROM drive), per poi cliccare su OK.
4 Seguire le istruzioni che compaiono sullo schermo per
completare l'installazione.
5 Cliccare su Finish e riaccendere il computer appena
compare la richiesta.
Connettere la docking station al
vostro computer
Dopo aver installato il software della docking station,
sarete pronti a connettere la docking station al vostro
computer. Per fare questo:
1 Connettere l'adattatore AC, di dotazione, alla presa
AC della docking station.
2 Connettere un'estremita' del cavo USB alla docking
station e l'altra in una delle porte USB 2.0 disponibili
sul computer.
NOTE: La docking station non funziona correttamente quando
l'adattatore AC non e' inserito in una presa AC.
Non connettere nessun dispositivo alla docking station fin
quando l'installazione non sia completa.
Installazione dei drivers di
default del dispositivo
Appena la docking station e' connessa al computer, i
drivers di default iniziano l'installazione di ciascuna delle
porte.
Page 80

80
Docking Station Portatile Targus con Video
Alcuni dispositivi di hardware potrebbero chiedervi di
installare i drivers.
Per installare i drivers:
1 Selezionare Installare il software automaticamente
(scelta consigliata) e cliccare su Successiva.
Il programma "Installazione guidata nuovo hardware"
inizia ad installare i drivers dell'hardware.
Sullo schermo appare "Completamento
dell'installazione guidata nuovo hardware".
2 Cliccare su Finish e ripetere la procedura per
ciascuno dei dispositivi desiderati.
3 Riaccendere il computer.
Spie LED indicatrici
Non appena tutti i drivers del dispositivo sono stati
installati, le spie USB LED indicatrici che si trovano sul
retro della docking station si illuminano e a quel punto
potete connettere i dispositivi alla docking station.
• La spia verde Tx si illumina quando si e' connessi ad
una rete e la spia gialla Rx lampeggia quando vengono
ricevuti o trasmessi dei dati dalla rete.
NOTA: La docking station supporta l'hot swapping del cavo di
rete.
• Le luci dell'USB si illuminano quando la docking station
e' collegata al computer.
•Il LED Always ON si illumina di verde quando si preme
il tasto.
Page 81

Porte USB
Seriali
Audio Audio
In Out
VGA
Always On
Adattatore
Network
Connessione
Cuscinetto di supporto per il notebook
dall'usb al pc
AC
81
Docking Station Portatile Targus con Video
porte della docking station
Connessione di nuovi
dispositivi
Per evitare eventuali danni quando si connette un nuovo
dispositivo, non forzare il connettore del cavo nella porta
della docking station. Se il connettore del cavo non si
inserisce facilmente, capovolgere il connettore e
riprovare ad inserirlo.
Connessione di un mouse
seriale
Per connettere un mouse seriale, inserire il connettore
del cavo alla porta seriale della docking station.
Connessione e configurazione di
un modem seriale
Per connettere un modem seriale:
1 Inserire il connettore del cavo alla porta seriale della
docking station.
2 Installare il driver del software del modem seguendo
le istruzioni che accompagnano il dispositivo.
Page 82

82
Docking Station Portatile Targus con Video
3 Non appena compare la richiesta per selezionare la
porta, scegliere l'USB Seriale (COMx), in cui x e' il
numero della porta COM assegnato dal sistema
operativo.
Connessione di un PDA
1 Inserire il connettore del cavo alla porta seriale della
docking station.
2 Verificare che l'impostazione della porta COM, o nel
software HotSync
®
o in quello ActiveSync®,
corrisponda all'impostazione della docking station.
Per verificare l'impostazione della porta COM della
docking station, consultare “Verificare che i dispositivi
siano installati” a pagina 88.
Per verificare l'impostazione della porta COM sul
PDA, consultare la documentazione che
l'accompagna.
Connessione ad una rete locale
(LAN)
Per connettere un cavo ethernet con un RJ-45, inserire il
connettore del cavo alla porta dell'ethernet/network della
docking station. Le ulteriori procedure per connettere ad
una rete effettiva dipendono dal tipo di rete che state
usando. Contattare l'amministratore della vostra rete per
ottenere istruzioni dettagliate.
Connessione di un dispositivo
USB
Per connettere un dispositivo USB, inseritelo in una porta
USB della docking station e seguite le istruzioni in
dotazione a quel dispositivo.
Page 83

83
Docking Station Portatile Targus con Video
Tutte e quattro le porte USB soddisfano i requisiti USB ad
alta velocita' fornendo una velocita' di trasferimento a
480Mbps e 500mA di potenza. Tuttavia, le due porte nere
USB presentano due caratteristiche uniche. Vedere
“Targus Always On” a pagina 86.
Le porte bianche USB sono porte ad alta velocita' che
forniscono i 500mA standard di potenza. Le porte di
alimentazione nere USB sono porte ad alta velocita' che
forniscono fino ad un massimo di 1Amp.
Connessione e configurazione
di un dispositivo audio
1 Inserire le cuffie o gli altoparlanti nella porta verde
Audio Out 3.5mm della docking station.
2 Per collegare un microfono, inserirlo nella porta mono
Audio In.
3 Per attivare le cuffie o gli altoparlanti, dovete anzitutto
scegliere l'audio USB nelle impostazioni delle
proprieta'.
a Per Windows
®
2000, cliccare su Start, Impostazi-
oni, Pannello di controllo, e quindi aprire la cartella
Suoni e Multimedia. Selezionare la scheda Audio.
Sotto Riproduzione del suono, cambiare il Dispositivo preferito a Audio USB dal menu' a discesa.
•Cliccare su Applica, quindi su OK.
b Per Windows
®
XP, andare sul Pannello di controllo
e scegliere Suono e Audio. Selezionare la scheda
Audio. Sotto Riproduzione del suono, cambiare il
Dispositivo preferito a Audio USB dal menu' a
discesa.
•Cliccare su Applica, quindi su OK.
Page 84

$OCKINGÖ3TATIONÖ0ORTATILEÖ4ARGUSÖCONÖ6IDEO
4 Assicuratevi che il volume non sia sull'opzione MUTO.
NOTA: Tutti i dispositivi audio non funzionano
simultaneamente nella port station e nel computer.
ATTENZIONE: Tutte I programmi audio e multimedia devono
essere c hius i prima di effettuare lo scambio tra l’uscita audio
del port station e l’uscita audio del computer.
Connessione di un monitor o di
un LCD
I monitor o gli LCD collegati alla porta video della docking
station saranno limitati ad una risoluzione massima di
1280 x 1024, colore 16-bit.
Opzioni del menu'
video
3IÖPUOfÖACCEDEREÖALLEÖOPZIONIÖDELÖMENUfÖVIDEOÖCLICCANDOÖCONÖ
ILÖ TASTOÖ DESTROÖ DELÖ MOUSEÖ SULLfICONAÖ $ISPLAYÖ 4ARGUSÖ NELLAÖ
SYSTEMÖTRAYÖOÖTRAMITEÖLEÖ7INDOWSÖ$ISPLAYÖ0ROPERTIES
L'unica opzione del menu' che non e' accessibile tramite
Windows Display Properties e' Mirror. A questa bisogna
arrivare tramite l'icona Display Targus.
Primario: 3TATEÖUSANDOÖUNÖMONITORÖODÖUNÖ,#$ÖNONÖLOÖ
SCHERMOÖDELÖVOSTROÖNOTEBOOKÖCOMEÖSCHERMOÖPRIMARIO
Esteso: 3TATEÖUSANDOÖLOÖSCHERMOÖDELÖVOSTROÖNOTEBOOKÖ
COMEÖSCHERMOÖPRIMARIOÖEÖILÖMONITORÖOÖLf,#$ÖCOMEÖSCHERMOÖ
SECONDARIO
Mirror: 3TATEÖ USANDOÖ LOÖ SCHERMOÖ DELÖ VOSTROÖ NOTEBOOKÖ
COMEÖ SCHERMOÖ PRIMARIOÖ EÖ ILÖ MONITORÖ OÖ Lf,#$Ö REPLICANOÖ LOÖ
SCHERMOÖDELÖNOTEBOOK
Page 85

85
Docking Station Portatile Targus con Video
Off: State usando lo schermo del vostro notebook come
schermo primario e il monitor o l'LCD sono spenti.
Schermo del
notebook
Monitor o LCD secondario
Primario: Off On
Esteso: On On
Mirror: On On
Off: On Off
Risoluzione: Quando si cambia la risoluzione
dell'utilita' Targus vi sara' un impatto solo sul monitor
collegato alla porta video della docking station.
NOTA: Alcuni LCD sono stati ottimizati per una risoluzione
specifica. Se la risoluzione ottimale non e' 1280 x 1024, i
risultati potrebbero non essere quelli desiderati.
Close: Rimuove l'icona dell'utilita' video Targus dalla
system tray. L'icona puo' essere sostituita dallo Start
Menu o dalla scorciatoia sul vostro desktop.
Modalita' Globale
Suspend
Quando il computer is trova in modalita' suspend, anche
la docking station entra in modalita' suspend per evitare
consumi d'energia. Quando il computer si sveglia, la
docking station si sveglia automaticamente.
Page 86

86
Docking Station Portatile Targus con Video
Targus Always On
Premere il tasto Targus Always On per attivare le porte
USB nere per continuare l'alimentazione anche quando il
notebook e' spento o e' scollegato dalla docking station.
Questo consente di caricare le batterie degli accessori
USB ricaricabili che avete collegato.
Utilizzo di dispositivi
USB che richiedono piu'
potenza
Alcuni dispositivi, che usano un'elevata quantita' di
potenza, come per esempio stampanti e lettori ottici,
dovrebbero essere inseriti nelle porte di alimentazione
USB. Queste porte forniscono fino ad un massimo di
1000mA di potenza - il doppio rispetto alle porte USB
standard.
Limiti del prodotto
Alcuni dispositivi potrebbero temporaneamente bloccarsi
quando avviene un trasferimento imponente di dati. Ad
esempio, il mouse potrebbe funzionare lentamente
quando e' in stampa un documento con figure o quando
vi e' un grosso traffico di rete.
Vi raccomandiamo di seguire queste istruzioni:
• Non ricevere o trasferire contemporaneamente dati da
multipli dispositivi ad alta velocita', come per esempio
una macchina fotografica digitale od uno scanner.
Page 87

87
Docking Station Portatile Targus con Video
• Se avviene un rallentamento della velocita', chiudere
gli altri programmi che usano un dispositivo USB allo
scopo di migliorare la prestazione del dispositivo.
Risoluzione dei
problemi
Il dispositivo non funziona
• Assicuratevi che il dispositivo sia saldamente inserito
nella porta giusta della docking station.
• Inserire il dispositivo in un'altra porta della docking
station. Se continua a non funzionare, testare il
dispositivo collegandolo direttamente al computer.
• Accertarsi di avere eseguito il setup o l'installazione del
programma per il dispositivo.
• Accertarsi che il dispositivo compaia nel Device
Manager. Per ulteriori informazioni consultare
“Verificare che i dispositivi siano installati” a pagina 88.
• Scollegare tutti i dispositivi dalla docking station e
ricollegarli uno alla volta. Controllare che ciascuno dei
dispositivi funzioni prima di inserire quello successivo.
• Tutte le porte USB sono fornite di protezione contro le
sovracorrenti. Se un dispositivo USB usa piu' corrente
di quella che la porta USB puo' fornire, la porta
cessera' di funzionare. Per riattivare la porta,
scollegare il dispositivo ed andare su Device Manager
o sul messaggio nella system tray e scegliere l'opzione
di Reset. A quel punto si puo' inserire nuovamente il
dispositivo nella porta USB. Se dovesse cessare
ancora di funzionare, controllare i requisiti di potenza
del dispositivo.
Page 88

88
Docking Station Portatile Targus con Video
Verificare che i dispositivi siano
installati
I dispositivi installati sulla docking station si possono
trovare nella finestra del Device Manager nelle Proprieta'
del Sistema.
Cliccare con il tasto di destra del mouse su My
Computer, Proprieta', quindi cliccare sulla scheda
dell'Hardware, e quindi sul tasto del Device Manager.
Dalla finestra del Device Manager, espandere i seguenti
dati:
• Display Adapters — mostra il dispositivo dock USB 2.0
VGA Targus
• Dispositivi di interfaccia umana — mostra tastiere e
puntatori: mouse, trackballs, e joysticks
• Adattatori di rete — mostra ADM851X USB ad
adattatori ethernet veloci
• Porte (COM & LPT) — Seriali on USB [COM x]
• Controlli per il suono, i video e i giochi — mostra il
dispositivo audio USB
• Controlli Universal Serial Bus — mostra gli altri
dispositivi installati per la docking station e per l'hub
generico.
Verificare una connessione di
modem seriale
Quando si inserisce un modem alla porta seriale
(RS232), accertarsi che la porta assegnata al modem sia
un USB seriale (COMx), in cui x sia il numero della porta
COM.
Se il sistema operativo non riscontra automaticamente
che al modem e' stato assegnato un USB seriale
Page 89

89
Docking Station Portatile Targus con Video
(COMx), eseguire nuovamente la guida all'hardware e
scegliere Select dalla lista anziche' Autodetect. Quindi,
selezionare l'USB seriale (COMx) come porta COM.
Messaggio di errore sul PDA
Se sul PDA compare il messaggio di errore
“Connessione Non Stabilita”, controllare che
l'impostazione della porta COM nel vostro software
HotSync o in quello ActiveSync corrisponda
all'impostazione della docking station. Vedere “Verificare
che i dispositivi siano installati” a pagina 88 per verificare
l'impostazione della porta COM sulla docking station.
Alcune versioni piu' vecchie del software Palm
®
Desktop
non sono compatibili con la conversione da USB a
Seriale. Si prega di contattare il venditore del vostro PDA
per ottenere il software aggiornato.
Video
Posso ottenere una risoluzione piu'
alta sul mio monitor?
• No, la risoluzione e' regolata a 1280 x 1024, colore 16-
bit.
E' possibile che le funzioni I/O del disco
come per esempio, quelle di leggere e
scrivere tanto su un hard drive esterno
o un DVD, degradino la funzionalita'
video?
• Si'. Visto che tutti i dati devono passare attraverso
un'unica connessione USB, potreste notare della
degradazione nella prestazione video del vostro. La
prestazione video sara' ripristinata quando la lettura/
scrittura del disco diminuisce o cessa.
Page 90

$OCKINGÖ3TATIONÖ0ORTATILEÖ4ARGUSÖCONÖ6IDEO
Supporto tecnico
In caso di quesiti tecnici, visitare:
Internet http://www.targus.com/support.asp
Inglese http://www.targus.com/uk/support.asp
Francese http://www.targus.com/fr/support.asp
Tedesco http://www.targus.com/de/support.asp
Spagnolo http://www.targus.com/sp/support.asp
Italiano http://www.targus.com/it/support.asp
Il nostro staff di tecnici esperti è anche disponibile per
rispondere telefonicamente alle vostre domande. Potete
quindi chiamare uno dei numeri seguenti.
Austria 01 795 676 42
Belgio 02-717-2451
Danimarca 45 35-25-87 51
Finlandia 922948016
Francia 01-64-53-9151
Germania 0211-657-911-51
Italia 02 4827-1151
Norvegia 022577729
Paesi Bassi 02 0504 0671
Portogallo +351 21 415 4123
Spagna 91 745 6221
Svezia 8-751-4058
Svizzera 1-212-0007
Regno Unito 20-7744-0330
Europa dell'est e altri Paesi +31 0 20 05040671
Page 91

$OCKINGÖ3TATIONÖ0ORTATILEÖ4ARGUSÖCONÖ6IDEO
Registrazione del prodotto
Dovrete fornire il vostro nome e cognome, l'indirizzo e-mail, il
numero di telefono, e le informazioni dell'azienda (se applicabili).
Garanzia
Targus garantisce per la durata di due anni che questo prodotto è
privo di difetti di materiale e di manodopera. Se l'accessorio
Targus dovesse rivelarsi difettoso durante questo periodo, verrà
riparato o sostituito. Questa garanzia non copre i danni
accidentali, la normale usura e perdita consequenziale o
accidentale. In nessuna circostanza Targus sarà responsabile per
perdita di dati o danni a computer e/o programmi, dati
memorizzati o qualsiasi altro danno consequenziale o
accidentale, anche nel caso Targus sia stata informata di questa
possibilità. Questa garanzia non influisce sui diritti statutari
dell'utente.
Conformità alla normativa
Questo apparato è conforme alla Parte 15 delle Norme FCC
(Federal Communications Commission). La sua operatività è
soggetta alle due condizioni sottostanti: (1) Questo apparato può
non creare interferenze, e (2) Questo apparato deve accettare
eventuali interferenze ricevute, comprese quelle interferenze che
possono causare operazioni non desiderate.
Dichiarazione della FCC
Testato per la conformità
Questo apparato è stato testato e si è riscontrato essere
conforme ai limiti stabiliti per gli apparati di Classe B digitale, ai
sensi della Parte 15 del regolamento della FCC. Questi limiti sono
stabiliti per fornire una protezione ragionevole dalle interferenze
in installazioni residenziali. Questo apparecchio genera, utilizza,
e può emettere energia da radiofrequenze, e qualora non venisse
installato ed utilizzato secondo le istruzioni, può creare
interferenze alle comunicazioni radio. Comunque, non vi sono
Targus vi raccomanda di registrare il vostro prodotto subito dopo
averlo acquistato. Per registrarlo, visitate:
http://www.targus.com/registration.asp
Page 92

$OCKINGÖ3TATIONÖ0ORTATILEÖ4ARGUSÖCONÖ6IDEO
garanzie che non avvengano interferenze in particolari
installazioni.
Qualora questo apparecchio dovesse creare interferenze per la
ricezione di radio o televisioni, che possono essere determinate
dall'accensione e dallo spegnimento dell'apparato, al cliente
viene consigliato di provare a correggere l'interferenza tramite
l'utilizzo di una o piu' di una delle seguenti soluzioni:
• Riorientare o riposizionare l'antenna ricevente
• Aumentare la distanza tra l'apparecchio ed il ricevitore
• Collegare l'apparato in una presa di un circuito diverso da
quello al quale è collegato il ricevitore
• Consulta il rivenditore o un tecnico radio/TV specializzato per
ricevere supporto.
Conformemente alle Direttive
Questa periferica rientra nella categoria Classe 1
conformemente alle Direttive R&TTE (99/5/EC). Questa periferica
è a basso consumo ed è eslcusivamente utilizzabile in casa e in
ufficio. Questo prodotto può essere utilizzato in tutti i Paesi della
Comunità Europea.
Direttive di Riciclaggio Targus
Disporre il prodotto alla fine del suo ciclo di vita utile, in un punto
appropriato di raccolta per il riciclaggio collocato nel tuo territorio.
www.targus.com/recycling
Qualsiasi modifica o alterazione non autorizzata dalla parte responsabile per gli aspetti di conformità potrebbe annullare il diritto
dell'utente all'utilizzo di questo prodotto
Microsoft, Windows, e Windows Vista sono marchi registrati o marchi di fabbrica di Microsoft
Corporation negli Stati Uniti e/o in altri Paesi. Tutti i marchi di fabbrica e i marchi registrati
sono di proprietà dei rispettivi depositari. Tutti i diritti riservati.
Page 93

93
TARGUS MOBIEL
BASISSTATION MET
VIDEO
Inleiding
Gefeliciteerd met uw aankoop van het Targus mobiel
basisstation met video. Met deze draagbare
uitbreidingsmodule kunt u met één USB-verbinding tot 4
USB-toestellen, een monitor, een netwerkverbinding
(ethernet/LAN), luidsprekers, een microfoon en een
serieel toestel aansluiten.
Het basisstation is ook uitgerust met de technologie
Targus Always On, de Targus voedingspoort met dubbele
stroom op de USB-specificaties voor toestellen op groter
vermogen en USB-poorten met grotere tussenruimte
voor grotere adapters. Targus Always ON levert stroom
aan de USB-poorten zelfs wanneer de laptop is
uitgeschakeld, niet met het basisstation is verbonden of
zich in slaap-/stand-by-modus bevindt. Daardoor kunnen
USB-toestellen die via de USB-poort worden opgeladen,
in alle omstandigheden blijven opladen.
Functies
Warmteontwikkeling door natuurlijke
convectie:
Plaats de achterrand van uw laptop op de rubberen
kussens van de het basisstation. De meeste laptops
ontwikkelen warmte vanaf de onderzijde. Hoe meer lucht
onder de onderzijde kan stromen, des te groter is de
Page 94

94
Targus mobiel basisstation met video
kans dat de warmte zich door natuurlijke convectie zal
ontwikkelen.
Gemak
Het verhoogde platform zorgt voor een gemakkelijkere
positie voor de handen en verhoogde luchtstroom voor
meer afkoeling.
Het basisstation heeft de volgende
poorten:
• Twee 3,5 mm audio: (1) stereo uit en (1) microfoon in
• RS232 Serieel
• RJ-45 ethernet 10/100
• Twee USB 2.0 (wit)
• Twee USB-voedingspoorten (zwart) - leveren tot 1 amp
Inhoud
Naast deze handleiding bevat de verpakking eveneens:
• Targus mobiel basisstation met video
• Oplopende hoge snelheidskabel - USB 2.0
• cd met stuurprogrammasoftware
• Wisselstroomadapter (vereist)
Systeemvereisten
Hardware
• pc met een Intel® Pentium®- of gelijkwaardige
processor
• cd-rom-station
• USB-poort, versie 2.0
• Wisselstroombron (wisselstroomadapter is vereist)
Page 95

4ARGUSÖMOBIELÖBASISSTATIONÖMETÖVIDEO
N.B.: bij aansluiting op een USB-poort van versie 1.1 op uw
computer zal het basisstation niet optimaal werken en zal de
videopoort niet goed werken. De beste resultaten worden
gegeven bij verbinding met een USB-poort, versie 2.0.
Besturingssysteem
• Windows® 2000 - Service Pack 2 of hoger
• Windows
®
XP - Service Pack 1 of hoger
N.B.: om de nieuwste Service Packs te downloaden, leest u de
website van uw computerfabrikant of de downloadsite van
Microsoft:
http://support.microsoft.com/
default.aspx?scid=fh%3BEN-US%3Bsp
Installatie van het
toestel en de
stuurprogramma's
Vóór gebruik van het Targus basisstation, dient u het
stuurprogramma op uw computer te installeren. Sluit het
basisstation op uw computer aan en Windows Plug en
Play zal de stuurprogramma's van de hardware voor
iedere poort installeren.
WAARSCHUWING: u moet de software van het basisstation
installeren, ALVORENS u de aansluiting met uw computer
maakt. Indien u dit niet doet, zal het basisstation niet goed
werken.
• Windows Vista
TM
Page 96

96
Targus mobiel basisstation met video
Installatie van het
stuurprogramma voor het
basisstation
Door de installatie van het stuurprogramma voor uw
basisstation zal uw besturingssysteem het basisstation
en zijn poorten herkennen na de verbinding.
1 Schakel uw computer in.
2 Plaats de cd van de software van het stuurprogramma
in het cd-rom-station van uw computer.
3 Indien de installatie niet automatisch begint, klikt u op
Start, Uitvoeren en daarna voert u D:\Setup.exe in
(waarbij D het pad is van uw diskettestation). Klik
vervolgens op OK.
4 Volg de instructies op het scherm om de installatie te
voltooien.
5 Klik op Voltooien en herstart uw computer wanneer u
dat wordt gevraagd.
Aansluiting van het basisstation
op uw computer
Na installatie van de software voor het basisstation bent
u klaar om het basisstation op uw computer aan te
sluiten. U gaat als volgt tewerk:
1 Verbind de meegeleverde wisselstroomadapter met
het wisselstroomcontact van het basisstation.
2 Verbind één uiteinde van de USB-kabel met het
basisstation en plaats het andere uiteinde in een
beschikbare USB 2.0-poort aan uw computer.
N.B.: Het basisstation zal niet goed werken indien de
wisselstroomadapter niet in een stopcontact voor
Page 97

97
Targus mobiel basisstation met video
wisselstroom is geplaatst.
Verbind geen toestellen met het basisstation alvorens de
installatie voltooid is.
Installatie van de standaard
stuurprogramma's van het toestel
Nadat u het basisstation met uw computer hebt
verbonden, beginnen de standaard stuurprogramma's de
installatie voor elke poort.
Bepaalde hardwaretoestellen zullen vragen om de
stuurprogramma's te installeren.
Installatie van de stuurprogramma's:
1 Selecteer De software automatisch installeren (aan-
bevolen) en klik op Volgende.
De wizard Nieuwe hardware gevonden begint met de
installatie van de stuurprogramma's voor de hardware.
Het wizardscherm Nieuwe gevonden hardware
voltooien verschijnt.
2 Klik op Voltooien en herhaal, indien nodig, voor ieder
toestel.
3 Herstart uw computer.
Lichtdiodes voor statusindicatie
Zodra alle stuurprogramma's voor het toestel zijn
geïnstalleerd, branden de lichtdiodes voor statusindicatie
van de USB achteraan het basisstation en kunt u
toestellen op het basisstation aansluiten.
• Het groen verzendingslampje knippert bij verbinding
met een netwerk en het gele ontvangstlampje knippert
wanneer gegevens worden verzonden naar of van het
netwerk.
Page 98

98
Targus mobiel basisstation met video
N.B.: het basisstation ondersteunt hot swaps van de
netwerkkabel.
• USB-lampjes branden wanneer het basisstation met
uw computer is verbonden.
• De lichtdiode Altijd AAN brandt groen wanneer op de
knop wordt gedrukt.
USB-poorten
Serieel
Audio Audio
in uit
VGA
Altijd aan
adapter
Netwerk
USB naar pc:
verbinding
laptop Ondersteuningskussen
Wisselstroom-
POORTEN VAN BASISSTATION
Nieuwe toestellen
aansluiten
Om mogelijke beschadiging te voorkomen wanneer u
een nieuw toestel aansluit, mag u de kabelsteker niet in
de poort aan het basisstation forceren. Indien u de steker
niet vlot kunt bevestigen, draait u de steker om en
probeert u opnieuw.
Verbinding van een seriële muis
Om een seriële muis aan te sluiten, plaatst u de steker
van de kabel in de seriële poort van het basisstation.
Page 99

99
Targus mobiel basisstation met video
Verbinding en configuratie van
een seriële modem
Verbinding van een seriële modem:
1 Plaats de steker van de kabel in de seriële poort van
het basisstation.
2 Installeer het softwarestuurprogramma van de modem
volgens de instructies bij het toestel.
3 Wanneer u wordt gevraagd om de poort te selecteren,
kiest u de seriële USB (COMx), waarbij x het COMpoortnummer is dat door uw besturingssysteem wordt
toegewezen.
Verbinding van een PDA
1 Plaats de steker van de kabel in de seriële poort van
het basisstation.
2 Controleer of de instelling van de COM-poort in uw
HotSync
®
- of ActiveSync®-software strookt met de
instelling op het basisstation.
Om de instelling van de COM-poort op het
basisstation te controleren, zie “Installatie van de
toestellen verifiëren” op pagina 105.
Om de instelling van de COM-poort op uw PDA te
controleren, leest u de documentatie die ermee werd
geleverd.
Verbinding met een LAN
Voor aansluiting van een ethernet-kabel met RJ-45aansluiting plaatst u de steker van de kabel in de
ethernet-/netwerkpoort van het basisstation. Bijkomende
procedures voor aansluiting op een echt netwerk hangen
af van het type netwerk dat u gebruikt. Neem contact op
Page 100

100
Targus mobiel basisstation met video
met uw netwerkadministrator voor gedetailleerde
instructies.
Verbinding van een USB-toestel
Om een USB-toestel aan te sluiten, verbindt u het met
een USB-poort van het basisstation en volgt u de
instructies die met het toestel zijn geleverd.
De vier USB-poorten voldoen aan USBhogesnelheidsvereisten met levering van 480 Mbps
doorvoer en 500 mA vermogen. De twee zwarte USBpoorten hebben echter twee unieke functies. “Targus
Always On” op pagina 103 voor meer details.
De witte USB-poorten zijn hogesnelheidspoorten die
standaard 500 mA stroom leveren. De zwarte USBvoedingspoorten zijn hogesnelheidspoorten die tot 1
amp leveren.
Verbinding en configuratie van
een geluidstoestel
1 Verbind uw hoofdtelefoons of luidsprekers in de
groene 3,5 mm Audio uit-poort van het basisstation.
2 Een microfoon verbindt u met de monopoort Audio in.
3 Om de hoofdtelefoons of luidsprekers te activeren,
moet u eerst USB-audio kiezen in de instellingen van
eigenschappen.
a Voor Windows
®
2000 klikt u op Start, Instellingen,
Configuratiescherm. Open de map Geluiden en
multimedia. Selecteer het tabblad Audio. Onder
Geluidsplayback wijzigt u Voorkeurstoestel in
USB-audio uit de vervolgkeuzenlijst.
•Klik op Toepassen en vervolgens op OK.
 Loading...