

Page 1
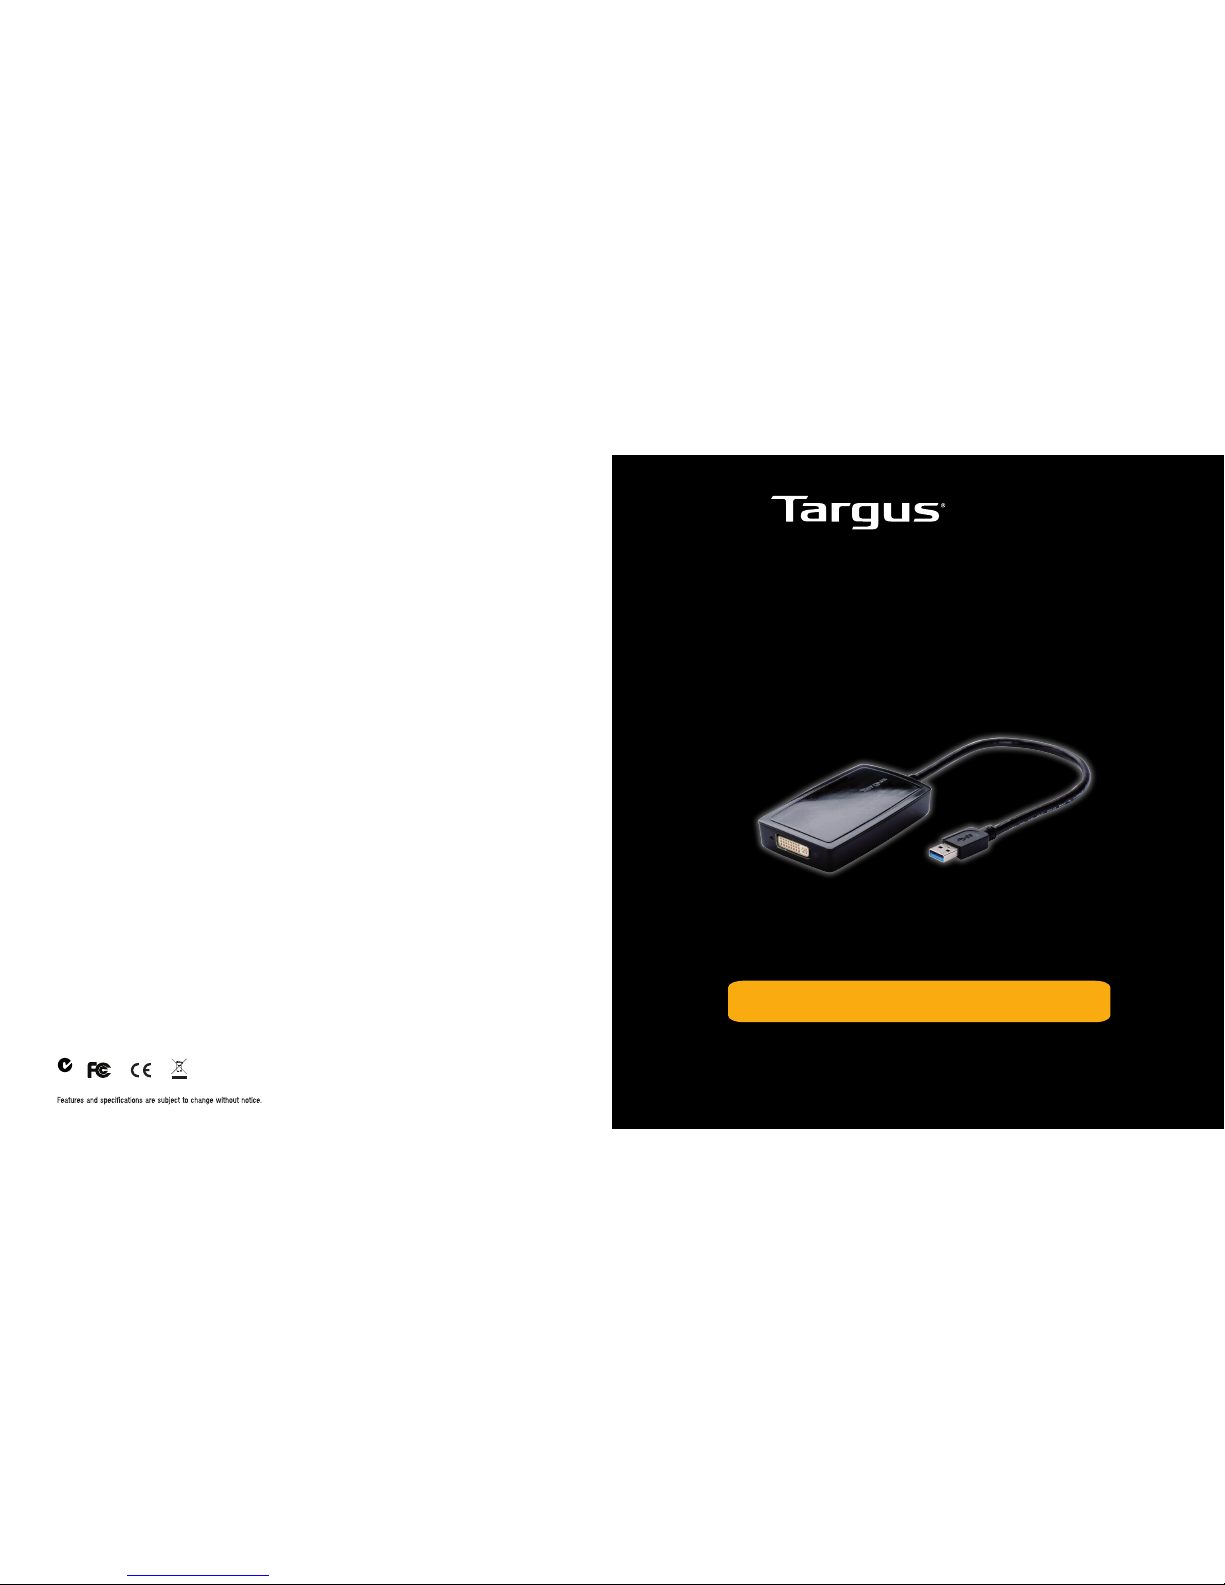
QUICK START GUIDE
USB 3.0 SUPERSPEED™
VIDEO ADAPTER
US Technical Support:
• Phone: 877-482-7 487
•
Web: www.targus.com /support
Warranty
Regulatory Compliance
FCC Statement
Tested to Comply
Declaration of Conformity
N2953
410-2385-001A (ACA038US)
Microsoft and Windows are registered trademarks or trademarks of Microsoft Corporation in the
United States and/or other countries. All trademarks and registered trademarks are the property of their respective
owners.
©2011 Targus Group International, Inc.
Contents
System Requirements
• Targus USB 3.0 SuperSpeed™ Video Adapter
• Driver CD
• DVI-I to VGA Adapter
Hardware
• PC with an Intel Pentium processor or equivalent
• USB port
Operating System (any of the following)
• Mircosoft Windows Vista with Service Pack 1 (32/64-bit)
• Mircosoft Windows XP with Service Pack 2 or 3
• Mircosoft Windows 7 (32/64-bit)
®
®
®
®
®
Targus warrants this product to be free from defects in
materials and workmanship for one year. If your Targus
accessory is found to be defective within that time, we
will promptly repair or replace it. This warranty does
not cover accidental damage, wear and tear, or
consequential or incidental loss. Under no conditions
is Targus liable for loss of, or damage to devices; nor
loss of, or damage to, programs, records, or data; nor
any consequential or incidental damages, even if
Targus has been informed of their possibility. This
warranty does not aect your statutory rights.
This device complies with Part 15 of the FCC Rules.
Operation is subject to the following two conditions:
(1) This device may not cause harmful interference, and
(2) This device must accept any interference received,
including interference that may cause undesired
operation.
Hereby, Targus, declares that this device is in
compliance with the essential requirements and other
relevant provisions of Directive 2004/108/EC.
This equipment has been tested and found to comply with
the limits of a Class B digital device, pursuant to Part 15 of
the FCC Rules. These limits are designed to provide
reasonable protection against harmful interference in a
residential installation. This equipment generates, uses, and
can radiate radio frequency energy and if not installed and
used in accordance with the instructions, may cause harmful
interference to radio communications. However, there is no
guarantee that interference will not occur in a particular
installation. If this equipment does cause harmful
interference to radio or television reception, which can be
determined by turning the equipment o and on, the user is
encouraged to try to correct the interference by one or more
of the following measures:
• Reorient or relocate the receiving antenna;
• Increase the separation between the equipment and
receiver;
• Connect the equipment into an outlet on a circuit different
from that to which the receiver is connected;
• Consult the dealer or an experienced radio/TV technician
for help.
Changes or modications not authorized by the party
responsible for compliance could void the user’s authority to
operate this product.
NOTE: PLEASE RUN WINDOWS UPDATE ON YOUR LAPTOP PRIOR
TO INSTALLING THE VIDEO ADAPTER AND VIDEO DRIVER
Page 2
The resolution, color depth and refresh
rate of the primary screen are replicated
on the monitorconnected to the docking
station.
1. Click on the DisplayLink icon .
2. Select Mirror in Manager Menu.
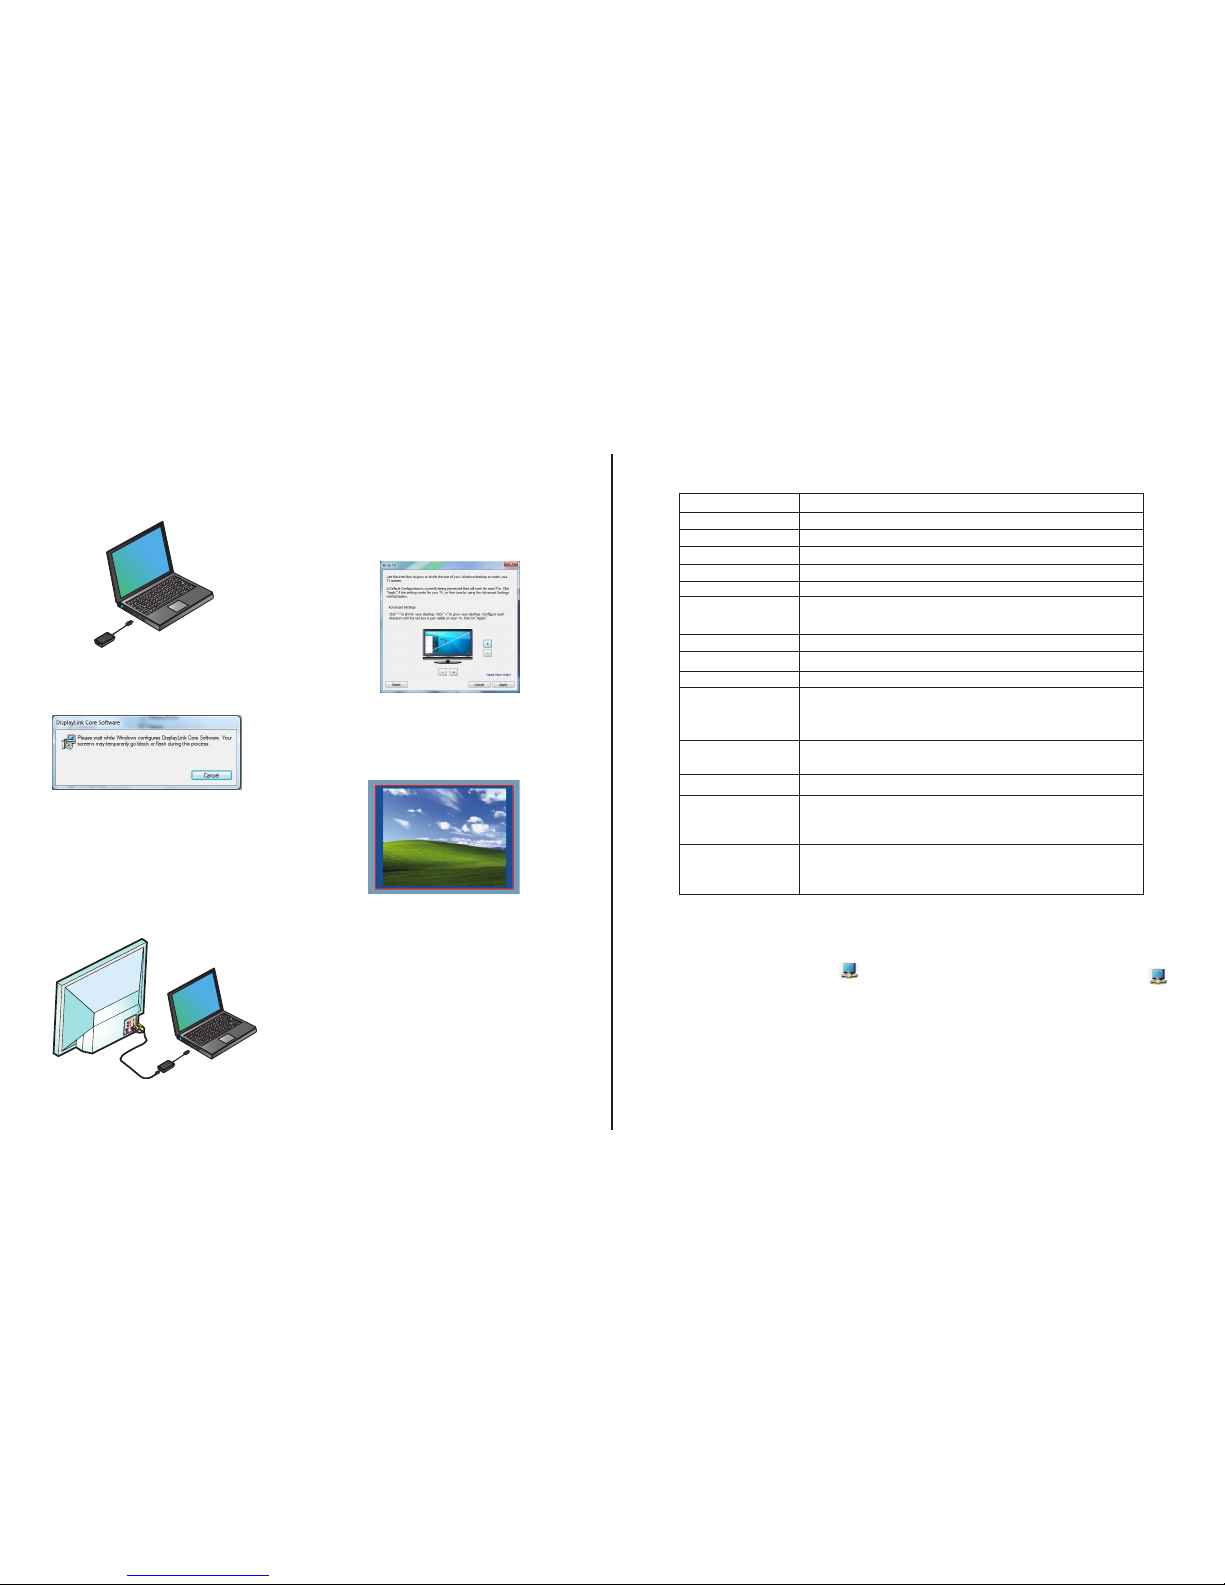
1. To configure Fit to TV, choose the option
from the DisplayLink Manager. The
following interface appears.
2. You will also see a red border on the
DisplayLink screen.
DisplayLink Manager Menu
To Set the Display into
Mirror Mode
Fit to TV Configuration
The red border shows the size of the new
WindowsDesktop. Use the “+” and “-”
controls to change the size of the red border
until it fits on the TV screen.
3. Once the red border is at the edges of
the TV screen, click “Apply” to resize the
Windows desktop.
The device is now extended in the direction
it was the last time the display was in this
mode. For more control, use the Extend
To submenu and select one of the options.
This puts the device into Extend Mode, and
places it to the Left/Right/Above/Below the
main monitor.
1. Click on the DisplayLink icon .
2. Select Extend in Manager Menu.
To Set the Display into
Extend Mode
Windows 7 Setup
1) Connect the Video Adapter to your laptop.
4) Connect the Video Adapter and monitor.
2) Windows will start installing the DisplayLink
Driver automatically.
Menu Option
DisplayLink Manager
Opens the Screen Resolution window
Check for Updates
Checks online if new drivers are available to download
DisplayLink devices Shows a list of all connected DisplayLink devices
Audio Setup
Video Setup
Opens the Audio Configuration window
Opens the Screen Resolution window
Screen Resolution
Shows a list of all available screen resolutions. Inferred Modes [ ]
are not available in mirror mode
Screen Rotation
Rotates the screen in clockwise or counter-clockwise directions
Extend
Set as Main Monitor
Extends the Windows desktop onto this display
Sets this screen as the main display
Notebook Monitor
Off
Switches off the laptop display and use the DisplayLink
display as the main screen (only works on PCs and when
only one DisplayLink screen is connected)
Mirror
Shows the same content on both screens (screen
resolutions must be the same)
Off
Turns off this DisplayLink display
Optimize for Video
Select for improved video playback on DisplayLink
connected displays (only applicable for video; text may
appear less clear)
Fit to TV
Adjusts the size of the Windows desktop to fit the
connected TV (only works when one DisplayLink display is
connected and set in Extend Mode)
3) Follow the on-screen instructions
until the installation is complete.
NOTE: If the driver installation does not automatically start,
disconnect the video adapter from your laptop, insert the
Driver CD, and click on the Setup.exe file.
®
TM
TM
NOTE: Use the included DVI-I to VGA Adapter if needed.
 Loading...