

Tapco Pro Cut-Off Gauge Operation Manual
OPERATIONS MANUAL
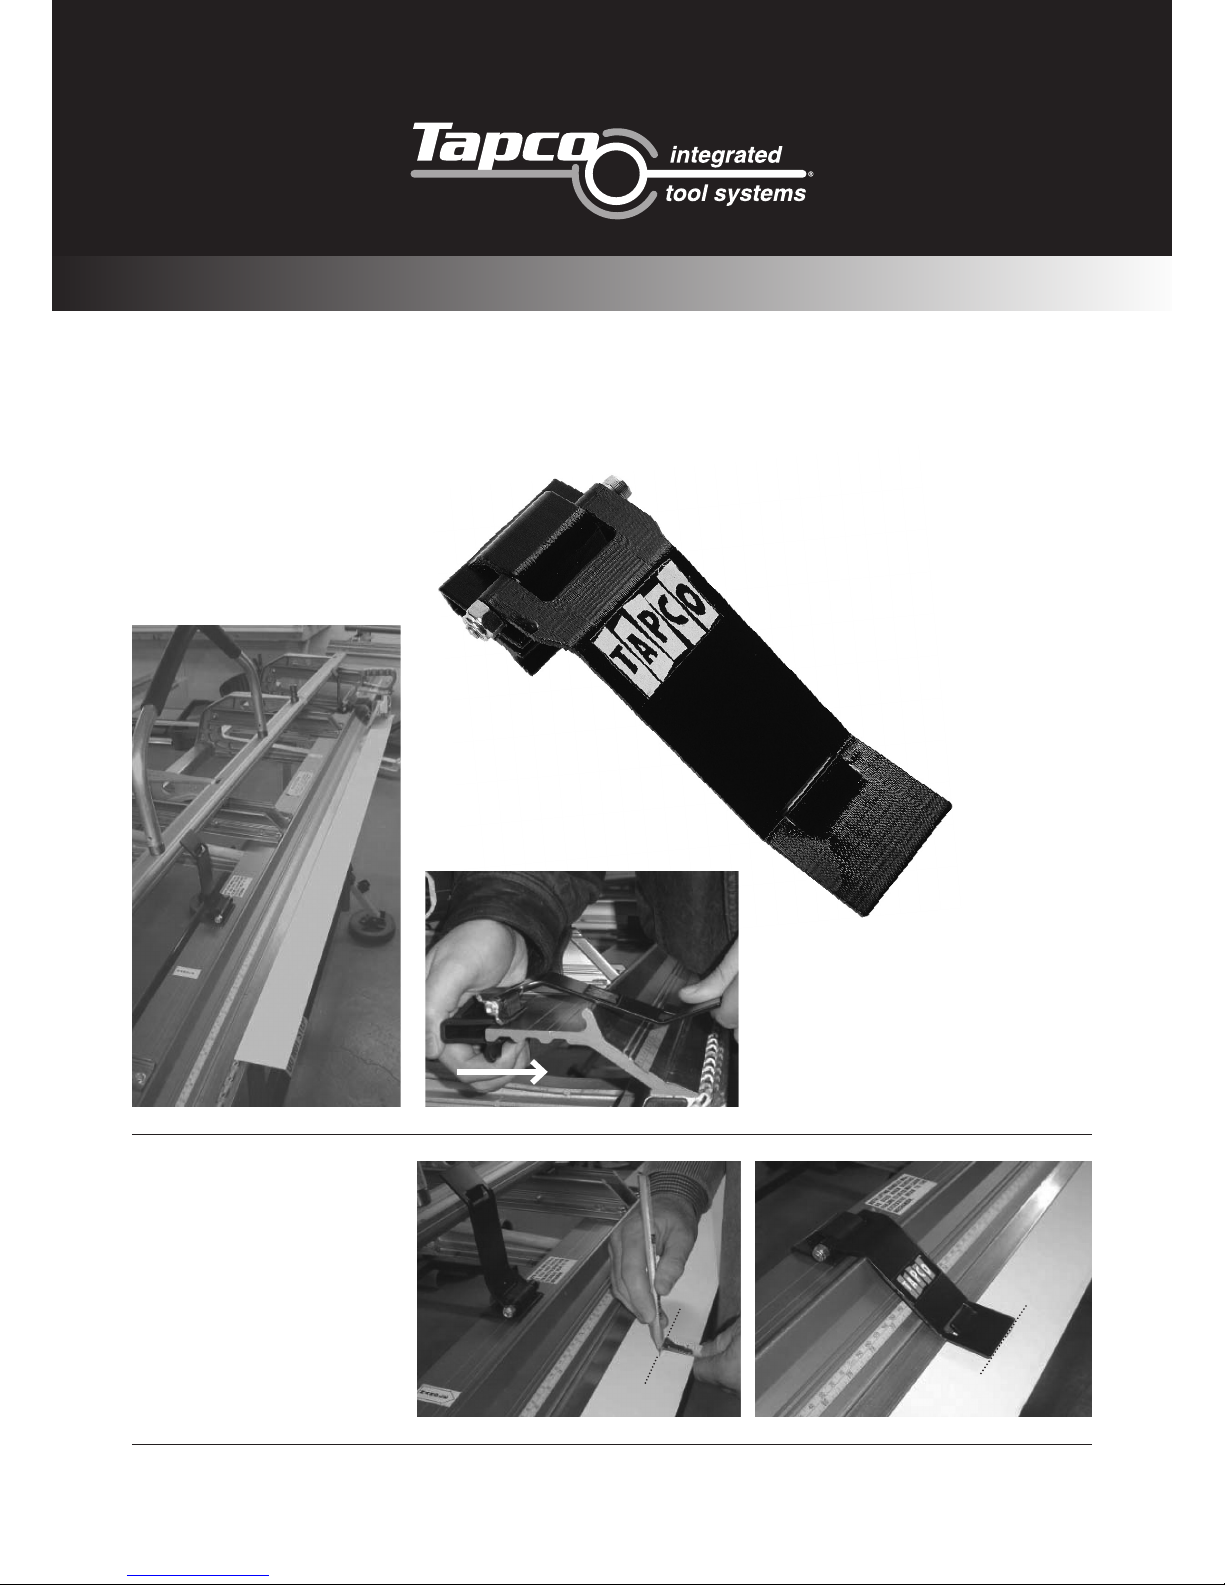
Pro Cut-Off Gauge
Make Cuts Faster Without Measuring Each Cut
®
STEP 1
Position the work piece in the Brake and close
the Brake to loosely hold the material. Attach
a Cut-Off Gauge near each end of the material.
Do this by placing the clip opening against the
back edge of the Locking Anvil and pulling it
sharply forward until it locks in place. Make
sure the clip is as far forward as it can go. Flip
the Cut-Off Gauges up and out of the way.
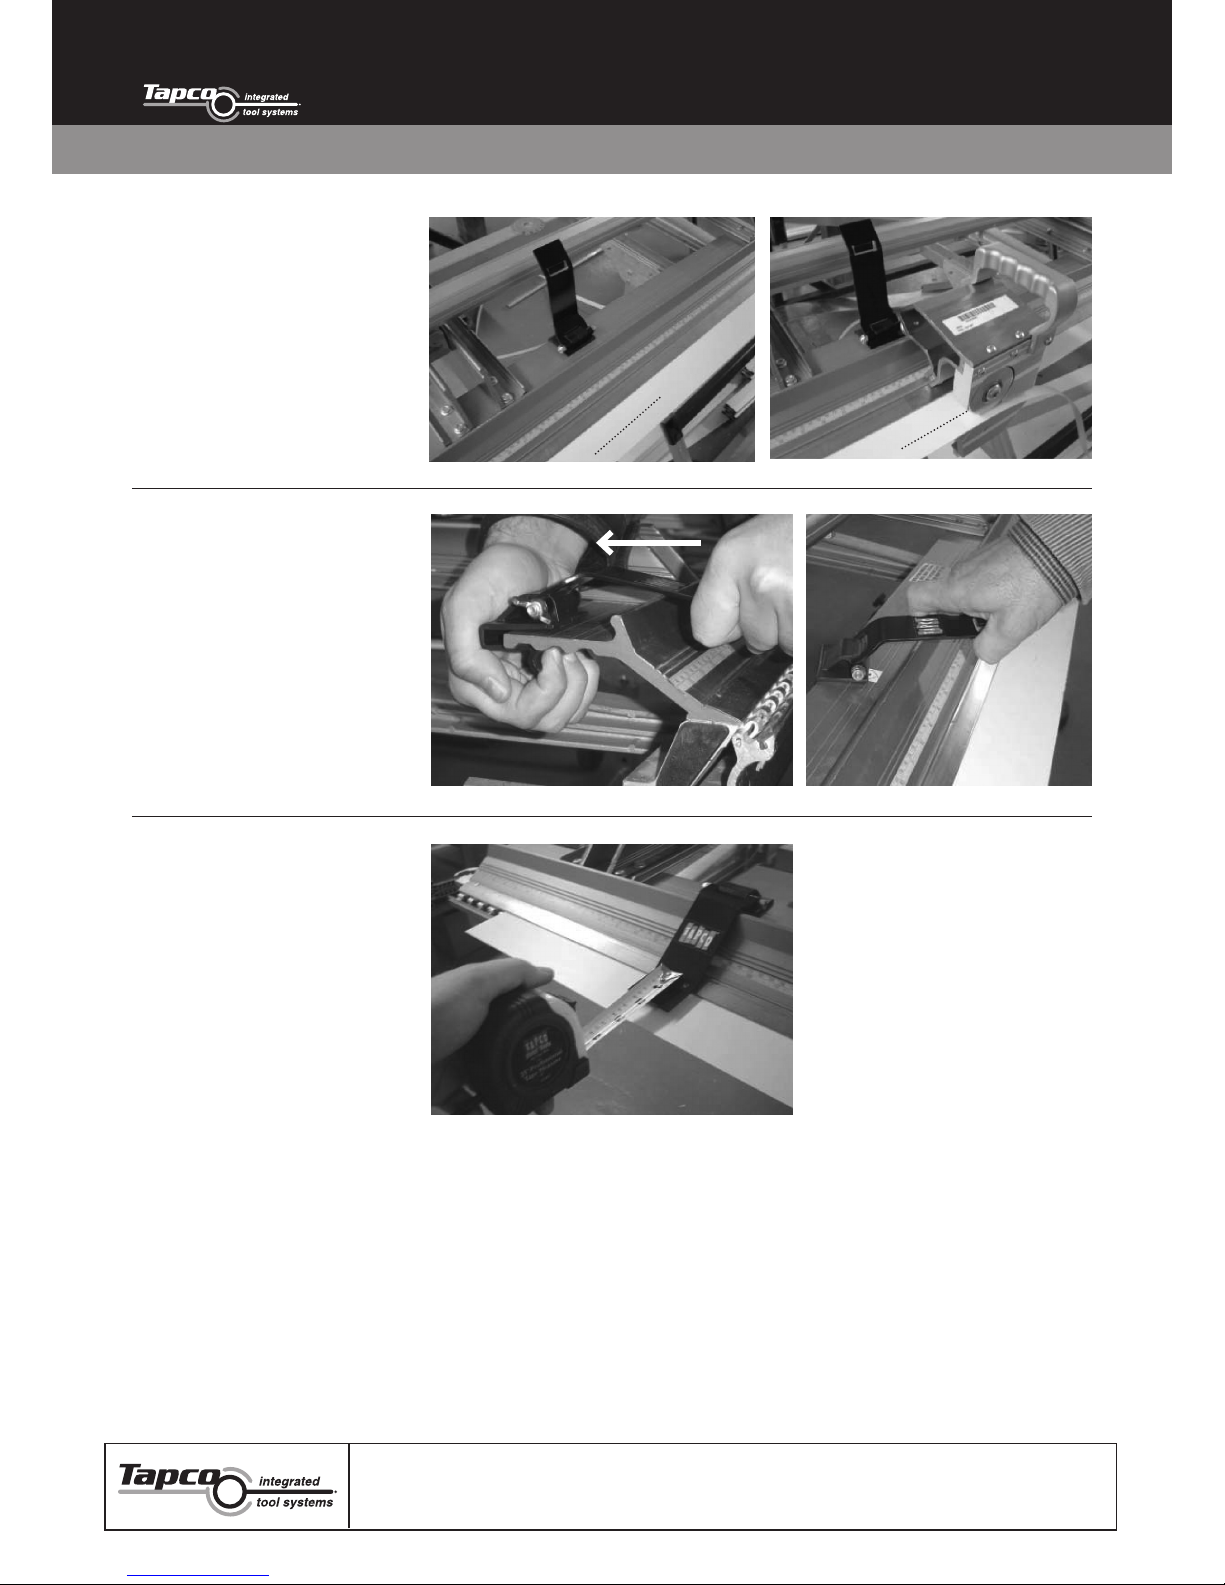
STEP 2
To set up for first-time use, measure
back from the edge near each end of
the workpiece and make a mark. Flip
the Cut-Off Gauges down. The ends
of the Cut-Off Gauges indicate where
the Cut-Off will make the cut. Move
the workpiece until the marks align
with the ends of the gauges, then lock
the brake.
Attach Pro Cut-Off Gauge
CUT LINE
2
WWW.TAPCO-EUROPE-TOOLS.COM
Item #12308
©2014 Tapco International Corporation
PRO CUT OFF GAUGE INSTRUCTIONS
Tapco Integrated Tools Systems
Unit 32, Tokenspire Business Park, Hull Road, Woodmansey, Beverley, East Yorkshire, HU17 0TB
Tel: +44 (0)1482 880478 | Fax: +44 (0)1482 880678 | international@tapcoint.com | www.tapco-europe-tools.com
STEP 3
Flip the Gauges up and out of the way
of the Cut-Off and make the cut. Look
at the cut relative to your marks. Due
to variations in Cut-Offs, it may be
necessary to adjust your future marks
to compensate for any differences.
STEP 4
When working with shorter lengths
of material, the Gauge can be
repositioned by sliding it along the
Anvil. It can be removed by pulling
down on the bottom of the clip and
sliding it off. Another way is to simply
push sideways on the end of the Gauge
to force the Clip off the Anvil.
The raised tab on the Gauge makes
a convenient place to hook a Tape
Measure for layout. The tab is
positioned to match the nose of
the Anvil or the bend point of the
workpiece.
 Loading...