

Tanita MC-180MA Instruction Manual

E
Copyright © 2005 TANITA Corporation. All Rights Reserved.
MC1807001(1
)
Please read this Instruction Manual carefully and keep it handy
for future reference.
GB
Multi-Frequency
Body Composition Analyzer
MC-180MA
Instruction Manual
GBGB
How to use
(cautions for safety)
Before use
(safety precautions)
When necessary
(cautions for safety)
32
Contents
Safety Notes
•••••••••••••••••••••••••••••••••••••••
4
Instructions
••••••••••••••••••••••••••••••••••••••••
6
•Explanation of terminology
••••••••••••••••••••••••••••
7
Part names / Connection procedure
•••••••••
8
•Using the touch panel
•••••••••••••••••••••••••••••••••
9
Preparation
••••••••••••••••••••••••••••••••••••••
10
Various settings
•••••••••••••••••••••••••••••••••
12
Troubleshooting
•••••••••••••••••••••••••••••••••
42
Connection to PC
•••••••••••••••••••••••••••••••
44
Technical notes
•••••••••••••••••••••••••••••••••
52
New Regression Formula
for Basal Metabolic Rate (BMR
)
••••••••••••
58
Product specifications
•••••••••••••••••••••••••
60
How to measure
••••••••••••••
24
When used as a body composition analyser
•••••••••••••••••••••••••••••••••••••
24
When used as scales
••••••••••••••••••••••••••
36
Explanation of printouts
••••••••••••••••••••••
38
Assessment criteria
••••••••••••••••••••••••••••
40
Applications
•This equipment can be used in the screening of
certain adult diseases and conditions related to body
weight and composition.
•It can be used in the monitoring and prevention of
conditions caused by excessive deposits of fat tissue
such as diabetes, hyperlipidemia, cholelithiasis and
fatty liver.
•It can be used in the monitoring of changes in
individuals‘ body composition related to differences in
the ratio of fat tissue to lean.
•It can be used to assess the effectiveness of
individuals‘ nutrition and exercise programmers, both
for health and physical fitness.
Benefits
1. This product is simple to use, and requires no
specialized facilities or expertise to take
measurements.
2. Measurements can be taken quickly and easily,
causing minimal inconvenience to the patient during
measurments.
MC-180MA

Before use
(cautions for safety)
Before use
(cautions for safety)
GBGB
54
•Do not insert your finger into any gaps or holes in this equipment.
Such action may result in injury.
•
Clean the electrode panels and their peripheries with alcohol before measurement.
Failure to do so may result in the spread of contagious disease, because the equipment comes into contact
with bare hands and feet.
•Before use, ensure that this equipment does not interfere electromagnetically with other
electronic devices that are susceptible to electromagnetic interference.
This equipment is designated a Class B IT equipment (mainly for systems intended to be used in domestic
environments) and CE (EMC), but weak equipment may be affected.
•When it is moved;
• Remove the power cord from the main unit.
Failure to do so may result in damage.
• Grip the handle for moving at the top, tilt the unit
until the adjusteble foot are off the floor, and wheel
it along on the casters.
Do not attempt to pick the unit up, as such action may
result in a back injury.
•Touch panel
•Avoid any impact on the panel
Such action may result in injury if the panel is broken,
as it is made of glass.
• Do not leave water droplets for prolonged periods.
Prolonged exposure to water may result in deformation,
color change, staining or blistering.
• Do not operate with a pointed object.
Such action may result in failure.
Caution
Place the equipment on a stable and
level surface.
Do not jump on the equipment. Do not lean on the equipment.
Failure to do so may result in injury due
to the individual stumbling over, or
measurement may not be possible.
Compulsory Prohibited
Such action may result in injury due to
the indivdual stumbling over.
Such action may result in injury due to
the indivdual stumbling over.
Prohibited
Safety Notes
must be observed
These symbols are used to indicate safe and correct use of the equipment, and to prevent injury to users or
damage to the product. Please review these symbols and their meanings before proceeding with this
instruction manual.
Warning
This symbol indicates the possibility of death or serious injury if the product is
mishandled or instructions are ignored.
Caution
This symbol indicates the possibility of physical injury or equipment damage if
instructions are ignored.
Warning
Individuals fitted with electronic
medical devices,
such as pacemakers,
must not use this product.
Do not attempt to disassemble or
remodel this product.
This symbol indicates details of
any prohibitions.
This product passes a very small electrical
current through the body, which may
cause such electronic medical devices to
operate erroneously, with possibly
serious consequences.
Prohibited
•Do not attempt to assess the analysis results or to base an
exercise routine on them by yourself.
Always heed to your doctor’s or qualified expert’s advice.
•Physically disabled persons should not attempt to take
measurements alone, but should have their caretakers
assist them in using the device.
•Distance from water
Do not use this product near a water supply or in any other place
where it may become wet. The product is liable to fail or produce
erroneous readings if wet.
This symbol indicates details of any compulsory
measures.
Prohibited
Such action may result in electric shock or
injury, and may impair the productユs
accuracy.
Do not handle the plug with a wet
hand.
The power cord must be connected to
a 3-pin plug (with an earth terminal).
Such action may result in electric shock,
fire, or leakage.
Prohibited
Compulsory
Failure to do so may result in an electric
shock or leakage.
Do not connect too many plugs to a
single socket.
Prohibited
Such action may result in fire.
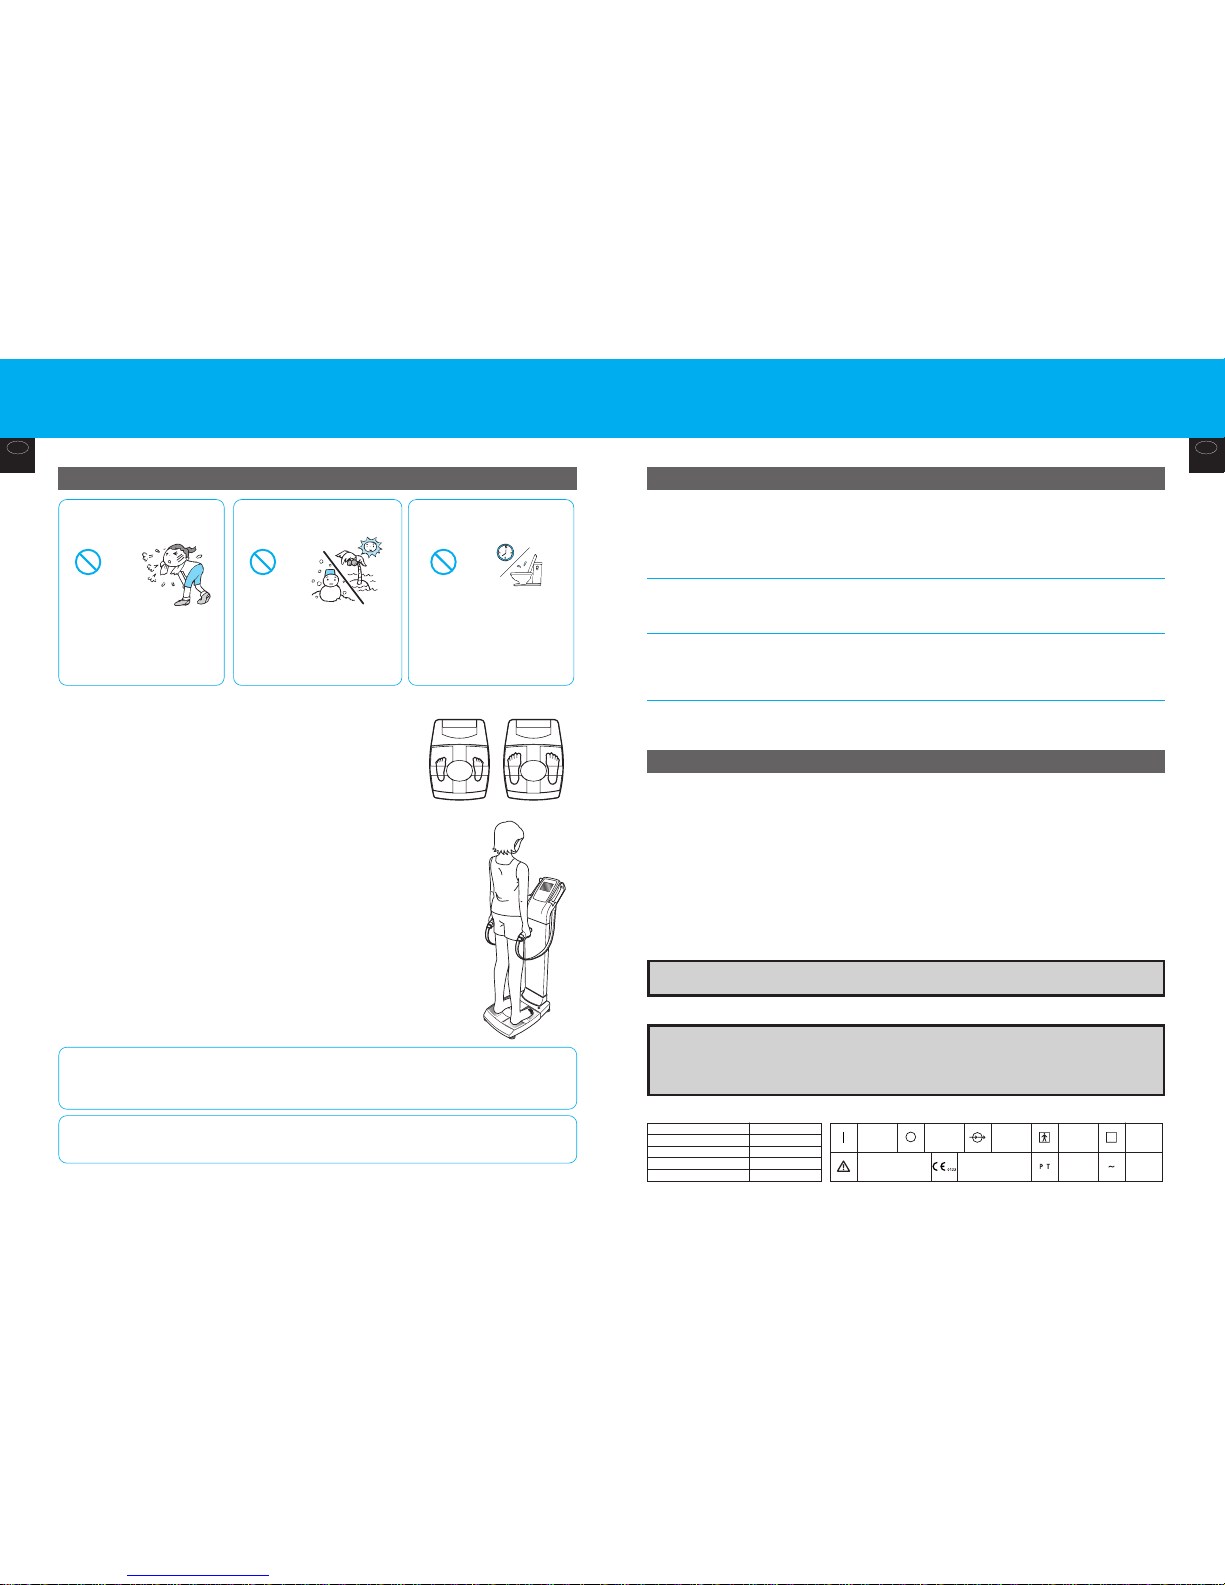
Electrode panels
(x 8)
Touch panel
Adjusteble foot (x 4)
Feet must be screwed
upwards into the base while
moving.
Casters (x 2)
Handle for moving
Before use
(cautions for safety)
Before use
(cautions for safety)
GBGB
76
For accurate measurements
Explanation of terminology
Installation
•Do not wipe the equipment with hot water, benzene.
Please use a damp cloth or a neutral detergent to clean the equipment, and wipe it dry with a dry cloth immediately
afterwards.
• Do not store on a surface subject to strong vibration.
• Do not store in locations subject to high humidity or dust.
• Do not store in locations subject to temperatures outside its storage range.
• When it has not been used for a long time, confirm it can be operated correctly and safely before use.
• Cover the main unit to prevent it from becoming dirty.
• Do not wash with water.
• Avoid subjecting the equipment to excessive shock or vibration.
• Do not unplug the power cord by pulling on the cord.
• When it is not to be used for a prolonged period, turn off the power, and unplug the power cord.
• Do not position in direct sunlight, in areas subject to airflow directly from an air conditioner, or near a heater.
• Do not position in locations subject to significant temperature fluctuation.
• Do not position in locations subject to high humidity or near a water supply.
• Do not position on surfaces subject to strong vibration.
• Do not position in close proximity to stored chemicals, or where gas is generated.
Handling
Storage
Clean-up
This product is precisely manufactured and accurately calibrated. Please observe the following instructions to ensure best results.
This equipment and the attached instruction manual use expressions including terminology sited in the NAWI directive.
Please review the following terminology explanations before use.
• Max (Maximum capacity)
This shows the maximum weight that can be measured by the scale.
[Example] In the case of “Max = 270 kg”, it can be used to measure an individual up to 270 kg.
* Individuals exceeding the weight capacity cannot be measured.
•e (Minimum graduation)
This shows the amount of one scale mark (graduation). In the case of a digital display, this shows the numeric interval value.
[Example] In the case of e = 0.05 kg”, the display increases or decreases in intervals of 0.05 kg.
•PT
To measure the body weight more accurately, the “Preset Tare Deduction” function automatically subtracts the pre-input weight of the
clothes (TARE). The pre-input weight of the clothes is called “Preset Tare” (PT).
<Usage Conditions>
Temperature Range for Use : 5°C / 35°C
Relative Humidity : 30% / 80%
<Storage Conditions>
Temperature Range of Environment : -10°C / 50°C
Range of Relative Humidity : 10% / 90% (without condensation)
To prevent malfunction, do not store the equipment in direct sunlight or subject it to significant changes in
temperature. Do not store in damp or dusty areas, near a fire or where the equipment may be subject to vibration or
shock.
<Power Source>
Value Range
Model Name
MC-180MA
Voltage Range
230VAC
Frequency Range
50 / 60Hz
Electric Current Range
2.5A
For correct measurement
Do not attempt to take measurements
after excessive consumption of either
food or drink, or while dehydrated.
Prohibited
Measurements are significantly affected
by changes in bodily water volume and
body temperature. It is therefore
recommended that measurements be
taken after going to the toilet, and
ideally measurements should be taken at
the same time every day under the same
conditions.
Monitoring any fluctuations is recommended for reference for the following types of
people.
• Patients undergoing artificial dialysis or with swellings
Method of abandoning product
• When disposing of this unit, please do so in accordance with the prevailing regulations in each country.
ProhibitedProhibited
Do not take measurements in areas
subject to significant temperature
changes.
The results may be erroneous. In the
event of the product being moved
somewhere with a temperature
difference of 20˚C or more, do not use
for at least 2 hours after such a
relocation.
Do not take measurements
immediately after strenuous
exercise.
The results may be erroneous. Please
ensure that the individual being
measured is sufficiently rested first.
Instructions
• Do not use this equipment near other products that emit electromagnetic waves.
Erroneous operation is possible as a result of interference with certain lighting equipment, medical instruments, and communications
equipment (such as inverter fluorescent lighting, microwave therapy devices, and mobile
phones), so these factors should be checked before use.
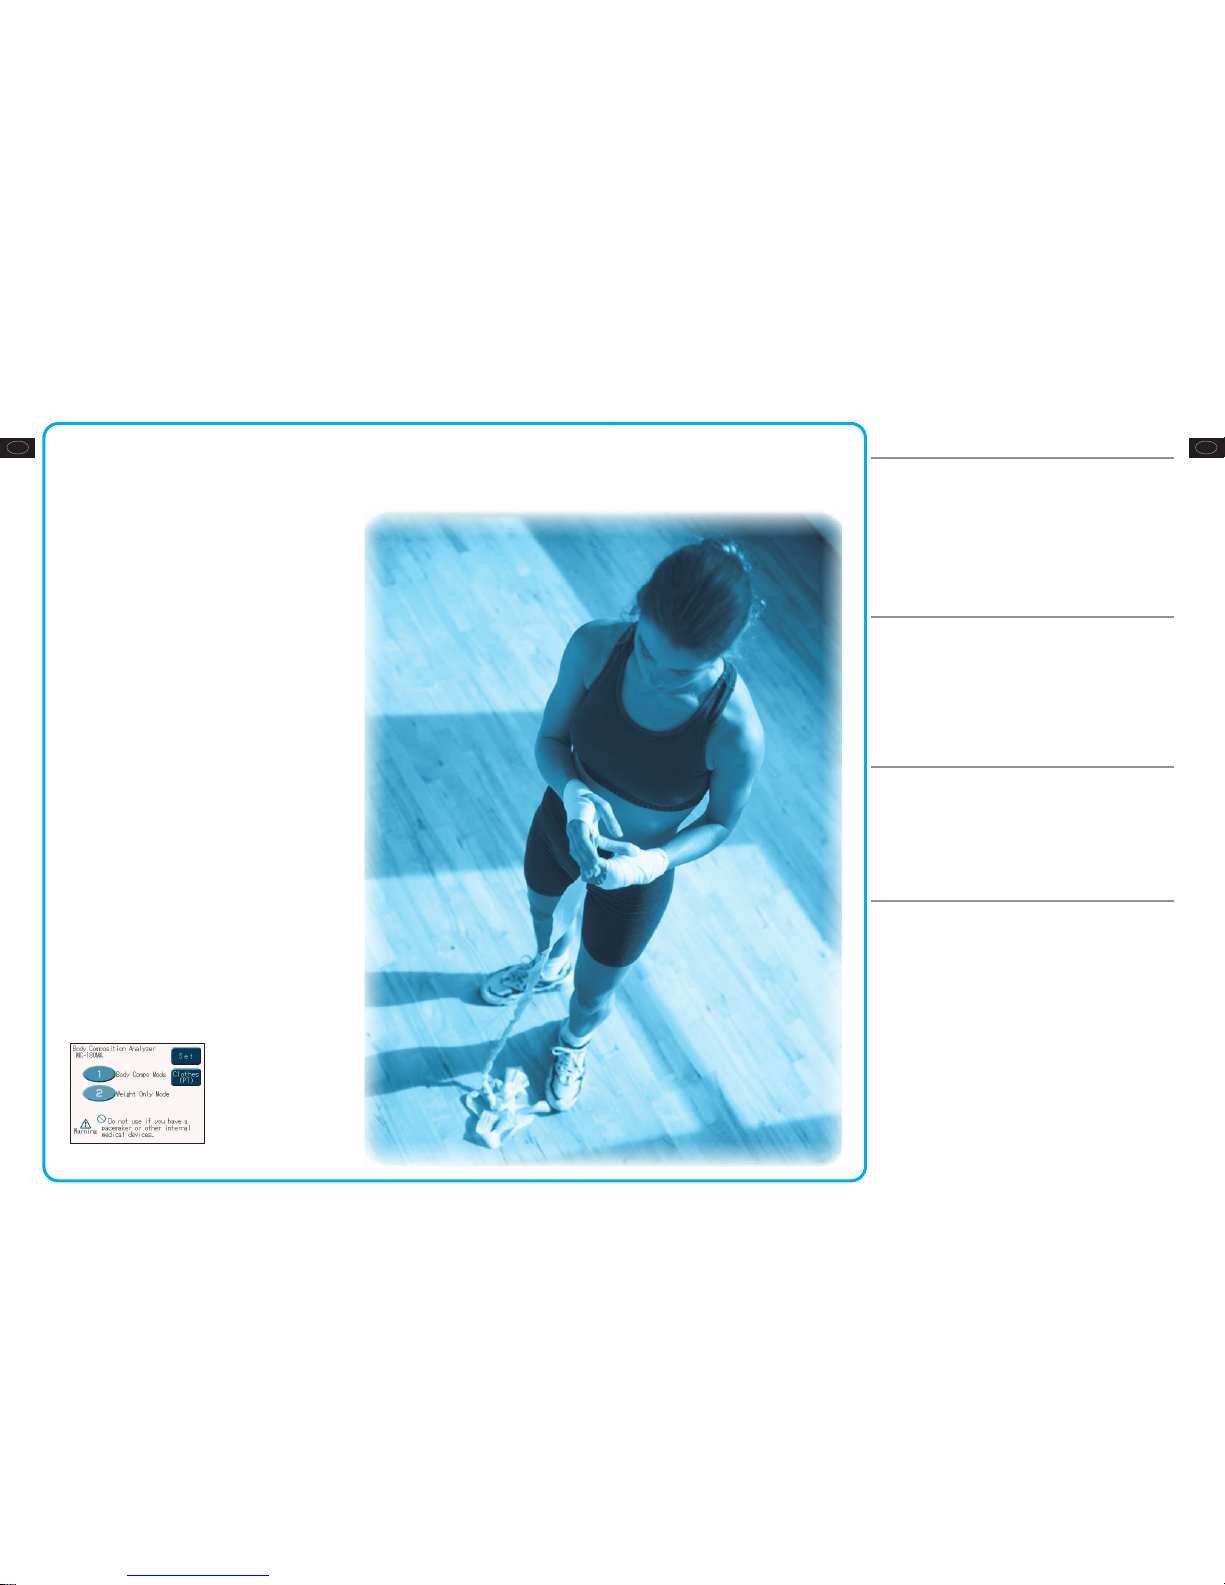
• Bare feet should be placed correctly on the electrode panel for
measurement.
Incorrect positioning may result in a lower fat % than is actually the case, or an error
message may be shown.
Feet should be positioned on the heel and toe electrodes on each side in roughly equal
proportions as indicated in the illustration on the right.
• Place arms straight down during measurement.
Other positions may induce a lower than actual fat %, or an error message may be shown.
• As far as possible, you should try to take measurements under the same conditions
each day in order to determine any fluctuations.
Otherwise, errors may be observed in the measured value. In order to enhance overall accuracy,
measurements should be taken at the same time every day, but not during the three hours after getting
up in the morning, or three hours after meals.
• Clean any dust or dirt from the palms and soles of the feet before measurement.
Such contaminants may induce a lower than actual fat %, or an error message may be shown.
• Avoid contact between the arms and torso, and between the inner thighs.
Such contact may induce a lower than actual fat %, or an error message may be shown. If they come
into contact because the measurement is being taken while naked or partially naked, a dry towel or
similar should be used as a barrier during measurement.
<Child> <Adult>
<Symbols and their Meanings>
On
Caution
Refer to the attached
notes.
Off
Conformity with
Medical Device
Directive 93/42/EEC
Input,
Output
Type BF
applied
part
Clothes
Weight
Setting
Class I
equipment
Alternating
current
)
GB
Before use
(cautions for safety)
Checking the level
8
GB
Before use
(cautions for safety)
Maintenance mode
button
cannot be used by
general customers
(
Check accessories
9
Using the touch panel
ON
OFF
Back
Mode setting
buttons
Used to change
each function
setting.
Printer cable
connection
RS-232C
After turning on the power, follow the procedure
below.
•Operation
•Measurement
e
Select measurement mode (body composition
analyzer / weight only (i.e. scales)).
•Setting
e
Press
Set
Cancel button
Used to cancel a
setting.
Back button
Used to return to
the previous screen.
Clear button
Used to correct the
input.
Next button
Used to display the
next setting screen.
Enter button
Used to set the
input information.
Toe electrodes
Level gauge
Right handgrip
Touch panel
Adjustable foot
(x 4)
Part names / Connection procedure
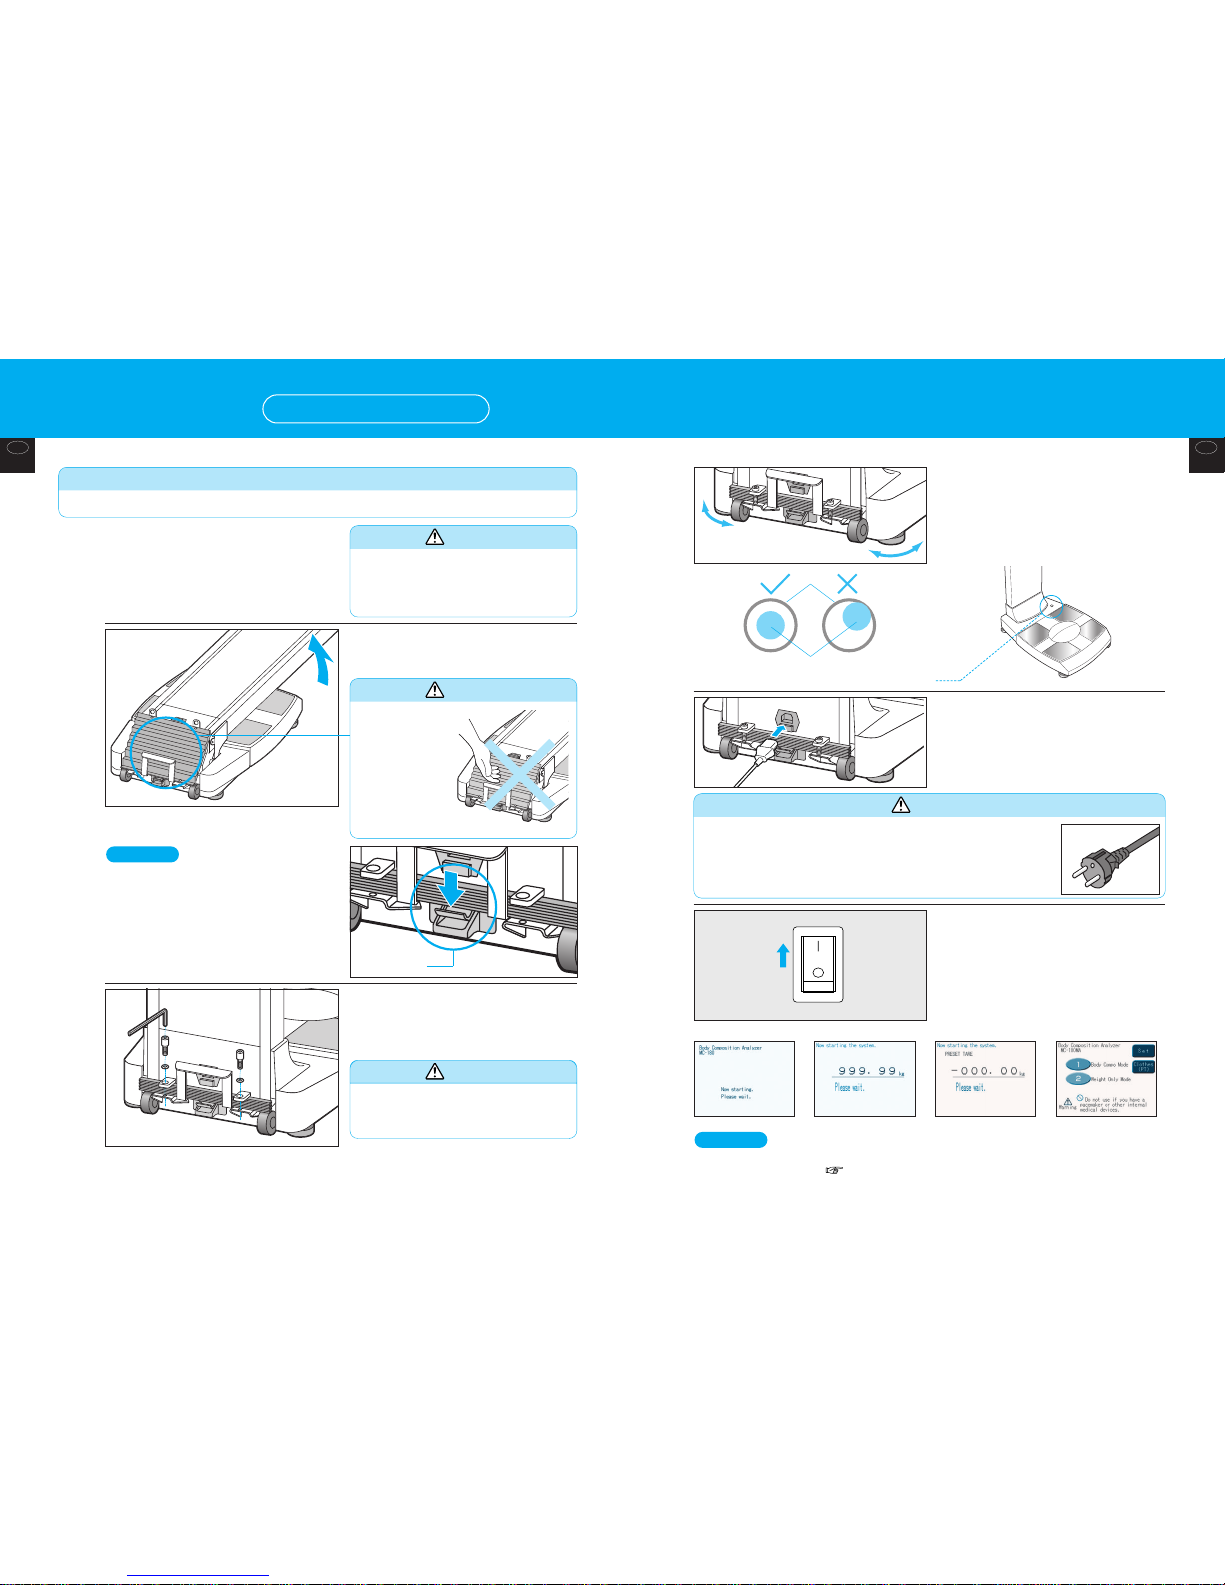
• For accurate measurement, position the scale to be
as level as possible.
• Rotate the four height-adjustable foot so that the air
bubble in the level gauge is perfectly centered.
black ring
air bubble
Status when the level gauge is viewed from above
• Instruction manual (this book)
• Dropper x 1
( page 42)
• Power cord x 1 • Allen wrench x 1
(to assemble the
column)
• Hexagon socket
setscrews / washers x 2
each (to assemble the
column)
• Main unit cover x 1
(for storage)
Left handgrip
Handle for moving
(back)
Power cord
connection
AC 230V
50/60 Hz
Heel electrodes
Measuring platform
USB
Power switch
Caution
Computer Connection
•
We do not supply computers. If connecting a computer,
please ensure that it is IEC60601-1 (EN60601-1)
compliant, or follow the IEC60601-1-1 (EN60601-1-1)
environment settings for products that conform to
IEC60950 (EN60950).
•
Before using the USB port, read “Connection to PC”
( page 58).
Printer Connection (optional)
•
We do not supply printers. Please select one that is
IEC60601-1 (EN60601-1) compliant, or follow the
IEC60601-1-1 (EN60601-1-1) setting conditions for
products that conform to IEC60950 (EN60950).
•
The installation manual provided with the printer must
be read before setting up the printer.
GBGB
Before use
(cautions for safety)
Before use
(cautions for safety)
Warning
10 11
Preparation
Setting up the main unit
ON
OFF
6
Turn on the power.
The screen counts down from “99999”, “88888”,
“77777” to “00000” before displaying the initial
screen.
Connect the power cord.
5
•The power cord must be connected to a 3-pin plug (with earth
terminal).
Failure to do so may result in an electric shock or leakage.
•If an “Error” message is shown;
Refer to “Troubleshooting” ( page 42) for details.
Note
s
① ② ③
④
1
Check the top and bottom of the
box and remove the main unit.
2
Positioning the column upright.
Raise the column until the lever clicks to indicate
it is in a locked position.
Secure the column and
measuring platform tightly
using the included screws and
washers.
3
Rotate the height-adjustable
feet (at the four corners) to
level the unit, and confirm that
the air bubble in the level
gauge is dead center.
4
black ring
air bubble
Status when the level gauge is viewed from above
Warning
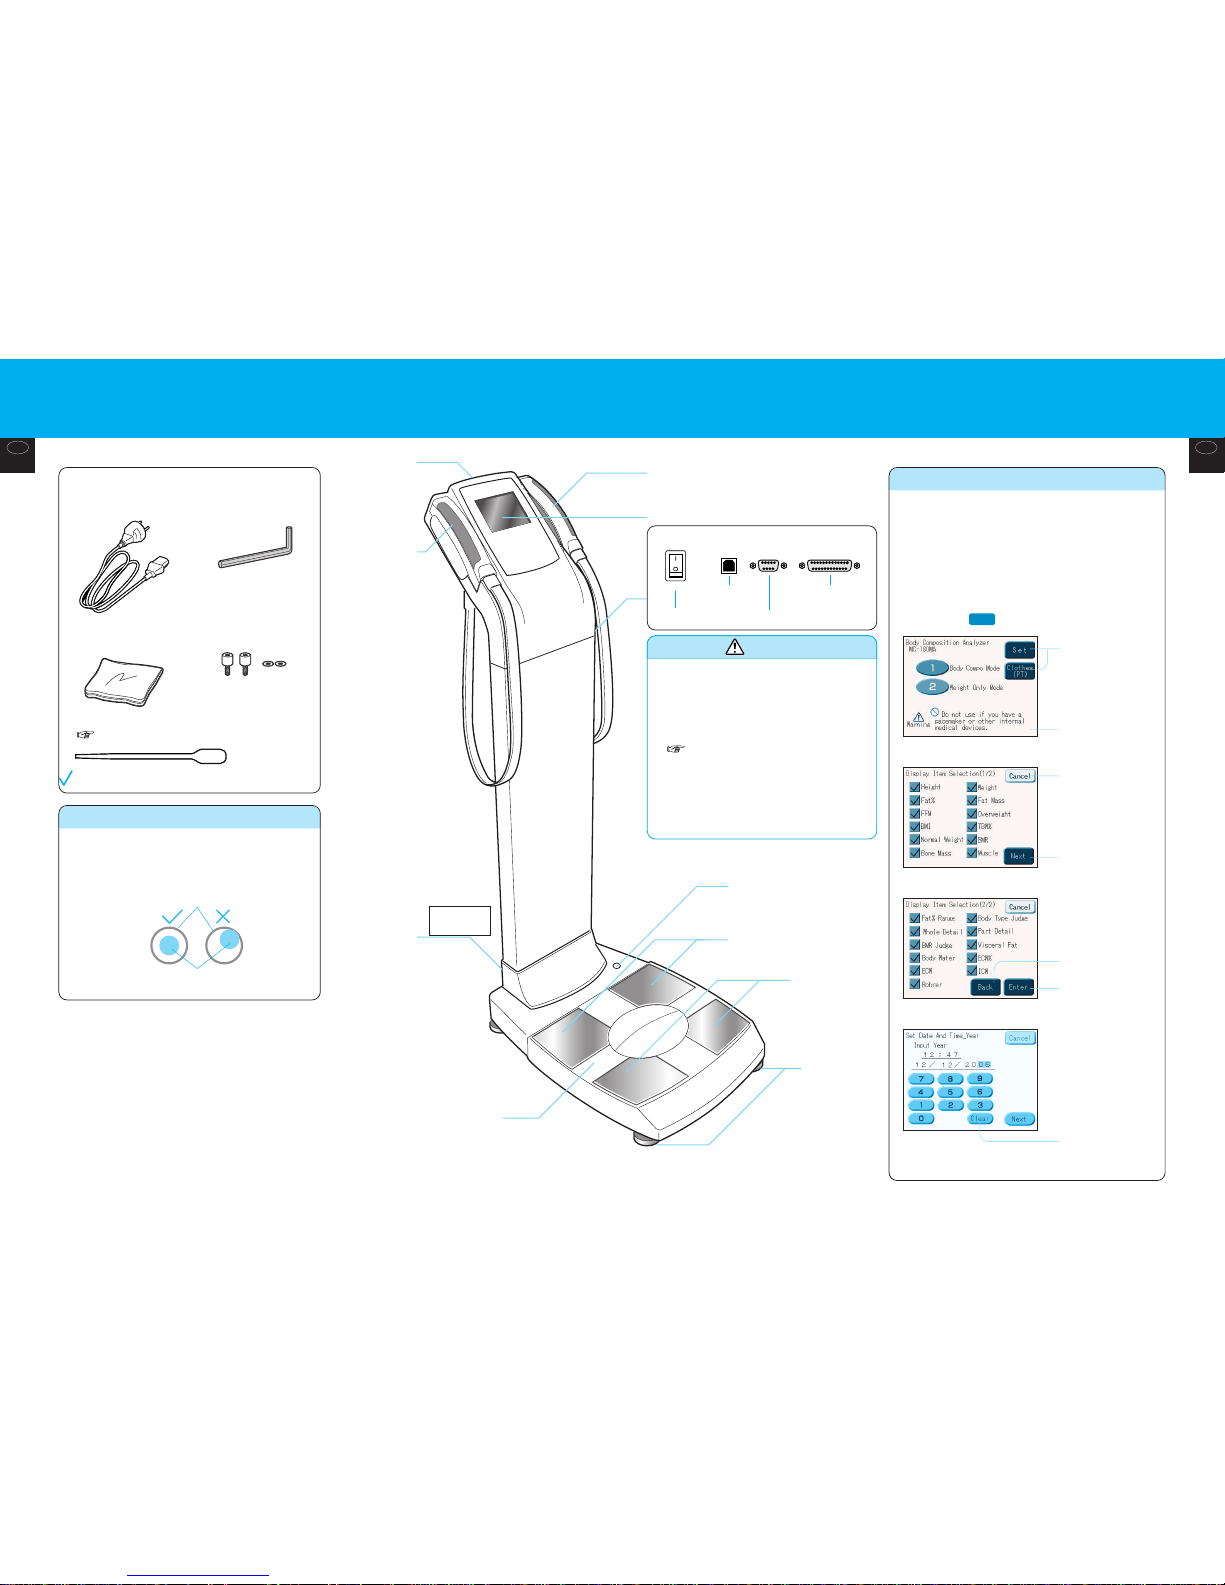
• During assembly,
be careful not to
insert or trap a
finger, foot or
suchlike in the
movable part of
the column. Such
action may result
in serious injury.
Warning
• The main unit is very heavy and should
therefore be taken out by two or more
people. Attempting to do this alone may
result in serious injury.
Request
• Please allow the retail sales staff to open the package and assemble the main unit.
Warning
• During assembly, hold the column firmly to
prevent it toppling over, and use the Allen
button supplied to tighten up the screws.
ss
•Unlocking the column to lay it flat
Press the tab just below the moving edge to
release the lock lever, and then gently lower the
column.
Note
Lock lever
GBGB
Before use
(cautions for safety)
Before use
(cautions for safety)
1312
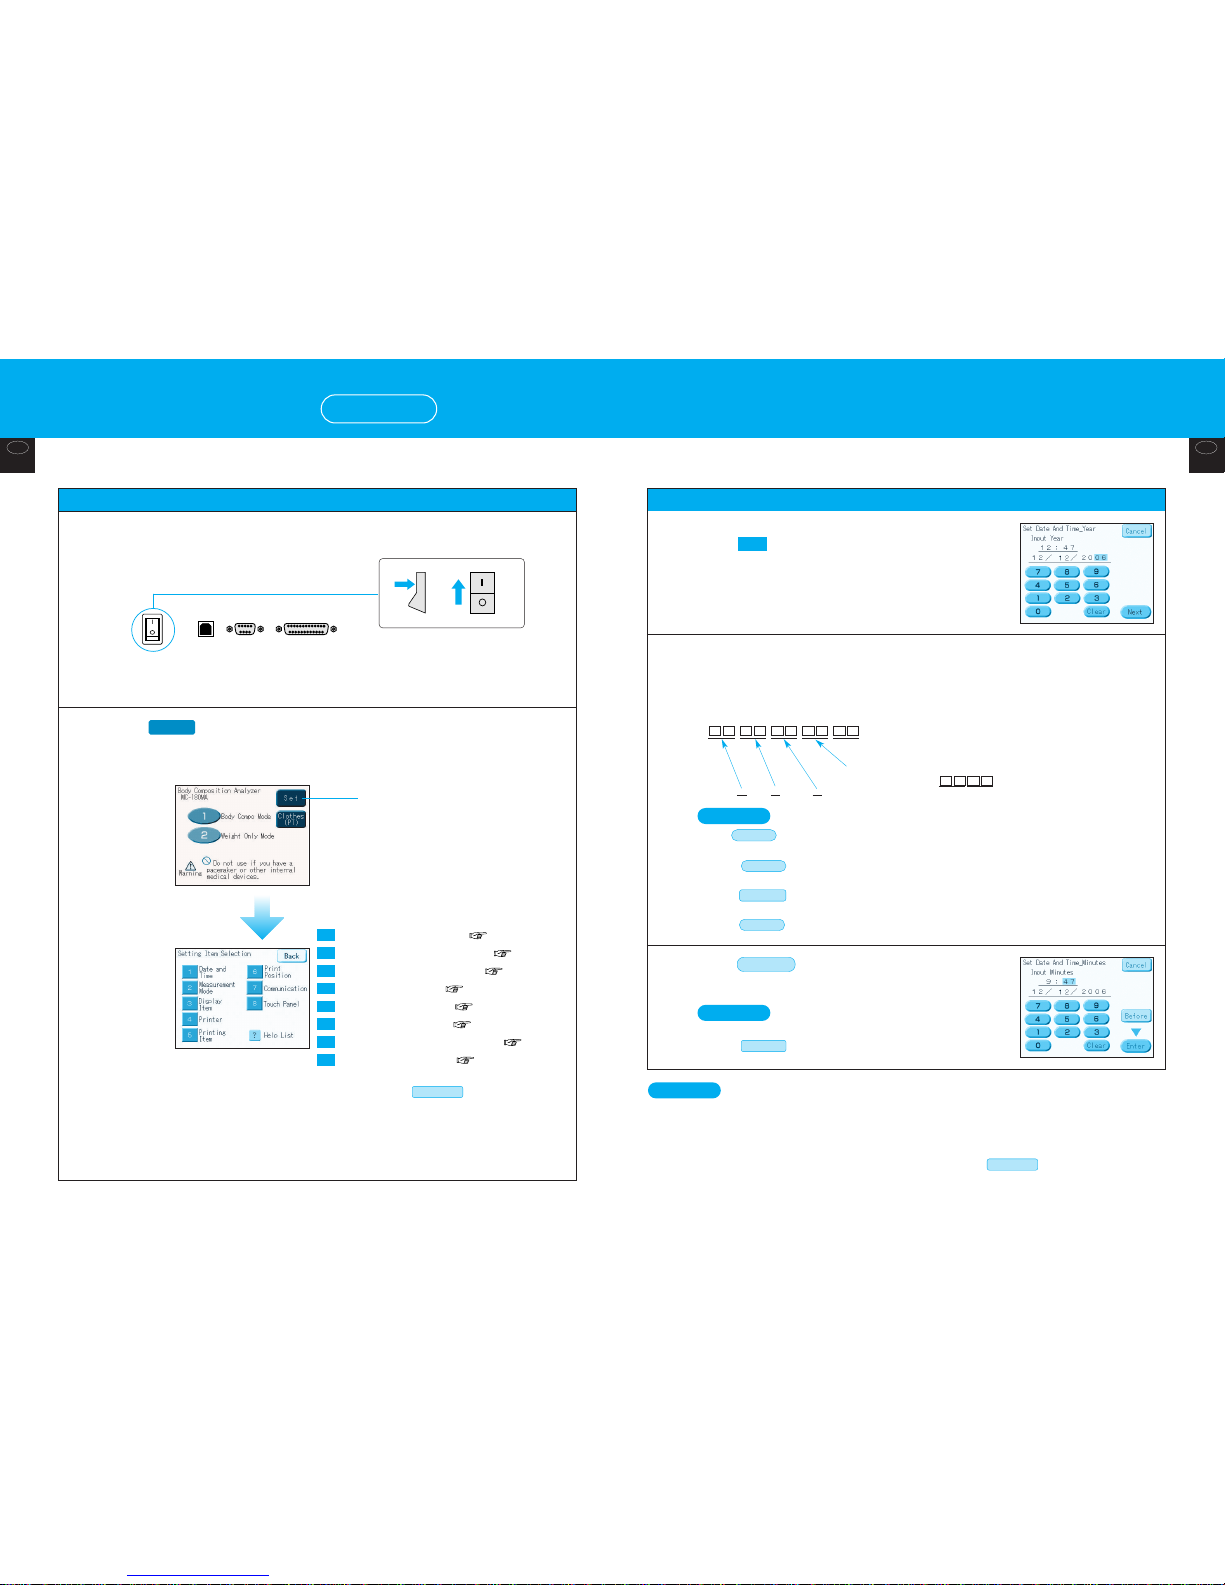
Setting the date and time
3
4
Input the current date and time
•Input the year, month, date, and time (hours and minutes) in sequential two-digit format as
indicated.
Example: To input 9:47 a.m. on January 21st, 2006;
9:47 a.m., January 21, 2006
Use the 24-hour clock.
e.g. 6 p.m. would be input as .
Month: 12
Date: 12 Year: 2006
•Input first in the case of single-digit numbers (0~9)
•To erase erroneous input,
e
Press (Input data is deleted.)
•To terminate the input process,
e
Press (Returns to the “Setting item selection” screen without changing the date and time.)
• After inputting the item displayed,
e
Press (The next input item is selected.)
Next
Cancel
Clear
0
Notes
0081
7490602121
•The clock function is backed up by rechargeable batteries, but if it is not used for a prolonged
period (two weeks or more), the setting is cleared naturally as the rechargeable batteries
discharge, so this must be reset. (Charging time: 5 hours or more)
•When various settings are performed in sequence,
e
Press each number to be set.
•Set details are retained until next modified.
Notes
On the “Setting item selection” screen,
press (Date and Time)
• The input screen for “Set Date, Time and Year” is displayed.
(The default setting when shipped is as per the screen in the
right.)
1
5
Press after all items have been input
• Returns to the “Setting item selection” screen.
•To return to the previous item,
e
Press .
Before
Notes
Enter
•Check: Is the procedure as per page 12 complete?
Activating the setting screen
Various settings
How to set
1
2
Turn on the power
• The initial screen is displayed.
• “Setting item selection”
screen is displayed.
Press
Set
Register the date and time. ( page 13)
Setting the measurement mode. ( page 14)
Setting of screen display items. ( page 15)
Setting up the printer. ( page 16)
Setting up of print items. ( page 18)
Adjust printing position. ( page 19)
Setting the communication details. ( page 20)
Setting the touch panel. ( page 21)
: After setting, press to return to the initial
screen.
Back
8
7
6
5
4
3
2
1
(Initial screen)
Back
(Setting item selection screen)
ON
OFF
Press the (Set button).
ON
OFF
•Once all settings have been made,
e
Press on the “Setting item
selection” screen. (Returns to the initial screen.)
Back
GBGB
Before use
(cautions for safety)
Before use
(cautions for safety)
14
Setting the measurement mode
(continued from page 12)
Power switch
(back)
Various settings
How to set (continued)
•
Check:
Is the procedure as per page 12 complete?
•When various settings are performed in sequence,
e
Press each number to be set.
•Set details are retained until next modified.
On the “Setting item selection” screen,
(1) Press (Measurement mode)
• The “Measurement mode
selection” screen is displayed.
(The default setting when
shipped is shown as the
following screen.)
2
3
4
Press
• Returns to the “Setting item selection” screen. ( page 12)
Enter
“Athletic”
•It is recommended to select
“Athletic” for individuals aged 18
or more who consider themselves
to be athletes or to whom the
following conditions apply, and
to use measured values for
reference.
• People who do 12 or more
hours of training (exercise) a
week
• Members of gymnastics or sports
organizations aiming to
participate competitively
• People such as bodybuilders who
undergo training to build up
muscles
• Sports professionals
(2) Select functions
•
Athletic selection
e
Decide whether or not to select
“Athletic” on the screen as the “Body Type”.( page 28)
•
Unit to input height
e
Input and output units can be
switched between millimetres and centimeters.
• Decide whether or not an ID number is to be input. Any ID
number that is input is displayed, printed and output serially
together with measurement results.
Serial ID: Specify
: [Check before measurement] to enable input of the
ID number. The input ID number is automatically increased serially after
each measurement.
ID
: The ID number input screen is shown after measuring the weight (or
immediately after that if skipped). If [Check before measurement] it is
specified, the ID number can be changed. It does not increase serially
after measurement, and the next user must input their ID.
•Stand-by screen
e
Select whether or not the stand-by screen display
function is to be activated or not. When is
selected, the stand-by screen is displayed for five minutes
after the last operation while the measuring platform is
clear.
ON
15
•Once all settings have been made,
e
Press on the “Setting item selection” screen. (Returns to
the initial screen.)
Back
•
Check:
Is the procedure as per page 12 complete?
Setting of screen display items
(continued from page 12)
4
Press
• Returns to the “Setting item selection” screen.
( page 12)
Enter
3
On the “Setting item
selection” screen:
(1) Press
(Display item)
• The “Display item selection
– Body composition
analyzer (1)” screen is
displayed. (The default
setting when shipped is as
per the screen in the
right.)
(2) Select items to
be displayed
•Pressing the or
mark beside each item
switches the selection.
* Items marked with an are not displayed on the screen
for measurement results ( page 31) or the screen for
whole body details ( page 32).
•To terminate the input process,
e
Press (Returns to the “Setting item
selection” screen without changing any items to be
displayed on the screen.)
•To terminate the input process,
e
Press (Returns to the “Setting item selection”
screen without changing the date and time.)
•To re-input the previous item,
e
Press (The previous input item is selected.)
Back
Cancel
Cancel
Notes
3
d
Press
Next
•To terminate the input process,
e
Press . (Returns to
the “Setting item selection”
screen without changing any
details that have been set.)
indicates current selection,
and indicates alternative
options.
Cancel
Notes
GBGB
Before use
(cautions for safety)
Before use
(cautions for safety)
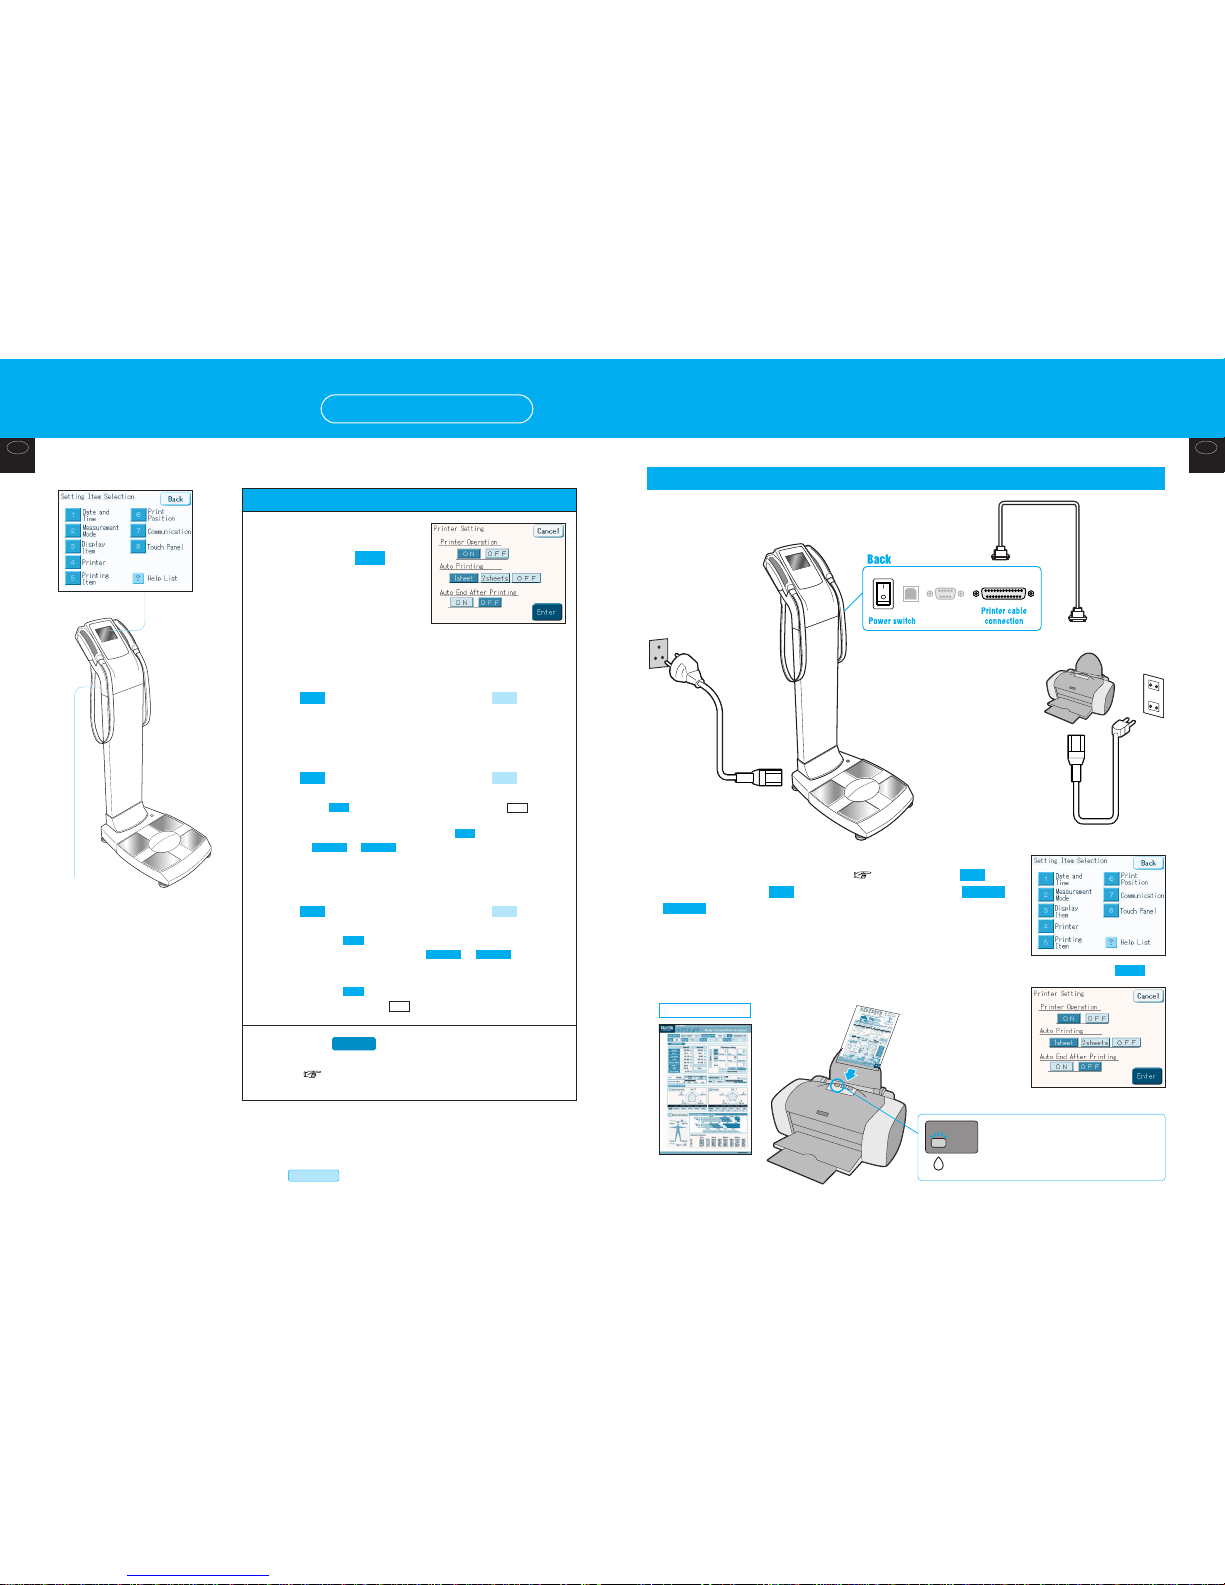
(1) Turn on the power on the main unit.
(2)On the “Setting item selection” screen ( page 12), select “ Printer”,
press printer operation , and the number of sheets to print (or
).
(3) Prepare operation of the printer.
* Refer to the manual provided with the printer. (Check ink settings and operation, etc.)
* Printing is not possible until at least 10 seconds after the printer has been turned on.
(4) Connect the attached printer cable as per the above illustration.
(5) Set the dedicated printing forms.
* Insert from the top of the printing form when setting. (Refer to the following illustration.)
2sheets
1sheetON
4
17
Printer Connection Example
ON
OFF
Setting up the printer (continued from page 12)
16
Power switch
(back)
•
Check:
Is the procedure as per page 12 complete?
•When various settings are performed in sequence,
e
Press each number to be set.
•Set details are retained until next modified.
•Once all settings have been made,
e
Press on the “Setting item selection” screen. (Returns to
the initial screen.)
Back
3
4
Press
• Returns to the “Setting item selection” screen.
( page 12)
Enter
On the “Setting item
selection” screen:
(1) Press
(printer)
• The “Printer Setting” screen
is displayed. (The default
setting when shipped is
shown as the following screen.)
(2) Setting of external printer
operation
• indicates current selection, and indicates
alternative options.
(3) Setting of automatic printing after
measurement
• indicates current selection, and indicates
alternative options.
* While is selected, a printout is issued only when is pressed
on the “Measurement results” screen.
* If the external printer operation is turned , nothing is printed even
if or is selected.
(4) Set to automatically end after
printing
• indicates current selection, and indicates
alternative options.
* When in mode, the “Measurement preparation” screen will
automatically appear only when or is specified for
automatic printing after measurement; the “Measurement preparation”
screen will appear automatically when printing finishes.
* When in mode, the "Measurement preparation" screen will
appear only when the button is pressed.
Quit
OFF
2sheets1sheet
ON
2sheets1sheet
OFF
Print
OFF
4
s
Press
4
(1)
(3)
(4)
(5)
(2)
d
Form insertion direction
• The ink lamp starts to flash once the ink
volume falls below a level sufficient to print
another 100 forms. (It is recommended that
the ink be replaced as soon as possible after
the lamp starts flashing.)
Various settings
How to set (continued)
GBGB
Before use
(cautions for safety)
Before use
(cautions for safety)
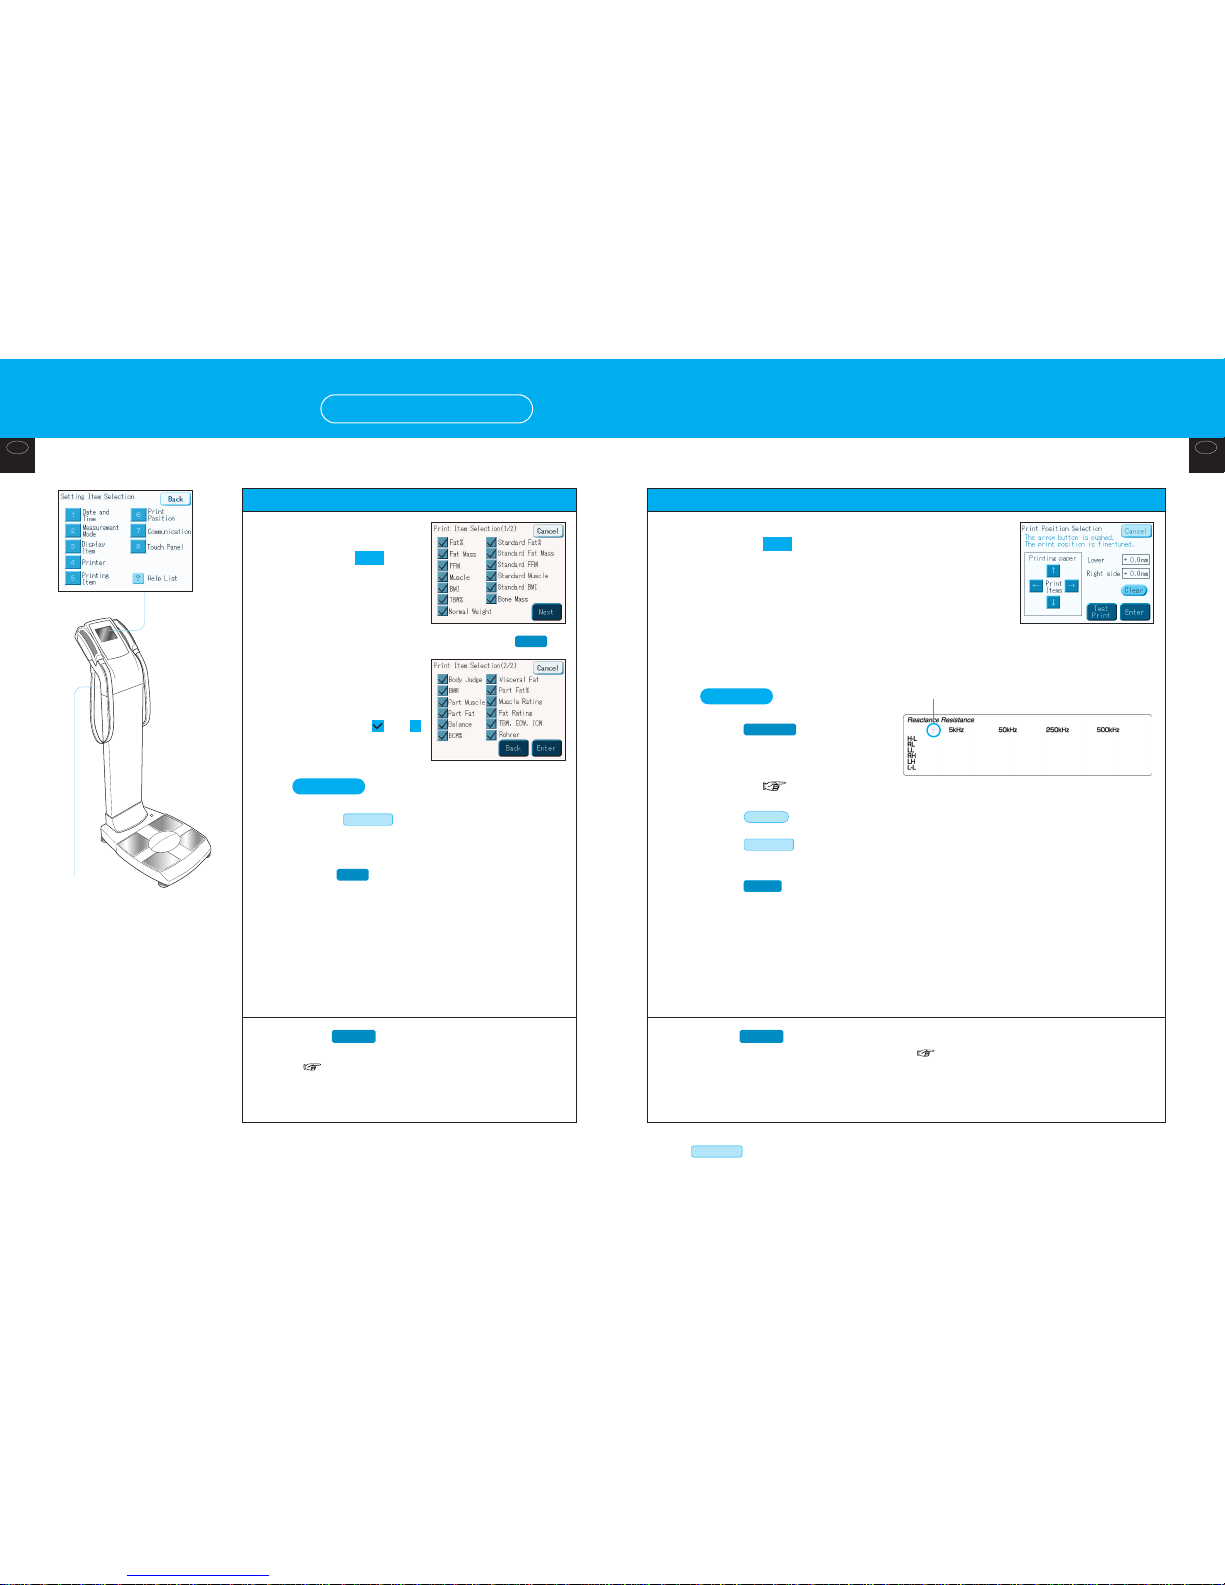
Adjust printing position (continued from page 12)
18 19
•
Check:
Is the procedure as per page 12 complete?
•Once all settings have been made,
e
Press on the “Setting item selection” screen. (Returns to the initial screen.)
Back
3
4
Press
• Returns to the “Setting item selection” screen. ( page 12)
Enter
On the “Setting item selection” screen:
(1) Press (Print position selection)
• The “Adjust printing position” screen is displayed. (The default
setting when shipped is as per the screen in the right.)
6
(2) Adjust the printing position
• The printing position can be adjusted in the direction indicated by the arrow in 0.1mm increments.
(Adjustable range: ±10.0)
•To confirm the printing position,
e
Press .
Adjust so that the printing position
adjustment mark on the form and
cross mark for printing are perfectly
aligned. ( pages 38 and 39)
•To return the printing position to its initial status,
e
Press (Returns all numeric values to 0.0.)
•To terminate the input process,
e
Press (Returns to the “Setting item selection” screen without changing the printing
position.)
•To confirm the printing position,
e
Press (Returns to the “Setting item selection” screen.)
Enter
Cancel
Clear
Test Print
Notes
Setting up of print items (continued from page 12)
Power switch
(back)
•
Check:
Is the procedure as per page 12 complete?
•When various settings are performed in sequence,
e
Press each number to be set.
•Set details are retained until next modified.
3
4
Press .
• Returns to the “Setting item selection” screen.
( page 12)
Enter
On the “Setting item
selection” screen:
(1) Press
(Printing item)
• The “Printing item setting –
Body composition analyzer
(1)” screen is displayed.
(The default setting when
shipped is as per the
screen in the right.)
(2) Select items to
be printed.
•Pressing the or
mark beside each item
switches the selection.
•To terminate the input process,
e
Press (Returns to the “Setting item
selection” screen without changing any items to be
displayed on the screen.)
•To re-input the previous item,
e
Press (Returns to the "Printing item selection
(1)" screen without changing the print items.)
Back
Cancel
Notes
5
s
Press
Next
Cross mark
Various settings
How to set (continued)
 Loading...