

Page 1
Instruction manual
1
Page 2

2
Page 3

The objective of every Tangent product
is that fundamentally correct
design can produce a product
capable of achieving excellent
performance and affordability.
www.tangent-audio.com
This operation manual supplies all the information that you need to have about your Tangent NET-200.
Please read this operation manual carefully before you start using the unit!
3
Page 4

Content
SAFETY PRECAUTIONS 6
IMPORTANT SAFETY INSTRUCTIONS 7
IMPORTANT INFORMATION 9
CONNECTION 10
Connection to the mains 10
FRONT PANEL BUTTONS AND CONNECTIONS 11
REAR PANEL CONNECTIONS AND BUTTONS 12
REMOTE CONTROL BUTTONS 13
USING THE REMOTE 15
Installation of batteries 15
Using the remote control 15
AUDIO CONNECTIONS 16
FRONT PANEL INPUT 17
INTERNET RADIO QUICKSTART GUIDE 18
What you need before you can use your Internet radio 18
Steps for connecting your radio to your wireless network 18
Step 1 - Power up the radio 18
Step 2 - Scan for a wireless network connection 18
Step 3 - Connect to the wireless network 19
Steps for connecting your radio to your wired network 19
Choosing a radio station to listen to 20
<Location> 21
<Genre> 21
<Search> 21
Using your radio for tuning into DAB stations 21
Using your radio for tuning into FM stations 22
Returning to the menu while a station is playing 22
Storing a radio station in a preset 22
Playing a preset radio station 22
Requesting a station that is currently unavailable 23
Stations which enable you to choose what you listen to 23
Setting the clock 23
MEDIA PLAYER QUICKSTART GUIDE 25
Set up your Windows PC to allow the radio to access your audio files via Windows Shares 25
Locate the shared audio files using the radio 25
Listening to a single shared track 25
Listening to a complete shared album 26
Queuing up tracks for playback later 26
4
Page 5

Queuing up albums for playback later 26
Controlling playback 26
Browsing the list of tracks currently queued up for playback 26
Removing tracks from the queue 26
Playing tracks in random order 27
Playing tracks in the queue repeatedly 27
Set up a Windows PC to allow the radio to access your audio files via a UPnP server 27
Locating and playing media files using the radio and UPnP 28
Browsing the list of tracks currently queued up for playback 29
Queuing up UPnP tracks for playback later 29
Queuing up albums for playback later 29
Controlling playback 29
Removing tracks from the queue 29
Playing tracks in random order 30
Playing tracks in the queue repeatedly 30
SETTINGS MENU 30
Choosing the option you want from the Settings menu 30
<Network Config> 30
<Version> 30
<Upgrade Firmware> 30
<Language> 31
<Factory Reset> 31
<Register> 31
<Set Time/Date> 31
<DAB Settings> 31
<UPnP> 31
<Wifi Strength> 31
CONFIGURING ‘MY STUFF’ 32
Registering an account on Reciva’s website 32
Configuring ‘My Stations’ 32
Configuring ‘My Streams’ 32
TROUBLESHOOTING 33
SOFTWARE LICENCE INFORMATION 34
SPECIFICATIONS 35
5
Page 6
SAFETY PRECAUTIONS
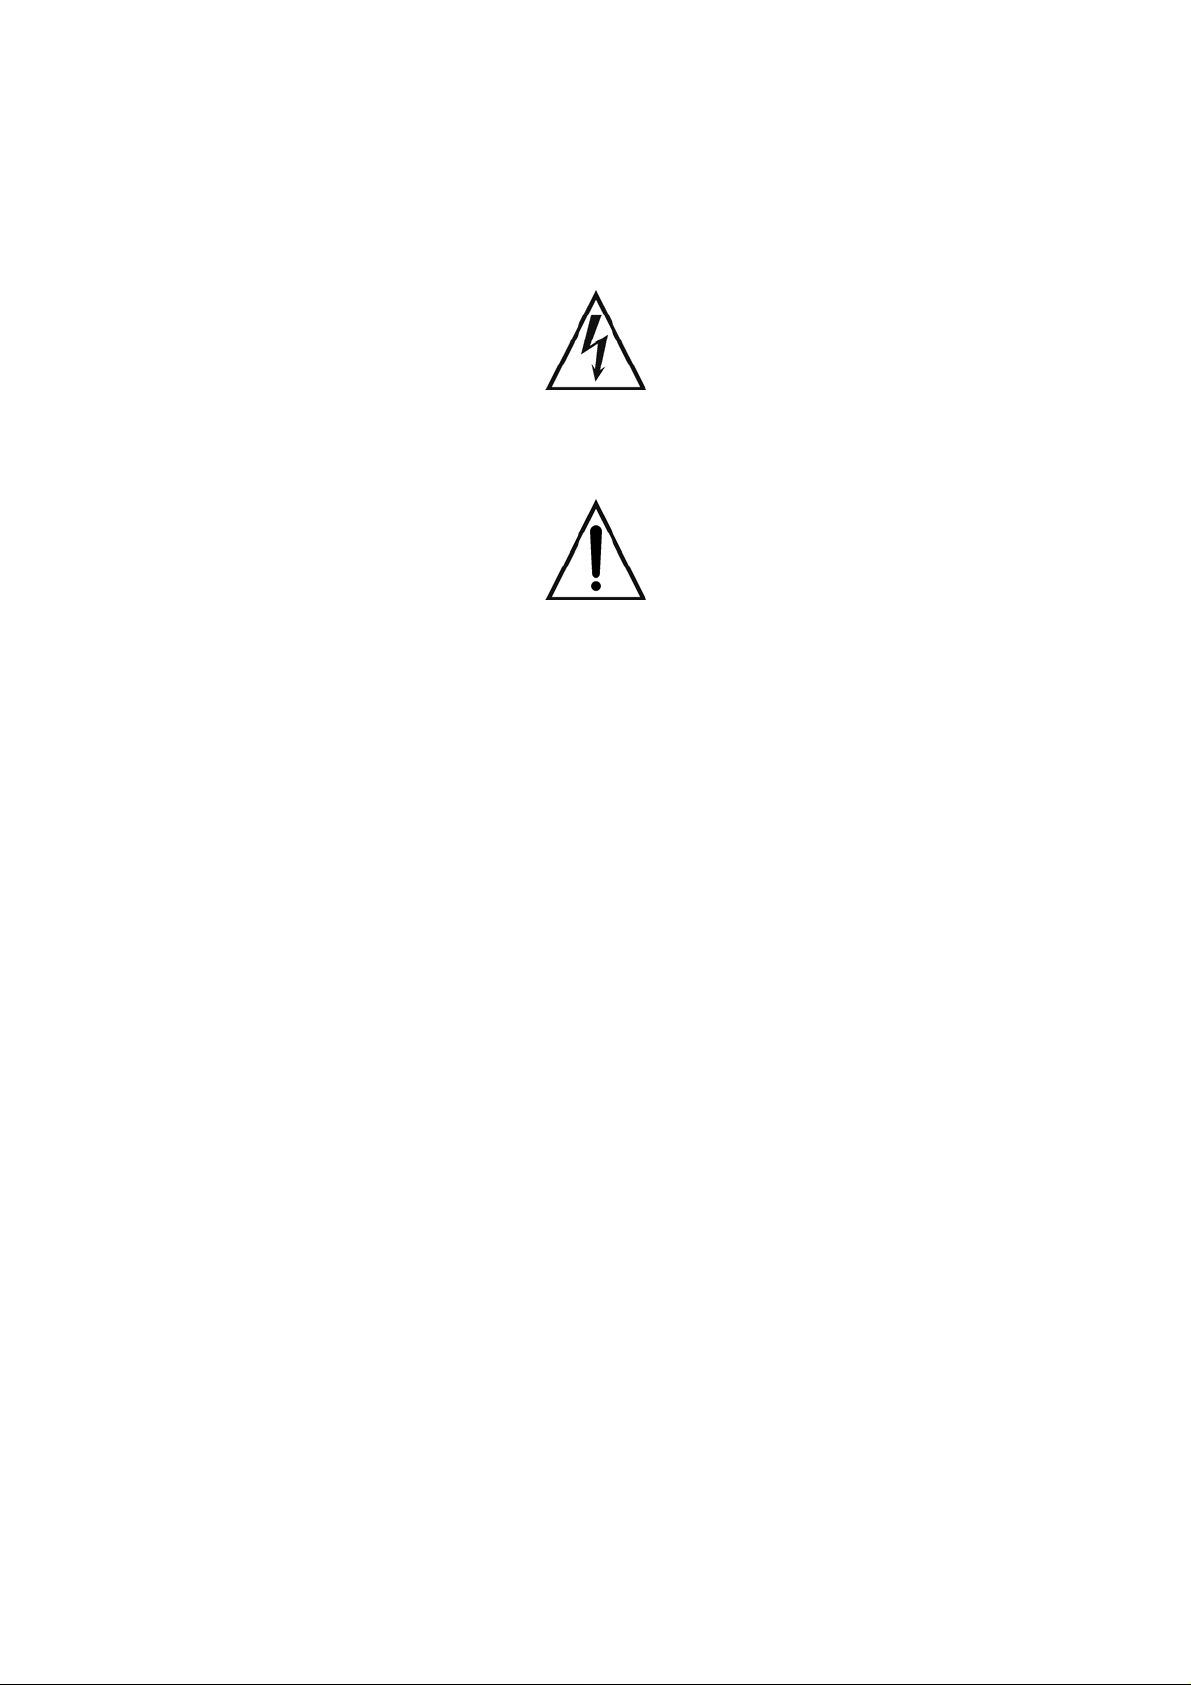
A triangle with a lightning symbol draws the user's attention to "dangerous voltage" without insulation in the
cabinet, which may be high enough to entail a risk of electric shock.
A triangle with an exclamation mark draws the user's attention to important instructions for use and
maintenance in the enclosed manual, which should be studied.
WARNING:
TO MINIMISE THE RISK OF FIRE OR ELECTRICAL SHOCK, DO NOT EXPOSE THE UNIT TO RAIN OR
MOISTURE. DO NOT OPEN THE CABINET AS IT CONTAINS DANGEROUS VOLTAGE. ONLY QUALIFIED
TECHNICIANS ARE ALLOWED TO CARRY OUT REPAIR AND SERVICE.
POWER SOURCE:
The unit if Class 1 construction and must be connected to a Mains socket outlet with a protective earthing
connection.
POWER CORD
The main plug is used as the disconnect device, the disconnect device shall remain readily operable.
POSITIONING
The apparatus shall not be exposed to dripping or splashing and that no objects with liquids, such as vases,
shall be placed on the apparatus.
CAUTION:
If the plug of the power cord needs to be replaced, it is important that the replacement is identical to the plug to
be replaced, or that the new plug has been recommended by the manufacturer
TO AVOID ELECTRICAL SHOCK, IT IS IMPORTANT TO INSERT THE PLUG CORRECTLY INTO THE
SOCKET.
6
Page 7

IMPORTANT SAFETY INSTRUCTIONS
WARNING: IT IS IMPORTANT THAT YOU READ AND OBSERVE BOTH THE INSTRUCTIONS IN THIS
MANUAL AND THE INSTRUCTIONS ON THE UNIT. KEEP THIS MANUAL FOR FUTURE REFERENCE.
This unit was designed and manufactured with a view to providing maximum safety for the user. Incorrect use
of the unit may cause electrical shock or fire. The protection devices built into this unit will protect the user if
the procedures below are observed in connection with installation, use and repair. This unit is fully electronic
and contains no parts that can be repaired by the user.
DO NOT REMOVE THE CABINET. RISK OF DANGEROUS VOLTAGE. ONLY QUALIFIED TECHNICIANS
ARE ALLOWED TO REPAIR THE UNIT.
Read the manual
Upon unpacking the unit, please read the manual carefully and observe all the instructions given.
Power supply
Only the power supply indicated on the rating plate must be used for this unit. If you are not sure which power
supply you have, please contact the distributor or the local electricity supplier.
Earthing or polarization
If the plug cannot be inserted properly into the socket, or if the plug does not fit, the unit must not be used in
your country.
Ventilation
The cabinet is provided with slots and openings to ensure ventilation and reliable operation and to protect the
unit against overheating. Do not block or cover these openings. The openings must never be blocked, for
instance by placing the unit on a bed, a sofa, a carpet or similar surface.
Heat
Do not place the unit near sources of heat such as radiators, heat registers, ovens or other units that produce
heat.
Water and moisture
The unit must not be placed close to water, such as bathtub, washbasin, kitchen sink or laundry tub, in a damp
cellar or close to a swimming pool, etc.
Cleaning
Unplug the unit before cleaning. Do not use liquid detergents and aerosol cleaning agents. Use a dry cloth.
Power cords
Wiring must be organized to prevent people from stepping on the cables and to avoid pinching by objects
placed on or beside them. Take special care around sockets and plug boxes and where the power cords leave
the unit.
Overloading
Make sure that wall sockets, extension cords and plug boxes are not overloaded as this may lead to fire or
electrical shock.
7
Page 8

IMPORTANT SAFETY INSTRUCTIONS
Lightning
Unplug the unit for additional protection during thunder or when the unit is not used for prolonged periods. This
will prevent damage to the unit from lightning and power surges.
Penetration of objects and liquid
Never push any foreign objects through the openings into the unit, as they may touch dangerous voltage
points or short-circuit parts and thus cause fire or electric shock. Do not spill liquid on the unit.
Accessories
Do not place the unit on unstable surfaces such as a trolley, stand, tripod, shelf or table. The unit may fall and
injure children or adults or be seriously damaged. Use only trolley, stand, tripod, shelf or table that is very
stable or provided with the unit. The unit must be installed in accordance with the manufacturer's instructions
and by means of installation equipment recommended by the manufacturer. If the unit is placed on a trolley,
the trolley must be moved very carefully. Sudden stops, unnecessary force and uneven surfaces may cause
the trolley to turn over.
Loads
Do not place heavy loads on the unit and do not step on it. The load may fall and cause serious injury to
persons or damage to the unit.
Damage
Unplug the unit and contact qualified technicians in the following cases:
A) If the power cord or the plug is damaged.
B) If liquid has been spilled on the unit or objects have fallen into the unit.
C) If the unit has been exposed to rain or water.
D) If the unit does not work properly after adhering to the instructions in the operation manual. Only the
settings described in the operation manual must be made as incorrect setting may result in damage and
often will make it difficult for a qualified technician to make the unit work properly again.
E) If the unit has been dropped or damaged in any other way.
F) When the operation of the unit changes drastically, the unit requires service.
Service
Do not attempt to carry out any service work yourself. By opening or removing the cabinet, you will be exposed
to dangerous voltage or other hazards. Any service work should be carried out by qualified technicians.
Spare parts
If spare parts are required, make sure that the service technician uses spare parts specified by the
manufacturer or spare parts with the same characteristics as the original. Unauthorized spare parts may cause
fire, electrical shock, etc.
Safety check
After service or repairs on the unit, ask the service technician to carry out a safety check to ensure that the unit
is ready for use.
8
Page 9

IMPORTANT INFORMATION
Handling instructions
- The top and back panel of the unit may become warm after prolonged use. This is not due to a defect.
- Turn off the power when the unit is not used.
Protect the power cord
- Follow the instructions below to prevent abnormal operation, electrical shock, fire or personal injury:
- Hold the plug firmly when inserting it into the socket.
- Avoid heat-producing devices.
- Do not place objects on the power cord.
- Do not carry out service work on or change the power cord.
Positioning
Do not place the unit in any of the fol. places:
- In sunlight, close to heat-producing devices or in an enclosed rack.
- In places with high temperatures (40C or more) or high relative humidity (90% or more).
- In dirty places as some internal parts may be damaged.
Do not put your fingers or any other objects into the unit
- Touching the internal parts is dangerous and may cause injury or damage. Do not open the cabinet.
- Do not place any foreign matter in the unit.
Interference
Placing the unit near a television set, radio or video player may cause poor picture and sound quality. In that
case, move the unit further away from the television set, radio or video player.
Condensation
Condensation may occur in the following cases:
- When the unit is moved directly from a cold to a warm place.
- When the unit is used in a room where the radiator has just been switched on or a place where the cold
air from the air-conditioning system is directed at the unit.
- If the unit is used in the summer in a warm and humid room just after it has been moved from an air-
conditioned room.
- If there is steam or a high level of humidity in the room.
In case of condensation, the unit will not work properly. Turn off the unit. Unplug the unit and leave it for 2-3
hours. The unit will then have adapted to the environment and any condensation will have disappeared.
9
Page 10
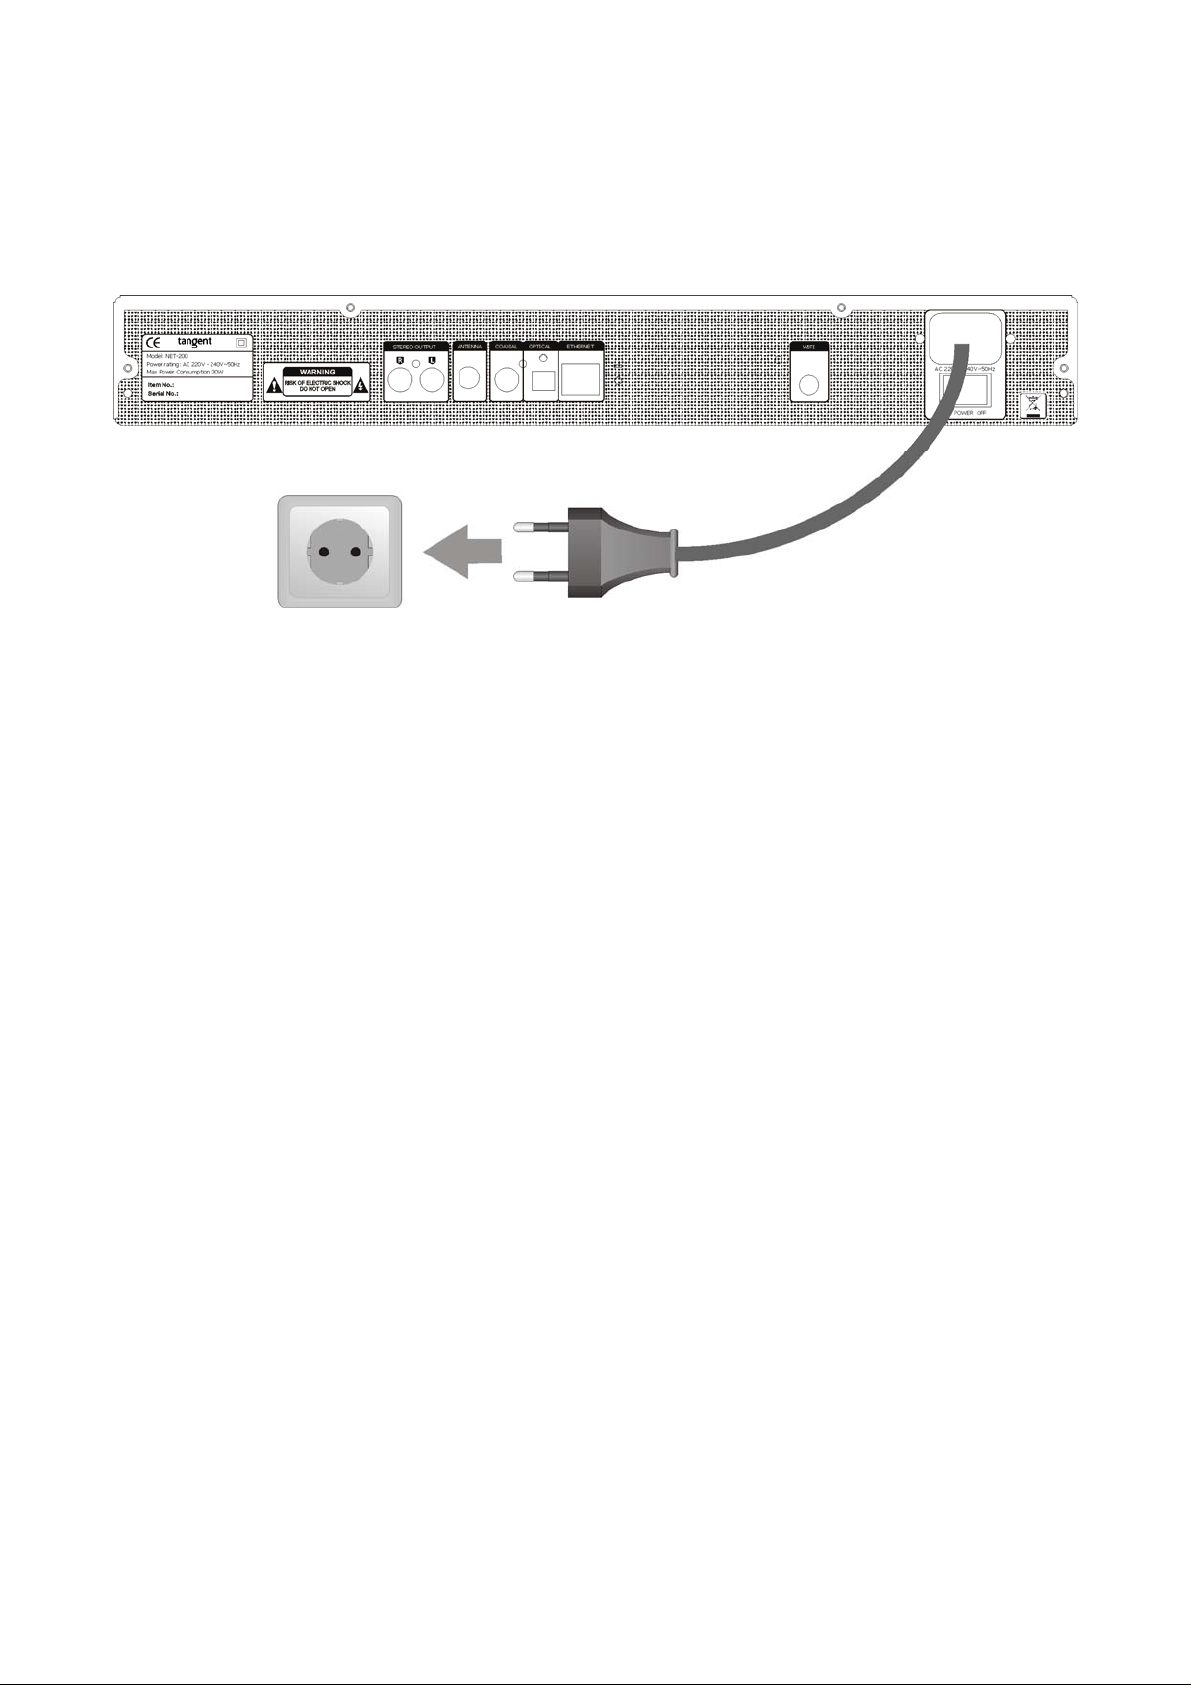
CONNECTION
Connection to the mains
Check that all other connections have been made correctly before inserting the mains plug into the wall
socket. Then insert the plug into a suitable socket.
Note: If the unit is to be used abroad, you may need an adapter.
CAUTION:
Do not turn on the power before all connections have been made correctly. You might break your new unit.
Check that all connections have been made correctly before turning on the power.
Check that the mains voltage is 220-240V AC50~60Hz before turning on the power.
10
Page 11
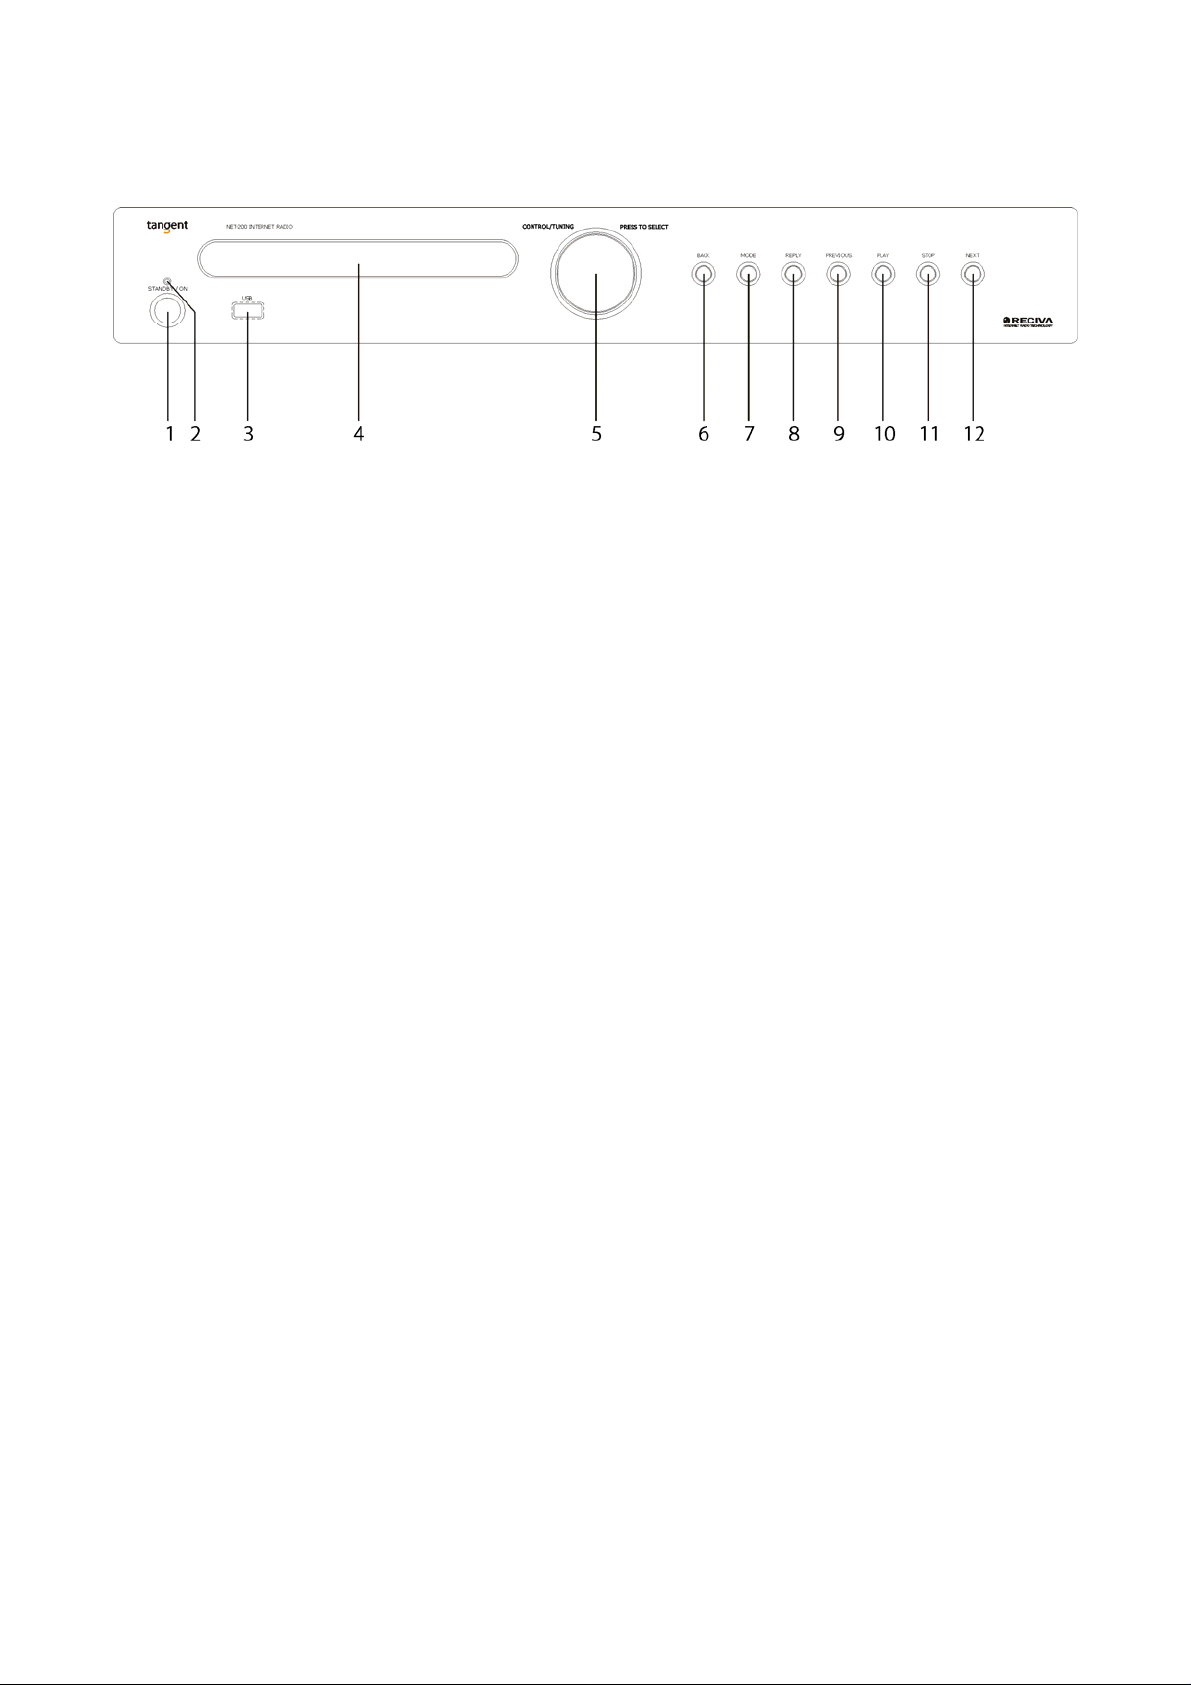
FRONT PANEL BUTTONS AND CONNECTIONS
The points below contains a brief description of the front panel buttons and inputs. For more detailed
descriptions of the functions and connections, please see the following pages of the manual.
1. POWER.
Press the power button to set the unit into standby. The standby LED will turn red. Press the power
button once again, to turn on the unit on again. The standby LED will turn green.
2. Standby LED
The standby LED indicates whether the unit is on or in standby. When the receiver is on, the standby
LED will glow green. When the unit is in standby, the standby LED will glow red.
3. USB input
Use this input for connection of USB sources, like a MP3 player, memory stick, cell phones, etc.
Note: This input is not compatible with all models of iPod.
4. Display.
Shows information of the selected source, adjustments, playback counter, system state, etc..
5. CONTROL/TUNING
Turn this button to navigate in menus, select tracks and change between channels. Press the button to
select
6. BACK
This button allows you to go back in menus.
7. MODE
This button changes between Internet radio mode, FM tuner mode and DAB tuner mode
8. REPLY
For future interactive features. See http://www.reciva.com for further information.
9. PREVIOUS
This button selects the previous track during media player mode.
10. PLAY
Press this button to start playback. Press it once more to temporarily stop playback.
11. STOP
Press this button to stop playback.
12. NEXT
This button selects the next track during media player mode.
11
Page 12

REAR PANEL CONNECTIONS AND BUTTONS
The points below contain a brief description of the rear panel buttons, inputs and outputs. For more detailed
descriptions of the functions and connections, please see the following pages of the manual.
1. Analog stereo output
Analog stereo output. For connecting to an amplifier or receiver with analog RCA cables.
2. FM/DAB antenna input
This antenna is used to obtain the best possible reception on the built in FM and DAB tuner
3. Coaxial output.
Coaxial output for connection to an external sound processor, surround receiver, digital stereo receiver,
etc.
4. Optical outputs.
Optical output for connection to an external sound processor, surround receiver, digital stereo receiver,
etc.
5. Ethernet (RJ-45)
Use the input for connection if you would like to integrate the NET-200 to your network via a wired
connection.
6. Wifi antenna
This WIFI antenna is used to obtain the best possible connection to the network (LAN)
Please notice that Tangent recommend only to use the included WIFI antenna.
7. Mains power input.
Connect the AC power cord to this jack when the installation is complete. To ensure safe operation, use
only the power cord supplied with the unit. If a replacement is required it must be of the same type and
capacity.
8. Mains power switch.
Mains power ON/OFF switch. This is not a standby function. This is the mains power switch. When this
switch is set to OFF, the unit will not use any power at all.
12
Page 13

REMOTE CONTROL BUTTONS
1. System off:
Sets all devices in the hifi 200 series into standby
2. 0-9 digits
Selects the tracks or chapters on the NET-200. If pressed in combination with the +10 button (3)
numbers larger than 9 can be selected.
3. +10
Use this button along with the 0-9 digits to select presets on the NET-200 above 9. For example press
the +10 button and the 5 digit to select preset 15.
4. St/Mo
This button changes between stereo and mono reception in FM tuner mode
5. Memory
Use this button to store stations to a preferred preset in either internet radio mode, FM tuner mode or
DAB tuner mode.
When listening to a station press the Memory button, then press the number the station should be stored
at, and confirm by preset the Enter button (14)
6. Autotune
This button tunes in all available station in DAB tuner mode and searches for stations FM tuner mode.
13
Page 14

7. Display
Press this button to change between information shown in the display.
8. CD/DVD/TUNER/AUX2/AUX3/PHONO
Press one of these buttons to set the NET-200 into standby.
9. T-Mode
Press this button to change between Internet radio mode, FM tuner mode and DAB tuner mode.
10. AUX1
Turns the NET-200 and AMP-200 on and selects the AUX1 input on the AMP-200.
The DVD, CD, TUNER, AUX2, AUX3 and PHONO buttons will set the NET-200 into standby.
11. Station -
This button selects the previous stored preset when listening to Internet radio mode, FM tuner mode or
DAB tuner mode.
12. Station +
This button selects the next stored preset when listening to Internet radio mode, FM tuner mode or DAB
tuner mode.
13. Up arrow
Works as Browse button. Please see the “Media Player Quickstart Guide” for further information
14. Enter
Press this button to confirm your choices in menus etc.
15. Left arrow
Press this button to navigate to the left in menus and between channels.
16. Right arrow
Press this button to navigate to the right in menus and between channels.
17. Down arrow
Press this button to go back in menus.
18. Tuning -
Press this button to tune down in frequency in FM tuner mode.
In DAB mode pressing this button will step to the previous station in the stations list of tuned in stations.
19. Tuning +
Press this button to tune up in frequency in FM tuner mode.
In DAB mode pressing this button will step to the next station in the stations list of tuned in stations.
20. Setup
Press this button to go directly to the Settings menu in the main menu.
21. Menu
Press this button to go to the root of the main menu.
22. Repeat
Press this button to play all tracks in the queue in media player mode repeatedly.
Press the button once again to return to normal playback mode.
23. Random:
Press this button to play all tracks in the queue in media player mode in random order.
Press the button once again to return to normal playback mode.
24. Previous (I<<)
Press this button to select the previous track in the queue in media player mode.
25. Next (>>I)
Press this button to select the next track in the queue in media player mode.
26. Stop
Press this button to stop playback in media player mode
27. Play / Pause
Press this button to pause playback temporarily in media player mode. Press the button once again to
start playback again.
14
Page 15

USING THE REMOTE
Installation of batteries
1 Remove the battery cover as illustrated.
2 Position two batteries of the type AAA/R03/UM4 in the battery compartment. Make sure that the
orientation of the batteries is correct (see drawing at bottom).
3 Replace the battery cover.
- Do not mix new and old batteries and do not use different types of batteries.
- If the remote control is not used for prolonged periods, remove the batteries from the remote control to
avoid corrosion.
Using the remote control
Direct the remote control at the sensor on the front panel of the unit. When the remote control signal is
received, the unit reacts accordingly. The remote control works within a range of 6 meters.
- Sometimes the remote control does not work well
in strong light. You may have to move the unit if it
is a problem.
- Malfunction may occur if other remote controls
are used near the unit.
- Do not place any objects on the remote control,
as the batteries may become flat if a key is
depressed constantly.
- Make sure that there are no obstacles between
remote control and unit.
- Do not position the unit behind tinted glass as it
may reduce the maximum range of the remote
control.
15
Page 16

AUDIO CONNECTIONS
Before Connection
Before connection turn off the power of all the equipment.
Read instructions of each component you intend to connect to this unit.
- Be sure to insert each plug securely. To prevent hum and noise, do not bundle the interconnection leads
with power cord or speaker leads.
Analog stereo outputs
If your amplifier is an analog stereo amplifier or an analog stereo receiver, with no digital inputs, you should
use the stereo outputs to connect the NET-200 to your system.
Optical and Coaxial outputs
It is possible to connect the NET-200 to a digital surround receiver, a digital stereo receiver or digital
processor. This can give you the ability to upgrade the sound experience from your NET-200. The unit has
both an optical and a coaxial digital output, so it should be possible to connect to most available digital
amplifiers.
16
Page 17

FRONT PANEL INPUT
The front panel has a USB input. This input is intended for temporary and easy connections.
- The USB input enables you to connect your MP3 player or Memory stick to the unit, to play music. You
can browse the files of the connected source via the display.
Please notice that the USB input on the front panel is not compatible with all models of iPod.
Note:
It can take several minutes after connecting the USB source before the NET-200 is ready to start playing.
Please see the section called “Media player Quickstart guide” for further explanation.
17
Page 18

Internet Radio Quickstart Guide
What you need before you can use your Internet radio
Before you can use your Internet radio, you need the following:
• A broadband Internet connection.
• A wireless access point (Wi-Fi) connected to your broadband Internet, preferably via a router.
• If your wireless network is configured to use Wired Equivalent Privacy (WEP) or Wi-Fi Protected
Access (WPA) data encryption then you need to know the WEP or WPA code so you can get the
Internet radio to communicate with the network.
The Internet radio should work anywhere within up to 30 meters of the wireless access point depending on the
wireless router.
Before you continue, make sure that your wireless access point is powered up and connected to your
broadband Internet. To get this part of the system working you must read the instructions supplied with the
wireless access point.
Steps for connecting your radio to your wireless network
Step 1 - Power up the radio
Plug the mains cable to the mains power input on the back of the radio.
The display on the front of the radio will light up and say:
Tangent
NET-200
Reciva enabled
ARM powered
After a few seconds, this will change to show:
Scanning for networks
/
Step 2 - Scan for a wireless network connection
When the display says <Scan for networks>, press the CONTROL/TUNING button.
(Note: if you make a mistake at any point, press the BACK button to go back to the previous screen.)
The radio will now scan for all available wireless networks and will display:
Scanning
IIIIIIIIIIIIIIIIII
If it can’t find one then the display will say:
No Wireless
Networks Found
If this happens then you will have to get your wireless access point working - see the instructions supplied with
it.
When the radio finds your wireless network, it displays the ESSID for the access point on the screen - this is a
name that is allocated to the access point by the person who set up the network - for example:
< My Home Network >
18
Page 19

It is possible, and in some locations highly likely, that your radio will find more than one wireless access point,
in which case you can choose which one you want to connect to. Turn the CONTROL/TUNING knob on the
radio to see the ESSID for each access point the radio has found.
Step 3 - Connect to the wireless network
When the ESSID for the access point you want to connect to is displayed on the screen, press the
CONTROL/TUNING button.
If your network is not configured to need an encryption code, the screen should say:
Connecting to
network
Then:
Network OK
If the screen displays either:
Enter WEP key
Or:
Enter WPA key
Then the network is using one of the encryption systems: Wired Equivalent Privacy (WEP) or Wi-Fi Protected
Access (WPA). You therefore need to enter the correct WEP or WPA code into the radio to get it to
communicate with your network.
Only the person who set up the network in the first place knows this code; if that person is not you then you
need to find out what it is.
After 3 seconds, the display goes into the code entry mode. To enter the code, use the CONTROL/TUNING
knob to select each character of the code in turn, pressing the CONTROL/TUNING button after each
character. Note that WEP and WPA codes are sensitive to upper and lower case characters so you must enter
them exactly.
After the final character, use the CONTROL/TUNING knob to select the END character and press the
CONTROL/TUNING button.
The radio should now be able to connect to the network.
Steps for connecting your radio to your wired network
For connection via a wired network, simply plug in the Ethernet cable from your switch or hub before you
connect the radio to power. The radio will always prioritize a wired network in front of a wireless network if it is
available.
The RJ-45 connecter has two LEDs near the port that shows the status of the connection. The Green LED
indicates if a live connection is present. The yellow LED indicates if there are any on going traffic on the wired
connection.
If you wish to make sure the radio only will attempt to connect to either a wired or a wireless network, you can
lock it to use only a wired or wireless connection.
1. Press the CONTROL/TUNING button to return to the top-level menu.
(Note: if you make a mistake at any point, press the BACK button to go back to the previous screen.)
19
Page 20

< Internet radio >
2. Turn the CONTROL/TUNING button until the display says < Settings > and press CONTROL/TUNING
to confirm.
< Settings >
3. Turn the CONTROL/TUNING button until the display says < Network Config > and press
CONTROL/TUNING to confirm.
< Network Config >
4. Turn the CONTROL/TUNING button until the display says < Wired/Wireless > and press
CONTROL/TUNING to confirm.
< Wired/Wireless >
5. Now it is possible to choose between Auto, Wired Only and Wireless Only.
Choosing a radio station to listen to
1. Press the MENU button on the remote to return to the top-level menu.
(Note: if you make a mistake at any point, press the BACK button to go back to the previous screen.)
< Internet radio >
2. If the screen does not say < Internet radio > as shown above, turn the CONTROL/TUNING knob until
it does.
3. Press the CONTROL/TUNING button.
4. Turn the knob to choose from <Location> , <Genre> or <Search>.
<Location> enables you to choose from the radio stations provided by any country which you choose
from a list.
<Genre> enables you to choose radio stations according to their content, for example Classic Rock,
Sport, News, etc.
<Search> enables you to enter a name or parts of a name of a station, and the radio will then find the
station for you.
5. Press the CONTROL/TUNING button to choose the option you want.
20
Page 21

<Location>
1. Turn the CONTROL/TUNING knob until the display shows the region you want,
2. Press the CONTROL/TUNING button.
3. Turn the CONTROL/TUNING knob until the display shows the country you want.
4. Press the CONTROL/TUNING button.
5. Turn the CONTROL/TUNING knob to choose between [All Stations] or [By Genre]
6. Press the CONTROL/TUNING button.
7. Turn the CONTROL/TUNING knob until the display shows the station you want to listen to.
8. Press the CONTROL/TUNING button and wait until the radio connects to that station.
Note that some radio stations do not broadcast 24 hours per day, and some stations are not always on-line.
If this station has on-demand content (that is, it gives the option of listening to programs which have already
been broadcast), see “Stations which enable you to choose what you listen to”.
<Genre>
1. Turn the CONTROL/TUNING knob until the display shows the type of content you want, then press
the CONTROL/TUNING button.
2. Turn the CONTROL/TUNING knob to choose between [All Stations] or [By Location]
3. Press the CONTROL/TUNING button.
4. Turn the CONTROL/TUNING knob until the display shows the station you want to listen to.
5. Press the CONTROL/TUNING button and wait until the radio connects to that station.
Note that some radio stations do not broadcast 24 hours per day, and some stations are not always on-line.
If this station has on-demand content (that is, it gives the option of listening to programs which have already
been broadcast), see “Stations which enable you to choose what you listen to”.
<Search>
1. Turn the CONTROL/TUNING knob until the display shows <Search>, then press the
CONTROL/TUNING button.
2. Turn the CONTROL/TUNING knob to enter the name of the station you would like to find. Confirm
each letter with the CONTROL/TUNING button.
3. Select END and press the CONTROL/TUNING button.
4. The radio will find the stations that matches your search criterias.
5. Turn the CONTROL/TUNING button to select your preferred station.
6. Press the CONTROL/TUNING button and wait until the radio connects to that station.
Note that some radio stations do not broadcast 24 hours per day, and some stations are not always on-line.
If this station has on-demand content (that is, it gives the option of listening to programs which have already
been broadcast), see “Stations which enable you to choose what you listen to”.
Using your radio for tuning into DAB stations
Your radio supports a DAB tuner with band III and L-band, so you will be able to access standard DAB stations
from it.
1. You can access the radio’s DAB tuner by pressing the ‘Mode’ button on the front panel or the T-mode
button on the remote
2. You can also access the DAB tuner by selecting the ‘DAB tuner’ menu item from the radio’s main
menu.
3. When entering DAB tuner mode for the first time, the radio will start scanning for available stations by
it self. The display will show SCANNING and a bar in the bottom of the display will slowly grow. When
the bar in the bottom disappears, the radio has found all the available stations.
21
Page 22

4. Press the Autotune button on the remote to allow the radio to search for working FM frequencies that it
can detect. The radio will continue to scan through all its available FM frequencies until it finds one
that is used by a working station.
5. To select a DAB station after the radio have finished scanning for station, simply turn the
CONTROL/TUNING button on the front panel until the preferred station is shown.
It is also possible to use the TUNING+, TUNING- and ENTER buttons on the remote to do this
operation.
6. To save an DAB station to the radio’s memory, press the memory button on the remote and then one
of the digit button in the same way that you would save an Internet station to a preset.
7. To access a saved DAB station, simply press the preset button assigned to the saved frequency.
Note: Before tuning in DAB channels, the DAB region must selected. This setting can be found in the settings
menu under DAB settings.
Using your radio for tuning into FM stations
Your radio supports a FM tuner with RDS, so you will be able to access standard FM stations from it.
1. You can access the radio’s FM tuner by pressing the ‘Mode’ button on the front panel or the T-mode
button on the remote
2. You can also access the FM tuner by selecting the ‘FM tuner’ menu item from the radio’s main menu.
3. Whilst the radio is in its FM tuner state, it will display what FM frequency it is currently tuned into.
Turning the Control/Tuning button clockwise will increase the FM frequency the radio is tuned into and
turning it anticlockwise will decrease the frequency.
4. Press the Autotune button on the remote to allow the radio to search for working FM frequencies that it
can detect. The radio will continue to scan through all its available FM frequencies until it finds one
that is used by a working station.
5. To save an FM frequency to the radio’s memory, press the memory button on the remote and then
one of the digit button in the same way that you would save an Internet station to a preset.
6. To access a saved FM frequency, simply press the preset button assigned to the saved frequency.
Returning to the menu while a station is playing
When the Internet radio is playing a radio station it will display the station’s name and bit rate. You can return
to the radio’s menu section at any time by either pressing the MENU button on the remote – which will take
you to the ‘Internet radio’ menu - or the DOWN ARROW button on the remote to return to the previous menu
item.
Storing a radio station in a preset
Whilst a radio station is playing, press the MEMORY button on the remote, and then press one of the 0-9 digit
button on the remote (numbered 0 to 9) until the screen says
Assigned to
Preset #
Where # is the number of the preset.
Playing a preset radio station
When a radio station is playing, briefly press one of the preset buttons, 0 to 9 on the remote, for the station you
want.
22
Page 23
Requesting a station that is currently unavailable
If you want to listen to a particular radio station which is currently not available online, you can visit the Reciva
website at http://www.reciva.com/ and put in a request to add the station to the list.
Stations which enable you to choose what you listen to
Some radio stations can provide a number of options associated with their station; for example, some stations
enable you to listen to programs that have already been broadcast. When you select a radio station that has
this facility, the station does not start playing immediately, but instead the display shows:
< Live >
1. Turn the CONTROL/TUNING knob to choose <Live> or <On Demand>, then press the
CONTROL/TUNING button.
If you choose <Live> then the radio plays the current output from this station as normal.
If you choose <On Demand> then more screens are displayed where you choose what you want to
listen to.
What is displayed will depend on the station you have chosen - the following steps are only a guide.
2. When you choose <On Demand>, the display shows the names of the programs. Turn the
CONTROL/TUNING knob to choose the program you want, then press the CONTROL/TUNING
button.
3. When you have chosen the program you want to listen to, either it will just start playing, or the display
may show a list of days for you to choose from - use the CONTROL/TUNING knob to set the day the
program was broadcast, then press the CONTROL/TUNING button.
4. After you have chosen the day, you may be able to choose the Start Time. Set the Start Time using
the CONTROL/TUNING knob and press the CONTROL/TUNING button.
5. Programs which enable you to choose the time also enable you to fast-forward and rewind to the part
you want while the radio is playing. When you press the PREVIOUS or NEXT button, the elapsed time
that the program has been playing is displayed. You can now turn the CONTROL/TUNING knob to
change this time. You can also use the PREVIOUS or NEXT buttons to adjust the time. When you
press the CONTROL/TUNING button again, the program will play from that point.
6. Once the Internet radio is playing a program that allows you to choose its start time, the radio’s preset
buttons become playback-control buttons for the stream; e.g. you can press PLAY at any time to
pause the stream, and then press PLAY to resume playing.
Setting the clock
1. Press the CONTROL/TUNING button. (Note: if you make a mistake at any point, press the BACK
button to go back to the previous screen.)
2. Turn the CONTROL/TUNING knob until the display says <Settings>.
< Settings >
3. Press the CONTROL/TUNING button.
4. Turn the CONTROL/TUNING knob until the display says <Set Time/Date>.
< Set Time/Date >
5. Press the CONTROL/TUNING button.
Set Time
14:03
6. Turn the CONTROL/TUNING knob until the hour setting is correct, then press the
CONTROL/TUNING button.
Set Time
15:03
23
Page 24
7. Turn the CONTROL/TUNING knob until the minute setting is correct, then press the
CONTROL/TUNING button.
Time Set:
15:06
8. Turn the CONTROL/TUNING knob until the Day setting is correct, then press the CONTROL/TUNING
button.
Set Date:
01 Jan 2008
9. Turn the CONTROL/TUNING knob until the Month setting is correct, then press the
CONTROL/TUNING button.
Set Date:
01 Jan 2008
10. Turn the CONTROL/TUNING knob until the Year setting is correct, then press the
CONTROL/TUNING button.
Set Date:
01 Jan 2008
The display says Time and Date Set with the new time shown beneath for 3 seconds, then returns to the radio
station display.
Time and Date:
Set
24
Page 25

Media Player Quickstart Guide
The Media Player allows you to play audio files (AAC, AIFF, AU, MP3, RM, WAV and WMA) and playlists
(M3U) stored on a networked PC. It has been verified to work on Windows 2000 and Windows XP.
Set up your Windows PC to allow the radio to access your audio files via
Windows Shares
1. Please ensure that your PC is available on the network for your Internet radio, then, using Windows
Explorer, locate the folder where your audio files are stored.
2. Right click on the folder.
3. Select ‘Properties’.
4. Click on ‘Sharing’.
5. Select ‘Share this folder on the network’ and ‘Allow network users to change my files’. Please note, do
not try to make your ‘My Documents’ or any of its sub-folders (e.g. ‘My Music’) shareable.
Locate the shared audio files using the radio
1. Power up the radio.
2. Wait for ‘Internet radio’ to be displayed on the radio, or press the BACK button repeatedly until
‘Internet radio’ is displayed.
3. Turn the CONTROL/TUNING knob until the radio display shows 'Media Player'.
4. Press the CONTROL/TUNING button and turn the CONTROL/TUNING knob until ‘Windows Shares’
is displayed.
5. Press the CONTROL/TUNING button, turn the CONTROL/TUNING knob until ‘Scan for PCs’ is
displayed and press CONTROL/TUNING again.
6. The radio will now display ‘Finding PCs’. Once the radio has finished, turn the CONTROL/TUNING
knob to highlight the correct PC.
7. Press the CONTROL/TUNING button. The radio will search for shared folders.
8. Turn the CONTROL/TUNING knob to highlight the correct shared folder and press
CONTROL/TUNING.
9. The radio will display 'File Scan…' as it scans through the media files in the shared folder. Text on the
bottom row of the display will change to indicate that the file scan is in progress. If you have a large
number of audio files this could take several minutes to complete.
10. Once the radio has finished scanning, it will display 'By Album'. You can now browse through the
scanned media files, which will now be organized ‘By Album’, ‘By Artist’ and ‘Playlists’ – if available.
Note that the first time the file scan is done a file called ‘.reciva_media_cache’ is written to the folder where the
audio files are stored. This is in order to speed up subsequent file scans.
Note: You may be required to enter the user name and password of the computer containing the shared files.
Listening to a single shared track
1. Turn the CONTROL/TUNING knob until ‘By Artist’ is displayed.
2. Press the CONTROL/TUNING button.
3. Turn the CONTROL/TUNING knob until the required artist is displayed.
4. Press the CONTROL/TUNING button.
5. Turn the CONTROL/TUNING knob until the required album name is displayed.
6. Press the CONTROL/TUNING button. ‘[Add to Queue]’ will be displayed.
7. Turn the CONTROL/TUNING knob until the required track is displayed.
8. Press the CONTROL/TUNING button. The track will begin playing.
25
Page 26

Listening to a complete shared album
1. Turn the CONTROL/TUNING knob until ‘By Artist’ is displayed.
2. Press the CONTROL/TUNING button.
3. Turn the CONTROL/TUNING knob until the required artist is displayed.
4. Press the CONTROL/TUNING button.
5. Turn the CONTROL/TUNING knob until the required album name is displayed.
6. Press the CONTROL/TUNING button. ‘[Add to Queue]’ will be displayed.
7. Press the CONTROL/TUNING button. The album will begin playing.
Queuing up tracks for playback later
1. Highlight the required track.
2. Press the CONTROL/TUNING button. ‘Track Added To Queue’ will be displayed.
Queuing up albums for playback later
1. Highlight the required album.
2. Press the CONTROL/TUNING button.
3. Turn the CONTROL/TUNING knob until ‘[Add To Queue]’ is displayed.
4. Press the CONTROL/TUNING button. ‘Tracks Added to Queue’ will be displayed.
Controlling playback
1. Use the STOP button to stop playback.
2. Use the PLAY button to either pause a currently playing track or to restart a currently paused track or
to restart a stopped track.
3. Use the PREV button to start playback of the previous track in the queue.
4. Use the NEXT button to start playback of the next track in the queue.
Browsing the list of tracks currently queued up for playback
1. Press the UP ARROW button on the remote. The currently playing track name will be displayed.
2. Turn the CONTROL/TUNING knob to see which tracks are queued up for playback.
3. If you want to jump to a particular place in the queue then press the CONTROL/TUNING button when
the required track is displayed.
Removing tracks from the queue
1. Press the UP ARROW button on the remote. The currently playing track name will be displayed.
2. Turn the CONTROL/TUNING knob to select the track you want to remove from the queue.
3. Press and hold the STOP button for 2 seconds and the radio will display: ‘Delete Track?’
4. Turn the CONTROL/TUNING knob to highlight ‘Yes’ or ‘No’.
5. Press CONTROL/TUNING to confirm whether you actually want to delete the track from the queue.
6. If ‘Yes’ was selected then ‘Removed From Queue’ will be displayed.
7. To remove all tracks from the queue, keep pressing BACK until the ‘Media Player’ menu item is
selected, press CONTROL/TUNING and then turn the CONTROL/TUNING knob to select ‘Clear
Queue’ and press CONTROL/TUNING again.
26
Page 27

Playing tracks in random order
1. Select the individual tracks as described previously.
Simply press the RANDOM button on the remote, or follow the description below.
2. Navigate to top-level menu item 'Media Player' using the CONTROL/TUNING and BACK buttons.
3. Press the CONTROL/TUNING button.
4. Turn the CONTROL/TUNING knob until 'Playback Mode' is displayed.
5. Press the CONTROL/TUNING button.
6. Turn the CONTROL/TUNING knob until 'Shuffle' is displayed.
7. Press the CONTROL/TUNING button.
8. Turn the CONTROL/TUNING knob to select YES/NO to confirm that shuffle mode should be enabled.
Playing tracks in the queue repeatedly
1. Select the individual tracks as described previously.
Simply press the REPEAT button on the remote, or follow the description below.
2. Navigate to top-level menu item 'Media Player' using the CONTROL/TUNING and BACK buttons.
3. Press the CONTROL/TUNING button.
4. Turn the CONTROL/TUNING knob until 'Playback Mode' is displayed.
5. Press the CONTROL/TUNING button.
6. Turn the CONTROL/TUNING knob until 'Repeat' is displayed.
7. Press the CONTROL/TUNING button.
8. Turn the CONTROL/TUNING knob to select YES/NO to confirm that repeat mode should be enabled.
Set up a Windows PC to allow the radio to access your audi o files via a UPnP
server
1. If your PC is running Microsoft Windows XP, then you can use Windows Media Player 11 (WMP11) to
act as your UPnP (Universal Plug and Play) media server 1.0. Windows Media Player 11 may be
downloaded from Microsoft’s website and installed by following the instructions detailed in its
installation wizard.
2. Once installed, Windows Media Player 11 will create a library from all the media files available to it on
your PC. To add new media files to the library, select ‘File > Add to Library… > Advanced Options’,
click ‘Add’ and choose the files you wish to add and click ‘OK’.
3. You will now need to connect your Internet radio to Windows Media Player 11 and configure it to allow
the radio to access your media library. In order to this, you will need to do the following:
• Keep pressing BACK to get to the radio’s top-level menu and then turn the
CONTROL/TUNING knob to select ‘Media Player’.
• Press CONTROL/TUNING and then turn the CONTROL/TUNING knob to highlight ‘UPNP
Servers’.
• Press CONTROL/TUNING and the radio will scan for all available UPnP servers. Note, this
may take a few seconds for the radio to complete its scan and before the scan has completed,
the radio will display ‘[Empty]’. The radio will continue to display ‘[Empty]’ if no UPnP servers
are found.
• After a successful scan, select your UPnP server, by rotating the knob if there is more than
one UPnP server, and then press CONTROL/TUNING (note, your radio will display ‘Access
Denied’ at this stage).
4. Your PC will now prompt you that a device has attempted to connect to your UPnP server. In order to
allow the radio to have access to the media files, you will need to click the ‘Library’ tab from Windows
Media Player 11 and select the ‘Media Sharing…’ item to open the ‘Media Sharing’ window.
27
Page 28

Selecting ‘Media Sharing…’ for Windows Media Player 11:
5. From the ‘Media Sharing’ window, the radio will be listed as an unknown device. Click on the unknown
device listed, then click the ‘Allow’ button and then click ‘OK’.
Allowing the Radio to Connect:
Locating and playing media files using the radio and UPnP
1. Once the UPnP server is configured to share media files with the Internet radio, you can play the files
by doing the following on the radio.
2. Keep pressing BACK to get to the radio’s top-level menu and then turn the knob to select ‘Media
Player’.
3. Press CONTROL/TUNING and then turn the CONTROL/TUNING knob to highlight ‘UPNP Servers’.
4. Press CONTROL/TUNING and the radio will scan for all available UPnP servers. Note, this may take
a few seconds for the radio to complete its scan and before the scan has completed, the radio will
display ‘[Empty]’. The radio will continue to display ‘[Empty]’ if no UPnP servers are found.
5. After a successful scan, select your UPnP server, by rotating the knob if there is more than one UPnP
server, and then press CONTROL/TUNING.
6. The radio will now list the media categories available from the UPnP server, e.g. ‘Music’, ‘Playlists’ etc.
Turn the CONTROL/TUNING knob to select which category you wish to browse, press
CONTROL/TUNING and turn the CONTROL/TUNING knob to highlight a sub category and press
CONTROL/TUNING again. For example, you could select ‘Music’ and then ‘Album’.
7. Turn the CONTROL/TUNING knob to highlight the media files that you wish to play and press
CONTROL/TUNING.
28
Page 29

8. The radio will display ‘[Add to Queue]’, press CONTROL/TUNING and the radio will add the tracks to
its queue and begin playing them automatically.
Browsing the list of tracks currently queued up for playback
1. Press the UP ARROW button on the remote. The currently playing track name will be displayed.
2. Turn the CONTROL/TUNING knob to see which tracks are queued up for playback.
3. If you want to jump to a particular place in the queue then press the CONTROL/TUNING button when
the required track is displayed.
4. It is important to note here that media files scanned from the radio’s ‘Windows Shares’ function can
also be added to the radio’s queue.
Queuing up UPnP tracks for playback later
1. Highlight the required track.
2. Press the CONTROL/TUNING button. ‘Track Added To Queue’ will be displayed.
Queuing up albums for playback later
1. Highlight the required album.
2. Press the CONTROL/TUNING button.
3. Turn the CONTROL/TUNING knob until ‘[Add To Queue]’ is displayed.
4. Press the CONTROL/TUNING button. ‘Tracks Added to Queue’ will be displayed.
Controlling playback
1. Use the STOP button to stop playback.
2. Use the PLAY button to either pause a currently playing track or to restart a currently paused track or
to restart a stopped track.
3. Use the PREVIOUS button to start playback of the previous track in the queue.
4. Use the NEXT button to start playback of the next track in the queue.
Removing tracks from the queue
1. Press the UP ARROW button on the remote. The currently playing track name will be displayed.
2. Turn the CONTROL/TUNING knob to select the track you want to remove from the queue.
3. Press and hold the STOP button for 2 seconds.
4. Turn the CONTROL/TUNING knob to highlight ‘Yes’ or ‘No’.
5. Press CONTROL/TUNING to confirm whether you actually want to delete the track from the queue.
6. If ‘Yes’ was selected then ‘Removed From Queue’ will be displayed.
7. To remove all tracks from the queue, keep pressing BACK until the ‘Media Player’ menu item is
selected, press CONTROL/TUNING and then turn the CONTROL/TUNING knob to select ‘Clear
Queue’ and press CONTROL/TUNING again.
29
Page 30

Playing tracks in random order
1. Select the individual tracks as described previously.
Simply press the RANDOM button on the remote, or follow the description below.
2. Navigate to top-level menu item 'Media Player' using the CONTROL/TUNING and BACK buttons.
3. Press the CONTROL/TUNING button.
4. Turn the CONTROL/TUNING knob until 'Playback Mode' is displayed.
5. Press the CONTROL/TUNING button.
6. Turn the CONTROL/TUNING knob until 'Shuffle' is displayed.
7. Press the CONTROL/TUNING button.
8. Turn the CONTROL/TUNING knob to select YES/NO to confirm that shuffle mode should be enabled.
Playing tracks in the queue repeatedly
1. Select the individual tracks as described previously.
Simply press the REPEAT button on the remote, or follow the description below.
2. Navigate to top-level menu item 'Media Player' using the CONTROL/TUNING and BACK buttons.
3. Press the CONTROL/TUNING button.
4. Turn the CONTROL/TUNING knob until 'Playback Mode' is displayed.
5. Press the CONTROL/TUNING button.
6. Turn the CONTROL/TUNING knob until 'Repeat' is displayed.
7. Press the CONTROL/TUNING button.
8. Turn the CONTROL/TUNING knob to select YES/NO to confirm that repeat mode should be enabled.
Settings menu
Choosing the option you want from the Settings menu
1. Press the CONTROL/TUNING button.
Note: if you make a mistake at any point, press the BACK button to go back to the previous screen.
2. Turn the CONTROL/TUNING knob until ‘Settings’ is displayed
3. Press the CONTROL/TUNING button.
4. Turn the CONTROL/TUNING knob until the display shows the option you want.
5. Press the CONTROL/TUNING button to choose the option shown on the display. The options are
explained below.
<Network Config>
Enables you to scan again for connection to another wireless network, or to manually configure the
network parameters. Use this if you take the Internet radio to another building where you want to use it
The Network Config menu also allows you to choose whether or not the Internet radio displays a warning
message when its network signal strength is low. You can enable this feature by selecting ‘Signal Warning’
and then selecting ‘Yes’.
<Version>
Displays the versions numbers of the various parts of software and hardware on your Internet radio.
<Upgrade Firmware>
Use this option to download new firmware for the radio from the Reciva portal on the Internet. If there is
new firmware available, then the radio will prompt you if you want to download it or not. Note, at this stage,
you can press the radio’s BACK button to cancel the radio beginning a firmware upgrade. A Firmware
upgrade may take several minutes, so do NOT
complete otherwise the radio may become permanently damaged.
switch off the power to the radio until the operation is
30
Page 31

<Language>
Allows you to change the display language.
<Factory Reset>
Puts all the settings back to their defaults as they were when they left the factory. If you perform a factory
reset on your radio you will lose all your presets and your wireless network connection.
<Register>
This will display a key that can be used to register the radio on the Reciva Customer portal:
http://www.reciva.com/
<Set Time/Date>
Use this option to set the time and date, see “Setting the clock”
<DAB Settings>
Here you can scan for new station, select the which DAB band you wish to tune into to and clear the
current DAB stations list
<UPnP>
Here you can set the name that will be shown in the Windows Media player, when you give the NET-200
access to the files on your PC via UPnP.
<Wifi Strength>
Use this option to see the signal strength between your NET-200 radio and your wireless access point.
31
Page 32

Configuring ‘My Stuff’
Registering an account on Reciva’s website
1. Open the website, http://www.reciva.com, from your Internet browser.
2. Click on the ‘My Account’ link and follow the on-screen instructions to register an account. Please
note, during the registration process, a validation code will be sent to you via email. Please enter this
code when prompted to do so.
3. After logging into your account, you will be able to edit your information for ‘My Stations’, ‘My
Streams’, ‘My Details’ and ‘My Radios’ from the ‘My Account’ section.
4. You can now add your Internet Radio to your account on the website by accessing the ‘My Radios’
link. From the ‘My Radios’ section, you will need to enter in your radio’s eight-digit serial number,
which can be found from the ‘Settings > Version’ menu on the radio, and you will also need to enter in
your radio’s registration code - which can be found from the ‘Settings > Register’ menu on the radio.
Configuring ‘My Stations’
1. It is possible to search for radio stations that are available in Reciva’s stations’ database from Reciva’s
website. Whenever stations are searched for on the website, they will be displayed in a list of search
results together with a link to ‘Add to My Stations’.
2. Clicking on the ‘Add to My Stations’ link, will add the station to your account’s ‘My Stations’ list. This
list can be edited by clicking on ‘My Stations’ under the ‘My Account’ section on the website.
3. Once you have Internet stations available in your ‘My Stations’ list, you may play these stations from
your Internet Radio. These stations will be available on your radio from the menu item: ‘Stations > My
Stuff > My Stations’. Please note, the stations will only be available to your radio once your radio has
downloaded a new stations’ list. To cause the radio to download a new stations’ list immediately,
please remove and reconnect the power to your radio.
Configuring ‘My Streams’
1. Once logged into your Reciva website account, you can add your own Internet radio streams to the
‘My Streams’ section, which is listed under the ‘My Account’ section
2. Clicking on ‘My Streams’ will prompt you to enter the station’s name and its media stream URL. The
media stream URL should be a link to a website’s actual audio stream. If you have any doubt about
locating the media stream URL from a webpage, then please refer to the FAQs section on Reciva’s
website, http://www.reciva.com.
3. Once you have Internet radio streams available in your ‘My Streams’ list, you may play these stations
from your Internet Radio. These stations will be available on your radio from the menu item: ‘Stations
> My Stuff > My Streams’. Please note, the streams will only be available to your radio once your radio
has downloaded a new stations’ list. To cause the radio to download a new stations’ list immediately,
please remove and reconnect the power to your radio.
32
Page 33

Troubleshooting
If you experience any trouble with your wireless Internet radio, then you may find it useful to visit the help
section on our webpage: http://www.reciva.com
If you have trouble connecting the radio to your wireless network, these steps may help to resolve the
problem:
1. Confirm that a Wi-Fi connected PC can access the Internet (i.e. can browse the web) using the same
network.
2. Check that a DHCP server is available, or that you have configured a static IP address on the radio.
You can configure a static IP address on the radio using the menu item ‘Settings -> Network Config ->
Edit Config’, and then select ‘No’ for ‘Auto (DHCP)’.
3. Check that your network’s firewall is not blocking any outgoing ports. As a minimum, the radio needs
access to UDP and TCP ports 80, 554, 1755, 5000 and 7070.
4. Check your access point does not restrict connections to particular MAC addresses. You can view the
radio’s MAC address using the menu item ‘Settings -> Network Config -> View Config -> MAC
address’.
5. If you have an encrypted network, check that you have entered the correct key or passphrase into the
radio. Remember that text-format keys are case sensitive. If, when attempting to connect to an
encrypted network, your radio displays: ‘Wireless error’ followed by a 5-digit number, then please
ensure that you enter the correct passphrase for the network. If the problem persists, then you may
need to consult your network configuration.
If your radio can connect to the network successfully, but is unable to play particular stations, it may be due to
one of the following causes:
1. The station is not broadcasting at this time of the day (remember it may be located in a different time
zone).
2. The station has reached the maximum allowed number of simultaneous listeners.
3. The station is not broadcasting anymore.
4. The link on the radio is out of date.
5. The Internet connection between the server (often located in a different country) and you is slow.
Try using a PC to play back the stream via the broadcaster’s web site.
If you can play back the station with a PC, use the form at http://www.reciva.com/ to notify us so that we can
change the station data that is used by the radio.
No operation can be performed with the remote control
1. Check the batteries are installed with the correct polarities (+ & -)
2. Make sure the batteries are in good condition and not depleted. If yes, replace the new ones.
3. Make sure the remote is pointing at the sensor
4. Remove the obstacles between the player and the remote
Remark: Abnormal functioning of this unit may be caused by static electricity or other external interference. To
restore normal operation, unplug the AC cord and then plug it in again or switch off and on the player again.
33
Page 34

Software license information
This product contains software licensed under version 2 of the GNU Public License and version 2.1 of the
GNU Lesser Public License, The source code for this software is available from:
http://www.reciva.com/gpl/
This product includes technology owned by Microsoft Corporation and under a licence from Microsoft
Licensing GP. Use or distribution of such technology outside of this product is prohibited without a license from
Microsoft Corporation and/or Microsoft Licensing, GP as applicable.
34
Page 35

Specifications
Power Requirements: Power Supply: AC220V –240V~ 50/60Hz
Power Consumption: 20 Watts
Dimensions: 430(W) x 60(H) x 240(D) mm
Net Weight: 3.8 Kg
Connection: 802.11b/g
Security: WEP, WPA1 (TKIP) and WPA2 (TKIP)
File formats: Real audio, MP3, Windows media streams,
OGG vorbis, AAC, WAV, AIFF and AU
Connections: RCA stereo analog audio output
Optical digital output
Coaxial digital output
USB input
RJ-45 connecter for wired LAN connection
Signal noise ratio 110 dB
Dynamic Range 100 dB
Total Harmonic Distortion 0.004%
*Design and specifications are subject to change without notice.
35
Page 36

Service hotline +45 9641 1599
For further information please visit our website:
36
Item No.: 40618
 Loading...