

Page 1
Dab2go junior
DAB+/DAB/FM/Bluetooth radio
User’s manual
Mode d’emploi
Brugermanual
Käyttöopas
Gebruiksaanwijzingen
Page 2
Tangent Dab2go Junior
DAB/DAB+ and FM Radio with Bluetooth
Thank you for purchasing your new Tangent Dab2go Junior DAB/DAB+/FM Radio
with Bluetooth. It has many exciting features to make your listening to music
experience more enjoyable. We recommend that you spend some time reading
this instruction manual in order that you fully understand all the operational
features it offers. You will also find some hints and tips to help you resolve any
issues.
Read all the safety instructions carefully before use and keep this instruction
manual for future reference.
Page 3

Safety Warnings
• Always protect the device against moisture and humidity. Do not put this device in water or
other liquids! If you spill any liquid into the device, it can cause serious damage. Switch it
off at the mains immediately. Withdraw the mains plug and consult your dealer.
• Using the device in rooms or climates with high humidity and temperatures may cause
condensation to form inside the device. Condensation may damage the device.
• Using the device in a dusty condition may cause damages to the interior electronic
components, which may lead to malfunctions in the device.
• The device must be placed on a flat stable surface and should not be subjected to
vibrations.
• To reduce the risk of electric shock, do not remove screws. The device does not contain
any user-serviceable parts. Please leave all maintenance work to qualified personnel.
• Only use the power adaptor delivered with the device.
• Avoid extreme degrees of temperature, either hot or cold. Place the device well away from
heat sources such as radiators or gas/ electric fires.
• The mains socket must be located near the device and should be easily accessible.
• Never touch the plug or the device itself with wet hands. Never pull the power cable when
disconnecting the power adaptor from power supply.
• Ensure that the available supply voltage agrees with the required operational voltage of
the device before use.
• If the device is not in use for a long period of time (e.g. holidays), disconnect it from the
power supply.
• In case of using the headphones, be reminded that excessive
sound pressure or volumes from headphones or earphones can
lead to damage to the hearing. Always adjust the volume to a
pleasant, not too loud level. If you have adjusted the volume of
the headphones to be too high and use that for an extended
period, it can damage the listener’s hearing.
• Ensure to unplug the device from the mains socket before cleaning.
• Batteries (battery pack or batteries installed) shall not be exposed to excessive heat such
as sunshine, fire or the like.
• Remove dead batteries from equipment and all batteries from equipment you know you
are not going to use for a long time. Otherwise the batteries may leak and cause damage.
• Never dispose of batteries in fire as this can cause them to explode. Please recycle dead
batteries; do not put with the normal household waste.
• Do not use any type of abrasive pad or abrasive cleaning solutions as these may damage
the device’s surface.
• Before using the device, please familiarize yourself with all of the safety information and
instructions for use. When passing this device on to others, please also include all the
documents.
Page 4

What’s in the box? ................................................................................................ 1
Controls and Functions ........................................................................................ 1
Front View ......................................................................................................... 1
Back view .......................................................................................................... 2
Before First Use ................................................................................................... 2
Instruction Guide .................................................................................................. 3
Basic Operation ................................................................................................ 3
DAB Radio ........................................................................................................ 3
FM Radio .......................................................................................................... 4
Bluetooth Mode ................................................................................................. 4
Station information for DAB and FM Radio ...................................................... 5
Menu Setting ..................................................................................................... 6
Dual Alarm Setting and Alarm Snooze ............................................................. 6
Troubleshooting .................................................................................................... 8
Specifications ....................................................................................................... 9
Page 5

1
What’s in the box?
Instruction Manual
DAB/FM Radio
Power Adaptor
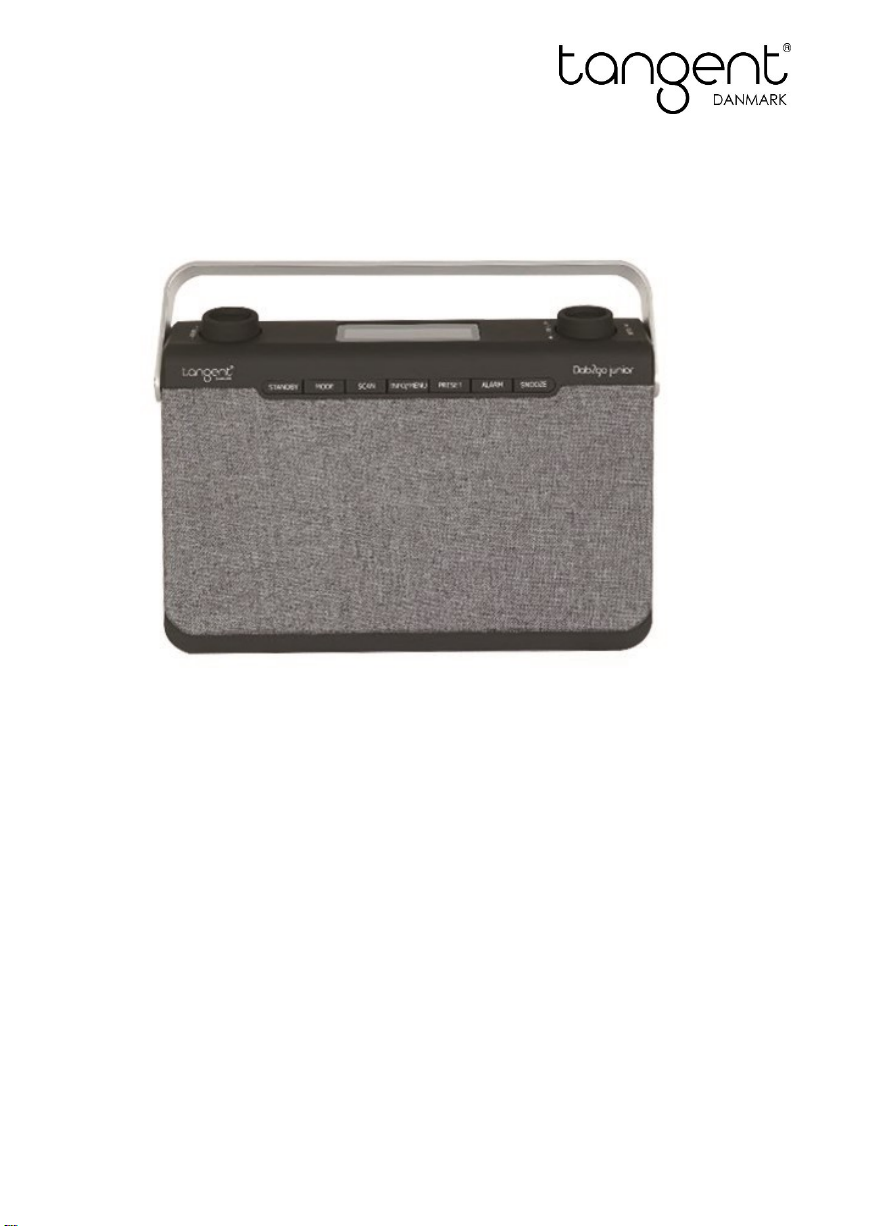
Controls and Functions
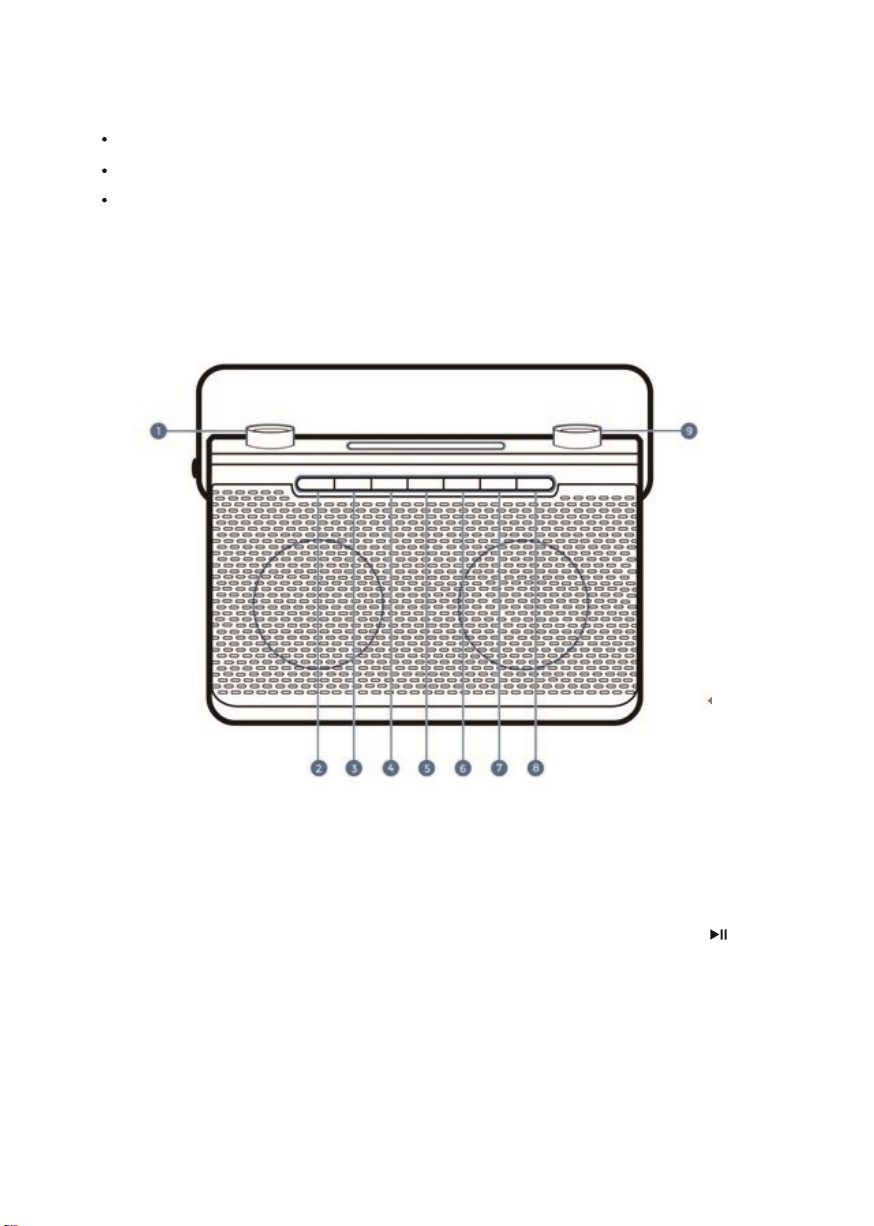
Front View
1.Volume -/+ 6. Preset
2.Standby 7. Alarm
3.Mode 8. Snooze
4.Scan 9. Tune+/-/Enter/
5.Info/Menu
Page 6
2
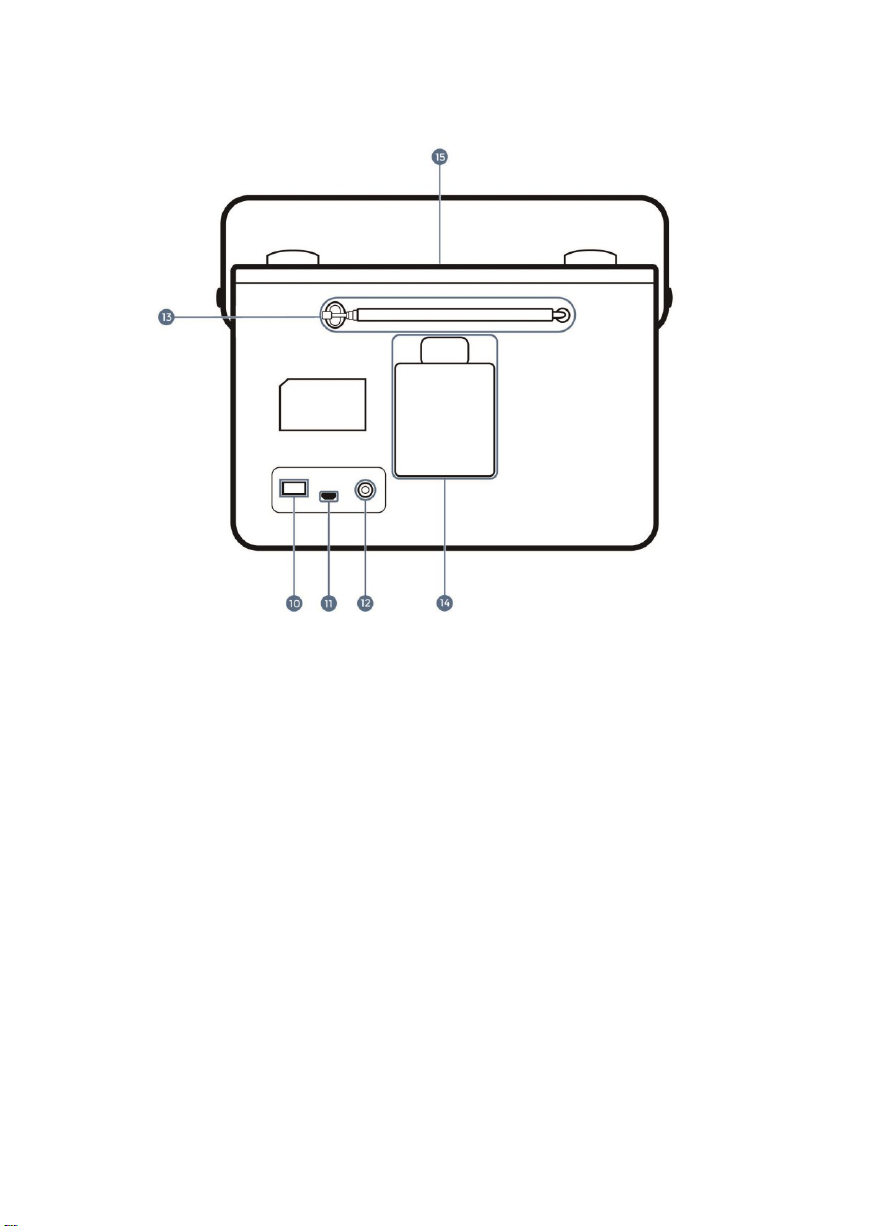
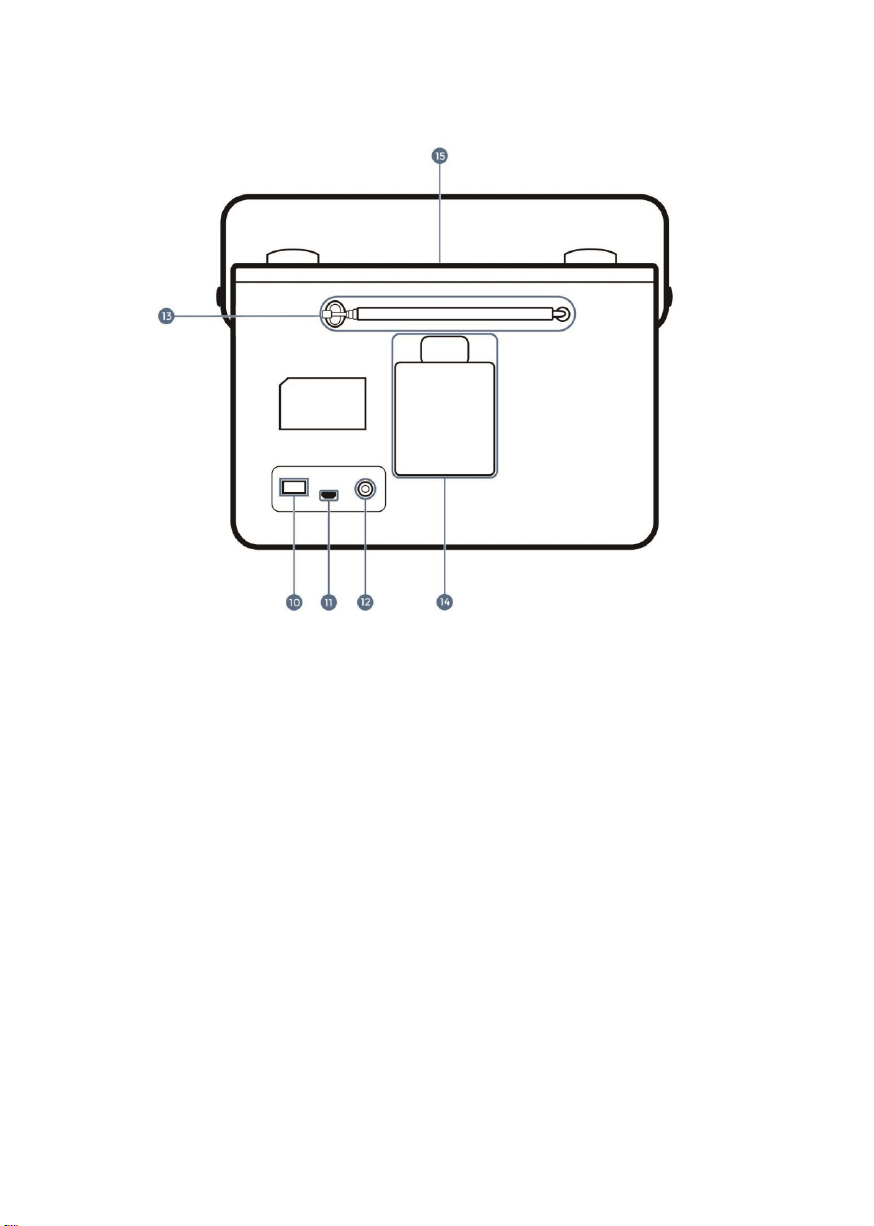
Back view
10. ON/OFF 13. Antenna
11. USB Power Supply Port 14. Battery Compartment
12. Earphone Jack 15. Display Screen
Before First Use
Unpack the unit.
Please retain all packaging unit you have checked and counted all the parts
and the contents against the parts list.
Your unit is now ready for normal use.
Page 7

3
Instruction Guide
Basic Operation
• Plug the connector into the back of system labelled USB and the power
supply into the mains.
• Ensure the antenna is extended as far as possible so that you can
rotate it. This will enable you to get the best signal you can. Switch the
button on the rear of the unit to “On”.
• Press the Standby button to turn the unit on. When DAB radio is activated for
the first time, press the Scan button then a full scan will automatically
commence, or will play the last station before the unit was turned off.
• To scroll through the stations, use the Tune/Enter button. Press the
Tune/Enter button to listen to a station.
• To change the mode, press the Mode button.
This will switch between DAB Radio/ FM Radio and Bluetooth mode.
• The display screen will dim automatically after 10 seconds if left in standby or
working mode.
DAB Radio
• Press the Mode button to switch to DAB Radio. Fully extend the antenna.
• To auto scan, press the Scan button and then release. This will start scanning
up the frequency band and store all stations that have good signal.
• The radio will automatically save all the stations with a strong signal.
After searching has finished it will automatically play the first station stored.
• To listen to all stations that have been stored turn the Tune/Enter button to
scroll through them. Press the Tune/Enter button when on the required
station.
• The Radio will display station information when you press the Info/Menu
button. Press multiple times to view all information available.
When you turn the radio on after switching off, it will automatically tune to the
same station (DAB or FM) that was last selected.
In DAB mode, the radio will synchronize with the time and date of the station.
Page 8

4
FM Radio
Press the Mode button multiple times to switch between DAB/FM/BT.
The first time you do this, the FM frequency “87.5 MHz” will be displayed on the
screen. Remember to extend the antenna.
To auto scan, press and release the Scan button. This will start scanning up
the frequency band and play the first station finds with good signal.
To scan down the frequency band, press and hold the Scan button for a few
seconds. The radio will display station information when you press the
Info/Menu button. Press multiple times to view all information available.
FM Scan setting
Choose between scanning strong and week signals (All) or only the strong
stations (Only). Press and hold the Info/Menu button. To make your choice,
twist the Tune/Enter button to highlight your option.
The radio will automatically save all the stations with a strong signal. After
searching has finished it will automatically play the first station Stored. Select
“FM Scan Setting” and press Tune/Enter button down. Turn the Tune/Enter
button to choose between “All” or “Only”. Press the Tune/Enter button down to
confirm your choice.
Manual scan
To listen to a specific frequency, turn the Tune/Enter button to search forward
and back.
Mono and Stereo
In working mode, press the Tune/Enter button to switch between “Set to Mono”
or “Set to Stereo”.
Bluetooth Mode
Press the Mode button to select Bluetooth Mode and then the display will show
“Bluetooth Pairing”.
Turn on your device Bluetooth on and search the pairing name“Dab2go Junior”
then press it to pair. After the pairing successfully, the display will show
“Bluetooth Paired Play/ Pause”.
Page 9

5
When play the music, the display will show “Bluetooth Paired Play”; when
pause the music, there will be show “Bluetooth Paired Pause”
Press the Tune/Enter button to play or pause the song playback.
Turn the Tune/Enter button to play the next or previous song.
Turn the Volume-/+ button to increase or decrease the volume.
Set Up of Preset Stations
How to store a preset radio station
You can store up to 10 DAB and 10 FM radio stations.
To store a station, you must be listening to the station you want to save.
Press and hold the Preset button, the display will show “ 1:( Empty) ”. If a
station is already stored, will show the station name and preset number.
Twist the Tune/Enter button to select the preset number you want to store the
station as, and then press the Tune/Enter button to save, the display will show
“Preset # stored”.
How to play a preset radio station
Press the Preset button and turn the Tune/Enter button to select the desired
preset station’s number.
Press the Tune/Enter button to play the stored station.
Station information for DAB and FM Radio
DAB Radio
Press the Info/Menu repeatedly to show the different program information.
Signal Strength: Displays a signal bar with the strength of the current station.
Bit Error Rate: Provides details of the signal error rate.
Channel and Frequency: Displays the station’s transmission channel number
and frequency.
PTY (Program Type): Shows the type and description of the program provided
by the DAB station.
Time and Date: Displays the time and date information provided by the
broadcaster.
Bit Rate: The data rate which the signal is being transmitted.
Page 10

6
Dynamic Label Segment: Displays scrolling text information supplied by the
broadcaster.
FM Radio
Press the Info/Menu button repeatedly to show the different program
information.
Program Type: Displays a description of the type of program provided by the
broadcaster..
Signal Strength: Displays a signal bar with the strength of the current station..
Time and Date: Displays the time and the date.
Frequency: Displays the station’s transmission frequency .
Audio Type: Displays the audio type of the station you are listening to. It will
either be Stereo or Mono.
Radio Text: Displays scrolling test information supplied by the broadcaster.
Menu Setting
With the radio turned on, press and hold the Info/Menu button. This will open
the “Set Menu”.
Turn the Tune/Enter button to select your desired Sub-option between:
Time/Date:
Press the Tune/Enter button, the hour digitals will flash. Turn the Tune/Enter
button to set the hour correctly, then press the Tune/Enter button to confirm.
Repeat the last two steps to set the minutes, the year, Month, Date.
System Version:
Press the Tune/Enter button, then you can check the software version number.
Factory reset:
Press the Tune/Enter button and the display will show ”Factory reset ? <No>
Yes ”. Turn the Tune/Enter button to select “Yes”.
Press the Tune/Enter button again and will reset the radio.
Dual Alarm Setting and Alarm Snooze
Alarm Setting
Press the Alarm button to use Alarm 1 and press again to use Alarm2.
Page 11

7
Then press the Tune/Enter button and turn the Tune/Enter button until the
word ”ON” is flashing and press the Tune/Enter button again to confirm.
The hour digits for the alarm will flash, turn the Tune/Enter button to change
the hour and press the Tune/Enter button to confirm.
Turn the Tune/Enter button to change the minute and press the Tune/Enter
button to confirm.
Turn the Tune/Enter button to change the volume and press the Tune/Enter
button to confirm.
Turn the Tune/Enter button to change between Alarm-DAB-FM and press the
Tune/Enter button to confirm.
To set the Alarm 2,follow the Alarm 1 instructions.
Note: You can press the Info/Menu button to get back last one step when in
the process of setting the alarm.
Turn off the alarm
To turn off the alarm, turn the Tune/Enter button until the word “OFF” is
flashing and then press the Tune/Enter button. The alarm is OFF now.
Turn off the alarm when sounding
Press the Standby button to turn off the alarm when it is sounding.
Sleep timer
In working mode, press and hold the Alarm button and will display “Set Sleep:
OFF”.
Turn the Tune/Enter button to select either OFF-120-90-60-45-30-15-5
minutes.
Then press the Tune/Enter button to confirm.
Snooze Function
When the alarm sounds, press the Snooze button to snooze for 9 minutes, the
radio will go into standby mode.
To turn the alarm off completely when sounding, press the Standby button.
Page 12
8
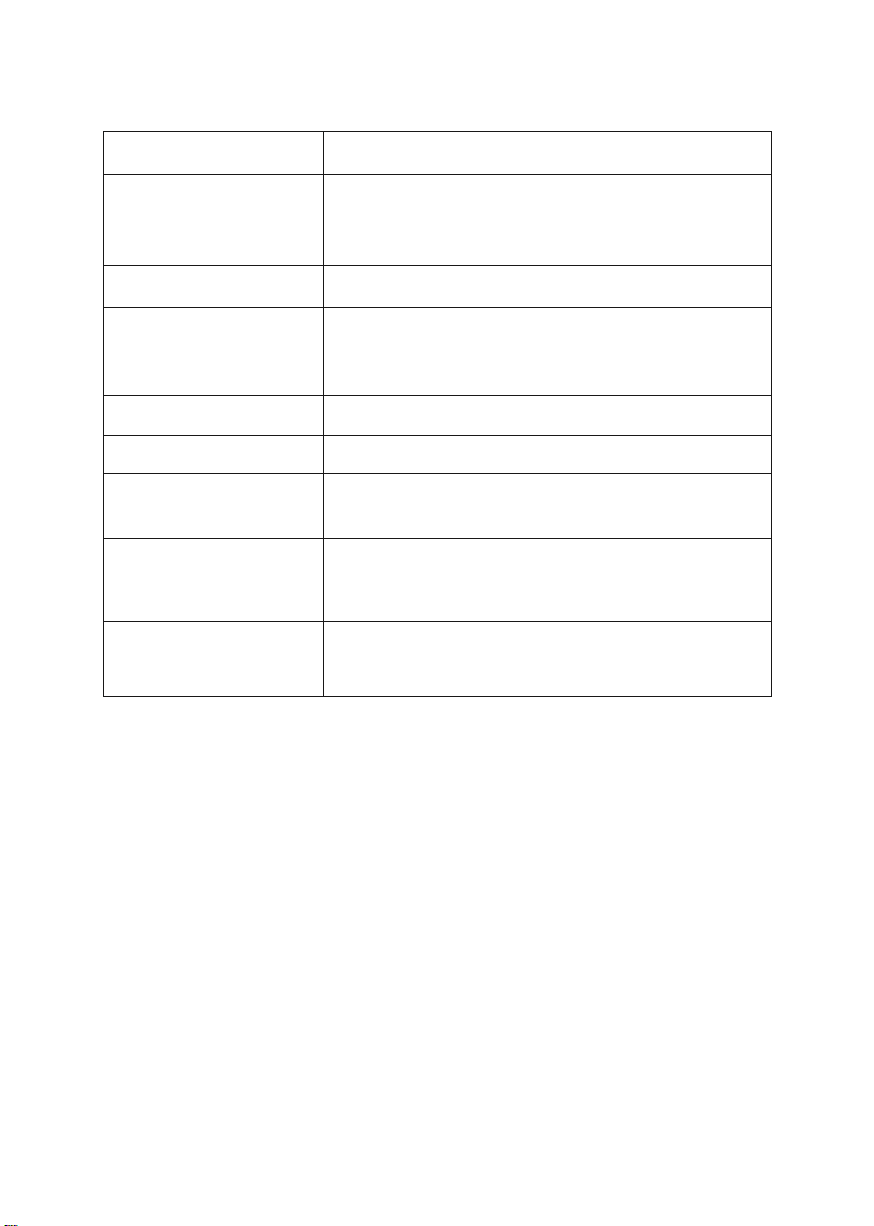
Troubleshooting
Problem
Solution
No sound
• The station is not tuned in. Fine tune the station.
• The volume is set to a low position. Increase the volume.
• Headphones may be connected. Disconnect the headphones.
Buttons a not working
Turn off the unit and turn on again after a few seconds.
FM: Static sound
DAB+: Burbling/
intermittent cut-out
• Signal reception is too low.Adjust the aerial or move the unit
to a stronger signal location.
• Rescan stations.
Sound is distorted
The volume is too high. Adjust the volume control.
Desired station not found
Weak signal. Use the manual tune function.
Display shows “No Service”
There is no DAB+ coverage in your area, or poor
reception.Adjust the position of the aerial,or move the unit to a
stronger signal location.
Display is blank
This may occur if the broadcaster changes the label of a
service or removes a lable while tuned.The unit will try to
retuned or perform a scan.
Time and date not setting
automatically
For the time and date to set automatically you need to turn on
the system and switch to DAB radio and let this scan.The date
and clock will update automatically.
Page 13
Specifications
Display
2 line display
FM
87.5 – 108.0 MHz
DAB/DAB+
Band III
Power adaptor
Input : AC 100-240V, 50/60 Hz
Connections
DC IN (power supply)
Description DAB/DAB+/FM Radio with Bluetooth
Output : DC 5V, 1A
This symbol on the product or in the instructions means that your
electrical and electronic equipment should be disposed at the end of its
life separately from your household waste. There are separate
collection systems for recycling in the EU.
EARPHONE (3.5mm socket)
Page 14
Tangent Dab2go Junior
Radio FM et DAB/DAB+ avec Bluetooth
Nous vous remercions d’avoir acheté votre new Tangent Dab2go Junior
DAB/DAB+/FM Radio avec Bluetooth. Il dispose de nombreuses
fonctionnalités qui rendront votre écoute musicale plus agréable. Nous
vous recommandons de prendre le temps de lire ce mode d’emploi afin de
bien comprendre toutes les caractéristiques opérationnelles propres à ce
produit. Vous trouverez également quelques conseils et astuces pour vous
aider à résoudre tous les problèmes éventuels.
Lisez attentivement toutes les consignes de sécurité avant utilisation
et gardez ce mode d’emploi pour une consultation ultérieure.
Page 15

Contenu de la boîte .............................................................................................. 1
Commandes et fonctions ...................................................................................... 1
Vue de face ....................................................................................................... 1
Vue arrière ........................................................................................................ 2
Avant première utilisation ..................................................................................... 2
Guide d'instructions .............................................................................................. 3
Fonctions de base ............................................................................................ 3
Radio DAB ........................................................................................................ 3
Radio FM .......................................................................................................... 4
Mode Bluetooth ................................................................................................. 5
Information de station pour Radio FM et DAB .................................................. 5
Configuration du menu ..................................................................................... 6
Configuration d'alarme double et de rappel d’alarme ....................................... 7
Dépannage ........................................................................................................... 9
Caractéristiques techniques ............................................................................ 10
Page 16
1
Contenu de la boîte
Mode d’emploi
Radio DAB/FM
Adaptateur électrique
Commandes et fonctions
Vue de face
1.Volume -/+ 6. Preset
2.Standby 7. Alarm
3.Mode 8. Snooze
4.Scan 9. Tune+/-/Enter/
5.Info/Menu
Page 17
2
Vue arrière
10. MARCHE/ARRÊT 13. Antenne
11. Port d'alimentation USB 14. Compartiment de la batterie
12. Prise des écouteurs 15. Écran d’affichage
Avant première utilisation
Déballez l’appareil.
Veuillez conserver tout l’emballage après avoir inspecté et compté l’ensemble
des pièces et du contenu en se conformant à la liste des pièces.
Votre appareil est maintenant prêt à être utilisé normalement.
Page 18

3
Guide d'instructions
Fonctions de base
• Branchez le connecteur au dos du système portant l’indication USB, et
l’alimentation au secteur.
• Assurez-vous que l’antenne est déployée à fond afin de pouvoir la
tourner. Vous pourrez ainsi recevoir le meilleur signal. Réglez le bouton
situé à l’arrière de l’unité sur « MARCHE ».
• Appuyez sur le bouton Standby pour allumer l'unité. À la première mise en
service de la radio DAB, appuyez sur le bouton Scan afin de lancer une
recherche complète automatique, ou la dernière station écoutée avant l’arrêt
de l’unité sera lue.
• Utilisez le bouton Tune/Enter pour parcourir les stations. Appuyez
sur le bouton Tune/Enter pour écouter une station.
• Appuyez sur le bouton Mode pour changer le mode.
Les modes DAB Radio/FM Radio et Bluetooth permuteront.
• La luminosité de l’écran d’affichage diminuera automatiquement après 10
secondes en mode veille ou en mode de fonctionnement.
Radio DAB
• Appuyez sur le bouton Mode pour passer en mode DAB Radio. Déployez
complètement l’antenne.
• Appuyez sur le bouton Scan puis relâchez-le pour effectuer une recherche
automatique. La recherche en amont de la bande de fréquences démarrera,
et les stations dont le signal est correct seront toutes enregistrées.
• La radio enregistrera automatiquement toutes les stations dont le signal est
fort.
Une fois la recherche terminée, elle lira automatiquement la première station
enregistrée.
• Pour écouter toutes les stations enregistrées, réglez le bouton Tune/Enter et
parcourez-les. Appuyez sur le bouton Tune/Enter lorsque vous atteignez la
station requise.
• La Radio affichera les informations de la station dès vous appuierez sur le
bouton Info/Menu. Appuyez plusieurs fois pour visualiser toutes les
informations disponibles.
Lorsque vous allumez la radio après l’avoir éteinte, elle se met
automatiquement sur la station (DAB ou FM) précédemment sélectionnée.
Page 19

4
En mode DAB, la radio se synchronisera avec l'heure et la date de la station.
Radio FM
• Appuyez plusieurs fois sur le bouton Mode pour permuter entre
DAB/FM/BT.
À la première occasion, la fréquence FM « 87.5 MHz » s’affichera à l’écran.
N’oubliez pas de déployer l’antenne.
Appuyez sur le bouton Scan, puis relâchez-le pour effectuer une recherche
automatique. La recherche en amont de la bande de fréquences démarrera,
et la première station dont le signal est correct sera lue.
Pour rechercher en aval de la bande de fréquence, maintenez le bouton Scan
enfoncé pendant quelques secondes. La radio affichera les informations de
la station dès vous appuierez sur le bouton Info/Menu. Appuyez plusieurs
fois pour visualiser toutes les informations disponibles.
Configuration de recherche FM
Effectuez une recherche de signaux forts et faibles (Tout) ou uniquement de
stations fortes (Uniquement). Maintenez le bouton Info/Menu enfoncé.
Faites votre choix en tournant le bouton Tune/Enter pour éclairer votre
option.
La radio enregistrera automatiquement toutes les stations dont le signal est
fort. Une fois la recherche terminée, elle lira automatiquement la première
station enregistrée. Sélectionnez « FM Scan Setting » et appuyez sur le
bouton Tune/Enter. Tournez le bouton Tune/Enter pour sélectionner
« Tout » ou « Uniquement ». Appuyez sur le bouton Tune/Enter pour
confirmer votre choix.
Recherche manuelle
Pour écouter une fréquence précise, tournez le bouton Tune/Enter pour
rechercher vers l’avant et vers l’arrière.
Mono et Stéréo
En mode de fonctionnement, appuyez sur le bouton Tune/Enter pour basculer
entre « Set to Mono » ou « Set to Stereo ».
Page 20

5
Mode Bluetooth
Appuyez sur le bouton Mode pour sélectionner le mode de Bluetooth, puis
l’écran affichera « Bluetooth Pairing ».
Activez la fonction Bluetooth de votre appareil et recherchez le nom
d’appairage « Dab2go Junior », puis appuyez dessus pour appairer. Une fois
l’appairage effectué, l’écran affichera « Bluetooth Paired ».
Lorsque vous écoutez la musique, l’écran indiquera « Bluetooth Paired Play » ;
et lorsque vous la mettez en pause, il affichera « Bluetooth Paired Pause ».
Appuyez sur le bouton Tune/Enter pour écouter une chanson ou la mettre en
pause.
Tournez le bouton Tune/Enter pour écouter la chanson suivante ou
précédente.
Tournez le bouton Volume-/+ pour augmenter ou diminuer le volume.
Définir des stations préréglées
Mémoriser une station de radio préréglée
Vous pouvez mémoriser jusqu'à 10 stations de radio DAB et 10 stations de
radio FM.
Pour mémoriser une station, vous devez écouter la station que vous souhaitez
mémoriser.
Maintenez le bouton Preset enfoncé, l’écran indiquera « 1:( Vide) ». Si une
station est déjà mémorisée, il affichera le nom de la station et le numéro de
préréglage.
Tournez le bouton Tune/Enter pour sélectionner le numéro de préréglage de
la station que vous souhaitez mémoriser, puis appuyez sur le bouton
Tune/Enter pour enregistrer, l'écran indiquera « Préréglage # mémorisé ».
Lire une station de radio préréglée
Appuyez sur le bouton Preset et tournez le bouton Tune/Enter pour
sélectionner le numéro de la station préréglée souhaitée.
Appuyez sur le bouton Tune/Enter pour écouter la station mémorisée.
Information de station pour Radio FM et DAB
Radio DAB
Page 21

6
Appuyez plusieurs fois sur le bouton Info/Menu pour afficher les différentes
informations du programme.
Signal Strength : Affiche une barre de signal indiquant la force de la station
en cours.
Bit Error Rate : Apporte des détails sur le taux d'erreur de signal.
Channel and Frequency : Affiche la fréquence et le numéro du canal de
transmission de la station.
PTY (Program Type) : Indique le type et la description du programme fourni
par la station DAB.
Time and Date : Affiche l’heure et la date fournies par le radiodiffuseur.
Bit Rate: Débit du signal transmis.
Dynamic Label Segment : Fait défiler les informations textuelles fournies par
le radiodiffuseur.
Radio FM
Appuyez plusieurs fois sur le bouton Info/Menu pour afficher les différentes
informations du programme.
Program Type : Affiche une description du type de programme fourni par le
radiodiffuseur.
Signal Strength : Affiche une barre de signal indiquant la force de la station en
cours.
Time and Date : Affiche l'heure et la date.
Frequency : Affiche la fréquence de transmission de la station.
Audio Type : Affiche le type de son de la station que vous écoutez. Il est soit
Stéréo soit Mono.
Radio Text : Fait défiler les informations textuelles fournies par le
radiodiffuseur.
Configuration du menu
Une fois la radio allumée, maintenez le bouton Info/Menu enfoncé. « Set
Menu » s’ouvrira.
Tournez le bouton Tune/Enter pour sélectionner la Sous-option que vous
souhaitez parmi :
Time/Date :
Page 22

7
Appuyez sur le bouton Tune/Enter, et les chiffres des heures clignoteront.
Tournez le bouton Tune/Enter pour régler correctement l’heure, puis appuyez
sur le bouton Tune/Enter pour confirmer.
Répétez les deux dernières étapes pour régler les minutes, l'année, le mois et
la date.
Version du système :
Appuyez sur le bouton Tune/Enter, puis vérifiez le numéro de version du
logiciel.
Factory reset :
Appuyez sur le bouton Tune/Enter et l’écran affichera « Réinitialisation d’usine
? <Non> Oui ». Tournez le bouton Tune/Enter et sélectionnez « Oui ».
Appuyez à nouveau sur le bouton Tune/Enter et la radio se réinitialisera.
Configuration d'alarme double et de rappel d’alarme
Configuration de l’alarme
Appuyez sur le bouton Alarme pour utiliser Alarme 1 et appuyez à nouveau
pour utiliser Alarme 2.
Puis, appuyez sur le bouton Tune/Enter, tournez-le jusqu’à ce que le mot
« ON » clignote et appuyez à nouveau sur le bouton Tune/Enter pour
confirmer.
Les chiffres des heures de l’alarme clignoteront, tournez le bouton Tune/Enter
pour changer l’heure et appuyez sur le bouton Tune/Enter pour confirmer.
Tournez le bouton Tune/Enter pour changer les minutes et appuyez sur le
bouton Tune/Enter pour confirmer.
Tournez le bouton Tune/Enter pour changer le volume et appuyez sur le
bouton Tune/Enter pour confirmer.
Tournez le bouton Tune/Enter pour permuter entre Alarme-DAB-FM et
appuyez sur le bouton Tune/Enter pour confirmer.
Pour régler Alarme 2, suivez les instructions sur Alarme 1.
Remarque : Vous pouvez appuyer sur le bouton Info/Menu pour revenir à la
précédente étape dans le processus de configuration de l’alarme.
Arrêter l'alarme
Page 23

8
Pour arrêter l'alarme, tournez le bouton Tune/Enter jusqu’à ce que le mot
« ARRÊT » clignote et appuyez sur le bouton Tune/Enter. L'alarme est
maintenant ARRÊT.
Arrêter l'alarme lorsqu’elle retentit
Appuyez sur le bouton Veille pour arrêter l'alarme lorsqu’elle retentit.
Minuterie de sommeil
En mode de fonctionnement, maintenez le bouton Alarme enfoncé et l’écran
affichera « Régler le Sommeil : ARRÊT ».
Tournez le bouton Tune/Enter pour sélectionner entre ARRÊT-120-90-60-45-
30-15-5.
Puis, appuyez sur le bouton Tune/Enter pour confirmer.
Fonction de rappel
Lorsque l’alarme retentit, appuyez sur le bouton Snooze pour la mettre en
pause pendant 9 minutes, la radio passera en mode veille.
Pour arrêter complètement l’alarme lorsqu’elle retentit, appuyez sur le bouton
Standby.
Page 24

9
Dépannage
Problème
Solution
Aucun son
• La station n’est pas réglée. Réglez la station.
• Le volume est trop bas. Augmentez le volume.
• Un casque peut être branché. Débranchez le casque.
Les boutons ne fonctionnent
pas
Éteignez l’unité et allumez-la à nouveau après quelques
secondes.
FM : Son statique
DAB+ :
Bruissement/arrêt
intermittent
• La réception du signal est trop faible. Réglez l’antenne ou
déplacez l’unité vers un endroit où le signal est plus fort.
• Recherchez à nouveau les stations.
Le son est déformé
Le volume est trop haut. Réglez la commande du volume.
Impossible de trouver la
station souhaitée
Signal faible. utilisez la fonction de réglage manuel.
L’écran affiche « Aucun
service »
Aucune couverture DAB+ dans cette zone ou réception faible.
Réglez la position de l'antenne ou déplacez l'unité vers un
endroit où le signal est plus fort.
Écran vide
Cela peut se produire si le radiodiffuseur change le nom d’un
service ou supprime un nom pendant un réglage. L’unité
essayera de régler à nouveau ou d’effectuer une recherche.
L’heure et la date ne se
règlent pas automatiquement
Pour un réglage automatique de l’heure et de la date, vous
devez allumer le système, passer en mode DAB et laisser la
recherche s’effectuer. La date et l’heure se mettront
automatiquement à jour.
Page 25

Caractérisques techniques
DAB/DAB+
Bande III
Adaptateur électrique
Entrée : CA 100-240V, 50/60 Hz
Connexions
ENTRÉE CC (alimentation électrique)
Description Radio DAB/DAB+/FM avec Bluetooth
Écran Affichage sur 2 lignes
FM 87.5 – 108.0 MHz
Sortie : CC 5V, 1A
Ce symbole sur le produit ou dans les instructions indique que votre
équipement électrique et électronique doit être éliminé, en fin de vie
utile, séparément des déchets domestiques. Un système de collecte
séparée est mis en place pour le recyclage dans les pays de l'UE.
ÉCOUTEUR (prise 3,5mm)
Page 26

Tangent Dab2go Junior
DAB/DAB+/FM Radio med Bluetooth
Tillykke med købet af din nye Tangent Dab2go Junior DAB/DAB+/FM Radio
med Bluetooth. Vi anbefaler at du læser betjeningsvejledningen. Her finder
du også nogle hint’s som kan hjælpe dig med brug af radioen.
Husk at læse sikkerhedsinstruktionerne og gem denne vejledning til
senere brug..
Page 27

Sikkerhedsadvarsler
• Enheden skal altid beskyttes mod fugt. Nedsæt ikke denne enhed i vand eller andre
væsker! Hvis der spildes væske på enheden, kan det forårsage alvorlige skader. Sluk
straks på stikkontakten. Træk stikket ud, og kontakt din forhandler.
• Hvis enheden bruges i rum eller klimaer med høj fugtighed og temperatur, kan der opstå
kondensvand inde i enheden. Kondensvand kan beskadige enheden.
• Brug af enheden i støvfyldte omgivelser kan beskadige de interne elektroniske
komponenter, hvilket kan beskadige enheden.
• Enheden skal placeres på en flad, stabil overflade, og den må ikke udsættes for
vibrationer.
• For at mindske risikoen for elektrisk stød, må du ikke fjerne skruerne i kabinettet. Enheden
indeholder ingen dele, som brugeren selv kan reparere. Du bedes venligst overlade alt
vedligeholdelsesarbejde til kvalificeret personale.
• Brug kun den strømforsyning, som leveres med enheden.
• Undgå ekstreme temperaturer, hvad enten det er varmt eller koldt. Hold enheden fjernt fra
varmekilder såsom radiatorer og gas-/elektriske komfurer.
• Stikkontakten skal være i nærheden af enheden, og den skal være let tilgængelig.
• Berør aldrig stikket eller selve enheden med våde hænder. Træk aldrig i ledningen, når
den trækkes ud af stikkontakten.
• Kontroller inden brug, at den tilgængelige strømspænding stemmer overens med
spændingen, som enheden bruger.
• Hvis enheden ikke skal bruges i længere tid (f.eks. ferie), skal du trække stikket ud af
stikkontakten.
• I tilfælde af brug af hovedtelefoner, gør vi opmærksom på, at et
for højt lyd tryk eller lydstyrke fra hovedtelefoner eller
høretelefoner kan beskadige hørelsen. Indstil altid lydstyrken til
et behageligt niveau, som ikke er for højt. Hvis du skruer højt
op for lydstyrken, når du bruger hovedtelefoner, og bruger dem
i en længere periode, kan det være skadeligt for din hørelse.
• Træk stikket ud af stikkontakten, inden du rengør enheden.
• Batterierne (batteriet eller batteripakken) må ikke udsættes for stærk varme såsom solskin,
ild eller lignende.
• Tag opbrugte batterier ud af udstyret, og tag alle batterier ud af udstyr, som du ved ikke
skal bruges i lang tid. I modsat fald kan batterierne lække og forårsage skader.
• Batterier må aldrig smides på ild, da dette kan få dem til at eksplodere. Aflever opbrugte
batterier hos det lokale genbrugssted; batterier må ikke smides ud med det almindelige
husholdningsaffald.
• Brug ikke nogen form for slibende svampe eller rengøringsmidler, da disse kan beskadige
enhedens overflade.
• Inden du bruger enheden, skal du gøre dig bekendt med alle sikkerhedsanvisningerne for
brug af enheden. Hvis du overdrager denne enhed til andre, skal alle dokumenterne følge
med.
Page 28

1
Sikkerhedsadvarsler .................................................................................................. 0
Hvad er der I kassen? ............................................................................................... 2
Knapper og Funktioner .............................................................................................. 2
Set forfra ................................................................................................................ 2
Set bagfra............................................................................................................... 3
Kom godt igang ......................................................................................................... 3
Instruction Guide ....................................................................................................... 3
Instruktionsvejledning ............................................................................................ 3
DAB Radio ............................................................................................................. 4
FM Radio ................................................................................................................ 5
Bluetooth Mode ...................................................................................................... 5
Station information for DAB og FM Radio .............................................................. 6
Menu Setting .......................................................................................................... 6
Alarm Indstillinger og Alarm Snooze ...................................................................... 7
Fejlsøgning ................................................................................................................ 8
Specifikationer ....................................................................................................... 9
Page 29

2
Hvad er der I kassen?
Betjeningsvejledning
Tangent Dab2go Junior Radio
Strømforsyning
Knapper og Funktioner
Set forfra
1.Volume -/+ 6. Preset
2.Standby 7. Alarm
3.Mode 8. Snooze
4.Scan 9. Tune+/-/Enter/
5.Info/Menu
Page 30

3
Set bagfra
10. ON/OFF 13. Antenne
11. USB input til strømforsyning 14. Batterirum
12. Hovedtelefon udgang 3.5mm 15. Display skærm
Kom godt igang
Pak enheden ud.
Venligst behold al emballage. Din enhed er nu klar til normal brug.
Instruction Guide
Instruktionsvejledning
• Tilslut stikket til bagsiden af enheden mærket USB og strømforsyningen i
stikkontakten.
Page 31

4
• Sørg for, at antennen forlænges så langt som muligt, så du kan rotere den. Dette
giver dig mulighed for at få det bedste signal, du kan.
Tænd for din Radio ved at sætte knappen på bagsiden af enheden til "Til".
• Tryk på standby-knappen for at tænde for apparatet. Når DAB-radio aktiveres for
første gang, skal du trykke på Scan-knappen, så starter en fuld scan automatisk
eller afspiller den sidste station, før enheden blev slukket.
• For at rulle gennem stationerne skal du bruge Tune / Enter-knappen. Tryk på
Tune / Enter-knappen for at vælge/lytte til en station.
• Tryk på MODE for at ændre tilstanden.
Dette skifter mellem DAB Radio / FM Radio og Bluetooth-tilstand.
• Skærmen slukkes automatisk efter 10 sekunder, hvis den er i standby eller i
arbejdstilstand.
DAB Radio
• Tryk på Mode knappen for at skifte mellem DAB/FM/BT Radio.
• For at scanne efter kanaler tryk på SCAN knappen. Så vil radioen begynde at
scanne frekvensbåndet og gemme alle stationer med et stærkt signal.
• Efter scanningen er færdig vil radioen begynde at spille den først fundne station.
• For at lytte til alle de fundne stationer kan du rotere TUNE knappen og vælge
den ønskede station ved at trykke på den.
• I displayet kan du se information om stationen, og hvis du trykker på
INFO/MENU knappen så kan du vælge imellem de tilgængelige informationer.
• Når du tænder for radioen efter at den har været slukket, så vil den starte op på
den kanal du sidst valgte.
I DAB mode opdatere den med tid og dato fra den valgte station.
Page 32

5
FM Radio
Tryk på Mode knappen for at skifte mellem DAB/FM/BT Radio.
For at scanne efter kanaler tryk på SCAN knappen. Så vil radioen begynde at
scanne frekvensbåndet og begynde at afspille den første station med et godt
signal. For at scanne ned af frekvensbåndet skal du lave et langt tryk på SCAN
knappen.
I displayet kan du se information om stationen, og hvis du trykker på INFO/MENU
knappen så kan du vælge imellem de tilgængelige informationer
FM Scannings indstillinger
Du kan vælge mellem at scanne stærke stationer og svage (ALL) eller kun stærke
stationer (STRONG). Lav et langt tryk på Info/Menu knappen for at komme I
menu’en. Når du har undet FM scan setting kan du vælge og bekræfte med
TUNE/ENTER knappen.
Manual scan
For at scanne manuelt skal du dreje på TUNE/ENTER knappen for at finde den
station du ønsker.
Mono og Stereo
For at vælge mellem mono og stereo, skal du trykke på Tune/Enter knappen for at
vælge imellem “Set to Mono” eller “Set to Stereo”.
Bluetooth Mode
Tryk på Mode knappen for at vælge Bluetooth Mode og displayet vil vise
“Bluetooth Pairing”.
Tænd for Bluetooth på din telefon og søg efter “Dab2go junior” vælg “Dab2go
junior” for at skabe forbindelsen mellem din telefon og din radio. Når parringen er
gennemført vil displayet vise “Bluetooth Paired Play/ Pause”.
Når du spiller music vil displayet vise “Bluetooth Paired Play”; og hvis du pauser
musikken vil der stå “Bluetooth Paired Pause”
Tryk på Tune/Enter knappen for at afspille eller pause under afspilning.
Drej på Tune/Enter for at afspille den næste eller forrige sang.
Drej på Volume-/+ knappen for at skrue op eller ned for lydstyrken.
Hvordan gemmer du en radiostation som preset.
Du kan gemme op til 10 DAB og 10 FM stationer.
Page 33

6
For at gemme en station skal du lytte til den station som du vil gemme.
Tryk og hold Preset knappen og displayet vil vise “ 1:( Empty) ”. (Hvis der allerede
er gem en station på det følgende preset vil stationens navn blive vist.
Drej Tune/Enter knappen for at vælge det preset nummer som du vil gemme på
og tryk derefter på Tune/Enter for at gemme. Displayet vil vise “Preset # stored”.
Hvordan vælger du et gemt preset
Tryk på Preset knappen og drej på Tune/Enter knappen for at vælge den
ønskede station.
Tryk på Tune/Enter for at vælge og afspille den gemte station.
Station information for DAB og FM Radio
DAB Radio
Tryk på Info/Menu gentagne gange for at bladre imellem de tilgængelige
programinformationer.
Signal Strength: Viser en signal bjælke der viser styrken af den valgte station.
Bit Error Rate: Viser detaljer omkring signal fejl.
Channel and Frequency: Viser stationens kanal nummer og frekvens.
PTY (Program Type): Viser program typen.
Time and Date: Viser tid og dato som bliver udsendt af radiostationen.
Bit Rate: Viser data bitrate.
Dynamic Label Segment: Viser tekst information der bliver sendt af stationen.
FM Radio
Tryk på Info/Menu gentagne gange for at bladre imellem de tilgængelige
programinformationer.
Program Type: Viser program typen udsendt fra stationen.
Signal Strength: Viser en signal bjælke der viser styrken af den valgte station.
Time and Date: Viser tid og dato.
Frequency: Viser stationens frekvens.
Audio Type: Viser lydtypen af stationen som enten vil være stereo eller mono.
Radio Text: Viser tekst informationen sendt fra stationen.
Menu Setting
Når din radio er tændt kan du lave et langt tryk på Info/Menu knappen dette vil
give dig adgang til menuen.
Drej Tune/Enter knappen til den ønskede under menu.
Time/Date:
Page 34

7
Tryk på Tune/Enter knappen, og timetallet vil blinke, drej Tune/Enter knappen for
at indstille timetallet og tryk på Tune/Enter knappen for at bekræfte valget.
Gentag same procedure for indstille minutterne. År, måned samt dato.
System Version:
Tryk på Tune/Enter knappen, og du kan se software versionen.
Factory reset:
Tryk på Tune/Enter knappen og du kan vælge ”Factory reset ? <No> Yes ”. Drej
Tune/Enter knappen til “Yes”. Tryk på Tune/Enter igen og din radio vil blive
resat/nulstillet til fabriksindstillinger.
Alarm Indstillinger og Alarm Snooze
Alarm Indstilling
Tryk på Alarm knappen for at vælge Alarm 1 og tryk igen for at vælge Alarm2.
Derefter tryk på Tune/Enter knappen og drej knappen Tune/Enter indtil ”ON”
blinker og tryk igen for at vælge ON.
Derefter vil timetallet blinke, drej knappen for a indstille timetallet og tryk for at
bekræfte.
Derefter vil minutterne blinke, drej knappen for a indstille minutter og tryk for at
bekræfte.
Derefter vil volume blinke, drej knappen for a indstille det ønskede volume niveau
og tryk for at bekræfte.
Drej derefter Tune/Enter knappen for at vælge mellem Alarm-DAB-FM og tryk for
at bekræfte valget.
For at indstille Alarm 2 følger du samme procedure.
Note: Under indstilling kan du trykke på Info/Menu knappen for at gå et skridt
tilbage i indstillings menuen.
For at slå alarmen fra:
For at slå alarmen fra skal du trykke på standby knappen. Og for at gøre alarmen
inaktiv permanent skal du i alarm menu’en vælge alarm til OFF.
Sleep timer
I radio mode tryk og hold ALARM knappen og displayet vil vise “Set Sleep: OFF”.
Drej på Tune/Enter knappen for at vælge mellem OFF-120-90-60-45-30-15-5
minutter.
Og tryk på Tune/Enter knappen for at bekræfte valget.
Page 35

8
Snooze Function
Når alarmen lyder tryk på Snooze knappen for at snooze 9 minutes, radioen går I
standby mode.
For at slukke alarmen helt når den lyder, skal du trykke på STANDBY knappen.
Fejlsøgning
Problem
Løsning
Ingen lyd
• Radioen er ikke tunet ind på stationen.
• Volumen er skruet helt ned, skru op for volumen.
• Øretelefoner er tilsluttet, tag øretelefonerne ud.
Knapperne virker ikke
Tag strømmen fra og tilslut igen efter lidt tid.
FM: Statisk lyd
DAB+: Lyden falder ud
• Signal modtagelse er for lav. Juster antennen eller flyt
radioen til et andet sted med bedre modtageforhold.
• Scan efter stationer igen.
Lyden er forvrænget
Volumen er for høj, juster volumen.
Den ønskede station er ikke
fundet.
Svagt signal, prøv at udføre en manual søgning.
Displayet viser “No Service”
Der er ikke DAB+ signal I dit område, eller dårlig modtagelse.
Juster antennen eller flyt radioen til et sted med bedre
modtageforhold.
Displayet er blank
Dette kan sked hvis radiostationen ikke sender information
korrekt ud. Nogle gange kan det løses ved at lave en ny
skanning efter kanaler.
Tid og dato er ikke korrekt
For at tid og dato er korrekt skal du tænde for en DAB kana log
radioen modtager korrekt information fra den.
Page 36

Specifikationer
Connections
DC IN (Strømforsyning – Micro USB)
Beskrivelse DAB/DAB+/FM Radio med Bluetooth
Display 2 liniers display
FM 87.5 – 108.0 MHz
DAB/DAB+ Band III
Strømforsyning Input : AC 100-240V, 50/60 Hz
Output : DC 5V, 1A
Dette symbol på produktet eller i vejledningen betyder, at dit elektriske
og elektroniske udstyr skal bortskaffes ved afslutningen af dets levetid
adskilt fra husholdningsaffaldet. Der er separate indsamlingssystemer
til genanvendelse i EU.
Øretelefon indgang (3.5mm mini jack stik)
Page 37

Tangent Dab2go Junior
Bluetoothilla varustettu DAB/DAB+ ja FM Radio
Kiitos uuden Bluetooth varustetun new Tangent Dab2go Junior
DAB/DAB+/FM Radio hankkimisesta. Siinä on paljon jännittäviä
ominaisuuksia, joiden ansiosta musiikin kuuntelemisesta tulee
nautittavampi kokemus. Suosittelemme käyttämään hieman aikaa tämän
ohjeen lukemiseen, jotta ymmärrät täysin laitteen sisältämät toiminnot.
Löydät myös vinkkejä ongelmatilanteiden ratkaisemiseksi.
Lue kaikki turvaohjeet huolellisesti ennen käyttöä ja pidä nämä ohjeet
tallessa.
Page 38

Mitä pakkaus sisältää? ......................................................................................... 1
Säätimet ja toiminnot ............................................................................................ 1
Näkymä edestä ................................................................................................. 1
Näkymä takaa ................................................................................................... 2
Ennen ensimmäistä käyttökertaa ......................................................................... 2
Käyttöohje............................................................................................................. 3
Perustoiminta .................................................................................................... 3
DAB-radio ......................................................................................................... 3
FM-radio ............................................................................................................ 4
Bluetooth-tila ..................................................................................................... 4
DAB- ja FM-radion asematiedot ....................................................................... 5
Valikon asetukset: ............................................................................................. 6
Kaksoisherätyksen asetus ja torkku ................................................................. 7
Vianetsintä ............................................................................................................ 8
Tekniset tiedot ................................................................................................ 9
Page 39

1
Mitä pakkaus sisältää?
Käyttöohje
DAB/FM Radio
Virtasovitin
Säätimet ja toiminnot
Näkymä edestä
1.Volume -/+ 6. Preset
2.Standby 7. Alarm
3.Mode 8. Snooze
4.Scan 9. Tune+/-/Enter/
5.Info/Menu
Page 40

2
Näkymä takaa
10. PÄÄLLÄ/POIS 13. Antenni
11. USB-liitin 14 Paristokotelo
12. Kuulokeliitäntä 15. Näyttöruutu
Ennen ensimmäistä käyttökertaa
Poista laite pakkauksesta.
Säilytä kaikki tarkistetut pakkaukset ja laske kaikki osat ja sisältö osaluettelon
mukaisesti.
Laite on nyt käyttövalmis.
Page 41

3
Käyttöohje
Perustoiminta
• Kiinnitä laite sen taakse USB-merkittyyn liittimen avulla verkkovirtaan.
• Varmista, että antenni ylettää mahdollisimman pitkälle, jotta pääset
pyörittämään sitä. Näin saavutetaan paras mahdollinen signaali.
Käännä laitteen takana oleva kytkin On-asentoon.
• Painamalla Standby-painiketta laite käynnistetään. Kun DAB-radio
aktivoidaan ensimmäistä kertaa, paina Scan-painiketta, jolloin täysi skannaus
käynnistyy automaattisesti tai valitaan edellinen asema ennen laitteen
sulkemista.
• Voit selata asemia Tune/Enter -painikkeella. Painamalla Tune/Enter
-painiketta voidaan kuunnella asemaa.
• Voit vaihtaa tilaa painamalla Mode-painiketta.
Sillä selataan DAB Radio/ FM Radio- ja Bluetooth-tilojen välillä.
• Näyttö himmenee automaattisesti 10 sekunnin kuluttua, jos se jätetään
valmius- tai toimintatilaan.
DAB-radio
• Painamalla Mode-painiketta kytketään DAB-radio päälle. Vedä antenni
kokonaan ulos.
• Painamalla Scan-painiketta suoritetaan automaattinen skannaus, minkä
jälkeen painike vapautetaan. Näin käynnistetään taajuuden skannaus. Kaikki
hyvin kuuluvat asemat tallennetaan muistiin.
• Radio tallentaa automaattisesti kaikki asemat, joiden signaali on hyvä.
Kun haku on suoritettu, ensimmäinen tallennettu asema toistetaan
automaattisesti.
• Voit kuunnella tallennettuja asemia ja selata niitä Tune/Enter -painikkeella.
Paina Tune/Enter -painiketta, kun olet haluamallasi asemalla.
• Radio näyttää aseman tiedot, kun painat Info/Menu -painiketta. Painamalla
useita kertoja näet kaikki saatavilla olevat tiedot.
Kun avaat radion sen sulkemisen jälkeen, se virittyy automaattisesti samalle
asemalle (DAB tai FM), kuin millä se oli aiemmin.
Radio synkronoituu DAB-tilassa aseman ajan ja päivämäärän kanssa.
Page 42

4
FM-radio
• Painamalla Mode-painiketta useampaan kertaan voi selata välillä
DAB/FM/BT.
Kun se tehdään ensimmäistä kertaa, FM-taajuus 87.5 MHz tulee näkyviin
näytölle. Muista vetää antenni ulos.
Painamalla ja vapauttamalla Scan-painike suoritetaan automaattinen
skannaus. Näin käynnistetään taajuuden skannaus. Kaikki hyvin kuuluvat
asemat soitetaan ensin.
Selaa taajuuksia painamalla ja pitämällä Scan-painiketta useita sekunteja.
Radio näyttää aseman tiedot, kun painat Info/Menu -painiketta. Painamalla
useita kertoja näet kaikki saatavilla olevat tiedot.
FM-hakuasetus
Valitse skannaus voimakkaiden ja heikkojen signaalien välillä (All) tai vain
voimakkaat asemat (Only). Paina ja pidä Info/Menu -painiketta. Tee valinta
kääntämällä Tune/Enter -painiketta ja korostamalla valinta.
Radio tallentaa automaattisesti kaikki asemat, joiden signaali on hyvä. Kun
haku on suoritettu, ensimmäinen tallennettu asema toistetaan
automaattisesti. Valitse “FM Scan Setting” ja paina Tune/Enter -painike
alas. Käännä Tune/Enter -painiketta ja valitse joko “All” tai “Only”. Paina
Tune/Enter -painiketta valinnan vahvistamiseksi.
Manuaalinen haku
Voit tiettyä taajuutta kääntämällä Tune/Enter -painiketta hakuun eteen ja
taakse.
Mono ja stereo
Paina Tune/Enter -painiketta toimintatilassa ja valitse joko “Set to Mono” tai
“Set to Stereo”.
Bluetooth-tila
Painamalla Mode-painiketta valitaan Bluetooth-tila, minkä jälkeen näytöllä
näkyy “Bluetooth Pairing”.
Page 43

5
Käynnistä laitteesi Bluetooth ja valitse yhdistämisnimi “Dab2go Junior” ja paina
sitä yhdistämistä varten. Kun yhdistäminen onnistui, näytöllä näkyy “Bluetooth
Paired”.
Kun soitetaan musiikkia, näytöllä näkyy “Bluetooth Paired Play”; ja kun on
tauko, näytöllä näkyy “Bluetooth Paired Pause”
Painamalla Tune/Enter -painiketta soitetaan tai keskeytetään soittaminen.
Käännä Tune/Enter -painiketta seuraavan tai edellisen kappaleen
soittamiseksi.
Käännä Volume-/+ -painiketta äänenvoimakkuuden lisäämiseksi tai
vähentämiseksi.
Esiasetettujen asemien asettaminen
Esiasetuksen tallentaminen
Voit tallentaa jopa 10 DAB- ja 10 FM-radioasemaa.
Asema tallennetaan samalla, kun kuuntelet tallennettavaa asemaa.
Paina ja pidä Preset -painiketta, jolloin näytöllä näkyy “ 1:( Empty) ”. Kun
asema on tallennettu, aseman nimi ja esiasetusnumero näkyvät näytöllä.
Käännä Tune/Enter -painiketta ja valitse numero, jonka haluat tallentaa
asemaksi, ja tallenna sitten painamalla Tune/Enter -painiketta, jolloin näytöllä
näkyy ”Preset # stored”.
Esiasetetun radioaseman soittaminen
Painamalla Preset-painiketta ja kääntämällä Tune/Enter -painiketta valitaan
haluttu esiasetuksen numero.
Painamalla Tune/Enter -painiketta tallennetaan asema.
DAB- ja FM-radion asematiedot
DAB-radio
Paina Info/Menu -painiketta toistuvasti, jolloin eri ohjelmatiedot tulevat
näkyviin.
Signal Strength: Näyttää signaalipalkin kyseisen aseman voimakkuuksineen.
Bit Error Rate: Kertoo signaalin virheen tiedot.
Channel and Frequency: Näyttää aseman välityskanavan numeron ja
taajuuden.
Page 44

6
PTY (Program Type): Näyttä DAB-aseman tyypin ja kuvauksen.
Time and Date: Näyttää ajan ja päivän tiedot, jotka ohjelman lähettäjä antaa.
Bit Rate: Tiedot, joilla signaali lähetetään.
Dynamic Label Segment: Näyttää ohjelman lähettäjän tarjoamat tekstitiedot.
FM-radio
Paina Info/Menu -painiketta toistuvasti, jolloin eri ohjelmatiedot tulevat
näkyviin.
Program Type: Näyttää ohjelman lähettäjän tarjoamat ohjelmatyypin
kuvauksen.
Signal Strength: Näyttää signaalipalkin kyseisen aseman voimakkuuksineen.
Time and Date: Näyttää ajan ja päiväyksen.
Frequency: Näyttää aseman taajuuden.
Audio Type: Näyttää kuunneltavan aseman audiotyypin. Se on joko Stereo tai
Mono.
Radio Text: Näyttää ohjelman lähettäjän tarjoamat selaustiedot.
Valikon asetukset:
Kun radio on päällä, paina ja pidä Info/Menu -painiketta. Esiin tulee “Set
Menu”.
Valitse Tune/Enter -painikkeella haluamasi vaihtoehto seuraavista:
Time/Date:
Painettaessa Tune/Enter -painiketta tiimalasi vilkkuu. Käännä Tune/Enter painiketta ja aseta tunnit oikein. Vahvista sitten painamalla Tune/Enter.
Toista kaksi edellistä vaihetta minuuttien, vuoden, kuukauden ja päivämäärän
asettamiseksi.
Järjestelmäversio
Paina Tune/Enter -painiketta, minkä jälkeen voit tarkistaa ohjelmiston
versionumeron.
Factory reset:
Painamalla Tune/Enter -painiketta näytölle tulee ”Factory reset ? <No> Yes ”.
Käännä Tune/Enter -painikkeesta vaihtoehto “Yes”.
Painamalla Tune/Enter -painiketta uudelleen nollataan radion asetukset.
Page 45

7
Kaksoisherätyksen asetus ja torkku
Herätyksen asetus
Herätys asetetaan painamalla Alarm 1 ja painamalla Alarm2.
Paina sitten Tune/Enter -painiketta ja käännä Tune/Enter -painiketta, kunnes
näytöllä vilkkuu ”ON”. Vahvista sitten painamalla Tune/Enter uudelleen.
Herätyksen tunnit vilkkuvat. Muuta Tune/Enter -painikkeesta tunnit ja vahvista
painamalla Tune/Enter uudelleen.
Käännä Tune/Enter -painiketta muuttaaksesi minuutit ja vahvista painamalla
Tune/Enter.
Käännä Tune/Enter -painiketta muuttaaksesi äänenvoimakkuutta ja vahvista
painamalla Tune/Enter.
Käännä Tune/Enter -painiketta selataksesi Alarm-DAB-FM ja vahvista
painamalla Tune/Enter.
Herätys 2 asetetaan noudattamalla herätyksen 1 ohjeita.
Huomaa: Voit painaa Info/Menu -painiketta siirtyäksesi yhden askelen
taaksepäin, kun olet asettamassa hälytystä.
Herätyksen kytkeminen pois päältä
Herätyksen kytkeminen pois päältä tapahtuu kääntämällä Tune/Enter painiketta, kunnes näytöllä vilkkuu “OFF”. Paina sitten Tune/Enter -painiketta.
Herätys on nyt pois päältä.
Herätyksen sammutus sen soidessa
Painamalla Standby-painiketta sammutetaan herätys sen soidessa.
Uniajastin
Paina käytön aikana herätyspainiketta ja pidä sitä painettuna, kunnes näytöllä
näkyy “Set Sleep: OFF”.
Käännä Tune/Enter -painikkeesta vaihtoehto OFF-120-90-60-45-30-15-5
minuuttia.
Vahvista sitten painamalla Tune/Enter.
Torkku
Kun herätys soi, painamalla Snooze aktivoidaan torkku 9 minuutiksi, minkä
jälkeen radio siirtyy valmiustilaan.
Page 46

8
Hälytys sammutetaan kokonaan sen soidessa painamalla Standby.
Vianetsintä
Ongelma
Ratkaisu
Ei ääntä
• Asema ei ole kohdallaan. Hienosäädä asema.
• Äänenvoimakkuus on liian alhainen. Lisää
äänenvoimakkuutta.
• Kuulokkeet ovat ehkä kytkettyinä. Irrota kuulokkeet.
Painikkeet eivät toimi
Sammuta laite ja käynnistä se uudelleen muutaman sekunnin
kuluttua.
FM: Jatkuva ääni
DAB+:
Pulputtava/katkonainen
ääni
• Signaalin vastaanotto on heikko. Säädä antennia ja siirrä se
vahvemman signaalin alueelle.
• Skannaa asemat uudelleen.
Ääni on vääristynyt.
Äänenvoimakkuus on liian korkea. Säädä äänenvoimakkuutta.
Haluttua asemaa ei löydy
Heikko signaali. Käytä manuaalista viritystoimintoa.
Näytöllä lukee “No Service”
Alueella ei ole DAB+ -peittoa tai vastaanotto on heikkoa. Säädä
antennia ja siirrä se vahvemman signaalin alueelle.
Näyttö on tyhjä
Näin voi tapahtua, jos lähettäjä muuttaa palvelimen etikettiä
tai poistaa tunnisteen virityksen aikana. Laite yrittää virittää
uudelleen tai suorittaa skannauksen.
Ajan ja päivän asetus ei ole
automaattinen
Jos haluat määrittää kellonajan ja päivämäärän automaattisesti,
sinun on käynnistettävä järjestelmä ja vaihdettava DAB-radioon
ja suoritettava skannaus. Päivämäärä ja kellonaika päivittyvät
automaattisesti.
Page 47

Tekniset edot
DAB/DAB+
Band III
Virtasovitin
Tulo: AC 100-240V, 50/60 Hz
Liitännät
DC IN (virtalähde)
Kuvaus Bluetoothilla varustettu DAB/DAB+ ja FM Radio
Näyttö 2-Rivinen näyttö
FM 87.5 – 108.0 MHz
Lähtö: DC 5V, 1A
EARPHONE (3,5 mm:n kuulokeliitäntä)
Tämä merkki tuotteessa tai ohjeissa osoittaa, että sähkö- tai
elektroniikkatuote tulee sen käyttöiän lopuksi hävittää erillään
talousjätteestä.
kierrätystä varten.
EU:n sisällä on käytössä erilaisia keräilyjärjestelmiä
Page 48

Tangent Dab2go Junior
DAB/DAB+ en FM-radio met Bluetooth
Hartelijk bedankt voor het aanschaffen van je nieuwe Tangent Dab2go Junior
DAB/DAB+/FM-radio met Bluetooth. Het heeft vele spannende eigenschappen
waardoor jouw muziekervaring nog fantastischer wordt. Wij raden je aan even de
tijd te nemen deze gebruikshandleiding door te lezen, zodat je alle functionele
kenmerken van deze radio volledig begrijpt Je zult ook enkele hints en tips vinden
die je kunnen helpen eventuele problemen op te lossen.
Lees alle veiligheidsvoorschriften zorgvuldig door en bewaar deze
gebruikshandleiding als eventueel naslagwerk.
Page 49

Veiligheidsvoorschriften
• Bescherm het apparaat altijd tegen vocht en hoge luchtvochtigheid. Plaats dit apparaat
nooit in water of andere vloeistoffen! Als vloeistoffen in het apparaat terechtkomen, dan
kan dit ernstige schade veroorzaken. Schakel het apparaat bij het stopcontact onmiddellijk
uit. Haal de stekker uit het stopcontact en raadpleeg je winkelier/
• Door het apparaat in kamers of klimaten met hoge luchtvochtigheid en temperaturen te
gebruiken, kan er condensatie optreden binnenin het apparaat. Condensatie kan het
apparaat beschadigen.
• Door het apparaat in stoffige omstandigheden te gebruiken, kunnen de interne
elektronische onderdelen worden beschadigd waardoor storingen kunnen optreden in het
apparaat.
• Het apparaat moet op een vlak en stabiel oppervlak worden geplaatst, vrij van vibraties.
• Om het risico op elektrische schokken te voorkomen, verwijder geen van de schroeven.
Het apparaat bevat geen onderdelen die de gebruiker zelf kan repareren. Laat alle
onderhoudsingrepen a.u.b. over aan gekwalificeerd personeel.
• Gebruik uitsluitend de stroomadapter meegeleverd met het apparaat.
• Vermijd extreem hoge of lage temperaturen. Plaats het apparaat ver uit de buurt van
hittebronnen, zoals radiateurs of gas-/elektrische branders.
• Het stopcontact moet in de buurt van het apparaat zitten en dient eenvoudig bereikbaar te
zijn.
• Raak de stekker of het apparaat zelf nooit aan met natte handen. Trek nooit aan de
voedingskabel wanneer je de stroomadapter uit het stopcontact haalt.
• Controleer vóór gebruik of de beschikbare netspanning overeenkomt met de vereiste
bedrijfsspanning van het apparaat.
• Haal de stekker uit het stopcontact wanneer je het apparaat voor langere tijd niet gebruikt
(bijv. vakanties).
• In het geval dat je een hoofdtelefoon gebruikt, houd er rekening
mee dat een te hoge geluidsdruk of te hoge volumes uit de
hoofd- of oortelefoon tot gehoorbeschadiging kunnen leiden.
Pas het volume altijd aan tot op een comfortabel en niet te luid
niveau. Als je het volume van de hoofdtelefoon te hoog hebt
ingesteld en dit niveau lang gebruikt, dan kan dit je gehoor
beschadigen.
• Zorg ervoor de stekker uit het stopcontact te halen voorafgaand aan reiniging.
• Batterijen (batterijblok of geïnstalleerde batterijen) mogen niet worden blootgesteld aan
teveel hitte zoals zonlicht, vuur en dergelijke.
• Verwijder uitgeputte batterijen uit apparatuur en alle batterijen uit apparatuur wanneer je
van plan bent deze voor langere tijd niet te gebruiken. De batterijen kunnen anders
beginnen te lekken en beschadiging veroorzaken.
Page 50

• Dank batterijen nooit af in vuur, omdat deze hierdoor kunnen ontploffen. Recycle
uitgeputte batterijen a.u.b.; dank deze nooit af als normaal huishoudelijk afval.
• Gebruik geen enkel type schuursponsje of agressieve reinigingsmiddelen, anders kan de
oppervlakte van het apparaat beschadigd raken.
• Voordat je het apparaat in gebruik neemt, maak jezelf a.u.b. bekend met alle
veiligheidsinformatie en gebruiksaanwijzingen. Wanneer je dit apparaat aan anderen
geeft, overhandig dan a.u.b. ook alle documentatie.
Page 51

Wat zit er in de doos? ........................................................................................... 1
Bedieningen en functies ....................................................................................... 1
Vooraanzicht ..................................................................................................... 1
Achteraanzicht .................................................................................................. 2
Vóór het eerste gebruik ........................................................................................ 2
Gebruiksaanwijzingen .......................................................................................... 3
Algemene bediening ......................................................................................... 3
DAB-radio ......................................................................................................... 3
FM-radio ............................................................................................................ 4
Bluetooth-modus ............................................................................................... 5
Stationsinformatie voor DAB- en FM-radio ....................................................... 5
Menu-instelling .................................................................................................. 6
Dubbele alarminstelling en sluimerfunctie ........................................................ 7
Probleemoplossing ............................................................................................... 8
Specificaties ....................................................................................................... 10
Page 52

1
Wat zit er in de doos?
Gebruikshandleiding
DAB/FM-radio
Stroomadapter
Bedieningen en functies
Vooraanzicht
1.Volume -/+ 6. Preset
2.Standby 7. Alarm
3.Mode 8. Snooze
4.Scan 9. Tune+/-/Enter/
5.Info/Menu
Page 53

2
Achteraanzicht
10. ON/OFF 13. Antenne
11. USB-voedingspoort 14. Batterijvak
12. Hoofdtelefoonuitgang 15. Weergavescherm
Vóór het eerste gebruik
Pak het apparaat uit.
Bewaar a.u.b. alle verpakkingsmaterialen nadat je alle onderdelen hebt
gecontroleerd en geteld en de inhoud hebt vergeleken met de onderdelenlijst.
Je apparaat is nu gereed voor normaal gebruik.
Page 54

3
Gebruiksaanwijzingen
Algemene bediening
• Steek de stekker in de achterzijde van het systeem, gemarkeerd met USB, en
de stroomadapter in het stopcontact.
• Trek de antenne zo ver mogelijk uit, zodat je deze kunt draaien.
Hierdoor zul je een optimale signaalontvangst krijgen. Stel de knop op
de achterzijde van het apparaat in op “On”.
• Druk op de toets Standby om het apparaat in te schakelen. Wanneer je de
DAB-radio voor het eerst activeert, druk dan op de toets Scanom vervolgens
automatisch een volledige scan uit te voeren, zo niet dan zal het laatst
beluisterde station worden afgespeeld voordat het apparaat was
uitgeschakeld.
• Gebruik de knop Tune/Enterom de stations te doorlopen. Druk op de
knop Tune/Enter om naar een station te luisteren.
• Druk op de toets Mode om van modus te wisselen
Hierdoor kun je wisselen tussen de modi DAB-radio/ FM-radio en Bluetooth.
• De display zal na 10 seconden automatisch dimmen wanneer in stand-by of
gebruiksmodus gelaten.
DAB-radio
• Druk op de toets Mode om op DAB-radio te schakelen. Trek de antenne
volledig uit.
• Druk op de toets Scan en laat vervolgens los om automatisch te scannen.
Hierdoor zal de frequentieband in oplopende frequentie worden doorzocht en
worden alle stations met een goed signaal opgeslagen.
• De radio zal automatisch alle stations opslaan die een krachtig signaal
hebben.
Nadat de scan is voltooid, dan zal automatisch het eerste opgeslagen station
worden afgespeeld.
• Om naar alle opgeslagen stations te luisteren, draai de knop Tune/Enter om
de stations te doorlopen. Druk op de knop Tune/Enter wanneer het gewenste
station is geselecteerd.
• De radio zal stationsinformatie weergeven wanneer je op de toets Info/Menu
drukt. Druk meerdere keren in om alle beschikbare informatie te zien.
Page 55

4
Wanneer je de radio inschakelt na deze te hebben uitgeschakeld, dan zal
deze automatisch afstemmen op hetzelfde station (DAB of FM) dat het laatste
was geselecteerd.
De radio zal in DAB-modus de tijd en datum van het station synchroniseren.
FM-radio
Druk meerdere keren op de toets Mode om te wisselen tussen DAB/FM/BT.
Wanneer je dit voor het eerst doet, dan zal de FM-frequentie “87.5 MHz” op de
display worden weergegeven. Vergeet niet de antenne uit te trekken.
Druk op de toets Scan en laat vervolgens los om automatisch te scannen.
Hierdoor zal de frequentieband in oplopende frequentie worden doorzocht en
worden alle stations met een goed signaal opgeslagen.
Je kunt de band ook in aflopende frequentie scannen door de toets Scan
enkele seconden ingedrukt te houden. De radio zal stationsinformatie
weergeven wanneer je op de toets Info/Menu drukt. Druk meerdere keren in
om alle beschikbare informatie te zien.
FM-scaninstelling
Kies uit sterke en zwakke signalen scannen (Alle) of alleen krachtige stations
(Alleen). Houd de toets Info/Menu ingedrukt. Maak je keuze door de knop
Tune/Enter te draaien en de gewenste optie te markeren.
De radio zal automatisch alle stations opslaan die een krachtig signaal hebben.
Nadat de scan is voltooid, dan zal automatisch het eerste opgeslagen station
worden afgespeeld. Selecteer “FM Scan Setting” en druk vervolgens op de
knopTune/Enter. Draai de knop Tune/Enter om te kiezen uit “All” of “Only”.
Druk op de knop Tune/Enter om je keuze te bevestigen.
Handmatig scannen
Draai de knop Tune/Enter om vooruit en achteruit te zoeken en naar een
specifieke frequentie te luisteren.
Mono en stereo
Druk in gebruiksmodus op de knop Tune/Enterom te wisselen tussen “Set to
Mono” en “Set to Stereo”.
Page 56

5
Bluetooth-modus
Druk op de toets Mode om de Bluetooth-modus te selecteren en de display zal
vervolgens “Bluetooth Pairing” weergeven.
Schakel je Bluetooth-apparaat in, zoek naar de paringnaam “Dab2go Junior” en
druk vervolgens op deze naam om te paren. De display zal na een geslaagde
paring “Bluetooth Paired Play/ Pause” weergeven.
Wanneer de muziek wordt afgespeeld, dan zal de display “Bluetooth Paired
Play” weergeven; wanneer de muziek is gepauzeerd, dan zal “Bluetooth Paired
Pause” verschijnen.
Druk op de knop Tune/Enterom het afspelen van een track te starten of
pauzeren.
Draai de knop Tune/Enterom de volgende of vorige track af te spelen.
Draai de knop Volume-/+om het volume te verhogen of verlagen.
Voorkeuzestations instellen
Een radiostation in het voorkeuzegeheugen opslaan
Je kunt tot op 10 DAB- end 10 FM-radiostations opslaan.
Om een station op te slaan, moet je naar het station luisteren dat je wilt
opslaan.
Houd de toets Preset ingedrukt en de display toont “1:(Empty)”. Als een station
al is opgeslagen, dan zullen de stationsnaam en het geheugennummer worden
weergegeven.
Draai de knop Tune/Enter om het voorkeuzenummer te selecteren waaronder
je het station wilt opslaan en druk vervolgens op de knop Tune/Enter om op te
slaan; de display zal “Preset # stored” weergeven.
Een opgeslagen radiostation afspelen
Druk op de toets Preset en draai de knop Tune/Enterom het
voorkeuzenummer van het gewenste station te selecteren.
Druk op de knop Tune/Enterom het opgeslagen station af te spelen.
Stationsinformatie voor DAB- en FM-radio
DAB-radio
Page 57

6
Druk meerdere keren op Info/Menu om de verschillende programma-informatie
weer te geven.
Signaalsterkte: Toont een signaalbalk met de sterkte van het huidige station.
Bitfoutfrequentie: Verstrekt details over de bitfoutfrequentie.
Kanaal en frequentie: Toont de frequentie en het nummer van het zendkanaal
van het station.
PTY (programmatype):Toont de type en een beschrijving van het programma
zoals verstrekt door het DAB-station.
Tijd en datum:Toont de tijd- en datuminformatie verstrekt door de zender.
Bitsnelheid:De gegevenssnelheid waarmee het signaal wordt verzonden.
Dynamisch labelsegment: Toont scrollende tekstinformatie verstrekt door de
zender.
FM-radio
Druk meerdere keren op de toets Info/Menu om de verschillende programmainformatie weer te geven.
Programmatype: Toont een beschrijving van het type programma zoals
verstrekt door de zender.
Signaalsterkte:Toont een signaalbalk met de sterkte van het huidige station.
Tijd en datum: Toont de tijd en datum.
Frequentie: Toont de zendfrequentie van het station.
Audiotype: Toont het audiotype van het station waar je naar luistert. Dit kan
Stereo of Mono zijn.
Radiotekst: Toont scrollende tekstinformatie verstrekt door de zender.
Menu-instelling
Houd met ingeschakelde radio de toets Info/Menu ingedrukt. Hierdoor zal “Set
Menu” worden geopend.
Draai de knop Tune/Enter om de gewenste suboptie te kiezen uit:
Tijd/datum:
Druk op de knop Tune/Enter en de uurweergave zal beginnen te knipperen.
Draai de knop Tune/Enter om de juiste uren in te stellen en druk vervolgens
ter bevestiging op de knop Tune/Enter.
Herhaal de laatste twee stappen om de minuten, het jaar, de maand en de
daum in te stellen.
Page 58

7
Systeemversie:
Druk op de knop Tune/Enter om het nummer van de softwareversie te
controleren.
Fabrieksinstellingen:
Druk op de knop Tune/Enteren de display zal “Factory reset ? <No> Yes”
weergeven. Draai de knop Tune/Enter om “Yes” te selecteren.
Druk nogmaals op de knopTune/Enter om de radio te resetten.
Dubbele alarminstelling en sluimerfunctie
Alarminstelling
Druk op de Alarmom Alarm 1 te gebruiken of druk nogmaals in om Alarm 2 te
gebruiken.
Druk nu op de knop Tune/Enter, draai de knop Tune/Enter totdat het woord
“ON” knippert en druk nogmaals op de knop Tune/Enter om te bevestigen.
De uurweergave van het alarm zal nu knipperen; draai de knop Tune/Enter om
de uren aan te passen en druk ter bevestiging op de knop Tune/Enter.
Draai de knop Tune/Enter om de minuten in te stellen en druk vervolgens ter
bevestiging op de knop Tune/Enter.
Draai de knop Tune/Enter om het volume aan te passen en druk vervolgens
ter bevestiging op de knop Tune/Enter.
Draai de knop Tune/Enter om te wisselen tussen Alarm-DAB-FM en druk
vervolgens ter bevestiging op de knop Tune/Enter.
Volg de instructies voor Alarm 1 om Alarm 2 in te stellen.
Opmerking: Je kunt op de toets Info/Menu indrukken om één stap terug te
keren tijdens de alarminstellingen.
Het alarm uitschakelen
Je kunt het alarm uitschakelen door de knop Tune/Enterte draaien totdat het
woord “OFF” knippert en vervolgens op de knop Tune/Enter te drukken. Het
alarm staat nu UIT.
Het alarm uitschakelen wanneer het alarm klinkt
Druk op de toets Standby om het alarm uit te schakelen wanneer het alarm
klinkt.
Page 59

8
Slaaptimer
Houd in gebruiksmodus de Alarm ingedrukt en “Set Sleep:OFF” zal
verschijnen.
Draai de knop Tune/Enter om OFF-120-90-60-45-30-15-5 minutes te
selecteren.
Druk vervolgens ter bevestiging op de knop Tune/Enter.
Sluimerfunctie
Wanneer het alarm klinkt, dan kun je op de toets Snooze drukken om de radio
voor 9 minuten op stand-by te schakelen.
Wanneer het alarm klinkt, dan kun je het alarm volledig uitschakelen door op
de toets Standby te drukken.
Probleemoplossing
Probleem
Oplossing
Geen geluid
• Het station is niet afgestemd. Stem het station nauwkeuriger
af.
• Het volume is op een lage stand ingesteld. Verhoog het
volume.
• Er is mogelijk een hoofdtelefoon aangesloten. Koppel de
hoofdtelefoon los.
Toetsen werken niet.
Schakel het apparaat uit en na enkele seconden weer in.
FM: Statische ruis
DAB+:
Geratel/intermitterende
onderbreking
• Te zwakke signaalontvangst. Pas de antenne aan of
verplaats het apparaat naar een plek met een sterker
signaal.
• Scan opnieuw naar stations.
Vervormd geluid.
Het volume is te hoog. Pas de volumeregeling aan.
Gewenste station niet
gevonden.
Zwak signaal. Gebruik de handmatige afstemfunctie.
De display toont "Geen
Service".
Er is geen DAB+ dekking in jouw omgeving of de ontvangst is
slecht. Pas de antenne aan of verplaats het apparaat naar een
plek met een sterker signaal.
Page 60

9
De display is blanco.
Dit kan gebeuren als de zender het label van een service
verandert of een tabel verwijdert wanneer afgestemd. Het
apparaat zal proberen opnieuw af te stemmen of een scan uit
te voeren..
Tijd en datum niet
automatisch ingesteld.
Om voor de tijd en datum automatisch te kunnen worden
ingesteld, dien je het systeem in te schakelen, op DAB-radio in
te stellen en een scan uit te laten voeren. De datum en klok
zullen automatisch worden bijgewerkt.
Page 61

Specificaties
Beschrijving
DAB/DAB+/FM-radio met Bluetooth
Display
Display met 2 regels
FM:
(87,5 – 108,0 MHz)
DAB/DAB+
Band III
Stroomadapter
Ingang: AC 100-240V, 50/60 Hz
Uitgang: DC 5V, 1,5A
Aansluitingen
DC IN (voeding)
HOOFDTELEFOON (3,5mm aansluiting)
Het symbool op het product of in de instructies betekent dat uw elektrische en
elektronische apparatuur aan het einde van de levensduur, gescheiden
van uw huishoudelijk afval moet worden verwijderd. Er zijn aparte
inzamelsystemen voor recycling in de EU.
Page 62

Dab2go junior
DAB+/DAB/FM/Bluetooth radio
WWW.TANGENT-AUDIO.COM
 Loading...