

Page 1
TacT 2150 + TCS Quick installation guide
1. UPDATE THE TCS PC SOFTWARE TO
VERSION 2.0 OR HIGHER
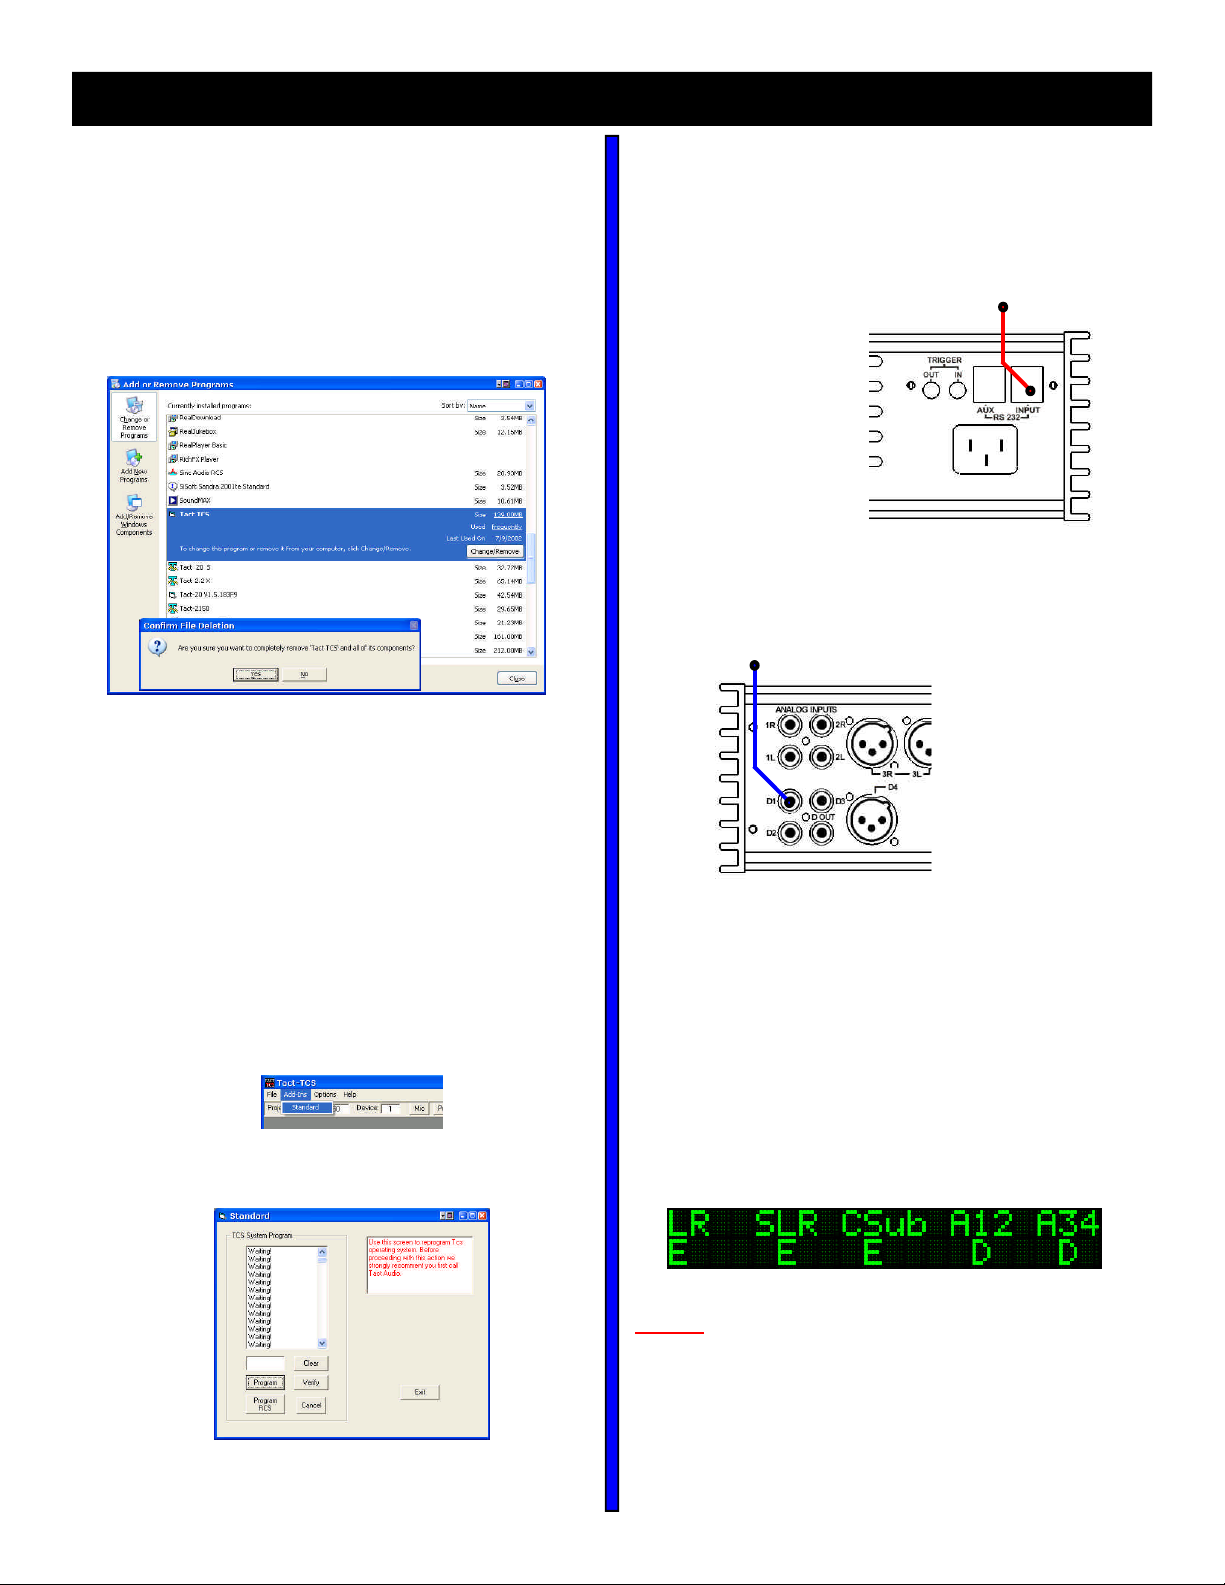
Remove your old installation of the TCS software.
To do this, enter the Windows control panel and select the “Add/
Remove Programs” option. Highlight the “TacT-TCS” option and
click on “Change/Remove”. You will be asked to confirm the removal - click on “Yes” and the old TCS software will be removed.
All target curves and measurements stored under unique names
will NOT be removed.
Install the new TacT TCS v2.0 software.
Insert the CD-rom with the TCS v2.0 software and open “My Computer” - double click on the CD-rom icon and then on “Install TacTTCS v2.0”. The installation will initiate and complete. You might
be asked to restart your computer.
3. CONNECTING THE COMPONENTS
RS232 Connection.
The TCS and 2150 amplifiers have to be connected with a RS232
communication cable. This cable is supplied with the 2150 amplifier.
From TCS AUX connector
RS232
Digital signal connection.
You can only a coax digital cable to connect the TCS digital output
to the 2150 amplifier digital input.
From TCS Digital output
2. UPDATE THE TCS FIRMWARE
Reprogramming of the TCS
Connect the PC to the TCS using the RS232 cable. Only the TCS
should be connected during system reprogramming.
Open the TacT-TCS software and check if communication is OK.
Turn the TCS OFF from the rear-panel mains switch. From the
software mainscreen, click on “Add-inns” then “Standard” - you
will now see the programming screen.
Click on “Program” and you will see “Waiting”. Go back to the TCS
and hold down the remote control “Volume UP” button while you
turn it back ON.
The display will indicate “Programming Mode” and you should
confirm the programming in the software. The TCS will return to
normal operation mode when finished.
Refer to the 2150 amplifier Owners Manual for speaker connection.
4. FRONT PANEL MENU SETTINGS
TCS front panel menu
The TCS needs to be configured for Amp Control. Open the front
panel menu and select the “AMP” option. You can now select
which output should have Amp Control enabled.
E = Enabled
D = Disabled
* NOTE: When the option is set to “Enabled”, the digital output
of the TCS goes to maximum level. It is strongly recommended
to lower the system volume (master volume on the TCS) before you enable the amp-control.
This menu should be set to “Enabled”. Press “Enter” to switch
between the options. Press “Menu” to exit.
CONTINUED...........>
Page 2
TacT 2150 + TCS Quick installation guide
2150 Amplifier front panel menu
*NOTE: Remote control on the 2150 amplifier can be disabled/
enabled by pressing the front panel “DIGITAL” and “ANALOG”
buttons simultaneously. It is recommended to disable the amplifier remote control during normal use, to prevent unwanted
menu-changes. All front panel controls remain active.
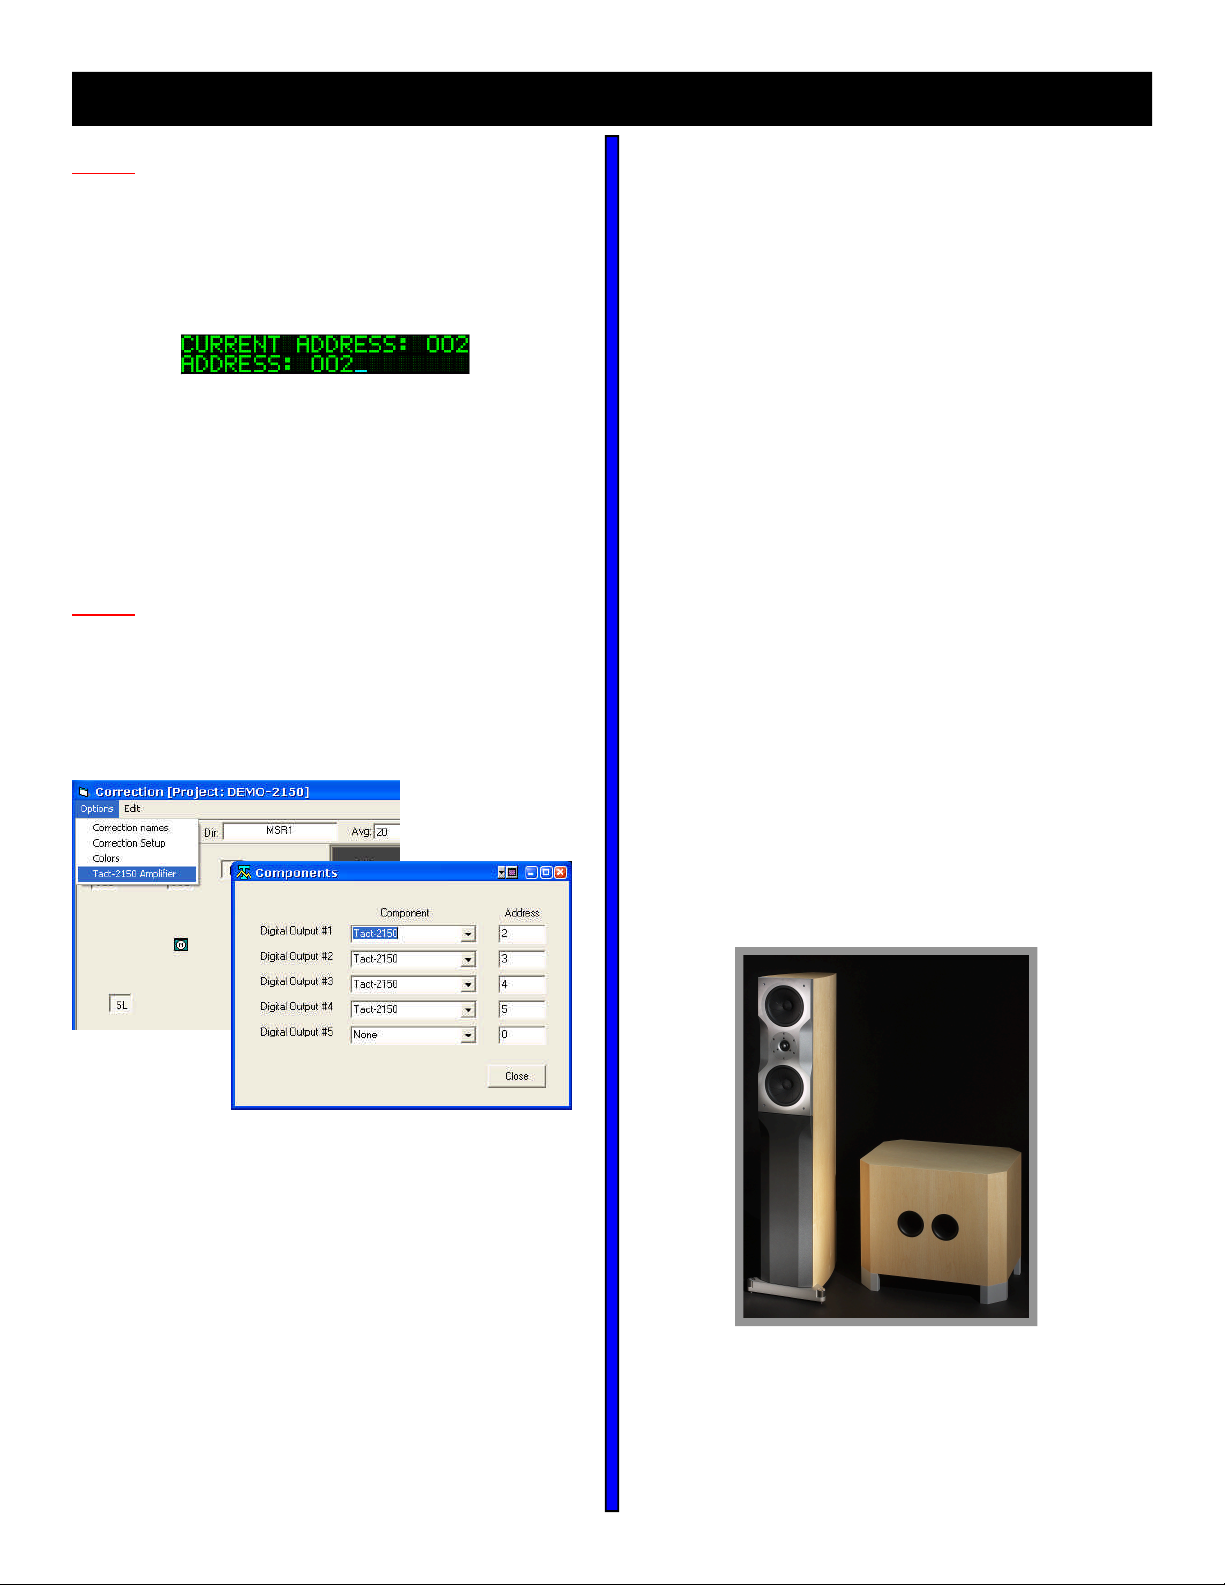
Enter the “ADDR” (Address) menu and set the address to “002”......
If you are using multiple amps, set the address to “003”, “004”...
Select the appropriate digital input.
YOUR HARDWARE IS NOW PROPERLY CONFIGURED !
5. TCS SOFTWARE CHANGES
*NOTE: To get the best performance with the Room Correction System it is necessary to re-measure your system after
connecting the 2150 amplifier.
The TCS correction software has been slightly modified to operate with the 2150 amplifier, and before you start the measurements sequence you need to configure the amplifier settings in
the “TacT-2150 Amplifier” menu under “options.
AVAILABLE SOON:
TacT Loudspeaker systems:
TacT Audio has become famous for its leadership in digital
amplification and room correction systems. Now TacT Audio
is taking further advantage of these technologies by creating a loudspeaker system specifically designed for use with
the room correction technology and the TacT intelligent
digital amplifiers. Each speaker is measured anechoically
before it leaves the factory and correction parameters are
supplied with each speaker. These correction coefficients
are loaded into the TacT amplifier to linearise the frequency
and phase response of the speaker. So in effect the
amplifier is calibrated to work with one particular speaker.
While TacT room correction have yielded tremendous
benefits to existing loudspeaker systems it is possible to
achieve even greater results if the speakers are designed,
from the ground up, to be used with room correction . The
main potential benefits are:
1. Lower distortion
2. Higher efficiency
3. Greater dynamic range
4. Relatively small size of cabinets
5. Improved transient response throughout the
frequency range
6. More linear response
The “Components” window controls the amplifier settings: how
many are used and at which address the software can find them.
The address should match the address on the amplifier front
panel (i.e. “002”, “003” etc. as set previously). This will allow the
software to control the amplifier’s volume during the measurement sequence. The amplifiers will be set to 0.0dB attenuation /
full volume during measurement. When the measurement has
completed the amplifier will go back to the previous volume setting.
The Output Pulse selector allows you to set the volume of the
measurement pulse. Start with a low value - 30-50% - and check
the microphone gain - it should be no more than 40dB for a valid
measurement. Set the Output Pulse at a higher percentage if the
microphone gain is high (more than 40dB).
The TacT solution is a subwoofer / satellite system with the
highest quality components and cabinetry.
More information at
www.tactaudio.com
You are now ready to perform the correction sequence!
 Loading...