

Page 1
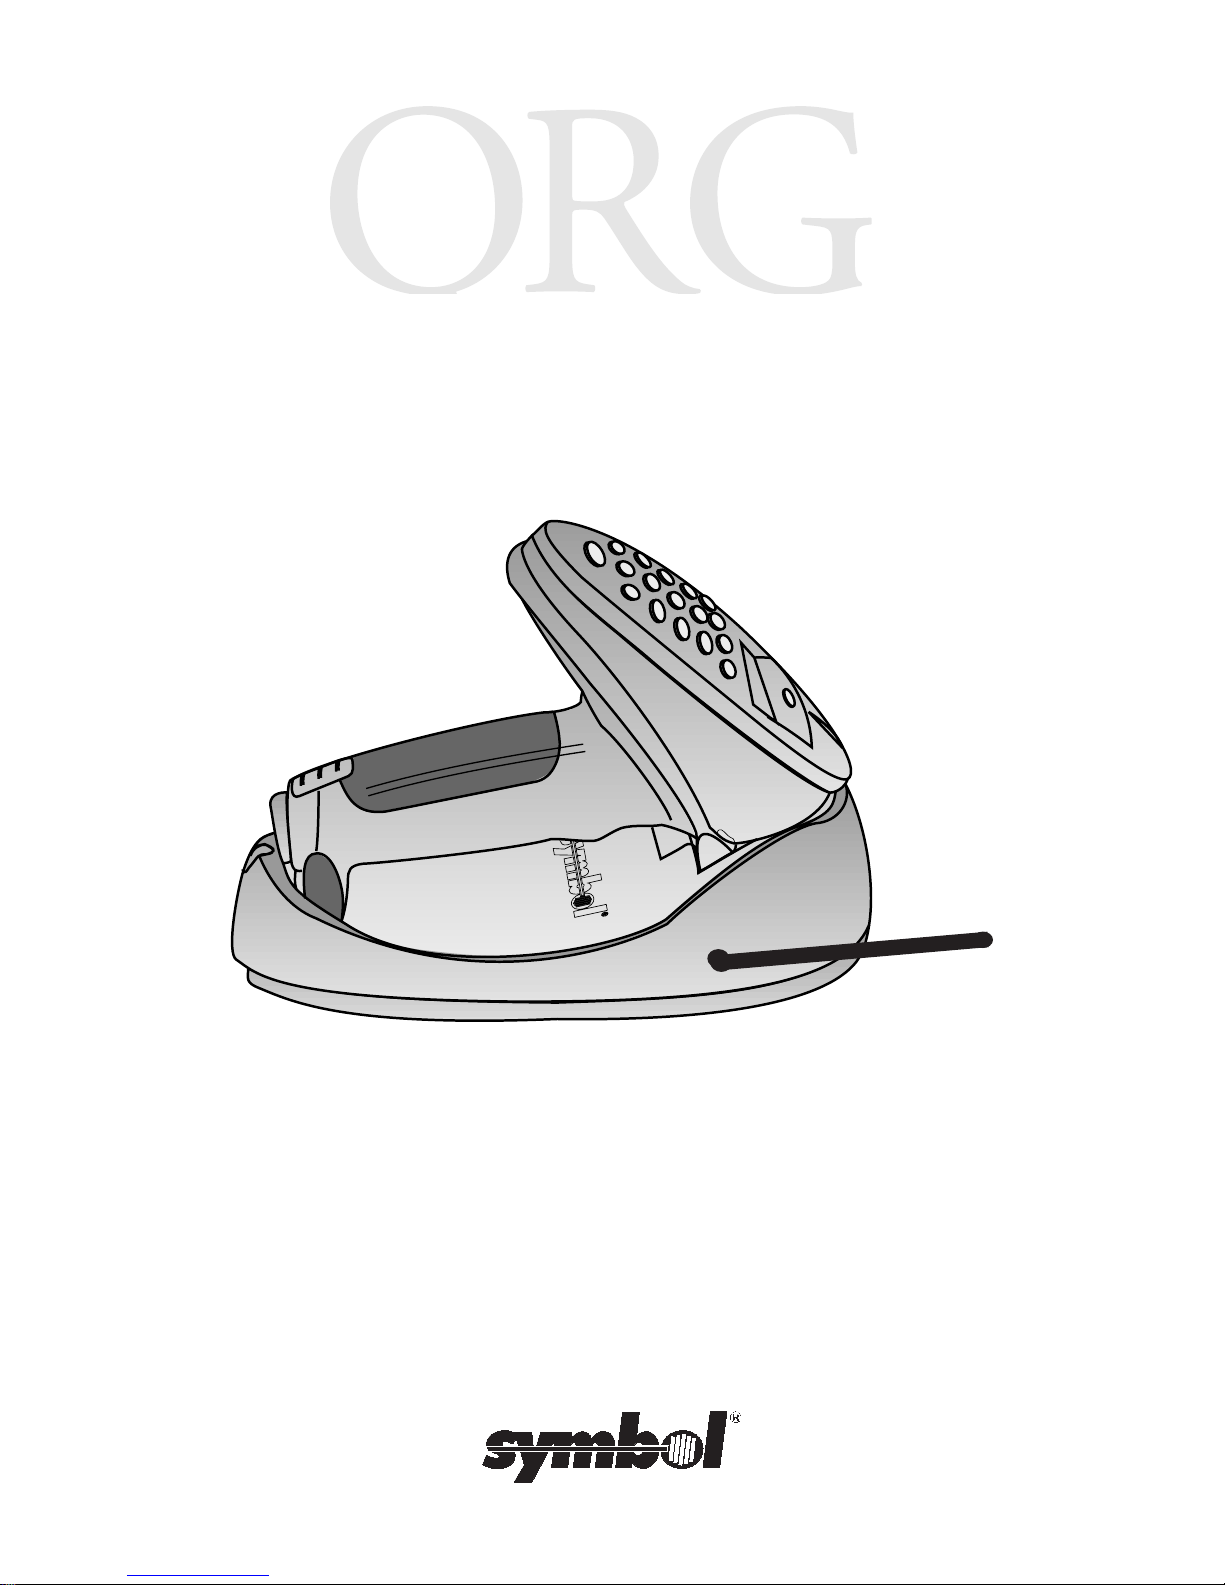
PL 470 Base
Cradle
Preliminary
Page 2

PL 470 Base Cradle
1998 SYMBOL TECHNOLOGIES, INC. All rights reserved.
Symbol reserves the right to make changes to any product to improve reliability,
function, or design.
Symbol does not assume any product liability arising out of, or in connection with, the
application or use of any product, circuit, or application described herein.
No license is granted, either expressly or by implication, estoppel, or otherwise under
any patent right or patent, covering or relating to any combination, system, apparatus,
machine, material, method, or process in which Symbol products might be used. An
implie d lic ense on ly e xists for eq uipm ent, ci rcuit s, an d subs ystems cont ained i n Sym bol
products.
Symbol is a registered trademark of Symbol Technologies, Inc. Other product names
mentioned in this manual may be trademarks or registered trademarks of their
respective companies and are hereby acknowledged.
Symbol Technologies, Inc.
One Symbol Plaza
Holtsville, N.Y. 11742-1300
http://www.symbol.com
Patents
This product is covered by one or more of the following U.S. and foreign Patents:
U.S. Patent No.4,360,798; 4,369,361; 4,387,297; 4,460,120; 4,496,831; 4,593,186;
4,603,262; 4,607,156; 4,652,750; 4,673,805; 4,736,095; 4,758,717; 4,816,660;
4,845,350; 4,896,026; 4,897,532; 4,923,281; 4,933,538; 4,992,717; 5,015,833;
5,017,765; 5,021,641; 5,029,183; 5,047,617; 5,103,461; 5,113,445; 5,130,520
5,140,144; 5,142,550; 5,149,950; 5,157,687; 5,168,148; 5,168,149; 5,180,904;
5,229,591; 5,230,088; 5,235,167; 5,243,655; 5,247,162; 5,250,791; 5,250,792;
5,262,627; 5,262,628; 5,266,787; 5,278,398; 5,280,162; 5,280,163; 5,280,164;
5,280,498; 5,304,786; 5,304,788; 5,306,900; 5,321,246; 5,324,924; 5,337,361;
5,367,151; 5,373,148; 5,378,882; 5,396,053; 5,396,055; 5,399,846; 5,408,081;
5,410,139; 5,410,140; 5,412,198; 5,418,812; 5,420,411; 5,436,440; 5,444,231;
5,449,891; 5,449,893; 5,468,949; 5,471,042; 5,478,998; 5,479,000; 5,479,002;
5,479,441; 5,504,322; 5,519,577; 5,528,621; 5,532,469; 5,543,610; 5,545,889;
5,552,592; 5,578,810; 5,581,070; 5,589,679; 5,589,680; 5,608,202; 5,612,531;
5,619,028; 5,664,229; 5,668,803; 5,675,139; 5,693,929; 5,698,835; 5,705,800;
5,714,746; 5,723,851; 5,734,152; 5,734,153; 5,745,794; 5,754,587; 5,762,516;
5,763,863; 5,767,500; 5,789,728; 5,808,287; 5,811,785; 5,811,787; 5,815,811;
5,821,519; 5,821,520; 5,823,812; 5,828,050; 5,850,078; 5,861,615; 5,874,720;
5,875,415; D305,885; D341,584; D344,501; D359,483; D362,453; D363,700;
D363,918; D370,478; D383,124; D391,250; D405,077; D406,581.
Invention No. 55,358; 62,539; 69,060; 69,187 (Taiwan); No. 1,601,796; 1,907,875;
1,955,269 (Japan).
European Patent 367,299; 414,281; 367,300; 367,298; UK 2,072,832; France 81/
03938; Italy 1,138,713.
rev. 4/99
Preliminary
Page 3

Quick Reference
Introduction
The PhaserLink PL 470 Base Cradle acts as a stand, host
communication interface, and a charger for the Phaser Radio
Scanner. It can sit o n a desktop or be wall-mounted - whi chever is
more conveni ent.
The cradle receives data from the scanner via connectors in the
bottom of the scanner and the top of the cradle. It then transmits
that data to the host device through an attached cable.
The cradle also provides power for charging the scanner’s battery
pack (in the scan ner) . The crad le has a cha rge s tatus indi cator light.
There are two versions of the cradle available:
• PL 470 Base Cradle: the radio retail version
• PL 370 Base Cradle: the radio industrial version
This
and use of the c rad le . U nl ess o the rwi s e note d, the te rm Ph as er Lin k
refers to all versions of the cradle.
Quick Reference Guide
provides basic instr uction on the set up
Equipment Supplied
The equipment supplied is:
• Two Screws (for wall mounting)
• One Velcro Strip (for desk mounting)
• Four Rubber Feet (for desk mounting)
•This Guide
• Cradle
Save the shipping container for storing or shipping. Inspect all your
equipment for damage. If any thing is dam aged or missin g, call your
authorized Customer Support Representative immediately.
Related Documentation
Phaser Series Scanner Product Reference Guide
p/n 70-33629-xx
Preliminary
,
1
Page 4

PL 470 Base Cradle
P 370/470 Radio Scanner Quick Reference Guide,
p/n 72-xxxxx-xx
Preliminary
2
Page 5
Quick Reference
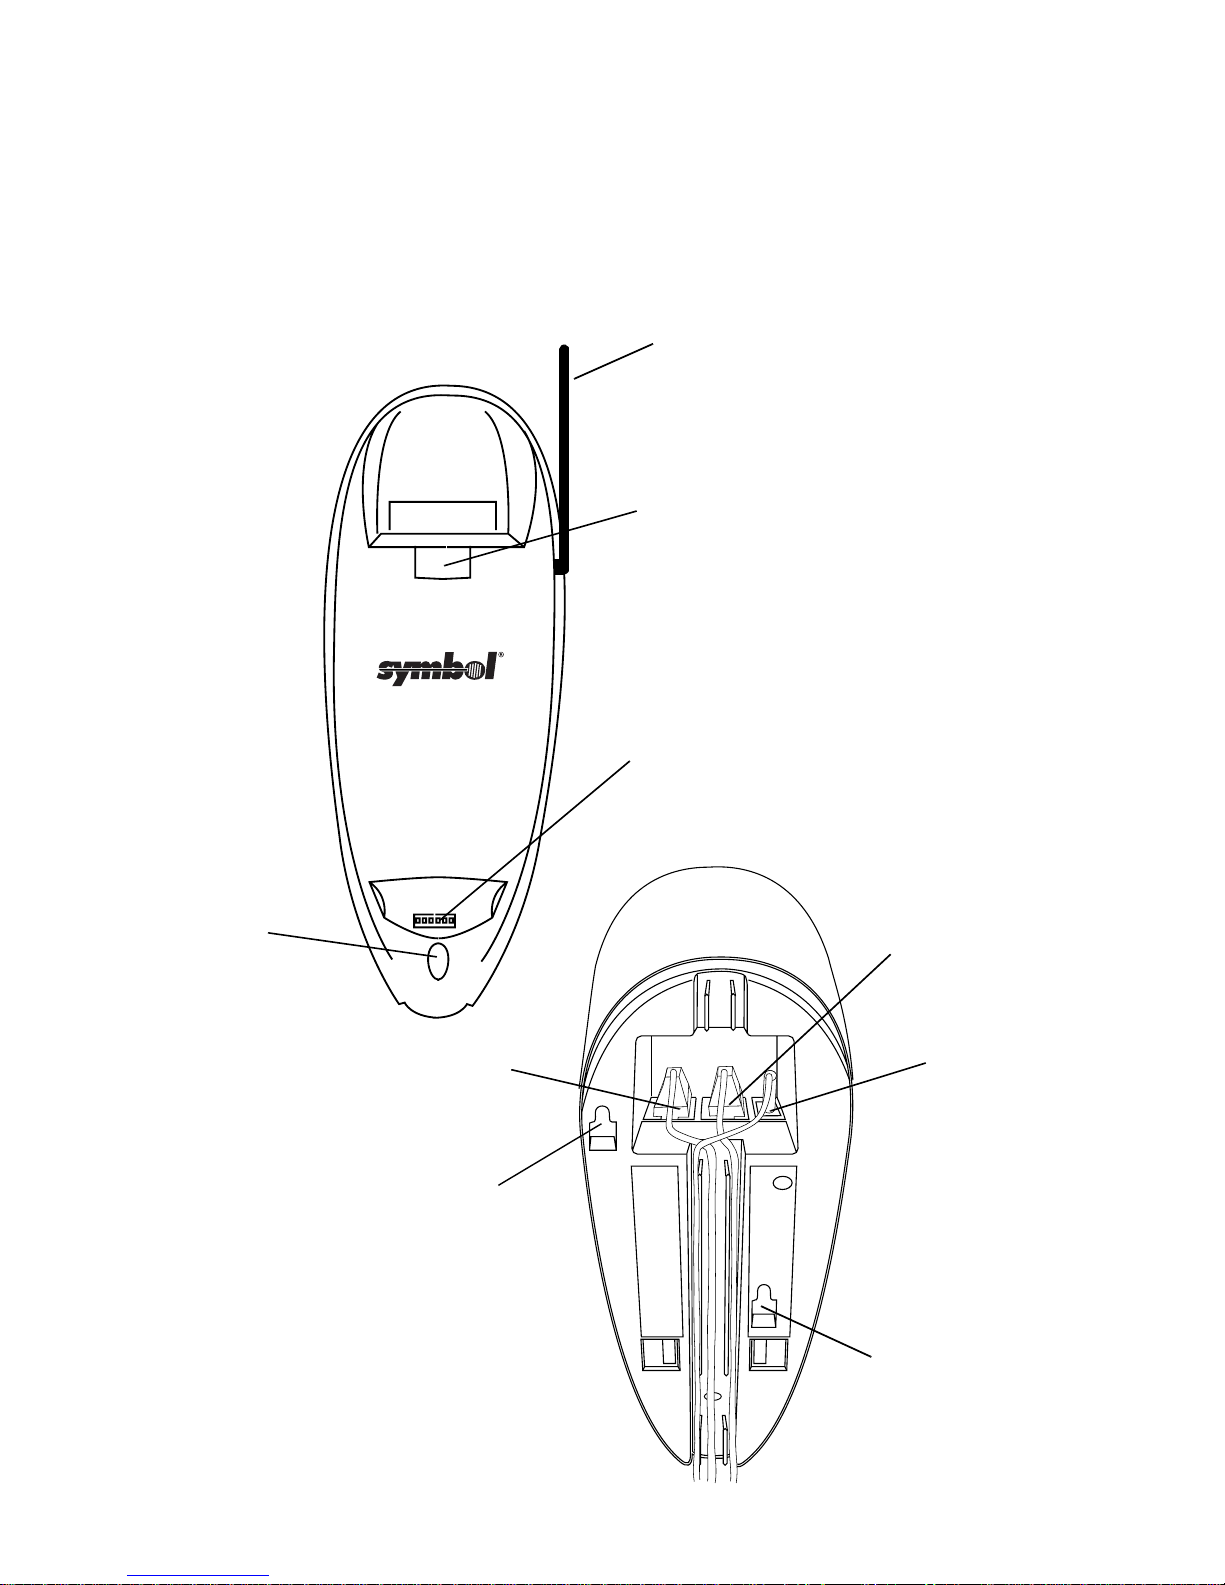
P arts of the Cradle
This figure shows the parts of the PhaserLink Cradle:
Antenna
Scanner
Support
Tab
Charging
LED
Indicator
COM 2
Wallmounting
Socket 1
Charging/
Communications
Contacts
COM 1
Power
Port
Preliminary
Wallmounting
Socket 2
3
Page 6
PL 470 Base Cradle
Connecting To The Host
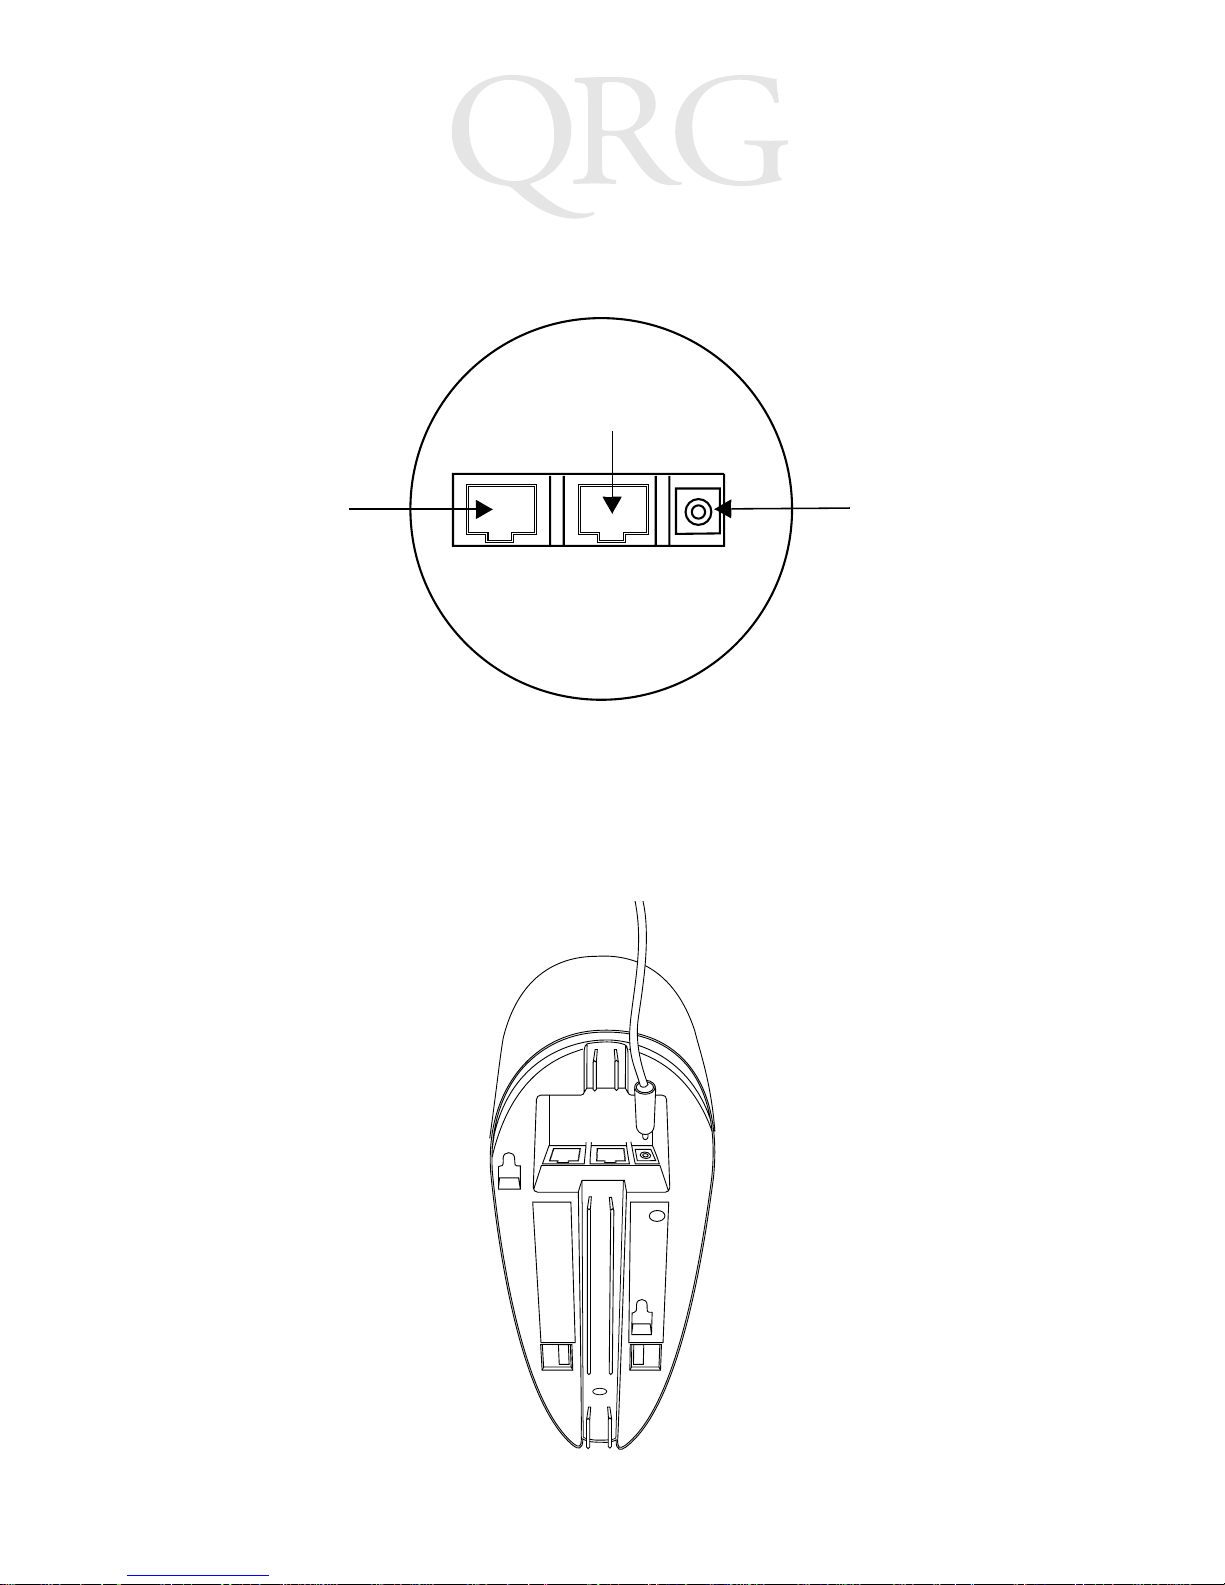
On the bottom of the cradle are three ports -
COM 1
COM 2
COM 1 connects to the host computer, COM 2 is used for daisychaining multiple cradles together, and the Power Port supplies
power to the cradle.
1. Insert the independent power plug into the Power Port (the
cradle canno t be powered by the host computer ).
Power Port
Preliminary
4
Page 7
Quick Reference
2. Insert the cable from the host computer into COM 1 and the
cable to the other cradl es, if any, into COM 2.
Daisy-Chaining
Note: The cradle supports daisy-chaining when connected to a serial host
and not when using Synapse interfaces.
To daisy-chain two or more cr adles together, connect COM 1 of the
first cradle to the host and COM 2 to COM 1 of the second cradle.
Then connect COM 2 of the second cradle to COM 1 of the third
cradle. You can daisy-chain up to 12 cradles to one host in this
manner.
Wall Mounting
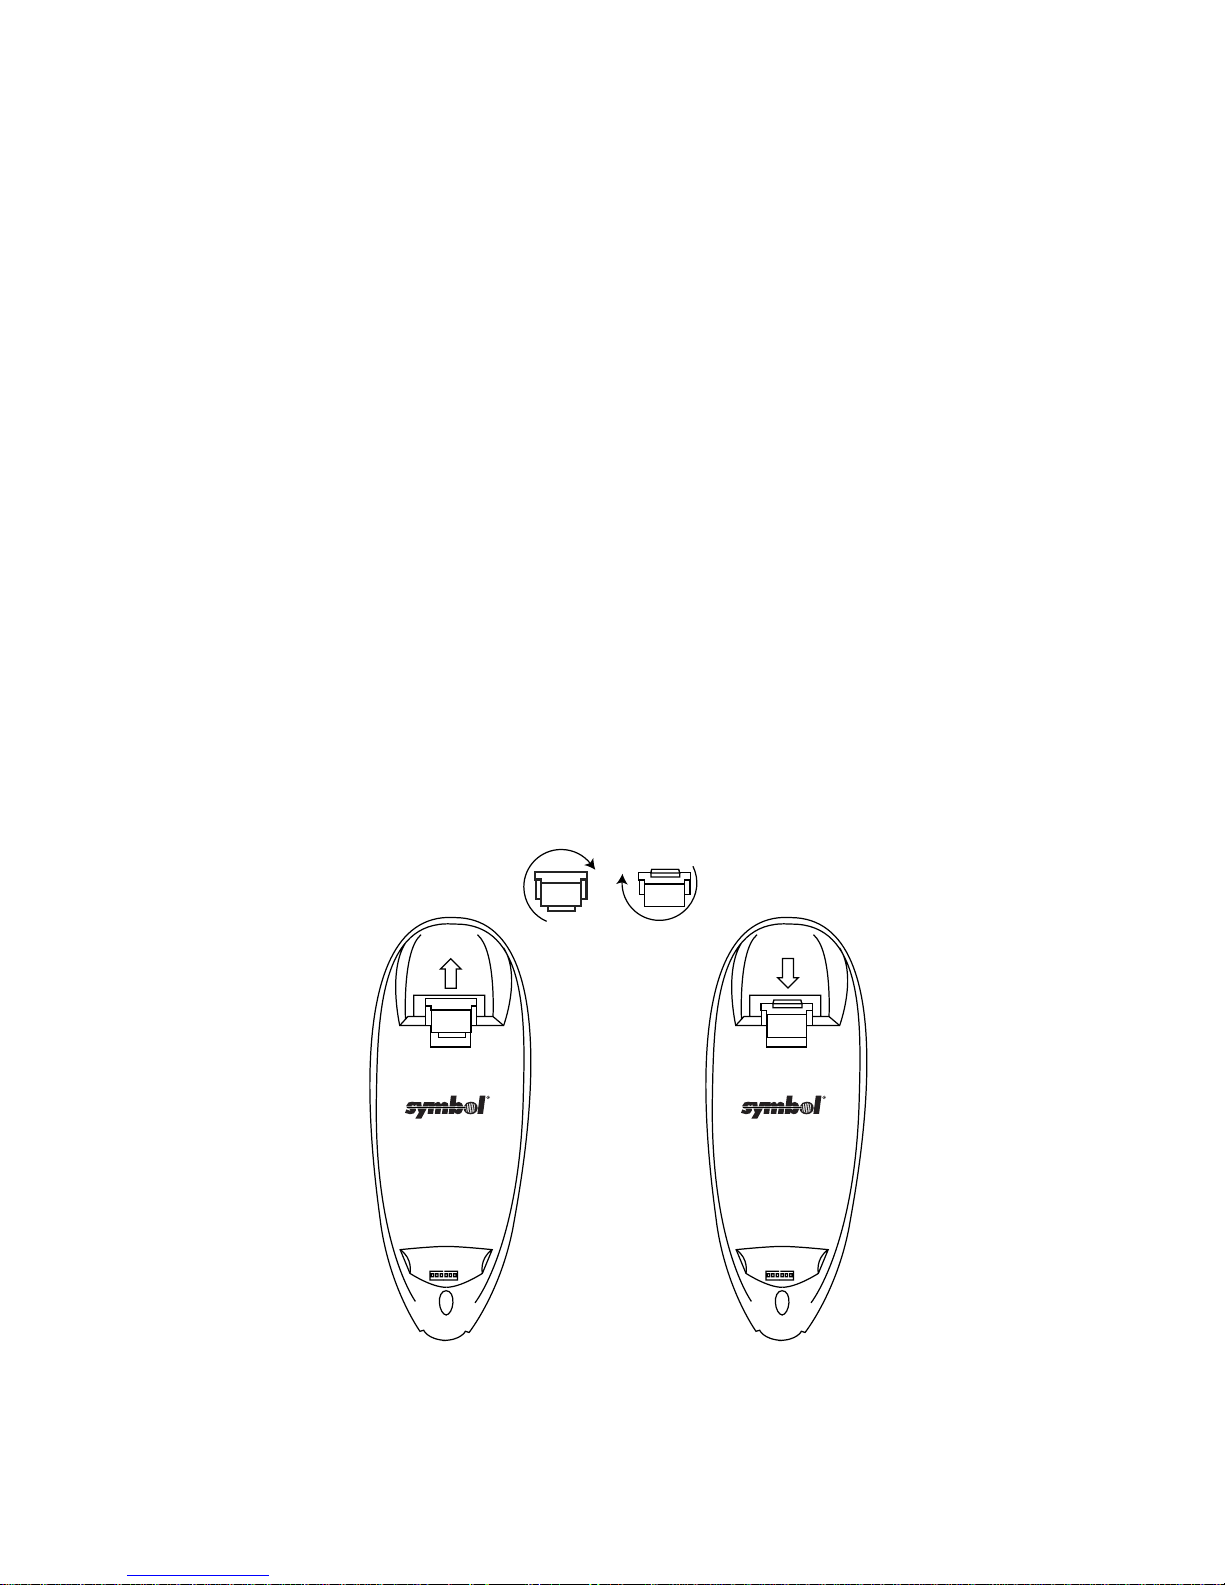
Before wall-mounting the cradle, the scanner support tab must be
changed from the desk-mount position to the wall-mount position.
1. Lift the scanner support tab out of the top part of the cradle
and replace it in the wall-mount position, as shown:
Desk Mount
Preliminary
Wall Mount
5
Page 8
PL 470 Base Cradle
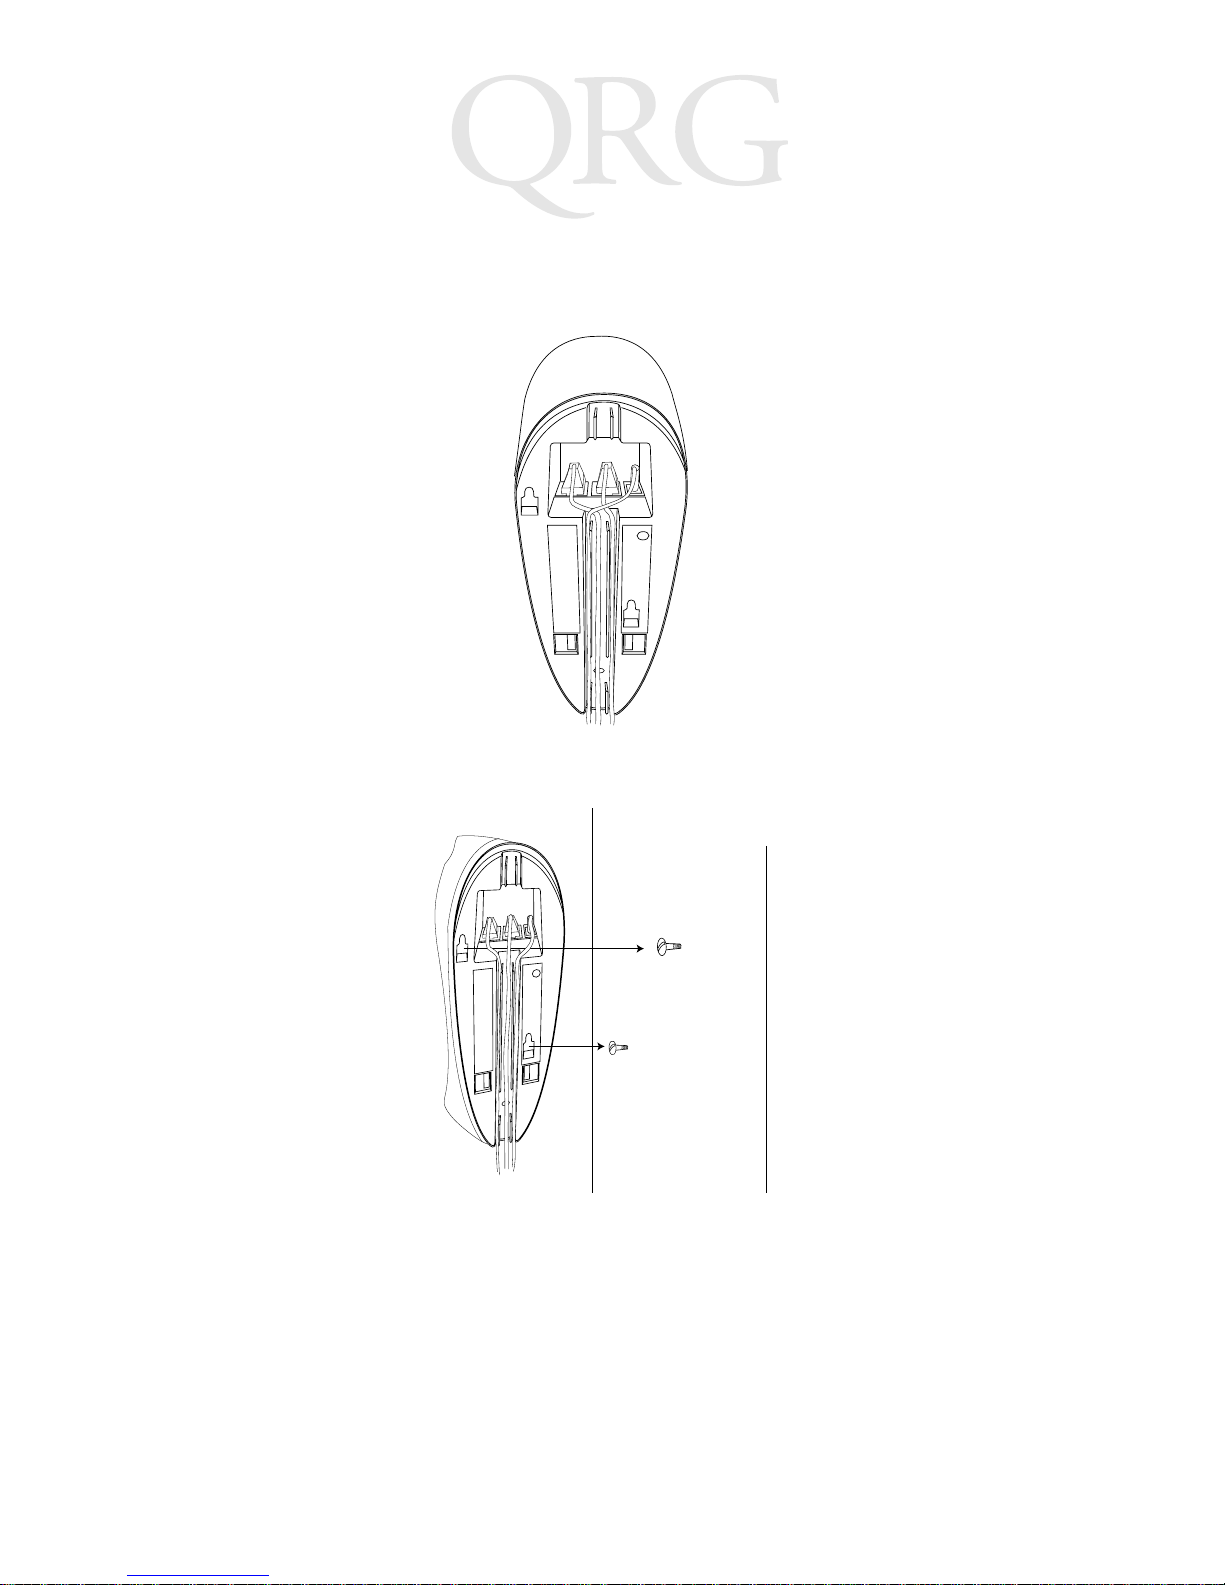
2. Seat the cables from the bottom of the cradle in the grooves
along the length of it so that the bottom of the cradle is
smooth and flat, as shown:
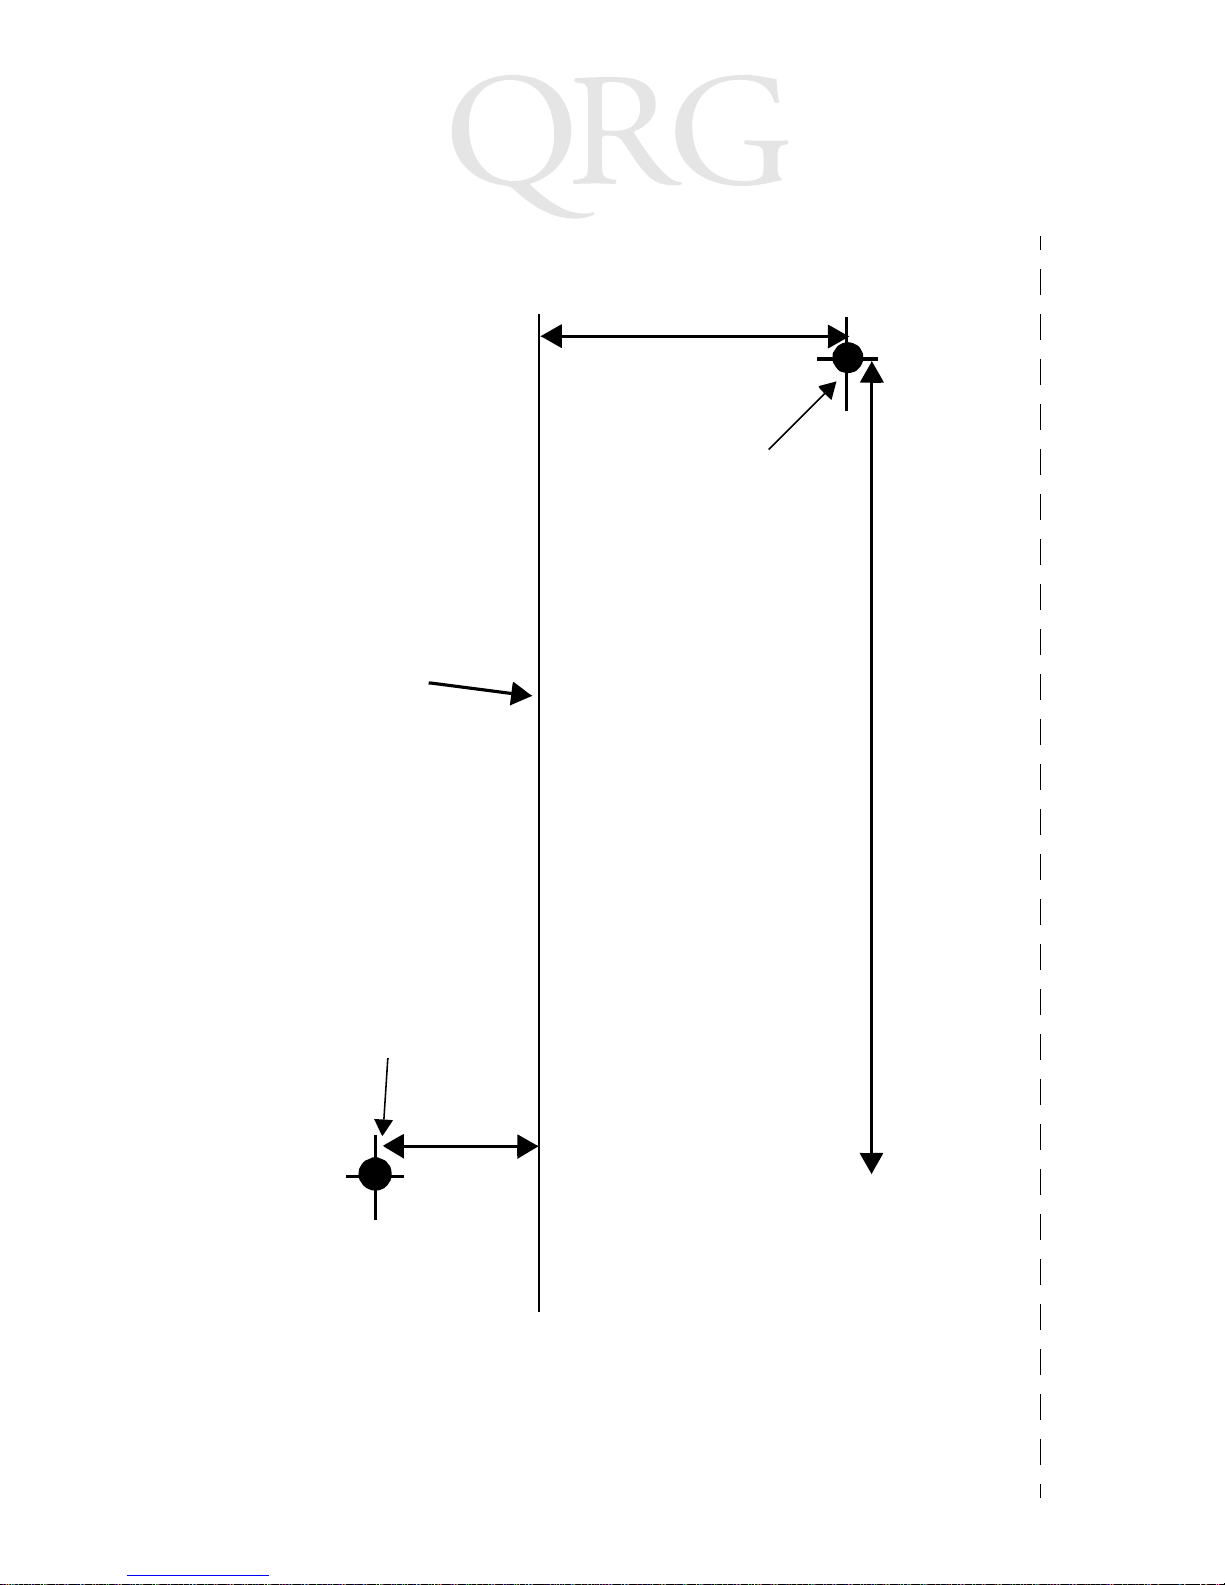
3. Secure two screws (included) to the wall. A template is
provided for you on page 12.
4. Fasten the s crews into the wall where the cradle will hang,
leaving about 1/8 ” (.3 cm) of the screw outside the wall so that
the cradle will have something to hang on.
5. Place the cradle over the screw h eads and slide down until it
fits into place. Slight pressure upwards should not move the
cradle.
6. Place the Phaser in the cradle.
Preliminary
6
Page 9
Quick Reference
Inserting Phaser in the Cradle
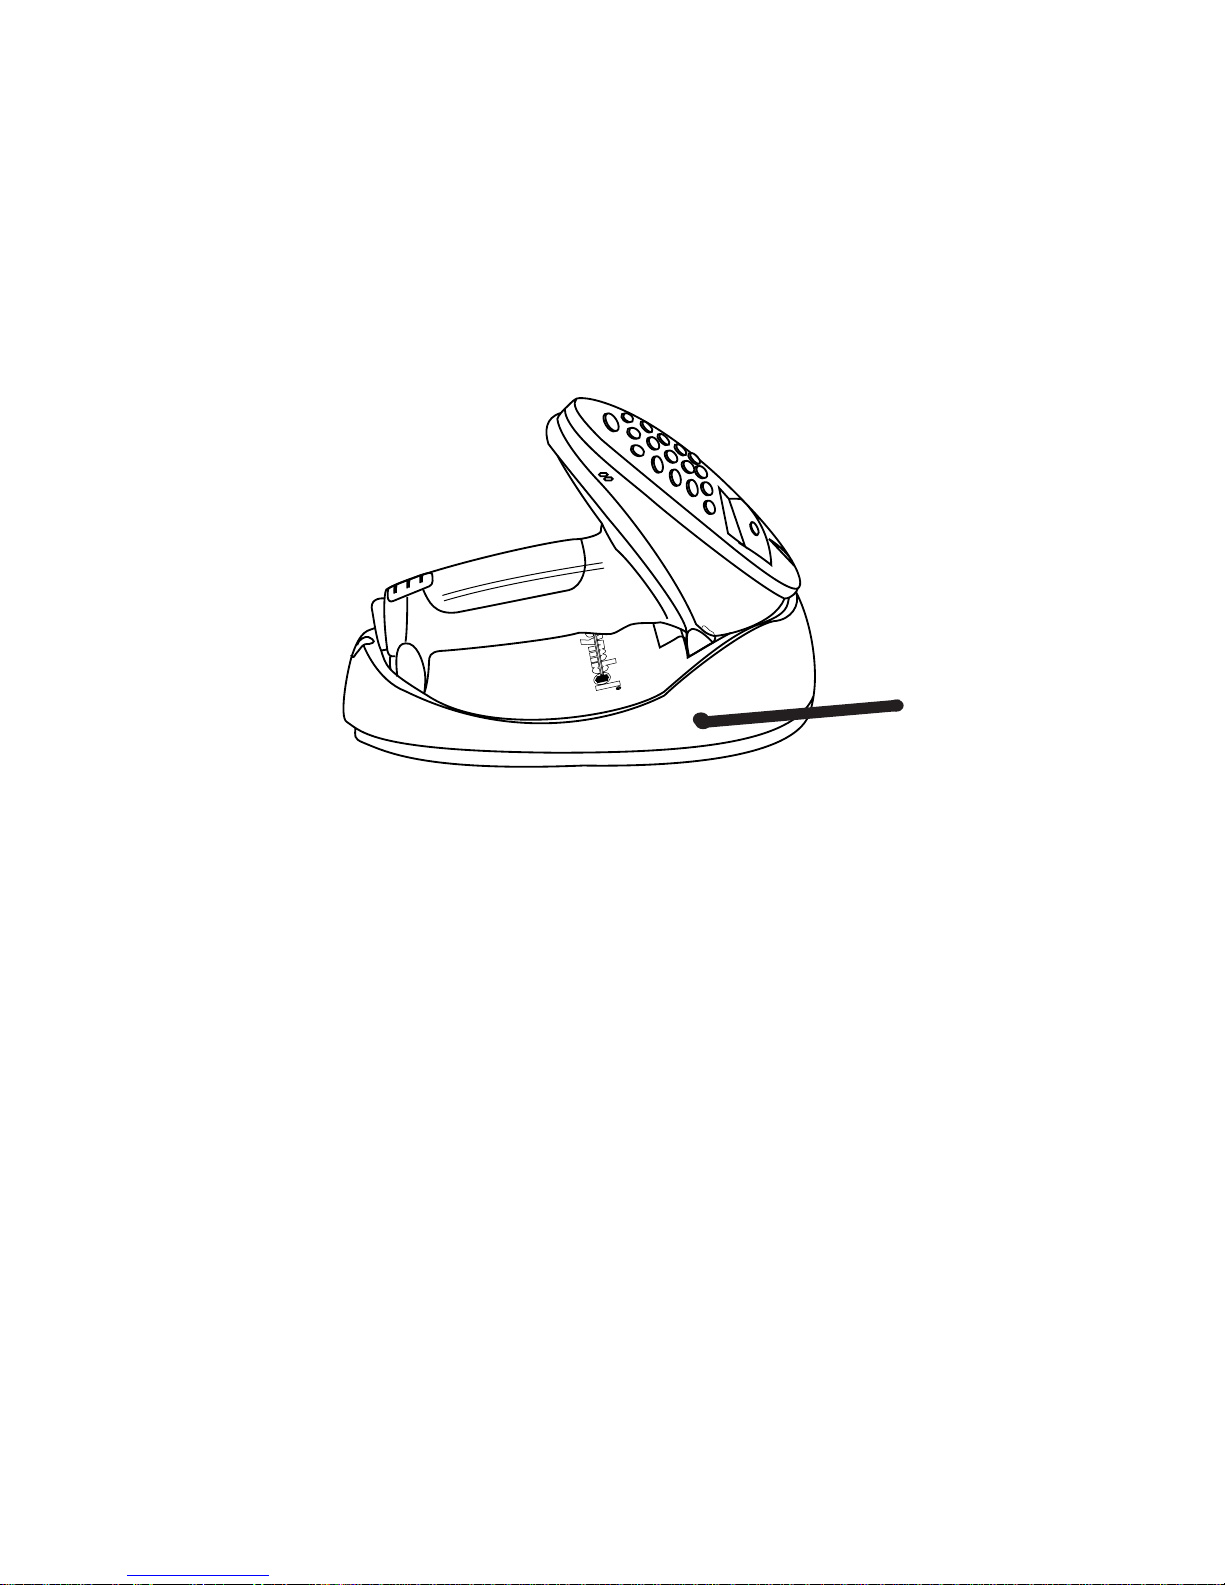
Place the Phaser scanner in the cradle so that the top of the scanner
sits in the larger part of the cradle and the metal contacts on the
bottom of the scanner touch the contacts on the cradle, like so:
Sending Data to Host Computer
To set up the PhaserLink Cradle for communications between a
Phaser and a host computer:
1. Connect the cradle to the host comput er as described i n
Connecting To The Host
2. Insert the Phaser in the cradle.
3. Start the comm unicatio ns program on the host comp uter and
the Phaser.
on page 4.
Recharging the Battery in the Phaser
1. Connect the cradle to a receptacle supplying AC power of the
proper voltage level.
2. Place the scanner in the cradle, ensuring the metal contacts on
the bottom of the scanner touch the contacts on the cradle.
3. A complet e charge takes u p to 4 hours, dep ending upon the r emaining charge in the battery of the scanner.
Preliminary
7
Page 10
PL 470 Base Cradle
Indicator LED
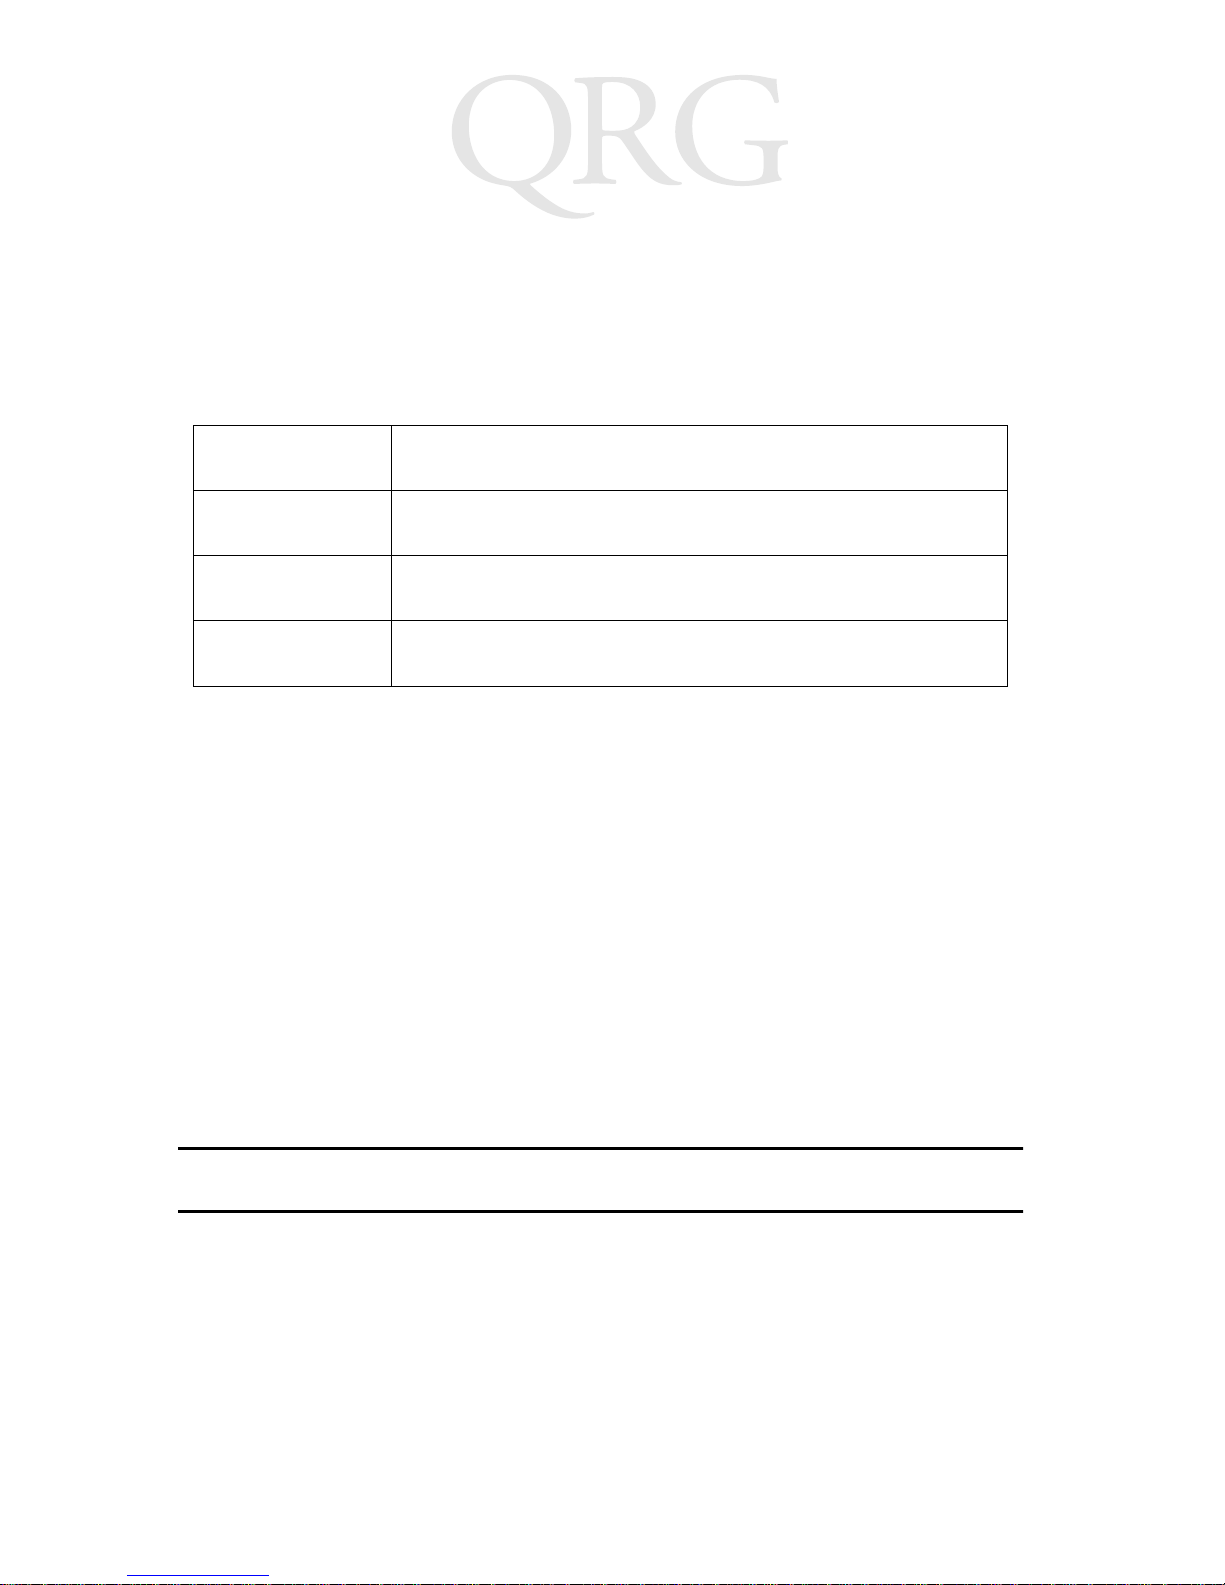
Once the scanner is placed in the cradle, it will wait 15 minutes to
start charging the battery in the scanner. The LED blinks in a
specific pattern to show what the cradle is doing:
Off
Slow Blink
Fast Blink
On
The scanner is not in the cradle
Scanner is in cradle, not charging
Scanner is in cradle, charging
Scanner is in cradle, charge cycle is complete
Troubleshooting
If the cradle does not work after you’ve followed these operating
instructions:
• Check the system power.
• Check for loose cable connections.
• Check the scanner is sitting properly in the cradle.
Cleaning
Wipe the cradle periodically with a lens tissue or other material
suitable for cleaning optical material, such as eyeglasses.
Caution:
Do not pour, spray or spill any liquid on the cradle.
Preliminary
8
Page 11
Quick Reference
Regulator y Information
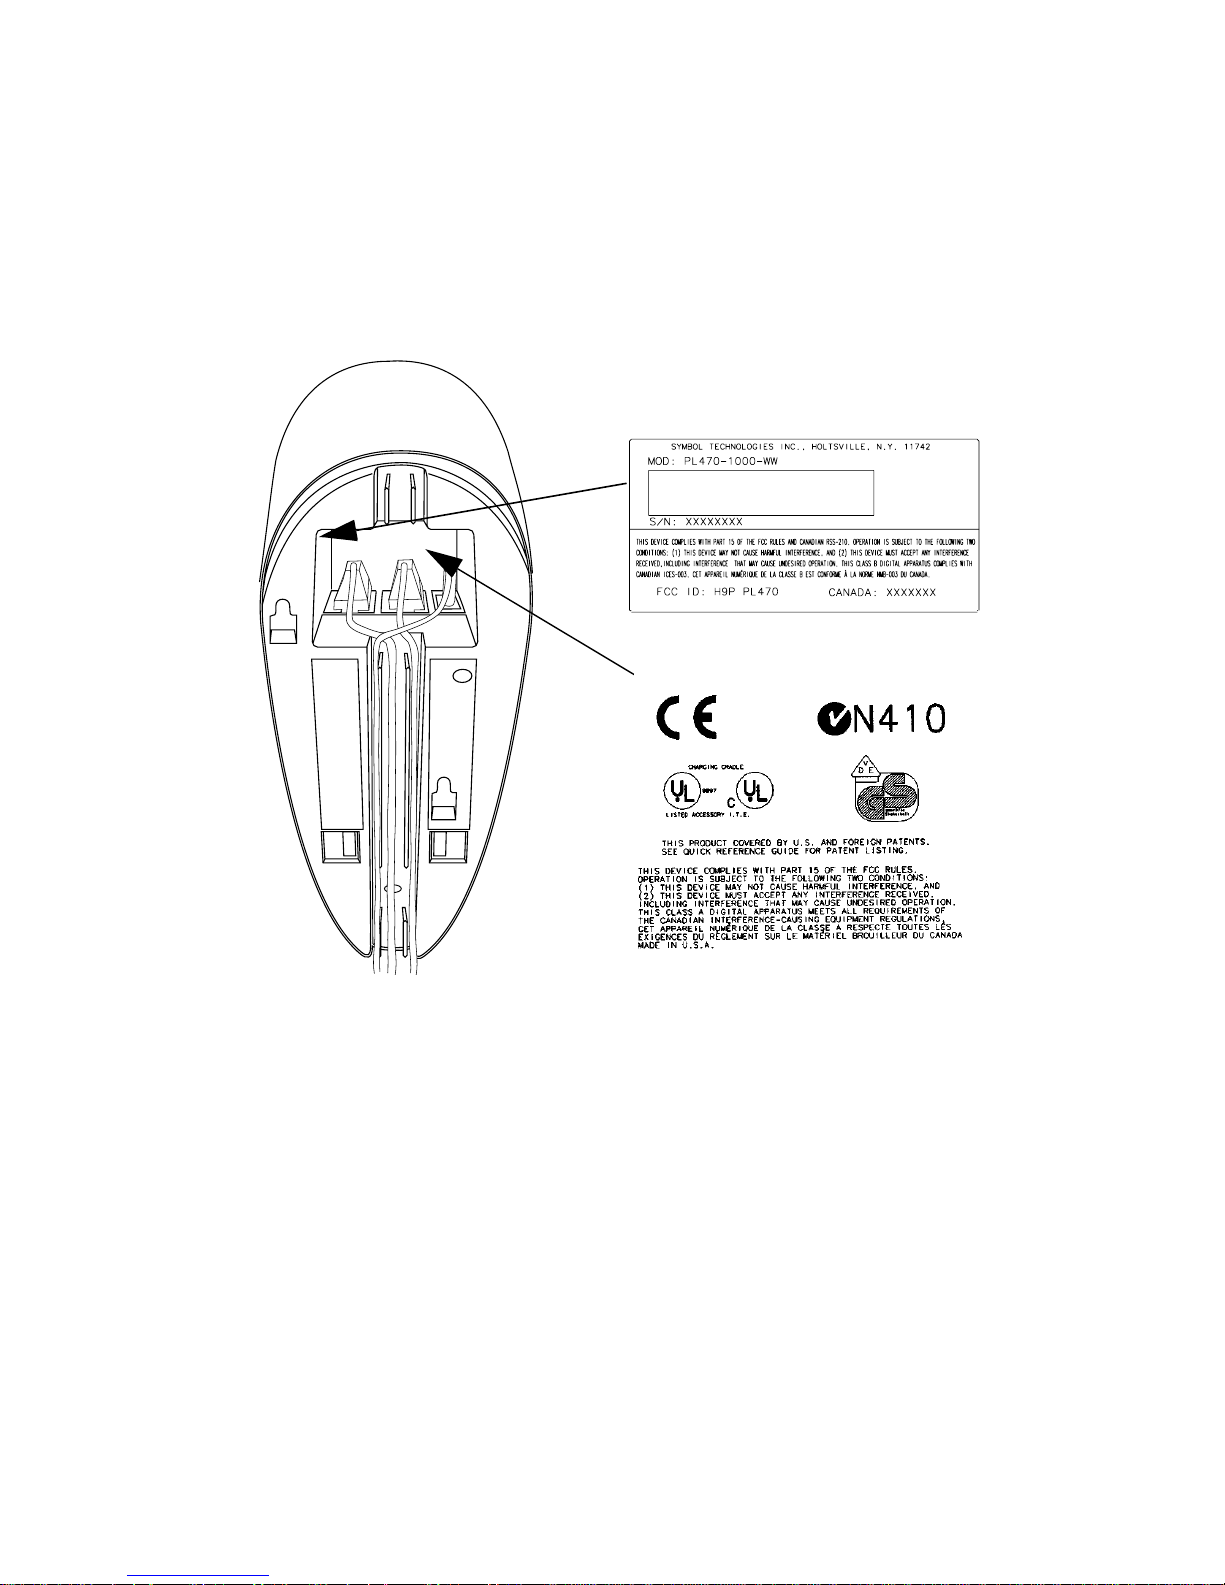
Cradle Labeling
Radio Frequency Interference Requirements
This device has been tested and found to comply with the limits for a Class A digital
device pursuant to Part 15 of the Federal Communications Commissions Rules and
Regulation. These limits are designed to provide reasonable protection against harmful
interference when the equipment is operated in a commercial environment. This
equipment generates, uses, and can radiate radio frequency energy and, if not installed
and used in accordance with the instruc tion manual, may cause harmful interference to
radio communications. Operation of this equipment in a residential area is likely to
cause harmful interference in which case the user will be required to correct the
interference at his own expense.
However, there is no guarantee that interference will not occur in a particular
installation. If th e equ ipment does cause harmful interference to radio or television
reception, which can be determined by tu rning the equipment off and on, the user is
encouraged to try to correct the interfere nce by one or more of the following measures:
• Re-orient or relocate the receiving antenna.
Preliminary
• Increase the separation between the equipment and receiver.
9
Page 12

PL 470 Base Cradle
• Connect the equipment into an outlet on a circuit different from that which the
receiver is connected.
• Consult the dealer or an experienced radio/TV technician for help.
Radio Frequency Interference Requirements - Canada
This Class A digital apparatus meets the requirements of the Canadian InterferenceCausing Equipment Regulations.
Cet appareil numérique de la Classe A respecte tout es les exigences du Reglement sur
le Materiél Brouilleur du Canada.
CE Marking and European Union Compliance
Products intended for sale within the European Union are marked with the
CE Mark which indicates compliance to applicable Directives and
European Normes (EN), as follows. Amendments to these Directives or
ENs are included:
Applica bl e Di rectives
• Electromagnetic Compatibility Directive 89/336/EEC
• Low Voltage Directive 73/23/EEC
Applicable Standards
• EN 55 022 - Limits and Methods of Measurement of Radio Interference Characteristics of Information technology Equipment
• EN 50 08 2-1 - El ec t ro mag n eti c C o mpa t ib i lit y - Ge ner i c Imm un i ty S t a nda rd , Part
1: Residential, commercial, Light Industry
• IEC 801.2 - Electromagnetic Compatibility for Industrial Process Measurement
and Control Equipment Part 2: Electrostatic Discharge Requirements
• IEC 80 1.3 - El ect romag neti c Compatibility for Industrial Process Measurement
and Control Equipment Part 3: Radiated Electromagnetic Field Requirements
• IEC 801.4 - Electromagnetic Compatibility for Industrial Process Measurement
and Control Equipment Part 4: Electrical Fast Transients Re quirements
• EN 60 950 + Amd 1 + Amd 2 - Safety of Information Technology Equipment
Including Electrical Business Equipment
RF Devices
Symbol’s RF products are designed to be compliant with the rules and regulations in
the locations into which they are sold and will be labeled as required. The majority of
Symbol’s RF devices are type approved and do not require the user to obtain license or
authorization before using the equipment. Any changes or modifications to Symbol
Technologies equipment not expressly approved by Symbol Technologies could void
the user’s authority to operate the equipment.
Preliminary
10
Page 13

Quick Reference
Service Information
Before you use the cra dle , it must be c onfigur ed to operate in your
facility’s network and run your applications.If you hav e a prob le m
with running your cradle or using your equipment, contact your
facility’ s Technical or Systems Support. If there is a p roblem with the
equipment, they will contact the Symbol Support Center:
1-800-653-5350
Outside North America, contact your local Symbol representative.
Warranty
Symbol produc ts are warranted against de fects in workmanship and
materials for a period of one year from the date of shipment,
provided that the product remains unmodified and is operated
under normal and proper conditions.
This warranty is limited to repair or replacement at Symbol’s
option, with reasonable promptness after being returned to Symbol
by a carrier selected and paid for by the customer. These provisions
do not prolong the original warranty term for any product which
has been repaired or replaced by Sy mbol.
This warranty applies to the o riginal owner and does n ot extend to
any product which has been subject to misuse, neglect, accidental
damage, unauthorized repair or tampering. Preventive maintenance
activities are not covered by warranty.
Preliminary
11
Page 14
PL 470 Base Cradle
Wall Mounting Template:
1 5/16”
Wall
Mounting
Socket 1
Use 1/8” drill
Center
Line of
Cradle
Wall
Mounting
Socket 2
11/16”
bit for the
screw holes.
3 1/2”
Preliminary
12
Page 15

Quick Reference
this page intentionally left blank
Preliminary
13
Page 16

Preliminary
Symbol Technologies, Inc. One Symbol Plaza Holtsville, NY 11742-1300
70-38494-01
Revision .1 — June 1999
 Loading...