

Page 1
User Manual – SMPK7838
Sylvania is a registered trademarks of OSRAM Sylvania Inc used under License
1
Page 2

IntroductionⅠ
Product features:
z Display: 2.8-inch touch TFT screens.
z Operation interface: Friendly operation interface, easy for operation.
z Memory: Built–in flash memory
z Card slot: Micro-SD card slot to expand memory.
z Speaker: A high quality speaker.
z Interface: USB2.0.
z Language: Multi-languages.
z Audio: MP3, WMA format files, etc.
z Video: AVI format files.
z Photo: JPEG format files.
Appearance and KeysⅡ
Accessories
- User Manual & Quick Set Guide
- USB Cable
Earphone and Adaptor
-
CD Driver
-
-
2
Page 3
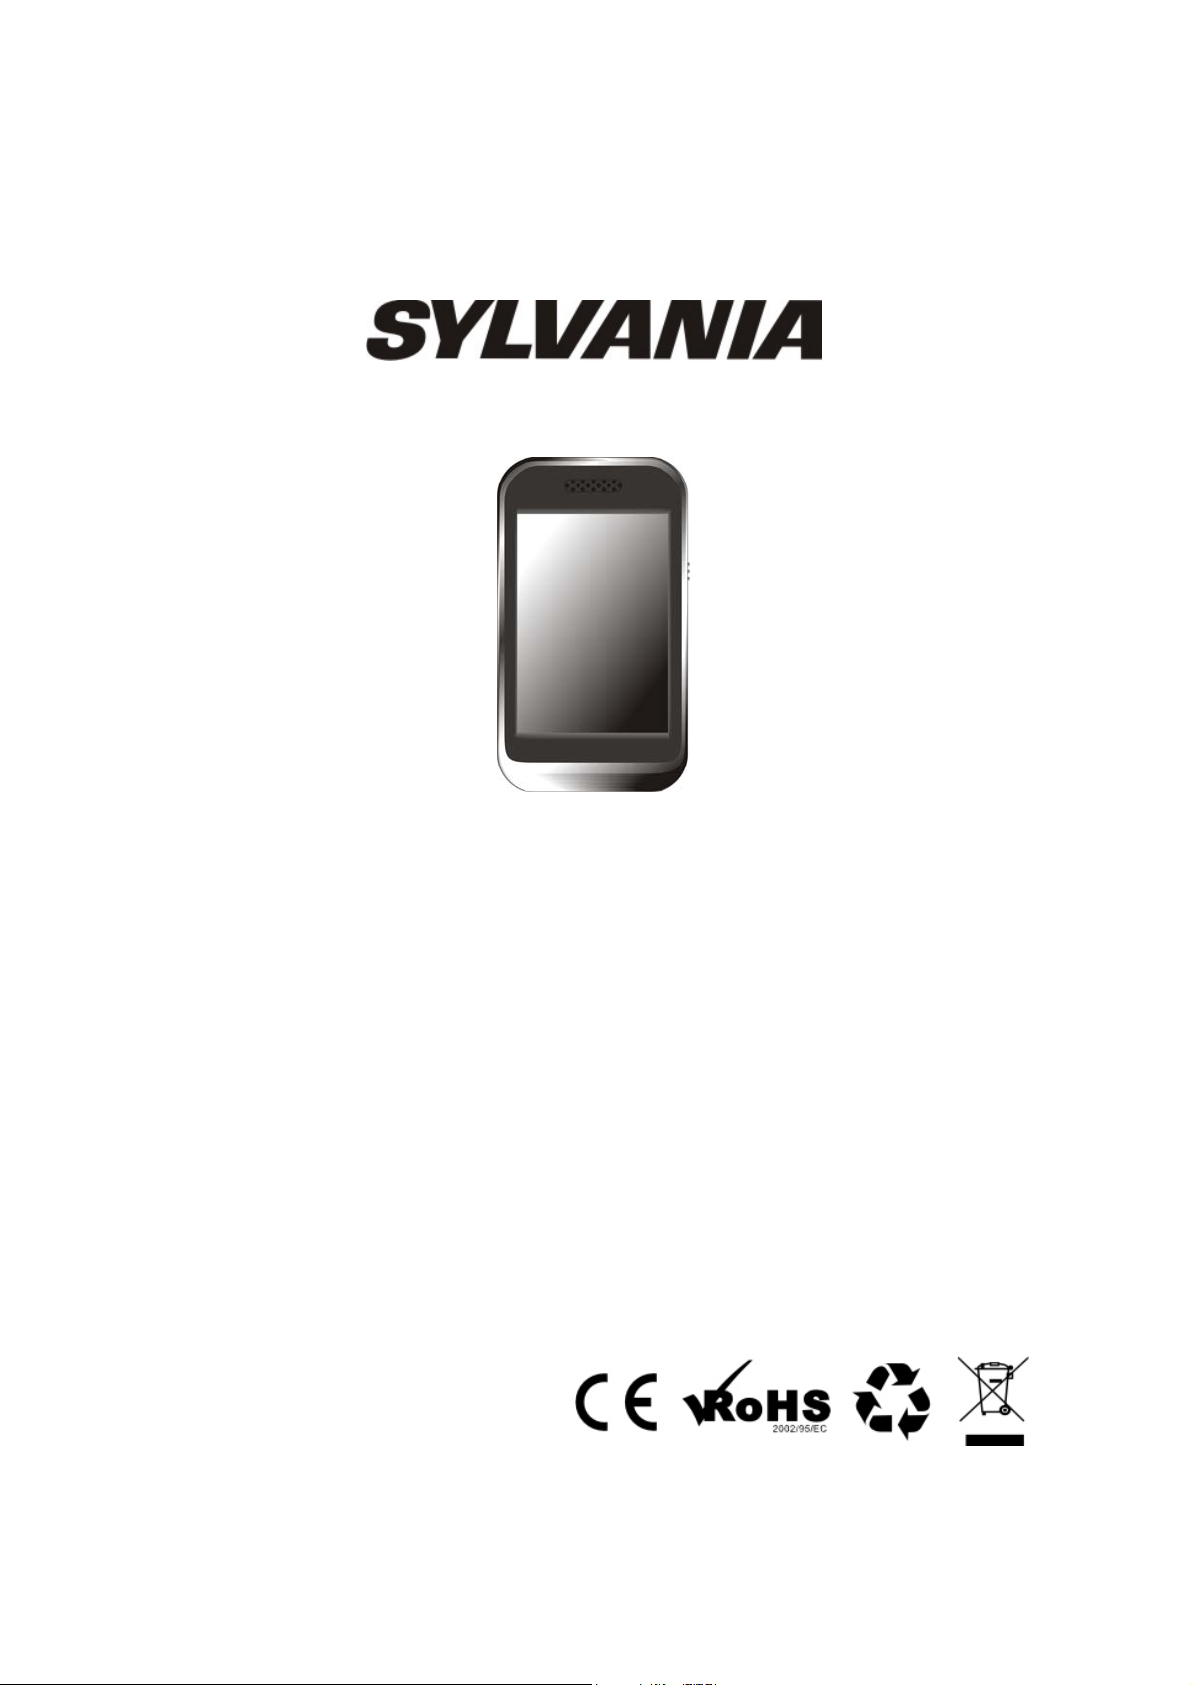
Music Mode:
01: Play mode
02: Loop mode
03: Play/pause state
04: Power display
05: Current music/total music
06: EQ
07: Bit rate
08: Music name
09: Lyric
10: Progress bar
11: Time already playing the current music
12: Volume
13: Current remaining time
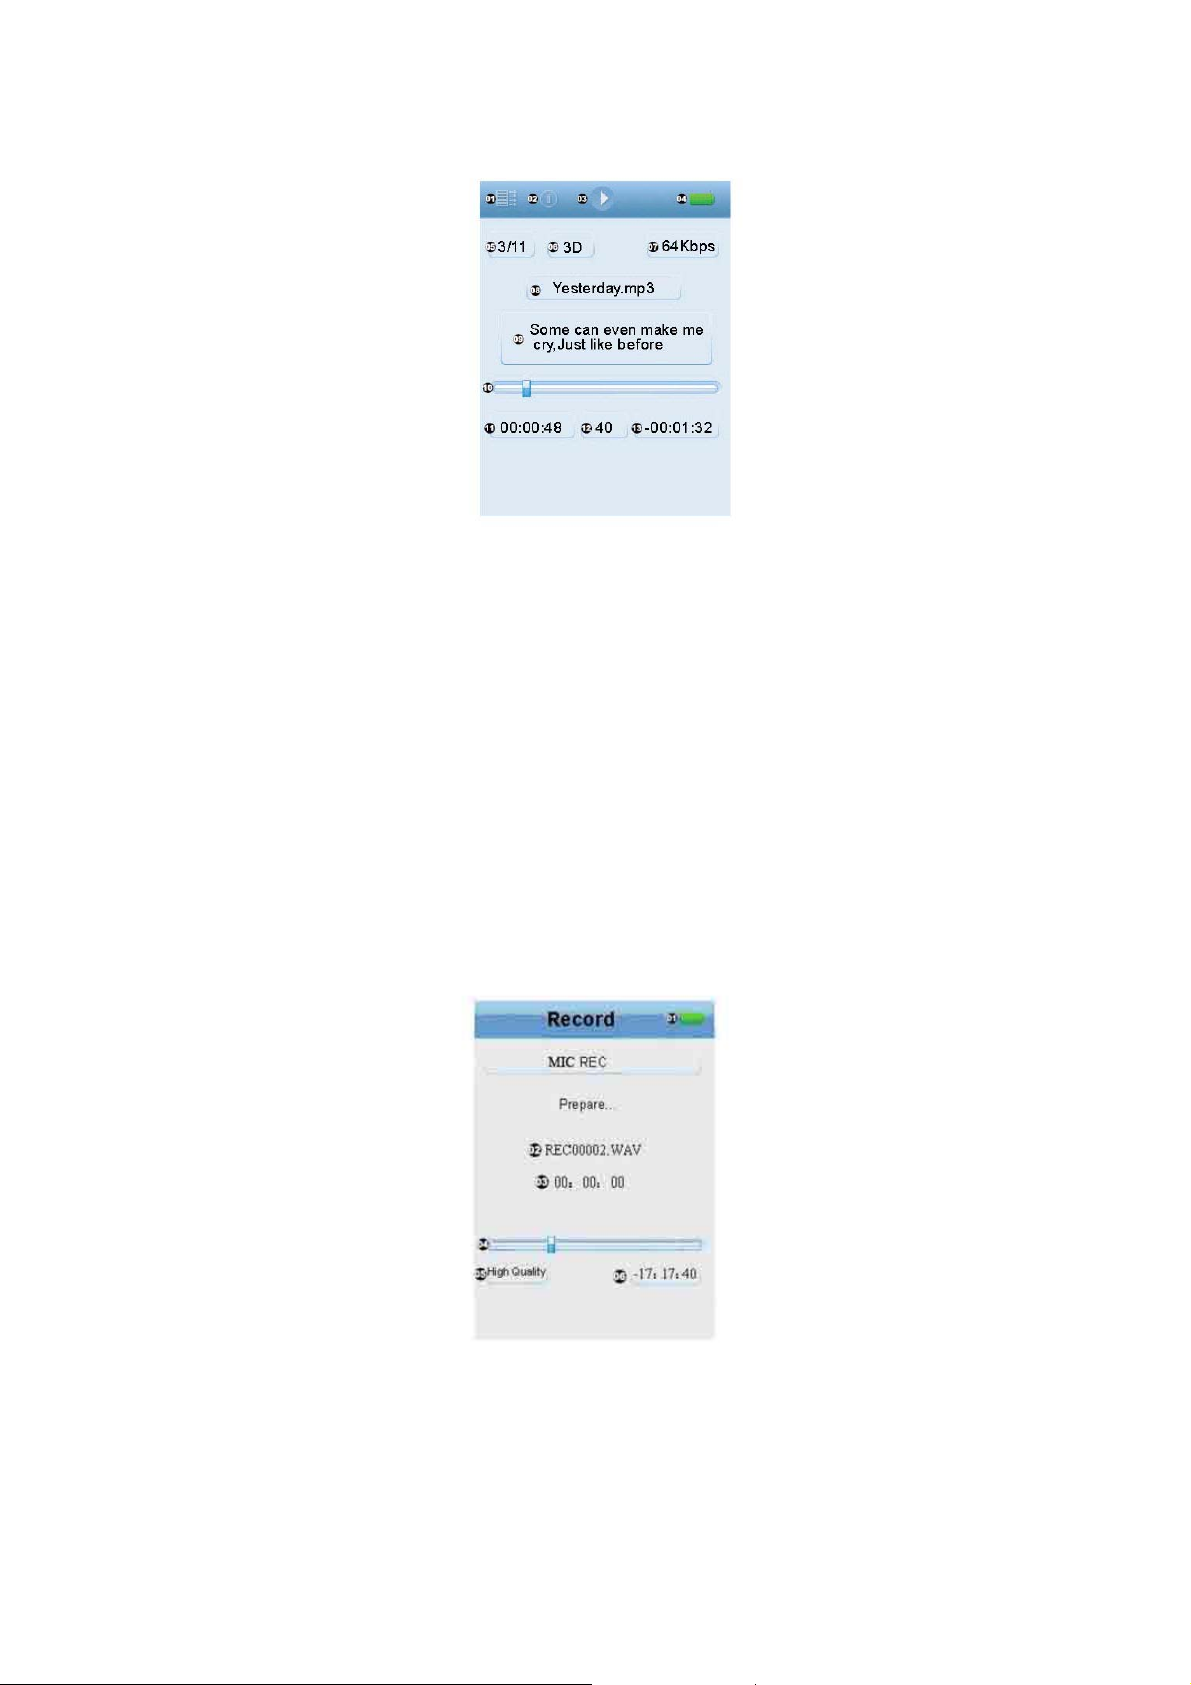
Record Mode:
01: Power display
02: Recorded file name
03: Recording time
04: Recording progress bar
05: Recording quality
06: Remaining time for recording
3
Page 4

Ⅲ Operations
Power on
Slide the power switch of the player towards the direction of ON for 3 seconds for power on.
Power off
In the power off state, slide the power switch of the player towards the direction of OFF for 3
seconds for power off.
Lock button on/off
In the states of video and music, you can set the lock button as ON to prevent unintended button
error operation.
Button lock: Slide the switch button of the player towards the direction of HOLD, and the button
of the player will be locked up without any response to any operation.
Button lock: Slide the switch button of the player to the original position to unlock and to restore
to the button operation.
Volume Control
In the states of music and video, etc, you can perform volume control using + or – button at the
lower part of the screen. + button is for increased volume and – button is for reduced volume.
Hold Button + or Button – to continuously increase or reduce volume.
Switching the earphone/built-in speaker output
To unplug the earphone to change the sound output from earphone jack to built-in speaker.
Power reset
If there is shutdown to the player in the process of operation, you can turn off and restart the
player by pressing RESET button.
Connecting the computer and data file transmission
Start the computer and then connect the unit with the USB port of the computer using the
connection line. In this way you can perform USB power supply or USB data transmission. This
unit and the computer can be connected using the USB interface, and can be used as a moving
disk. All you do is put your favorite music in the player without the procedures of any third party
4
Page 5
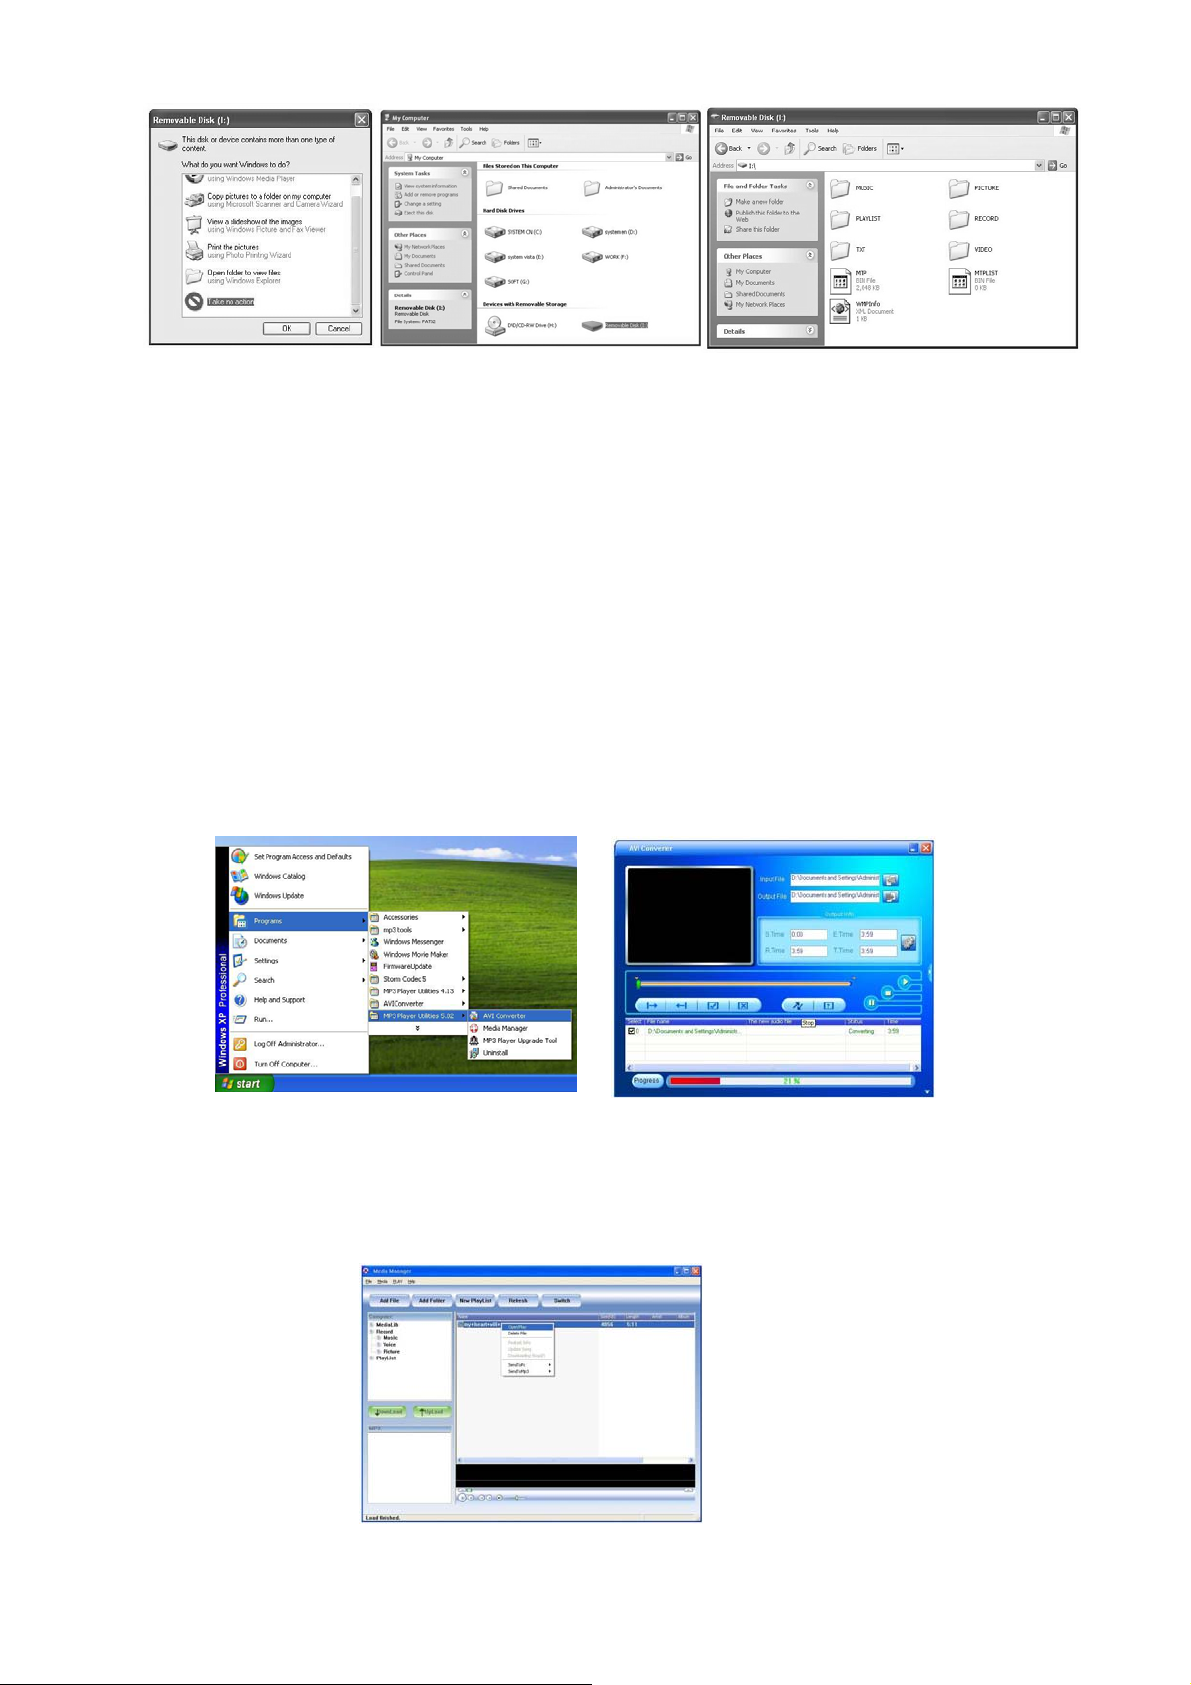
The above screen would appear. (Apply only to Window XP) Choose Take no action and click
OK to close the window. Double click My Computer on your desktop and the above window
would appear. Look for the Removable Disk Icon.
Double click the Removable Disk icon. Note: Do not disconnect the USB cable once you click
into the removable disk window. Such action may cause data loss or problems to the player.
Drag and drop your media files into the removable disk. You can create any folder or directory in
the removable disk. Close the removable disk window and disconnect the player from your PC
after the data transfer.
Software Operation
Video Converter
You can convert your favorite video file in any other format into the .AVI format with the help of
the AVI converter. The converting progress is shown.
Media Manager
You can enjoy songs from both PC and your player thru the Media manager. You can also
convert your recorded .ACT voice into .WAV format thru the media manager
5
Page 6

Battery
High capacity lithium battery is used for this unit.
The duration available of the battery power depends on volume, types of playing files and
operation of batteries. The player can be set up by the user as [user define power off time] or
[display setup] to save batteries.
Charging
In the time of charging, connect the player with the USB port of the USB or the charger. If the
charger attached to the unit is used, the indicator of the charger during charging is red. When the
indicator of the charger turns green, it indicates that the battery is full.
Using the Micro SD card
After this unit is connected with the computer, you will find two moving disks. The first one is
the built-in memory disk for this unit and the other is the disk for the Micro SD card. If no card is
inserted, the second disk cannot be opened.
Inserting and Pulling out the Micro SD card
Inserting: Put the Micro SD card face up (side with words) (with the direction of the display
screen as the face), and slightly force the card into the socket of the card, i.e. connecting the unit.
Under this state, you can play the content in the Micro card.
Pulling: Slightly push the Micro SD, and it will bounce by a section, and then you can take it out.
Caution: Please perform inserting and pulling operation when power is off! Otherwise, it will
lead to the loss or damage to the files within the unit! If no card is inserted, the computer will be
unable to perform read and write operation for the disk notes of the later moving disk (Micro SD
card).
IV Main Interface
MP4 provides a contact screen operation system, which allows you to perform even more
visually. In the main menu interface, click on the corresponding function icons on the screen to
access the selected function mode.
After accessing the corresponding function mode, gently touch the contact screen. You can see a
menu window.
After some time or after
window will disappear.
Press M button at the lower part of the screen or contact at the bottom of the contact screen
to directly return to the main menu interface.
Long press M button at the lower part of the screen or in the control menu at the upper part
of the screen to return to the main menu to select he interface.
at the upper part of the screen on the screen is contacted, the menu
6
Page 7

V Music Mode
In the main menu interface, click on “Music” function icon on the contact screen to access the
“Music” function interface.
1. Description of playing interface
After accessing the “Music” function mode, gently touch the screen to be able to see the “Menu
Window”.
Touch the “ ” at the upper part of the “screen menu”, and the “Menu Window” will disappear.
Press “M” button at the upper part of the screen or “ ” button at the bottom of the contact
screen to be able to directly return to the “Main Menu” interface.
Built-in speaker on/off control button
Use the music mode setup shortcut button to be able to perform the music playing mode, the
loop mode and the EQ mode.
Directly return to the “Main Menu” interface.
Close the button menu display.
Short press the button to enter the previous music and long press for the fast rewind of the
current music
Access the music list to select the music files
7
Page 8

Play/pause the current music
Short press the button to access the next music and long press for the fast
2. Description of the music list interface
Directly touch the “name of music” on the screen to be able to play the selected music.
Built-in speaker on/off control button
Directly return to the main menu interface
Close the button menu display
File browse up
Delete the selected music
Return to the folder at the upper level
File browse down
3. Lyric display
The player supports “*LRC” lyric files (The user can download via “www.lrc.com” website, or
acquire lyric files via “LRC”) to perform synchronous playing of lyrics and music. Names of
lyrics and files of music must be identical.
When there is any lyric file bearing the same name under the directory of playing music, the
playing will directly access the lyric display interface.
VII Video Mode
In the main menu interface, click on “Video” function icon on the screen to be able to access the
“Video” function interface.
After accessing the “Video” function mode, gently touch the contact screen to be able to see the
menu window.
Touch the “ ” at the upper part of the “screen menu”, and the “Menu Window” will disappear.
Press “M” button at the upper part of the screen or “ ” button at the bottom of the contact
screen to be able to directly return to the “Main Menu” interface.
Description of movie file list interface
Directly click on the name of video file on the screen to be able to start playing the selected
video.
8
Page 9

Built-in speaker on/off control button
Directly return to the main menu interface
Close the button menu display
File browse up
Delete the selected music
Return to the folder at the upper level
File browse down
Description of video playing
Close button menu display
Directly return to the main menu interface
Built-in speaker on/off control button
Short press the button to access the previous video and long press for fast rewind of the
current video
Access the video list and select the video files
Play/pause the current video
Short press the button to access the next video and long press for the fast forward of the
current video
VIII Picture Browse
In the main menu interface, click on “Picture” function icon to be able to access the “Picture”
function interface.
After accessing the “Picture” function mode, gently touch the contact screen to be able to see the
“menu window”.
Touch the “ ” at the upper part of the “screen menu”, and the “Menu Window” will disappear.
9
Page 10

Press “M” button at the upper part of the screen or “ ” button at the bottom of the contact
screen to be able to directly return to the “Main Menu” interface.
1. Description of the picture file list interface
Directly click on the “picture file name” on the screen to be able to display the selected pictures.
Built-in speaker on/off control button
Directly return to the main menu interface
Close the button menu display
File browse up
Delete the selected pictures
Return to the folder at the upper level
File browse down
2. Picture browse
Close the button menu display;
Directly return to the main menu interface;
Built-in speaker on/off control button;
Access the previous picture;
Access the picture list to select from the picture files;
Automatic picture browse playing/pausing switch button;
Access the next picture.
IX Recording
In the main menu interface, touch “Record” function icon on the screen to be able to access
“MIC voice recording” function interface.
After accessing the “Record” function mode, gently touch the screen to be able to seethe menu
window.
10
Page 11

Touch the “ ” at the upper part of the “screen menu”, and the “Menu Window” will disappear.
Press “M” button at the upper part of the screen or “ ” button at the bottom of the contact
screen to be able to directly return to the “Main Menu” interface.
Built-in speaker on/off control button
Directly return to the main menu interface
Close the button menu display
Long press the button to save the recorded files and exit the recording state
Short press the button to start/pause recording
11
Page 12

X Explorer
In the main menu interface, touch “Explorer” function icon on the screen to be able to access
“Explorer” function interface.
To select files in the list : Double click the file to play the file and press to delete the selected
files and alert window will pop out for final confirmation.
XI Settings
In the main menu interface, touch the “Settings” function on the screen to be able to access the
“Settings” setup function. This function can offer function settings such as “music”, “Record”
“Display” , “Auto play”, “System”, “Power Off”, “Default Set” and “Upgrade”.
Touch the corresponding function setup icon on the screen to be able to access the corresponding
function setup options.
In the “Settings” interface, long press “M” menu button to return to the main menu interface.
1. Music
In this setup, there are 4 options: Repeat Mode, Play Mode, EQ select and user EQ Set.
At this time touch the screen “
selected zone on the screen to access Level 2 menu. In the 4 options, touch “
/ ” the icon button to select the setup options. Short touch the
/ ” icon on the
screen to select the corresponding setup, short touch the selected zone on the screen to exit and
12
Page 13

save the settings. Touch “ ” icon to return to the upper level of setup menu.
1) Repeat Mode
In this menu, there is: single once, repeat single music, folder once, repeat folder, repeat once,
repeat all, trial listening for your option.
2) Play Mode
In this menu, there is: Sequence playing, random playing selection for your option.
3) EQ select
In this menu, there is: normal, 3D, rock, popular, classical, bass, jazz, user define for your option.
4) user EQ Set
In this menu there are five frequencies, for each of which there are 6 levels for the user in
adjustment.
2. Record
In this setting, there are two options: REC Quality and REC Volume.
At this time touch “ / ” buttons to select the setup options. Then short touch the selected zone
on the screen to access Level 2 menu. In 3 options, touch“ / ” icon button on the screen to
select the corresponding setup and then short touch the selected zone to confirm exiting and
saving the setup. Touch “ ” icon button to return to the upper level of setup menu.
1) REC quality
In this menu there is: high quality and common quality for your option.
2) REC volume
In this menu, there are 5 options: +1, +2, +3, +4, +5. The higher the level is, the greater volume it
records.
3. Display
In this setup there are 3 modes options: BLight Time, Lum and BLight Mode.
At this time touch “
zone on the screen to access Level 2 menu. In two options, touch “
/ ” icon button to select the setup option. Then short touch the selected the
/ ” icon on the screen to
select the corresponding setup. Short touch the selected zone on the screen to confirm exiting and
13
Page 14

saving the setup. Touch “ ” icon button to return to the upper level of the setup menu.
1) BLight Time
In this menu there are 6 options such as: 5 seconds, 10 seconds, 15 seconds, 20 seconds, 30
seconds and long time lighting for your option.
2) Lum
In this menu, there are 5 options such as 1, 2, 3, 4 and 5. The higher the level is, the brighter it
will be.
3) BLight Mode
In this menu there are two options such as normal and power save for your option.
4. Auto Play
In this setup there are two options: text and Jpeg.
At this time touch “ / ” icon button to select the setup option. Then short touch the selected the
zone on the screen to access Level 2 menu. In two options, touch “ / ” icon on the screen to
select the corresponding setup. Short touch the selected zone on the screen to confirm exiting and
saving the setup. Touch “ ” icon button to return to the upper level of the setup menu.
1) T ext
In this menu, there are 5 options such as 10 seconds, 15 seconds, 20 seconds, 25 seconds and 30
seconds for your option.
2) Jpeg
In this menu, there are 5 options such as 1 seconds, 2 seconds, 3 seconds, 4 seconds and 5
seconds for your option.
5. System
In this setup there are 3 options such as Language, About, Touch Calibrate
At this time touch“
zone on the screen to access Level 2 menu. In four options, touch “
/ ” icon button to select the setup option. Then short touch the selected the
/ ” icon on the screen to
select the corresponding setup. Short touch the selected zone on the screen to confirm exiting and
14
Page 15

saving the setup. Touch “ ” icon button to return to the upper level of the setup menu.
1) Language
In this menu there are options of three languages: simplified Chinese, traditional Chinese,
English, for your option.
2) About
In this menu, there is the remaining capacity and system software version number. This
information is only read information. Short touch the information display zone on the screen and
exit.
3) Calibrate
When you find that the contact screen position is not right, you can calibrate the contact buttons
using this function.
6. Power Off time
In this setup there are 6 options such as close, 10 minutes, 15 minutes, 30 minutes, 60 minutes,
and 120minutes for your option. At this time touch “ / ”icon button to select the setup option.
Then short touch the selected the zone on the screen to access Level 2 menu. In 4 options, touch
“ / ” icon on the screen to select the corresponding setup. Short touch the selected zone on the
screen to confirm exiting and saving the setup. Touch “ ” icon button to return to the upper
level of the setup menu.
7. Default set
Touch “Default Set” icon on the screen to access the “System recovery default” warning
interface. Short touch “Yes” button on the screen to restore to the factory default setup. Short
touch “Nol” on the contact screen to give up this recovery operation.
8. Upgrade
Touch “Upgrade” icon on the screen to access the “Firmware Upgrade” warning interface.
Connect the player to the computer USB interface to update the new firmware operation for the
player. Short touch “No” on the contact screen to give up this recovery operation.
XII Firmware Update
The player can be upgraded or reset by the software program stored inside the installation CD.
1. Insert the installation CD.
2. Install and run the program.
3. Click “Open” and select the firmware file (.rfw)
4. Click Update to start the firmware upgrade process
15
Page 16

If the firmware in the player is in good condition, the tool will shift to firmware upgrading mode;
it displays the information of the player’s firmware such as version etc in the box on the upper of
the tool interface. Click button “Open” to select the firmware file to be upgraded. After the
firmware file detected to be correct by the tool, it displays the information of the selected
firmware such as version etc in the box of the tool interface. Now click button “Update” to
upgrade the firmware. If the internal firmware of the player has been damaged, the tool will
change to firmware restoration mode. The version information of the player’s internal firmware
now will not be displayed in the box of the software interface. It requires the user to select a
correct firmware file to repair the damaged one. At the same time, the information such version
etc of the firmware file to be repaired is displayed in the box; click button “Update” to upgrade
the firmware.
Note: Firmware upgrade is to improve and optimize the performance of the player, but the
normal operation would not be affected without the firmware upgrade. However, an
inappropriate upgrade may damage the player.
XIII Common troubleshooting
1. Products cannot be opened.
Check the battery. If the battery is discharged, please use the provided adaptor to charge the
battery and then retry. Based on the discharging state, the charging of full battery needs some
time. If there is no response of the product, please press “RESET” button on the side of the unit.
Note that RESET will be disconnected, but there is no influence on the product.
2. Buttons do not work.
Check whether the power switch is in the HOLD position. If it is, please move it to the opposite
direction.
3. No sound.
Check whether the voice is set to “0”. If it is so, please control it to your favorite position. Check
whether there is any playing source on the product. If there is no playing source on the product,
there will be no output of sound.
16
Page 17

4. Noise in playing.
The damaged music files may utter noise, or discontinued sound output. Check whether the
earphone is connected. There is impurity in the jack/terminal in the earphone and there is noise.
5. The time for playing the files in the connected m emory is shortened.
Compared with the files in the built-in memory, it requires more sources while playing the files
on the external memory of MP4. Therefore, if the product playing is respectively saved in the
same file in the memory and the outside memory and the built-in memory, the time for playing
the former may be shortened.
6. Noise in the recorded files
The MP4 has been equipped with super fine microphone. This may lead to the noise in the
production process so that the quality will be badly distributed, which is the cause of the nature
of the digital equipment.
7. Clobbers displayed on the screen
Please check whether proper language options are set up. The language options will be set up in
the “Settings” – “System” – “Language”.
8. Unable to download files
Make sure that the computer and the player are properly connected.
Make sure that the memory space of the memory is full.
Make sure that the USB connection lines are damaged.
Specifications are subject to change without notice.
No part of this document may be reproduced or transmitted
in any form or by any mean, electronics or mechanical
including photocopying and recording
or translated to another language for any purpose
17
 Loading...