

Page 1

Schnurgebundenes Telefon
mit Freisprecheinrichtung
Téléphone
Mode mains−libres
Telefono
Funzione vivavoce
Corded telephone
with handsfree function
T 36 clip
Bedienungsanleitung
Mode d’emploi
Istruzioni per l’uso
Operating Instructions
Page 2

Bedienungsanleitung 3. . . . . . . .
Mode d’emploi 17. . . . . . . . . . . .
Istruzioni per l’uso 31. . . . . . . . . .
Operating Instructions 45. . . . . . .
Declaration of Conformity 60. . . .
2
Page 3

1
Inhaltsverzeichnis
1 Sicherheitshinweise 4. . . . . . . . . . . . . . . . . . . . . . . .
2 Telefon in Betrieb nehmen 5. . . . . . . . . . . . . . . . . . . .
3 Bedienelemente 7. . . . . . . . . . . . . . . . . . . . . . . . . . .
4 Telefonieren 8. . . . . . . . . . . . . . . . . . . . . . . . . . . . . .
5 Telefonbuch 11. . . . . . . . . . . . . . . . . . . . . . . . . . . . . .
6 Anrufliste 13. . . . . . . . . . . . . . . . . . . . . . . . . . . . . . . .
7 Nebenstellenanlagen / Zusatzdienste 14. . . . . . . . . . . .
8 Wichtige Informationen 15. . . . . . . . . . . . . . . . . . . . . .
9 Stichwortverzeichnis 16. . . . . . . . . . . . . . . . . . . . . . . .
3
Page 4

Sicherheitshinweise
1 Sicherheitshinweise
Lesen Sie diese Bedienungsanleitung sorgfältig durch.
Bestimmungsgemäße Verwendung
Dieses Telefon ist geeignet für das Telefonieren innerhalb eines Telefonnetzes. Jede andere
Verwendung gilt als nicht bestimmungsgemäß. Eigenmächtige Veränderungen oder Umbauten sind nicht zulässig. Öffnen Sie das Gerät in keinem Fall selbst und führen Sie keine eigenen Reparaturversuche durch.
Aufstellungsort
Vermeiden Sie Belastungen durch Rauch, Staub, Erschütterungen, Chemikalien, Feuchtigkeit,
Hitze oder direkte Sonneneinstrahlung.
Hörgeräte kompatibel
Das Telefon ist mit den meisten am Markt befindlichen Hörgeräten kompatibel. Eine einwandfreie Funktion mit jedem Hörgerät kann jedoch nicht garantiert werden.
Entsorgung
Sie sind gesetzlich zur sachgerechten Entsorgung von Gebrauchsgütern verpflichtet.
Das nebenstehende Symbol auf Ihrem Telefon bedeutet, dass elektrische und elektronische Altgeräte und Akkus getrennt vom Hausmüll zu entsorgen sind.
Elektrische oder elektronische Geräte entsorgen Sie bei einer Sammelstelle eines
geeigneten Entsorgungsträgers.
Akkus/Batterien entsorgen Sie beim batterievertreibenden Handel sowie bei zuständigen Sammelstellen, die entsprechende Behälter bereitstellen.
Verpackungsmaterialien entsorgen Sie entsprechend den lokalen Vorschriften.
4
Page 5

Telefon in Betrieb nehmen
2 Telefon in Betrieb nehmen
Sicherheitshinweise
Achtung: Lesen Sie vor der Inbetriebnahme unbedingt die Sicherheitshinweise in
Kapitel 1.
Verpackungsinhalt prüfen
Zum Lieferumfang gehören:
− ein Telefon − ein Telefonhörer
− ein Telefonanschlusskabel − ein Spiralkabel
− eine Tischstütze − eine Bedienungsanleitung
− vier Batterien Typ AAA
Telefonhörer anschließen
Stecken Sie das kurze Ende des Spiralkabels in die Buchse am unteren Ende des Hörers. Anschließend stecken Sie das lange Ende in die Buchse HANDSET. Führen Sie das Kabel
durch den Kabelkanal nach außen.
Batterien einlegen
Bevor Sie das Telefon mit dem Telefonnetz verbinden, müssen die Batterien eingelegt werden. Bitte benutzen Sie immer Batterien des Typs AAA Alkaline. Die Batterien werden für die
Rufnummernanzeige, die Freisprecheinrichtung und weitere Funktionen des Telefons
benötigt.
Achten Sie darauf, dass das Telefon nicht mit dem Telefonnetz verbunden ist, wenn
2
Sie Batterien einlegen oder wechseln.
Tauschen Sie die Batterien, wenn im Display das Symbol angezeigt wird. Alle vier Batterien müssen dann ersetzt werden, damit die Rufnummernanzeige und die Freisprecheinrichtung wieder einwandfrei funktionieren. Bei entladenen Batterien bleibt das Display dunkel und
die Freisprecheinrichtung funktioniert nicht.
Telefon anschließen
Verbinden Sie das beiliegende Telefonanschlusskabel mit der Telefonsteckdose und der Telefonbuchse LINE auf der Unterseite des Telefons. Führen Sie dann das Kabel durch den Kabelkanal entweder nach oben oder nach unten aus dem Telefongehäuse heraus.
Tischstütze anbringen
Möchten Sie das Telefon auf einen Tisch stellen, muss die mitgelieferte Tischstütze montiert
werden. Stecken Sie die beiden oberen Laschen in die dafür vorgesehenen Öffnungen. Rasten Sie anschließend die untere Lasche ein. Auf Seite 7 finden Sie, welche Öffnungen für die
Tischstütze vorgesehen sind.
5
Page 6

Telefon in Betrieb nehmen
Wandmontage
Ihr Telefon ist auch zur Wandmontage geeignet. Benutzen Sie zur Befestigung zwei Schrauben. Bohren Sie zwei Löcher im Abstand von 67 mm senkrecht untereinander und lassen Sie
die Schrauben 5 mm aus der Wand herausstehen. Die Tischstütze wird bei der Wandmontage
nicht benötigt. Stecken Sie nun die Aufhängungen des Telefons auf die Schrauben und schieben Sie es etwas nach unten.
Achtung: Unter dem zu bohrenden Loch dürfen sich keine Leitungen befinden.
Damit der Hörer im aufgelegten Zustand nicht herunterfällt, gibt es in der Hörerablage eine
kleine Höreraufhängung. Mit einem kleinen Schraubenzieher drehen Sie diese Einhängevorrichtung um 180°, bis am oberen Ende ein kleiner Haken entsteht. Jetzt können Sie den Hörer
einhängen.
Wenn die Funktion Freisprechen" nicht eingeschaltet ist, können Sie den Hörer an
das Telefon hängen, ohne die Verbindung zu unterbrechen. Dazu befindet sich über
der Hörerablage ein Einhängehaken.
Grundeinstellungen
Haben Sie die Batterien eingelegt, werden Sie aufgefordert einige Grundeinstellungen vorzunehmen. Informationen zur Darstellungs− und Schreibweise der Bedienungsanleitung finden
Sie auf Seite 8.
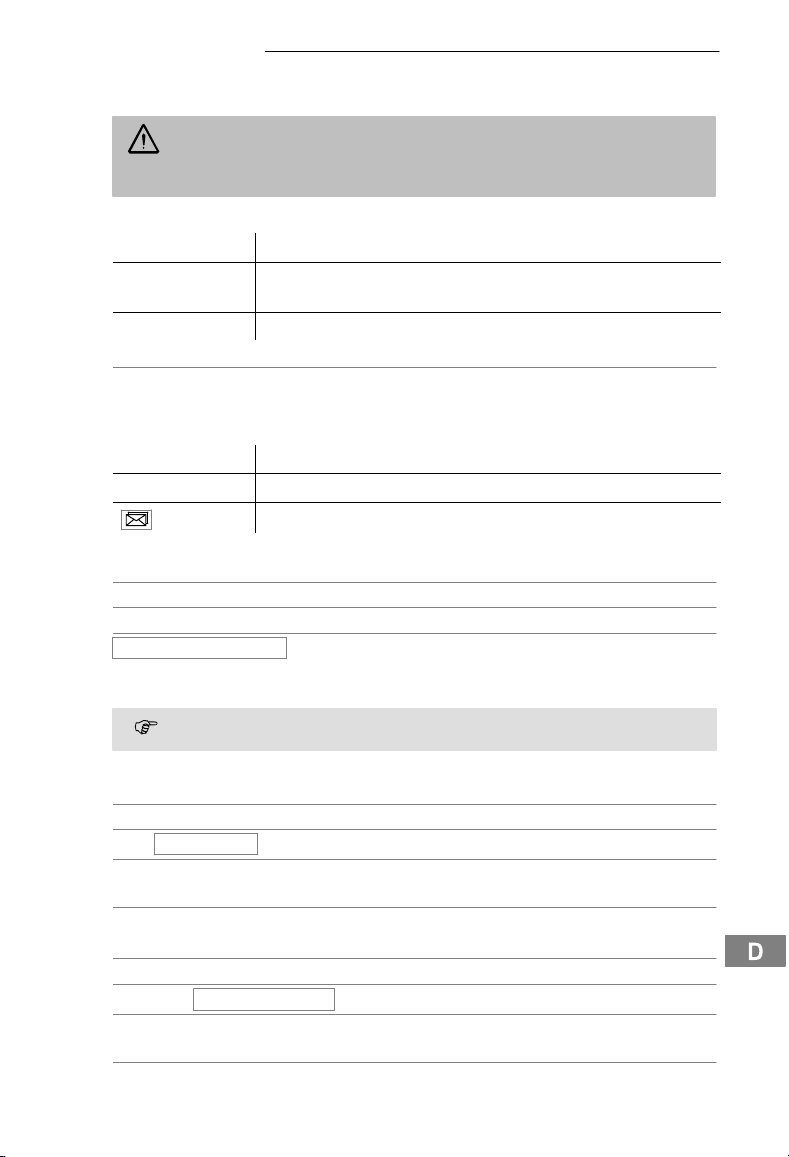
Sprache einstellen
y oder z
[DEUTSCH]
z. B.:
Kontrast einstellen
y oder z z. B.:
Datum und Zeit einstellen
y oder z z. B.:
y oder z z. B.:
y oder z z. B.:
y oder z z. B.:
Möchten Sie die vorgenommenen Einstellungen später wieder ändern, halten Sie die
3
, C Sprache auswählen und bestätigen
[4]
, C Kontrast auswählen und bestätigen
[15]
, C Stunde einstellen und bestätigen
[31]
, C Minute einstellen und bestätgen
[28]
, C Tag einstellen und bestätigen
[11]
, C Monat einstellen und bestätigen
Taste y für 4 Sekunden gedrückt.
6
Page 7
Bedienelemente
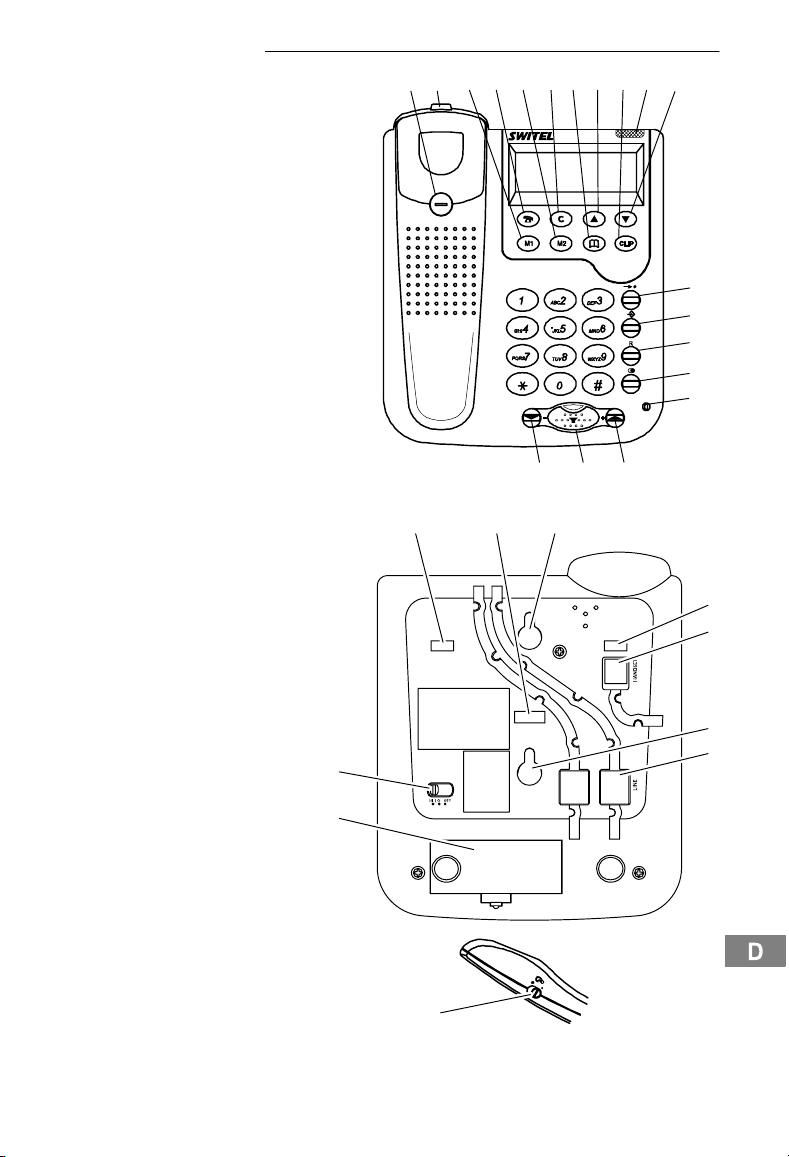
3 Bedienelemente
Oberseite
1 Höreraufhängung
2 Einhängehaken bei
Wandmontage (Freisprechen)
3 Direktwahltaste M1
4 Bestätigungstaste
5 Direktwahltaste M2
6 Löschen
7 Telefonbuch
8 Aufwärts blättern
9 Anrufliste CLIP
10 LED Neuer Anruf"
11 Abwärts blättern
12 Kurzwahltaste
13 Speichertaste
14 R−Taste (Flash)
15 Wahlwiederholung / Wahlpause
16 Mikrofon zum Freisprechen
17 Freisprechlautstärke +
18 Taste zum Freisprechen
19 Freisprechlautstärke −
Unterseite
1 Befestigung für Tischstütze
2 Aufhängung für Wandmontage
3 Anschluss Spiralkabel Hörer
4 Anschluss Telefonkabel
5 Batteriefach
6 Schiebeschalter
Klingellautstärke"
1 2435678910
T36clip
12
6
1
11
12
13
14
15
16
171819
1
3
2
4
Telefonhörer
1 Schiebeschalter Hörerlautstärke"
Die Tasten werden in dieser Bedienungsanleitung mit einer einheitlichen Kontur abgebildet.
Abweichungen von Tastensymbolen Ihres Telefons gegenüber den hier abgebildeten Tastensymbolen sind möglich.
5
1
7
Page 8
Telefonieren
4 Telefonieren
Darstellungen und Schreibweisen
ë Nummern oder Buchstaben eingeben
* Abgebildete Taste kurz drücken
2 sec * Abgebildete Taste 2 Sekunden drücken
halten * Abgebildete Taste halten
loslassen * Abgebildete Taste loslassen
{ì} Telefon klingelt
è Hörer abnehmen
é Hörer auflegen
DEUTSCH
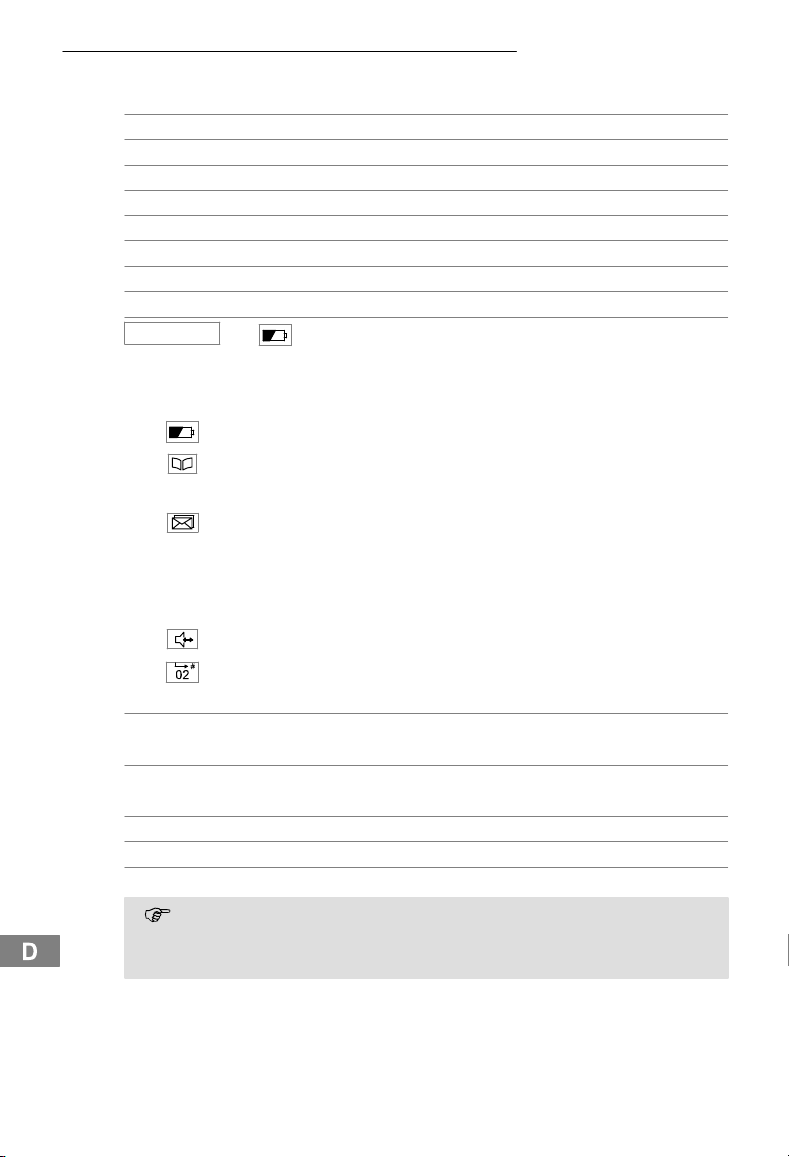
Symbole im Display
Display Beschreibung
CLIP Sie befinden sich in der Anrufliste. Seite 13
NEW Der Eintrag in der Anrufliste ist neu. Seite 13
16:33 Anzeige der Uhrzeit. Seite 6
17/11 Anzeige des Datums. Seite 6
oder
Tauschen Sie die Batterien. Seite 5
Sie befinden sich im Telefonbuch. Seite 11
Der Anrufer hat mehrmals angerufen. Seite 13
Das Freisprechen ist aktiviert. Seite 10
Speicherplatznummer der Rufnummer in der Anrufliste.
Text oder Symbole im Display
Anruf annehmen
{ì}, è oder Anruf annehmen
Gespräch beenden
é oder Gespräch beenden
Anrufen
ë Rufnummer eingeben (max. 22 Ziffern)
C Bei Falscheingabe letzte Ziffer löschen
è oder Rufnummer wählen
8
Sie können auch zuerst den Hörer abnehmen oder die Freisprechtaste drücken, um
das Freizeichen zu hören. Die eingegebenen Ziffern Ihrer gewünschten Rufnummer
werden sofort gewählt. Eine Korrektur einzelner Ziffern der Rufnummer ist bei dieser
Form des Gesprächaufbaus nicht möglich.
Page 9
Telefonieren
Wahlwiederholung
Ihr Telefon speichert die zuletzt gewählte Rufnummer.
£ Wahlwiederholung öffnen
è oder oder Verbindung herstellen
Eingegangene Anrufe zurückrufen
Ihr Telefon speichert 32 eingegangene Anrufe in einer Anrufliste.
c Anrufliste öffnen
y oder z, Eintrag auswählen und Verbindung herstellen
Rufnummern aus dem Telefonbuch wählen
Sie müssen Rufnummern im Telefonbuch gespeichert haben. Seite 11
¤ Telefonbuch öffnen
y oder z, Eintrag auswählen und Verbindung herstellen
Die Rufnummer wird gewählt und das Telefon schaltet automatisch die Funktion
Freisprechen" ein. Wenn Sie über den Hörer telefonieren möchten, nehmen Sie den
Hörer vom Telefon.
Direktwahl
Sie müssen Rufnummern als Direktwahlnummern gespeichert haben. Seite 12
z. B.: ^ Gewünschte Direktwahltaste drücken
è oder oder Verbindung herstellen
Kurzwahl
Sie müssen Rufnummern als Kurzwahlnummern gespeichert haben. Seite 12
, z. B.: 1 Gewünschte Kurzwahltaste drücken
è oder oder Verbindung herstellen
Nummern verketten und übertragen
Die Funktion findet Anwendung bei komplexeren Telefondiensten wie z. B. Telefonbanking,
Call by Call oder Calling−Card−Verfahren. Sie können mehrere gespeicherte Nummern während einer bestehenden Verbindung aus dem Telefonbuch übertragen. Übertragungen von
Nummern aus dem Telefonbuch können Sie mit manuellen Nummereingaben kombinieren.
Sie können während einer Verbindung beliebig viele Einträge aus dem Telefonbuch verketten
und übertragen.
¤ Während einer bestehenden Verbindung
y oder z, Telefonbucheintrag auswählen und Nummer
Telefonbuch öffnen
übertragen
9
Page 10
Telefonieren
Einstellen der Hörerlautstärke
Sie können die Hörerlautstärke mit einem Schiebeschalter an der Seite des Hörers auf laut
oder leise stellen.
Lautstärke mit Schiebeschalter anpassen
Anzeige der Gesprächsdauer
Während eines Gesprächs wird die Gesprächsdauer in Minuten und Sekunden angezeigt.
Freisprechen
Einstellen der Freisprechlautstärke
Klingellautstärke
4
Nutzen Sie diese Funktion, um den Gesprächspartner über den Lautsprecher zu hören.
Freisprechen einschalten
Freispechen ausschalten
: oder ; Lautstärke anpassen
Sie können die Klingellautstärke mit einem Schiebeschalter auf der Geräteunterseite anpassen oder ausschalten.
Lautstärke mit Schiebeschalter anpassen
10
Page 11

5 Telefonbuch
Im Telefonbuch können Sie 32 Rufnummern mit den dazugehörigen Namen speichern.
Geben Sie bei allen Rufnummern immer die Vorwahl mit ein, damit das Telefon auch
eingehende Ortsgespräche einem Telefonbucheintrag zuordnen kann.
Ist die Speicherkapazität erschöpft, zeigt das Display beim nächsten Speichern die
Meldung
anderen Eintrag löschen.
Die Telefonbucheinträge sind alphabetisch geordnet. Um direkt zum gewünschten
Telefonbucheintrag zu springen, drücken Sie den entsprechenden Anfangsbuchstaben.
SPEICHER VOLL
Namenseingabe
Zur Eingabe von Namen sind die Zahlentasten mit Buchstaben beschriftet. Durch mehrmaliges Drücken der entsprechenden Taste können Großbuchstaben sowie Zahlen eingegeben
werden.
1 Leerzeichen
C Löschen
*, # oder 0 Sonderzeichen
y oder z Cursor bewegen
Um den gleichen Buchstaben zweimal einzugeben, drücken Sie den entsprechen-
den Buchstaben. Warten Sie, bis der Cursor eine Stelle weiter gesprungen ist. Geben
Sie den Buchstaben erneut ein.
Telefonbucheinträge erstellen
¤ Telefonbuch öffnen
SPEICHERN ?
ë, Rufnummer eingeben und bestätigen (max. 22
ë, Namen eingeben und bestätigen (max. 16
, Speichervorgang einleiten und bestätigen
Einträge im Telefonbuch ändern
¤ Telefonbuch öffnen
y oder z Telefonbucheintrag auswählen
2 sec
ë, Rufnummer ändern und bestätigen
ë, Namen ändern und bestätigen
ÄNDERN ?
Einträge aus dem Telefonbuch löschen
Einen Eintrag löschen
¤ Telefonbuch öffnen
y oder z Telefonbucheintrag auswählen
LÖSCHEN ?
C
2 sec C Löschvorgang bestätigen
y oder z Löschvorgang abbrechen
. Um wieder Platz zu schaffen, müssen Sie zuerst einen
5
Ziffern)
Buchstaben)
6
, Änderungsvorgang einleiten und bestätigen
Löschvorgang aktivieren
oder
Telefonbuch
11
Page 12

Telefonbuch
Alle Einträge löschen
¤ Telefonbuch öffnen
y oder z Beliebigen Telefonbucheintrag auswählen
4 sec C
2 sec C Löschvorgang bestätigen
y oder z Löschvorgang abbrechen
Direktwahl
Sie können jeweils 1 Rufnummer als Direktwahl auf den Tasten ^ und _ speichern.
Rufnummern als Direktwahl speichern
c Anrufliste öffnen
ë, Rufnummer eingeben und bestätigen (max. 22
ë, Namen eingeben und bestätigen (max. 16
POSITION
Kurzwahl
8
Sie können 10 Rufnummern als Kurzwahl auf den Nummerntasten speichern.
Rufnummern als Kurzwahl speichern
c Anrufliste öffnen
ë, Rufnummer eingeben und bestätigen (max. 22
ë, Namen eingeben und bestätigen (max. 16
POSITION
Die gespeicherten Rufnummern auf den Direktwahl− und Kurzwahltasten können
ALLE LÖSCHEN ?
7
NUMMER SPEICHERN
^ oder _ Direktwahltaste auswählen
NUMMER SPEICHERN
z. B.: 1 Kurzwahltaste auswählen
nicht gelöscht werden. Beim Speichern neuer Rufnummern werden die alten Einträge
überschrieben.
Löschvorgang aktivieren
oder
Speichervorgang einleiten
Ziffern)
Buchstaben)
Speichervorgang einleiten
Ziffern)
Buchstaben)
12
Page 13
6 Anrufliste
Insgesamt werden 32 Rufnummern in einer Anrufliste gespeichert.
Die Rufnummernanzeige ist ein optionaler Service Ihres Netzbetreibers. Ihr Telefon zeigt die
Rufnummern im Display, wenn Ihr Netzbetreiber diesen Service anbietet. Bitte fragen Sie Ihren Netzbetreiber nach weiteren Informationen. Steht dieser Service nicht zur Verfügung, werden eingehende Anrufe nicht im Display angezeigt.
Meldungen im Display:
KEINE NUMMER Die Rufnummer wurde nur teilweise oder fehlerhaft empfangen.
UNBEKANNT /
FERNGESPRÄCH
ANONYM Der Anrufer hat das Senden seiner Rufnummer unterdrückt.
Rufnummern aus der Anrufliste anzeigen
c, y oder z Anrufliste öffnen und Eintrag auswählen
Zwei unterschiedliche Anzeigen informieren Sie, ob der Anrufer einmal oder mehrmals ange-
rufen hat.
Display Beschreibung
NEW Der Eintrag in der Anrufliste ist neu.
Rufnummer aus der Anrufliste im Telefonbuch speichern
Eine Rufnummer kann direkt aus der Anrufliste im Telefonbuch gespeichert werden.
c, y oder z Anrufliste öffnen und Eintrag auswählen
Speichervorgang starten
NUMMER KOPIEREN ?
Die Rufnummer wurde im Telefonbuch ohne Namen abgelegt. Geben Sie jetzt einen Namen
für die Rufnummer ein. Einträge im Telefonbuch ändern Seite 11
Sobald die Rufnummer im Telefonbuch mit einem Namen gespeichert wurde, er-
scheint in der Anrufliste zusätzlich der eingegebene Name.
Rufnummern aus der Anrufliste löschen
Einzelne Rufnummer löschen
c, y oder z Anrufliste öffnen und Eintrag auswählen
LÖSCHEN ? Löschvorgang aktivieren
C
2 sec C Löschvorgang bestätigen
y oder z Löschvorgang abbrechen
Alle Rufnummern löschen
c, y oder z Anrufliste öffnen und Eintrag auswählen
4 sec C
2 sec C Löschvorgang bestätigen
y oder z Löschvorgang abbrechen
Die Information der Rufnummer ist nicht verfügbar. Es könnte sich um
ein internationales Gespräch handeln.
Der Anrufer in der Anrufliste hat mehrmals angerufen.
Speichervorgang bestätigen
oder
ALLE LÖSCHEN ? Löschvorgang aktivieren
oder
Anrufliste
13
Page 14

Nebenstellenanlagen / Zusatzdienste
7 Nebenstellenanlagen / Zusatzdienste
R−Taste an Nebenstellenanlagen
Ist Ihr Telefon an einer Nebenstellenanlage angeschlossen, können Sie über die R−Taste
Funktionen, wie z. B. Anrufe weiterleiten und automatischen Rückruf, nutzen. Ob Ihr Telefon
an Ihrer Nebenstellenanlage einwandfrei funktioniert, erfahren Sie bei dem Händler, bei dem
die Anlage gekauft wurde.
Wahlpause
Bei Nebenstellenanlagen ist es erforderlich, eine Amtskennzahl vorzuwählen, um ein Freizeichen zu bekommen. Bei wenigen, älteren Nebenstellenanlagen dauert es einige Zeit, bis das
Freizeichen zu hören ist. Für diese Nebenstellenanlagen kann nach der Amtskennzahl eine
Wahlpause eingefügt werden, um direkt weiter wählen zu können, ohne das Freizeichen abzuwarten.
£ Wahlpause einfügen
Nach der Amtskennzahl wartet Ihr Telefon für ca. 3 Sekunden mit dem Wählen der eigentli-
chen Rufnummer.
Die Pause kann auch bei der Eingabe von Rufnummern im Telefonbuch gespeichert
werden.
R−Taste und Zusatzdienste
Ihr Telefon unterstützt Zusatzdienste Ihres Netzbetreibers, wie z. B. Makeln, Anklopfen und
Konferenz. Über die R−Taste können Sie diese Zusatzdienste nutzen. Zur Freischaltung von
Zusatzdiensten wenden Sie sich bitte an Ihren Netzbetreiber.
Rufnummernanzeige (CLIP1)
Wenn diese Funktion an Ihrer Telefonleitung zur Verfügung steht, wird Ihnen bereits die Rufnummer des Anrufers angezeigt, wenn das Telefon klingelt. Hat der Anrufer das Übertragen
seiner Rufnummer unterdrückt, wird eine entsprechende Meldung angezeigt. Die Rufnummer
kann nicht angezeigt und somit auch nicht in der Anrufliste gespeichert werden.
Die Rufnummernanzeige ist ein optionaler Service Ihres Netzbetreibers. Fragen Sie
Ihren Netzbetreiber nach weiteren Informationen.
14
1
CLIP: Calling Line Identification Presentation
Page 15

Wichtige Informationen
8 Wichtige Informationen
Haben Sie Probleme mit Ihrem Telefon, kontrollieren Sie zuerst die folgenden Hinweise. Bei
technischen Problemen oder Garantieansprüchen wenden Sie sich an Ihren Fachhändler. Die
Garantiezeit beträgt 2 Jahre.
Fehlerbehebung
Entfernen Sie alle zusätzlichen Telefonapparate und verbinden Sie nur das Telefon direkt mit
der Telefonbuchse. Sollte der Fehler immer noch auftreten, verbinden Sie ein anderes Telefon
mit der Telefonbuchse. Die Ergebnisse zeigen Ihnen, ob der Fehler am Gerät oder der Telefonleitung liegt.
Pflegehinweise
Reinigen Sie die Gehäuseoberflächen mit einem weichen und fusselfreien Tuch.
Verwenden Sie keine Reinigungsmittel oder Lösungsmittel.
Garantie
SWITEL − Geräte werden nach den modernsten Produktionsverfahren hergestellt und geprüft.
Ausgesuchte Materialien und hoch entwickelte Technologien sorgen für einwandfreie Funktion
und lange Lebensdauer. Ein Garantiefall liegt nicht vor, wenn die Ursache einer Fehlfunktion
des Gerätes bei dem Telefonnetzbetreiber oder einer eventuell zwischengeschalteten Nebenstellenanlage liegt. Die Garantie gilt nicht für die in den Produkten verwendeten Batterien, Akkus oder Akkupacks. Die Garantiezeit beträgt 24 Monate, gerechnet vom Tage des Kaufs.
Innerhalb der Garantiezeit werden alle Mängel, die auf Material− oder Herstellungsfehler zurückzuführen sind, kostenlos beseitigt. Der Garantieanspruch erlischt bei Eingriffen durch den
Käufer oder durch Dritte. Schäden, die durch unsachgemäße Behandlung oder Bedienung,
durch falsches Aufstellen oder Aufbewahren, durch unsachgemäßen Anschluss oder Installation sowie durch höhere Gewalt oder sonstige äußere Einflüsse entstehen, fallen nicht unter
die Garantieleistung. Wir behalten uns vor, bei Reklamationen die defekten Teile auszubessern, zu ersetzen oder das Gerät auszutauschen. Ausgetauschte Teile oder ausgetauschte
Geräte gehen in unser Eigentum über. Schadenersatzansprüche sind ausgeschlossen, soweit
sie nicht auf Vorsatz oder grober Fahrlässigkeit des Herstellers beruhen.
Sollte Ihr Gerät dennoch einen Defekt innerhalb der Garantiezeit aufweisen, wenden Sie sich
bitte unter Vorlage Ihrer Kaufquittung ausschließlich an das Geschäft, in dem Sie Ihr SWITEL −
Gerät gekauft haben. Alle Gewährleistungsansprüche nach diesen Bestimmungen sind ausschließlich gegenüber Ihrem Fachhändler geltend zu machen. Nach Ablauf von zwei Jahren
nach Kauf und Übergabe unserer Produkte können Gewährleistungsrechte nicht mehr geltend
gemacht werden.
Konformitätserklärung
Dieses Gerät erfüllt die Anforderungen der EU−Richtlinie:
1999/5/EG Richtlinie über Funkanlagen und Telekommunikationsendeinrichtungen
und die gegenseitige Anerkennung ihrer Konformität. Die Konformität mit der o. a.
Richtlinie wird durch das CE−Zeichen auf dem Gerät bestätigt.
15
Page 16

Stichwortverzeichnis
9 Stichwortverzeichnis
A
Anruf annehmen, 8
Anrufen, 8
Anrufliste, 13
B
Batterien einlegen, 5
Bedienelemente, 7
D
Darstellungen, 8
Datum und Zeit einstellen, 6
Direktwahl, 9, 12
E
Eingegangene Anrufe zurückrufen, 9
Einträge aus dem Telefonbuch löschen, 11
Einträge im Telefonbuch ändern, 11
F
Fehlerbehebung, 15
Freisprechen, 10
Freisprechlautstärke, 10
G
Garantie, 15
Gespräch beenden, 8
Gesprächsdauer, 10
H
Hörerlautstärke, 10
K
Klingellautstärke, 10
Konformitätserklärung, 15
Kontrast einstellen, 6
Kurzwahl, 9, 12
N
Namenseingabe, 11
Nebenstellenanlagen, 14
Nummern verketten und übertragen, 9
P
Pflegehinweise, 15
R
R−Taste an Nebenstellenanlagen, 14
R−Taste und Zusatzdienste, 14
Rufnummer aus der Anrufliste im Telefonbuch
speichern, 13
Rufnummern aus dem Telefonbuch wählen, 9
Rufnummern aus der Anrufliste anzeigen, 13
Rufnummern aus der Anrufliste löschen, 13
Rufnummernanzeige, 14
S
Schreibweisen, 8
Sicherheitshinweise, 4
Sprache einstellen, 6
Symbole im Display, 8
T
Telefon anschließen, 5
Telefon in Betrieb nehmen, 5
Telefonbuch, 11
Telefonbucheinträge erstellen, 11
Telefonhörer anschließen, 5
Telefonieren, 8
Tischstütze anbringen, 5
V
Verpackungsinhalt, 5
W
Wahlpause, 14
Wahlwiederholung, 9
Wandmontage, 6
Z
Zusatzdienste, 14
16
Page 17

9
Table des matières
1 Consignes de sécurité 18. . . . . . . . . . . . . . . . . . . . . . .
2 Mettre le téléphone en service 19. . . . . . . . . . . . . . . . .
3 Eléments de manipulation 21. . . . . . . . . . . . . . . . . . . .
4 Téléphoner 22. . . . . . . . . . . . . . . . . . . . . . . . . . . . . . .
5 Répertoire 25. . . . . . . . . . . . . . . . . . . . . . . . . . . . . . .
6 Liste d’appels 27. . . . . . . . . . . . . . . . . . . . . . . . . . . . .
7 Installations à postes suppl. / Services suppl. 28. . . . . .
8 Informations importantes 29. . . . . . . . . . . . . . . . . . . . .
9 Index 30. . . . . . . . . . . . . . . . . . . . . . . . . . . . . . . . . . .
17
Page 18

Consignes de sécurité
1 Consignes de sécurité
Lisez très attentivement ce mode d’emploi.
Utilisation conforme aux prescriptions
Ce téléphone convient pour téléphoner à l’intérieur d’un réseau téléphonique. Toute autre utilisation est considérée comme non conforme à l’usage. Des modifications ou changements effectués d’un propre gré ne sont pas autorisés. N’ouvrez en aucun cas l’appareil et n’effectuez
aucun essai de réparation vous−même.
Lieu d’installation
Evitez toute nuisance par la fumée, la poussière, les tremblements, les produits chimiques,
l’humidité, la grande chaleur ou l’ensoleillement direct.
Compatible avec prothèse auditive
Ce téléphone est compatible avec la plupart des prothèses auditives en vente sur le marché.
Cependant, une fonction irréprochable ne peut être garantie pour chacune d’entre elles.
Elimination
La loi vous oblige à éliminer de manière appropriée les biens de consommation.
L’icône ci−contre sur votre téléphone signifie que les anciens appareils électriques et
électroniques doivent être éliminés séparément des ordures ménagères.
Éliminez les appareils électriques ou électroniques dans le centre de collecte
d’un organisme approprié d’évacuation des déchets.
Éliminez les piles/piles rechargeables auprès d’un revendeur spécialisé ainsi que
dans des centres de collecte qui tiennent à votre disposition les collecteurs appropriés correspondants.
Éliminez les matériaux d’emballage conformément au règlement local.
18
Page 19

Mettre le téléphone en service
2 Mettre le téléphone en service
Remarques concernant la sécurité
Attention: Avant de mettre votre appareil en service, lisez impérativement les consi-
gnes de sécurité mentionnées au chapitre 1.
Vérifier le contenu de l’emballage
Les éléments suivants font partie de la livraison :
− un téléphone − un écouteur
− un câble de raccordement téléphonique − un câble spiralé
− un support de table − un mode d’emploi
− quatre piles de type AAA
Raccorder l’écouteur
Introduisez la courte extrémité du câble spiralé dans la prise située en bas de votre écouteur.
Puis introduisez la longue extrémité dans la prise HANDSET. Coincez le câble vers l’extérieur
dans le canal pour câble.
Introduire les piles
Avant de raccorder votre téléphone au réseau téléphonique, vous devez avoir introduit les piles. Veuillez toujours utiliser des piles alcalines du type AAA. Les piles sont nécessaires pour
l’affichage du numéro d’appel, le poste mains−libres et autres fonctions du téléphone.
Avant de les placer ou de les remplacer, veillez à ce que le téléphone ne soit pas relié
10
au réseau téléphonique.
Remplacer les piles lorsque l’icône apparaît sur l’écran . Les quatre piles doivent être
remplacées afin que l’affichage du numéro d’appel et le poste mains−libres fonctionnent de
nouveau impeccablement. Quand les piles sont déchargées, l’écran reste foncé et le poste
mains−libres ne fonctionne pas.
Raccorder le téléphone
Raccordez le câble de raccordement téléphonique ci−joint à la prise téléphonique et à la prise
téléphonique LINE située sous le téléphone. Conduisez ensuite le câble par le guidage de
câble, ou bien vers le haut, ou bien vers le bas, en dehors du boîtier du téléphone.
Monter le support de table
Si vous utilisez le téléphone sur une table, montez le support de table fourni avec l’appareil.
Introduisez les deux languettes supérieures dans les orifices prévus à cet effet. Enclenchez
ensuite la languette inférieure. La page 21 vous indiquera quels orifices sont prévus pour le
support.
19
Page 20

Mettre le téléphone en service
Montage mural
Votre téléphone est également conçu pour le montage mural. Utilisez deux vis pour le fixer.
Percez deux trous l’un en dessous de l’autre à une distance de 67 mm et faîtes dépasser les
vis du mur sur une longueur de 5mm. Vous n’avez pas besoin du support pour le montage
mural. Fixez maintenant les encoches du téléphone sur les vis et poussez−le légèrement vers
le bas.
Attention:Il ne doit pas se trouver de ligne électrique sous le trou devant être percé.
En montage mural, le récepteur de l’écouteur est muni d’un petit dispositif de suspension pour
éviter à l’écouteur de tomber lorsqu’il est raccroché. A l’aide d’un petit tournevis, tournez ce
dispositif d’accrochage de 180° jusqu’à ce qu’un petit crochet apparaisse sur l’extrémité
supérieure. Maintenant, vous pouvez accrocher l’écouteur.
Si la fonction Mode mains−libres" n’est pas activée, vous pouvez suspendre l’écou-
teur au téléphone sans interrompre la communication. Pour cela, un crochet de suspension se trouve au−dessus du récepteur de l’écouteur.
Réglages de base
Lorsque vous avez placé les piles, vous êtes invité à procéder à quelques réglages de base.
Vous trouverez des modes de représentation et des notations à la page 22 du mode d’emploi.
Réglage de la langue
y ou z
z. B.:
Réglage du contraste
y ou z p. ex.:
Réglage de l’heure et de la date
y ou z p. ex.:
y ou z p. ex.:
y ou z p. ex.:
y ou z p. ex.:
Si vous désirez modifier ultérieurement les réglages, maintenez la touche y ap-
11
[FRANÇAIS]
puyée pendant 4 secondes.
, C Sélectionner la langue et confirmer
[4]
[15]
[31]
[28]
[11]
, C Sélectionner le contraste et confirmer
, C Régler l’heure et confirmer
, C Régler les minutes et confirmer
, C Régler le jour et confirmer
, C Régler le mois et confirmer
20
Page 21

Eléments de manipulation
3 Eléments de manipulation
Face supérieure
1 Suspension de l’écouteur
2 Crochet de suspension si
montage mural (mode mains−libres)
3 Touche de sélection directe M1
4 Touche de confirmation
5 Touche de sélection directe M2
6 Effacer
7 Répertoire
8 Faire défiler vers le haut
9 Liste d’appels CLIP
10 DEL Nouvel appel"
11 Faire défiler vers le bas
12 Touche de sélection abrégée
13 Touche de mémoire
14 Touche R (Flash)
15 Touche BIS / Pause de numérotation
16 Microphone pour le mode mains−libres
17 Volume mode mains−libres +
18 Touche pour mode mains−libres
19 Volume mode mains−libres −
Face inférieure
1 Fixation pour le support de table
2 Suspension pour montage mural
3 Raccordement du câble spiralé
de l’écouteur
4 Raccordement du câble
téléphonique
5 Compartiment à piles
6 Régulateur à coulisse
Volume sonnerie"
1 2435678910
T36clip
12
6
1
11
12
13
14
15
16
171819
1
3
2
4
Écouteur
1 Interrupteur à coulisse Volume
sonore de l’écouteur"
Les touches sont représentées dans ce mode d’emploi par un contour uniforme. Les symboles de votre téléphone peuvent présenter des différences par rapport à ceux représentés
ici.
5
1
21
Page 22

Téléphoner
4 Téléphoner
Représentations et notations
ë Saisir des chiffres ou des lettres
* Appuyer brièvement sur la touche représentée
2 sec * Appuyer 2 secondes sur la touche représentée
Maintenir* Maintenir apppuyée la touche représentée
Relâcher* Relâcher la touche représentée
{ì} Le téléphone sonne
è Décrocher l’écouteur
é Reposer l’écouteur
FRANÇAIS
Symboles à l’écran
Ecran Description
CLIP Vous vous trouvez dans la liste d’appels. page 27
NEW L’enregistrement est nouveau. page 27
16:33 Affichage de l’heure. page 20
17/11 Affichage de la date. page 20
ou
Remplacez les piles. page 19
Vous vous trouvez dans le répertoire. page 25
Le correspondant a appelé plusieurs fois. page 27
Le mode mains−libres est activé. page 24
Numéro de place en mémoire du numéro dans la liste d’appels.
Texte ou icônes sur l’écran
Prendre l’appel
{ì}, èou Prendre l’appel
Terminer la communication
éou Terminer la communication
Appeler
ë Composer le numéro d’appel (max. 22 chiffres)
C Si la saisie est erronée, effacer le dernier chiffre
è ou Composer le numéro d’appel
Vous pouvez également d’abord décrocher l’écouteur ou appuyer sur la touche
mains−libres pour entendre la tonalité. Les chiffres saisis de votre numéro d’appel seront immédiatement composés. La correction individuelle des chiffres du numéro
d’appel n’est pas possible quand la communication est établie de cette manière.
22
Page 23

Touche de répétition automatique des derniers numéros
Votre téléphone enregistre le dernier numéro d’appel composé.
£ Ouvrir la touche BIS
è ou ou Établir la communication
Rappel des appels entrés
Votre téléphone enregistre les 32 appels manqués dans une liste d’appels.
c Ouvrir le journal des appels
y ou z, Sélectionner l’enregistrement et établir la
communication
Composer des numéros du répertoire
Vous devez avoir enregistré des numéros d’appel dans le répertoire. page 25
¤ Ouvrir le répertoire
y ou z, Sélectionner l’enregistrement et établir la
communication
Le numéro est composé et le téléphone active automatiquement la fonction Mode
mains−libres". Si vous désirez téléphoner avec l’écouteur, décrochez−le.
Sélection directe
Vous devez avoir enregistré des numéros d’appel comme numéros à sélection directe.
page 26
p. ex.:^ Appuyer sur la touche de sélection directe désirée
è ou ou Établir la communication
Sélection abrégée
Vous devez avoir enregistré des numéros d’appel comme numéros abrégés. page 26
, p. ex.: 1 Appuyer sur la touche de sélection abrégée de
votre choix
è ou ou Établir la communication
Enchaînement et transmission de numéros
La fonction de numérotation en chaîne est employée dans le cas de services de télécommunication plus complexes comme par ex. la banque par téléphone, l’appel par appel ou l’emploi
de la carte pastel. Vous pouvez transmettre plusieurs numéros enregistrés dans le répertoire
pendant une communication. Vous pouvez combiner des transmissions de numéros de votre
répertoire avec des entrées de numéros à la main. Pendant une communication, vous pouvez
numéroter en chaîne autant d’enregistrements de votre répertoire que vous désirez et les
transférer.
¤ Ouvrir le répertoire pendant une communication
y ou z, Sélectionner un enregistrement et transférer un
numéro
Téléphoner
23
Page 24

Téléphoner
Régler le volume sonore de l’écouteur
Vous pouvez régler le volume sonore de l’écouteur sur fort ou bas à l’aide d’un régulateur à
coulisse situé sur le côté de l’écouteur.
Régler le volume à l’aide d’un régulateur à
coulisse
Affichage de la durée de la communication
La durée d’une communication est affichée en minutes et secondes.
Mode mains−libres
Utilisez cette fonction pour entendre le correspondant par l’intermédiaire du haut−parleur.
Activer le mode mains−libres
Désactiver le mode mains−libres
Réglage du volume du mode mains−libres
: ou ; Régler le volume
Volume de la sonnerie
Vous pouvez régler ou désactiver le volume de la sonnerie à l’aide d’un régulateur à coulisse
situé sous le téléphone.
12
Régler le volume à l’aide d’un régulateur à
coulisse
24
Page 25

5 Répertoire
Vous pouvez enregistrer 32 numéros d’appel et le nom y afférant dans votre répertoire.
Saisissez toujours les numéros d’appel avec l’indicatif afin que le téléphone puisse aussi
attribuer les communications locales à un enregistrement du répertoire.
Si la capacité de mémoire est épuisée, l’écran affiche le message suivant lors du prochain
enregistrement
effacer un autre enregistrement.
Les enregistrements du répertoire sont rangés par ordre alphabétique. Pour sauter
directement à l’enregistrement désiré, appuyez sur l’initiale correspondante.
Introduction du nom
Les touches numériques portent des lettres afin de pouvoir entrer le nom. En appuyant plusieurs fois sur la touche correspondante, vous pouvez saisir des majuscules ainsi que des
chiffres.
1 Espace
C Effacer
*, # ou 0 Caractères spéciaux
y ou z Déplacer le curseur
Pour entrer deux fois la même lettre, appuyez sur la lettre adéquate. Attendez que le
curseur soit passé derrière. Puis tapez la lettre une nouvelle fois.
Créer des enregistrements du répertoire
¤ Ouvrir le répertoire
ENREGISTRER ?
ë, Entrer le numéro (max. 22 chiffres) et confirmer
ë, Entrer le nom et confirmer (max. 16 caractères)
Modifier des enregistrements dans le répertoire
¤ Ouvrir le répertoire
y ou z Sélectionner l’enregistrement
2 sec
ë, Modifier le numéro d’appel et confirmer
ë, Modifier le nom et confirmer
Effacer des enregistrements du répertoire
Effacer un enregistrement
¤ Ouvrir le répertoire
y ou z Sélectionner l’enregistrement
EFFACER ?
C
2 sec C Confirmer l’effacement
y ou z Annuler l’effacement
MEMOIRE PLEINE . Pour créer de la place, vous devez tout d’abord
13
, Introduire l’enregistrement et confirmer
14
EDITER ?
, Introduire la modification et confirmer
Activer l’effacement
ou
Répertoire
25
Page 26

Répertoire
Effacer tous les enregistrements
¤ Ouvrir le répertoire
y ou z Sélectionner un enregistrement quelconque
4 sec C
2 sec C Confirmer l’effacement
y ou z Annuler l’effacement
Sélection directe
Vous pouvez enregistrer 1 numéro comme sélection directe sur les touches ^ et _.
Enregistrer des numéros d’appel comme sélection directe
c Ouvrir le journal des appels
ë, Entrer le numéro (max. 22 chiffres) et confirmer
ë, Entrer le nom et confirmer (max. 16 caractères)
LIEU
Sélection abrégée
Vous pouvez mémoriser 10 numéros comme sélection abrégée sur les touches à chiffres.
Enregistrer des numéros d’appel comme sélection abrégée
c Ouvrir le journal des appels
ë, Entrer le numéro (max. 22 chiffres) et confirmer
ë, Entrer le nom et confirmer (max. 16 caractères)
LIEU
Vous ne pouvez pas effacer les numéros enregistrés sur les touches de sélection di-
TOUT EFFACER ?
15
ENREGISTRER NUM
^ ou _ Sélectionner la touche de sélection directe
16
ENREGISTRER NUM
p. ex.: 1 Sélectionner la touche de sélection abrégée
recte et les touches de sélection abrégée. Lorsque vous enregistrez de nouveaux
numéros, les anciens enregistrements sont écrasés.
Activer l’effacement
ou
Introduire l’enregistrement
Introduire l’enregistrement
26
Page 27

Liste d’appels
6 Liste d’appels
Dans l’ensemble, 32 numéros d’appel sont enregistrés dans une liste d’appels.
L’affichage du numéro d’appel est un service optionnel de votre exploitant de réseau. Votre
téléphone affiche les numéros d’appel à l’écran si votre exploitant de réseau offre ce service.
Veuillez lui demander de plus amples informations. Si ce service n’est pas disponible, les appels entrants ne sont pas visibles sur votre écran.
Messages à l’écran:
PAS DE NUMERO Le numéro n’a été reçu que partiellement ou de façon défectueuse.
HORS ZONE / LON-
GUE DISTANCE
PRIVE Le correspondant a bloqué la transmission de son numéro d’appel.
Afficher des numéros de la liste d’appels
c, y ou z Ouvrir la liste d’appels et sélectionner
Deux affichages différents vous informent si le correspondant a appelé une fois ou plusieurs
fois.
Ecran Description
NEW L’enregistrement est nouveau.
Enregistrez ce numéro dans le répertoire
Vous pouvez enregistrer un numéro directement de la liste d’appels dans le répertoire.
c, y ou z Ouvrir la liste d’appels et sélectionner
Démarrer l’enregistrement
COPIER NUMERO ?
Le numéro d’appel a été déposé sans nom dans le répertoire. Entrez maintenant un nom pour
le numéro. Modifier des enregistrements dans le répertoire Page 25
Dès que le numéro a été enregistré dans le répertoire avec un nom, celui−ci apparaît
également dans la liste d’appels.
Effacer des numéros de la liste d’appels
Effacer des numéros individuels
c, y ou z Ouvrir la liste d’appels et sélectionner
c EFFACER ? Activer l’effacement
2 sec C Confirmer l’effacement
y ou z Annuler l’effacement
Effacer tous les numéros
c, y ou z Ouvrir la liste d’appels et sélectionner
4 sec C
2 sec C Confirmer l’effacement
y ou z Annuler l’effacement
TOUT EFFACER ?
L’information du numéro d’appel n’est pas disponible. Il pourrait
s’agir d’une communication internationale.
l’enregistrement
Le correspondant de la liste d’appels a appelé plusieurs fois.
l’enregistrement
Confirmer l’enregistrement
l’enregistrement
ou
l’enregistrement
Activer l’effacement
ou
27
Page 28

Installations à postes suppl. / Services suppl.
7 Installations à postes suppl. / Services suppl.
Touche R sur les installations à postes supplémentaires
Si votre téléphone est raccordé à une installation à postes supplémentaires, vous pouvez, par
l’intermédiaire de la touche R, tirer profit des fonctions comme par ex. le transfert d’appels et
le rappel automatique. Votre revendeur, auprès duquel vous avez acheté l’installation, vous informera si votre téléphone fonctionne parfaitement sur ce genre d’installation.
Pause de numérotation
Dans le cas d’installations à postes supplémentaires, il est nécessaire de composer auparavant un code réseau pour obtenir la tonalité. Sur les quelques installations à postes
supplémentaires plus anciennes, cela dure quelques instants jusqu’à ce que vous entendiez
la tonalité. Pour ces installations à postes supplémentaires, une pause de numérotation peut
être insérée après le code réseau afin de pouvoir continuer à numéroter directement sans attendre la tonalité.
£ Introduire une pause de numérotation
Après le code réseau votre téléphone attend 3 secondes avant de compser le numéro d’ap-
pel.
La pause peut également être enregistrée lors de la saisie de numéros d’appel dans
le répertoire.
Touche R et services supplémentaires
Votre téléphone supporte des services supplémentaires de votre opérateur, comme par ex. le
va−et−vient, la signalisation d’appel en instance et la conférence. Vous pouvez utiliser ces services supplémentaires par l’intermédiaire de la touche R. Contactez votre opérateur pour
déconnecter les services supplémentaires.
Affichage du numéro d’appel (CLIP1)
Si cette fonction est à votre disposition sur votre ligne téléphonique, le numéro du correspondant vous sera affiché dès que le téléphone sonne. Si votre correspondant a bloqué la transmission de son numéro, un message correspondant sera affiché. Le numéro d’appel ne peut
pas être affiché et donc être enregistré dans la liste des appels.
L’affichage du numéro d’appel est un service optionnel de votre exploitant de réseau.
Veuillez lui demander de plus amples informations.
28
1
CLIP: Calling Line Identification Presentation
Page 29

Informations importantes
8 Informations importantes
Si vous avez des problèmes avec votre téléphone, contrôlez d’abord les remarques suivantes.
Lors de problèmes techniques ou de droits à la garantie, adresez−vous à votre revendeur. La
durée de la garantie est de 2 ans.
Suppression des erreurs
Enlevez tous les appareils téléphoniques supplémentaires et reliez seulement le téléphone directement avec la prise téléphonique. Si l’erreur devait toujours se produire, raccordez un autre téléphone à la prise téléphonique. Les résultats vous montrent si l’erreur provient de l’appareil ou de la ligne téléphonique.
Remarques d’entretien
Nettoyez les surfaces du boîtier avec un chiffon doux et non pelucheux.
N’utilisez pas de produits d’entretien ou de solvants.
Garantie
Les appareils SWITEL sont fabriqués selon les procédes les plus modernes et sont contrôlés.
Des matériels sélectionnés et des technologies de pointe ont pour effet un fonctionnement
irréprochable et une longue durée de vie. La garantie ne rentre pas en jeu si l’exploitant du
réseau téléphonique ou une installation à postes supplémentaires éventuellement intercalée
est responsable du dysfonctionnement de l’appareil. La garantie n’est pas valable pour les piles, piles rechargeables ou packs de piles utilisés dans le produits. La durée de la garantie est
de 24 mois, à partir de la date d’achat.
Pendant la durée de la garantie, tous les défauts, dus à des vices de matériel ou de fabrication, seront éliminés gratuitement. Le droit à la garantie expire en cas d’intervention de l’acheteur ou de tiers. Les dommages provenant d’un maniement ou d’une manipulation incorrects,
d’une mauvaise mise en place ou d’une mauvaise conservation de l’appareil, d’un raccordement non conforme ainsi que d’un cas de force majeure ou autres influences extérieures, sont
exclus de la garantie. Nous nous reservons le droit, en cas de réclamations, de réparer ou de
remplacer les composants défectueux ou d’échanger l’appareil. Les composants remplacés
ou les appareils échangés deviennent notre propriété. Les demandes de dommages et
intérêts sont exclues tant qu’elles ne reposent pas sur l’intention ou une négligence grossière
du fabricant.
Si votre appareil devait malgré tout présenter une défectuosité pendant la période de garantie,
veuillez vous adressez, muni de la quittance d’achat, exclusivement au magasin où vous avez
acheté votre appareil SWITEL. Vous ne pouvez faire valoir vos droits à la garantie selon ces
dispositions qu’auprès de votre revendeur exclusivement. Deux ans après l’achat et la remise
de nos produits, il n’est plus possible de faire valoir les droits à la garantie.
Déclaration de conformité
Cet appareil répond aux exigences des directives de l’union européenne (UE) :
1999/5/CE Directive sur les installations de radio et de télécommunication et la re-
connaissance réciproque de leur conformité. La conformité avec la directive mentionnée ci−dessus est confirmée sur l’appareil par la marque CE.
29
Page 30

Index
9 Index
A
Affichage du numéro d’appel, 28
Afficher des numéros de la liste d’appels, 27
Appeler, 22
C
Composer des numéros du répertoire, 23
Consignes de sécurité, 18
Contenu de l’emballage, 19
Créer des enregistrements du répertoire, 25
D
Déclaration de conformité, 29
Durée de la communication, 24
E
Effacer des enregistrements du répertoire, 25
Effacer des numéros de la liste d’appels, 27
Eléments de manipulation, 21
Enregistrez ce numéro dans le répertoire, 27
G
Garantie, 29
I
Installations à postes supplémentaires, 28
Introduction du nom, 25
Introduire les piles, 19
L
Liste d’appels, 27
M
Mettre le téléphone en service, 19
Mode mains−libres, 24
Modifier des enregistrements dans
le répertoire, 25
Montage mural, 20
Monter le support de table, 19
N
Notations, 22
Numérotation en chaîne et transmission de
numéros, 23
P
Pause de numérotation, 28
Prendre l’appel, 22
R
Raccorder l’écouteur, 19
Raccorder le téléphone, 19
Rappel des appels entrés, 23
Réglage de l’heure et de la date, 20
Réglage de la langue, 20
Réglage du contraste, 20
Remarques d’entretien, 29
Répertoire, 25
Représentations, 22
S
Sélection abrégée, 23, 26
Sélection directe, 23, 26
Services supplémentaires, 28
Suppression des erreurs, 29
Symboles à l’écran, 22
T
Téléphoner, 22
Terminer la communication, 22
Touche de répétition automatique des derniers
numéros, 23
Touche R et services supplémentaires, 28
Touche R sur les installations à postes
supplémentaires, 28
V
Volume de la sonnerie, 24
Volume mode mains libres, 24
Volume sonore de l’écouteur, 24
30
Page 31

17
Contenuto
1 Indicazioni di sicurezza 32. . . . . . . . . . . . . . . . . . . . . .
2 Mettere in funzione il telefono 33. . . . . . . . . . . . . . . . . .
3 Elementi di comando 35. . . . . . . . . . . . . . . . . . . . . . . .
4 Compiere telefonate 36. . . . . . . . . . . . . . . . . . . . . . . .
5 Rubrica telefonica 39. . . . . . . . . . . . . . . . . . . . . . . . . .
6 Elenco chiamate 41. . . . . . . . . . . . . . . . . . . . . . . . . . .
7 Impianti telefonici interni / Servizi addizionali 42. . . . . . .
8 Informazioni importanti 43. . . . . . . . . . . . . . . . . . . . . .
9 Indice alfabetico 44. . . . . . . . . . . . . . . . . . . . . . . . . . .
31
Page 32

Indicazioni di sicurezza
1 Indicazioni di sicurezza
Leggere attentamente le presenti istruzioni per l’uso.
Impiego conforme agli usi previsti
Il presente apparecchio consente di compiere telefonate in una rete di telecomunicazione.
Qualsiasi altro impiego è considerato come non conforme agli usi previsti. Non sono consentite modifiche o trasformazioni non autorizzate. Non aprire per nessuna ragione l’apparecchio
autonomamente e svolgere riparazioni di propria iniziativa.
Luogo di installazione
Evitare un’esposizione a fumo, polvere, vibrazioni, sostanze chimiche, umidità, calore e raggi
solari diretti.
Compatibilità con apparecchi acustici
Il telefono è compatibile con il maggior numero di apparecchi acustici presenti sul mercato.
Ciò nonostante non è possibile garantire un perfetto funzionamento con qualsiasi tipo di apparecchio acustico.
Smaltimento
Sussiste l’obbligo legislativo al corretto smaltimento di beni di consumo. Il simbolo riportato sul telefono e raffigurato qui a lato indica che apparecchi usati elettrici ed elettronici e batterie esauste non sono da smaltire assieme ai normali rifiuti domestici.
Procedere allo smaltimento di apparecchi elettrici o elettronici presso un centro di
raccolta incaricato con lo smaltimento conforme.
Consegnare batterie ricaricabili / batterie standard per lo smaltimento presso rivenditori al dettaglio di batterie o centri di raccolta che mettono a disposizione appositi contenitori.
Smaltire confezioni ed imballaggi in base a quanto indicato dalle norme in vigore a
livello locale.
32
Page 33

Mettere in funzione il telefono
2 Mettere in funzione il telefono
Indicazioni di sicurezza
Attenzione: Prima della messa in funzione, leggere attentamente le indicazioni di si-
curezza riportate al capitolo 1.
Verificare il contenuto della confezione
La confezione contiene:
− un telefono − un ricevitore
− un cavo di collegamento telefonico − un cavo a spirale
− un supporto da tavolo − un manuale di istruzioni per l’uso
− quattro batterie tipo AAA
Collegare il ricevitore
Introdurre l’estremità corta del cavo a spirale nella presa presente sulla parte inferiore del ricevitore. Fatto questo, introdurre l’estremità lunga nella presa riportante l’indicazione HANDSET.
Fare passare il cavo lungo la canalina.
Inserire le batterie
Prima di collegare il telefono con la rete telefonica è necessario inserire le batterie. Si consiglia di utilizzare sempre batterie AAA di tipo alcaline. Le batterie consentono determinate funzioni come la visualizzazione del numero di chiamata , l’esercizio del vivavoce e altre funzioni
del telefono.
Fare attenzione a scollegare il telefono dalla rete telefonica in caso di inserimento o
18
sostituzione delle batterie.
Sostituire le batterie non appena sul display è visualizzato il simbolo . In tal caso è necessario sostituire tutte e quattro le batterie per consentire nuovamente il perfetto funzionamento della visualizzazione del numero di chiamata e del dispositivo di vivavoce. Con batterie
scariche il display rimane scuro ed il dispositivo di vivavoce non funziona.
Collegare il telefono
Collegare il cavo di collegamento telefonico fornito con il jack telefonico e la presa telefonica
LINE presente sul lato inferiore del telefono. Fare passare il cavo lungo la canalina verso sopra o verso sotto lungo la custodia del telefono.
Montare il supporto da tavolo
Volendo adoperare il telefono da un tavolo si renderà necessario montare prima l’apposito
supporto da tavolo fornito in dotazione. Introdurre le due linguette superiori nelle rispettive
aperture. Fare infine scattare in posizione la linguetta inferiore. A pagina 35 sono indicate le
aperture previste per il supporto da tavolo.
33
Page 34

Mettere in funzione il telefono
Montaggio a parete
Il telefono si presta altresì per il montaggio a parete. Utilizzare in tal caso due viti. Prevedere
due fori disposti verticalmente con una distanza di 67 mm tra loro e lasciare sporgere le viti di
5 mm dal muro. Il supporto da tavolo non è necessario in caso di montaggio a parete. Poggiare quindi i dispositivi di aggancio del telefono sulle viti e spingere l’apparecchio verso sotto.
Attenzione: Sincerarsi che non vi siano linee sotto traccia sul punto in cui si desidera
eseguire la foratura.
In modo da impedire al ricevitore agganciato di staccarsi dal telefono e cadere ecco che il
supporto del ricevitore è dotato di un apposito dispositivo di fermo. Girare con un piccolo giravite il dispositivo di aggancio di 180° fino a creare un piccolo gancio. A questo punto è possibile agganciare il ricevitore in maniera sicura.
Avendo disattivato la funzione Vivavoce" è possibile agganciare il ricevitore al tele-
fono senza dover interrompere la comunicazione. Il supporto del ricevitore è dotato
a tale scopo di apposito gancio di fermo.
Impostazioni di base
Dopo aver inserito le batterie, il telefono richiama l’attenzione su alcune impostazioni di base.
Informazioni su rappresentazioni e modi di scrittura impiegati nelle presenti istruzioni per l’uso
sono riportate a pagina 36.
Impostare la lingua
La lingua [ITALIANO] non è disponibile
y o z
per es.:
Impostare il contrasto
y o z per es.:
Impostare data e ora
y o z per es.:
y o z per es.:
y o z per es.:
y o z per es.:
Nel caso si volessero eseguire in un secondo momento modifiche alle impostazioni
19
[ENGLISH]
eseguite, tenere premuto il tasto y per 4 secondi.
, C Selezionare la lingua e confermare
[4]
, C Selezionare il contrasto e confermare
[15]
, C Impostare l’ora e confermare
[31]
, C Impostare i minuti e confermare
[28]
, C Impostare il giorno e confermare
[11]
, C Impostare il mese e confermare
34
Page 35

Elementi di comando
3 Elementi di comando
Lato superiore
1 Dispositivo di aggancio ricevitore
2 Gancio di fermo per montaggio
a parete (funzione vivavoce)
3 Tasto di selezione diretta M1
4 Tasto di conferma
5 Tasto di selezione diretta M2
6 Cancellare
7 Rubrica telefonica
8 Scorrere verso sopra
9 Elenco chiamate CLIP
10 LED Nuova chiamata"
11 Scorrere verso sotto
12 Tasto di selezione abbreviata
13 Tasto memoria
14 Tasto R (flash)
15 Ripetizione di selezione /
Pausa di selezione
16 Microfono per funzione vivavoce
17 Volume del dispositivo di vivavoce +
18 Tasto per funzione vivavoce
19 Volume del dispositivo di vivavoce−
Lato inferiore
1 Fissaggio per supporto da tavolo
2 Aggancio per montaggio a parete
3 Collegamento cavo a spirale
ricevitore
4 Collegamento cavo telefonico
5 Vano batterie
6 Interruttore a scorrimento
Volume di squillo"
1 2435678910
T36clip
12
6
1
11
12
13
14
15
16
171819
1
3
2
4
Ricevitore del telefono
1 Interruttore a scorrimento
Volume del ricevitore"
I tasti riportati nelle presenti istruzioni per l’uso sono raffigurati con un contorno uniforme.
Con riserva di modifiche per tasti e simboli visualizzati sul display del telefono rispetto a tasti
e simboli di display qui raffigurati.
5
1
35
Page 36

Compiere telefonate
4 Compiere telefonate
Rappresentazioni e modi di scrittura
ë Inserire numeri o lettere
* Premere brevemente il tasto raffigurato
2 sec * Premere il tasto raffigurato per 2 secondi
tenere * Tenere premuto il tasto raffigurato
rilasciare * Rilasciare il tasto raffigurato
{ì} Telefono squilla
è Sollevare il ricevitore
é Agganciare il ricevitore
ENGLISH
Simboli sul display
Display Descrizione
CLIP Ci si trova nell’elenco chiamate. pagina 41.
NEW La voce nell’elenco chiamate è nuova. pagina 41.
16:33 Indicazione dell’ora. pagina 34.
17/11 Indicazione della data. pagina 34.
oppure
Sostituire le batterie. pagina 33.
Ci si trova nella rubrica telefonica. pagina 39.
Il chiamante ha compiuto diversi tentativi di chiamata. pagina 41.
La funzione vivavoce è attivata. pagina 38.
Posizione di memoria del numero di chiamata nell’elenco chiamate.
Testo o simboli sul display
Ricevere una chiamata
{ì}, è o Ricevere una chiamata
Concludere una chiamata
é o Concludere una chiamata
Telefonare
ë Inserire un numero di chiamata (max. 22 cifre)
C In caso di immissione errata cancellare l’ultima
è o Selezionare un numero di chiamata
È possibile sollevare prima il ricevitore o premere il tasto del dispositivo di vivavoce
36
cifra
per ricevere una segnale di linea libera. Le cifre immesse per la composizione del numero di chiamata desiderato sono immediatamente selezionate. Nel corso di una simile chiamata non è possibile eseguire la correzione di singole cifre che compongono il numero di chiamata.
Page 37

Compiere telefonate
Ripetizione di selezione
Il telefono memorizza l’ultimo numero di chiamata selezionato.
£ Aprire la ripetizione di chiamata
è o o Instaurare un collegamento
Riselezionare chiamate ricevute
Il telefono memorizza 32 chiamate ricevute in un elenco chiamate.
c Aprire l’elenco chiamate
y o z, Selezionare una voce e instaurare un
Selezionare numeri dalla rubrica telefonica
Per fare questo è necessario aver memorizzato i numeri di chiamata nella rubrica telefonica.
pagina 39.
¤ Aprire la rubrica telefonica
y o z, Selezionare una voce e instaurare un
Il numero di chiamata è selezionato ed il telefono inserisce automaticamente la fun-
zione Vivavoce". Se si desidera telefonare con il ricevitore, sollevare il ricevitore dal
telefono.
Selezione diretta
È necessario aver memorizzato numeri di chiamata sotto forma di numeri di chiamata diretta.
pagina 40.
per es.: ^ Premere il tasto di selezione diretta desiderato
è o o Instaurare un collegamento
Selezione abbreviata
È necessario aver memorizzato numeri di chiamata sotto forma di numeri di selezione abbreviata. pagina 40.
, per es.: 1 Premere il tasto di selezione abbreviata
è o o Instaurare un collegamento
Concatenare e trasmettere numeri
La funzione viene applicata per servizi telefonici più complessi come per es. banking via telefono, call by call o procedure con calling card. Durante lo svolgimento di una chiamata è infatti
possibile trasmettere diversi numeri memorizzati precedentemente nella rubrica telefonica. La
trasmissione di numeri dalla rubrica telefonica è combinabile con l’immissione di numeri manuale. Con chiamata in corso è possibile combinare e trasmettere un numero illimitato di numeri tratti dalla rubrica telefonica.
¤ Aprire la rubrica telefonica con chiamata in corso
y o z, Selezionare una voce dall’elenco telefonico e
collegamento
collegamento
desiderato
trasmettere il numero
37
Page 38

Compiere telefonate
Impostare il volume del ricevitore
Il volume del ricevitore può essere aumentato o ridotto tramite interruttore a scorrimento presente a lato del ricevitore.
Regolare il volume mediante interruttore a
scorrimento
Visualizzazione della durata di conversazione
Durante lo svolgimento di una chiamata, la durata della telefonata è visualizzata in minuti e
secondi sul display.
Funzione vivavoce
Utilizzare questa funzione per ascoltare il partner di chiamata attraverso l’altoparlante.
Attivare la funzione vivavoce
Disattivare la funzione vivavoce
Regolare il volume del dispositivo vivavoce
: o ; Adeguare il volume
Volume di squillo
Il volume di squillo può essere impostato o disinserito tramite interruttore a scorrimento presente sul lato inferiore dell’apparecchio.
20
Regolare il volume mediante interruttore a
scorrimento
38
Page 39

Rubrica telefonica
5 Rubrica telefonica
La rubrica telefonica consente di memorizzare 32 numeri di chiamata con rispettivi nomi.
I numeri di chiamata dovranno essere immessi sempre con il rispettivo prefisso, cosa che
consente di assegnare anche ai numeri di chiamate urbane una delle voci dell’elenco
telefonico.
Con capacità di memoria esaurita, sul display è visualizzata l’indicazione
MEMORY FULL
nuovo spazio memoria, cancellare prima una voce già presente.
Le voci dell’elenco telefonico sono elencate in ordine alfabetico. Per poter saltare
direttamente alla voce dell’elenco telefonico desiderata, premere il tasto con la rispettiva
lettera iniziale.
Immissione di nomi
L’immissione di nomi è compiuta con i tasti numerici sui quali sono altresì riportate delle lettere. Premendo ripetutamente il rispettivo tasto, si ha modo di selezionare anche lettere maiuscole e cifre.
1 Spazio vuoto
C Cancellare
*, # o 0 Carattere speciale
y o z Muovere il cursore
Per immettere la stessa lettera una seconda volta, premere la rispettiva lettera. Atten-
dere fino a quando il cursore si sia spostato di una posizione. Immettere quindi la lettera una seconda volta.
Immettere voci nella rubrica telefonica
¤ Aprire la rubrica telefonica
SAVE ?
ë, Inserire il numero di chiamata e confermare
ë, Inserire il nome e confermare (max. 16 lettere)
Modificare voci nella rubrica telefonica
¤ Aprire la rubrica telefonica
y o z Selezionare una voce dalla rubrica telefonica
2 sec
ë, Modificare il numero di chiamata e confermare
ë, Modificare il nome e confermare
EDIT ?
Cancellare voci dalla rubrica telefonica
Cancellare una voce
¤ Aprire la rubrica telefonica
y o z Selezionare una voce dalla rubrica telefonica
DELETE ?
C
2 sec C Confermare la procedura di cancellazione
y o z Interrompere la procedura di cancellazione
dopo aver memorizzato l’ultimo messaggio. Per poter disporre di
21
, Avviare la procedura di memorizzazione e
confermare
(max. 22 cifre)
22
, Avviare la procedura di modifica e confermare
Attivare la procedura di cancellazione
oppure
39
Page 40

Rubrica telefonica
Cancellare tutte le voci
¤ Aprire la rubrica telefonica
y o z Selezionare una voce qualsiasi dalla rubrica
4 sec C
2 sec C Confermare la procedura di cancellazione
y o z Interrompere la procedura di cancellazione
Selezione diretta
È possibile memorizzare 1 numero di chiamata come numero di selezione diretta rispettivamente sui tasti ^ e _.
DELETE ALL ?
23
Memorizzare numeri di chiamata come numeri di selezione diretta
c Aprire l’elenco chiamate
STORE NUMBER
ë, Inserire il numero di chiamata e confermare
ë, Inserire il nome e confermare (max. 16 lettere)
LOCATION?
Selezione abbreviata
È possibile memorizzare 10 numeri di chiamata sui tasti numerici per compiere una selezione
abbreviata.
^ o _ Selezionare il tasto di selezione diretta
24
Memorizzare numeri di chiamata come numeri di selezione abbreviata
c Aprire l’elenco chiamate
STORE NUMBER
ë, Inserire il numero di chiamata e confermare
ë, Inserire il nome e confermare (max. 16 lettere)
LOCATION?
Non è consentito cancellare i numeri di chiamata memorizzati sui tasti di selezione di-
per es.: 1 Selezionare il tasto di selezione abbreviata
retta e abbreviata. Le vecchie voci sono invece sovrascritte in sede di memorizzazione con nuovi numeri di chiamata.
telefonica
Attivare la procedura di cancellazione
oppure
Avviare la procedura di memorizzazione
(max. 22 cifre)
Avviare la procedura di memorizzazione
(max. 22 cifre)
40
Page 41

Elenco chiamate
6 Elenco chiamate
All’interno dell’elenco chiamate è possibile memorizzare in tutto 32 numeri telefonici.
La visualizzazione del numero di chiamata è un servizio opzionale offerto dal proprio gestore di
rete telefonica. Il telefono indica infatti il numero di chiamata sul display solo se il gestore della
rete telefonica offre questa funzione. Per maggiori dettagli a riguardo, rivolgersi al proprio gestore di rete telefonica. In mancanza di disponibilità di tale servizio, le chiamate in arrivo non
sono visualizzate sul display.
Messaggi sul display:
NO NUMBER Il numero di chiamata è stato ricevuto solo in parte o non corretta-
OUT OF AREA /
LONG DISTANCE
PRIVATE Il chiamante ha disattivato la trasmissione del proprio numero di chia-
Visualizzare numeri di chiamata dall’elenco chiamate
c, y o z Aprire l’elenco chiamate e selezionare una voce
Due simboli differenti informano se il chiamante ha chiamato una volta sola o se invece ha
tentato di chiamare più volte.
Display Descrizione
NEW La voce nell’elenco chiamate è nuova.
Memorizzare il numero di chiamata dall’elenco chiamate nella rubrica telefonica
È possibile memorizzare un numero di chiamata direttamente dall’elenco chiamate nella rubrica telefonica.
c, y o z Aprire l’elenco chiamate e selezionare una voce
Avviare la procedura di memorizzazione
COPY NUMBER?
Il numero di chiamata è stato salvato nella rubrica telefonica senza indicazione di un nome. A
questo punto è quindi possibile inserire anche un nome da abbinare al numero di chiamata.
Modificare voci nella rubrica telefonica pagina 39
Non appena al numero di chiamata memorizzato nella rubrica telefonica è abbinato
un nome, nell’elenco chiamate appare in più anche il nome precedentemente inserito.
Cancellare numeri di chiamata dall’elenco chiamate
Cancellare singoli numeri di chiamata
c, y o z Aprire l’elenco chiamate e selezionare una voce
DELETE ?
C
2 sec C Confermare la procedura di cancellazione
y o z Interrompere la procedura di cancellazione
Cancellare tutti i numeri di chiamata
c, y o z Aprire l’elenco chiamate e selezionare una voce
4 sec C
2 sec C Confermare la procedura di cancellazione
y o z Interrompere la procedura di cancellazione
mente.
L’informazione relativa al numero di chiamata non è disponibile. Si
potrebbe anche trattare di una chiamata internazionale.
mata.
Il chiamante riportato nell’elenco chiamate ha chiamato più volte.
Confermare la procedura di memorizzazione
Attivare la procedura di cancellazione
oppure
DELETE ALL ?
Attivare la procedura di cancellazione
oppure
41
Page 42

Impianti telefonici interni / Servizi addizionali
7 Impianti telefonici interni / Servizi addizionali
Tasto R in impianti telefonici interni
Avendo collegato il telefono ad un impianto telefonico interno, il tasto R consente di accedere
a tutte le altre funzioni disponibili come per es. trasferimento di chiamata e funzione di richiamata automatica. Il rivenditore specializzato è in grado di indicare se il telefono acquistato funzionerà senza alcun problema nel proprio impianto telefonico interno.
Pausa di selezione
In presenza di impianti telefonici interni è necessario preselezionare un numero di accesso
alla rete esterna per ottenere un segnale di linea libera prima di poter compiere una telefonata. Alcuni impianti telefonici interni di vecchia data richiedono un intervallo di tempo di poco
superiore prima di trasmettere un segnale di libero. In particolare, proprio per questi impianti
telefonici interni è possibile prevedere, dopo aver inserito il numero di accesso alla rete
esterna, una pausa di selezione che consente di comporre il numero di chiamata desiderato
senza dover necessariamente attendere il segnale di libero.
£ Impostare una pausa di selezione
Dopo aver selezionato il numero di accesso alla rete esterna, il telefono attende ca. 3 secondi
prima di procedere alla selezione del numero di chiamata vero e proprio.
La pausa è anche programmabile in sede di immissione dei numeri di chiamata nella
rubrica telefonica.
Tasto R e servizi addizionali
Il telefono supporta servizi addizionali messi a disposizione dal proprio gestore di rete telefonica come per es. le funzioni di chiamata in attesa, avviso di chiamata e chiamata a conferenza. Con il tasto R è possibile accedere a questi servizi addizionali. Rivolgersi al proprio
gestore di rete telefonica per ottenere l’abilitazione ai servizi addizionali.
Visualizzazione del numero di chiamata (CLIP1)
A condizione che il collegamento telefonico disponga di questa funzione, l’apparecchio visualizza il numero telefonico del chiamante non appena il telefono squilla. Nel caso in cui il chiamante abbia soppresso la trasmissione del proprio numero di chiamata, appare un’apposita
indicazione. Se il numero di chiamata non è visualizzabile, questo non sarà memorizzato
nell’elenco chiamate.
La visualizzazione del numero di chiamata è un servizio opzionale offerto dal proprio
gestore di rete telefonica. Si consiglia di rivolgersi al proprio gestore di rete telefonica
per ricevere maggiori informazioni a riguardo.
42
1
CLIP: Calling Line Identification Presentation
Page 43

Informazioni importanti
8 Informazioni importanti
In presenza di problemi con il telefono, seguire le indicazioni riportate qui di seguito. Rivolgersi al proprio rivenditore in caso di problemi tecnici o di interventi nell’ambito della garanzia.
Il periodo di garanzia ricopre 2 anni.
In presenza di errori
Rimuovere tutti gli apparecchi telefonici addizionali e collegare solo il telefono direttamente
con la presa telefonica. Se il problema continuasse a presentarsi, collegare un altro telefono
alla presa telefonica. I risultati mostrano se l’errore riguarda l’apparecchio oppure la linea telefonica.
Consigli per la cura
Pulire le superfici degli apparecchi con un panno morbido e antipilling.
Non utilizzare mai detergenti o solventi.
Garanzia
Gli apparecchi SWITEL sono costruiti e collaudati in osservanza dei processi di produzione
più moderni. L’impiego di materiali selezionati e tecnologie altamente sviluppate sono garanti
di una perfetta funzionalità e lunga durata in vita. La garanzia non viene considerata esecutiva
qualora la causa del malfunzionamento dell’apparecchio è dovuta al gestore della rete telefonica oppure se questa è da attribuirsi ad un impianto telefonico interno interposto. La garanzia
non si estende a batterie, accumulatori o batterie ricaricabili utilizzati all’interno degli apparecchi. Il periodo di garanzia è di 24 mesi a partire dalla data di acquisto.
Entro il periodo di garanzia si procederà all’eliminazione gratuita di tutti i guasti dovuti a difetti
di materiale o produzione. Il diritto di garanzia cessa in caso di interventi da parte dell’acquirente o di terzi. La presente garanzia non ricopre danni dovuti all’uso o all’esercizio non conformi a quanto previsto, a montaggio o conservazione errati, a collegamento o installazione
impropri così come a forza maggiore o a qualsiasi altro influsso esterno. In qualità di produttore ci riserviamo il diritto, in caso di reclami, di riparare o sostituire le parti difettose o di rimpiazzare l’apparecchio. Parti sostituite o apparecchi rimpiazzati divengono di nostra proprietà.
Sono esclusi diritti di risarcimento per danni qualora non siano dovuti a intenzione o colpa
grave del costruttore.
Nel caso in cui il presente apparecchio dovesse ciò nonostante presentare un difetto durante il
periodo di garanzia, si prega di rivolgersi esclusivamente al negozio di rivendita dell’apparecchio SWITEL assieme al relativo scontrino di acquisto. In base a quanto riportato nelle presenti disposizioni, tutti i diritti di garanzia dovranno essere rivendicati nei confronti del rivenditore autorizzato. Decorso il termine di due anni dalla data di acquisto e consegna dei nostri
prodotti non sarà più possibile fare valere alcun diritto di garanzia.
Dichiarazione di conformità
Questo apparecchio risponde a quanto disposto dalla Direttiva UE:
1999/5/CE Direttiva concernente le apparecchiature radio, le apparecchiature
terminali di telecomunicazioni e il reciproco riconoscimento della loro conformità.
La conformità con la Direttiva di cui sopra viene confermata dal marchio CE
applicato sull’apparecchio.
43
Page 44

Indice alfabetico
9 Indice alfabetico
C
Cancellare numeri di chiamata dall’elenco chia-
mate, 41
Cancellare voci dalla rubrica telefonica, 39
Collegare il ricevitore, 33
Collegare il telefono, 33
Compiere telefonate, 36
Concatenare e trasmettere numeri, 37
Concludere una chiamata, 36
Consigli per la cura, 43
Contenuto della confezione, 33
D
Dichiarazione di conformità, 43
Durata di conversazione, 38
E
Elementi di comando, 35
Elenco chiamate, 41
F
Funzione vivavoce, 38
G
Garanzia, 43
I
Immettere voci nella rubrica telefonica, 39
Immissione di nomi, 39
Impianti telefonici interni, 42
Impostare data e ora, 34
Impostare il contrasto, 34
Impostare la lingua, 34
In presenza di errori, 43
Indicazioni di sicurezza, 32
Inserire le batterie, 33
M
Memorizzare il numero di chiamata dall’elenco
chiamate nella rubrica telefonica, 41
Mettere in funzione il telefono, 33
Modi di scrittura, 36
Modificare voci nella rubrica telefonica, 39
Montaggio a parete, 34
Montare il supporto da tavolo, 33
P
Pausa di selezione, 42
R
Rappresentazioni, 36
Ricevere una chiamata, 36
Ripetizione di selezione, 37
Riselezionare chiamate ricevute, 37
Rubrica telefonica, 39
S
Selezionare numeri dalla rubrica telefonica, 37
Selezione abbreviata, 37, 40
Selezione diretta, 37, 40
Servizi addizionali, 42
Simboli sul display, 36
T
Tasto R e servizi addizionali, 42
Tasto R in impianti telefonici interni, 42
Telefonare, 36
V
Visualizzare numeri di chiamata dall’elenco
chiamate, 41
Visualizzazione del numero di chiamata, 42
Volume del dispositivo vivavoce , 38
Volume del ricevitore, 38
Volume di squillo, 38
44
Page 45

25
Contents
1 Safety Information 46. . . . . . . . . . . . . . . . . . . . . . . . . .
2 Putting the Telephone into Operation 47. . . . . . . . . . . . .
3 Operating Elements 49. . . . . . . . . . . . . . . . . . . . . . . . .
4 Telephoning 50. . . . . . . . . . . . . . . . . . . . . . . . . . . . . .
5 Phone Book 53. . . . . . . . . . . . . . . . . . . . . . . . . . . . . .
6 Calls List 55. . . . . . . . . . . . . . . . . . . . . . . . . . . . . . . .
7 PABX / Supplementary Services 56. . . . . . . . . . . . . . . .
8 Important Information 57. . . . . . . . . . . . . . . . . . . . . . .
9 Index 58. . . . . . . . . . . . . . . . . . . . . . . . . . . . . . . . . . .
45
Page 46

Safety Information
1 Safety Information
Please read this operating instruction manual thoroughly.
Intended use
The telephone is suitable for telephoning within a public telephone network system. Any other
use is considered unintended use. Unauthorised modification or reconstruction is not permitted. Under no circumstances open the device or complete any repair work yourself.
Installation location
Prevent excessive exposure to smoke, dust, vibration, chemicals, moisture, heat and direct
sunlight.
Hearing aid compatible
The telephone is compatible with most popular hearing aids on the market. However, due to
the wide range of hearing aids available, there is no guarantee that the telephone will function
problem−free with every model.
Disposal
You are obliged to dispose of consumable goods properly in accordance with the applicable legal regulations. The adjacent symbol on the telephone indicates that electrical and electronic apparatus and batteries no longer required must be disposed of
separate from domestic waste.
Electrical and electronic devices must be disposed of at a suitable collection point
provided by the public waste authorities.
Powerpacks/Batteries must be disposed of at the point of sale or at the appropriate
collection points provided by the public waste authorities.
Packaging materials must be disposed of according to local regulations.
46
Page 47

Putting the Telephone into Operation
2 Putting the Telephone into Operation
Safety notes
Caution: It is essential to read the safety information in Chapter 1 before preparing
the telephone for use.
Checking the contents of the package
The package contains:
− a telephone − a receiver
− a telephone connection cable − a helix cable
− a tabletop support − an operating manual
− four batteries, type AAA
Connecting the receiver
Plug the short end of the helix cable in the socket at the bottom of the receiver. Then plug the
long end in the HANDSET jack. Feed the cable through the cable duct outwards.
Inserting the batteries
Insert the batteries before connecting the telephone to the telephone network. Always use
AAA Alkaline type batteries. The batteries are required for the caller number display, handsfree feature and other telephone functions.
Pay attention that the telephone is not connected to the telephone network when
26
inserting or changing the batteries.
Change the batteries when the icon appears in the display. All four batteries must then
be replaced so that the caller number display and handsfree feature work properly. When the
batteries are discharged, the display remains dark and the handsfree feature does not work.
Connecting the telephone
Connect the telephone connection cable enclosed to the telephone line socket and the LINE
jack on the underside of the telephone. Feed the cable through the cable duct either upwards
or downwards out of the telephone housing.
Mounting the tabletop support
If you want to have the telephone on a table, you must mount the tabletop support supplied. Insert the two top clips in the slots provided for them. Then latch the bottom clip in place. The
slots provided for the tabletop support are indicated on Page 49.
47
Page 48

Putting the Telephone into Operation
Wall installation
The telephone can also be installed on a wall. Use two screws to insert in the holding slots.
Drill two holes 67 mm apart vertically under each other, insert the screws and allow them to
project 5 mm from the wall. The tabletop support is not required for wall installation. Position
the slots in the telephone base over the screws, insert and slide the telephone down a little.
Caution: Ensure there are no cables or pipes in the wall where the hole is drilled.
In order that the receiver does not fall when placed on−hook, there is a small receiver clip in
the receiver cradle. Use a small screwdriver to turn the clip 180° until a small hook is created
at the top end. You can then place the receiver on−hook.
If the handsfree" function is not activated, you can hook the receiver on the telephone
without interrupting the connection. To do this, there is a hook provided above the
receiver cradle.
Basic settings
When the batteries have been inserted, you are requested to program some basic settings. Information on the methods of illustration and notation used in the operating manual is available
on Page 50.
Setting the language
y or z
e.g.:
Setting the contrast
y or z e.g.:
Setting the time and date
y or z e.g.:
y or z e.g.:
y or z e.g.:
y or z e.g.:
27
[ENGLISH]
If you want to change these settings at a later date, press and hold the y button
for 4 seconds.
, C Select the language and confirm
[4]
, C Select the contrast and confirm
[15]
, C Set the hour and confirm
[31]
, C Set the minute and confirm
[28]
, C Set the day’s date and confirm
[11]
, C Set the month and confirm
48
Page 49

Operating Elements
3 Operating Elements
Top side
1 Receiver hook
2 Hook clip for
wall installation (handsfree)
3 One−touch dialling key M1
4 Confirmation button
5 One−touch dialling key M2
6 Delete (Clear) button
7 Phone book
8 Scroll upwards
9 CLIP, calls list
10 LED New Call"
11 Scroll downwards
12 Quick dial button
13 Save button
14 R−button (Flash)
15 Redialling / Dialling pause
16 Microphone for handsfree mode
17 Handsfree volume +
18 Handsfree button
19 Handsfree volume −
Underside
1 Fixation slots for tabletop support
2 Slots for wall installation
3 Jack for helix cable, receiver
4 Jack for telephone cable
5 Battery compartment
6 Ringing volume"
sliding switch
1 2435678910
T36clip
12
6
1
11
12
13
14
15
16
171819
1
3
2
4
Receiver
1 Receiver volume" sliding switch
The buttons in this operating manual are depicted with a uniform contour. Variations in the
symbols on the telephone buttons compared to those depicted here are possible.
5
1
49
Page 50

Telephoning
4 Telephoning
Display and explanation of operation sequences
ë Enter digits or letters
* Press the button depicted briefly
2 sec * Press the button depicted for 2 seconds
Press and hold * Press and hold the button depicted
Release * Release the button depicted
{ì} Telephone rings
è Lift the receiver
é Replace the receiver on−hook
ENGLISH or Text or icon in the display
Icons in the display
Display Description
Replace the batteries. Page 47
The phone book is open. Page 53
CLIP The calls list is open. Page 55
The caller has called several times. Page 55
NEW The entry in the calls list is new. Page 55
16:33 Time display. Page 48
17/11 Date display. Page 48
Handsfree mode is activated. Page 52
Memory location number of the phone number in the calls list.
Taking a call
Ending a call
Making a call
50
{ì}, èor Take the call
éor End the call
ë Enter the phone number (max. 22 digits)
C Following incorrect input, press the button to
delete the last digit
èor Dial the phone number
You can also lift the receiver or press the Handsfree button first and wait for the dialling
tone. The digits in the phone number then entered are dialled immediately. It is not
possible to correct wrong digits individually using this dialling procedure.
Page 51

Telephoning
Redialling
Your telephone stores the last phone number dialled.
£ Open the redialling list
èor or Dial the number
Calling back calls received
The telephone stores the numbers of the last 32 calls received in a calls list.
c Open the calls list
y or z, Select an entry and dial the number
Dialling phone numbers from the phone book
There must be phone numbers stored in the phone book. Page 53
¤ Open the phone book
y or z, Select an entry and dial the number
The phone number is dialled and the phone automatically activates the Handsfree"
function. If you want to take the call with the receiver, simply lift the receiver from the
base.
One−touch dialling
There must be phone numbers stored as one−touch dialling numbers. Page 54
E.g.: ^ Press the required one−touch dialling button
èor or Dial the number
Two−touch dialling
Phone numbers must have been stored as two−touch dialling numbers. Page 54
, e.g.: 1 Select the required quick dial button
èor or Dial the number
Chain dialling
The function is used in more complex telephone services, e.g. for telephone banking, call−by−
call or calling card procedures. Several numbers stored in the phone book can be dialled
when a connection has already been made. It is also possible to combine numbers for transfer
from the phone book with numbers entered manually. Numbers stored in the phone book can
be chained and transmitted as required.
¤ Open the phone book when a connection has
y or z, Select the phone book entry and transmit the
been made
number
51
Page 52

Telephoning
Adjusting the receiver volume
The receiver volume can be adjusted to high or low by means of the sliding switch on the side
of the receiver.
Adjust the volume using the sliding switch
Talk time display
The duration of a call is displayed in minutes and seconds during the call.
Handsfree
Adjusting the handsfree volume
Ringing volume
28
Use this function to listen to the caller via the loudspeaker.
Switch on handsfree mode
Deactivate handsfree mode
: or ; Adjust the volume
The ringing volume can be adjusted or switched off by means of the sliding switch on the
underside of the telephone.
Adjust the volume using the sliding switch
52
Page 53

Phone Book
5 Phone Book
Thirty−two phone numbers can be stored in the phone book together with the associated names.
Always enter the area access code with the phone numbers so that the telephone can
also assign incoming local calls to a phone book entry.
When the memory capacity of the phone book is used up, the message
MEMORY FULL
space, an existing entry must first be deleted.
The phone book entries are arranged alphabetically. To skip to the required phone book
entry directly, enter the first letter of the corresponding entry.
Entering a name
The digit keys are also labelled with letters for the entry of the respective letters. Pressing the
respective key the necessary number of times enables capital letters and digits to be entered.
1 Space
C Delete
*, # or 0 Special character
y or z Move the cursor
To enter the same letter twice, press the button to enter the letter. Wait until the cursor
skips one place forward. Enter the letter again.
Creating phone book entries
¤ Open the phone book
SAVE ?
ë, Enter the phone number (max. 22 digits) and
ë, Enter the name (max. 16 letters) and confirm it
Editing entries in the phone book
¤ Open the phone book
y or z Select a phone book entry
2 sec EDIT ? , Initiate the editing process and confirm
ë, Change the phone number and confirm
ë, Change the name and confirm
Deleting entries from the phone book
Deleting a single entry
¤ Open the phone book
y or z Select a phone book entry
DELETE ?
C
2 sec C Confirm the deleting process
y or z Cancel the deleting process
appears when an attempt is made to store another number. To create
29
, Initiate the save process and confirm
confirm it
30
Activate the deleting process
or
53
Page 54

Phone Book
Delete all entries
¤ Open the phone book
y or z Select any phone book entry
4 sec C
2 sec C Confirm the deleting process
y or z Cancel the deleting process
One−touch dialling
You can assign one different phone number to each of the one−touch dialling buttons ^
and _.
Storing phone numbers as one−touch numbers
c Open the calls list
ë, Enter the phone number (max. 22 digits) and
ë, Enter the name (max. 16 letters)and confirm it
LOCATION?
Quick dialling
You can store 10 phone numbers on quick (two−touch) dialling buttons.
Storing phone numbers as quick dial numbers
c Open the calls list
ë, Enter the phone number (max. 22 digits) and
ë, Enter the name (max. 16 letters) and confirm it
LOCATION?
The phone numbers assigned to the one and two−touch dialling buttons cannot be
DELETE ALL ?
31
STORE NUMBER
^ or _ Select the one−touch dialling button
32
STORE NUMBER
e.g.: 1 Select the required quick dial button
deleted. Existing numbers are overwritten when new phone numbers are stored.
Activate the deleting process
or
Initiate the storing process
confirm it
Initiate the storing process
confirm it
54
Page 55

6 Calls List
A total of 32 phone numbers can be stored in a calls list.
The caller number display function is an optional service offered by telephone network pro-
viders. Your telephone will show the number in the display if your telephone network provider
offers this service. Please ask your telephone network provider for further information. If this
service is not available, incoming calls will not be shown in the display.
Messages in the Display:
NO NUMBER The number has only been partially or incorrectly received.
OUT OF AREA /
LONG DISTANCE
PRIVATE The caller has suppressed the transmission of his telephone number
Displaying phone numbers in the calls list
c, y or z Open the calls list and select an entry
Two different display messages indicate whether the caller has called once or several times.
Display Description
NEW The entry in the calls list is new.
Storing numbers from the calls list in the phone book
A phone number stored in the calls list can be transferred directly to the phone book.
c, y or z Open the calls list and select an entry
Start the storing process
COPY NUMBER?
The phone number is stored in the phone book without a name being assigned. Then enter a
name for the phone number. Editing entries in the phone book Page 53
When the number in the phone book is stored together with a name, the name entered
also appears in the calls list.
Deleting phone numbers from the calls list
Deleting phone numbers individually
c, y or z Open the calls list and select an entry
DELETE ?
C
2 sec C Confirm the deleting process
y or z Cancel the deleting process
Deleting all the phone numbers
c, y or z Open the calls list and select an entry
4 sec C
2 sec C Confirm the deleting process
y or z Cancel the deleting process
The particulars of the number are not available. This could have been
an international call.
or it was not possible to transmit the number.
The caller in the calls list has called several times.
Confirm the storing process
Activate the deleting process
or
DELETE ALL ?
Activate the deleting process
or
Calls List
55
Page 56

PABX / Supplementary Services
7 PABX / Supplementary Services
R button on private branch exchanges
If the telephone is connected to a private branch exchange, functions such as transferring calls
and automatic call back can be used via the R button. The dealer where you purchased the
exchange can provide information as to whether the telephone will work properly with the exchange.
Dialling pause
In the case of private branch exchanges, it is necessary to enter an access code to get an outside line with its corresponding dialling tone. When using some older private branch exchanges, it takes a little time before the dialling tone becomes audible. Particularly in the case
of such private branch exchanges, it is possible to insert a dialling pause after the number for
the outside line so that the number can be dialled in a continuous process without having to
wait for the dialling tone.
£ Insert a dialling pause
After dialling the number for the outside line, the telephone waits approx. 3 seconds before
dialling the actual phone number.
The pause can also be stored with the phone number in the phone book.
R button and supplementary services
Your telephone supports the supplementary services offered by your telephone network provider, such as brokering, call waiting and conference calls. The supplementary services can be
used in conjunction with the R button. Please contact the telephone network provider with regard to enabling the supplementary services.
Caller number display (CLIP1)
If this function is available with your telephone line, the number of the caller appears in the display when the phone rings. If the caller has suppressed transmission of his phone number, a
corresponding message appears in the display. The phone number is not displayed and, as a
result, is not stored in the calls list.
The caller number display function is an optional service offered by telephone net-
work providers. Contact your network provider for further information.
56
1
CLIP: Calling Line Identification Presentation
Page 57

Important Information
8 Important Information
Should problems arise with the telephone, please refer to the following information first. In the
case of technical problems or in the case of claims under the terms of guarantee, contact your
sales outlet. There is a 2 year period of guarantee.
Troubleshooting
Disconnect any additional telephones and only connect the problem phone to the telephone
socket. If the fault continues to occur, connect a different phone to the telephone socket. The
result will show if the fault is in the telephone unit or the cable.
Maintenance
Clean the housing surfaces with a soft, fluff−free cloth.
Never use cleaning agents or solvents.
Guarantee
SWITEL equipment is produced and tested according to the latest production methods. The
implementation of carefully chosen materials and highly developed technologies ensure trouble−free functioning and a long service life. The terms of guarantee do not apply where the
cause of equipment malfunction is the fault of the telephone network operator or any interposed private branch extension system. The terms of guarantee do not apply to the batteries or
power packs used in the products. The period of guarantee is 24 months from the date of purchase.
All deficiencies resulting from material or production faults which occur during the period of
guarantee will be eliminated free of charge. Rights to claims under the terms of guarantee are
annulled following intervention by the purchaser or third parties. Damage caused as a result of
improper handling or operation, incorrect positioning or storing, improper connection or installation, Acts of God or other external influence are not covered by the terms of guarantee. In
the case of complaints, we reserve the right to repair or replace defect parts or provide a replacement device. Replacement parts or devices become our property. Rights to compensation in
the case of damage are excluded where there is no evidence of intent or gross negligence by
the manufacturer.
If your equipment shows signs of defect during the period of guarantee, please return it to the
sales outlet in which you purchased the SWITEL equipment together with the purchase receipt. All rights to claims under the terms of guarantee in accordance with this agreement must
be asserted exclusively with regard to your sales outlet. Two years after the purchase and
transfer of our products, claims under the terms of guarantee can no longer be asserted.
Declaration of Conformity
This device fulfils the requirements stipulated in the EU directive:
1999/5/EU directive on radio equipment and telecommunications terminal equip-
ment and the mutual recognition of their conformity. Conformity with the above mentioned directive is confirmed by the CE symbol on the device.
57
Page 58

Index
9 Index
C
Caller number display, 56
Calling back calls received, 51
Calls list, 55
Chain dialling, 51
Connecting the receiver, 47
Connecting the telephone, 47
Creating phone book entries, 53
D
Declaration of Conformity, 57
Deleting entries from the phone book, 53
Deleting phone numbers from the calls list, 55
Dialling pause, 56
Dialling phone numbers from
the phone book, 51
Display, 50
Displaying phone numbers in the calls list, 55
E
Editing entries in the phone book, 53
Ending a call, 50
Entering a name, 53
Explanations, 50
G
Guarantee, 57
H
Handsfree, 52
Handsfree volume, 52
I
Icons in the display, 50
Inserting the batteries, 47
M
Maintenance, 57
Making a call, 50
Mounting the tabletop support, 47
O
One−touch dialling, 51
Operating elements, 49
P
Package contents, 47
Phone book, 53
Private branch exchanges, 56
Putting the telephone into operation, 47
Q
Quick dial, 54
R
R button and supplementary services, 56
R button on private branch exchanges, 56
Receiver volume, 52
Redialling, 51
Ringing volume, 52
S
Safety information, 46
Setting the contrast, 48
Setting the language, 48
Setting the time and date, 48
Storing numbers from the calls list in the phone
book, 55
Supplementary services, 56
T
Taking a call, 50
Talk time, 52
Telephoning, 50
Troubleshooting, 57
Two−touch dialling , 51
W
Wall installation, 48
58
Page 59

Index
59
Page 60

33Declaration of conformity
WE TELGO AG
OF Route d’Englisberg 17
CH−1763 Granges−Paccot
Declare under our own responsibility that the product
MODEL: T 36 Clip
DESCRIPTION: Corded telephone with handsfree function
Is in conformity with directives: R&TTE Directive (1999/5/EC)
COMPLIANCE IS ACHIEVED BY CONFORMITY TO THE FOLLOWING:
EN 55022:1998+A1+A2, EN 61000−3−2:2000, EN 61000−3−3:1995+A1, EN 55024:1998+A1+A2, EN
60950−1:2001, ETSI TS 103 021−1 v1.1.1 (2003−08), ETSI TS 103 021−2 v1.1.2 (2003−09), ETSI TS
103 201−3 v1.1.2 (2003−09), TBR 38:1998
TEST REPORT NUMBERS:
05272762 Dated: 23. DECEMBER 2005, ET−R0525186 Dated: 21. DECEMBER 2005, 0526617
Dated: 23. DECEMBER 2005
AUTHORISED BY:
Signed:
Name (printed): Selim Dusi
Position in company: Managing Director
Date of issue: 10.01.2006
Copies of this document will be held on file for a period of 10 years after the last production.
________________________
Supplier: TELGO AG, Route d’Englisberg 17
CH−1763 Granges−Paccot
Product: T 36 Clip
This product has been developed for use on an analogue telephone line (PSTN) within Germany.However, no guarantee can be accepted for trouble−free operation on all telecommunications terminalequipment connections due to the differences between the different telecommunications network
op−erators.
 Loading...