

Page 1
Babycom 268
Digital Baby Phone
Bedienungsanleitung
Istruzioni per l’uso
Instrukcja Obsługi
Mode d’emploi
User manual
Istrucciones
Page 2

Babycom 268
Willkommen bei Swissvoice
Nehmen Sie sich etwas Zeit, um diese Bedienungsanleitung aufmerksam
zu lesen und um die Funktionen Ihres Babycom 268 kennen und nutzen
zu lernen.
Sicherheitshinweise
- Dieses Produkt kann die verantwortungsbewusste elterliche Auf-
sicht nicht ersetzen.
- Dieser Baby-Monitor ist als Hilfe gedacht und eignet sich nicht zur
medizinischen Überwachung.
- Geräte und Kabel müssen sich immer ausserhalb der Reichweite von
Kindern befinden, niemals in das Babybett oder die Krabbelecke
legen!
- Stellen Sie das Gerät nicht in Bädern oder Duschräumen auf und
schützen Sie es vor Feuchtigkeit.
- Bei einem Spannungsausfall des öffentlichen Stromnetzes, wenn der
Adapter nicht eingesteckt ist oder bei leeren Batterien funktioniert das
Gerät nicht.
- Versuchen Sie nicht, die Antenne herauszuziehen oder das Gerät in
irgend einer Weise zu modifizier
en!
Inhaltsverzeichnis
Verpackungsinhalt . . . . . . . . . . . . . . . . . . . . . . . . . . . . . . . . . . . . . . . .2
Tasten und Anzeigen . . . . . . . . . . . . . . . . . . . . . . . . . . . . . . . . . . . . . .3
Tasten Babyeinheit . . . . . . . . . . . . . . . . . . . . . . . . . . . . . . . . . . . . . .3
Tasten Elterneinheit . . . . . . . . . . . . . . . . . . . . . . . . . . . . . . . . . . . . .3
Anzeigen . . . . . . . . . . . . . . . . . . . . . . . . . . . . . . . . . . . . . . . . . . . . . .4
Ihr Babycom 268 anschließen . . . . . . . . . . . . . . . . . . . . . . . . . . . . . . .4
Batterien einlegen (Eltern- und Babyeinheit) . . . . . . . . . . . . . . . . . .4
Page 3

Babycom 268
Hinweise zum Gebrauch von Akkus . . . . . . . . . . . . . . . . . . . . . . . . .4
Erstladung der Batterien / Adapter anschliessen . . . . . . . . . . . . . . .5
Ladeanzeigen . . . . . . . . . . . . . . . . . . . . . . . . . . . . . . . . . . . . . . . . . .6
Batterien aufladen . . . . . . . . . . . . . . . . . . . . . . . . . . . . . . . . . . . . . . .6
Test vor Inbetriebnahme . . . . . . . . . . . . . . . . . . . . . . . . . . . . . . . . . . .7
Sendeleistung der Babyeinheit / Empfangsleistung der
Elterneinheit testen . . . . . . . . . . . . . . . . . . . . . . . . . . . . . . . . . . . . . .7
Sendeleistung der Babyeinheit testen . . . . . . . . . . . . . . . . . . . . . . . .7
Empfangsleistung der Elterneinheit testen . . . . . . . . . . . . . . . . . . . .7
Einstellungen . . . . . . . . . . . . . . . . . . . . . . . . . . . . . . . . . . . . . . . . . . . .8
Lautstärke einstellen . . . . . . . . . . . . . . . . . . . . . . . . . . . . . . . . . . . . .8
CTCSS-Code einstellen . . . . . . . . . . . . . . . . . . . . . . . . . . . . . . . . . . .8
Sensibilität einstellen (nur Babyeinheit) . . . . . . . . . . . . . . . . . . . . . . .9
Tastensperre ein-ausschalten . . . . . . . . . . . . . . . . . . . . . . . . . . . . .10
Bedienung . . . . . . . . . . . . . . . . . . . . . . . . . . . . . . . . . . . . . . . . . . . . . .10
Alarm Ausser Reichweite (nur auf Elterneinheit) . . . . . . . . . . . . . . .10
Mit Babyeinheit sprechen (von Elterneinheit aus) . . . . . . . . . . . . . .10
Signalton senden . . . . . . . . . . . . . . . . . . . . . . . . . . . . . . . . . . . . . . .11
Störung und Selbsthilfe bei der Fehlersuche . . . . . . . . . . . . . . . . . .11
Anhang . . . . . . . . . . . . . . . . . . . . . . . . . . . . . . . . . . . . . . . . . . . . . . . .12
Pflege . . . . . . . . . . . . . . . . . . . . . . . . . . . . . . . . . . . . . . . . . . . . . . . .12
Entsorgungshinweis (Umweltschutz) . . . . . . . . . . . . . . . . . . . . . . . .13
Batterien-/Akku-Entsorgung . . . . . . . . . . . . . . . . . . . . . . . . . . . . . . .13
Garantiebestimmungen . . . . . . . . . . . . . . . . . . . . . . . . . . . . . . . . . .13
Zulassung und Konformität . . . . . . . . . . . . . . . . . . . . . . . . . . . . . . .14
1
Page 4
Babycom 268
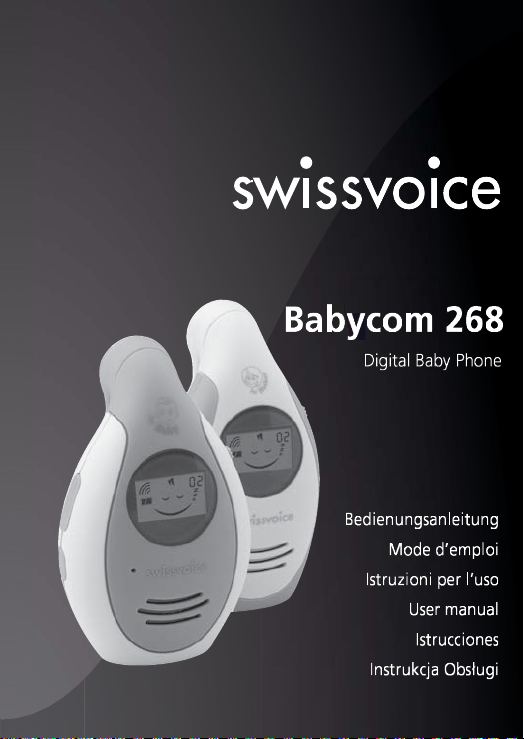
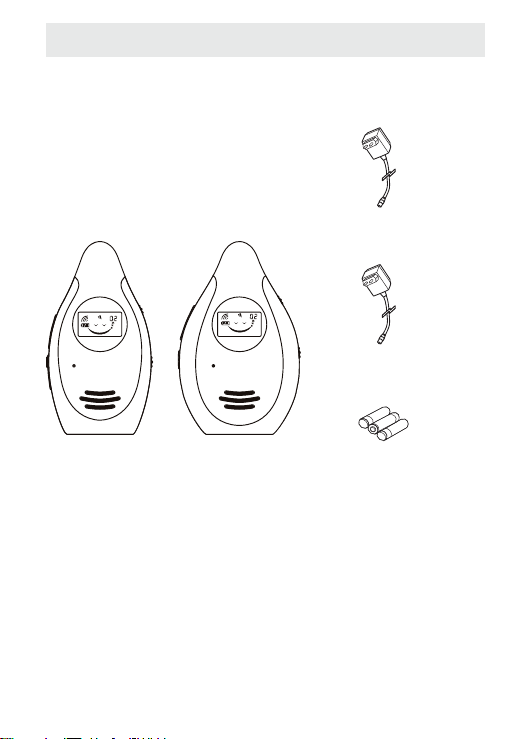
Verpackungsinhalt
AC Netzadapter
(für Elterneinheit)
AC Netzadapter
(für Babyeinheit)
Elterneinheit
2
Babyeinheit
Mitgelieferte wiederaufladbare Batterien (x 3)
Page 5

Tasten und Anzeigen
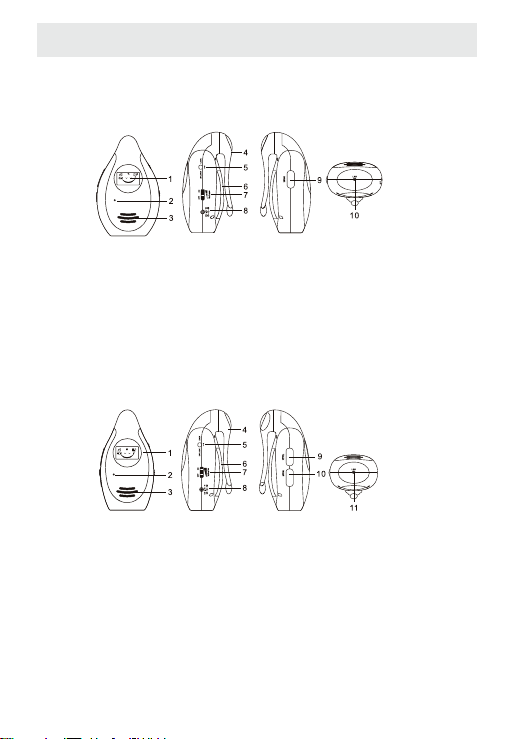
Tasten Babyeinheit
Babycom 268
1 LCD Anzeige
2 Mikrofon
3 Lautpsprecher
4 Gürtelclip
5 Tastensperre ein/aus
6 Batteriefach
Tasten Elterneinheit
1 LCD Anzeige
2 Mikrofon
3 Lautpsprecher
4 Gürtelclip
5 Tastensperre ein/aus
6 Batteriefach
7 ON/OFF / Lautstärkeregler
8 AC/DC-Anschlussbuchse
9 Taste PAGE
10 Taste LINK
7 ON/OFF / Lautstärkeregler
8 AC/DC-Anschlussbuchse
9 Taste TALK
10 Taste PAGE
11 Taste LINK
3
Page 6
Babycom 268
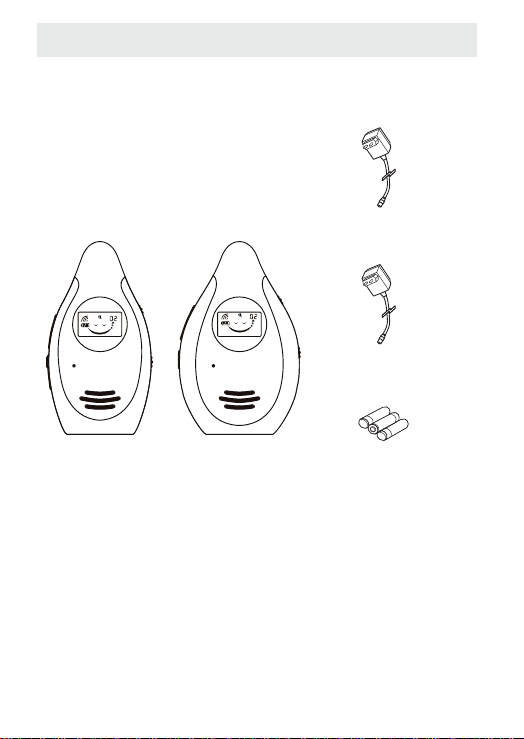
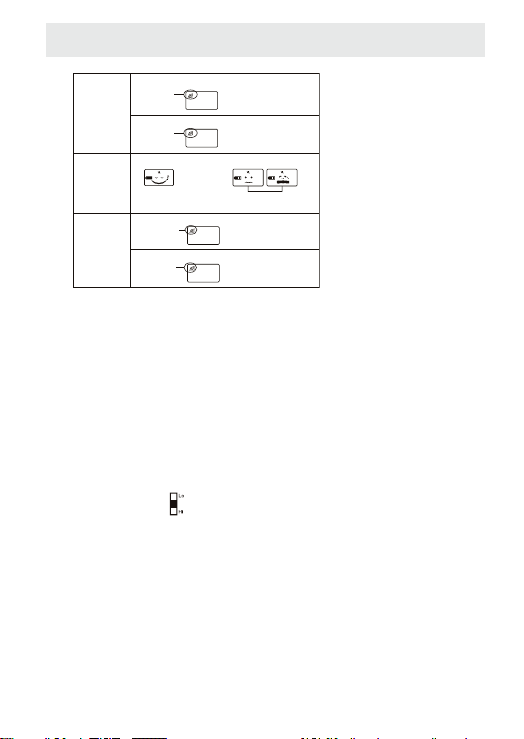
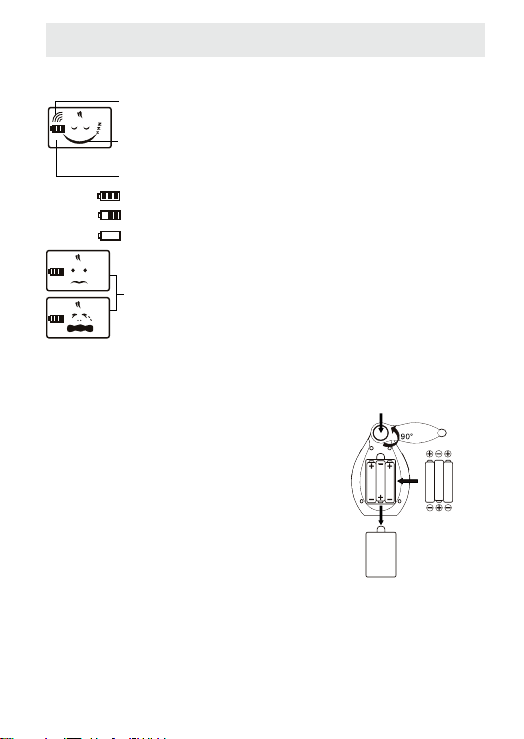
Anzeigen
Alarmsymbol Ausser Reichweite
Symbol Baby schläft: kein Signal / Standby-Betrieb
Symbol Ladezustand Batterien
Geladen
Fast leer: Sie müssen die Batterien aufladen
Leer (blinkende Anzeige): Sie müssen die Batterien aufladen
Symbol Baby ruft: die Anzeige wechselt ständig
Ihr Babycom 268 anschließen
Batterien einlegen (Eltern- und Babyeinheit)
- Das Gerät muss ausgeschaltet sein. Drücken Sie auf die Taste auf dem Gürtelclip
und drehen Sie ihn um 90° nach rechts
oder links.
- Öffnen Sie das Batteriefach.
- Legen Sie die mitgelieferten AAA Batterien
in das Gerät ein (Polarität beachten).
- Schliessen Sie das Batteriefach.
Hinweise zum Gebrauch von Akkus
Verwenden Sie nur die Original-Akkus (3 x NiMH, AAA, 1.2 V 600 mAh)
und die Original-Netzadapter (7.5 V DC, 600 mA) für Ihr Babycom 268.
4
Page 7

Babycom 268
Hinweis:
Der Einsatz anderer Akku-Typen oder von nicht wiederaufladbaren
Batterien / Primärzellen kann gefährlich sein und zusätzlich zu
Funktionsstörungen bzw. Beschädigungen des Gerätes führen. Die
Batterien nicht kurzschließen (gefährlich). Vermeiden Sie besonders
versehentliche Kurzschlüsse bei Lagerung und Transport durch z.
B. Schlüsselbund, Metallplatten oder Ähnliches und achten Sie
darauf, dass die Batterien nicht mit fetthaltigen Stoffen in Verbindung kommen. Batterien deshalb außerhalb des Gerätes nur in
isolierender Verpackung aufbewahren. Vermeiden Sie ebenso die
Berührung der Kontakte mit fettigen Teilen. Batterien werden
während des Aufladens warm; dies ist ein normaler und ungefährlicher Vorgang.
Erstladung der Batterien / Adapter anschliessen
- Bei Auslieferung des Gerätes sind die Batterien noch nicht geladen.
- Um die Batterien zu laden, stecken Sie die mitgelieferten Adapter in
die AC/DC-Anschlussbuchsen an der Eltern- und Babyeinheit.
- Stecken Sie die Adapter anschliessend in eine Stromsteckdose. Der
Ladevorgang beginnt. Die Ladezeit der Akkus beträgt ca. 8 Stunden
(erste Ladung).
Hinweis:
- Die mitgelieferten Adapter wurden speziell für dieses Gerät entwickelt.
Sie dürfen nicht für andere Geräte verwendet werden. Verwenden Sie
niemals andere Adapter für Ihr Babycom 268.
- Nicht wiederaufladbare Batterien dürfen nicht geladen werden.
- Wir empfehlen Ihnen die Geräte auszuschalten bevor Sie die Adapter
ein- oder ausstecken.
- Wenn die Geräte während längerer Zeit nicht in Gebrauch sind, stecken Sie die Adapter aus.
5
Page 8

Babycom 268
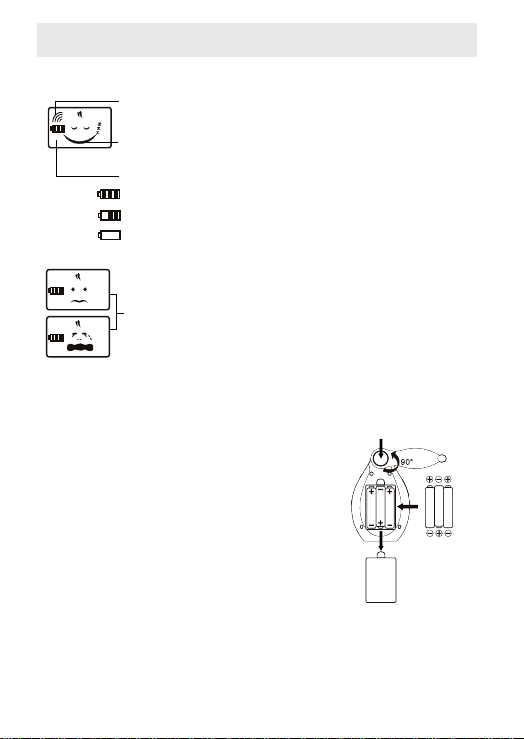
Ladeanzeigen
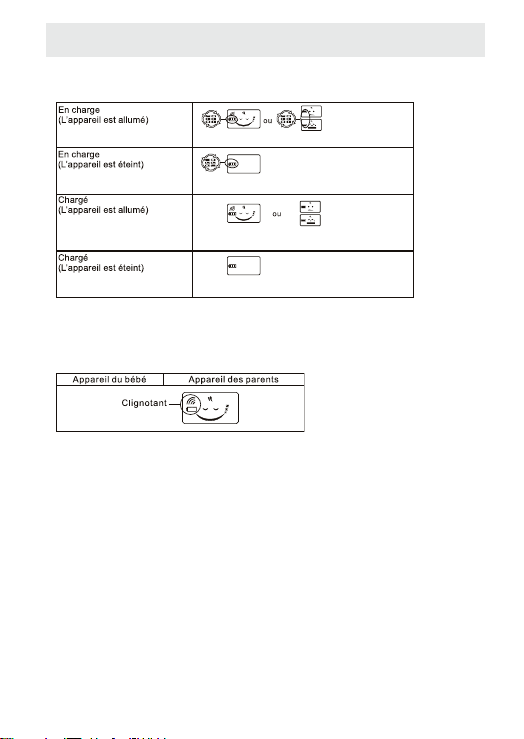
Ladevorgang
(Gerät ist eingeschaltet)
Ladevorgang
(Gerät ist ausgeschaltet)
Vollständig geladen
(Gerät ist eingeschaltet)
Vollständig geladen
(Gerät ist ausgeschaltet)
Das Batteriesymbol erscheint und blinkt.
Das Batteriesymbol erscheint und blinkt.
Das Batteriesymbol ist voll und hört auf zu blinken.
Das Batteriesymbol ist voll und hört auf zu blinken.
oder
oder
Batterien aufladen
Wenn die Batterien fast leer sind, zeigt das Display:
Babyeinheit
Sie müssen innerhalb der nächsten 5 Minuten die Batterien aufladen.
Nach diesem Zeitraum stellt das Gerät automatisch ab.
Hinweis:
- Nicht wiederaufladbare Batterien dürfen nicht aufgeladen werden.
- Entfernen Sie leere Batterien, sie könnten auslaufen und das Gerät
beschädigen.
- Auf der Babyeinheit ertönt kein Alarmton, wenn die Batterien leer sind!
Elterneinheit
blinkt
6
Page 9
Babycom 268
Test vor Inbetriebnahme
Sendeleistung der Babyeinheit / Empfangsleistung der
Elterneinheit testen
- Stellen Sie die Geräte in die Räume, in denen Sie sie betreiben
wollen.
- Schalten Sie die Geräte ein: Schieben Sie den Schalter ON/OFF auf
Position ON. Sie hören ein Klicken, das Gerät ist eingeschaltet.
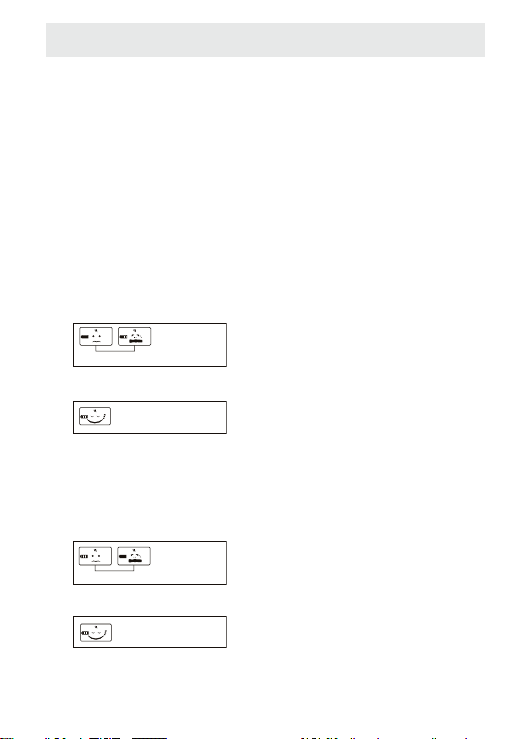
Sendeleistung der Babyeinheit testen
- Stellen Sie auf der Babyeinheit mit dem Sensibilitätsschalter die
gewünschte Empfindlichkeit ein.
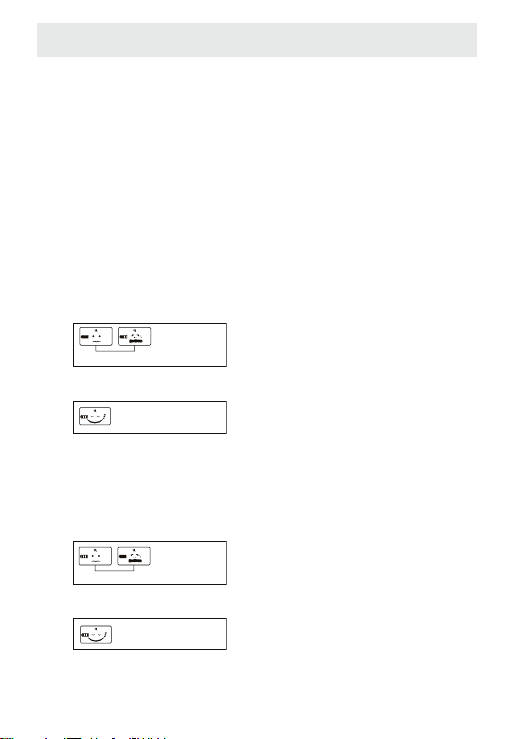
- Sobald die Babyeinheit ein Signal sendet, zeigt das Display:
Ständig wechselnde Displayanzeigen.
- Wenn die Babyeinheit auf Standby ist, zeigt das Display:
Empfangsleistung der Elterneinheit testen
- Stellen Sie auf der Elterneinheit mit dem Lautstärkeregler die
gewünschte Lautstärke ein. Die Elterneinheit ist bereit zum Empfang.
- Sobald die Elterneinheit ein Signal empfängt, zeigt das Display:
Ständig wechselnde Displayanzeigen.
- Wenn die Elterneinheit auf Standby ist, zeigt das Display:
7
Page 10

Babycom 268
Hinweis:
- Sollten störende Geräusche auf Grund von Interferenzen auf den
Geräten ertönen (Rauschen, Brummen) ändern Sie den CTCSS-Code
der Eltern- und Babyeinheit. Siehe Kapitel „CTCSS-Code einstellen“.
- Testen Sie den Empfang der Elterneinheit vor Gebrauch und jedes
Mal, wenn Sie die Babyeinheit umplatzieren.
- Stellen Sie die Babyeinheit mit mindestens 1 Meter Entfernung vom
Baby auf.
- Die maximale Reichweite zwischen Eltern- und Babyeinheit beträgt
300 Meter.
Einstellungen
Lautstärke einstellen
Stellen Sie mit dem Lautstärkeregler die gewünschte Lautstärke ein
(nach oben schieben = Lautstärke erhöhen / nach unten schieben = Lautstärke verringern).
CTCSS-Code einstellen
Für eine geschütztere Privatsphäre stehen Ihnen 65'000 CTCSS-Codes
zur Verfügung: Der Empfänger (Elterneinheit) schaltet sich nur ein, wenn
sie ein Signal vom eigenen Sender (Babyeinheit) empfängt. Es ist deshalb unerlässlich auf der Eltern- und der Babyeinheit denselben CTCSSCode einzustellen, damit die beiden Geräte kommunizieren können.
CTCSS-Code ändern:
- Versichern Sie sich, dass die Geräte eingeschaltet sind.
- Drücken Sie auf die Taste LINK auf der Unterseite der Geräte
(benutzen Sie dazu einen spitzen Gegenstand, z.B. Stift). Die Geräte
beginnen automatisch mit der Suche nach einem neuen gemeinsamen Code. Das Display zeigt:
8
Page 11
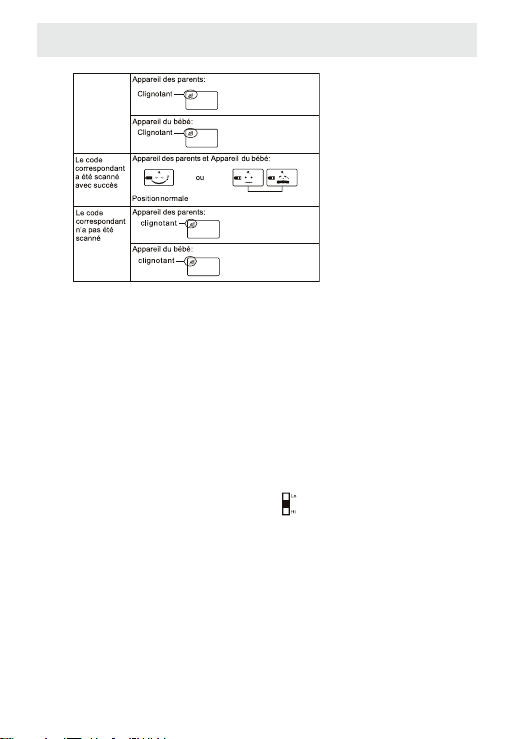
Babycom 268
Automatisches
Elterneinheit:
Scannen des
korrespondierenden
Codes
Der korrespondierende Code
wurde erfolgreich gescannt
Der korrespondierende Code
wurde nicht
erfolgreich
gescannt
Blinkt
Babyeinheit:
Blinkt
Babyeinheit und Elterneinheit:
Normalstatus
Elterneinheit:
Babyeinheit:
Blinkt
weiterhin
Blinkt
weiterhin
oder
ständig wechselnde
Displayanzeigen
Hinweis:
- Bei der ersten Inbetriebnahme brauchen Sie den CTCSS-Code nicht
einzustellen: Sobald Sie die Eltern-/Babyeinheit einschalten, suchen
die Geräte automatisch nach einem gemeinsamen Code.
- Wenn Sie die Adapter zur Stromversorgung benutzen, schliessen Sie
diese zuerst an, schalten Sie danach die Geräte ein und ändern Sie
erst danach den CTCSS-Code.
Sensibilität einstellen (nur Babyeinheit)
Stellen Sie das gewünschte Empfindlichkeitsniveau ein indem Sie den
schwarzen Schalter auf dem Batteriefach der Babyeinheit verschieben:
- nach oben: (Position HI) = hohe Empfindlichkeit (Geräusche in einem
Umkreis von 2-6 m werden empfangen)
- nach unten: (Position LO) = mittlere Empfindlichkeit (Geräusche in
einem Umkreis von 1-2 m werden empfangen).
9
Page 12
Babycom 268
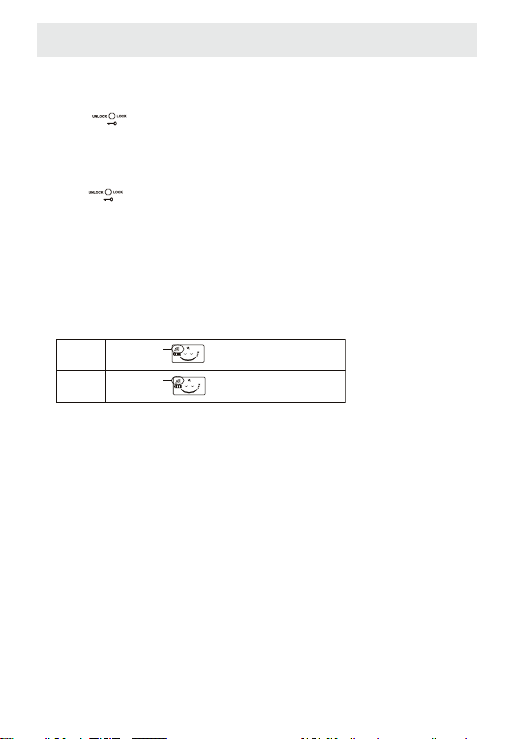
Tastensperre ein-ausschalten
Um die Tastensperre einzuschalten, stellen Sie den Schalter Tastensperre , der sich auf der rechten Seite des Gerätes befindet, auf
Position LOCK.
Um die Tastensperre auszuschalten, stellen Sie den Schalter Tastensperre , der sich auf der rechten Seite des Gerätes befindet, auf
Position UNLOCK.
Bedienung
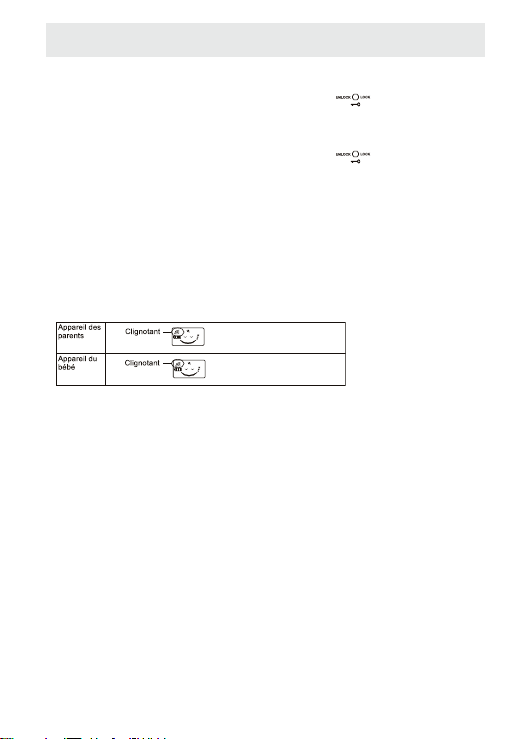
Alarm Ausser Reichweite (nur auf Elterneinheit)
Die maximale Reichweite zwischen Eltern- und Babyeinheit beträgt
ungefähr 300 Meter. Wird die Reichweite überschritten zeigt das Display:
Elterneinheit:
Babyeinheit:
Hinweis :
Wenn sich die Geräte ausser Reichweite befinden, funktionieren die
Tasten TALK und PAGE nicht.
Mit Babyeinheit sprechen (von Elterneinheit aus)
- Drücken Sie die Taste TALK auf der linken Seite der Elterneinheit.
Halten Sie die Taste gedrückt solange Sie ins Mikrofon sprechen.
- Lassen Sie die Taste TALK wieder los um zum normalen Empfangsbetrieb zurückzukehren.
Hinweis:
Solange die Taste TALK gedrückt wird, kann die Elterneinheit keine Signale von der Babyeinheit empfangen.
Blinkt
Blinkt
10
Page 13

Babycom 268
Signalton senden
Die beiden Geräte können einander einen Signalton senden:
- Drücken Sie die Taste PAGE auf der linken Seite der Eltern-/Babyeinheit um das andere Gerät zu rufen.
- Ein Klingelton ertönt auf dem gerufenen Gerät (3 Beeps)
Störung und Selbsthilfe bei der Fehlersuche
Nicht bei jeder Störung muss es sich um einen Defekt an Ihrem Babycom
268 handeln:
Keine Speisung
- Gerät ist ausgeschaltet. Schalten Sie es ein.
- Überprüfen Sie, dass die Batterien korrekt eingelegt sind.
- Wenn Sie die Adapter zur Stromversorgung benutzen, überprüfen Sie,
dass sie eingeschaltet und korrekt angeschlossen sind.
- Die Batterien sind leer. Laden Sie sie auf oder wechseln Sie sie aus.
Mit Babyeinheit sprechen funktioniert nicht
- Sensibilität auf Babyeinheit zu schwach. Erhöhen Sie sie.
- Geräte sind ausser Reichweite. Verringern Sie den Abstand zwischen
ihnen.
- Prüfen Sie, dass die Taste TALK nicht gedrückt ist.
- Prüfen Sie, dass die Tastensperre nicht eingeschaltet ist.
- Prüfen Sie, dass die Eltern- und Babyeinheit auf den gleichen
CTCSS-Code eingestellt sind.
Signalton senden funktioniert nicht
- Lautstärke auf Elterneinheit zu schwach. Erhöhen Sie die Lautstärke.
- Sensibilität auf Babyeinheit zu schwach. Erhöhen Sie sie.
- Geräte sind ausser Reichweite. Verringern Sie den Abstand zwischen
ihnen.
11
Page 14

Babycom 268
- Prüfen Sie, dass die Taste TALK nicht gedrückt ist.
- Prüfen Sie, dass die Tastensperre nicht eingeschaltet ist.
- Prüfen Sie, dass die Eltern- und Babyeinheit auf den gleichen
CTCSS-Code eingestellt sind.
Empfang von Unterhaltungen/Geräuschen aus der Nachbarschaft
- Signalstörung auf Grund eines anderen Babymonitors oder SchnurlosTelefons auf dem gleichen CTCSS-Code. Stellen Sie Eltern- und
Babyeinheit auf einen anderen CTCSS-Code ein.
Störende Geräusche ertönen (Rauschen, Brummen)
- Die Geräte sind zu nahe beieinander (weniger als 1 Meter Abstand).
Vergrössern Sie den Abstand zwischen Eltern- und Babyeinheit.
- Lautstärke auf Elterneinheit zu hoch. Verringern Sie die Lautstärke.
- Die Batterien sind leer. Laden Sie sie auf oder wechseln Sie sie aus.
Stromanzeige grün blinkt schnell, kein Senden/Empfangen
- Die Batterien sind leer. Laden Sie sie auf oder wechseln Sie sie aus.
Anhang
Pflege
Ihr Babycom 268 ist ein Produkt, das in Design und Ausführung hohen
Ansprüchen genügt. Es sollte daher mit Sorgfalt behandelt werden.
Zum Reinigen des Geräts wischen Sie das Gerät mit einem Antistatiktuch
oder einem etwas angefeuchteten weichen Ledertuch ab, anschliessend
mit einem trockenen Tuch.
12
Page 15
Babycom 268
Entsorgungshinweis (Umweltschutz)
Am Ende der Lebensdauer des Produkts darf das Gerät nicht
im normalen Hausmüll entsorgt werden. Bringen Sie es zu
einer Sammelstelle zur Aufbereitung elektrischer und elektronischer Geräte. Das Symbol am Produkt, in der Bedienungsanleitung und/oder Verpackung zeigt dies an.
Einige der Materialien des Produkts können wiederverwendet werden,
wenn Sie das Gerät in einer Aufbereitungsstelle abgeben. Mit der
Wiederverwertung einiger Teile oder Rohmaterialien aus gebrauchten
Produkten leisten Sie einen wichtigen Beitrag zum Umweltschutz.
Wenden Sie sich bitte an Ihre örtlichen Behörden, wenn Sie weitere
Informationen über Sammelstellen in Ihrer Umgebung benötigen.
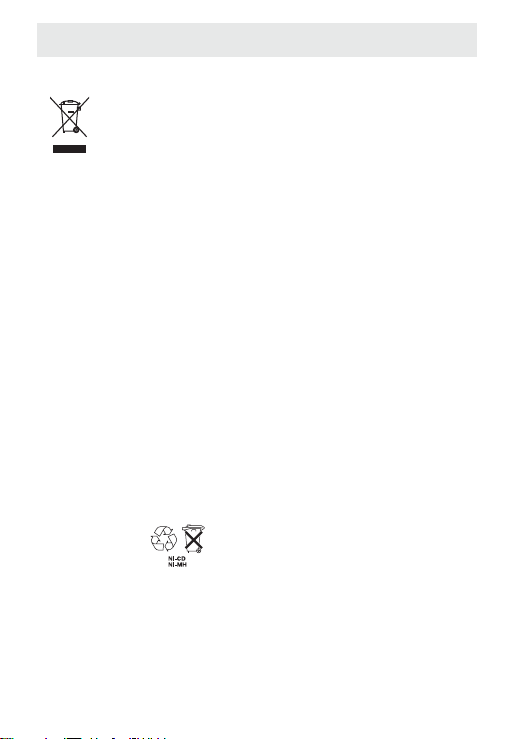
Batterien-/Akku-Entsorgung
Für alle verbrauchten Batterien und Akkus besteht eine gesetzliche Rückgabepflicht; sie dürfen nicht über den Hausmüll entsorgt werden. Entsorgen Sie die Batterien/ Akkus entsprechend den behördlichen Auflagen. Führen Sie sie der Wiederverwertung zu. Die Batterien/Akkus
werden recycelt, da sie z. B. Nickel - Cadmium (Ni - Cd), Blei (Pb),
Cadmium (Cd) oder QuecksiIber (Hg) enthalten können.
Die Batterien/Akkus sind mit Symbolen und ihrem Inhaltsstoff gekennzeichnet, z. B. :
Garantiebestimmungen
Auf Ihr Gerät wird Garantie ab Kaufdatum im Rahmen der gesetzlichen
Bestimmungen des Landes, in dem Sie Ihr Gerät gekauft haben,
gewährt. Zum Nachweis des Kaufdatums bewahren Sie bitte den
13
Page 16

Babycom 268
Kaufbeleg oder die durch die Verkaufsstelle komplett ausgefüllte Garantiekarte auf. Innerhalb der Garantiezeit werden unentgeltlich alle Mängel,
die auf Material- und Herstellungsfehlern beruhen, beseitigt. Die Garantieleistung erfolgt durch Reparatur oder Austausch des defekten Gerätes
nach Wahl des Lieferanten.
Von der Garantie ausgenommen sind Verbrauchsmaterialien (z. B.
Akkuzelle), Mängel, die den Wert oder Gebrauch des Gerätes nur
unerheblich beeinträchtigen, sowie Schäden, die auf unsachgemässen
Gebrauch, auf Verschleiss oder auf Eingriffe durch Dritte, zurückzuführen
sind. Eventuelle Folgeschäden, hervorgerufen durch die Nutzung, den
Ausfall oder Mängel des Produktes, insbesondere jede Haftung für Vermögensschäden sind von dieser Garantie ausgeschlossen.
Im Garantiefall wenden Sie sich bitte an die Verkaufsstelle, bei der Sie
das Gerät gekauft haben.
Zulassung und Konformität
Dieser Baby-Monitor entspricht den grundlegenden Anforderungen der
R&TTE Richtlinie 1999/5/EG über Funkanlagen und Telekommuni ka tions endeinrichtungen und ist geeignet zum Anschluss und Betrieb in
demjenigen Land, in welchem das Gerät verkauft wurde.
Die Konformitätserklärung ist auf folgender Webseite abrufbar:
www.swissvoice.net.
Die Konformität des Geräts mit der obgenannten Richtlinie
wird durch das CE-Zeichen bestätigt.
14
Page 17

Babycom 268
Bienvenue chez Swissvoice
Prenez le temps de lire attentivement le présent mode d’emploi et de
vous familiariser avec les fonctionnalités de votre Babycom 268.
Sécurité
- Ce produit ne peut remplacer la surveillance d’un adulte
responsable.
- Cet appareil de surveillance bébé est conçu comme une aide. Ne pas
l’utiliser comme un appareil de surveillance médical.
- Assurez-vous que le récepteur et le câble de l’adaptateur soient hors
de portée de l’enfant. Ne jamais mettre le récepteur à l’intérieur du
berceau ou du parc du bébé !
- Pour réduire le risque de choc électrique, ne pas exposer cet appareil
à la pluie ou à l’humidité.
- Votre Babycom 268 ne peut pas fonctionner si l’adaptateur secteur
n’est pas branché ou en cas de coupure de courant.
- Ne tirez pas sur les antennes et ne modifiez en aucun cas les
appareils !
Sommaire
Matériel livré . . . . . . . . . . . . . . . . . . . . . . . . . . . . . . . . . . . . . . . . . . .17
Touches et affichages . . . . . . . . . . . . . . . . . . . . . . . . . . . . . . . . . . . .18
Touches appareil bébé . . . . . . . . . . . . . . . . . . . . . . . . . . . . . . . . .18
Touches appareil parents . . . . . . . . . . . . . . . . . . . . . . . . . . . . . . . .18
Affichages . . . . . . . . . . . . . . . . . . . . . . . . . . . . . . . . . . . . . . . . . . . .19
Raccorder le Babycom 268 . . . . . . . . . . . . . . . . . . . . . . . . . . . . . . . .19
Mise en place des batteries (appareil parents / bébé) . . . . . . . . . .19
15
Page 18

Babycom 268
Informations sur l’utilisation des batteries . . . . . . . . . . . . . . . . . . . .19
Charger les batteries pour la première fois / Raccorder les
adaptateurs . . . . . . . . . . . . . . . . . . . . . . . . . . . . . . . . . . . . . . . . . . .20
Indications de charge . . . . . . . . . . . . . . . . . . . . . . . . . . . . . . . . . . .21
Recharge des batteries . . . . . . . . . . . . . . . . . . . . . . . . . . . . . . . . . .21
Test avant la première utilisation . . . . . . . . . . . . . . . . . . . . . . . . . . .22
Tester l’émission de l’appareil bébé et la réception de l’appareil
parents . . . . . . . . . . . . . . . . . . . . . . . . . . . . . . . . . . . . . . . . . . . . . . .22
Tester l’émission de l’appareil bébé . . . . . . . . . . . . . . . . . . . . . . . .22
Tester la réception de l’appareil parents . . . . . . . . . . . . . . . . . . . . .22
Configuration . . . . . . . . . . . . . . . . . . . . . . . . . . . . . . . . . . . . . . . . . . .23
Régler le volume . . . . . . . . . . . . . . . . . . . . . . . . . . . . . . . . . . . . . . .23
Régler les codes CTCSS . . . . . . . . . . . . . . . . . . . . . . . . . . . . . . . . .23
Régler la sensibilité (uniquement pour l’appareil bébé) . . . . . . . . .24
Verrouillage / déverrouillage des touches . . . . . . . . . . . . . . . . . . . .25
Fonctionnement . . . . . . . . . . . . . . . . . . . . . . . . . . . . . . . . . . . . . . . . .25
Alerte hors portée (uniquement sur l’appareil parents) . . . . . . . . . .25
Appeler l’appareil bébé avec l’appareil parents . . . . . . . . . . . . . . . .25
Mode message . . . . . . . . . . . . . . . . . . . . . . . . . . . . . . . . . . . . . . . .26
Aide à la recherche d’erreurs . . . . . . . . . . . . . . . . . . . . . . . . . . . . .26
Annexe . . . . . . . . . . . . . . . . . . . . . . . . . . . . . . . . . . . . . . . . . . . . . . . .27
Entretien . . . . . . . . . . . . . . . . . . . . . . . . . . . . . . . . . . . . . . . . . . . . .27
Elimination (protection de l’environnement) . . . . . . . . . . . . . . . . . .28
Elimination des batteries NiMH . . . . . . . . . . . . . . . . . . . . . . . . . . . .28
Garantie . . . . . . . . . . . . . . . . . . . . . . . . . . . . . . . . . . . . . . . . . . . . . .28
Homologation et conformité . . . . . . . . . . . . . . . . . . . . . . . . . . . . . . .29
16
Page 19
Matériel livré
Babycom 268
Adaptateur AC
(pour l’appareil parents)
Adaptateur AC
(pour l’appareil bébé)
Appareil parents
Appareil bébé
Batteries rechargeables
fournies (x 3)
17
Page 20
Babycom 268
Touches et affichages
Touches appareil bébé
1 Affichage LCD
2 Microphone
3 Haut-parleur
4 Clip ceinture
5 Verrouillage / Déverrouillage
6 Compartiment batteries
Touches appareil parents
1 Affichage LCD
2 Microphone
3 Haut-parleur
4 Clip ceinture
5 Verrouillage / Déverrouillage
6 Compartiment batteries
18
7 Interrupteur On / Off / Réglage volume
8 Prise AC/DC
9 Touche PAGE
10 Touche LINK
7 Interrupteur On / Off / Réglage volume
8 Prise AC/DC
9 Touche TALK
10 Touche PAGE
11 Touche LINK
Page 21
Babycom 268
Affichages
Icône d’alarme hors de portée
Icône “Bébé dort“ : (pas de signal /mode veille)
Icône des batteries:
Batteries pleines
Batteries presque vides, vous devez charger les batteries
Batteries vides (clignote), vous devez charger les batteries.
Icône “Bébé appelle“ : l'affichage change constamment
Raccorder le Babycom 268
Mise en place des batteries (appareil parents / bébé)
- Assurez-vous que l’appareil est éteint.
Pressez la touche sur le clip ceinture et
tournez-le de 90° dans un sens ou dans
l’autre.
- Ouvrez le compartiment des batteries.
- Insérez les batteries AAA fournies dans
l'appareil parents/bébé en respectant les
polarités.
- Refermez le compartiment des batteries.
Informations sur l’utilisation des batteries
N’utilisez que les batteries d’origine (3 x NiMH, AAA, 1.2 V 600 mAh)
ainsi que les adaptateurs secteur d’origine (7.5 V DC, 600 mA).
19
Page 22

Babycom 268
Nota :
L’utilisation d’autres types de batteries ou de batteries non rechargeables pourrait s’avérer dangereuse et perturber le fonction nement de l’appareil, voire l’endommager. Ne court-circuitez pas les
batteries (danger). Evitez en particulier les courts-circuits
accidentels lors du stockage ou du transport, pouvant être causés
par exemple par un trousseau de clés, des plaques métalliques ou
similaires et veillez à ce que les batteries n’entrent pas en contact
avec des matières grasses. Conservez de ce fait les batteries dans
un emballage isolant lorsqu'ils ne sont pas dans l'appareil. Evitez
également de toucher les contacts avec des objets gras. Les
batteries s’échauffent pendant la charge. Il s’agit là d’un
phénomène normal et sans danger.
Charger les batteries pour la première fois / Raccorder les
adaptateurs
- Les batteries ne sont pas chargées lorsque vous déballez l’appareil.
- Pour charger les batteries, branchez les adaptateurs AC fournis aux
prises AC/DC des appareils parents et bébé.
- Branchez-les ensuite sur une prise de courant. Le processus de
charge se met en route. La durée du premier cycle de charge est
d’environ 8 heures.
Nota :
- Les adaptateurs fournis ont été spécialement élaborés pour ce produit. Ils ne peuvent être utilisés pour d’autres appareils. Ne jamais
utiliser un adaptateur différent pour cet appareil de surveillance bébé.
- N’essayez pas de recharger des batteries non-rechargeables.
- Il est recommandé d’éteindre les appareils avant de brancher ou de
débrancher les adaptateurs.
- Si vous n’utilisez pas les appareils pendant un certain temps,
débranchez les adaptateurs de la prise de courant.
20
Page 23
Babycom 268
Indications de charge
L’icône de la batterie fait une boucle et clignote.
L’icône de la batterie fait une boucle et clignote.
L’icône de la batterie est plein et arrête de clignoter.
L’icône de la batterie est plein et arrête de clignoter.
Recharge des batteries
Lorsque le niveau des batteries faiblit, l’écran affiche :
Vous devez recharger les batteries dans les 5 minutes qui suivent. Après
ce délai, l’appareil s’éteint automatiquement.
Nota :
- N’essayez pas de recharger des batteries non-rechargeables.
- Enlevez les batteries usagées des appareils, elles pourraient couler et
les endommager.
- Sur l’appareil bébé aucune alerte batteries faibles n’est émise !
21
Page 24
Babycom 268
Test avant la première utilisation
Tester l’émission de l’appareil bébé et la réception de l’appareil parents
- Mettez les deux appareils (bébé et parents) dans la pièce où vous
devez les utiliser.
- Enclenchez les appareils en coulissant l’interrupteur On/Off sur la
position On. Vous entendez un clic indiquant que l’appareil est allumé.
Tester l’émission de l’appareil bébé
- Réglez la sensibilité désirée sur l’appareil bébé en utilisant
l’interrupteur de sensibilité.
- Dès que l’appareil bébé transmet un signal, l’écran affiche :
L'affichage change constamment.
- L’appareil est en veille si l’écran affiche :
Tester la réception de l’appareil parents
- Réglez le volume désiré sur l’appareil parents en utilisant l’interrupteur
VOLUME. L’appareil parents est prêt pour la réception.
- Dès que l’appareil parents reçoit un signal, l’écran affiche :
L'affichage change constamment.
- L’appareil est en veille si l’écran affiche :
22
Page 25

Babycom 268
Nota :
- S’il arrive que vous ayez des interférences (bourdonnements etc.),
changez le code CTCSS des deux appareils. Pour les détails, veuillez
vous reporter au chapitre « Régler les codes CTCSS ».
- Testez la réception du son sur l’appareil parents avant utilisation et
chaque fois que vous changez l’appareil bébé de place.
- Placez le transmetteur à au moins un mètre du bébé pour une transmission optimale du son.
- La portée de transmission entre émetteur (appareil bébé) et récepteur
(appareil parents) est de 300 mètres au maximum.
Configuration
Régler le volume
Faites coulisser l’interrupteur Réglage Volume jusqu’au niveau sonore
désiré (vers le haut pour augmenter le volume / vers le bas pour le
diminuer).
Régler les codes CTCSS
Vous disposez de 65'000 codes CTCSS pour une communication plus
privée : Le récepteur (l’appareil parents) s’enclenche uniquement s’il
reçoit un signal de son propre émetteur (appareil bébé). Il est donc indispensable que le même code CTCSS soit réglé sur les 2 appareils pour
qu’ils puissent communiquer entre eux.
Pour changer le code CTCSS :
- Assurez-vous que les appareils soient allumés.
- Appuyez sur la touche LINK se trouvant sous les appareil parents et
bébé (utilisez un objet pointu tel qu’un stylo). Les appareils
commencent automatiquement à rechercher un nouveau code
commun. L’écran affiche :
23
Page 26
Babycom 268
Recherche
automatique
du code
L'affichage change constamment
Nota :
- Lors de la première mise en service, pas besoin de régler le code
CTCSS : Lorsque vous allumez les appareils parents et bébé, ceux-ci
recherchent automatiquement un code commun.
- Si vous utilisez les appareils avec les adapateurs, branchez d’abord
les adaptateurs, enclenchez les unités et changez ensuite le code
CTCSS.
Régler la sensibilité (uniquement pour l’appareil bébé)
Réglez la sensibilité (niveau de détection des sons) de l’appareil bébé en
coulissant l’interrupteur sensibilité (noir) sur le compartiment des
batteries.
- position HI = sensibilité accrue (rayon de détection des sons 2 à 6
mètres)
- position LO = sensibilité moyenne (rayon de détection des sons 1 à 2
mètres)
24
Page 27
Babycom 268
Verrouillage / déverrouillage des touches
Mettez l’interrupter de verrouillage/déverrouillage situé sur le côté
droite de l’appareil sur la position LOCK pour verrouiller les touches.
Mettez l’interrupter de verrouillage/déverrouillage sur la position
UNLOCK pour déverrouiller les touches.
Fonctionnement
Alerte hors portée (uniquement sur l’appareil parents)
La portée de transmission entre émetteur (appareil bébé) et récepteur
(appareil parents) est de 300 mètres au maximum. Si la portée est
dépassée, les appareils affichent :
Nota :
Si les appareils sont hors portée, vous ne pouvez pas utiliser les touches
TALK et PAGE.
Appeler l’appareil bébé avec l’appareil parents
- Appuyez sur la touche TALK située sur le côté gauche de l’appareil
parents et tenez-la enfoncée pendant que vous parlez dans le
microphone.
- Relâchez la touche TALK pour revenir en mode réception.
Nota :
Tant que la touche TALK est enfoncée, l’appareil parents ne peut pas
recevoir de signaux de l’appareil bébé.
25
Page 28

Babycom 268
Mode message
L’un des appareils peut envoyer un signal d’appel à l’autre :
- Appuyez sur la touche PAGE située sur le côté gauche de l’appareil
parents et bébé pour appeler l’autre appareil.
- Un signal sonore est émis sur l’appareil appelé (3 bips).
Aide à la recherche d’erreurs
Une panne n’est pas forcément due à un défaut de votre Babycom 268 :
Pas d’alimentation
- L’appareil n’est pas allumé. Allumez-le.
- Vérifiez que les batteries soient correctement installées.
- Si vous utilisez les adaptateurs pour alimenter les appareils, vérifiez
que ceux-ci soient branchés correctement.
- Les batteries sont vides, rechargez ou changez-les.
Pas de message transmis
- Le niveau de sensibilité de l’appareil bébé est trop bas. Augmentez-le.
- Les appareils sont hors de portée. Rapprochez-les.
- Assurez-vous que la touche TALK ne soit pas enfoncée.
- Assurez-vous que les touches ne soient pas verrouillées.
- Assurez-vous que les deux appareils soient réglés sur le même code
CTCSS.
Pas de signal sonore
- Le niveau du volume de l’appareil parents est réglé trop bas.
Augmentez-le.
- Le niveau de sensibilité de l’appareil bébé est trop bas. Augmentez-le.
- Les appareils sont hors de portée. Rapprochez-les.
- Assurez-vous que la touche TALK ne soit pas enfoncée.
- Assurez-vous que les touches ne soient pas verrouillées.
26
Page 29

Babycom 268
- Assurez-vous que les deux appareils soient réglés sur le même code
CTCSS.
Conversations/bruits en provenance d’un voisin
- Signaux d’interférence, un autre appareil de surveillance bébé ou un
téléphone sans fil dans les environs est réglé sur le même code
CTCSS. Modifiez le réglage sur vos appareils.
Parasites et autres bruits gênants
- Les 2 appareils (parents/bébé) sont placés trop près l’un de l’autre (à
moins d’un mètre de distance). Eloignez-les.
- Le volume sur l’appareil parents est trop fort. Baissez-le.
- Les batteries sont vides, rechargez ou changez-les.
Le voyant de marche clignote rapidement en vert, aucune transmission/émission
- Batteries épuisées, rechargez ou changez-les.
Annexe
Entretien
Votre appareil de surveillance pour bébé est un produit répondant à de
hautes exigences en matière de design et de fabrication, raison pour
laquelle il convient de le traiter avec soin.
Pour nettoyer l'appareil, frottez d’abord l’appareil avec un chiffon antistatique ou une peau de chamois légèrement humide puis séchez-le
avec un chiffon sec.
27
Page 30
Babycom 268
Elimination (protection de l’environnement)
A la fin de sa durée de vie, l'appareil ne doit pas être éliminé
avec les déchets ménagers. Apportez-le à un point de collecte
pour le traitement des appareils électriques et électroniques.
Le symbole figurant sur le produit, dans le mode d’emploi et/ou
Lorsque l'appareil est déposé dans un centre de traitement, certains de
ses matériaux peuvent être recyclés. Par la réutilisation de certains éléments ou matériaux bruts des produits usagés, vous contribuez de
manière essentielle à la protection de l’environnement.
Veuillez vous adressez aux autorités locales dont vous dépendez pour
tout complément d’information sur les points de collecte près de chez
vous.
l’emballage indique ces conditions d’élimination.
Elimination des batteries NiMH
La loi impose la collecte spécifique des piles et batteries usagés. Ils ne
peuvent être éliminés avec les ordures ménagères. Pour éliminer les
batteries/accumulateurs conformez-vous aux prescriptions en vigueur
localement. Amenez-les au recyclage.
Les batteries/accumulateurs sont recyclés parce qu’ils peuvent contenir
du nickel-cadmium (Ni-Cd), du plomb (Cd), du cadmium (Cd) ou du
mercure (Hg).
Les matériaux des batteries / accumulateurs sont signalés par des symboles, Exemple :
Garantie
Votre appareil bénéficie, à partir de sa date d’acquisition, d’une garantie
conforme aux dispositions légales en vigueur dans le pays dans lequel
vous l’avez acheté.
28
Page 31

Babycom 268
Pour pouvoir prouver la date d’acquisition de votre appareil, veuillez donc
conserver précieusement votre ticket de caisse ou la carte de garantie
qui aura été dûment remplie par le responsable de votre point de vente.
Pendant la durée de validité de la garantie, tous les défauts de
fabrication ou qui auront été constatés sur le matériel seront éliminés
gratuitement.
Cette prestation de garantie prendra la forme soit d’une réparation, soit
d’un échange standard de l’appareil défectueux, au choix du fournisseur.
Sont exclus de la garantie les consommables (par exemples la batterie),
les défauts réduisant de manière insignifiante la valeur ou l’utilisation de
l’appareil ainsi que les dommages causés par une utilisation non
conforme de l’appareil, l’usure ou l’intervention d’un tiers.
Les éventuels dommages découlant de l’utilisation, de la défaillance ou
d’un défaut du produit et notamment toute responsabilité pour dommages
pécuniaires sont expressément exclus de la présente garantie.
Pour toute prétention à garantie, veuillez vous adresser au point de vente
auprès duquel vous avez acheté votre appareil de surveillance pour
bébé.
Homologation et conformité
Cet appareil de surveillance pour bébé est conforme aux exigences fondamentales de la Directive R&TTE 1999/5/CEE concernant les
équipements hertziens et les équipements terminaux de
télécommunications et est destiné au raccordement et au fonctionnement
dans le pays dans lequel il a été commercialisé.
La déclaration de conformité peut être consultée sur le site suivant:
www.swissvoice.net.
La conformité de l'appareil à la directive mentionnée cidessus est attestée par la marque CE sur l'appareil.
29
Page 32

Babycom 268
Benvenuti da Swissvoice
Prendetevi il tempo di leggere attentamente le presenti istruzioni per
scoprire e imparare a usare le funzioni di questo apparecchio.
Avvertenze di sicurezza
- Questo prodotto non supplice a un controllo responsabile da
parte dei genitori.
- Il baby monitor è inteso come aiuto e non si presta per la sorveglianza
in ambito medico.
- Gli apparecchi e i c
bambini e non devono mai essere messi nel lettino o nel box!
- Non collocare l'apparecchio in stanze da bagno o locali doc
teggerlo dall'umidità.
- In caso di caduta di tensione sulla rete elettrica, adattatore non
inserito nella presa o pile scariche l'
- Non tentare di estrarre l'antenna o di modificare in qualsiasi modo l'apparecchio!
avi vanno sempre tenuti fuori dalla portata dei
cia e pro-
apparecchio non funziona.
Sommario
Contenuto dell'imballaggio . . . . . . . . . . . . . . . . . . . . . . . . . . . . . . . .32
Tasti e visualizzazioni . . . . . . . . . . . . . . . . . . . . . . . . . . . . . . . . . . . .33
Tasti unità bebè . . . . . . . . . . . . . . . . . . . . . . . . . . . . . . . . . . . . . . .33
Tasti unità genitori . . . . . . . . . . . . . . . . . . . . . . . . . . . . . . . . . . . . . .33
Visualizzazioni . . . . . . . . . . . . . . . . . . . . . . . . . . . . . . . . . . . . . . . . .34
Predisporre il Babycom 268 . . . . . . . . . . . . . . . . . . . . . . . . . . . . . . .34
Introdurre le pile (unità genitori e unità bebè) . . . . . . . . . . . . . . . . .34
Page 33

Babycom 268
Indicazioni sull'uso di accumulatori . . . . . . . . . . . . . . . . . . . . . . . . .34
Prima carica delle pile / Collegare l'adattatore . . . . . . . . . . . . . . . .35
Stato di carica . . . . . . . . . . . . . . . . . . . . . . . . . . . . . . . . . . . . . . . . .36
Ricaricare le pile . . . . . . . . . . . . . . . . . . . . . . . . . . . . . . . . . . . . . . .36
Test preliminare . . . . . . . . . . . . . . . . . . . . . . . . . . . . . . . . . . . . . . . . .37
Testare la trasmissione dell'unità bebè / la ricezione
dell'unità genitori . . . . . . . . . . . . . . . . . . . . . . . . . . . . . . . . . . . . . . .37
Testare la trasmissione dell'unità bebè . . . . . . . . . . . . . . . . . . . . . .37
Testare la ricezione dell'unità genitori . . . . . . . . . . . . . . . . . . . . . . .37
Impostazioni . . . . . . . . . . . . . . . . . . . . . . . . . . . . . . . . . . . . . . . . . . . .38
Regolare il volume . . . . . . . . . . . . . . . . . . . . . . . . . . . . . . . . . . . . . .38
Impostare il codice CTCSS . . . . . . . . . . . . . . . . . . . . . . . . . . . . . . .38
Regolare la sensibilità (solo unità bebè) . . . . . . . . . . . . . . . . . . . . .39
Attivare/Disattivare il blocco tasti . . . . . . . . . . . . . . . . . . . . . . . . . . .40
Modo d'uso . . . . . . . . . . . . . . . . . . . . . . . . . . . . . . . . . . . . . . . . . . . . .40
Allarme fuori portata (solo unità genitori) . . . . . . . . . . . . . . . . . . . .40
Parlare con l'unità bebè (a partire dall'unità genitori) . . . . . . . . . . .40
Inviare un segnale acustico . . . . . . . . . . . . . . . . . . . . . . . . . . . . . . .41
Come intervenire personalmente in caso di anomalie ed errori . . .41
Appendice . . . . . . . . . . . . . . . . . . . . . . . . . . . . . . . . . . . . . . . . . . . . . .42
Cura . . . . . . . . . . . . . . . . . . . . . . . . . . . . . . . . . . . . . . . . . . . . . . . . .42
Avvertenze per lo smaltimento (Salvaguardia dell’ambiente) . . . . .43
Smaltimento di batterie ed accumulatori . . . . . . . . . . . . . . . . . . . . .43
Garanzia . . . . . . . . . . . . . . . . . . . . . . . . . . . . . . . . . . . . . . . . . . . . .43
Omologazione e conformità . . . . . . . . . . . . . . . . . . . . . . . . . . . . . . .44
31
Page 34

Babycom 268
Contenuto dell'imballaggio
Adattatore AC
(per unità genitori)
Adattatore AC
(per unità bebè)
Unità genitori
32
Unità bebè
Pile ricaricabili in
dotazione (3 x)
Page 35

Tasti e visualizzazioni
Tasti unità bebè
Babycom 268
1 Display LCD
2 Microfono
3 Altoparlante
4 Clip da cintura
5 Blocco tasti on/off
6 Vano pile
Tasti unità genitori
1 Display LCD
2 Microfono
3 Altoparlante
4 Clip da cintura
5 Blocco tasti on/off
6 Vano pile
7 Interruttore ON/OFF / Regolatore di
volume
8 Presa AC/DC
9 Tasto PAGE
10 Tasto LINK
7 Interruttore ON/OFF / Regolatore di
volume
8 Presa AC/DC
9 Tasto TALK
10 Tasto PAGE
11 Tasto LINK
33
Page 36

Babycom 268
Visualizzazioni
Simbolo di allarme fuori portata
Simbolo "Bebè dorme": nessun segnale / standby
Simbolo "Stato di carica pile"
Pile cariche
Pile quasi scariche: è necessario caricare le pile
pile scariche (lampeggiante): è necessario caricare le pile
Simbolo "Bebè chiama": il display cambia continuamente
Predisporre il Babycom 268
Introdurre le pile (unità genitori e unità bebè)
- L'apparecchio deve essere spento.
Premere il tasto sul clip da cintura ruotare
quest'ultimo di 90° verso destra o verso
sinistra.
- Aprire il vano pile.
- Introdurre le pile AAA in dotazione (osservare la polarità).
- Chiudere il vano pile.
Indicazioni sull'uso di accumulatori
Utilizzare esclusivamente le pile ricaricabili originali (3 x NiMH, AAA,
1.2 V 600 mAh) e l'adattatore di rete originale (7.5 V DC, 600 mA).
34
Page 37

Babycom 268
Avvertenze
L'uso di altri tipi di accumulatore e di pile normali non ricaricabili
può essere pericoloso e compromettere il funzionamento o
danneggiare l'apparecchio. Non cortocircuitare le pile (è
pericoloso). Evitare in particolare cortocircuiti accidentali durante lo
stoccaggio e il trasporto causati p.e. da mazzi di chiavi, placche di
metallo o simili ed evitare che le pile entrino in contatto con
sostanze grasse. Le pile non inserite nell'apparecchio vanno conservate in un imballaggio isolante. Evitare anche di toccare i
contatti con oggetti grassi. Durante la ricarica, le pile si riscaldano;
si tratta di un fenomeno normale e assolutamente non pericoloso.
Prima carica delle pile / Collegare l'adattatore
- Al momento della consegna, le pile sono scariche.
- Per caricare le pile, collegare gli adattatori in dotazione alle rispettive
prese AC/DC dell'unità genitori e dell'unità bebè.
- Inserire infine gli adattatori in una presa elettrica. Il processo di carica
inizia. Il tempo di carica degli accumulatori è di circa 8 ore (prima
carica).
Avvertenze
- Gli adattatori in dotazione sono stati sviluppati specificamente per
questo prodotto. Non devono essere utilizzati per agli apparecchi. Non
utilizzare mai altri adattatori per il Babycom 268.
- Le pile non ricaricabili non possono essere ricaricate.
- Si raccomanda di spegnere gli apparecchi prima di collegare o
staccare gli adattatori.
- Se gli apparecchi non vengono utilizzati per un lungo periodo,
staccare gli adattatori dalla presa elettrica.
35
Page 38

Babycom 268
Stato di carica
In carica
(unità accesa)
In carica
(unità spenta)
Pile cariche
(unità accesa)
Pile cariche
(unità spenta)
Il simbolo della batteria lampeggia.
Il simbolo della batteria lampeggia.
Il simbolo della batteria è pieno e non lampeggia più
Il simbolo della batteria è pieno e non lampeggia più
oppure
oppure
Ricaricare le pile
Quando le pile sono quasi scariche sul display appare:
Unità bebè
Le pile devono essere messe in ricarica nei successivi 5 minuti. In caso
contrario l'apparecchio si spegne automaticamente.
Avvertenze
- Le pile non ricaricabili non possono essere ricaricate.
- Rimuovere le pile scariche; l'eventuale fuoriuscita di liquido potrebbe
danneggiare l'apparecchio.
- L'unità bebè non emette alcun segnale acustico in caso di pile quasi
scariche!
Unità genitori
Lampeggiante
36
Page 39

Babycom 268
Test preliminare
Testare la trasmissione dell'unità bebè / la ricezione
dell'unità genitori
- Collocare gli apparecchi nei locali in cui si desidera utilizzarli.
- Accendere gli apparecchi portando l'interruttore ON/OFF sulla
posizione ON. Uno scatto segnala che l'apparecchio è accesso.
Testare la trasmissione dell'unità bebè
- Regolare il livello rumore desiderato con il commutatore di sensibilità.
- Non appena l'unità bebè invia un segnale, sul display appare:
Display cambia continuamente.
- Quando l'unità bebè è in standby, sul display appare:
Testare la ricezione dell'unità genitori
- Impostare il livello di volume desiderato con il regolatore di volume.
L'unità genitori è pronta a ricevere.
- Non appena l'unità genitori riceve un segnale, sul display appare:
Display cambia continuamente.
- Quando l'unità genitori è in standby, sul display appare:
37
Page 40

Babycom 268
Avvertenze
- Se gli apparecchi emettono rumori fastidiosi (fruscii, ronzii) causati da
interferenze, modificare il codice CTCSS sull'unità genitori e sull'unità
bebè. Vedi capitolo "Impostare il codice CTCSS".
- Testare la ricezione dell'unità genitori prima dell'uso e ogni volta che si
sposta l'unità bebè.
- Collocare l'unità bebè ad almeno 1 metro di distanza dal bebè.
- La portata massima tra l'unità genitori e l'unità bebè è di 300 metri.
Impostazioni
Regolare il volume
Impostare il livello di volume desiderato con il regolatore di volume (spostarlo verso l'alto = aumentare il volume / spostarlo verso il basso =
ridurre il volume).
Impostare il codice CTCSS
Per una maggiore protezione della sfera privata, sono disponibili 65'000
codici CTCSS: il ricevitore (unità genitori) si accende soltanto quando
riceve un segnale dal proprio emettitore (unità bebè). È perciò indispensabile impostare lo stesso codice CTCSS sull'unità genitori e
sull'unità bebè affinché gli apparecchi possano comunicare tra loro.
Modificare il codice CTCSS
- Accertarsi che gli apparecchi siano accesi.
- Premere il tasto LINK sul lato inferiore degli apparecchi (utilizzare un
oggetto appuntito, p.e. una penna a sfera). Gli apparecchi iniziano
automaticamente a cercare un nuovo codice comune. Sul display
appare:
38
Page 41

Babycom 268
Ricerca
Unità genitori :
automatica
del codice
Codice trovato
Codice non è
stato trovato
Lampeggiante
Unità bebè :
Lampeggiante
Unità bebè e genitori :
oppure
Modalità normale
Unità genitori :
Lampeggiante
U
nità bebè :
Lampeggiante
Display cambia
continuamente
Avvertenze
- Alla prima messa in funzione non occorre impostare il codice CTCSS:
quando si accendono gli apparecchi, questi iniziano automaticamente
a cercare un codice comune.
- Se gli adattatori vengono utilizzati per alimentare gli apparecchi,
collegare dapprima gli adattatori, inserirli in una presa elettrica,
accendere gli apparecchi e modificare il codice CTCSS.
Regolare la sensibilità (solo unità bebè)
Impostare la sensibilità desiderata spostando il commutatore nero che
si trova sul vano pile dell'unità bebè:
- verso l'alto: (posizione HI) = sensibilità alta (i rumori vengono captati in
un raggio di 2-6 m);
- verso il basso: (posizione LO) = sensibilità media (i rumori vengono
captati in un raggio di 1-2 m).
39
Page 42

Babycom 268
Attivare/Disattivare il blocco tasti
Per attivare il blocco tasti, portare il commutatore che si trova sul
lato destro dell'apparecchio sulla posizione LOCK.
Per disattivare il blocco tasti, portare il commutatore che si trova
sul lato destro dell'apparecchio sulla posizione UNLOCK.
Modo d'uso
Allarme fuori portata (solo unità genitori)
La portata massima tra l'unità genitori e l'unità bebè è di circa 300 metri.
Quando si supera la portata massima, sul display appare:
Unità genitori
Lampeggiante
Unità bebè
Lampeggiante
Avvertenza
Quando gli apparecchi sono fuori portata, i tasti TALK e PAGE non
funzionano.
Parlare con l'unità bebè (a partire dall'unità genitori)
- Premere il tasto TALK sul lato sinistro dell'unità genitori e tenerlo
premuto mentre si parla nel microfono.
- Rilasciare il tasto TALK per tornare alla modalità di ricezione.
Avvertenza
Con il tasto TALK premuto, l'unità genitori non è in grado di ricevere segnali dall'unità bebè.
40
Page 43

Babycom 268
Inviare un segnale acustico
Entrambi gli apparecchi possono inviarsi un segnale acustico:
- Premere il tasto PAGE sul lato sinistro dell'unità genitori/bebè per
chiamare l'altro apparecchio.
- Sull'apparecchio chiamato si sente un segnale acustico (3 bip).
Come intervenire personalmente in caso di anomalie ed errori
Non tutti i guasti equivalgono a un difetto del Babycom 268.
Nessuna alimentazione
- L'apparecchio è spento. Accendere l'apparecchio.
- Verificare il corretto inserimento delle pile.
- Se gli adattatori vengono utilizzati per alimentare gli apparecchi,
verificare che siano collegati correttamente.
- Le pile sono scariche. Ricaricare o sostituire le pile.
Non è possibile parlare con l'unità bebè
- La sensibilità dell'unità bebè è troppo bassa. Aumentare la sensibilità.
- Gli apparecchi sono fuori portata. Ridurre la distanza tra gli
apparecchi.
- Verificare che il tasto TALK non sia premuto.
- Verificare che il blocco tasti non si attivato.
- Verificare che sull'unità genitori e sull'unità bebè sia impostato lo
stesso codice CTCSS.
Non è possibile inviare un segnale acustico
- Il volume dell'unità genitori è troppo basso. Aumentare il volume.
- La sensibilità dell'unità bebè è troppo bassa. Aumentare la sensibilità.
- Gli apparecchi sono fuori portata. Ridurre la distanza tra gli
apparecchi.
- Verificare che il tasto TALK non sia premuto.
41
Page 44

Babycom 268
- Verificare che il blocco tasti non si attivato.
- Verificare che sull'unità genitori e sull'unità bebè sia impostato lo
stesso codice CTCSS.
Ricezione di conversazioni/rumori del vicinato
- Interferenze dovute alla presenza di un altro Baby-Monitor o telefono
cordless impostati sullo stesso codice CTCSS. Impostare l'unità
genitori e l'unità bebè su un altro codice CTCSS.
Rumori fastidiosi (fruscii, ronzii)
- Gli apparecchi sono troppo vicini (distanza inferiore a 1 metro).
Aumentare la distanza tra l'unità genitori e l'unità bebè.
- Il volume dell'unità genitori è troppo alto. Ridurre il volume.
- Le pile sono scariche. Ricaricare o sostituire le pile.
La spia di stato verde lampeggia rapidamente, nessuna trasmissione/ricezione
- Le pile sono scariche. Ricaricare o sostituire le pile.
Appendice
Cura
Il vostro apparecchio è un prodotto che rispetta elevati criteri di design e
funzionalità. Pertanto deve essere trattato con cura.
Per pulire il Babycom 268, spolverarlo con un panno antistatico oppure
con un panno di pelle leggermente inumidito e poi con un panno asciutto.
42
Page 45

Babycom 268
Avvertenze per lo smaltimento (Salvaguardia dell’ambiente)
Alla fine del ciclo di vita, il prodotto non deve essere smaltito
insieme ai rifiuti domestici. Portarlo ad un centro di raccolta
specializzato nello smaltimento di apparecchi elettrici ed elettronici. Ciò è indicato dal simbolo sul prodotto, nelle
Alcuni dei materiali di questo prodotto possono essere riciclati se il prodotto viene portato ad un centro di raccolta specializzato. Con il
riciclaggio di alcune parti o materie prime dei prodotti usati si apporta un
importante contributo alla salvaguardia dell’ambiente. Rivolgersi alle proprie autorità locali per ottenere maggiori informazioni sui centri di raccolta
presenti nelle vostre vicinanze.
istruzioni per l’uso e/o sull’imballaggio.
Smaltimento di batterie ed accumulatori
Per tutte le batterie e gli accumulatori scarichi vige l’obbligo di
restituzione per legge; questi non possono essere smaltiti insieme ai
rifiuti domestici. Si prega di smaltire batterie/accumulatori nel rispetto
delle norme delle autorità. Portarli ai centri di riciclaggio.
Batterie/accumulatori vengono riciclati poiché possono contenere ad es.
nickel - cadmio (Ni - Cd), piombo (Pb), cadmio (Cd) o mercurio (Hg).
Su batterie e accumulatori sono indicati i rispettivi simboli e le sostanze
contenute, ad es.:
Garanzia
Il vostro apparecchio è coperto da garanzia a partire dalla data
d’acquisto, nei limiti delle disposizioni legali vigenti nel paese in cui è
stato acquistato l’apparecchio.
Quale dimostrazione della data d’acquisto vi preghiamo di conservare la
prova d’acquisto oppure il foglio di garanzia dovutamente compilato da
43
Page 46

Babycom 268
parte del venditore. Nel periodo di garanzia, vengono eliminati
gratuitamente tutti i guasti che derivano da difetti di materiale o di fabbricazione. La prestazione di garanzia avviene tramite riparazione o
sostituzione dell’apparecchio guasto, su decisione del fornitore.
Non sono coperti dalla garanzia il materiale di consumo (ad esempio
l’accumulatore), difetti che riducono in modo irrilevante il valore o l’uso
dell’apparecchio, nonché guasti che derivano da uso improprio, usura o
interventi effettuati da terzi. Sono esclusi da questa garanzia eventuali
danni conseguenti dovuti all’uso dell’apparecchio, guasto o difetto del
prodotto, in particolare viene esclusa ogni responsabilità per danni
patrimoniali.
In caso di guasto coperto da garanzia vi preghiamo di rivolgervi al punto
vendita presso il quale avete acquistato il Babycom 268.
Omologazione e conformità
Questo baby monitor è conforme ai requisiti fondamentali della Direttiva
R&TTE 1999/5/EG riguardante le apparecchiature radio e le
apparecchiature terminali di telecomunica zione ed è previsto per il
collegamento e il funzionamento nel paese dove è stato commercialisato.
La dichiarazione di conformità può essere consultata al sito
www.swissvoice.net.
La conformità con la direttiva sopra menzionata è
confermata dal marchio CE sull’apparecchio.
44
Page 47

Babycom 268
Welcome to Swissvoice
Set aside some time to read this user manual carefully and get to know
and use the functions offered by your Babycom 268.
Safety notes
- This product is not a substitute for responsible parental supervision.
- This baby monitor is intended as an aid and is not suitable for medical
supervision.
- Electrical equipment and cables must always be kept out of children's
reach, and never placed in the cot or playpen!
- Never place the device in bathrooms or showers, and make sure it is
protected from damp.
- The device will not work during a power cut, if the adapter is not
plugged in or if the batteries are discharged.
- Do not attempt to remove the antenna or modify the device in any
way!
Contents
Contents of the package . . . . . . . . . . . . . . . . . . . . . . . . . . . . . . . . . .47
Keys and displays . . . . . . . . . . . . . . . . . . . . . . . . . . . . . . . . . . . . . . .48
Baby unit keys . . . . . . . . . . . . . . . . . . . . . . . . . . . . . . . . . . . . . . . .48
Parental unit keys . . . . . . . . . . . . . . . . . . . . . . . . . . . . . . . . . . . . .48
Displays . . . . . . . . . . . . . . . . . . . . . . . . . . . . . . . . . . . . . . . . . . . . . .49
Connecting your Babycom 268 . . . . . . . . . . . . . . . . . . . . . . . . . . . .49
Inserting the batteries (parental and baby unit) . . . . . . . . . . . . . . .49
Information on using the batteries . . . . . . . . . . . . . . . . . . . . . . . . . .49
Charging the batteries initially / connecting the adapter . . . . . . . . .50
45
Page 48

Babycom 268
Charge displays . . . . . . . . . . . . . . . . . . . . . . . . . . . . . . . . . . . . . . .51
Charging the batteries . . . . . . . . . . . . . . . . . . . . . . . . . . . . . . . . . . .51
Test before use . . . . . . . . . . . . . . . . . . . . . . . . . . . . . . . . . . . . . . . . . .52
Transmission from baby unit / reception on parental unit . . . . . . . .52
Test transmission from baby unit . . . . . . . . . . . . . . . . . . . . . . . . . . .52
Test reception on parental unit . . . . . . . . . . . . . . . . . . . . . . . . . . . .52
Settings . . . . . . . . . . . . . . . . . . . . . . . . . . . . . . . . . . . . . . . . . . . . . . . .53
Setting the volume . . . . . . . . . . . . . . . . . . . . . . . . . . . . . . . . . . . . . .53
Setting the CTCSS code . . . . . . . . . . . . . . . . . . . . . . . . . . . . . . . . .53
Setting the sensitivity (baby unit only) . . . . . . . . . . . . . . . . . . . . . . .54
Activating/deactivating the key lock . . . . . . . . . . . . . . . . . . . . . . . . .55
Operation . . . . . . . . . . . . . . . . . . . . . . . . . . . . . . . . . . . . . . . . . . . . . . .55
Out-of-range alarm (parental unit only) . . . . . . . . . . . . . . . . . . . . . .55
Talking to the baby unit (from parental unit) . . . . . . . . . . . . . . . . . .55
Sending a signal tone . . . . . . . . . . . . . . . . . . . . . . . . . . . . . . . . . . .56
Faults and trouble-shooting . . . . . . . . . . . . . . . . . . . . . . . . . . . . . . .56
Appendix . . . . . . . . . . . . . . . . . . . . . . . . . . . . . . . . . . . . . . . . . . . . . . .57
Care . . . . . . . . . . . . . . . . . . . . . . . . . . . . . . . . . . . . . . . . . . . . . . . . .57
Recycling (environmental protection) . . . . . . . . . . . . . . . . . . . . . . .58
Disposing of the rechargeable battery . . . . . . . . . . . . . . . . . . . . . . .58
Warranty conditions . . . . . . . . . . . . . . . . . . . . . . . . . . . . . . . . . . . . .58
Approval and conformity . . . . . . . . . . . . . . . . . . . . . . . . . . . . . . . . .59
46
Page 49

Contents of the package
Babycom 268
AC mains adapter
(for parental unit)
AC mains adapter
(for baby unit)
Parental unit
Baby unit
Rechargeable
batteries (x 3)
47
Page 50

Babycom 268
Keys and displays
Baby unit keys
1 LCD display
2 microphone
3 loudspeaker
4 belt clip
5 key block on/off
6 battery compartment
Parental unit keys
1 LCD display
2 microphone
3 loudspeaker
4 belt clip
5 key block on/off
6 battery compartment
48
7 ON/OFF / volume adjuster
8 AC/DC socket
9 PAGE key
10 LINK key
7 ON/OFF / volume adjuster
8 AC/DC socket
9 TALK key
10 PAGE key
11 LINK key
Page 51

Babycom 268
Displays
Out-of-range alarm symbol
Baby asleep symbol: no signal / standby mode
Battery status symbol
Fully charged
Low: You need to charge the batteries
Discharged (flashing display): You need to charge the
batteries immediately
Baby calling symbol: continually alternating display
Connecting your Babycom 268
Inserting the batteries (parental and baby unit)
- The unit must be switched off. Press the
key on the belt clip and rotate it 90 degrees
to the right or left.
- Open the battery compartment.
- Insert the AAA batteries supplied (making
sure the poles are correct).
- Close the battery compartment.
Information on using the batteries
Use only the original batteries (3 x NiMH, AAA, 1.2 V 600 mAh) and the
original mains adapter (7.5 V DC, 600 mA) for your Babycom 268.
49
Page 52

Babycom 268
Note:
Using other rechargeable batteries or non-rechargeable
batteries/primary cells can be dangerous and cause malfunctions or
damage to the telephone. Do not short-circuit the batteries (danger).
In particular, avoid inadvertent short-circuits during storage and
transport e.g. bunch of keys, metal panels or similar objects, and
make sure the batteries do not come into contact with greasy
materials. For this reason, store the batteries only in an insulating
package when they are not in the unit. Avoid also touching the
contacts with greasy objects. Rechargeable batteries can become
warm while recharging. This is a normal occurrence and is not
dangerous.
Charging the batteries initially / connecting the adapter
- Before using the device for the first time, the batteries need to be
charged.
- To charge the batteries, plug the adapter into the AC/DC sockets on
the parental and baby units.
- Plug the adapter into an electrical socket. The batteries will then start
to charge up and will take around 8 hours to fully charge (initially).
Note:
- The adapters supplied were developed specifically for this device. Do
not use them for any other device. Never use another adapter for your
Babycom 268.
- Non-rechargeable batteries must not be charged up.
- We recommend that you switch off the units before plugging in or
unplugging the adapters.
- If the units are not to be used for some time, unplug the adapters.
50
Page 53

Babycom 268
Charge displays
In charge
(unit is turned on)
In charge
(unit is turned off)
Fully charged
(unit is turned on)
Fully charged
(unit is turned off)
The battery icon loops and flashes.
The battery icon loops and flashes.
The battery icon is full and stops flashing.
The battery icon is full and stops flashing.
or
or
Charging the batteries
When the batteries are low, the following display is shown:
Baby unit
You must charge the batteries within the next 5 minutes; otherwise the
device will automatically switch off.
Note:
- Non-rechargeable batteries must not be charged up.
- Remove discharged batteries as they can leak and damage the unit.
- No alarm signal is emitted on the baby unit when the batteries are
discharged!
Parental unit
flashing
51
Page 54

Babycom 268
Test before use
Transmission from baby unit / reception on parental unit
- Place the units in the rooms where you want them to operate.
- Switch the units on: - Slide the ON/OFF switch to ON. When you hear
a click, the unit is switched on.
Test transmission from baby unit
- Use the sensitivity switch to set the preferred sensitivity level on the
baby unit.
- As soon as the baby unit sends a signal, the following display is
shown:
Constantly changing
- If the baby unit is on standby, the following display is shown:
Test reception on parental unit
- Use the volume adjuster to set the preferred volume on the parental
unit. The parental unit is ready to receive.
- As soon as the parental unit receives a signal, the following display is
shown:
Constantly changing
- If the parental unit is on standby, the following display is shown:
52
Page 55

Babycom 268
Note:
- If you hear any disturbance on the units due to interference (hissing,
buzzing), change the CTCSS code on the parental and baby units.
See "Setting the CTCSS code".
- Test reception on the parental unit before use and whenever you
reposition the baby unit.
- Position the baby unit at least one meter away from the baby.
- The maximum range between the parental and baby units is 300
meters.
Settings
Setting the volume
Use the volume adjuster to set the preferred volume (up = increase
volume / down = reduce volume).
Setting the CTCSS code
65,000 CTCSS codes are available for a protected private sphere: The
receiver (parental unit) is activated only when it receives a signal from its
own transmitter (baby unit). It is therefore essential for the same CTSS
code to be set on the parental and baby unit so that they can
communicate.
Changing the CTCSS code:
- Make sure the units are switched on
- Press the LINK key on the base of the unit (using a pointed object
such as a pencil). The units automatically start to search for a new
shared code. The following display is shown:
53
Page 56

Babycom 268
Scanning the
Parental unit:
corresponding
code
automatically
Corresponding
code was
scanned
successfully
Code scanning
failed
Flashing
Baby unit:
Flashing
Baby unit and parental unit:
Parental unit:
Baby unit:
flashing
flashing
or
still
still
Constantly changing Normal status
Note:
- There is no need to set CTCSS code before using the Babycom 268
for the first time: As soon as you switch the parental and baby units
on, they automatically search for a shared code.
- If you are using the adapters for power, connect them first, and then
switch the units on before changing the CTCSS code.
Setting the sensitivity (baby unit only)
Set the preferred sensitivity level by sliding the black switch on the
battery compartment of the baby unit:
- Up: (HI) = high sensitivity (responds to noises within a range of 2-6
meters)
- Down: (LO) = medium sensitivity (responds to noises within a range of
1-2 meters).
54
Page 57

Babycom 268
Activating/deactivating the key lock
To activate the key lock, set the key lock switch on the right of the
unit to LOCK.
To deactivate the key lock, set the key lock switch on the right of
the unit to UNLOCK.
Operation
Out-of-range alarm (parental unit only)
The maximum range between the parental and baby units is approximately 300 meters. If the range is exceeded, the following display is
shown:
Parental unit:
Baby unit:
Note:
The TALK and PAGE keys do not function if the units are out of range.
Talking to the baby unit (from parental unit)
- Press the TALK key on the left of the parental unit. Hold the key down
while talking into the microphone.
- Release the TALK key again to return to normal reception mode.
Note:
The parental unit cannot receive any signals from the baby unit while the
TALK key is pressed.
Flashing
Flashing
55
Page 58

Babycom 268
Sending a signal tone
Both units can send each other a signal tone:
- Press the PAGE key on the left of the parental/baby unit to call the
other unit.
- A ring tone (3 beeps) is heard on the called unit
Faults and trouble-shooting
Not every malfunction results from a defect in your Babycom 268.
No power
- Unit is switched off. Switch the unit on.
- Check to ensure the batteries are correctly inserted.
- If you are using the adapters for power, check to ensure they are
switched on and correctly connected.
- The batteries are discharged. Charge the batteries or replace them.
Unable to talk to baby unit
- Sensitivity on baby unit too weak. Increase the sensitivity level.
- The units are out of range. Reduce the distance between them.
- Check that the TALK key is not pressed
- Make sure the key block is not activated.
- Check that the parental and baby units are set to the same CTSS
code.
Unable to send signal tone
- Volume on parental unit too weak. Increase the volume.
- Sensitivity on baby unit too weak. Increase the sensitivity level.
- The units are out of range. Reduce the distance between them.
- Check that the TALK key is not pressed
- Make sure the key block is not activated.
56
Page 59

Babycom 268
- Check that the parental and baby units are set to the same CTSS
code.
Reception of calls/interference from neighbours
- Signal interference due to another baby monitor or cordless telephone
on the same CTCSS code. Set the parental and baby units to another
CTCSS code.
Interference (hissing, buzzing)
- The units are too close (less than 1 meter apart). Increase the distance between the parental and baby unit.
- Volume on parental unit too high. Reduce the volume.
- The batteries are discharged. Charge the batteries or replace them.
Rapidly flashing green power display, no send/receive
- The batteries are discharged. Charge the batteries or replace them.
Appendix
Care
Your baby monitor is a sophisticated product in terms of design and construction, and should therefore be handled with care.
To clean the baby monitor, wipe first with an antistatic cloth or a damp,
soft leather cloth and then dry using a dry cloth.
57
Page 60

Babycom 268
Recycling (environmental protection)
At the end of the product's life cycle, the unit must not be disposed of in normal domestic waste. Please take it to a
collection point for processing electrical and electronic
equipment: see symbol on the product, in the user manual
and/or packaging.
Some materials used in this product can be recycled if you take it to a
recycling depot. By recycling parts or raw materials from used products
you will be making an important contribution to environmental protection.
Please contact your local authority if you require information about
collection points in your neighbourhood.
Disposing of the rechargeable battery
By law, all used batteries and accumulators must be recycled and not disposed of in domestic waste. Please dispose of them according to the
official regulations. Take them to a recycling depot. The
batteries/accumulators will be recycled since they may, for example,
contain nickel cadmium (Ni - Cd), lead (Pb), cadmium (Cd) or mercury
(Hg). The batteries and accumulators are labelled with symbols and
information on their contents,
e.g.:
Warranty conditions
Your baby monitor is subject to a guarantee from the date of purchase in
accordance with the legal provisions of the country in which the unit was
purchased. As evidence of the date of purchase, please keep the receipt
or the warranty card completed by the retailer. All defects attributable to
material and manufacturing faults will be corrected free of charge within
58
Page 61

Babycom 268
the warranty period, either by repairing or replacing the defective
equipment.
The warranty does not cover expendable materials (battery cells), defects
which affect the value or use of the equipment only insignificantly, and
damage caused by incorrect use, ordinary wear and tear, or manipulation
by third parties.
This warranty does not cover consequential damage caused by the use,
failure or defectiveness of the product. In particular, no liability
whatsoever is accepted for damage to property and pecuniary loss.
To claim under this warranty, please contact the retailer where you
purchased your baby monitor.
Approval and conformity
This baby monitor complies with the basic requirements contained in the
R&TTE Directive 1999/5/EC on radio equipment and telecommunications
terminal equipment and is suitable for connection and operation in the
member state indicated on the base station and/or packaging.
The declaration of conformity may be viewed at: www.swissvoice.net.
The CE symbol confirms the conformity of the baby monitor
with the above directive.
59
Page 62

Babycom 268
Bienvenido a Swissvoice
Tómese el tiempo necesario para leer con atención estas instrucciones y
familiarizarse con las funciones del Babycom 268.
Seguridad
- Este producto no es ningún sustitutivo de la vigilancia de un
adulto responsable.
- Este vigilabebés está diseñado para servir de ayuda. No lo utilice
como dispositivo de supervisión médica.
- Asegúrese de que el receptor y el cable del adaptador estén fuera del
alcance del niño. ¡No ponga nunca el receptor en la cuna ni el
parquecito del bebé!
- Para reducir el riesgo de descarga eléctrica, no exponga este aparato
a la lluvia o la humedad.
- El Babycom 268 no puede funcionar si el adaptador de red no está
conectado o si se va la luz.
- ¡No tire de las antenas ni modifique los intercomunicadores bajo
ningún concepto!
Índice
Material suministrado . . . . . . . . . . . . . . . . . . . . . . . . . . . . . . . . . . . .62
Teclas y visualización de mensajes . . . . . . . . . . . . . . . . . . . . . . . . .63
Teclas del intercomunicador del bebé . . . . . . . . . . . . . . . . . . . . . .63
Teclas del intercomunicador de los padres . . . . . . . . . . . . . . . . . . .63
Mensajes visuales . . . . . . . . . . . . . . . . . . . . . . . . . . . . . . . . . . . . . .64
Conexión del Babycom 268 . . . . . . . . . . . . . . . . . . . . . . . . . . . . . . .64
Colocación de las baterías (en los dos aparatos) . . . . . . . . . . . . . .64
Page 63

Babycom 268
Información sobre el uso de las baterías . . . . . . . . . . . . . . . . . . . .64
Carga inicial de las baterías / Conexión de los adaptadores . . . . .65
Indicaciones de carga . . . . . . . . . . . . . . . . . . . . . . . . . . . . . . . . . .66
Recarga de las baterías . . . . . . . . . . . . . . . . . . . . . . . . . . . . . . . . .66
Comprobación antes del primer uso . . . . . . . . . . . . . . . . . . . . . . . .67
Compruebe que el emisor (intercomunicador del bebé) y
el receptor (intercomunicador de los padres) funcionen
debidamente . . . . . . . . . . . . . . . . . . . . . . . . . . . . . . . . . . . . . . . . . .67
Comprobación de la emisión del intercomunicador del bebé . . . . .67
Comprobación de la recepción del intercomunicador de los
padres . . . . . . . . . . . . . . . . . . . . . . . . . . . . . . . . . . . . . . . . . . . . . . .67
Configuración . . . . . . . . . . . . . . . . . . . . . . . . . . . . . . . . . . . . . . . . . . .68
Ajuste del volumen . . . . . . . . . . . . . . . . . . . . . . . . . . . . . . . . . . . . .68
Configuración de los códigos CTCSS . . . . . . . . . . . . . . . . . . . . . . .68
Ajuste de la sensibilidad (sólo para el intercomunicador del bebé) 69
Bloqueo / Desbloqueo de las teclas . . . . . . . . . . . . . . . . . . . . . . . .70
Funcionamiento . . . . . . . . . . . . . . . . . . . . . . . . . . . . . . . . . . . . . . . . .70
Aviso de fuera de alcance (sólo en el intercomunicador de los
padres) . . . . . . . . . . . . . . . . . . . . . . . . . . . . . . . . . . . . . . . . . . . . . . .70
Llamada al intercomunicador del bebé desde el de los padres . . .70
Modo mensaje . . . . . . . . . . . . . . . . . . . . . . . . . . . . . . . . . . . . . . . . .71
Guía para la localización de errores . . . . . . . . . . . . . . . . . . . . . . . .71
Anexo . . . . . . . . . . . . . . . . . . . . . . . . . . . . . . . . . . . . . . . . . . . . . . . . .72
Mantenimiento . . . . . . . . . . . . . . . . . . . . . . . . . . . . . . . . . . . . . . . . .72
Eliminación (protección del medio ambiente) . . . . . . . . . . . . . . . . .73
Baterías / Eliminación de los acumuladores . . . . . . . . . . . . . . . . . .73
Garantía . . . . . . . . . . . . . . . . . . . . . . . . . . . . . . . . . . . . . . . . . . . . . .73
Omologazione e conformità . . . . . . . . . . . . . . . . . . . . . . . . . . . . . . .74
61
Page 64

Babycom 268
Material suministrado
Adaptador AC (para el inter comunicador de los padres)
Adaptador AC (para el inter comunicador del bebé)
Intercomunicador
de los padres
62
Intercomunicador
del bebé
Se suministra con baterías
recargables (3 x)
Page 65

Teclas y visualización de mensajes
Teclas del intercomunicador del bebé
Babycom 268
1 Visor LCD
2 Micrófono
3 Altavoz
4 Enganche para cinturón
5 Bloqueo / Desbloqueo
6 Compartimento de las baterías
7 Interruptor On / Off / Mando del
volumen
8 Toma AC/DC
9 Tecla PAGE
10 Tecla LINK
Teclas del intercomunicador de los padres
1 Visor LCD
2 Micrófono
3 Altavoz
4 Enganche para cinturón
5 Bloqueo / Desbloqueo
6 Compartimento de las
baterías
7 Interruptor On / Off / Mando del
volumen
8 Toma AC/DC
9Tecla TALK
10 Tecla PAGE
11 Tecla LINK
63
Page 66

Babycom 268
Mensajes visuales
Icono de aviso de fuera de alcance
Icono «Bebé dormido»: (sin señal / modo espera)
Icono de las baterías:
Baterías llenas
Baterías casi vacías, debe recargarlas
Baterías vacías (parpadeo), debe recargarlas
Icono «Bebé llamando»: la imagen cambia constantemente
Conexión del Babycom 268
Colocación de las baterías (en los dos aparatos)
- Asegúrese de que el aparato esté apagado.
Pulse la tecla del enganche del cinturón y
gírelo 90º en cualquier sentido.
- Abra el compartimento de las baterías.
- Inserte en ambos aparatos las baterías
AAA suministradas, respetando la posición
de los polos.
- Cierre el compartimento de las baterías.
Información sobre el uso de las baterías
Utilice exclusivamente las baterías (3 x NiMH, AAA, 1,2 V 600 mAh) y los
adaptadores de red (7,5 V DC, 600 mA) originales.
64
Page 67

Babycom 268
Observación:
Utilizar otro tipo de baterías o pilas no recargables puede resultar
peligroso, y alterar el funcionamiento del aparato, e incluso
averiarlo. No cortocircuite las baterías (es peligroso). En particular,
evite que se produzcan cortocircuitos accidentales durante el
almacenamiento o el transporte, a causa, por ejemplo, de un
manojo de llaves o una chapa metálica o similar, y cuide de que las
baterías no entren en contacto con nada que esté grasiento. Dado el
caso, conserve las baterías en un embalaje aislante cuando no
estén colocadas en los aparatos. Igualmente, evite tocar los
contactos con objetos que contengan grasa. Las baterías se
calientan mientras cargan. Es un fenómeno totalmente natural que
no implica ningún peligro.
Carga inicial de las baterías / Conexión de los adaptadores
- Cuando desembale usted el aparato, las baterías no estarán
cargadas.
- Para cargarlas, conecte los adaptadores AC suministrados a las
tomas AC/DC de los dos aparatos.
- Luego conéctelas a una toma de corriente. El proceso de carga
arranca. La duración de esta primera carga es de unas ocho horas.
Observación:
- Los adaptadores suministrados están elaborados especialmente para
este producto. No se pueden utilizar con otros aparatos. No utilice
nunca un adaptador distinto con este vigilabebés.
- No intente recargar pilas no recargables.
- Es aconsejable que apague los aparatos antes de conectar o
desconectar los adaptadores.
- Si no va a usted a utilizar los aparatos durante algún tiempo,
desconecte los adaptadores de la toma de corriente.
65
Page 68

Babycom 268
Indicaciones de carga
Cargando
(el aparato está encendido)
Cargando
(el aparato está apagado)
Cargado
(el aparato está encendido)
Cargado
(el aparato está apagado)
El icono de la batería forma un círculo y parpadea.
El icono de la batería forma un círculo y parpadea.
El icono de la batería se ve lleno y deja de parpadear.
El icono de la batería se ve lleno y deja de parpadear.
o
o
Recarga de las baterías
Cuando el nivel de las baterías baja, el visor muestra:
Intercomunicador del bebé
Hay que recargar las baterías en los siguientes cinco minutos. Tras ese
tiempo, el aparato se apagará automáticamente.
Observación:
- No intente recargar pilas no recargables.
- Saque las baterías gastadas de los aparatos, ya que podrían
averiarlos.
- ¡El intercomunicador del bebé no avisa de que las baterías están
bajas!
Intercomunicador de los padres
Intermitende
66
Page 69

Babycom 268
Comprobación antes del primer uso
Compruebe que el emisor (intercomunicador del bebé) y el
receptor (intercomunicador de los padres) funcionen debidamente
- Ponga los dos intercomunicadores (bebé y padres) en la habitación
donde vaya a utilizarlos.
-
Ponga en marcha los aparatos desplazando el interruptor On/Off hasta la
posición On. Oirá un clic que indica que el aparato está encendido.
Comprobación de la emisión del intercomunicador del bebé
- Ajuste la sensibilidad deseada en el intercomunicador del bebé con el
interruptor de sensibilidad.
- Cuando el intercomunicador del bebé transmite una señal, el visor
muestra:
Las pantallas cambian constantemente
- El aparato está en espera si el visor muestra:
Comprobación de la recepción del intercomunicador de los padres
- Ajuste el volumen deseado en el intercomunicador de los padres con
el mando de volumen. El intercomunicador de los padres está listo
para recibir.
- Cuando el intercomunicador de los padres recibe una señal, el visor
muestra:
Las pantallas cambian constantemente
- El aparato está en espera si el visor muestra:
67
Page 70

Babycom 268
Observación:
- Si se escuchan interferencias (zumbidos, etc.), cambie el código
CTCSS en ambos aparatos. Para ver los detalles, remítase al capítulo
«Ajustar los códigos CTCSS».
- Compruebe la recepción del sonido en el intercomunicador de los
padres antes del utilizarlo y cada vez que cambie usted de sitio el intercomunicador del bebé.
- Coloque el transmisor a un metro del bebé, como mínimo, para
obtener la mejor calidad de sonido.
- El alcance de transmisión entre el emisor (intercomunicador del bebé)
y el receptor (intercomunicador de los padres) es de 300 metros,
como máximo.
Configuración
Ajuste del volumen
Deslice el mando del volumen hasta el nivel acústico que desee (hacia
arriba para subir el volumen y hacia abajo para reducirlo).
Configuración de los códigos CTCSS
Dispone usted de 65.000 códigos CTCSS para que la comunicación sea
más privada: El receptor (intercomunicador de los padres) sólo se pone
en marcha si recibe una señal de su propio emisor (intercomunicador del
bebé). Por lo tanto, es imprescindible ajustar el mismo subcanal CTCSS
en ambos aparatos para que puedan comunicarse entre sí.
Para cambiar el código CTCSS:
- Asegúrese de que los aparatos estén encendidos.
- Pulse la tecla LINK de debajo de ambos intercomunicadores (padres
y bebé), con un objeto con punta, como por ejemplo un bolígrafo. Los
aparatos empezarán automáticamente a buscar un nuevo código
común. El visor muestra:
68
Page 71

Babycom 268
Búsqueda
Intercomunicador de los padres:
automática
del código
El barrido ha
localizado con
éxito el código
coincidente
El barrido no
ha localizado
el código
coincidente
Intermitende
Intercomunicador del bebé:
Intermitende
Intercomunicador de los padres y intercomunicador del bebé:
Estado normal
Intercomunicador de los padres:
Intercomunicador del bebé:
Parpadea
Parpadea
o
Las pantallas cambian
constentamente
Observación:
- Cuando ponga a funcionar los aparatos por primera vez, no tendrá
que ajustar el código CTCSS: Al encender ambos intercomunicadores
(padres y bebé), éstos buscan automáticamente un código común.
- Si utiliza usted los aparatos con los adaptadores, conecte primero los
adaptadores, ponga en marcha las unidades y luego cambie el código
CTCSS.
Ajuste de la sensibilidad (sólo para el intercomunicador del bebé)
Ajuste la sensibilidad (nivel de detección de los sonidos) del intercomuni cador del bebé moviendo el interruptor de sensibilidad (negro) del
compartimento de las baterías:
- posición HI = sensibilidad alta (radio de detección de los sonidos de
dos a seis metros)
- posición LO = sensibilidad intermedia (radio de detección de los
sonidos de uno a dos metros)
69
Page 72

Babycom 268
Bloqueo / Desbloqueo de las teclas
Para bloquear las teclas, ponga el interruptor de bloqueo / desbloqueo
de la derecha del aparato en la posición LOCK.
Para desbloquearlas, ponga el interruptor de bloqueo / desbloqueo
en la posición UNLOCK.
Funcionamiento
Aviso de fuera de alcance (sólo en el intercomunicador de
los padres)
El alcance de transmisión entre el emisor (intercomunicador del bebé) y
el receptor (intercomunicador de los padres) es de 300 metros, como
máximo. Si se supera esa distancia, los aparatos muestran:
Intercomunicador
de los padres
Intercomunicador
del bebé
Observación:
Si los aparatos están fuera de alcance entre sí, no podrá usted utilizar
las teclas TALK y PAGE.
Llamada al intercomunicador del bebé desde el de los padres
- Pulse la tecla TALK de la izquierda del intercomunicador de los
padres, y manténgala pulsada mientras hable por el micrófono.
- Suelte la tecla TALK para regresar al modo recepción.
Intermitende
Intermitende
Observación:
Mientras que esté pulsada la tecla TALK, el intercomunicador de los
padres no podrá recibir señales del intercomunicador del bebé.
70
Page 73

Babycom 268
Modo mensaje
Uno de los aparatos puede enviar una señal de llamada al otro:
- Pulse la tecla PAGE de la izquierda de cualquiera de los dos intercomunicadores (padres y bebé) para llamar al otro aparato.
- En el aparato al que se llama se oirá una señal acústica (3 pitidos).
Guía para la localización de errores
Una avería no siempre se debe a un fallo del Babycom 268:
No hay alimentación
- El aparato no está encendido. Enciéndalo.
- Compruebe que las baterías estén correctamente instaladas.
- Si utiliza adaptadores para alimentar los aparatos, compruebe que
estén correctamente conectados.
- Las baterías están vacías, recárguelas o cámbielas.
No se transmite ningún mensaje
- El nivel de sensibilidad del emisor (intercomunicador del bebé) está
demasiado bajo. Súbalo.
- Los aparatos están fuera de alcance entre sí. Acérquelos.
- Asegúrese de que no esté pulsada la tecla TALK.
- Asegúrese de que las teclas no estén bloqueadas.
- Asegúrese de que ambos aparatos estén configurados con el mismo
código CTCSS.
No hay señal acústica
- El ajuste del nivel del volumen del receptor (intercomunicador de los
padres) está demasiado bajo. Súbalo.
- El nivel de sensibilidad del emisor (intercomunicador del bebé) está
demasiado bajo. Súbalo.
- Los aparatos están fuera de alcance entre sí. Acérquelos.
71
Page 74

Babycom 268
- Asegúrese de que no esté pulsada la tecla TALK.
- Asegúrese de que las teclas no estén bloqueadas.
- Asegúrese de que ambos aparatos estén configurados con el mismo
código CTCSS.
Conversaciones / ruidos procedentes del vecindario
- Señales de interferencia: otro vigilabebés o un teléfono inalámbrico en
los alrededores está configurado con el mismo código CTCSS.
Modifique el ajuste de los aparatos.
Ruidos parasitarios y molestos
- Los dos aparatos (padres y bebé) están demasiado cerca uno del otro
(a menos de un metro de distancia). Aléjelos.
- El volumen en el intercomunicador de los padres es demasiado alto.
Bájelo.
- Las baterías están vacías, recárguelas o cámbielas.
El piloto de funcionamiento parpadea rápidamente en verde, sin que
ninguna transmisión o emisión lo justifique
- Las baterías están gastadas, recárguelas o cámbielas.
Anexo
Mantenimiento
Su aparato es un producto fabricación a las más altas exigencias en
materia de diseño razón por la cual se debe tratar con cuidado.
Para limpiar el Babycom 268, frótelo con un paño antiestático o una piel
de gamuza ligeramente húmeda y séquelo después con un paño seco.
72
Page 75

Babycom 268
Eliminación (protección del medio ambiente)
Para deshacerse de forma ecológica del aparato en fin de
vida, no le deposite en el contenedor de basura domestica.
Entréguelo a un centro de recogida y reciclaje de aparatos
eléctricos y electrónicos. Los símbolos que figuran sobre el
condiciones para su eliminación. Ciertos materiales y elementos pueden
ser recuperados y reutilizados. Procediendo de esta manera se contribuye eficazmente a la protección del medio ambiente.
Consulte a las autoridades de donde depende para informarse acerca de
los centros de recogida más cercano.
aparato, en el modo de empleo y en el embalaje indican las
Baterías / Eliminación de los acumuladores
La ley obliga a la colecta selectiva de usadas. No las deposite en el
contenedor de basura domestica y respete las prescripciones locales en
vigor para su eliminación y reciclado.
Las pilas y baterías contienen plomo (Pb), niquel (Ni), cadmium (Cd) y
mercurio (Hg) lo cual está indicado por los símbolos :
Garantía
Su aparato está bajo garantía a partir de la fecha de compra, de acuerdo
con las cláusulas legales del país en el que haya sido adquirido.
Como prueba de la compra, le aconsejamos que conserve el recibo de
compra o la tarjeta de garantía establecida por su proveedor. Dentro del
periodo de garantía, se corregirá, de forma gratuita, cualquier defecto del
aparato debido a los materiales o a su fabricación, ya sea por su
reparación o por su sustitución.
Quedan excluidos de la garantía los materiales consumibles (baterías),
los defectos que afecten al valor o al uso del aparato de forma insig-
73
Page 76

Babycom 268
nificante y cualquier daño causado por el uso incorrecto del aparato, el
desgaste natural o la manipulación del aparato por parte de un tercero.
La responsabilidad por eventuales daños debidos a la utilización, fallo o
defecto del producto y en particular, la responsabilidad por perjuicios
pecuniarios, están expresamente excluidas de la presente garantía.
Para cualquier reclamación de garantía, póngase en contacto con el
punto de venta en que adquirió su Babycom 268.
Omologazione e conformità
Este Babycom 268 cumple las cláusulas básicas establecidas en la
Directiva R&TTE 1999/5/CEE para equipos hertzianos y equipos
terminales de telecomunicación y está destinado al uso en el país donde
ha sido comercializado, indicado en el aparato y/o su embalaje.
La declaración de conformidad se encuentra sobre el sitio internet
www.swissvoice.net.
La marca CE confirma la conformidad del aparato con
respecto a la Directiva mencionada.
74
Page 77

Babycom 268
Witamy w Swissvoice!
Prosimy poświęcić kilka chwil na zapoznanie się z tą instrukcją obsługi
aby dowiedzieć się jak w pełni wykorzystać wszystkie funkcje Twojej
elektronicznej niani Babycom 268.
Uwaga!
- Ten produkt nie służy do profesjonalnej i w pełni odpowiedzialnej
opieki nad dzieckiem.
- Ta elektroniczna niania służy wyłącznie jako pomoc i nie może być
używana w celach medycznych czy leczniczych.
- Wszystkie połączenia elektryczne i kable musz
poza zasięgiem dzieci i nigdy nie należy umieszczać ich w łóżeczku
dziecka.
- Nie zostawiaj urządzenia w miejscach wilgotnych jak łazienka czy
toaleta i upewnij się, że urządzenie jest zabezpieczone przed
zamoknięciem
- Urządzenie nie będzie działać podczas przerw w dostawach prądu
kiedy akumulatory są rozładowane or
podłąc
zony do gniazda 230V.
- Nie wolno usuwać ani modyfikować elementów nadawczoodbiorczych urządzenia.
ą być bezwzględnie
az kiedy zasilacz nie będzie
Zawartość
Zawartość opakowania . . . . . . . . . . . . . . . . . . . . . . . . . . . . . . . . . . .77
Przyciski . . . . . . . . . . . . . . . . . . . . . . . . . . . . . . . . . . . . . . . . . . . . . . .78
Urządzenie “dla dziecka” . . . . . . . . . . . . . . . . . . . . . . . . . . . . . . . .78
Urządzenie dla rodzica . . . . . . . . . . . . . . . . . . . . . . . . . . . . . . . . .78
Wyświetlanie informacji . . . . . . . . . . . . . . . . . . . . . . . . . . . . . . . . . .79
Podłączanie Twojej elektronicznej niani Babycom 268 . . . . . . . . .79
Wkładanie akumulatorów
(do urządzenia dla rodzica i „dla dziecka“) . . . . . . . . . . . . . . . . . . .79
75
Page 78

Babycom 268
Informacje na temat akumulatorów . . . . . . . . . . . . . . . . . . . . . . . . .79
Pierwsze ładowanie akumulatorów / podłączanie zasilacza . . . . . .80
Sygnalizacja ładowania . . . . . . . . . . . . . . . . . . . . . . . . . . . . . . . . .81
Ładowanie akumulatorów . . . . . . . . . . . . . . . . . . . . . . . . . . . . . . . .81
Sprawdź przed użytkowaniem . . . . . . . . . . . . . . . . . . . . . . . . . . . . .82
Komunikacja urządzenia “dla dziecka” z tym dla rodzica . . . . . . . .82
Komunikacja urządzenia dla rodzica z tym „dla dziecka” . . . . . . . .82
Sprawdź odbiór na urządzeniu dla rodzica . . . . . . . . . . . . . . . . . . .82
Ustawienia . . . . . . . . . . . . . . . . . . . . . . . . . . . . . . . . . . . . . . . . . . . . . .83
Ustawianie głośności . . . . . . . . . . . . . . . . . . . . . . . . . . . . . . . . . . . .83
Ustawianie kodu CTCSS . . . . . . . . . . . . . . . . . . . . . . . . . . . . . . . . .83
Ustawianie czułości (tylko na urządzeniu “dla dziecka”) . . . . . . . . .84
Aktywacja i deaktywacja blokady klawiatury . . . . . . . . . . . . . . . . . .85
Obsługa . . . . . . . . . . . . . . . . . . . . . . . . . . . . . . . . . . . . . . . . . . . . . . . .85
Sygnał braku zasięgu . . . . . . . . . . . . . . . . . . . . . . . . . . . . . . . . . . .85
Mówienie do dziecka (z urządzenia dla rodzica) . . . . . . . . . . . . . . .85
Wysyłanie sygnałów dźwiękowych . . . . . . . . . . . . . . . . . . . . . . . . .86
Usterki i problemy z obsługą . . . . . . . . . . . . . . . . . . . . . . . . . . . . . .86
Informacje dodatkowe . . . . . . . . . . . . . . . . . . . . . . . . . . . . . . . . . . . .87
Konserwacja . . . . . . . . . . . . . . . . . . . . . . . . . . . . . . . . . . . . . . . . . .87
Recykling (utylizacja) . . . . . . . . . . . . . . . . . . . . . . . . . . . . . . . . . . . .88
Potwierdzenie zgodności / certyfikat CE . . . . . . . . . . . . . . . . . . . . .88
Warunki gwarancji . . . . . . . . . . . . . . . . . . . . . . . . . . . . . . . . . . . . . .89
76
Page 79

Zawartość opakowania
Babycom 268
Zasilacz 230V (do
urządzenia dla rodzica)
Zasilacz 230V (do
urządzenia „dla dziecka”)
Urządzenie dla
rodzica
Urządzenie „dla
dziecka”
Akumulatory – 3 szt.
77
Page 80

Babycom 268
Przyciski
Urządzenie “dla dziecka”
1 wyświetlacz
2 mikrofon
3 głośnik
4 zaczep na pasek
5 blokada przycisków (wł/wył)
6 Komora akumulatorów
Urządzenie dla rodzica
1 wyświetlacz
2 mikrofon
3 głośnik
4 zaczep na pasek
5 blokada przycisków (wł/wył)
6 Komora akumulatorów
78
7 Włącznik / Wyłącznik / regulacja g
łośności
8 gniazdo zasilacza
9 przycisk przywołania PAGE
10 przycisk LINK – ustawianie tego s
amego kodu CTCSS
7 Włącznik / Wyłącznik / regulacja
głośności
8 gniazdo zasilacza
9 przycisk mówienia
10 przycisk przywołania PAGE
11 przycisk LINK – ustawianie tego s
amego kodu CTCSS
Page 81

Babycom 268
Wyświetlanie informacji
Sygnalizacja braku zasięgu
Symbol obudzenia dziecka: brak sygnału / tryb oczekiwania
Symbol akumulatorów:
W pełni naładowane
Niski poziom naładowania akumulatorów – naładuj
akumulatory
Rozładowane (miga wskaźnik zasilania) – naładuj
akumulatory
Symbol zaniepokojonego / płaczącego dziecka: pokazujący
się naprzemiennie
Podłączanie Twojej elektronicznej niani Babycom 268
Wkładanie akumulatorów (do urządzenia dla rodzica i „dla
dziecka“)
- urządzeniu musi być wyłączone
- Otwórz pokrywę akumulatorów
-Włóż załączone w zestawie akumulatory
AAA (sprawdź czy polaryzacja jest
poprawna)
- Zamknij pokrywe akumulatorów
Informacje na temat akumulatorów
Do Twojej elektronicznej niani Babycom 268 używaj tylko oryginalnych
akumulatorów NiMH (AAA, 1.2V 600mAh) i oryginalnego zasilacza na
prąd stały (7.5V, 600mA).
79
Page 82

Babycom 268
Uwaga!
Używanie innych akumulatorów lub baterii alkalicznych może być
niebezpieczne i powodować niewłaściwe działanie lub nawet
uszkodzenie urządzenia.
Uważaj aby nie zrobić zwarcia akumulatorów szczególnie podczas
transportu, niewłaściwego składowania / przechowywania i upewnij
się, że akumulatory nie będą miały kontaktu z przedmiotami
tłustymi.
Nagrzewanie się akumulatorów podczas ładowania jest normalnym
objawem i nie jest niebezpieczne.
Pierwsze ładowanie akumulatorów / podłączanie zasilacza
- Przed pierwszym użyciem akumulatory muszą zostać w pełni
naładowane
- Aby naładować akumulatory podłącz zasilacz do gniazd zasilania obu
urządzeń (dla rodziców i „dla dziecka”)
- Podłącz zasilacz do gniazda 230V. Proces pierwszego ładowania trwa
ok. 8 godzin. W tym czasie postaraj się nie używać urządzenia
Uwaga!
- Zasilacze zostały zaprojektowane i wyprodukowane specjalnie dla
tego urządzenia. Nie używaj ich do zasilania innych urządzeń. Nigdy
nie używaj też innego zasilacza do Twojej niani elektronicznej
Babycom 268.
- Baterie alkaliczne nie mogą być ładowane – grozi to uszkodzeniem
urządzenia i utratą gwarancji.
- Zalecamy wyłączenie urządzenia podczas podłączenia i odłączania
do ładowania
- Jeżeli urządzenie nie będzie używane przez dłuższy czas zalecamy
jego odłączenie od sieci 230V.
80
Page 83

Babycom 268
Sygnalizacja ładowania
Podczas ładowania
(urządzenie jest włączone)
Podczas ładowania
(urządzenie jest wyłączone)
Akumulatory naładowane
(urządzenie jest włączone)
Akumulatory naładowane
(urządzenie jest wyłączone)
ikona akumulatorka miga.
ikona akumulatorka miga.
ikona akumulatorka jest wypełniona i przestała migać
ikona akumulatorka jest wypełniona i przestała migać
lub
lub
Ładowanie akumulatorów
Jeżeli akumulatory są prawie rozładowane, następujący komunikat
zostanie wyświetlony:
Urządzenie “dla dziecka”
Należy naładować akumulatory w ciągu następnych 5 minut.
W przeciwnym przypadku urządzenie automatycznie wyłączy się.
Uwaga:
- baterie alkaliczne nie mogą być ładowane
- w przypadku stosowania baterii alkalicznych po rozładowaniu należy
usunąć je ze komory akumulatorów gdyż na skutek ładowania mogą
powodować wycieki i uszkodzić urządzenie co jest równoważne z
utratą gwarancji.
- urządzenie „dla dziecka” nie emituje sygnału o niskim stanie
akumulatorów.
Urządzenie dla rodzica
Miga
81
Page 84

Babycom 268
Sprawdź przed użytkowaniem
Komunikacja urządzenia “dla dziecka” z tym dla rodzica
- umieść urządzenia w miejscu, w którym chcesz ich używać
- włącz oba urządzenia przesuwając włącznik główny na ON. Sygnał
dźwiękowy powiadomi o włączeniu urządzenia.
Komunikacja urządzenia dla rodzica z tym „dla dziecka”
- ustaw żądaną czułość na urządzeniu dla dziecka
- gdy urządzenie „dla dziecka” zacznie wysyłać sygnał wyświetli się
następujący komunikat:
Stale zmienia się
- jeżeli urządzenie „dla dziecka” jest w trybie oczekiwania wyświetli się
następujący komunikat:
Sprawdź odbiór na urządzeniu dla rodzica
- użyj regulacji głośności do ustawienia preferowanego poziomu
głośności. Urządzenie może teraz odbierać sygnał.
- gdy urządzenie otrzyma sygnał wyświetli się następujący komunikat:
Stale zmienia się
- jeżeli urządzenie dla rodzica jest w trybie oczekiwania wyswietli się
następujący komunikat:
82
Page 85

Babycom 268
UWAGA!
- Jeżeli słychać jest szumy i trzaski, zakłócenia zmień kod CTCSS na
abu urządzeniach (patrz na tabelę kodów CTCSS).
- Sprawdź odbiór na urządzeniu dla rodzica przed użyciem i za każdym
razem gdy zmieniasz położenie urządzenia „dla dziecka”
- nie umieszczaj urządzenia „dla dziecka” bliżej nić 1m od dziecka.
- maksymalna odległość między oboma urządzeniami to 300 metrów.
Ustawienia
Ustawianie głośności
Użyj VOL+/VOL- aby ustawić preferowaną głośność (do góry =
zwiększenie poziomu głośności / do dołu = zmniejszenie poziomu
głośności).
Ustawianie kodu CTCSS
Urządzenie oferuje 65000 kodów CTCSS aby ograniczyć możliwość
podsłuchu. Urządzenie dla rodzica jest aktywne tylko wtedy gdy odbiera
sygnał od urządzenia „dla dziecka”. Na obu urządzeniach musi być
ustawiony ten sam kod CTCSS.
Zmiana kodu CTCSS:
- upewnij się, że oba urządzenia są włączone
- naciśnij przycisk LINK na stacji bazowej urządzenia używając
cienkiego przedmiotu (np. długopisu). Urządzenia zaczną szukać
nowego wspólnego kodu CTCSS. Wyświetli się następujący
komunikat:
83
Page 86

Babycom 268
Automatyczne
Urządzenie dla rodzica
szukanie
wspólnego
kodu
Wspólny kod
został
ustawiony
Poszukiwanie
kodu
zakończone
niepowodzeniem
Miga
Urządzenie “dla dziecka”
Miga
Urządzenie "dla dziecka" i dla rodzica
Urządzenie dla rodzica
Ciągle miga
Urządzenie “dla dziecka”
Ciągle miga
lub
Stale zmienia sięStatus domyślny
Uwaga!
- nie ma potrzeby zmiany kodu CTCSS gdy po raz pierwszy urządzenie
zostanie uruchomione gdyż na początku kody ustawiają się automatycznie
- jeśli używasz urządzenia na zasilaczu podłącz je najpierw a potem
ustaw urządzenia w tryb szukania kodów CTCSS (używając przycisku
LINK).
Ustawianie czułości (tylko na urządzeniu “dla dziecka”)
Ustaw preferowany poziom czułości za pomocą pokrętła na pokrywie
akumulatorów urządzenia „dla dziecka”
- do góry (wysoki) – wysoki poziom czułości (reaguje na sygnały w
zasięgu od 2-6 metrów)
- do dołu (średni) – średni poziom czułości (reaguje na sygnały w
zasięgu od 1-2 metrów)
84
Page 87

Babycom 268
Aktywacja i deaktywacja blokady klawiatury
Aby uaktywnić blokadę klawiatury przesuń przycisk blokady w
pozycję LOCK.
Aby dezaktywować blokadę przesuń przycisk blokady w pozycję
UNLOCK.
Obsługa
Sygnał braku zasięgu
Maksymalny zasięg pomiędzy urządzeniami dla rodzica i „dla dziecka“ to
300 metrów. Jeżeli urządzenia utracą kontakt wyświetlony zostanie
następujący komunikat:
Urządzenie
dla rodzica
Urządzenie
“dla dziecka”
Uwaga:
przyciski TALK i PAGE nie działają gdy urządzenia nie są w zasięgu.
Mówienie do dziecka (z urządzenia dla rodzica)
- naciśnij przycisk TALK po lewej stronie urzadzenia i przytrzymaj w
trakcie mówienia
- aby powrócić do trybu odbioru puść przycisk TALK
Uwaga:
Podczas gdy urządzenie dla rodzica komunikuje się z urządzeniem „dla
dziecka“ (wciśnięty jest przycisk TALK) urządzenie dla rodzica nie
odbiera sygnału z urządzenia „dla dziecka“ – nie słychać wtedy co dzieje
się w pokoju dziecka
Miga
Miga
85
Page 88

Babycom 268
Wysyłanie sygnałów dźwiękowych
Oba urzadzenia mogą wywoływać się nawzajem
- Naciśnij przycisk PAGE na urządzeniu dla rodzica lub „dla dziecka“
aby wywołać drugie urzadzenie
- na wywoływanym urządzeniu wyemitowany zostanie sygnał (3
dźwięki)
Usterki i problemy z obsługą
Nie wszystkie problemy mogą okazać się usterką urządzenia Babycom
268.
Brak zasilania
-urządzenie jest wyłączone. Włącz urządzenie
- Sprawdź czy akumulatory są poprawnie włożone (zgodnie z
polaryzacją jak na symbolach)
- Jeżeli używasz zasilacza sprawdź czy zasilacz jest właściwie
podłączony do urządzenia i gniazda 230V.
- Akumulatory mogą być rozładowane – Naładuj akumulatory
Brak możliwości mówienia do dziecka za pomocą Babycom 268
- poziom czułości na urządzeniu „dla dziecka“ jest za słaby. Zwiększ
poziom czułości.
-Urządzenia nie są w zasięgu. Zmniejsz odległość pomiędzy nimi.
- Sprawdź czy przycisk TALK nie jest wciśnięty
- Upewnij się, że blokada klawiatury nie jest aktywna
- Sprawdź czy oba urzadzenia mają ustawiony ten sam kod CTCSS.
Nie można wywołać urządzenia
- poziom głośności na urządzeniu dla rodzica jest za niski. Zwiększ
głośność.
86
Page 89

Babycom 268
- poziom czułości na urządzeniu „dla dziecka“ ustawiony jest na
minimum. Zwiększ poziom czułości.
- Urządzenia nie są w zasięgu. Zmniejsz odległość pomiędzy nimi.
- Sprawdź czy przycisk TALK nie jest wciśnięty
- Upewnij się, że blokada klawiatury nie jest aktywna
- Sprawdź czy oba urzadzenia mają ustawiony ten sam kod CTCSS.
Zakłócenia z innymi urządzeniami
- inna niania elektroniczna lub telefon DECT może powodować
zakłócenia – zmień wtedy kanał i kod CTCSS na inny (w obu
urządzeniach musi być ten sam kanał i kod CTCSS).
Zakłócenia (szumy, trzaski, buczenie)
-urządzenia są za blisko siebie (mniej niż 1 metr od siebie). Zwiększ
odległość pomiędzy urządzeniami
- poziom głośności na urządzeniu dla rodzica jest za wysoki. Zmniejsz
głośność.
- akumulatory są rozładowane – naładuj akumulatory
Szybko migający wskaźnik zasilania, brak wysyłania i odbierania
sygnałów
- Akumulatory są rozładowane. Naładuj akumulatory lub wymień je na
inne.
Informacje dodatkowe
Konserwacja
Twoja niania elektroniczna jest zaawansowanym produktem o
nowoczesnym wyglądzie i konstrukcji, dlatego należy dbać o jego
czystość i uważać na niego podczas transportu. Elementów obudowy nie
należy czyścić silnymi środkami chemicznymi. Do czyszczenia należy
stosować delikatnie nawilżoną antystatyczną szmatkę.
87
Page 90

Babycom 268
Uwaga: Prosimy nie zostawiać urządzeń w pomieszczeniach o dużym
zawilgoceniu takich jak np.: łazienka (prysznic, wanna), parapet okna
(może być wilgotny podczas deszczu jeśli okno zostanie uchylone).
Recykling (utylizacja)
Jeśli przestaniesz używać urządzenia i zechcesz go wyrzucić,
pamiętaj że nie wolno wyrzucać go do tradycyjnego kosza na
śmieci. Prosimy o odniesienie go do punktu zbiórki odpadów
elektrycznych i elektronicznych w Twojej gminie (dzielnicy),
gdzie zostanie przyjęty nieodpłatnie. Symbol widniejący na
produkcie, w instrukcji obsługi i/lub na opakowaniu określa
Wszystkie podzespoły niani elektronicznej Babycom 268 należy
utylizować w sposób przyjazny środowisku naturalnemu.
Niektóre elementy, z których wykonany jest aparat, można ponownie
wykorzystać w procesie recyklingu, zmniejszając tym samym ilość
szkodliwych odpadów. Więcej informacji na ten temat dostępnych jest w
Internecie pod hasłem recykling.
Zgodnie z prawem również zużyte akumulatorki należy wyrzucać do
odpowiednio oznakowanych pojemników (nie wolno wyrzucać ich do
zwykłego kosza na śmieci). Każdy z akumulatorów ma odpowiedni symbol na etykiecie. Przypominamy, że w Babycom 268 można stosować
wyłącznie akumulatory typu Nikiel- Wodorek (Ni-MH).
miejsce jego wyrzucenia.
Potwierdzenie zgodności / certyfikat CE
Niania elektroniczna Babycom 268 spełnia podstawowe wymogi Unii
Europejskiej (dyrektywa 1999/5/UE
Parlamentu Europejskiego i Rady Europejskiej dotycząca sprzętu radio-
88
Page 91

Babycom 268
wego, wyposażenia telekomunikacyjnego, oraz rozpoznawania ich
zgodności) i można go przyłączać, oraz użytkować w państwach członkowskich Unii, wskazanych na etykiecie urządzenia i/lub na opakowaniu.
Potwierdzenie deklaracji zgodności można zobaczyć na:
www.swissvoice.net.
Spełnianie powyższych wymagań potwierdzone jest przez
znak CE
Warunki gwarancji
Szanowny Kliencie,
Dziękujemy za zakup naszego produktu. Urządzenia firmy Swissvoice są
zaprojektowane i wyprodukowane według najnowszych technologii,
reprezentują europejskie standardy jakości i niezawodności oraz oferują
najwyższą funkcjonalność i niepowtarzalną stylistykę. Przed
rozpoczęciem korzystania ze sprzętu należy zapoznać się z procedurami
instalacji oraz warunkami eksploatacyjnymi urządzenia szczegółowo
opisanymi w jego Instrukcji Obsługi. W przypadku jakichkolwiek problemów prosimy o zwrócenie się do Autoryzowanego Serwisu firmy
Swissvoice Polska pod numerem telefonu 0 801 800 308. Nasi konsultanci służą Państwu pomocą w zakresie porad technicznych i eksploatacyjnych oraz realizacji uprawnień gwarancyjnych.
Warunki gwarancji
Swissvoice SA Oddział w Polsce Spółka z o.o. zwana dalej jako „Swissvoice SA” udziela niniejszym kupującemu gwarancji na urządzenie,
opisane szczegółowo w fakturze oraz Karcie Gwarancyjnej, co do jego
dobrej jakości i wykonania. Okres gwarancji wynosi 24 miesiące
począwszy od daty odbioru urządzenia, potwierdzonej podpisem i
pieczęcią sprzedawcy, zaś gwarancja zostaje udzielona zgodnie z
wymienionymi niżej warunkami.
89
Page 92

Babycom 268
Do uznania roszczenia gwarancyjnego w imieniu Swissvoice SA w
Polsce uprawniony jest wyłącznie Autoryzowany Serwis Swissvoice SA
zwany dalej „Autoryzowanym Serwisem”.
§ 1 Zakres gwarancji
1. Gwarancja dotyczy uszkodzeń urządzeń i oprogramowania. Wraz z
niniejszą gwarancją Swissvoice SA potwierdza, iż urządzenie jest
wolne od wad zarówno tkwiących w materiale jak i związanych z
niewłaściwym jego wykonaniem (wady powstałe z przyczyny tkwiącej
w produkcie), które mogłyby pogarszać lub zakłócać działanie
urządzenia w stosunku do danych zawartych w Instrukcji Obsługi
dołączonej w momencie jego nabycia.
2. Postępowanie gwarancyjne jest przeprowadzane w taki sposób, że
zgodnie z decyzją Swissvoice SA, urządzenie lub jego poszczególne
części zostaną wymienione lub naprawione.
3. Kupującemu przysługuje wymiana urządzenia na nowe, jeżeli:
- w okresie gwarancji Autoryzowany Serwis dokona trzech napraw
gwarancyjnych, a urządzenie nadal będzie wykazywało wady, które
uniemożliwiają jego użytkowanie zgodne z przeznaczeniem,
- Autoryzowany Serwis stwierdzi na piśmie, że usunięcie wady nie jest
możliwe.
4. Własność wymienionych na nowe części zamiennych przysługuje
Swissvoice SA bez zwrotu ich wartości.
5. Swissvoice SA zobowiązana jest wywiązać się z obowiązków
wynikających z gwarancji w terminie 21 (dwudziestu jeden) dni
roboczych, a w wyjątkowych przypadkach, w szczególności
związanych z koniecznością sprowadzenia niezbędnych części z
zagranicy, w terminie do 31 (trzydziestu jeden) dni roboczych.
6. W przypadku uznania roszczeń reklamacyjnych koszty materiałów i
robocizny (materiały dostarczone przez Swissvoice SA oraz robocizna
wykonana przez Swissvoice SA) ponoszone są przez Swissvoice SA.
§ 2 Okres gwarancji
1. Okres gwarancji rozpoczyna się począwszy od dnia wydania
90
Page 93

Babycom 268
kupującemu urządzenia przez sprzedawcę (data sprzedaży wpisana
na karcie gwarancyjnej musi być zgodna z datą faktury/paragonu).
Wszystkie roszczenia gwarancyjne zostaną rozpatrzone pod
warunkiem, że zostaną zgłoszone w okresie gwarancji w formie
pisemnej do Swissvoice SA. Okres gwarancji dla sprzętu kończy się z
upływem 24 miesięcy licząc od dnia wydania urządzenia.
§ 3 Postępowanie gwarancyjne
1. Kupujący, który wykonuje uprawnienia wynikające z gwarancji,
obowiązany jest skontaktować się ze sprzedawcą w celu dokonania
diagnostyki (zarówno Klient jak i Sprzedawca powinni korzystać z
pomocy telefonicznej konsultanta Swissvoice Polska pod numerem
Infolinii 0 801 800 308).
Zgłoszenia reklamacji oraz uzgodnienia optymalnego sposobu
przekazania urządzenia do naprawy dokonuje sprzedawca u kon-
sultanta Autoryzowanego Serwisu pod numerem Infolinii
0 801 800 308.
Autoryzowany Serwis Swissvoice SA
Bezpłatna Infolinia 0 801 800 308
tel. 022 351 28 33, faks 022 351 28 34
(poniedziałek-piątek 8.30-16.30)
e-mail: support.pl@swissvoice.net
2. W wypadku uznania roszczeń reklamacyjnych koszty związane z
transportem urządzenia od i do kupującego i ubezpieczeniem ponosi
Swissvoice SA.
3. Do uznania roszczenia gwarancyjnego w imieniu Swissvoice SA
uprawniony jest w Polsce wyłącznie Autoryzowany Serwis.
4. Z zastrzeżeniem ust.5 roszczenia gwarancyjne zostaną uznane tylko
wtedy, jeżeli urządzenie zostało zapakowane w oryginalne
opakowanie producenta oraz jeżeli została dołączona poprawnie i w
całości wypełniona karta gwarancyjna wraz z fakturą/paragonem
zakupu. Egzemplarz karty gwarancyjnej winien wskazywać wszystkie
niezbędne dane dotyczące daty sprzedaży urządzenia, nazwy i
91
Page 94

Babycom 268
numeru seryjnego urządzenia oraz dane dotyczące odbiorcy.
5. Jeżeli urządzenie zostanie przesłane do Autoryzowanego Serwisu w
innym opakowaniu niż zostało określone w § 3 ust.4, kupujący ponosi
całkowitą odpowiedzialność za przesłane urządzenie, w szczególności
za uszkodzenia mechaniczne powstałe w transporcie i może zostać w
związku z tymi uszkodzeniami pozbawiony gwarancji na to urządzenie
w zakresie spowodowanym tymi uszkodzeniami.
UWAGA!
Do przesłanego urządzenia należy dołączyć krótki opis stwierdzonego
uszkodzenia w tym: objawy zewnętrzne, środowisko pracy, w jakim się
ujawnia, a także czas pracy, po upływie którego zazwyczaj występuje.
Ponadto zaleca się podać dokładne dane kontaktowe osoby
bezpośrednio korzystającej z urządzenia w celu ewentualnej konsultacji
co do charakteru uszkodzenia.
§ 4 Wyłączenie gwarancji
1. Gwarancja nie obejmuje przypadków, gdy:
- urządzenie zostało uszkodzone lub zniszczone na skutek działania
siły wyższej lub wpływów środowiska (pożar, powódź, wilgoć,
wyładowania atmosferyczne, przepięcie w sieci telefonicznej lub
energetycznej, itp.)
- uszkodzenie spowodowane jest niewłaściwym użytkowaniem
urządzenia, w szczególności w sposób niezgodny z Instrukcją
Obsługi;
- urządzenie zostało otwarte lub było naprawiane przez nieautoryzowany punkt serwisowy lub inną osobę;
- urządzenie wykazuje jakiegokolwiek rodzaju uszkodzenia
mechaniczne, zarówno wewnętrzne jak i zewnętrzne;
- urządzenie było niewłaściwie transportowane i/lub składowane.
2. Gwarancją nie są objęte takie części jak akumulatory, obudowy,
przewody oraz pozostałe elementy posiadające z natury określony
czas zużycia, lub innego rodzaju wyposażenie dodatkowe.
3. Gwarancją nie są objęte czynności należące do normalnej obsługi
92
Page 95

Babycom 268
eksploatacyjnej np.: zainstalowanie sprzętu, sprawdzenie działania,
logowanie słuchawek, przypisywanie MSN itp.
4. Ponadto, żadne roszczenia gwarancyjne nie zostaną uznane w
przypadku, gdy urządzenie nie posiada widocznego numeru seryjnego
nadanego przez producenta.
§ 5 Warunki ogólne
1. Niniejsza gwarancja stanowi podstawę stosunku prawnego między
kupującym a Swissvoice SA.
Prawa i obowiązki stron reguluje wyłącznie treść postanowień ujętych
w niniejszej gwarancji, a z którymi kupujący obowiązany jest zapoznać
się przed zawarciem umowy kupna urządzenia. Zawarcie umowy
kupna jest jednoznaczne z przyjęciem warunków niniejszej gwarancji.
2. Sądem właściwym dla wszystkich sporów bezpośrednio i pośrednio
związanych z niniejszą gwarancją, w takim zakresie jak jest
dozwolone, jest sąd właściwy dla siedziby Swissvoice SA Oddział w
Polsce w Warszawie.
3. Gwarancja nie wyłącza, nie ogranicza ani nie zawiesza uprawnień
Klienta wynikających z niezgodności towaru z umową (Ustawa z dn.
27.07.2002, Dz. U. Nr 141, poz. 1176).
Najbardziej aktualne dane adresowe Autoryzowanego Serwisu produktów Swissvoice znajdą Państwo na naszej stronie internetowej
www.swissvoice.net lub pod numerem infolinii 0 801 800 308.
93
Page 96

Babycom 268
Page 97

Babycom 268
Page 98

Babycom 268
Page 99

Warranty Certificate
Warranty Certificate
Garantieschein, Bon de garantie, Certificato di garanzia,
Garantiebewijs, Takuutodistus, Garantibevis, Garantisedel,
Garantibevis, Certificado de Garantía, Talão de garantia
Babycom 268
device type: (Gerätetyp, type d’appareil, tipo di apparecchio, toesteltype, laitetyyppi, maskintype,
serial number: (Seriennummer, numéro de série, numero di serie, serienummer, sarjanumero,
dealer’s stamp: (Händlerstempel, sceau du vendeur, timbro del rivenditore, stempel van de dealer,
dealer’s signature: (Unterschrift des Händlers, signature du vendeur, firma del rivenditore,
date of purchase: (Kaufdatum, date d’achat, data d’acquisto, datum van aankoop, ostopäiväys,
apparattyp, apparattype, modelo del aparato, modelo do aparelho):
serienummer, serienummer, serienummer, número de serie, número de série):
kauppiaan leima, forhandlerens stempel, försäljarens stämpel, forhandlerstempel,
sello del comerciante. carimbo do vendedor):
handtekening van de dealer, kauppiaan allekirjoitus, forhandlerens underskrift,
försäljarens underskrift, forhandlers underskrift, firma del comerciante,
assinatura do vendedor):
kjøpsdato, datum för köpet, salgsdato, fecha de adquisición, data de compra):
Page 100

Internet:
www.swissvoice.net
© Swissvoice SA 2009
20405063xx_ba_a0
SV 20405063
 Loading...