

Page 1
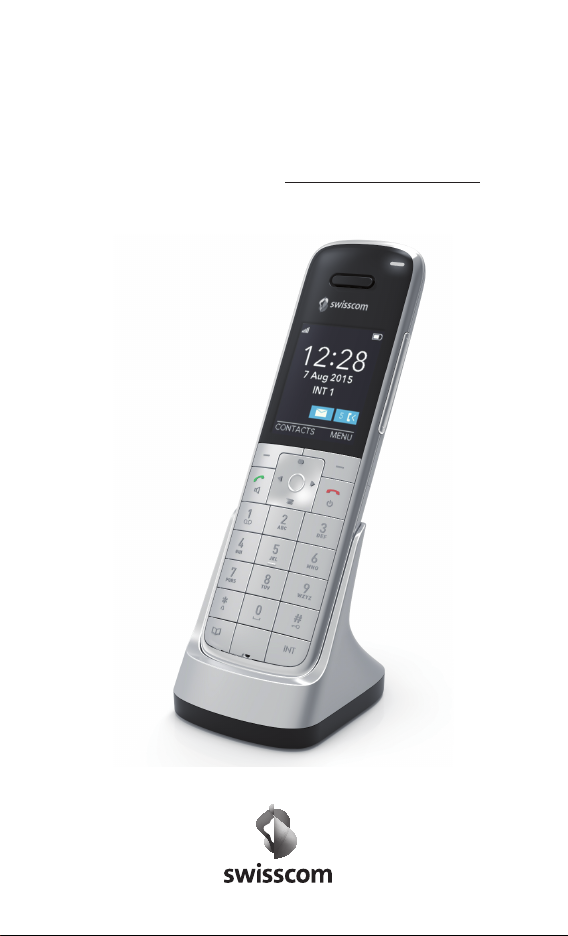
HD-Phone Nyon
User Guide
Page 2

Getting to know your telephone
Handset keys
Navigation key
LED indicator
Side volume key
(high/low)
Softkey (multifunctional key)
Talk key
Call COMBOX
Switch ringer
on/off
Our contacts
®
Softkey (multi-
functional key)
“End call” key
Call anonymous
Activating / deactivating the key lock
Internal call key
Dialled calls
Calls List
20408072en_ba_a1
Scroll left/right
Page 3
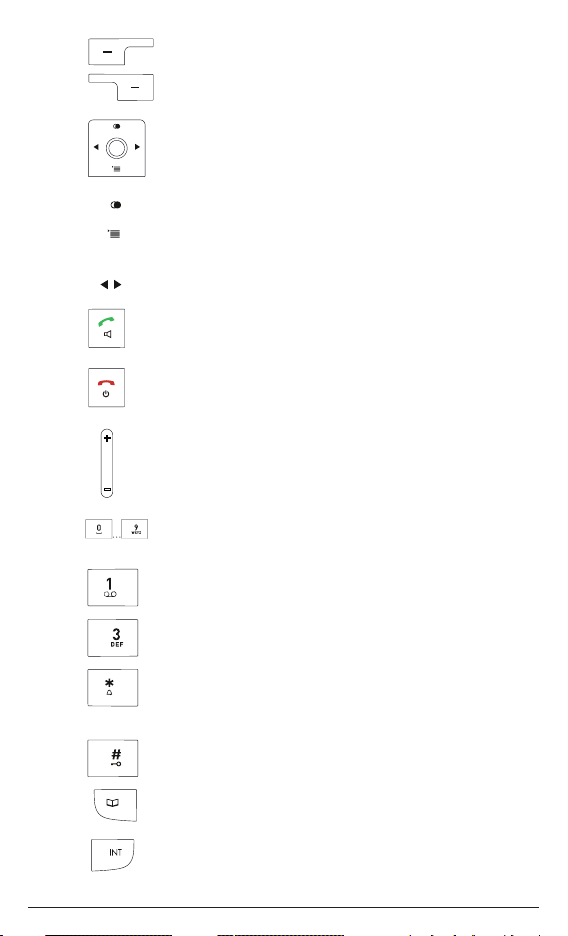
Softkeys (multifunctional keys) Right softkey: Open
menu, choose menu options, confirms entries/settings.
Left softkey: Open contacts, returns to previous menu step,
delete characters while entering text.
Navigation keyFor scrolling up/down or right/left.
Open list of last dialled calls.
Calls list Access to calls list (answered/missed calls, dialled
calls).
Scroll left/right.
Talk keyFor conducting and accepting calls and switching
to hands-free. When pressed in idle, goes off hook.
End call keyPress briefly to end a call or return to standby
mode. Press and hold down to switch the handset on/off.
Volume key In call volume adjustment during calls,
ringtone volume adjustment in idle.
Alphanumerical keypadFor dialling telephone numbers.
Letters printed on housing.
®
COMBOX
Press and hold down for direct access to net-
work answer machine messages.
Call anonymousPress and hold down to suppress caller ID
for next call.
Asterisk key For entering asterisks. In idle mode: Press and
hold down to switch handset ringer on/off. When entering
names, switch between upper and lower case lettering.
Hash keyFor entering the hash symbol. In idle mode: Press
and hold down to switch key lock on/off.
Our contactsOpen the phonebook "Our contacts“.
Internal call keyFor conducting handset-to-handset calls.
20408072en_ba_a1
1
Page 4
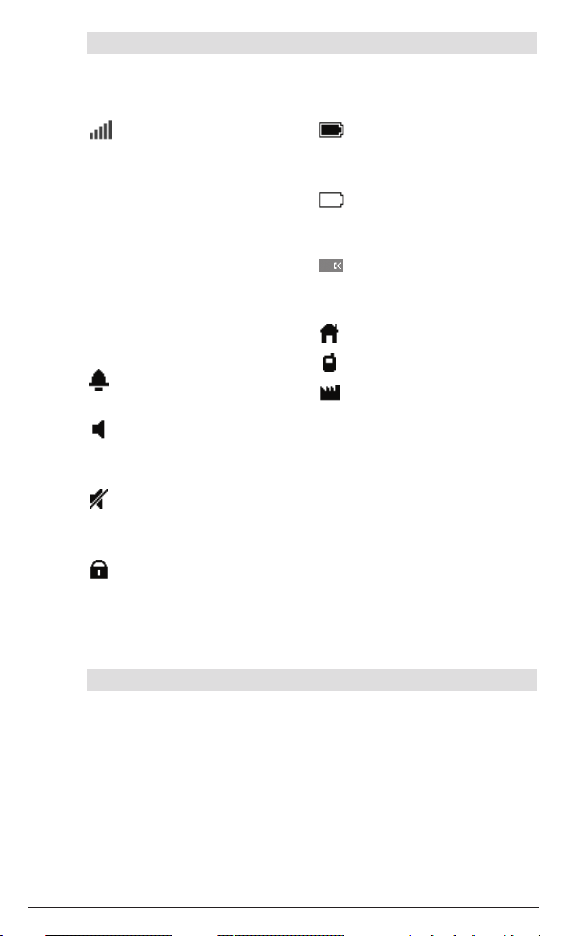
Handset display symbols
The following symbols are displayed on your handset.
Coverage symbol
Reception displayed when the
handset is within range of the
base station.
Flashes red when out of range
of the base station or not registered with the base station.
Is lit blue, when the electromagnetic radiation between
the base station and the
handset is shut down
(Ecomode plus activated).
Alarm set
Indicates that the alarm is set.
Handsfree on
Indicates that handsfree
speaking is activated.
Battery full
Indicates that the batteries are
fully charged.
Battery empty
Indicates that the batteries are
almost discharged.
Missed calls
Displayed if you have missed
calls in the calls list.
Home number
Mobile number
Office number
Symbols displayed in the contacts, dialled calls list etc. to
indicate which number of the
entry is used.
Ringer off
Indicates that the ringer is
switched off.
Keypad lock
Indicates that the keypad is
locked
LED indicator
Your HD-Phone Nyon handset has a LED indicator which is flashing on
some events, indicating:
- You are receiving an internal or external call.
- You have one or more missed calls.
- You are receiving a software update.
20408072en_ba_a1
2
Page 5

Practical advice
After successful registration of your handset, the following signposts may
help you to find important functions quickly.
Infomation about.…. …on page
COMBOX®setup 27
Modify ringer melodies 29
Set alarm clock 30
Activate direct call 28
Turn on keypad lock 17
Activate handsfree operation 16
Group call to locate a mislaid handset 17
Add a new contact in the
"My/Our contacts" phonebooks 21
Trouble-shooting 36
20408072en_ba_a1
3
Page 6

Contents
Getting to know your telephone
Handset keys
LED indicator
Handset display symbols
Practical advice
Safety precautions …………………………………………………………7
Setting up the telephone …………………………………………………9
Contents of the package ……………………………………………………9
Setting up the handset ………………………………………………………9
Setting the language …………………………………………………9
Installation assistant …………………………………………………………10
Connecting the charger ……………………………………………………11
Charging the batteries………………………………………………………11
Location………………………………………………………………………13
About the user guide / menus …………………………………………14
Main menu …………………………………………………………………14
Menu navigation ……………………………………………………………14
User guide fonts and symbols………………………………………………14
Telephoning ………………………………………………………………15
Making an external call ……………………………………………………15
Accepting a call ……………………………………………………………15
Current line display during call ……………………………………………15
Handsfree operation ………………………………………………………16
Earpiece/handsfree volume …………………………………………………16
Mute …………………………………………………………………………16
Dialled calls …………………………………………………………………17
Group call (paging) …………………………………………………………17
Keypad lock …………………………………………………………………17
Internal calls …………………………………………………………………18
Call waiting …………………………………………………………………18
Starting a second call ………………………………………………………19
Toggle (switching between two calls) ……………………………………19
Call transfer to another handset …………………………………………19
Three-way conference ………………………………………………………20
20408072en_ba_a1
4
Page 7

My/Our contacts …………………………………………………………21
Opening the "My/Our contacts" phonebooks ……………………………21
Select between the "My/Our contacts" phonebooks ……………………21
Dialling numbers from "My/our contacts" phonebooks …………………22
Adding a new contact ………………………………………………………22
Editing contacts ……………………………………………………………22
Show details …………………………………………………………………23
Deleting contacts/all the contacts …………………………………………23
Copying contacts/all the contacts to/from the
"My/Our contacts" phonebooks …………………………………………23
Filling empty contacts list by copying from "My/Our contacts" …………24
Search the "Our contacts" phonebook ……………………………………24
Merge duplicates in the "Our contacts" phonebook ……………………24
Calls list ……………………………………………………………………25
Dialling a number from the calls list ………………………………………25
Deleting individual entries …………………………………………………25
Deleting an entire list ………………………………………………………26
Deleting all lists………………………………………………………………26
Saving numbers from the calls list to the
"My/Our contacts" phonebooks …………………………………………26
Network ……………………………………………………………………27
®
COMBOX
(Network answer machine) ……………………………………27
Anonymous call (Identification restriction) ………………………………27
Direct call ……………………………………………………………………28
Call forwarding………………………………………………………………28
Audio ………………………………………………………………………29
Handset ringer ………………………………………………………………29
Tones …………………………………………………………………………29
Clock …………………………………………………………………………30
Appointments ………………………………………………………………30
Set alarm ……………………………………………………………………30
Set time/date ………………………………………………………………30
20408072en_ba_a1
5
Page 8

Settings ……………………………………………………………………31
Handset ………………………………………………………………………31
Handset names………………………………………………………………31
Language ……………………………………………………………………31
Line settings …………………………………………………………………32
Ecomode plus ………………………………………………………………33
Registration …………………………………………………………………33
System PIN …………………………………………………………………34
Reset …………………………………………………………………………35
Software version ……………………………………………………………35
Software update ……………………………………………………………35
Faults and trouble-shooting ……………………………………………36
Appendix……………………………………………………………………38
Care …………………………………………………………………………38
Environmental impact ………………………………………………………38
Disposing of the rechargeable batteries …………………………………38
Approval and conformity……………………………………………………38
Support ………………………………………………………………………39
20408072en_ba_a1
6
Page 9
Safety precautions
Your new Swisscom HD-Phone Nyon handset is designed for connection
to the Swisscom IP network.
Caution: Warning/danger statement, follow safety precautions!
➭ The ambient temperature must be between 5 °C and 40 °C.
➭ Please note that the ringer for incoming calls as well as signal
tones are emitted on the handset loudspeaker. Do not there-
fore hold the handset close to your ear while one of these
functions is on, otherwise your hearing may be affected.
➭ Use only the following supplied power supply:
- MN-A002-A080 ; 7.5 V , 300mA from MEIC
➭ This product requires an electrical supply of 100-240 volts AC.
➭ The mains power plug must always be easily accessible.
➭ To disconnect the device from mains, separate the plug from
the wall socket first.
Rechargeable batteries
Use only the supplied rechargeable batteries:
- HFR-44AAAJ800 from HIGHPOWER.
Using other rechargeable batteries or non-rechargeable batteries/primary cells can be dangerous and cause malfunctions in or
damage to the telephone. Insert the batteries/type indication see
chapter “Setting up the handset”.
Please note:
➭ Do not immerse batteries in water or throw in the fire.
➭ Rechargeable batteries can become warm while recharging. This is
normal and not dangerous.
➭ Do not use any other type of charging unit since this may damage
the batteries.
➭ Before using the telephone, wearers of hearing aids should note
that radio signals can be picked up by the hearing aid and cause an
unpleasant buzzing noise.
➭ Do not use your cordless telephone in environments at risk from
explosion (e.g. paintworks, petrol stations etc.)
➭ Do not position the telephone in bathrooms or showers.
➭ The radio signals may influence the working of medical equipment.
➭ In the event of a power cut or if the batteries are discharged, your
cordless telephone will not function!
20408072en_ba_a1
7
Page 10

➭ The handset must not be charged up without batteries or the battery
cover in place.
➭ Do not touch open contacts!
If the device is passed to another user
If the device is passed to another user, please reset the device (see page
35)
20408072en_ba_a1
8
Page 11

Setting up the telephone
Contents of the package
➭ 1 handset
➭ 1 charging station
➭ 1 power supply MN-A002-A080 ; 7.5 V , 300mA from MEIC
➭ 2 rechargeable batteries NiMH AAA 800 mAh/1.2 V
➭ 4 quick start guides
Setting up the handset
Inserting the rechargeable batteries
The bottom part of the handset contains a battery compartment for housing two type AAA batteries (microcells).
Removing the battery compartment cover
Slide the battery compartment cover
downwards (approx.3 mm) and lift it up.
Insert the batteries in the battery compartment. Make sure the polarity is correct.
Insert the batteries so that the flat end
(negative polarity) of the battery is pressing
against the spring. The handset will not
function if the batteries are incorrectly
inserted. This may result in damage.
Replace the compartment cover by placing
it approximately 3 mm offset and slide it
upwards until it clicks into place.
Setting the language
When the batteries have been inserted for the first time the language
choice appears.
1. Press to scroll to the desired language.
2. Confirm with OK.
The display texts are now displayed in the selected language.
20408072en_ba_a1
9
Page 12

Installation assistant
After having selected the language, the handset will automatically switch
to the registration mode.
1.
CONNECTION - PLEASE PRESS THE CONNECTION BUTTON ON THE ROUTER
OR THE BASE STATION AND WAIT
When using the Internet-Box, press the ’+’ KEY.
When using Centro Business 2.0 press long the ’DECT’ KEY.
2. If the registration is successful the handset is automatically assigned a
handset name (e.g.
DECT 203, INT 1
not successful, repeat the procedure.
3. If you have more than one IP line: After successful registration you can
directly select the incoming line(s) the handset is attached to and the
default outgoing line for your handset.
Note
• To register your handset you must install a base station first!
• The Swisscom Internet-Box and Centro Business 2.0 are also DECT
Base Stations. A separate Base Station is not required.
• If you interrupt the registration for a while, the registration menu will
close and the handset will wait for registration again.
• Refer to chapter "Settings / Registration" for further information.
appears.
or
HANDSET 1
). If the registration is
20408072en_ba_a1
10
Page 13
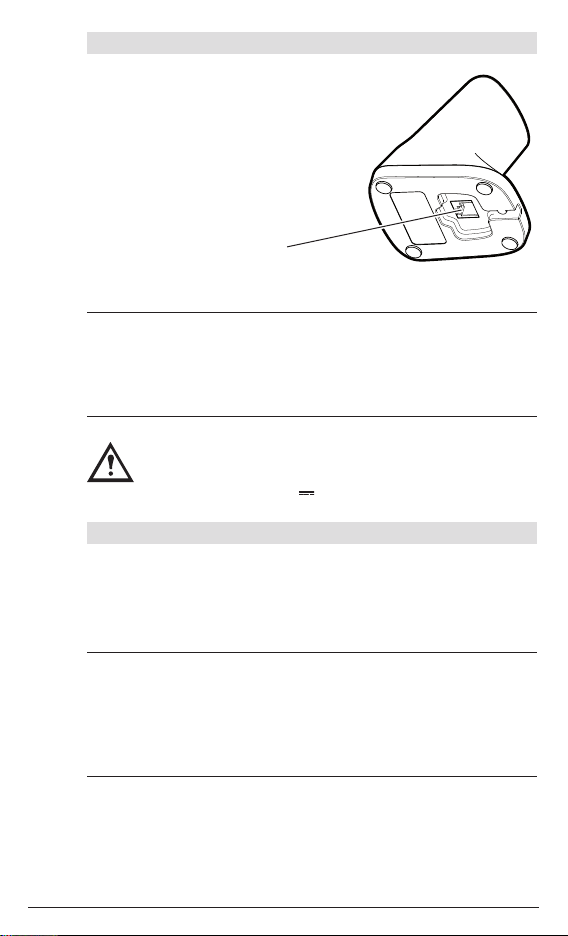
Connecting the charger
Before you can start using your charger you
must first plug in the mains cable: Insert the
plug into the corresponding socket on the
charger. Then insert the power supply in the
230 V socket. Place the handset on the
charger (make sure that the batteries are
inserted!).
Socket for mains cable
Note
• Your telephone will not function if the power supply is not plugged in
or during a power failure (no emergency mode).
• Position the base station in a clean, dry and well-aired location. The
ambient temperature must be between 5 °C and 40 °C.
Safety note
Use only the following supplied power supply:
- MN-A002-A080 ; 7.5 V , 300mA from MEIC
Charging the batteries
The batteries are not yet charged when you first unpack the telephone.
Insert the handset in the charger. The flashing battery symbol on the
handset shows the charging status. The batteries will take around 15 hours
to fully charge. Your handset is then ready to use.
Note
• For proper operation of the handset the batteries must be fully
charged initially.
• Do not insert the handset in the charging station without batteries.
• Do not use any other type of charging unit since this may damage the
batteries.
20408072en_ba_a1
11
Page 14
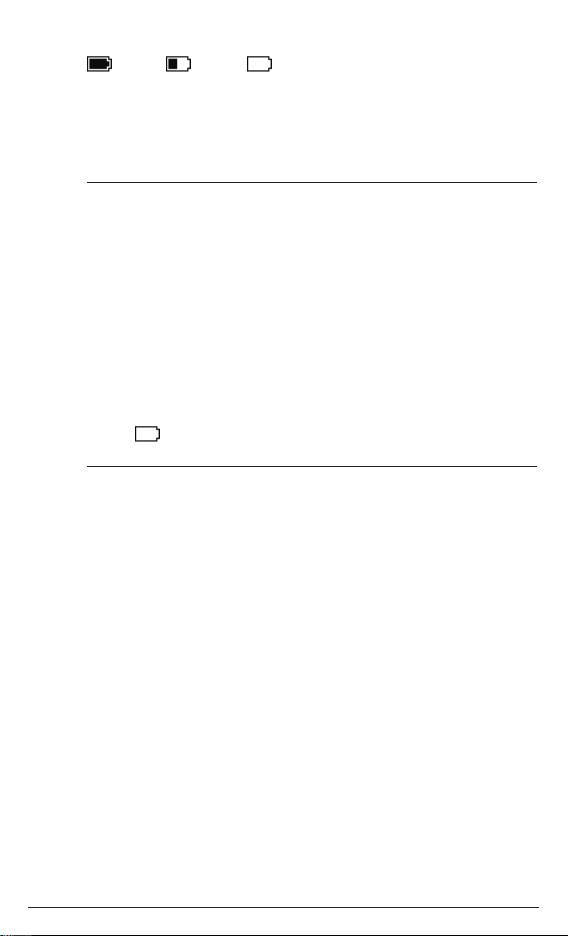
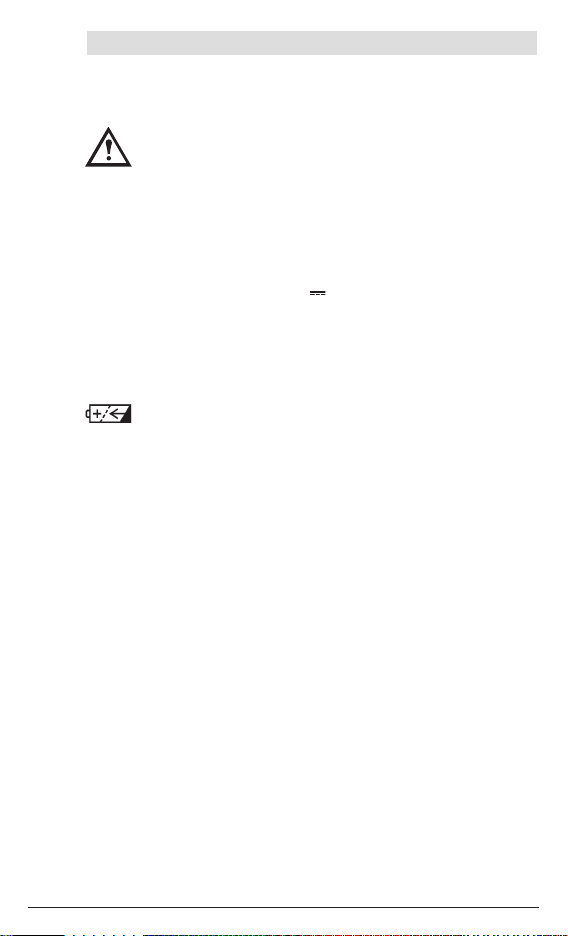
The following symbols indicate the charging status on the handset display:
“full“ “1/2“ “empty“
Important!
Please note: after you have inserted the batteries for the first time, the battery display will indicate the correct information on the charging status only
after a complete charging cycle.
Note
• You can replace the handset in the charger after every call. Charging is
electronically controlled to ensure optimal charging of the batteries in
different charge states. Avoid removing the batteries from the handset
for no good reason, since this affects the optimum charging cycle.
• Your HD-Phone Nyon handset is fitted with a low-radiation mechanism,
the antenna automatically switches off in standby mode and cannot
therefore emit any radiation. This feature must be switched on in the
base station the handset is registered with.
• You can telephone for up to 12 hours with fully charged batteries. The
handset has a standby time of up to 120 hours.
• If the battery charge status has reached its lower limit, the battery sym-
bol ( ) flashes in the display and a warning signal is heard. You have
only a few minutes of talk time left.
20408072en_ba_a1
12
Page 15

Location
The maximum range between the base station and handset is approximately 50 meters indoors and 300 meters outdoors. Depending on the
surrounding conditions as well as spatial and structural factors, the range
may be smaller. Silent zones can occur due to the digital transmission in
the frequency range used – even within the range, depending on the
structural environment. In this case the transmission quality may be
reduced through the increased incidence of short breaks in transmission.
Normal call quality can be restored if you move slightly out of the silent
zone. If the range is exceeded, the call will be disconnected unless you
move back into range within a few seconds.
➭ Do not expose the handset/charger to direct sunlight.
➭ Protect the handset/charger against moisture. Do not position the
handset/charger in rooms exposed to condensation, corrosive steam or
excessive dust. Condensation can be present in basements, garages,
conservatories or sheds.
➭ The ambient temperature must be between 5 °C and 40 °C.
Position the handset/charger in a clean, dry and well-aired location.
Choose a place which is stable, level, and not subject to vibrations. To
avoid mutual interference, do not position the handset/charger in the
immediate vicinity of electronic equipment such as hi-fi systems, office
equipment or microwave ovens. Avoid positioning the telephone near
heat sources such as heating elements or near obstacles such as metal
doors, thick walls, niches and cupboards.
20408072en_ba_a1
13
Page 16
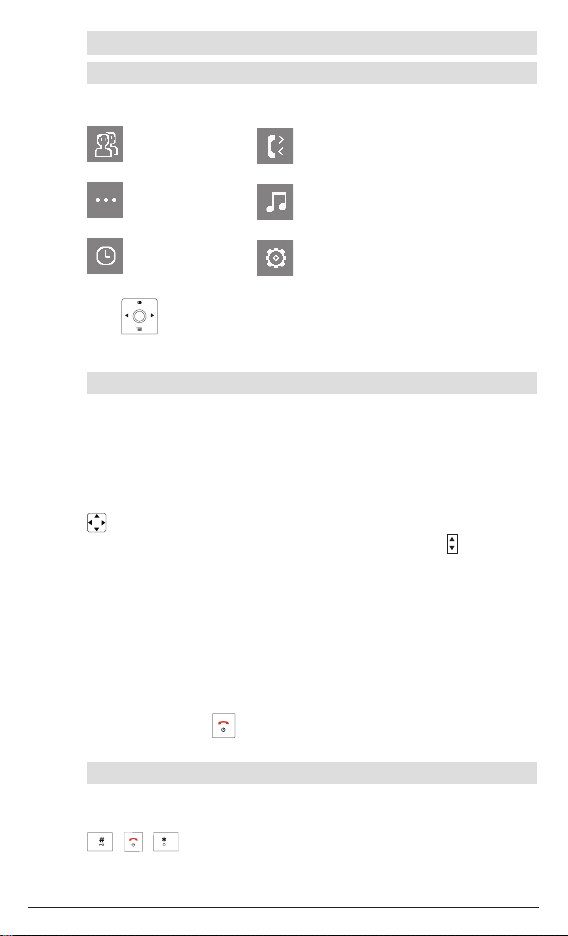
About the user guide / menus
Main menu
The available menu icons appear on the display:
Contacts Calls list
Network Audio
Clock Settings
Press to select the desired icon. The title of the selected menu
appears at the top of the display (e.g. Audio).
Menu navigation
Your handset provides you with an easy-to-follow menu. As a rule, every
menu offers a list of options. To select main menu, sub-menu and options,
press the softkey below the corresponding display text.
When the handset is switched on and ready for use, press the softkey
under MENU to open the menu selection and use the navigation key
to scroll to the menu you are seeking.
Press OK to open the options list, use the navigation key to scroll
down the list to the preferred option, and confirm the option by
pressing OK.
Back to previous menu
Press BACK to return to the previous menu.
End menu
To exit a menu, press the left softkey under BACK. If you want to return
to idle screen, press .
User guide fonts and symbols
MENU, OK, BACK Uppercase bold characters indicate softkey
functions.
, , These pictograms indicate the keys to be pressed.
KEYPAD LOCKED
20408072en_ba_a1
Uppercase bold italic grey characters indicate texts
appearing on your handset display.
14
Page 17
Telephoning
Making an external call
Call preparation/Predial
First, enter the number. Press to dial the number.
If you enter an incorrect number, you can:
• delete it by pressing repeatedly the softkey under
delete characters / long press to delete the entire number.
• move the cursor to the desired character by pressing the navigation
key (left/right).
Ending a call
Press or replace the handset in the charging station.
Accepting a call
The caller’s number or name is displayed. The name is displayed if saved in
the contacts or if CNIP* - Calling Name Identification Presentation is available.
Press , to accept the call.
Current line display during call
In case the handset is attached to multiple lines, the current line name is
displayed during the call (below the handset status bar):
• When receiving an external call, the incoming line name is displayed.
• When making an external call, the outgoing line name is displayed.
• When toggling between two calls, the line name of the active call is
displayed.
This information is only displayed in case the handset is attached to more
than one line. If the handset is attached to one line only, the information
is not available.
CLEAR
: short press to
*Functions dependent on network operator. Contact your network opera-
20408072en_ba_a1
tor to find out whether this service is supported.
15
Page 18
Handsfree operation
You can use the handsfree function to conduct calls without holding the
handset in your hand and allow others present in the room to take part in
the call.
Activating handsfree before a call:
1. Enter the desired phone number.
2. Press twice. The display shows and you can hear the ringing
signal over the handset loudspeaker.
3. Press to deactivate handsfree speaking.
Switching to handsfree speaking during a call:
1. Press .
2. To deactivate handsfree speaking press one more time.
Note
• Do not hold the handset close to your ear during handsfree operation,
the loudspea ker volume can be very high.
• If you have activated handsfree operation during a call, you can
replace the handset in the charger without ending the call.
Earpiece/handsfree volume
You can adjust the earpiece and handsfree loudspeaker volume in 5 levels.
Press the navigation key or the side Volume key during a call to adjust
the volume. The selected setting is saved after the end of the call.
Note
• The earpiece and handsfree loudspeaker volumes are independent but
the setting procedure is identical.
Mute
During a call you can mute the microphone.
1. Press the softkey under MIC OFF during a call to mute the handset
microphone.
2. Press the softkey under MIC ON to reactivate the microphone.
20408072en_ba_a1
16
Page 19
Dialled calls
Last dialled calls are saved in a Dialled calls list. If a name and number are
already stored in the contacts, the name is shown instead of the number.
Redialling a number from the list
If the telephone is in standby mode:
1. Press to open the dialled calls list and press to scroll through
the list.
2. Press to dial the number.
Press the softkey under OPTIONS. You have the following options:
• Dial: call the selected entry in the Dialled calls list
• Details: show details towards the selected entry in
• Delete call: delete the selected entry in the Dialled calls list
• Save number: save number in the contacts
• Delete all: delete the entire Dialled calls list on the
Note
• To open the dialled calls list with the telephone must be in
standby mode. After having pressed the talk key, the dialled calls list
cannot be opened with the -key.
the Dialled calls list
base or handset.
Group call (paging)
You can activate a group call to locate a mislaid handset.
1. Press the paging key on the base station. The mislaid handset rings.
2. Press the paging key again to end the ringing signal or press on
one of the handsets.
Keypad lock
If you want to carry the handset around in your pocket, you can activate
the key lock. This prevents you inadvertently dialling a number.
1. Press and hold down . The display shows
2. To unlock the keypad, press the softkey under UNLOCK, then press
.
20408072en_ba_a1
17
KEYPAD LOCKED
.
Page 20
Note
If the keypad is locked,
• you can dial emergency numbers (in call preparation only) and incom-
ing calls can still be accepted.
• you cannot dial a number or access menus.
Internal calls
You can call other handsets which are registered with your base station.
This allows you to make internal calls free of charge.
1. Press select the desired handset and confirm with OK.
Pressing automatically dials the second handset if only two hand-
sets are registered with the base station.
2. Press to end the call.
Call waiting
With this service you can have a telephone conversation and still be
informed that someone else is calling you. If a second call (internal or
external) comes in you will hear the “Call waiting” tone and you can
answer the call (press key ) or reject the call (press the softkey under
REJECT).
Press the softkey under OPTIONS. You have then the following options:
• Accept/End: Accept the waiting call, end the active call.
• Accept/Hold: Accept waiting call, active call is put on hold.
If you have two active calls:
• Press the left softkey under TOGGLE to switch between both call part-
ners.
Press OPTIONS again, you have the following options:
• Put on hold: put active call on hold.
• Conference: to connect all three call partners with each other.
• End/Unhold: end active call, continue the call on hold.
• End: end active call, the second call remains on hold.
• Call transfer: end call and connect the other two call parties.
20408072en_ba_a1
18
Page 21

Starting a second call
Second internal call
You are conducting an external call and you want to call an internal party
without ending the external call.
1. Press INT, select the desired handset and confirm with OK. Pressing
INT automatically dials the second handset if only two handsets are
registered with the base station.
2. The external call is put on hold, the called handset rings. If the second
handset answers, you can talk to the internal call partner without the
external caller hearing you.
3. Press the softkey under OPTIONS,
and to return to the original call.
Note
• Internal enquiries are managed by the base station and are not
dependent on your network operator’s available services.
Second external call
You are conducting an external call and want to call another external
party without ending the active external call.
1. Press the softkey under OPTIONS,
2. Enter the external call number and press key .
END/UNHOLD
START NEW CALL
to end the internal call
, confirm with OK.
Toggle (switching between two calls)
You have two active calls, one of which is on hold.
1. Press the left softkey under TOGGLE to switch between the call part-
ners.
2. Press the softkey under OPTIONS,
continue the one on hold.
END/UNHOLD
to end active call and
Call transfer to another handset
You can transfer the call you are conducting to another handset.
1. Press INT and select the handset to which you wish to transfer the call.
The external caller is put on hold.
20408072en_ba_a1
19
Page 22

2. If the second handset answers, you can talk to the internal call partner
without the external caller hearing you. Press the softkey under
OPTIONS,
CALL TRANSFER
to transfer the call.
Note
• If the second handset does not answer, you can end the ringing signal
and return to the original call by pressing the softkey END, then
Options,
UNHOLD
.
Three-way conference
You can set up a three-way conference with 2 external call parties.
1. Press the softkey under OPTIONS,
CONFERENCE
partners with each other. Each call partner can leave the conference call
by pressing .
2. Press the softkey under OPTIONS,
END CONFERENCE
conference.
to connect all three call
to end the
20408072en_ba_a1
20
Page 23

My/Our contacts
Your HD-Phone Nyon handset gives you access to 2 phonebooks:
- Our contacts: your contacts are saved on the internet box or on the
base station. All the handsets registered to the base can access these
shared contacts.
- My contacts: your contacts are saved locally on the handset.
By default, the HD-Phone Nyon is using the phonebook "Our contacts".
Note
• The shared contacts phonebook ("Our contacts") is only available on
CAT-iq 2.0 bases. The number of entries available depends on your
base (see the corresponding user manual).
• With Centro Business 2.0 "Our Contacts" are read only (not editable).
You can edit them only on customer portal www.swisscom.ch/login
• You can store up to 250 names and numbers in the "My contacts"
phonebook on the handset.
• Every entry contains a first and last name and up to 3 telephone num-
bers (e. g. home, mobile, office).
• First and last names can be up to 12 letters long and numbers up to
24 digits long.
Opening the "My/Our contacts" phonebooks
If the telephone is in idle mode:
1. Press the softkey under CONTACTS to open the shared or private
contacts
or
Press to open the shared contacts.
2. All contacts are displayed in alphabetical order.
.
Select between the "My/Our contacts" phonebooks
You can easily switch between phonebooks.
1. Open the contacts. Press the softkey under OPTIONS.
OUR CONTACTS
2. Select
contacts".
20408072en_ba_a1
or
MY CONTACTS
21
to switch between "My/Our
Page 24
Dialling numbers from "My/our contacts" phonebooks
1. Open the contacts. The contacts are displayed in alphabetical order.
2. Scroll to the desired contact and press . If you have stored more
than one number for a contact (e.g. mobile and office), both numbers
are displayed. Select the number you want to call (e.g. mobile) and
press to call the number.
You can also search alphabetically: enter the first letter of the name,
select the desired contact and press . The number is displayed and
dialled.
Adding a new contact
With Centro Business 2.0 "Our Contacts" are read only (not editable).
You can add them only on customer portal www.swisscom.ch/login
When using another base or the Internet-Box:
1. Open the contacts. Press the softkey under OPTIONS.
NEW CONTACT
2. Select
(max. 3). When using "My contacts", you can assign the desired ringer
melody to the contact and set "
wish to withhold your number when calling, confirm the entry.
Note
• If the "My contacts" or "Our contacts" phonebook is empty, a mes-
sage to this effect is displayed, an alert signal is heard and
and
TACT
CONTACTS
empty contacts list by copying from My/Our contacts").
COPY FROM OUR
and enter the first and last name and the numbers
CALL ANONYMOUS
or
COPY FROM MY CONTACTS
appears (see chapter "Filling
" to "ON" if you
NEW CON-
.
Tips for entering names/numbers
• Press to enter a space, or to enter a symbol
• The available special characters appear in the lower display line. Press
the relevant key repeatedly to scroll through the characters.
• When entering names, you can press to switch between upper
and lower case lettering.
Editing contacts
With Centro Business 2.0 "Our Contacts" are read only (not editable).
You can edit them only on customer portal www.swisscom.ch/login
20408072en_ba_a1
22
.
Page 25

When using another base or the Internet-Box:
1. Open the contacts. Scroll to the desired contact and press the softkey
under OPTIONS.
2. Select
EDIT <name>
, edit and save the contact.
Show details
1. Open the contacts. Scroll to the desired contact and press the softkey
under OPTIONS.
2. Select
SHOW DETAILS
to display detailed information about the contact.
Deleting contacts/all the contacts
With Centro Business 2.0 "Our Contacts" are read only (not editable).
You can delete them only on customer portal www.swisscom.ch/login
When using another base or the Internet-Box:
1. Open the contacts. Press the softkey under OPTIONS.
2. Select
DELETE <name>
Note
• When deleting all contacts, only the contacts in the current phonebook
will be deleted.
or
DELETE ALL
, confirm with YES.
Copying contacts/all the contacts to/from the
"My/Our contacts" phonebooks
You can copy contacts or the entire "Our contacts" list from the base to
every handset registered to base.
With Internet Box: You can also copy individual contacts or the entire "My
contacts" list from every handset registered to your base to the "Our contacts" list in the base. With Centro Business 2.0 it is not possible to copy the
contacts from "My contacts" to "Our contacts".
1. Open the contacts.
2. To copy contacts between the "My/Our contacts" phonebooks:
Scroll to the desired contact, press the softkey under OPTIONS. Select
COPY CONTACT
To copy all the contacts:
Press the softkey under OPTIONS. Select
CONTACTS
, confirm with OK.
COPY ALL
, confirm with OK.
.
20408072en_ba_a1
23
Page 26

Filling empty contacts list by copying from
"My/Our contacts"
If the "My contacts" list on your handset is empty, or the "Our contacts"
list of your base is empty, a message to this effect is displayed. You can in
this case copy the contacts of the base into the "My contacts" list of the
handset, or the contacts of the handset to the "Our contacts" list in the
base. With Centro Business 2.0 it is not possible to copy the contacts from
"My contacts" to "Our contacts".
1. Open the contacts,
COPY FROM OUR CONTACTS
2. Select
CONTACTS
Note
• The copy procedure is aborted if an incoming call is received.
• If you are copying all the contacts, all contacts transferred before the
call are saved.
NO CONTACTS
, confirm with OK.
appears.
or
COPY FROM MY
Search the "Our contacts" phonebook
You can search the "Our contacts" phonebook by first name or by last
name.
1. Open the "Our contacts" phonebook. Press the softkey under
OPTIONS.
SEARCH
2. Select
3. Choose if you like to search by
first letters of the name to be searched, confirm with OK.
, confirm with OK.
FIRST NAME
or
LAST NAME
and enter
Merge duplicates in the "Our contacts" phonebook
If you have contacts with identical first and last name in the "Our contacts" phonebook (for example when copying contacts from the private
contacts), you can use this option to delete or merge repeated/duplicate
contacts. With Centro Business 2.0 it is not possible to merge duplicates
in "Our contacts".
1. Open the "Our contacts" phonebook. Press the softkey under
OPTIONS.
MERGE DUPLICATES
2. Select
20408072en_ba_a1
, confirm with OK.
24
Page 27
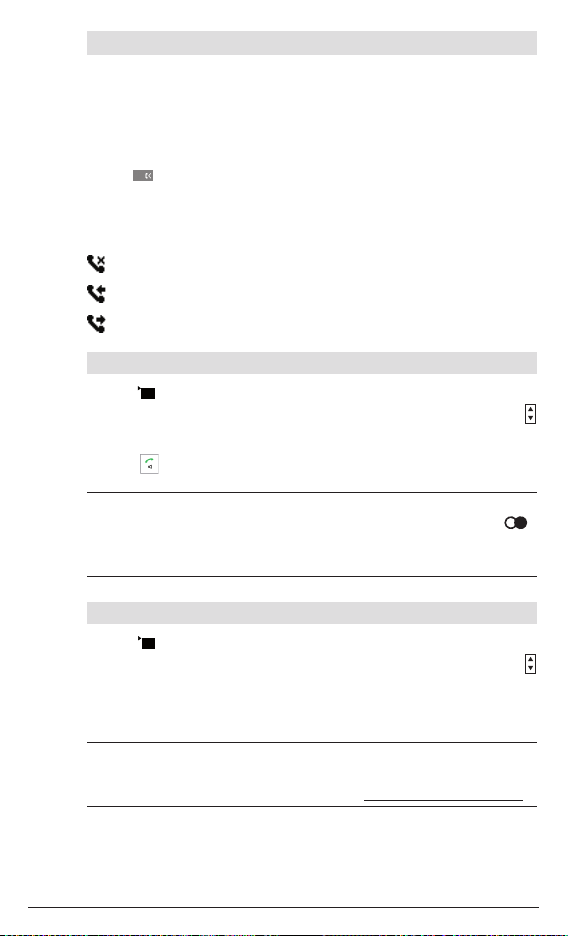
Calls list
Missed, answered and dialled calls
Missed, answered and dialled calls are saved in the calls list in the base
station. The number of entries depends on your base station (refer to the
corresponding user guide).
If you have received new missed calls, the LED indicator flashes and the
symbol to this effect appears in the display.
If the list is full, the oldest entry is overwritten by the most recent entry.
Pictograms in the calls list
Missed calls
Answered calls
Dialled calls
Dialling a number from the calls list
1. Press . Select
CALLS
, press OK to confirm. Scroll through the relevant calls list using
until you reach the entry you are seeking.
2. Press to dial the selected number.
Note
• The list of dialled calls can also be opened directly by pressing key .
• If a caller has withheld his number,
the caller's number.
Deleting individual entries
1. Press . Select
, press OK to confirm. Scroll through the relevant calls list using
CALLS
until you reach the entry you are seeking.
2. Press the softkey under OPTIONS,
MISSED CALLS,ANSWERED CALLS, DIALLED CALLS
ANONYMOUS
MISSED CALLS,ANSWERED CALLS, DIALLED CALLS
DELETE CALL
appears instead of
to delete the entry.
or
or
ALL
ALL
Note
• With Centro Business 2.0 "Calls lists" are read only (not editable). You
can delete entries only on customer portal www.swisscom.ch/login
20408072en_ba_a1
25
.
Page 28
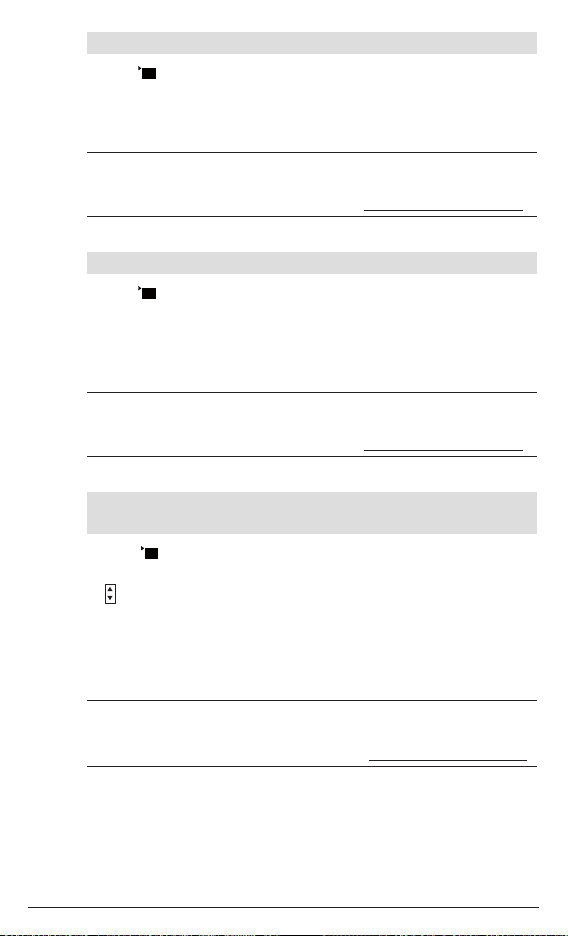
Deleting an entire list
1. Press . Select
ALL CALLS
2. Press the softkey under OPTIONS,
Note
• With Centro Business 2.0 "Calls lists" are read only (not editable). You
can delete entries only on customer portal www.swisscom.ch/login
MISSED CALLS,ANSWERED CALLS, DIALLED CALLS
, press OK to confirm.
DELETE ALL
to delete the entire list.
or
Deleting all lists
1. Press .
DELETE ALL
2. Select
question with YES, all lists (list of missed, answered and dialled calls)
are deleted.
Note
• With Centro Business 2.0 "Calls lists" are read only (not editable). You
can delete entries only on customer portal www.swisscom.ch/login
, press OK to confirm. When confirming the security
Saving numbers from the calls list to the "My/Our
contacts" phonebooks
1. Press . Select
ALL CALLS
until you reach the entry you are seeking.
2. Press the softkey under OPTIONS,
tact.
3. Enter the associated name and save the entry.
MISSED CALLS,ANSWERED CALLS, DIALLED CALLS
, press OK to confirm. Scroll through the relevant calls list using
SAVE NUMBER
to create an new con-
.
.
or
Note
• With Centro Business 2.0 "Our Contacts" are read only (not editable).
You can edit them only on customer portal www.swisscom.ch/login
20408072en_ba_a1
26
.
Page 29
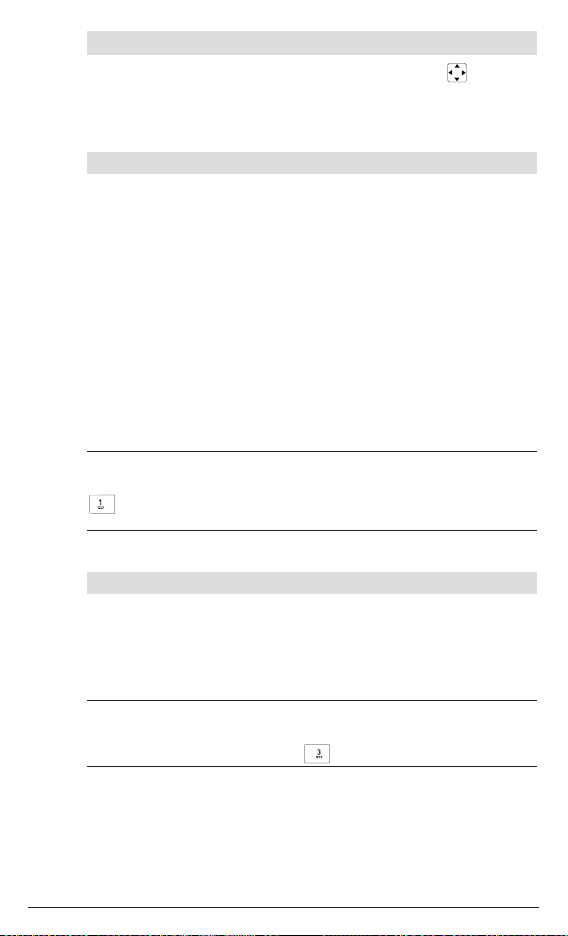
Network
1. Press the softkey under MENU. Scroll to
firm with OK.
2. You have then the following options:
COMBOX®(Network answer machine)
With COMBOX®you can always be reached on the telephone: The invisible answering machine answers any call you can’t take personally and
registers the callers’ voice messages. Before using your COMBOX
first time, you need to activate the call forwarding to be set in Customer
Center (IP telephony/Business Telephony, Call forwarding, select Forward
only missed calls to COMBOX
®
or Forward all calls directly to COMBOX®).
NETWORK
using and con-
®
for the
Using the COMBOX
You must first enter and save your COMBOX
your telephone number) in the submenu
To call your COMBOX
Note
To access your COMBOX
for a few seconds. For more details about your COMBOX
®
:
®
and listen to your messages select
®
quickly and simply, press and hold down key
®
access number (086 plus
COMBOX NUMBER
.
CALL COMBOX
®
please
.
visit www.swisscom.ch > Fixed network > COMBOX
Anonymous call (Identification restriction)
When you call someone, your number is shown on the other person’s
phone if it supports this function.
You can withhold your number for the next call i.e. you can call anonymously.
Note
• “Anonymous call” for the next call can also be activated directly by
pressing and holding down key .
20408072en_ba_a1
27
Page 30

Direct call
If you activate direct call on your telephone, the handset dials a preprogrammed number when any handset key is pressed. When entering a
direct call number, the function is activated automatically. You can deactivate the direct call function immediately (choose Off, confirm with YES).
Note
• Instead of entering the direct call number manually you can search
and copy it from the "My/Our contacts" phonebooks.
• You must deactivate the direct call function to restore your telephone’s
normal functions.
• Please note that direct call may not function in exceptional cases, e.g.
if the preprogrammed number is busy, if the preprogrammed mobile
phone number has no reception, in case of a power outage or when
the rechargeable batteries are empty.
Call forwarding
Call forwarding allows callers to reach you even if you are not near your
own telephone.
• Unconditional: Incoming calls are forwarded immediately.
• No reply: Incoming calls are forwarded after a delay.
• Busy: Calls are forwarded if the line is busy.
To turn on or off call forwarding:
1. Press the softkey under MENU. Scroll to
firm with OK.
2. Select
CALL FORWARDING
and confirm with OK.
3. In case your handset is attached to multiple lines, select the desired line
and confirm with OK.
4. Select the desired type of call forwarding
BUSY
, and confirm with OK.
5. Select now
SWITCH ON
or
SWITCH OFF
and confirm with OK.
6. If you are switching call forwarding on, enter the forwarding number
(i.e. the number to which calls are to be forwarded) and confirm with
SAVE. Instead of entering the number manually you can search and
copy it from the contacts.
7. Call forwarding status is confirmed.
20408072en_ba_a1
28
NETWORK
using and con-
UNCONDITIONAL, NO REPLY
to turn on or off call forwarding,
or
Page 31

Audio
1. Press the softkey under MENU. Scroll to
with OK.
2. You have then the following options:
Handset ringer
You can program different ringer melodies on each handset to signal
external and internal calls.
For incoming external calls, you can select a ringtone for each IP line your
handset is attached to. Choose from 15 ringtones.
Set the preferred ringer melodies and associated volume for external/internal calls (when you select
also set an ascending volume.
RINGER OFF,
Tones
Your telephone supports various tones which you can activate or deactivate:
• Keypad
Every time a key is pressed, a brief beep is heard.
• Out of range
A warning beep is sounded if you exceed the maximum range. Move
closer to the base station.
• Charging
When you insert your handset in the charger, the batteries are auto-
matically charged up. A short beep is heard.
• Battery low
Sounds when the batteries are running low.
• Confirmation
Settings and entries are confirmed by a short beep.
AUDIO
using and confirm
the ringer is switched off). You can
20408072en_ba_a1
29
Page 32

Clock
1. Press the softkey under MENU. Scroll to
with OK.
2. You have then the following options:
Appointments
Your telephone also acts as an appointments reminder: You can set 5 different appointment reminders. Enter an appointment title, date and time
and the desired melody (choose from 15 ringtones). The selected melody
is heard on the handset at the defined time.
Note
• As soon as the time of the appointment arrives, it is displayed and the
phone rings during a certain time. By pressing the softkey under
SILENCE (or after the ringing), the appointment will further be displayed. If you do not need the reminder in the display any longer,
press CLEAR.
• Pressing the softkey under OPTIONS you can edit or delete appoint-
ments.
Set alarm
You can use your telephone as an alarm clock.
Select the desired alarm time, alarm interval (e.g.
and alarm melody (choose from 15 ringtones).
Note
• The alarm only sounds on the handset on which it has been set.
CLOCK
using and confirm
MON - FRI
or
ON DAILY
)
Set time/date
Set the desired time format (12/24 hours) and date format (DD.MM.YY or
MM.DD.YY).
20408072en_ba_a1
30
Page 33

Settings
1. Press the softkey under MENU. Scroll to
firm with OK.
2. You have then the following options:
Handset
• Contrast - Select the desired contrast level.
• Screen saver - Turn the function on or off.
• Auto talk - If you activate this function, you can accept a call simply
by lifting the handset from the charger without pressing any key.
• Dialled calls - Select between the base shared or the handset local
dialled calls list.
• Big dial font - Set to
YES
to use bigger numbers for pre-dialling.
Handset names
All registered handsets are displayed (e.g. DECT 203, INT 1 or Handset 1).
To better distinguish between handsets, you can change the handset
names.
Language
Set the preferred display language. Display texts will appear in the selected
language.
SETTINGS
using and con-
20408072en_ba_a1
31
Page 34

Line settings
• Incoming line(s)*
All available IP lines for your account are displayed. Attach your handset
to all line(s) you want to use to receive incoming external calls (Setting:
ON).
• Outgoing line*
All IP lines your handset is attached to are displayed. Select the default
outgoing line you want to use for outgoing external calls.
• Line parameters
All IP lines your handset is attached to are displayed. Select the desired
line. You have then the following options:
• Line name
Give a name to your line. Enter the desired line name.
• Attached handsets
All handsets registered with the base station are displayed. Assign
the desired handsets to the selected line (setting: ON).
Note
• When a handset is not attached to any line, it will only work for inter-
nal calls. The handset does not ring on incoming external calls and you
cannot call external numbers.
Important
• When you request and receive more IP lines from Swisscom in the
future you must set the Incoming line(s)/Outgoing line and the Line
Parameters for the new lines.
• The lines can also be configured through the internet customer portal
or through web UI of the internet router. Please take care to avoid
conflicting configuration issues when setting lines with the HD-Phone
Nyon.
20408072en_ba_a1
* Appears only if more than one line available.
32
Page 35

Ecomode plus
When in standby, the electromagnetic radiation is automatically shut down
between the base station and the handset, when Ecomode plus is set to
"On". The handset does not emit any electromagnetic radiation when it is
not in use.
During a call, the electromagnetic radiation beween handset and base is
dynamically reduced according to the distance from the base station. The
handset’s power transmission is regulated; the power transmitted from the
handset is automatically reduced to the lowest level, depending on the distance to the base station. The closer you are to the base, the lower the
electromagnetic radiation.
Note
• The coverage symbol is lit blue, when the electromagnetic radiation
between the base station and the handset is shut down.
• To turn off Ecomode plus, select
SETTINGS/ECOMODE PLUS/OFF
.
• Ecomode plus also works if multiple handsets are registered (if the
handsets support Ecomode plus).
• Other cordless DECT products in range may interfere with Ecomode
plus.
Registration
You can register additional handsets with the base station. The base station must be within range.
Note
If you purchase additional handsets
• you must have a compatible base station available for this handset.
• the batteries must first be fully charged!
• the handsets must be registered with the base station before use!
If your handset is already registered, follow these steps to register it to
another base. If the handset is not registered, please refer to the "Installation assistant" section of this manual.
SETTINGS
1. Press the softkey under MENU. Scroll to
using and press
OK to confirm.
2. Scroll to
20408072en_ba_a1
REGISTRATION
using and press OK to confirm.
33
Page 36

3. Select
REGISTER HS
PRESS OK TO PUT THE HANDSET IN REGISTRATION MODE
4.
and press OK to confirm.
is displayed.
When you are ready to proceed to the handset registration, confirm by
OK to enter the registration mode.
5.
CONNECTION - PLEASE PRESS THE CONNECTION BUTTON ON THE ROUTER
OR THE BASE STATION AND WAIT
appears.
When using the Internet-Box, press the ’+’ KEY.
When using Centro Business 2.0 press long the ’DECT’ KEY.
Note
In case the base does not use 0000 as a system pin code, the handset
will request the pin.
6. If the registration is successful the handset is assigned a handset name
(e.g.
DECT 203, INT 1
or
HANDSET 1
).
If the registration is not successful, repeat the procedure.
7. If you have more than one IP line: After successful registration you can
directly select the incoming line(s) the handset is attached to and the
default outgoing line for your handset.
• Deregister a handset
All registered handsets are displayed. The actual handset is highlighted. You can deregister handsets from the base station. The base station must be within range.
System PIN
We recommend that you change the system PIN to protect your telephone
against unauthorised access.
Note
• Attention: Please take good note of your new system PIN!
20408072en_ba_a1
34
Page 37

Reset
• Reset handset
Reset the handset to default status.
Note
A handset reset deletes all handset settings, all entries in the "My contacts" phonebook and the registration to the base station.
• Reset base
Reset the base station to default status.
Note
This possibility is not offered when the handset is registered to the
Internet-Box or Centro Business 2.0.
Software version
You can view the actual software version of your handset or base.
Software update
Your handset will be automatically updated if a new software is available:
a message may appear in the display of your HD-Phone Nyon with update
information: an update is ready, ongoing or was done.
You can also update manually by selecting
is available the handset will update to this version.
UPDATE NOW
. If a new software
Important
Do NOT disconnect your phone from power supply during the update,
your equipment may get damaged!
20408072en_ba_a1
35
Page 38

Faults and trouble-shooting
Not every malfunction results from a defect in your telephone. Sometimes
you only need to briefly interrupt the flow of electricity (unplug the power
supply and plug it in again) or remove and re-insert the batteries in the
handset and check that all cables are connected properly (router, base,
handset and charger). The following guidelines will help you solve some
problems.
Symptom
Nothing is displayed on the
screen.
Handset does not react to
any key being pressed
Handset registration was not
successful
No ringer sound is emitted
Solution
• The display went into power save
mode after a period of inactivity.
Press any key to activate the display.
• Batteries are empty. Recharge or
change batteries.
• Keypad lock is activated, turn it off.
• Repeat registration and make sure
that you have installed a base station first.
• Check the system PIN of your base
station ("Easy Register handset" is
using 0000 as system PIN).
• Put your base station in registration
mode. Check in your base station
user manual, how to register a DECT
handset, and open the registration
mode.
• Handset is out of range of the base.
Move closer to the base.
• Make sure that the handset is registered, that the base is activated and
that the ringer volume is high
enough to be audible and not
turned off.
• In case of multiple lines: Make sure
that the handset is attached to the
calling incoming line.
20408072en_ba_a1
36
Page 39

The other party cannot hear
me
• Make sure that the microphone is
not muted.
No calls coming in
No outgoing calls possible
Desired softkeys do not
appear
Poor sound quality, background noise when in a call
• Make sure that the function “Call
forwarding“unconditional” is not
activated.
• Setting for “Incoming line(s)” is
missing. Attach your handset to all
line(s) you want to use to receive
incoming external calls.
• "Line settings" are missing.
• Check if you handset is attached to
proper outgoing line.
• Scroll down to display further available softkeys.
• The text behind the softkey depends
on the actual state of the phone
(e.g. active call, on hook, off hook).
• Avoid placing the base station near
other electronic equipment or large
metal objects.
• Plug the base station into
another power outlet.
20408072en_ba_a1
37
Page 40
Appendix
Care
Your telephone is a sophisticated product in terms of design and construction, and should therefore be handled with care.
To clean the telephone, wipe first with an antistatic cloth or a damp, soft
leather cloth and then dry using a dry cloth.
Environmental impact
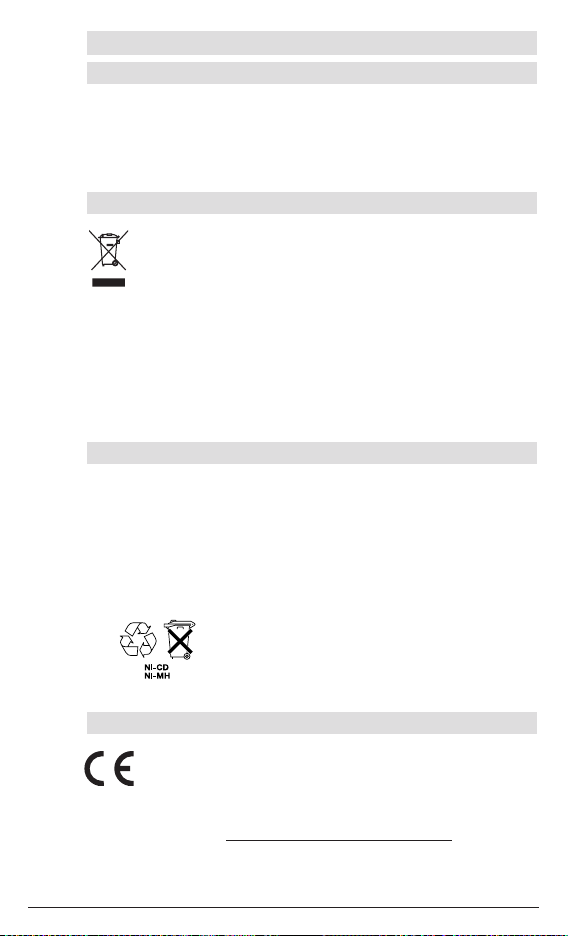
At the end of its working life this device must not under any circumstances be disposed of as normal waste. It must be taken to
a point of sale or central collection point for electronic and electrical devices in accordance with the Swiss Ordinance on the
Return, Taking Back and Disposal of Electrical and Electronic
Appliances (ORDEA).
The individual materials are recyclable as indicated. By reutilizing,
recycling or reusing them in any other form, you are making a
major contribution towards environmental protection.
Disposing of the rechargeable batteries
By law, all used batteries and accumulators must be recycled and not disposed of in domestic waste. Please dispose of them according to the official regulations. Take them to a recycling depot. The batteries/accumulators will be recycled since they may, for example, contain lithium (Li), nickel cadmium (Ni - Cd), lead (Pb), cadmium (Cd) or mercury (Hg). The batteries and accumulators are labelled with symbols and information on
their contents,
e.g.:
Approval and conformity
Handset and charger compliance to EU Directive 99/5/EC on
radio systems and telecommunication equipment is certified
by the CE symbol.
The conformity declaration is available on the following
website: www.swisscom.ch/hdphones-help
20408072en_ba_a1
38
Page 41

Support
If you have any general questions about products and services, please do
not hesitate to contact Swisscom Customer Service for "Vivo offers" on
freephone number 0800 800 800 or visit
www.swisscom.ch/hdphones-help
0800 055 055 or visit www.swisscom.ch/devices-help
and for "My SME Offers" on
.
20408072en_ba_a1
39
Page 42

en 07.2016 SV 20408072en_ba_a1
 Loading...