

Page 1
Swiftech Inc., 1703 E. 28
th
St., Signal Hill, CA 90755 T. (562) 595-8009 F. (562) 595-8769
Parts list
Parts QTY PARTS QTY
MCW5000-64™ assembly 1 Aluminum tension limiter 2
6-32 x 1 ¾ Philips screw 2 Springs 2
This product is intended for expert users. Please consult with a qualified technician for installation. Improper installation may result in
damage to your components. Swiftech assumes no liability whatsoever, expressed or implied, for the use of these products, nor their
installation. The following instructions are subject to change without notice. Please visit our web site at www.swiftnets.com
updates.
1. Before you install the MCW5000-64™ water-block:
Nylon shoulder washers 2 Arctic Alumina Thermal compound 1
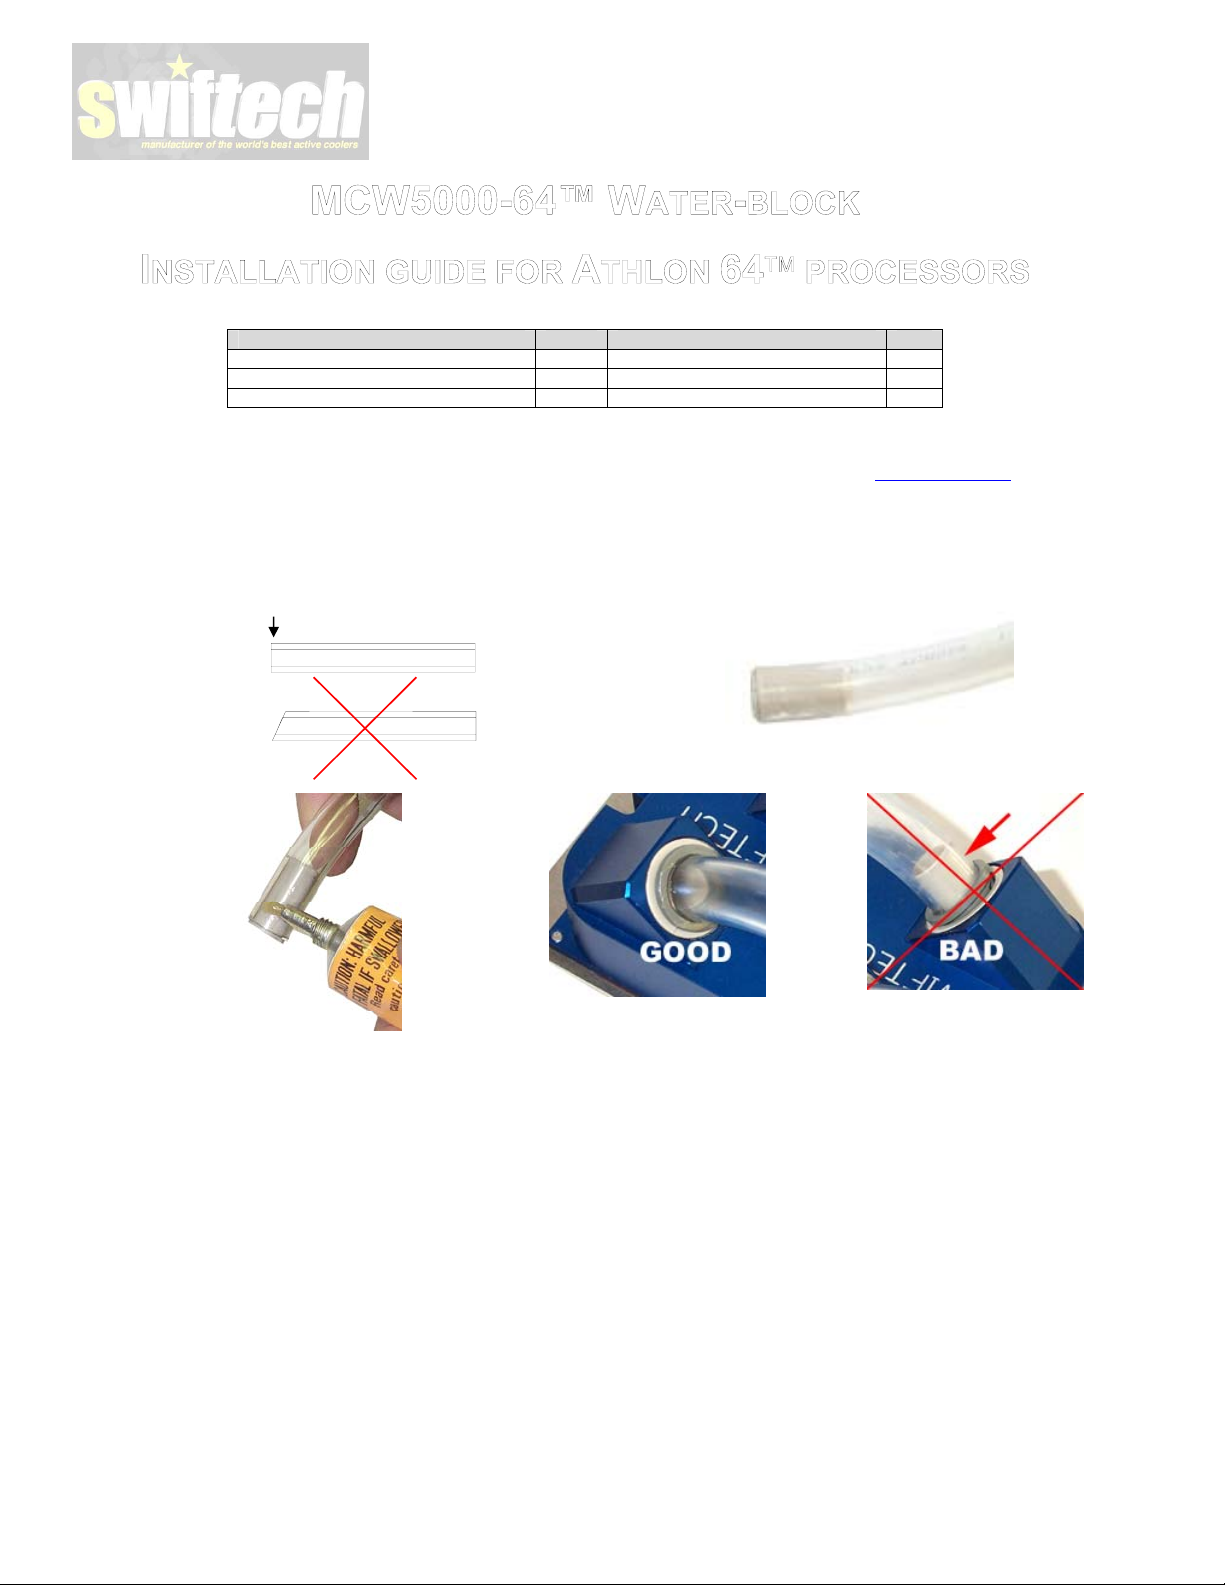
a. Prepare two pieces of tubing of sufficient length to connect
to the rest of your circuit. The cuts must be square as shown in
figure 1 or leaks may occur:
b. Install the provided plastic tube inserts at each end of the tubes,
as shown in figure 2: these inserts are absolutely imperative when
using any kind of soft tubing, such as vynil, ClearFlex, Taigon, etc...
Square cut
for
Figure 1
Figure 4
c. Spread a little bit of grease or simple
Figure 3
liquid soap around the tubing. It helps pushing
the tubes in, particularly with Clearflex tubing,
which features a very “sticky” surface.
2. Preparing your Motherboard
Remove the existing heat sink
Carefully clean the CPU.
Lightly coat the CPU with the provided thermal compound. Only a paper-thin coat is necessary. It should be applied
using preferably a razor blade, or a credit card, held between thumb and index at a 45-degree angle.
d. Fully insert both tubes into the fittings. The tip of the plastic tube inserts should
be flush with the inlet and outlet openings, as shown in figure 4 above. Inserting the
tubes requires a firm push, accompanied by a twisting motion.
3. MCW5000-64™ water-block installation diagram
The MCW5000-64 water-block bolts onto AMD’s validated plastic retention frame with two screw spring assemblies.
Please use the retention frame provided by your motherboard vendor. Remove the two existing screws that hold the
frame in place, place the water-block assembly onto the CPU, and use these two holes to bolt down the spring
assemblies, as shown on the schematic (figure 7) page.
Figure 2
Figure 5
Page 1 of 2
Page 2
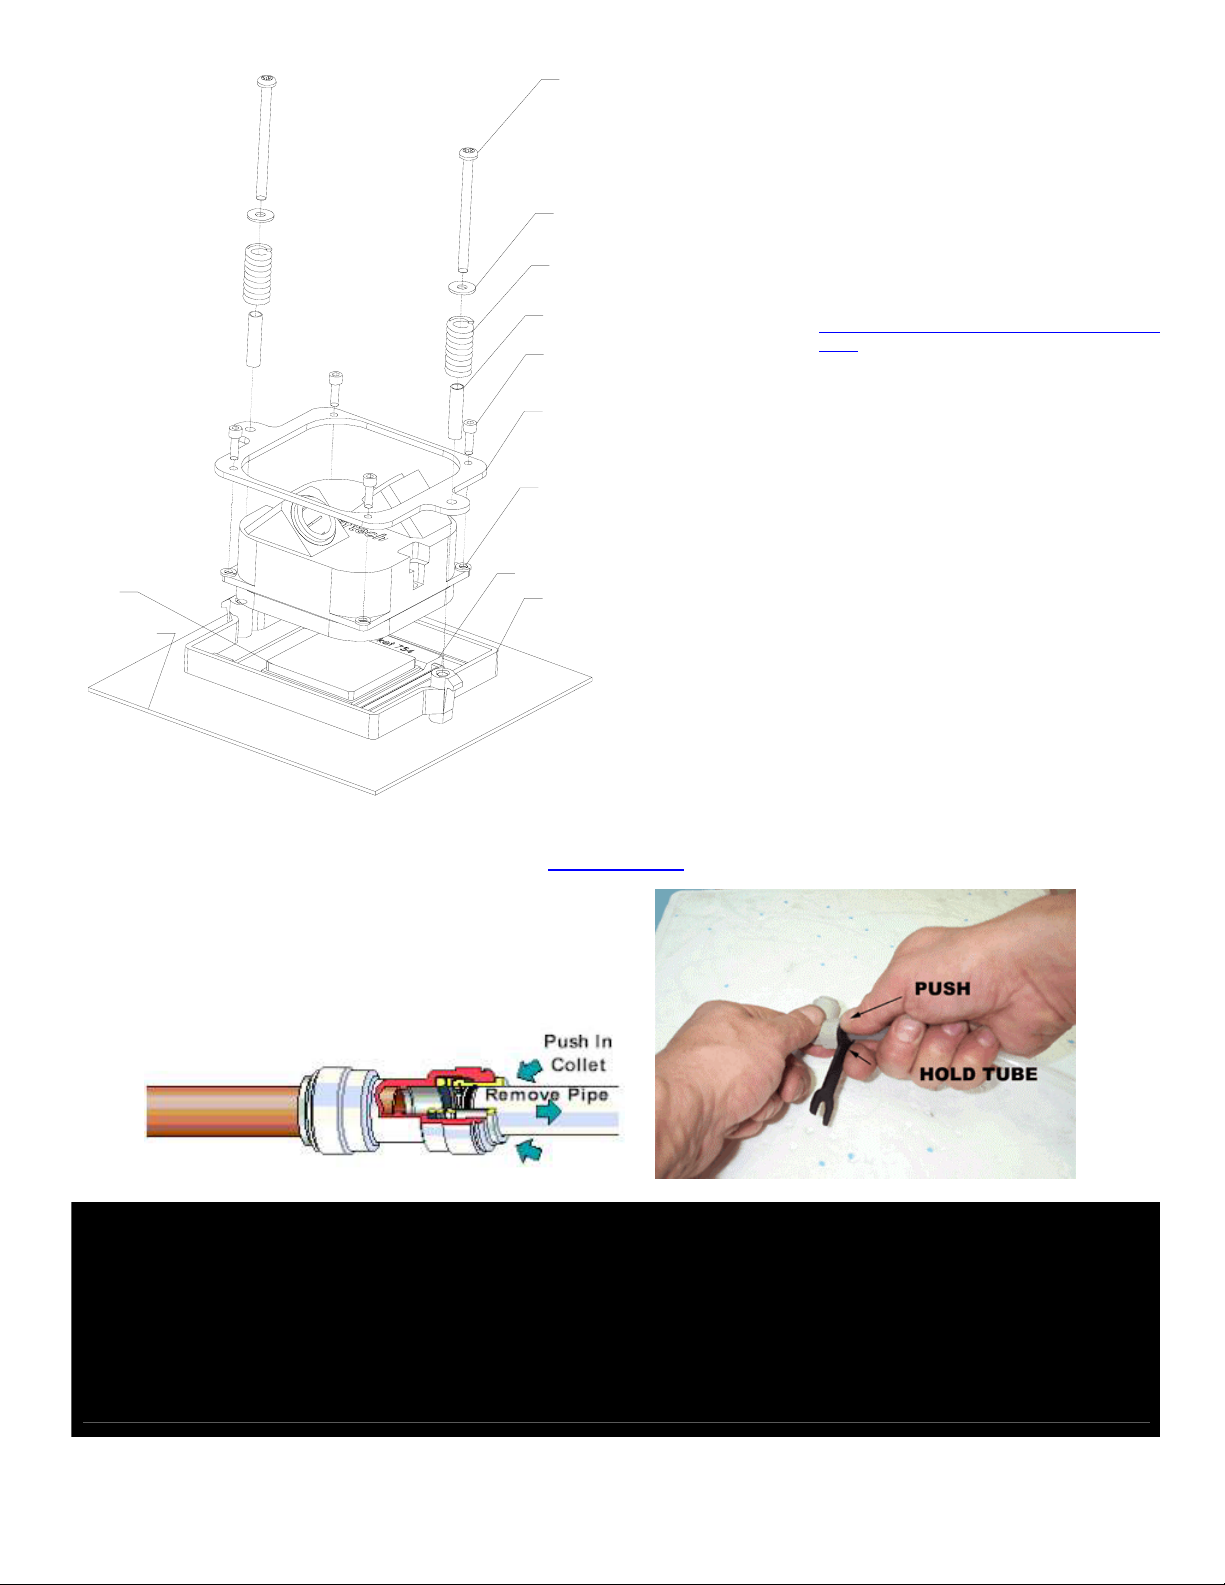
CPU
Motherboard
6-32 philips screw
Nylon shoulder washerNylon shoulder washer
Spring
Aluminum
Tension limiter
4-40 socket screw
Stainless steel frame
Nylon spacer
Socket
Plastic retention
frame
4. Connecting the water-block(s) to the cooling
circuit. FAQS:
Inlet and outlet are interchangeable.
In Multi-Processor environments, optimal water-
block performance will be achieved by connecting
them in series (outlet of one connected to the inlet
of the other).
Type of Coolant:
5.
a. For best performance, use 95% distilled water,
and 5% Swiftech brand “HydrX” corrosion
inhibitor (available here:
http://www.swiftnets.com/store/category.asp?Ca
tID=2, under the “accessories” section).
b. In ALL cases, you MUST use Distilled water
AND a corrosion inhibitor with the MCW5002
water-block. Regular automotive anti-freeze is
acceptable. Automotive manufacturers
recommend that not less than 25% is used.
c. NEVER use tap water, even for a short-term
test.
d. Not following paragraphs b and c above
constitutes misuse (*) of the product, and will
void your warranty.
Figure 6
6. Final inspection
Once the installation is completed, it is always a good idea to test the circuit for leaks, prior to powering up the computer.
Troubleshooting help is available on our web site at www.swiftnets.com
, or by calling customer support at 562-595-8009.
Note concerning removal of the tubing: Push in collet
squarely against face of fitting, using swiftech’s tube removal tool, or
a wrench of approximately the same opening diameter as the tube
(1/2” +). With the collet firmly held against the face of the fitting, the
tube can be safely pulled out. Do not attempt to pull the tube out
without pushing squarely against the collet. This may result in
damaging the fitting.
IMPORTANT DISCLOSURES
While all efforts have been made to provide the most comprehensive tutorial possible, Swiftech assumes no liability expressed or implied for any
damage(s) occurring to your components as a result of using Swiftech cooling products, either due to mistake or omission on our part in the above
instructions, or due to failure or defect in the Swiftech cooling products.
WARRANTY
Our products are guaranteed for 12 months from the date of delivery to the final user against defects in materials or workmanship. During this period,
they will be repaired or have parts replaced provided that: (I) the product is returned to the agent from which it was purchased; (II) the product has
been purchased by the end user and not used for hire purposes; (III) the product has not been misused (*), handled carelessly, or other than in
accordance with any instructions provided with respect to its use. This guarantee does not confer rights other than those expressly set out above and
does not cover any claims for consequential loss or damage. This guarantee is offered as an extra benefit and does not affect your statutory rights as a
consumer.
Page 2 of 2
 Loading...