

Page 1
Copyright Swiftech 2005 - All rights reserved - Last revision date: 2-7-06- One or more Patents Pending
Rouchon Industries, Inc., dba Swiftech - 1703 E. 28th Street, Signal Hill, CA90755 - Tel. 562-595-8009 - Fax 562-595-8769 E Mail: Swiftech@swiftnets.com - URL: http://www.swiftnets.com - Information subject to change without notice
MMMMCCCCBBBB111122220000 ““““RRRRaaaaddddbbbbooooxxxx””
””
IIIINNNNSSSSTTTTAAAALLLLLLLLAAAATTTTIIIIOO
O
ONNNN GGGGUUUUIIIIDDDDEEEE
Thank you for purchasing the MCB120 Radbox. This product offers a convenient method for installing your radiator to the back of just
about any computer case. It may provide significant thermal performance benefits compared to an installation of the radiator inside of
the case. Please use the existing case fan holes to install the RadBox. You may leave the existing case fan if you wish, as the Radbox
will not interfere with its airflow in any significant way. Please visit our web site at www.swiftnets.com for updates.
Radbox Installation
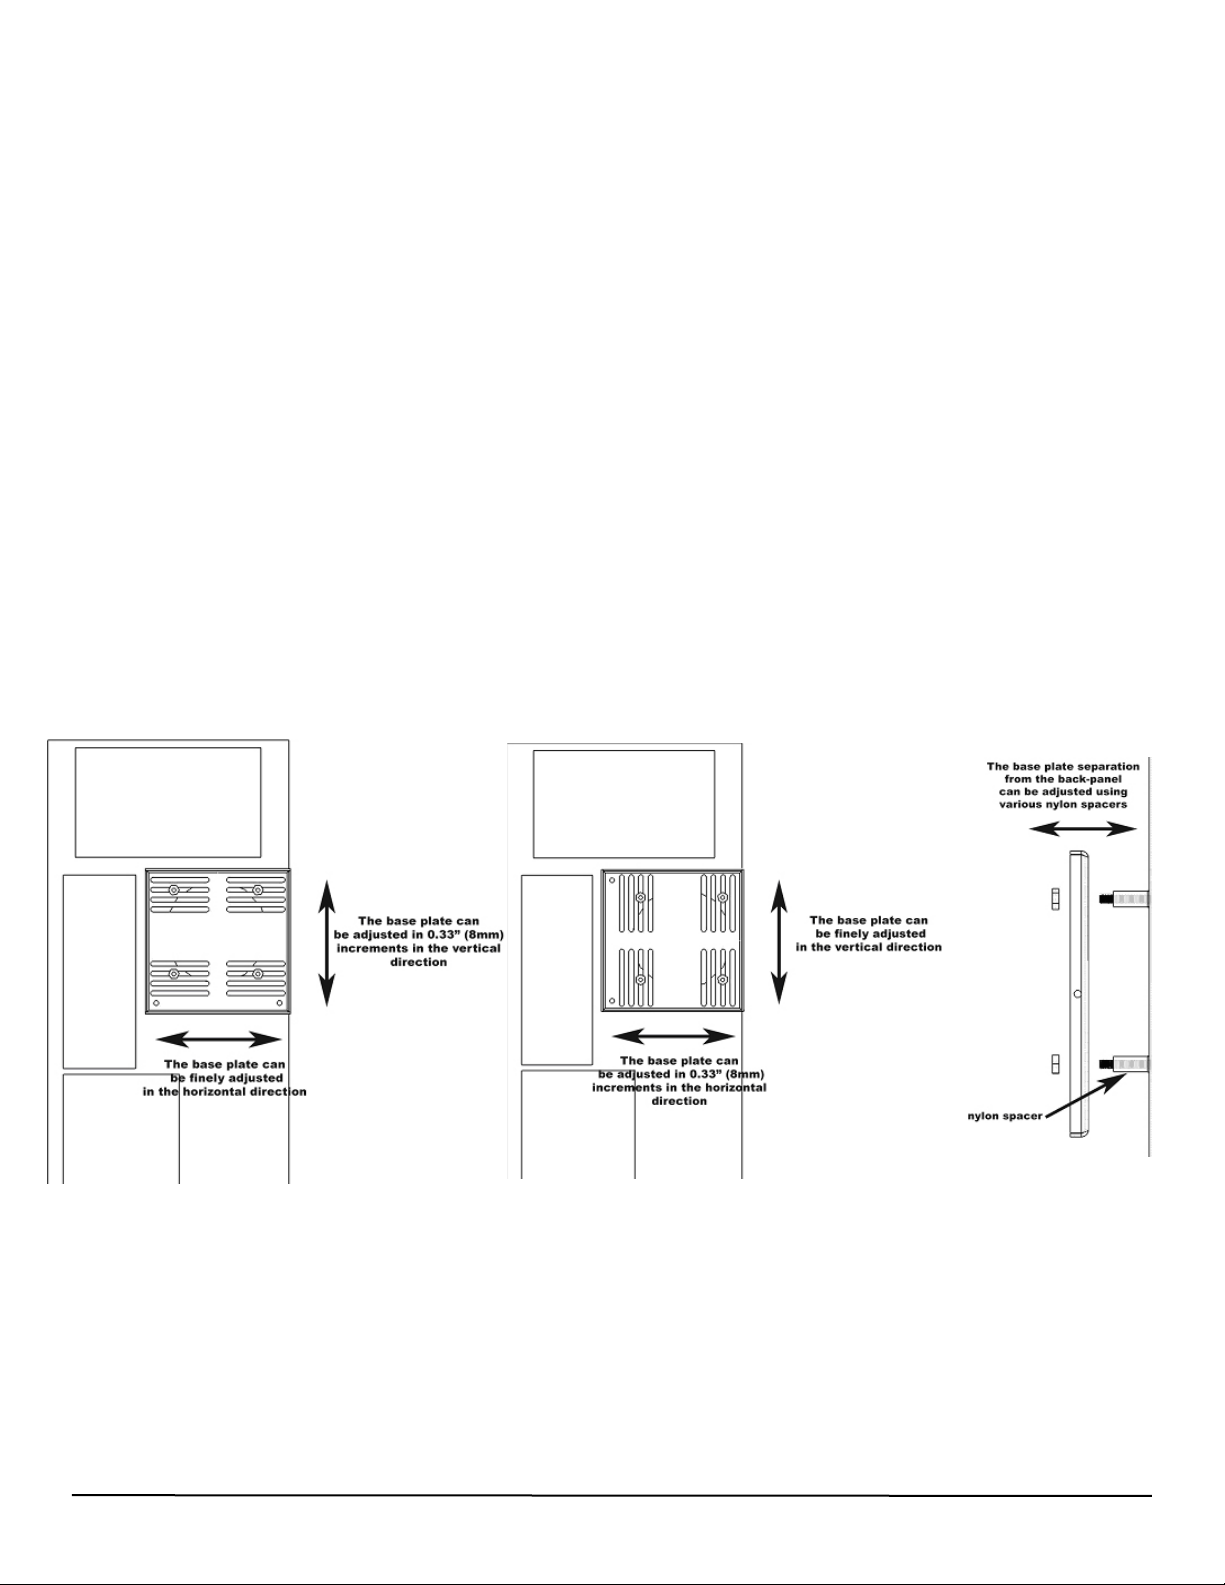
Place the radiator assembly on the back of the computer to roughly estimate where it will fit best. You need to consider the following
clearance issues:
- Exit cables and connectors from various PCI devices: the Radbox base plate can be moved in both vertical and horizontal direc-
tions to allow clearance for the cables as shown in figures 1 and 2.
- Opening the side panel once the Radbox is installed: the Radbox is supplied with various nylon spacers to separate the base
plate from the surface of the back-panel and to provide clearance for opening of the side-panel (see Fig.3)
Note that a chassis with 80mm fan opening(s) is likely to provide a very good range of adjustments. Conversely, a chassis featuring a
single 120mm fan opening the base-plate is a direct bolt on, but offers no adjustments, which may or may not suit your installation for
the purpose of positioning the radiator. In that case, it will be become necessary to drill (4) mounting holes of 0.150" (~3.5mm) in
diameter to install the base plate at the desired location.
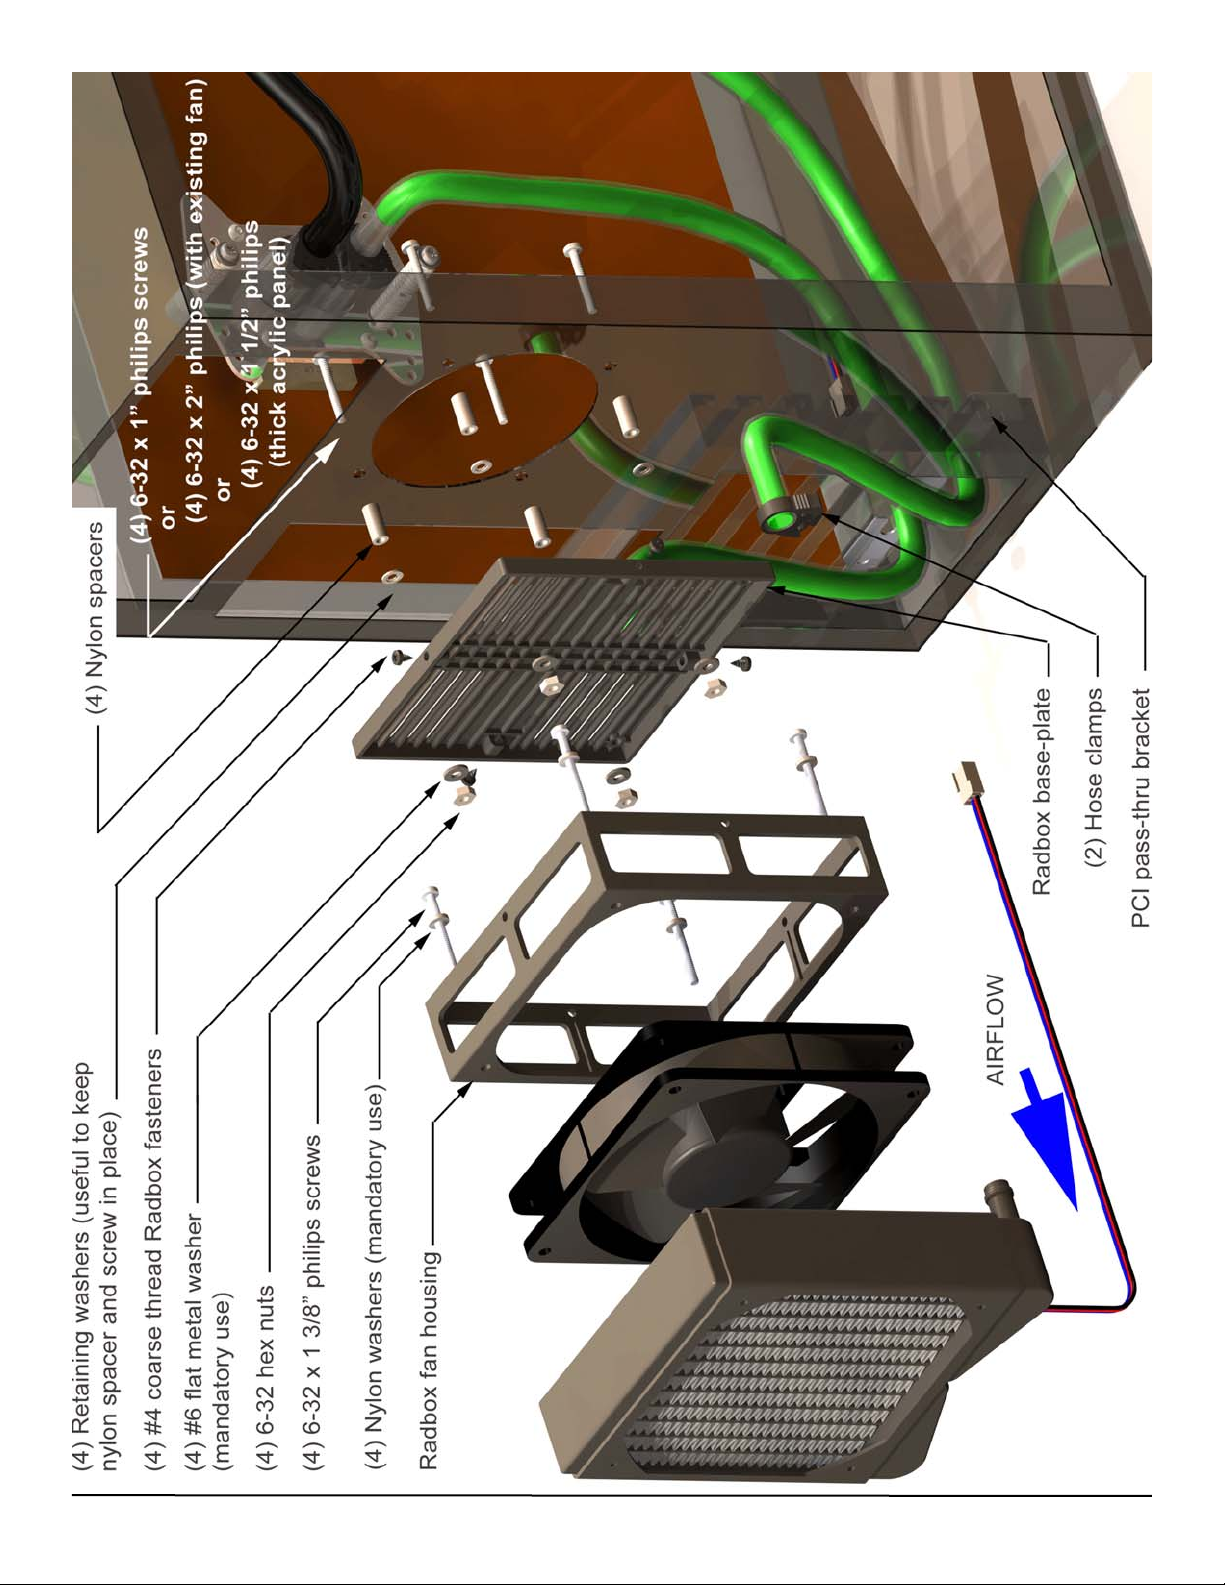
PCI pass-thru Installation
Make sure to insert your fan electrical connector through the slotted hole of the PCI bracket before you install the tubing. Only 3-pin
connectors (the type that connect to the motherboard) are small enough to pass through the slotted hole. 4-pin Molex connectors (the
type that connect to your power supply) will require that the terminals be removed from the Molex housing first.
Securing the base plate at the desired location:
IMPORTANT DISCLOSURES
While all efforts have been made to provide the most comprehensive tutorial possible, Swiftech assumes no liability expressed or
implied for any damage(s) occurring to your components as a result of using Swiftech cooling products, either due to mistake or omission on our part in the above instructions, or due to failure or defect in the Swiftech cooling products.
WARRANTY
Our products are guaranteed for 12 months from the date of delivery to the final user against defects in materials or workmanship.
During this period, they will be repaired or have parts replaced provided that: (I) the product is returned to the agent from which it was
purchased; (II) the product has been purchased by the end user and not used for hire purposes; (III) the product has not been misused (*), handled carelessly, or other than in accordance with any instructions provided with respect to its use. This guarantee does
not confer rights other than those expressly set out above and does not cover any claims for consequential loss or damage. This guarantee is offered as an extra benefit and does not affect your statutory rights as a consumer.
Fig. 1
Fig. 3Fig. 2
Page 2
Copyright Swiftech 2006 - All rights reserved - Last revision date: 1-17-06 - One or more Patents Pending
Rouchon Industries, Inc., dba Swiftech - 1703 E. 28th Street, Signal Hill, CA90755 - Tel. 562-595-8009 - Fax 562-595-8769 E Mail: Swiftech@swiftnets.com - URL: http://www.swiftnets.com - Information subject to change without notice
 Loading...