


Preface
iii
TABLE OF CONTENTS
CHAPTER 1: INTRODUCTION ..................................... 1
1.1 Package Contents ............................................................. 1
1.2 Overview ......................................................................... 1
1.3 P
1.4 SD Card Installation .......................................................... 4
1.5 Charging the Battery ......................................................... 6
hysical Details ................................................................. 2
CHAPTER 2: CONTENT ............................................ 7
2.1 File Transfer ..................................................................... 7
2.2 Adobe Reader ................................................................... 8
CHAPTER 3: HOMEPAGE ......................................... 11
3.1 Favorite .......................................................................... 13
3.2 Library............................................................................ 16
3.2.1 Filter ............................................................................................. 17
3.2.2 Sort .............................................................................................. 18
3.2.3 View ............................................................................................. 19
3.2.4 Search .......................................................................................... 20
3.3 Music ............................................................................. 21
3.4 File Explorer .................................................................... 22
3.5 Reading Record ............................................................... 22
3.6 Game ............................................................................. 22
3.7 Dictionary ....................................................................... 22
3.8 Picture ............................................................................ 23
3.9 Settings .......................................................................... 24
CHAPTER 4: WHAT YOU CAN DO WITH EBOOK READER .... 25
4.1 Reading eBooks ............................................................... 25
4.1.1 Bookmark ...................................................................................... 28
4.1.2 Turn Page ...................................................................................... 30
4.1.3 Search .......................................................................................... 31
4.1.4 Font .............................................................................................. 32
4.1.5 Screen Adjustment ......................................................................... 34
4.2 Watching Pictures and Comics ........................................... 36
4.3 Playing Game .................................................................. 39
4.4 Listening to Music ............................................................ 42
APPENDIX ......................................................... 44
Appendix A: Reset ....................................................................... 44
Appendix B: Cleaning and Safety .................................................. 45
Appendix C: Specifications ........................................................... 46
Chapter 1: Introduction
1
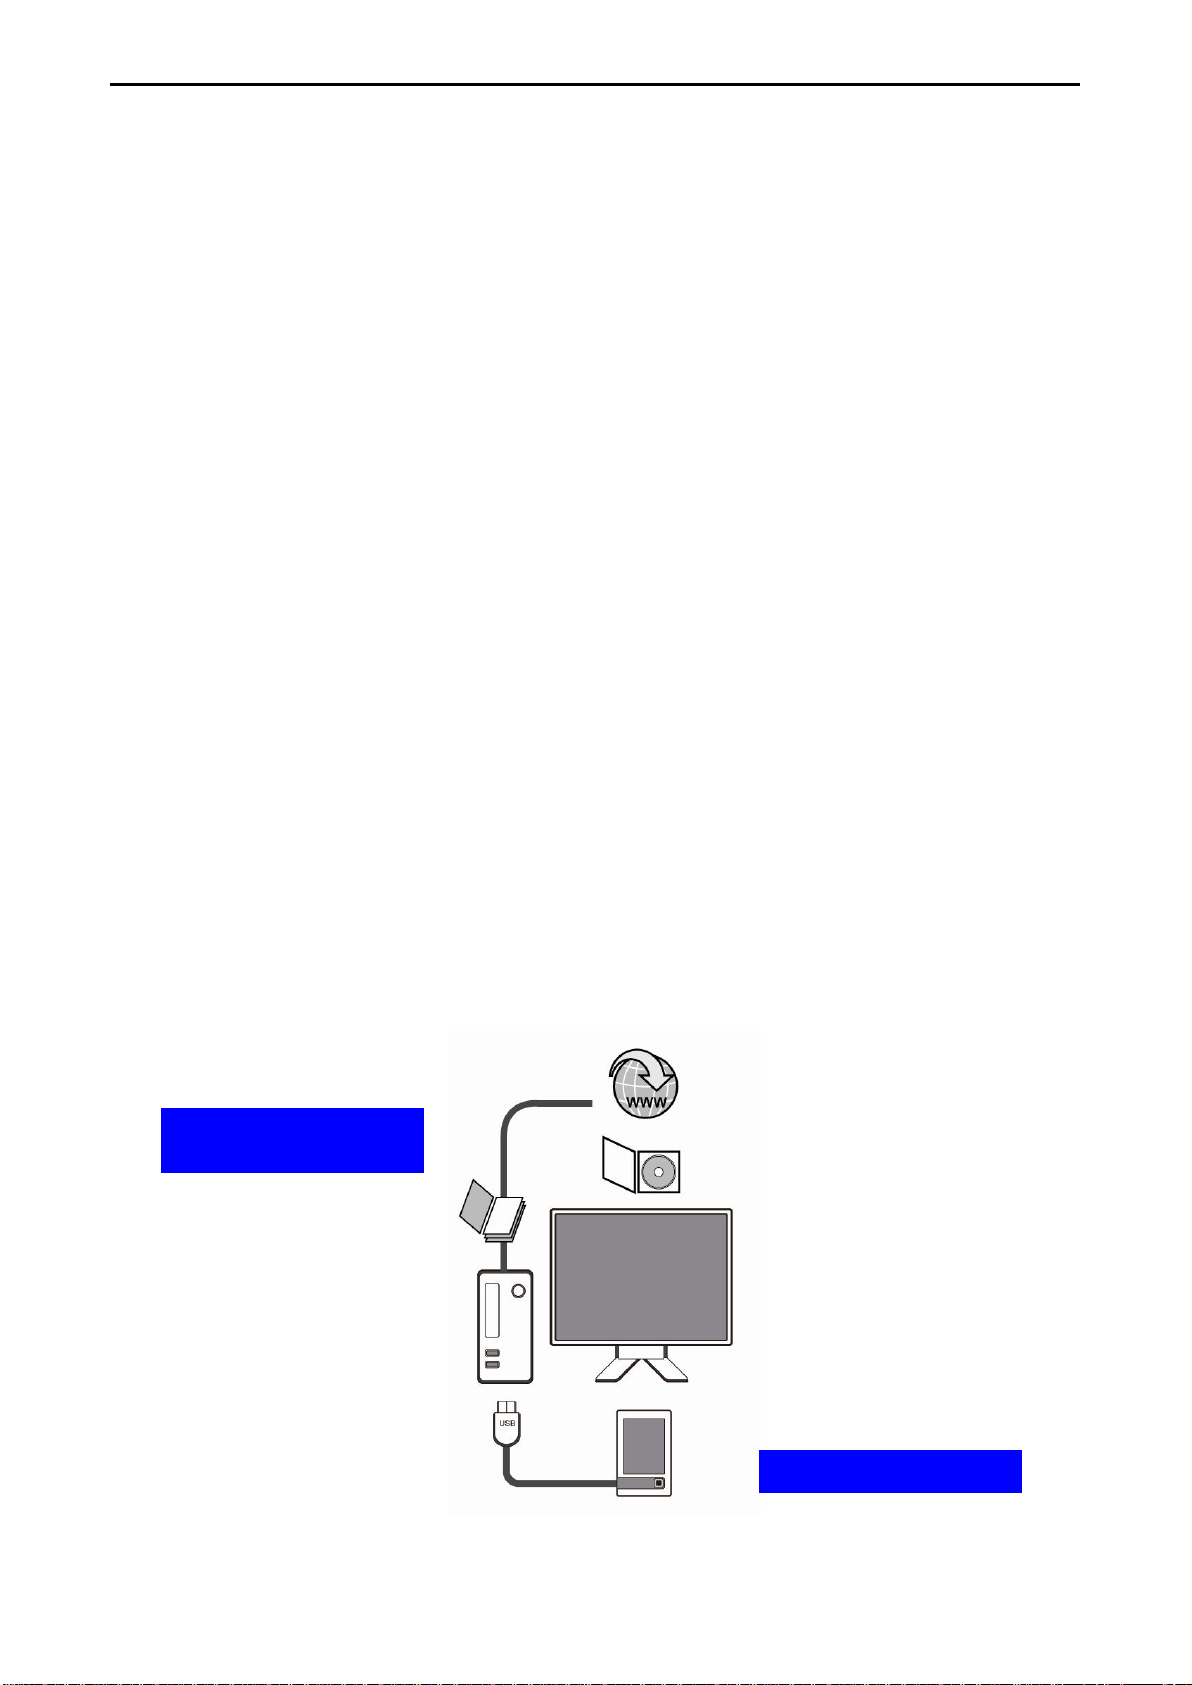
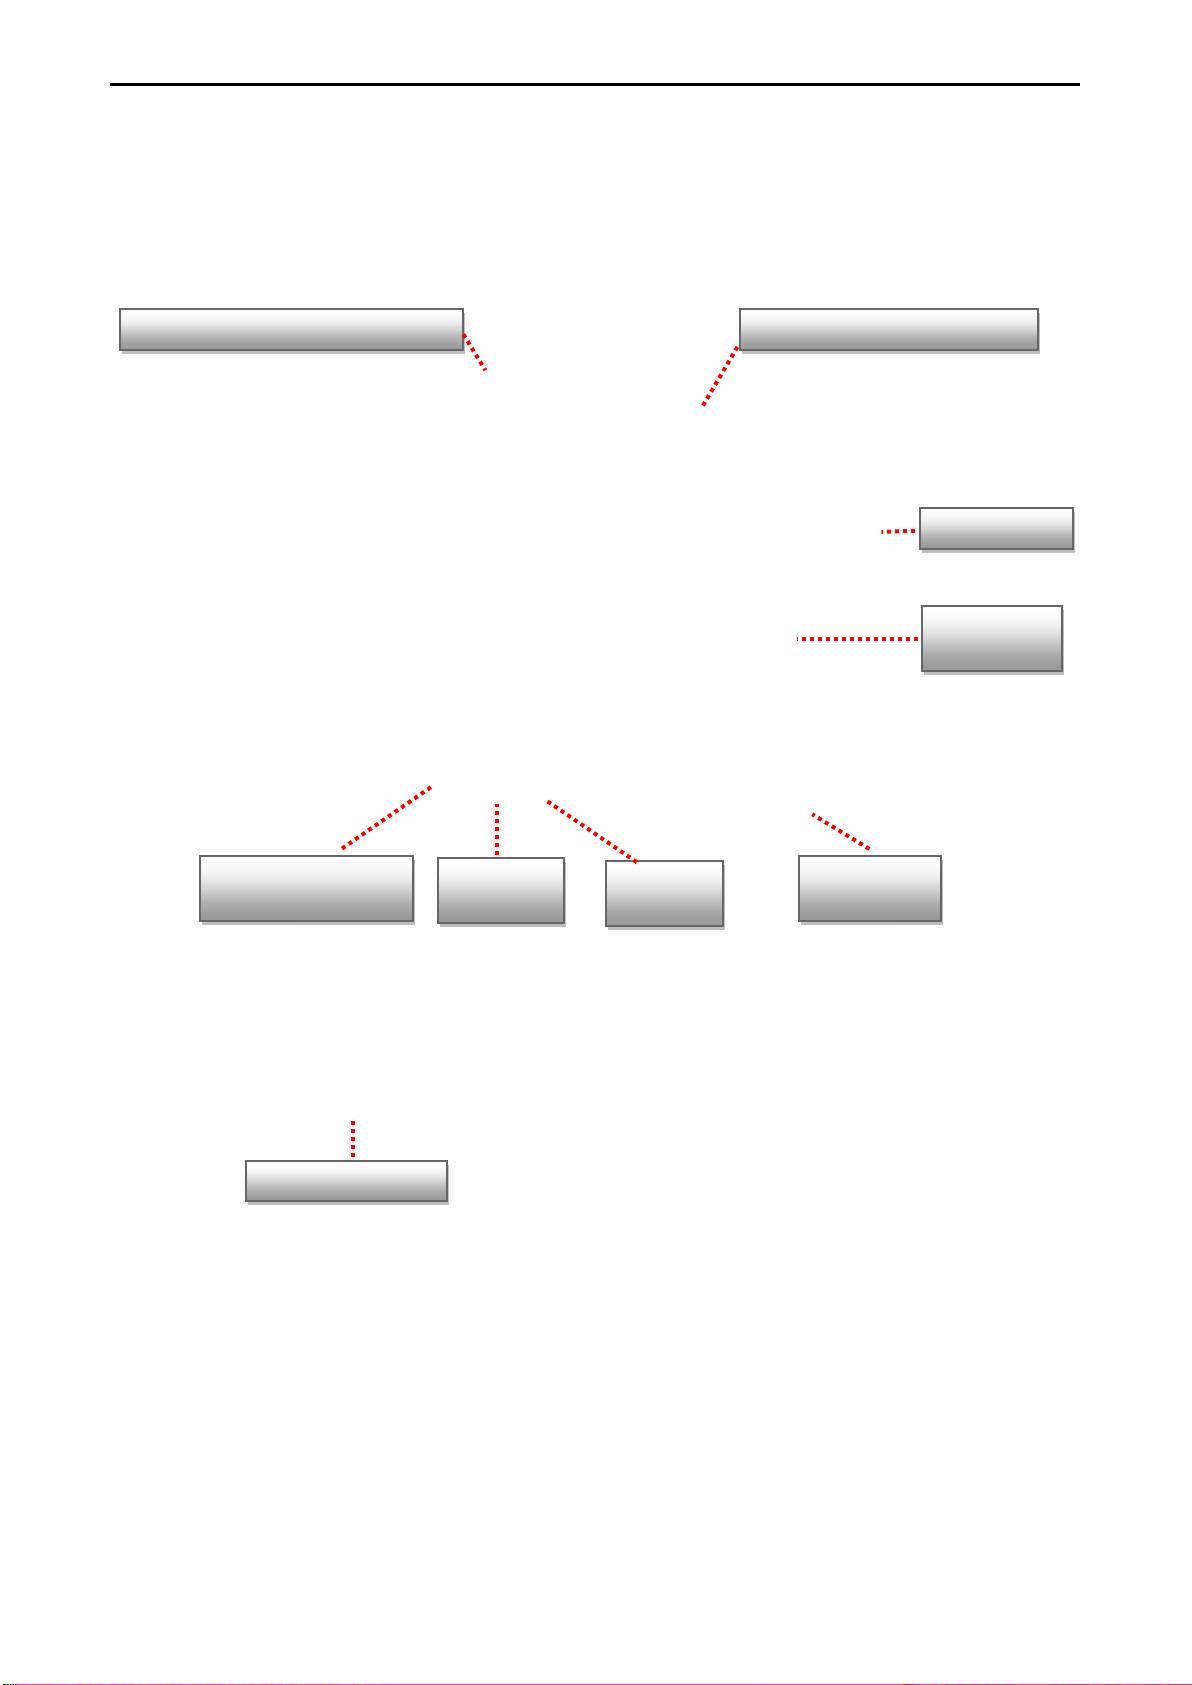
Downloaded
eBooks…
…and then transfer!
Chapter 1: Introduction
Thank you for purchasing the product. Read this chapter to know about your eBook
Reader including features, components, and capabilities.
1.1 Package Contents
Before using eBook Reader, please check your package contents to ensure that all items have
been included. If any of the listed items are missing, please contact your reseller from where you
purchased eBook Reader for assistance.
The package includes:
1 x eBook Reader
1 x Power adapter
1 x USB cable
1 x Quick intallation guide
1.2 O
Lightweight and super-portable, this eBook Reader can hold hundreds of electronic books inside.
Just like carrying a portable library, you can enjoy reading at anytime and anywhere!
Our eBook Reader is integrated with the E-Ink display to bring rich text and picture without
needing a backlight and is easy to read in bright environments. The high-contrast screen is as
close to actual ink on paper. It is natural, anti-glare and easy on the eyes. Furthermore, it is very
power-saving, capable running up to 30 hours, 8000 pages available with a full single charged.
eBook Reader displays .txt, .rtf, .pdf, .fb2, .epub, .html/chm, and .prc files as well as bmp, .jpg,
and .gif. It is also able to display books in a number of the world's most popular languages
including English, Deutsch, French, Españ ol, Russian, Dutch, Portuguese and Polish.
With the function of turn page, add bookmark, screen orientation, and zoom in, zoom out, eBook
Reader is suitable from young to old.
No more paper, no more heavy books, with this eBook Reader, you can bring lots of books with
you without increasing the heaviness on your backpack, and reduce the burden on your wrist.
Reading becomes more comfortable than ever!
verview
2
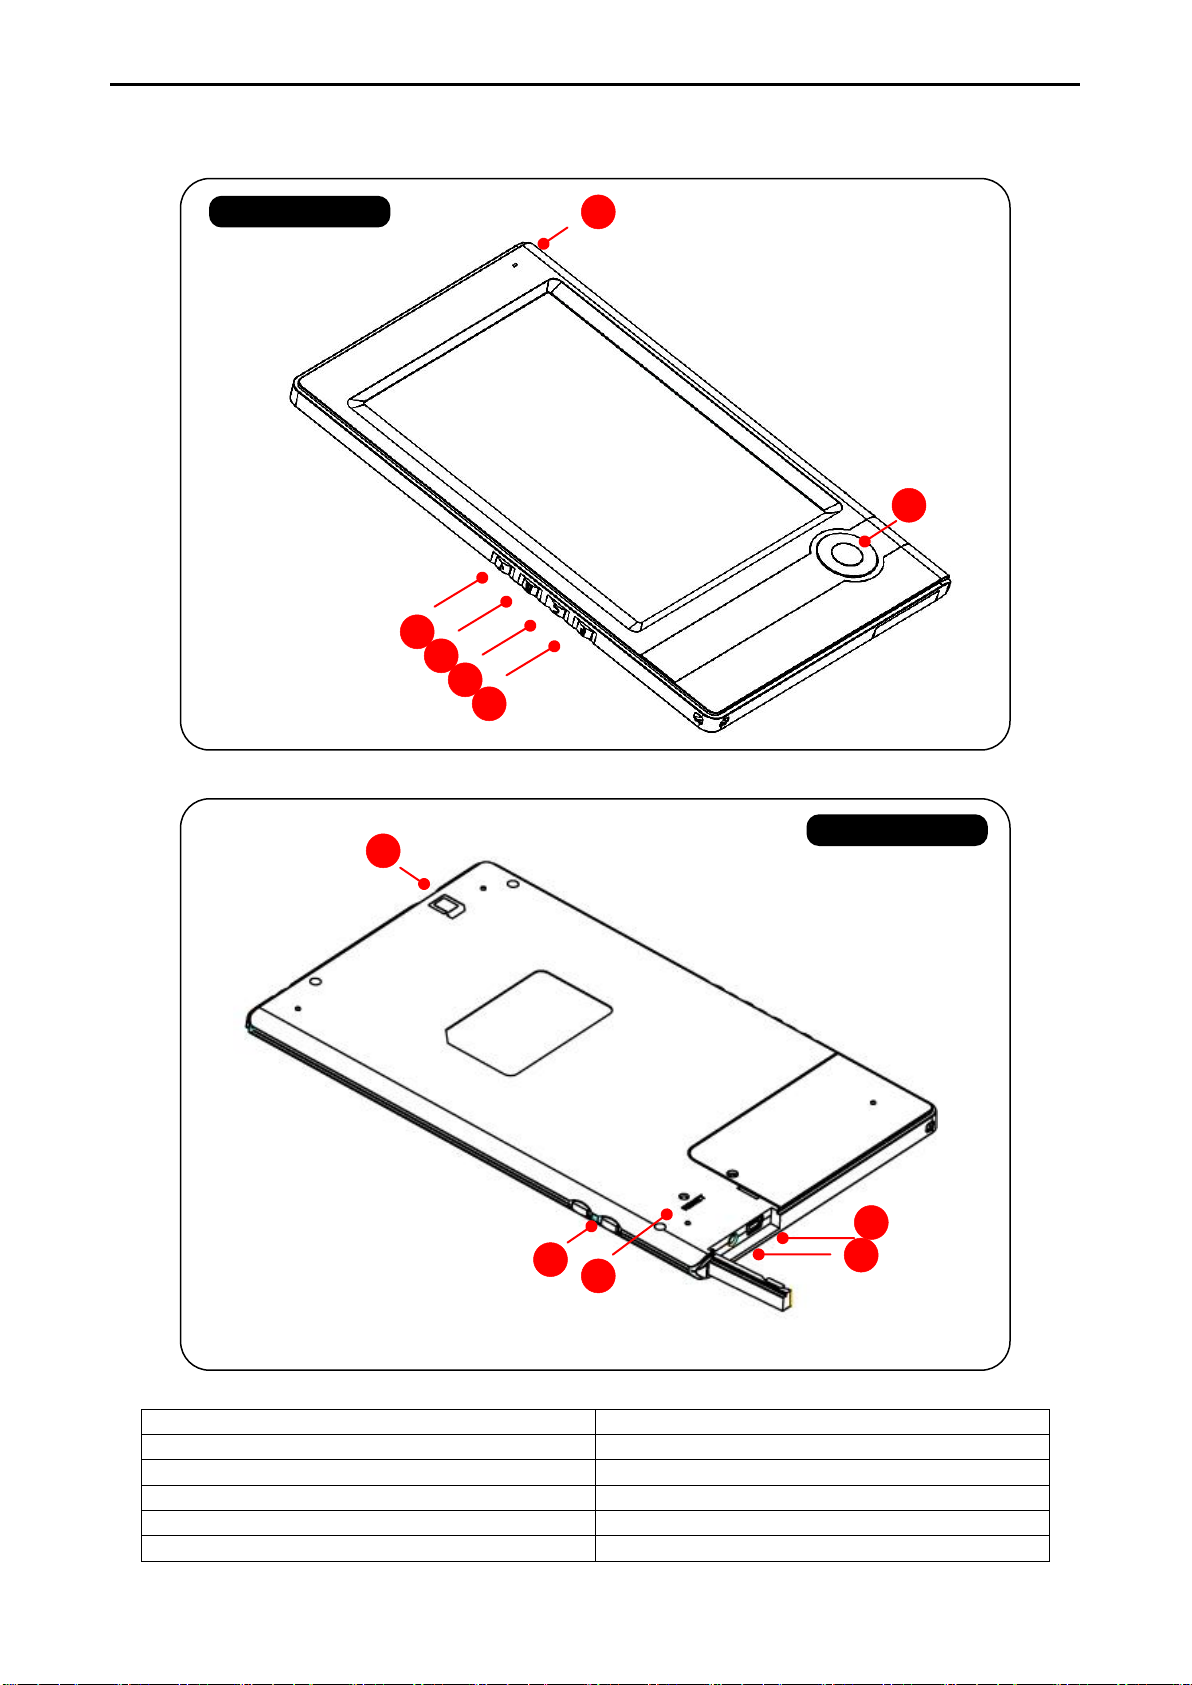
1. Power Button
7. SD card slot
2. Multimedia Button
8. Volume/Font Adjust Button
3. Rotate Button
9. Reset Button
4. Return Button
10. Headphone port (optional)
5. Menu Button
11. USB port & AC Power Adapter port
6. Cursor key and Select Button port
2 3 4 5 6
1
7 8 9
10
11
FRONT VIEW
BACK VIEW
1.3 Physical Details
Chapter 1: Introduction

Chapter 1: Introduction
3
1. Power Button
Turn the device on and off. To activate the device, press this “Power Button” for two seconds.
To power off, press and hold the button for five seconds.
2. Multimedia Button
Quick access to music folder
Add files to favorite or delete file from favorite list
Add/delete bookmark
3. Rotate Button
Press this button to rotate the image to vertical or horizontal.
4. Return Button
Return to the main menu at any environment.
5. Menu Button
Press this button to show pop out menu including bookmark, status options, library setting,
general setting, etc.
6. Cursor key and Select Button
Press these buttons to highlight up, down, left or right; and then press ENTER in the
middle to confirm. While reading, you can use “Cursor Key” to turn page, and “Select Button”
to show pop out menu.
7. SD card slot
To insert an SD card.
8. Volume/Font Adjust Buttons
While listening to music: buttons are used to adjust volume.
While reading: buttons are used to zoom in or zoom out font size.
9. Reset Button
To reset device if no operation is possible
10. Headphone Port (optional)
To connect headphones.
11. USB port and AC power adapter port
To connect the USB cable or AC power adapter.
Chapter 1: Introduction
4
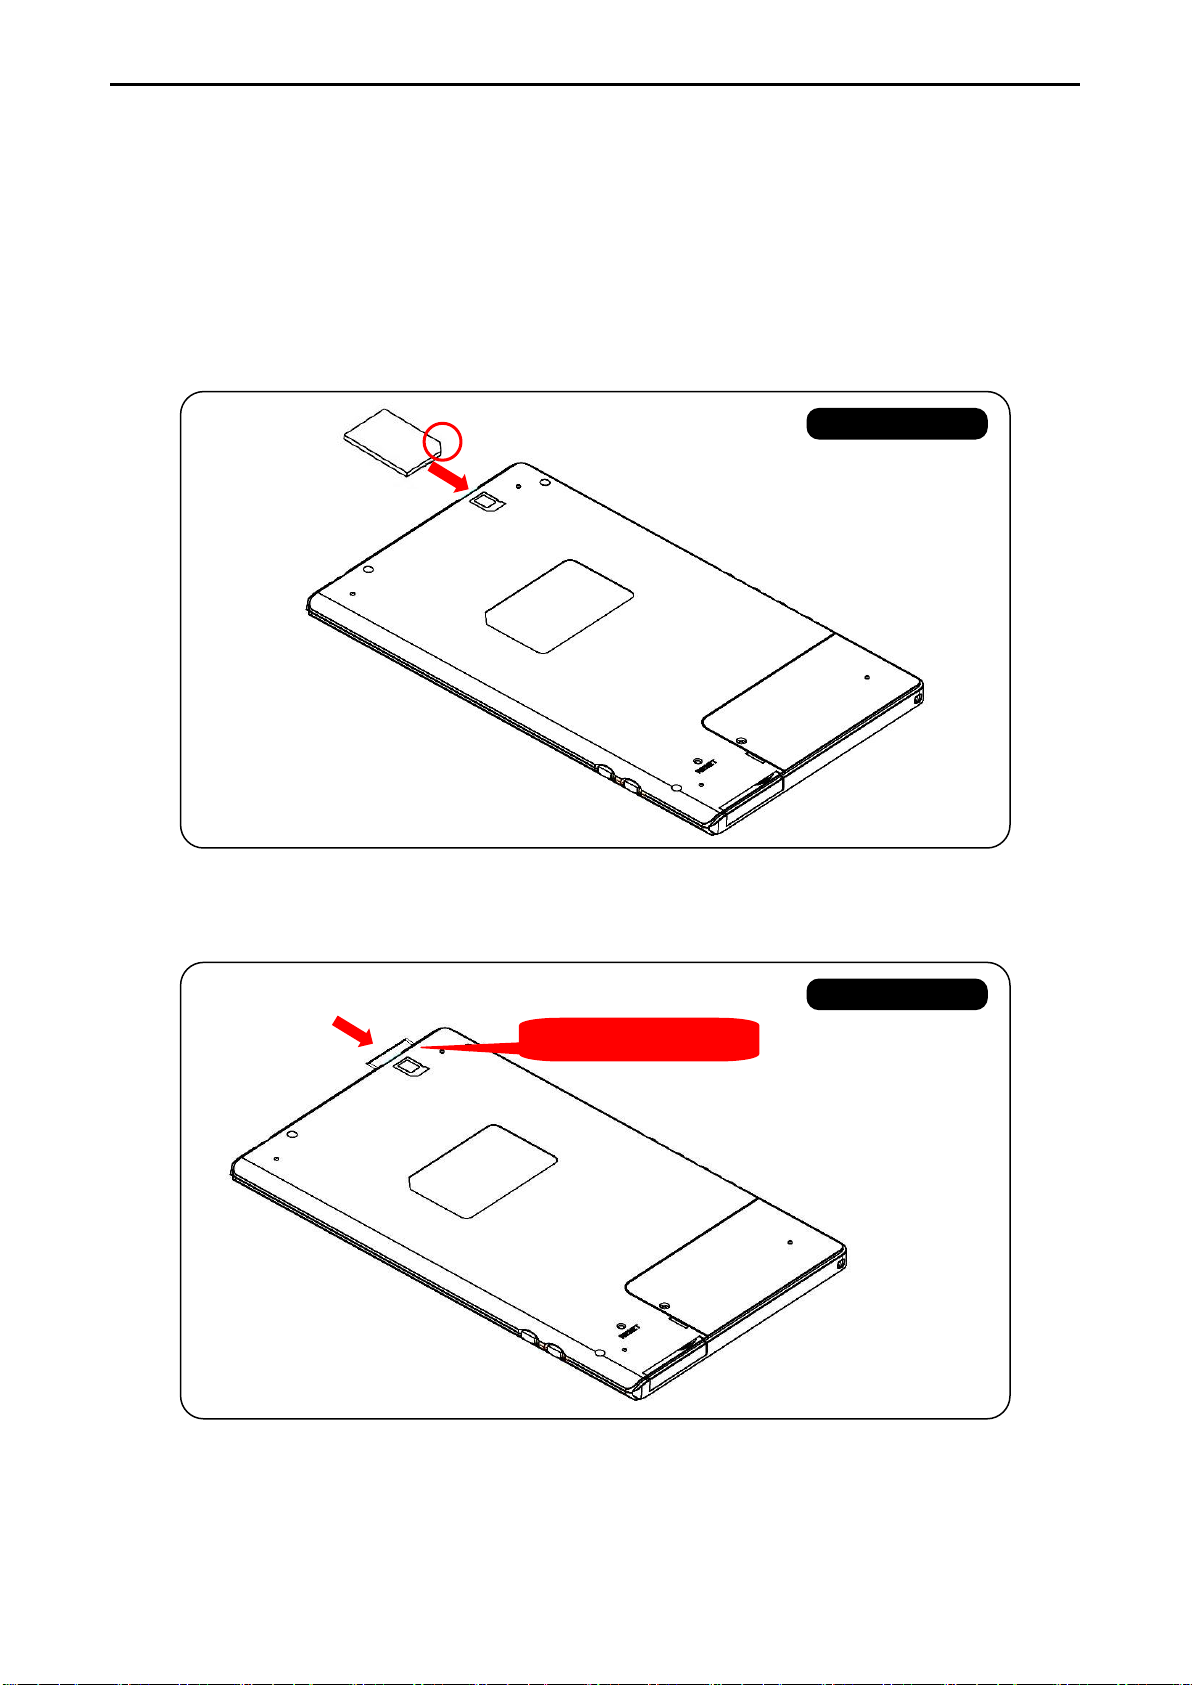
BACK VIEW
BACK VIEW
Insert til CLICK!
1.4 SD Card Installation
eBook Reader supports SD Memory Card. Please follow the steps to properly install/uninstall the
SD card to the device.
INSERTING CARD
1. Insert the SD card into the device as the picture shown. Be aware to the SD card direction!
2. Insert the SD card until it clicks into place.
5
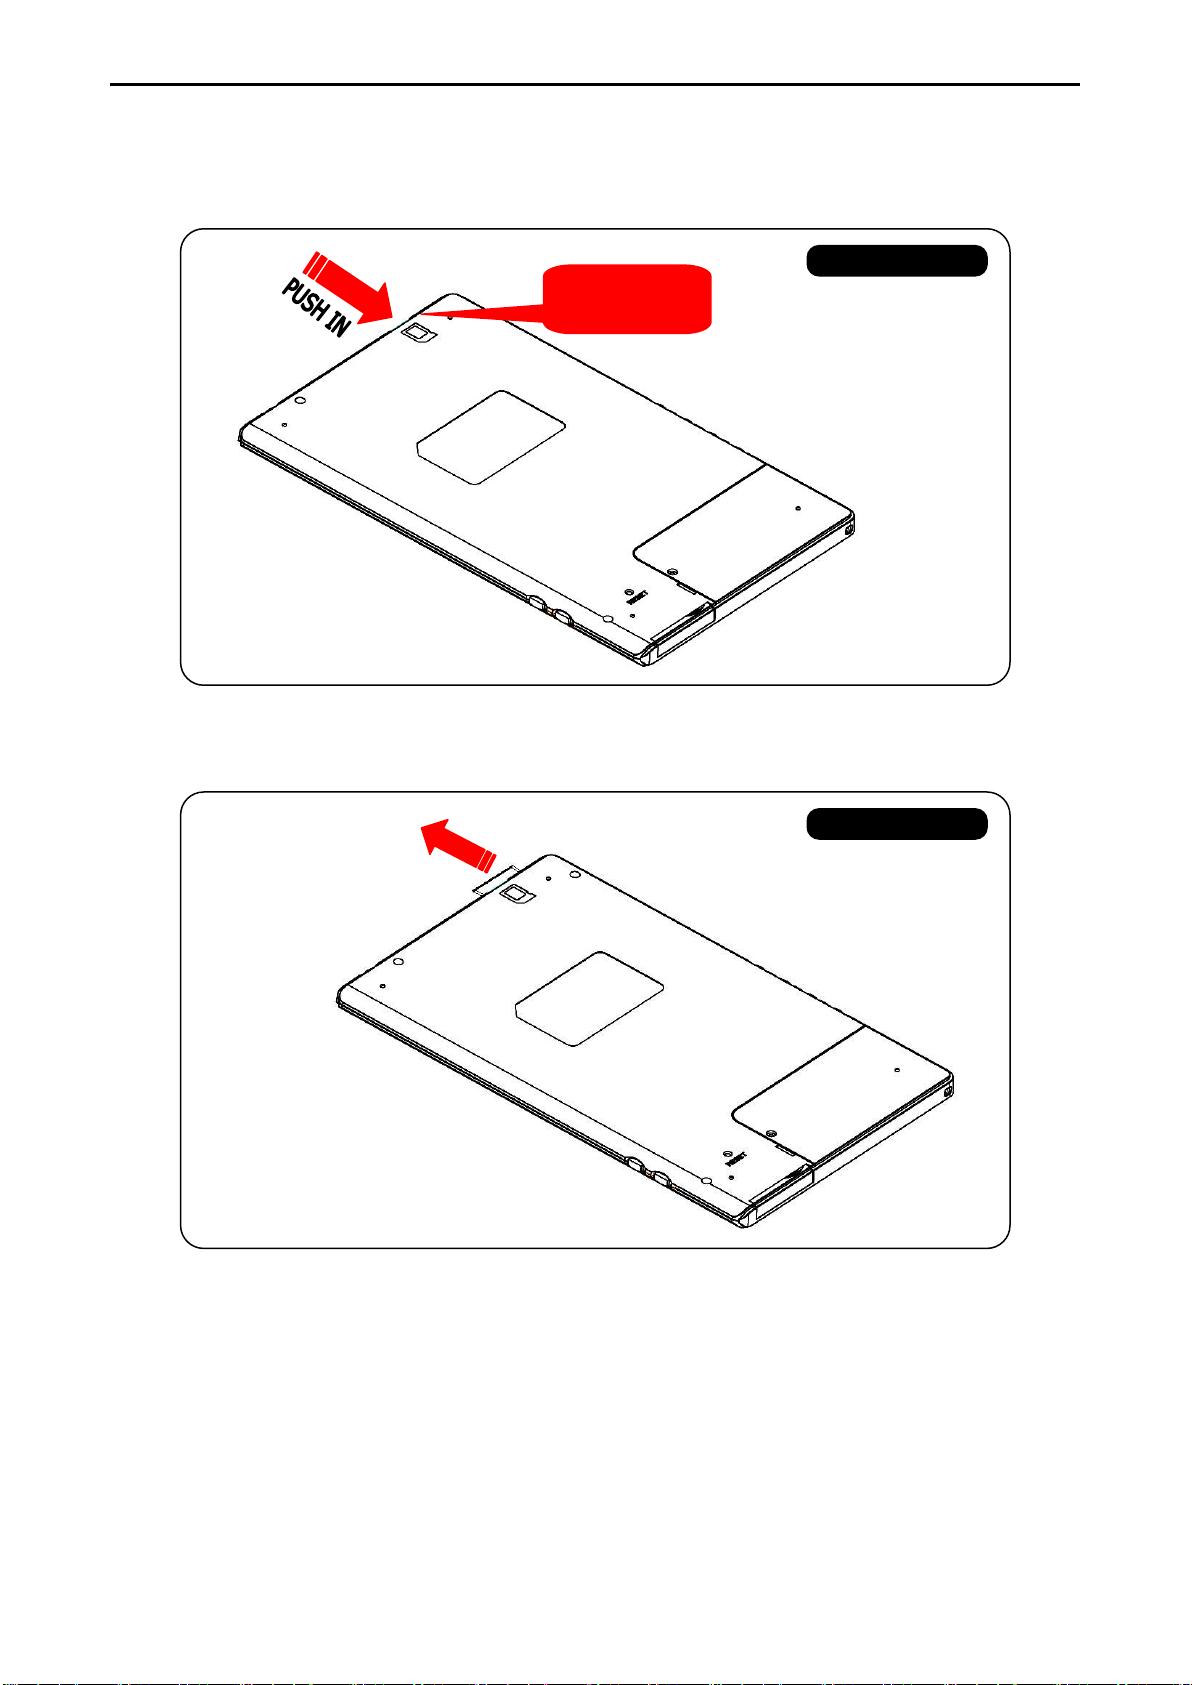
BACK VIEW
The card
jumps out!
BACK VIEW
REMOVING CARD
1. Gently push in the SD card.
Chapter 1: Introduction
2. Remove the SD card carefully from the slot.
Chapter 2: Content
6
1.5 Charging the Battery
eBook Reader has an internal, nonremovable battery. The battery is 80-percent charged in about
two hours, and fully charged in about four hours. If you charge eBook reader by connecting it to
your computer, it may take longer to charge.
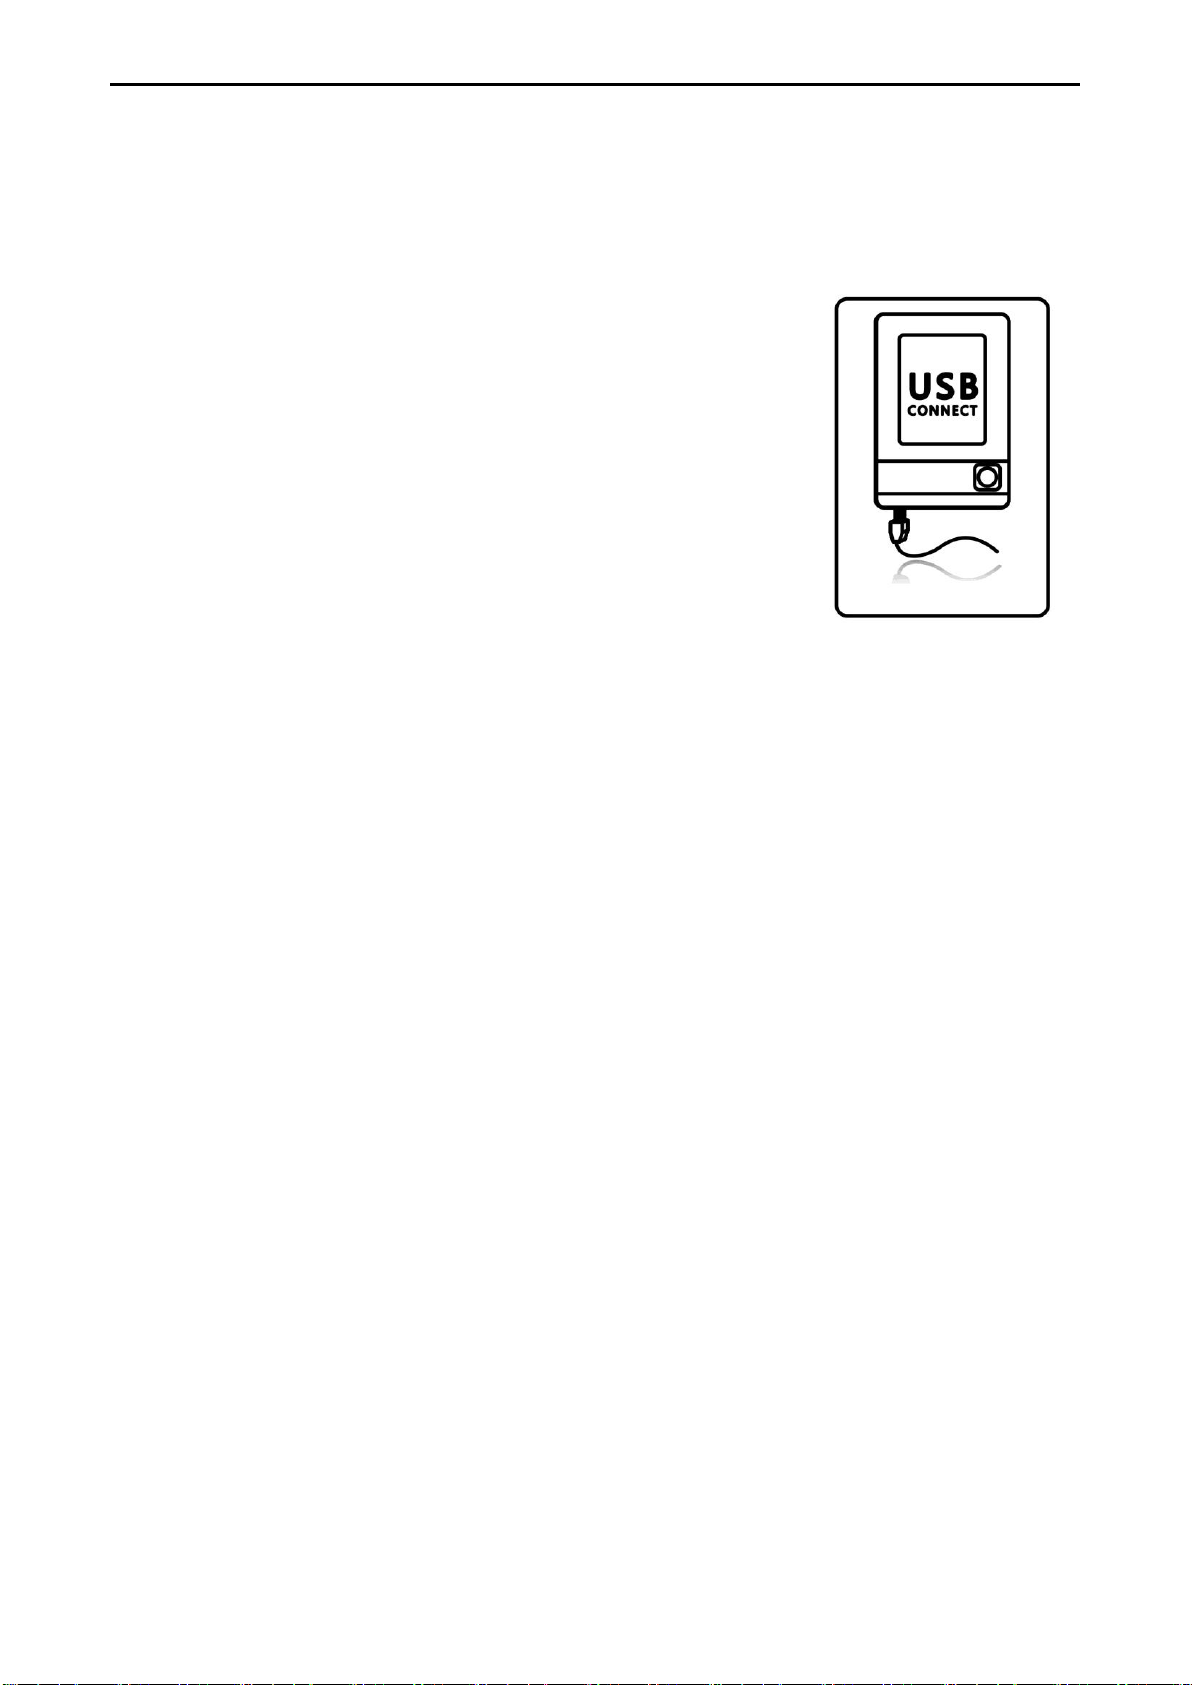
To charge the battery using your computer
Connect eBook Reader to your computer using the USB cable in the
package. Once connected, the device power on automatically and
the screen shows USB link status. The computer must be turned on
and not in sleep mode during charging.
To charge the battery using the power adapter
Use the power adapter in the package. Insert the mini USB end of
the cable to the device, and then plug the power adapter in to a
working electrical outlet. Once connect eBook Reader to the power
outlet, the device power on automatically. If the battery icon in the
upper-right corner of the eBook screen shows a plug, the battery is
charging.
Battery State
When the device is not connected to a power source, a battery icon in the top-right corner of the
eBook screen shows about how much charge is left.
Battery about halfway charged
If the device is connected to a power source, the battery icon animates to show that the battery
is charging.
Battery charging
You can disconnect and use the device before it is fully charged.

Chapter 2: Content
7
Chapter 2: Content
This chapter provides information to install the content to the eBook Reader Device.
2.1 File Transfer
When connecting to PC, the eBook Reader Device is recognized as a mass storage device with the
storage name “Sweex eBook Reader 6 inch”.
Simply copy the eBook folders or files bought/downloaded from the internet to the disk
“Sweex eBook Reader 6 inch”, and then disconnect the eBook Reader Device to start reading.
copy the eBook folders/files to a SD card, and plug the SD card to the device to read from
Or
directly.
Important A
It is recommended to make regular backups of the content of your eBook reader to prevent the
total loss of your books in cases of physical damage, failure, loss or theft.
dvise:
Chapter 2: Content
8
Click to start, and then
follow the process to
finish the appplication
Click to start
installation
2.2 Adobe Reader
This eBook Reader is embedded with Adobe Reader Mobile 9. The Reader Mobile 9 enables eBook
Reader devices to easily acquire, manage and display encrypted and unencrypted PDF and EPUB
content. Users can adopt Adobe Digital Editions as eBook management Utility between PC and
this eBook Reader.
Adobe® Digital Editions (ADE) software offers an engaging way to view and manage eBooks and
other digital publications. Use it to download and purchase digital content, which can be read both
online and offline. Transfer copy-protected eBooks from your personal computer to other
computers or devices. Organize your eBooks into a custom library and annotate pages. Digital
Editions also supports industry-standard eBook formats, including PDF/A and EPUB.
Installing ADE, following the authorization process to start reading and transfer Digital Rights
Management (DRM) content to your eBook Reader, and you are ready to enjoy over hundreds of
books in just a few grams.
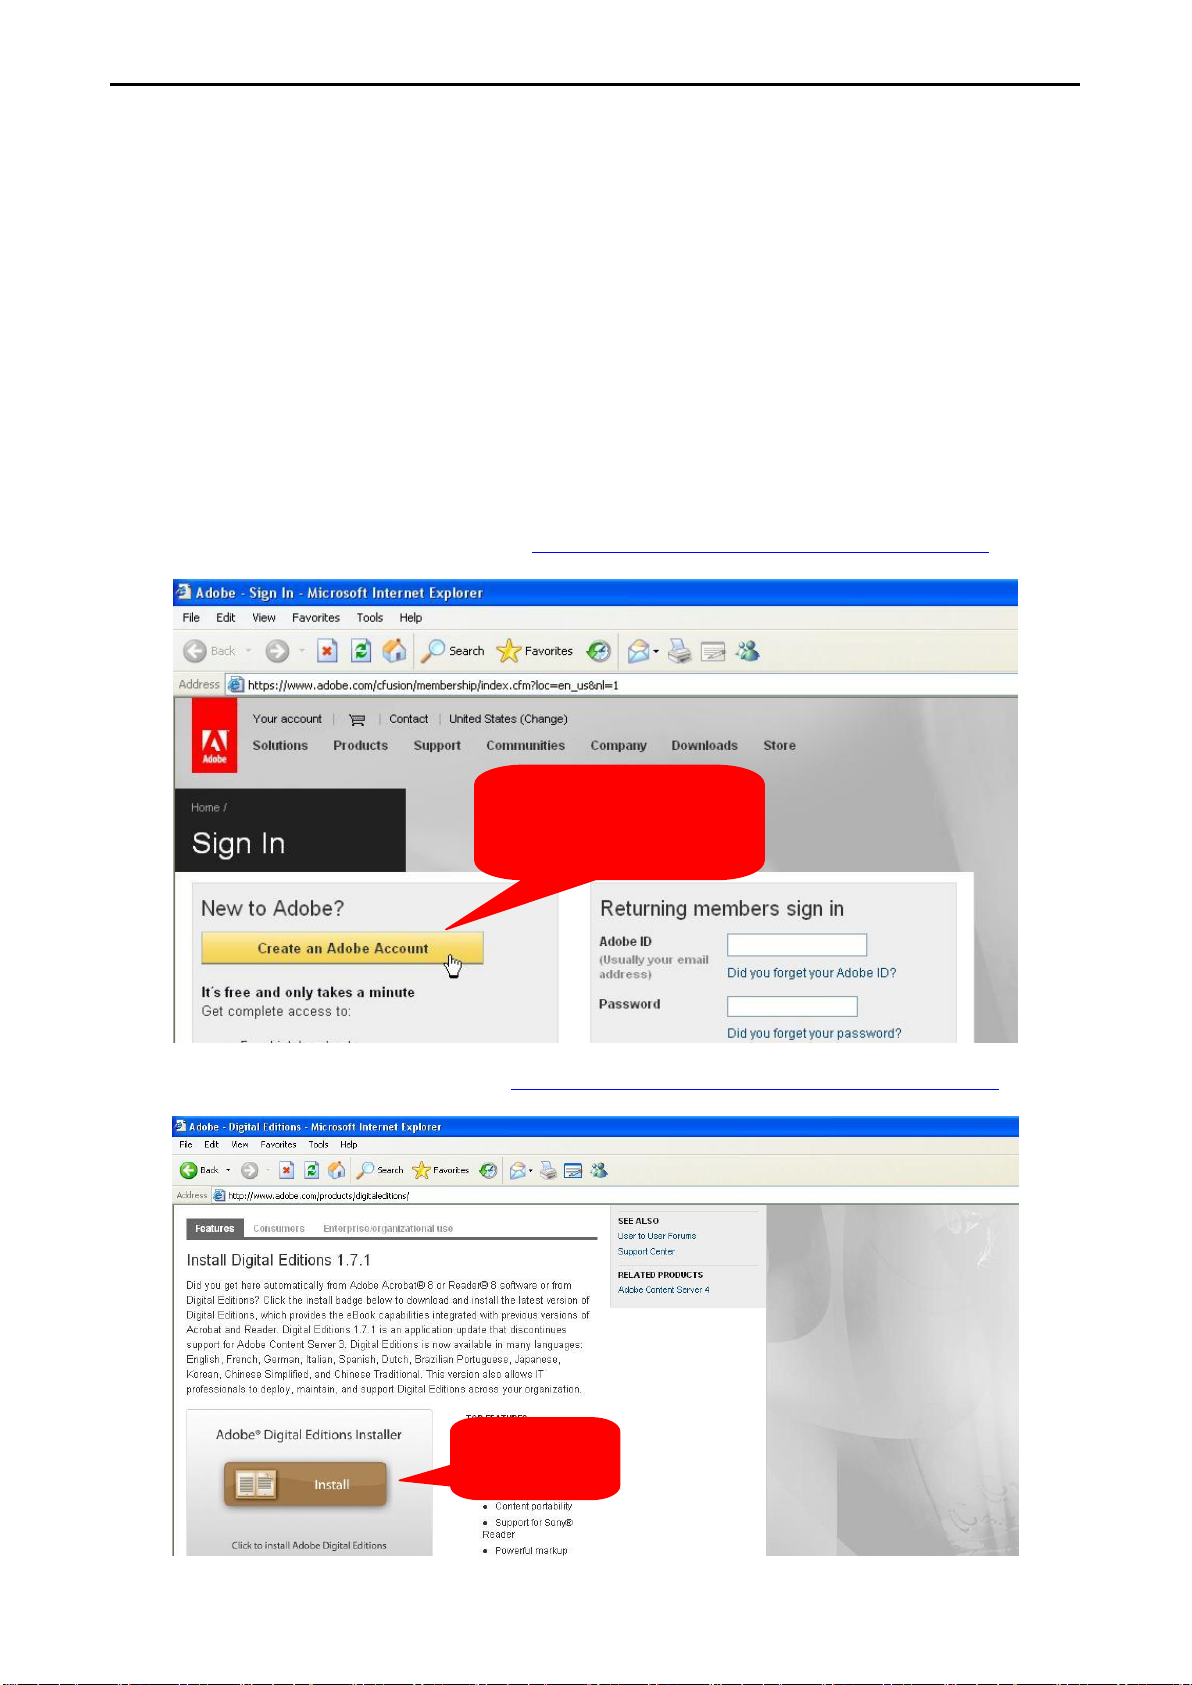
1. Apply an Adobe ID on Adobe Website http://www.adobe.com/cfusion/membership/
2. Download ADE from Adobe website http://www.adobe.com/products/digitaleditions/
Chapter 2: Content
9
Type in your Adobe
Accont and Password
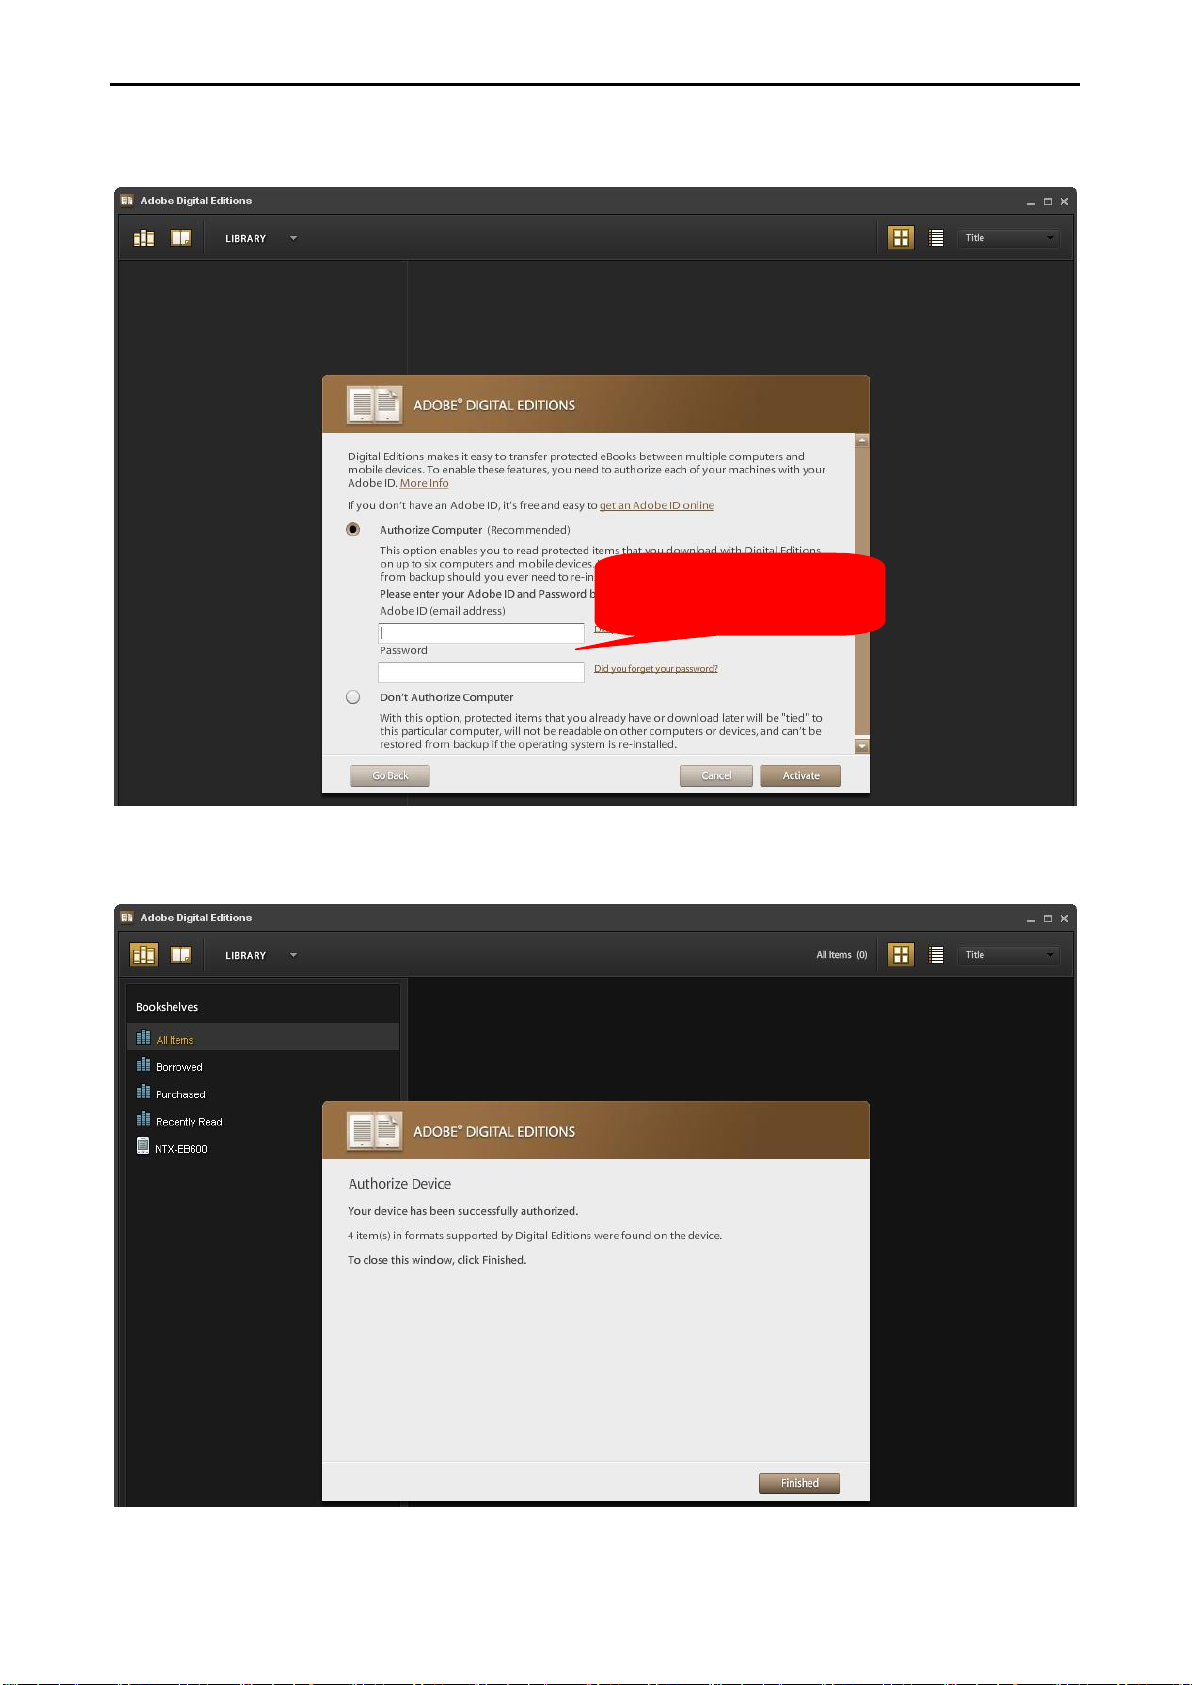
3. After installation, ADE activates automatically, and asks for authorizing the PC. Please type in
your account and password.
4. After authorizing your PC, please connect the eBook Reader to your PC, and use the same
Adobe account and password to authorize the device.
Chapter 2: Content
10
Click to open file!
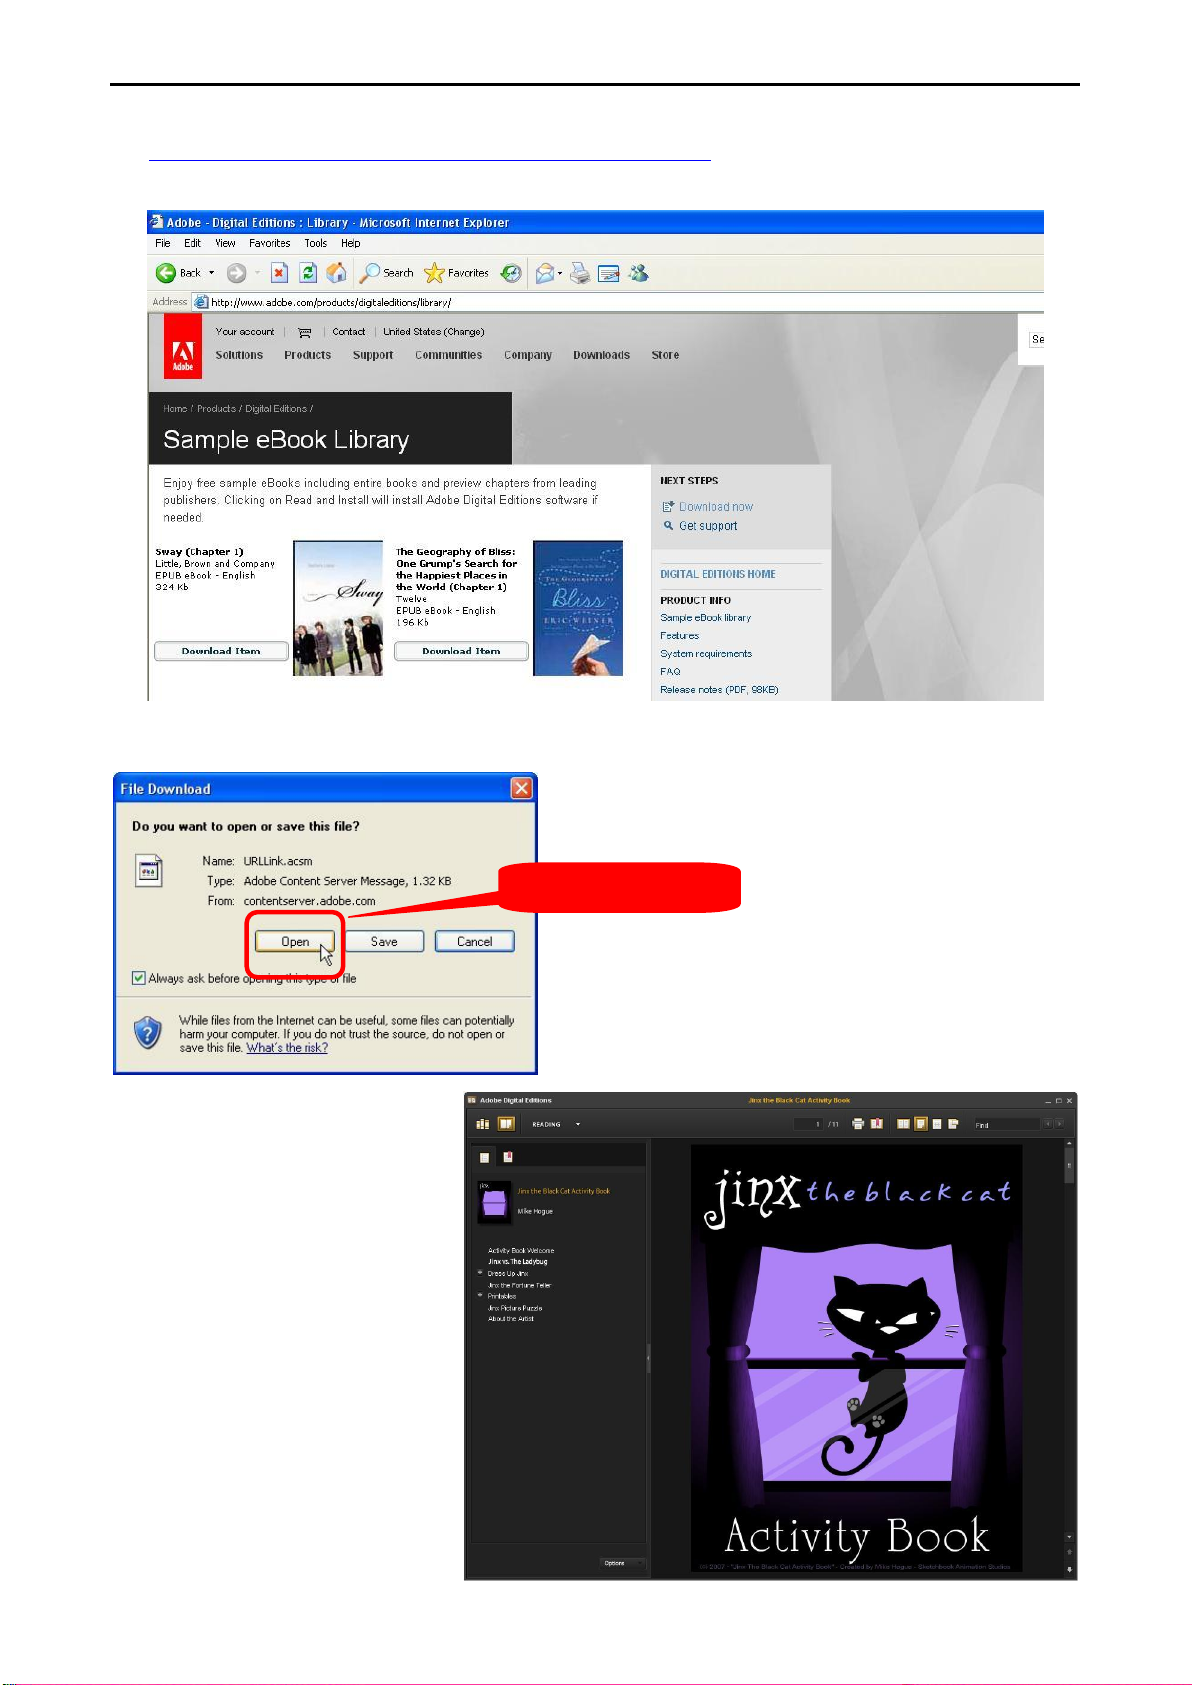
5. After authorizing the eBook Reader, please go to Adobe sample eBook library
http://www.adobe.com/products/digitaleditions/library/ to download free DRM eBooks to
test.
6. While finished download, select “Open” to import the file on ADE directly.
7. The result appears like below.

Chapter 3: Homepage
11
Chapter 3: Homepage
This chapter introduces the main page information.
The homepage shows on the device as the main page. You can always get back to this page by
pressing the “Return Button” on the left side of the device. The following table lists the
information and items that on the page. For detail instruction, please refer to the corresponding
chapters.
Chapter 3: Homepage
12
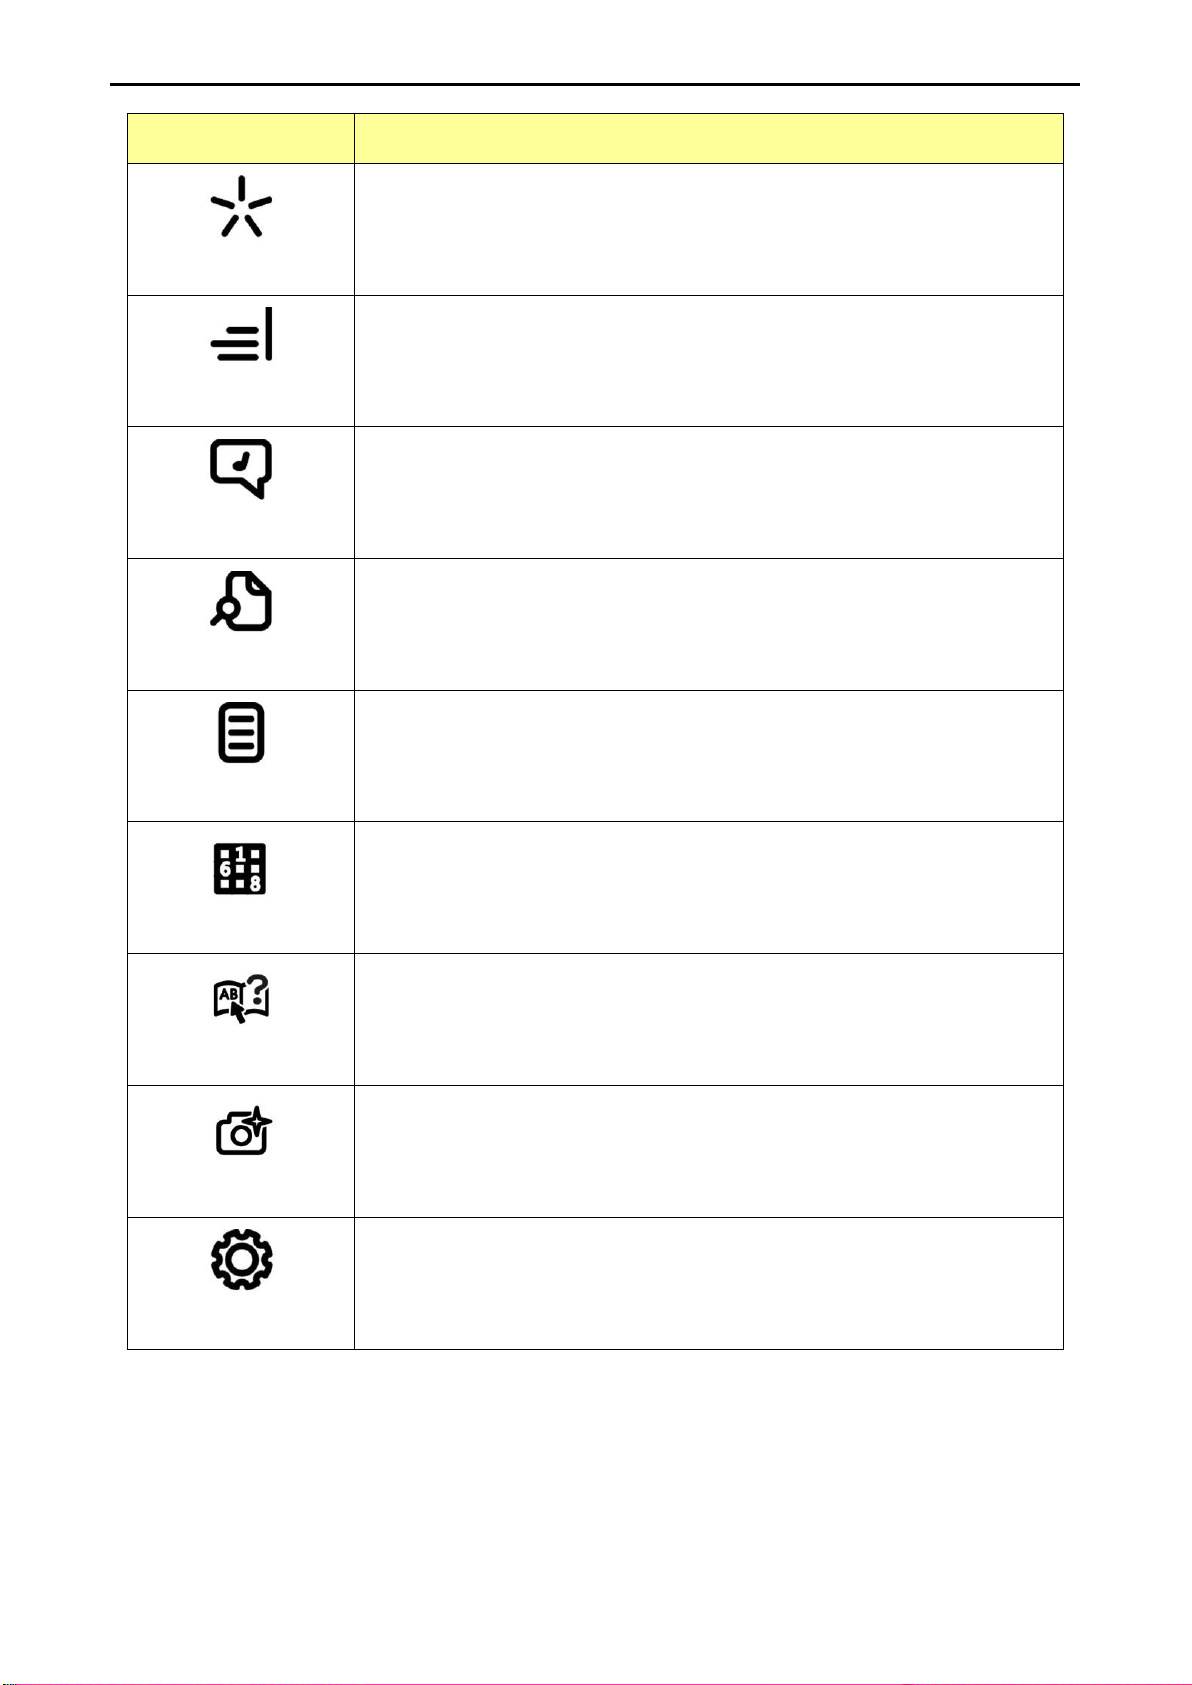
Category
Information
Favorite
Lists your favorite files.
Library
Lists all the available files inside the device and SD card.
Music
Lists all the available MP3 files inside the device and SD card. (This
version does not support this function yet)
Explorer
Lists all the available files inside the device and SD card separately.
Reading Record
Records files that you have read recently.
Game
Sudoku Game.
Dictionary
Look up vocabulary in dictionary. (This version does not support this
function yet)
Picture
Lists all the image files inside the device and SD card.
Settings
Configure settings including language, date and time, power off
mode, user’s name etc.
Chapter 3: Homepage
13
User Defined Name/Date, Battery
Progress Bar of Page
Reading Mode:
Horizontal or Vertical
Favorite Mark
Progress Bar
of Reading
Note
Numbers
Bookmark
Numbers
Size and
Publish Date
Page Position and Sorting Type
3.1 Favorite
Favorite lets you keep track of your favorite files. To designate any file as a favorite, just tag the
file no matter you are browsing in library page or in reading statement.

Chapter 3: Homepage
14
ENTER!
TAG!
Two ways to add/delete favorites in library page,
Simply press on the Multimedia Button
On library list, first select to the file and then press on the “Multimedia Button” on the left
side of the device. The file has been tagged.
Via on Screen Library Menu
1. On library list, first select to the file and then press on the “Menu Button” on the left side of
the device.
2. The “LIBRARY MENU” pops up. Select “Favorite” and press enter.
3. The file has been tagged.

Chapter 3: Homepage
15
ENTER!
ENTER!
To add/delete favorites in reading page,
1. On reading page, press on the “Menu Button” on the left side of the device.
2. The “READER MENU” pops up. Select to “MORE”. Enter subcategory.
3. In subcategory, select “Favorite” and press enter.
4. The information dialogue pops up.

Chapter 3: Homepage
16
User Defined Name/Date, Battery
Progress Bar of Page
Reading Mode:
Horizontal or Vertical
Favorite Mark
Progress Bar
of Reading
Note
Numbers
Bookmark
Numbers
Size and
Publish Date
Page Position and Sorting Type
3.2 Library
Library lists all the available files inside the device and SD card. You can use filter and search
function to find your file quickly.
Please also refer to 4.1 Reading eBooks to know more about the functions you can do during
reading.

Chapter 3: Homepage
17
ENTER!
3.2.1 Filter
The filter function is used to restrict the files that are shown on the library list.
1. On library page, press on the “Menu Button” on the left side of the device.
2. The “LIBRARY MENU” pops up. Enter “FILTER”.
3. The “FILTER” menu pops up. Select the filter mode you want and press enter.
4. An example of PDF file filter result appears as below.

Chapter 3: Homepage
18
ENTER!
SORT
3.2.2 Sort
The filter function is used to restrict the files that are shown on the library list.
1. On library page, press on the “Menu Button” on the left side of the device.
2. The “LIBRARY MENU” pops up. Enter “SORT”.
3. The “SORT” menu pops up. Select the sorting type you want and press enter.
4. The device refreshes the page according to
the sorting type you have selected. The
type of sorting describes on the up-right
screen.

Chapter 3: Homepage
19
TAG!
ENTER!
3.2.3 View
View in list or thumbnail mode is available on this device.
1. On library page, press on the “Menu Button” on the left side of the device.
2. The “LIBRARY MENU” pops up. Enter “VIEW”.
3. The thumbnail mode is shown as below. Follow the same steps to change back to list mode.

Chapter 3: Homepage
20
TAG!
ENTER!
ENTER!
3.2.4 Search
You can use the embedded soft keyboard to search for specific file on library list.
1. On library page, press on the “Menu Button” on the left side of the device.
2. The “LIBRARY MENU” pops up. Enter “Search”.
3. The keyboard appears on screen.
4. Type the file name you desire to look for on the list. Change the keyboard to numeral keys by
press on the numeral tab.

Chapter 3: Homepage
21
User Defined Name/Date, Battery
Progress Bar of Page
Favorite Mark
Size and
Publish Date
Page Position and Sorting Type
3.3 Music
Music page lists all the MP3 files inside the device and SD card. You can use filter and search
function to find your file quickly.
Please also refer to 4.4 Listening to Music to know more about the functions you can do during
listening to music. (This version does not support this function yet)

Chapter 3: Homepage
22
3.4 Explorer
Explorer lists all the available files inside the device and SD card separately.
3.5 Reading Record
Reading Record page records files you have read recently.
3.6 Game
This device provides the number puzzle game--SUDOKU. Please also refer to 4.3 Playing Games
to know more about the functions you can do during playing.
3.7 Dictionary
eBook reader provides dictionary for you looking up words. (This version does not support this
function yet)

Chapter 3: Homepage
23
User Defined Name/Date, Battery
Progress Bar of Page
Reading Mode:
Horizontal or Vertical
Favorite Mark
Progress Bar
of Reading
Bookmark
Numbers
Size and
Publish Date
Page Position and Sorting Type
3.8 Picture
In Pictures, it lists the entire image file inside the device or SD card. You can also use filter and
search function to find your file quickly.
Please also refer to 4.2 Watching Pictures to know more about the functions you can do during
watching pictures.

Chapter 3: Homepage
24
Items
Information
Power
Automatic power off with time regulation from 0 minutes to 20 minutes
while there is no operating on the device for a certain period of time.
Date/Time
Manual set the date and time for the device.
Language
Change language setting. 8 selections: English, Deutsch, French,
Españ ol, Russia, Traditional Chinese, Simple Chinese, and Japanese.
Default
Reset the device to default setting.
About
The information of this device.
Owner
Configure your own name for showing on the device.
3.9 Settings
You can configure settings on this device. Please refer to the functions in the table below.

Chapter 4: What You Can Do with eBook Reader
25
User Defined Name/Date, Battery
Progress Bar of Page
Book Title and Zoom Type
Chapter 4: What You Can Do with eBook Reader
4.1 Reading eBooks
This part introduces the reading page information and basic operations.
Reading Screen

Chapter 4: What You Can Do with eBook Reader
26
Rotate
3. Font Adjust Button
1. Rotate Button
2. Cursor Key
4. Enter
Basic Button Operation while Reading an eBook
1. Screen Rotation > “Rotate” button
You can always switch the screen orientation by pressing the “Rotate Button”.
2. Turn Page > Cursor key
Use cursor key to turn page. Long-pressing these buttons to quick turn page.

Chapter 4: What You Can Do with eBook Reader
27
Items
Information
Bookmark
Add or remove bookmark on the reading content.
TOC
Table of Contents. To jump to the table of contents in the reading file.
Rotate
Switch the screen orientation.
Search
Search for specific word.
Go To
To jump to the page of reading content manually.
Zoom
To configure font size and zoom out the page.
Back
Go back to the reading book.
More
To do more about the other functions.
Items
Information
Annotation
To jump to the bookmark list.
Font Family
To change the font type.
Full Screen
To change the screen into a full page mode.
About
To show the information of the file you are reading.
Favorite
To add/delete the file to my favorite list.
Delete
To delete the file.
Alignment
To rearrange the reading page.
Back
Go back to the “READER MENU”.
3. Font Adjustment > “+” or “–” buttons
Easily adjust the font size by pressing the “+/–” buttons.
4. More About the Function > Press “Enter”
Press enter to reach the pop-up “READER MENU” and the subcategory. Please refer to the
functions in the table below.
READER MENU
READER MENU (MORE)

Chapter 4: What You Can Do with eBook Reader
28
BOOKMARK
ENTER!
4.1.1 Bookmark
Add Bookmark
There are two ways to add/delete bookmarks while reading eBook:
Simply press on the Multimedia Button
Press on the “Multimedia Button” on the left side of the device to fold/unfold the page.
Via on Screen Reader Menu
1. Press enter on the cursor key.
2. The “READER MENU” pops up. Enter “Bookmark”.
3. The up-right corner of the page folded as a bookmark.
4. Follow the same steps to cancel a bookmark.

Chapter 4: What You Can Do with eBook Reader
29
ENTER!
ENTER!
View Bookmark List
1. Press enter on the cursor key.
2. The “READER MENU” pops up. Enter “More”
3. In subcategory, nnter “Annotation”.
4. The bookmark list appears.

Chapter 4: What You Can Do with eBook Reader
30
ENTER!
4.1.2 Turn Page
Page by Page
Press on the cursor key to turn to next/previous page.
Quick Turn Page
Long press the cursor key to quick turn page.
Designated Page
1. Press enter on the cursor key.
2. The “READER MENU” pops up. Enter “Goto”.
3. The number keyboard appears on screen.
4. Enter the number and go to the page you wish.

Chapter 4: What You Can Do with eBook Reader
31
ENTER!
ENTER!
4.1.3 Search
1. Press enter on the cursor key.
2. The “READER MENU” pops up. Enter “Search”.
3. The keyboard appears on screen.
4. Type the words you desire to look for in this document. Change the keyboard to numeral
keys by press on the numeral tab.
5.
After searching, the target words will be highlighted.

Chapter 4: What You Can Do with eBook Reader
32
ENTER!
4.1.4 Font
Font Size
1. Press enter on the cursor key.
2. The “READER MENU” pops up. Enter “ZOOM MENU”.
3. The “ZOOM MENU” pops up.
4. Select a font size you wish and press enter to confirm. You can also reach the zoom in/zoom
out function by simply press the “Font Adjust Buttons” on the right side of the device.

Chapter 4: What You Can Do with eBook Reader
33
ENTER!
Font Family
1. Press enter on the cursor key.
2. The “READER MENU” pops up. Enter “More”
3. In subcategory, enter “Font Family”.
4. The “FONT FAMILY” menu pops up.
5. Select a font type you wish and press enter to confirm.

Chapter 4: What You Can Do with eBook Reader
34
ENTER!
4.1.5 Screen Adjustment
Full Screen
1. Press enter on the cursor key.
2. The “READER MENU” pops up. Enter “More”.
3. Another “READER MENU” pops up. Enter “Full Screen”.
4. The full screen mode is shown as below. Follow the same steps to change back to original
mode.

Chapter 4: What You Can Do with eBook Reader
35
ENTER!
Alignment
1. Press enter on the cursor key.
2. The “READER MENU” pops up. Enter “More”
3. In subcategory, enter “Alignment”.
4. The result is shown as below. Follow the same steps to change back to original mode.

Chapter 4: What You Can Do with eBook Reader
36
4.2 Watching Pictures and Comics
This part introduces the image page information and basic operations.
Image Screen

Chapter 4: What You Can Do with eBook Reader
37
Rotate
1. Rotate Button
2. Cursor Key
3. Enter
Basic Button Operation while Watching Image Files
1. Screen Rotation > “Rotate” button
You can always switch the screen orientation by pressing the “Rotate Button”.
2. Turn Page > Cursor key
Use cursor key to turn page. Long-pressing these buttons to quick turn page.

Chapter 4: What You Can Do with eBook Reader
38
Items
Information
Zoom
Zoom in or zoom out the reading file.
Rotate
Rotate the image to vertical or horizontal. You can also reach this function
by simply press on the “Rotate” button on the left side of the device.
Sliding
Sliding pictures with time regulation from 0 second to 20 seconds.
About
The information of the reading file.
Favorite
Add this file to favorite or cancel favorite.
Delete
Delete file.
3. More About the Function > Press “Enter”
While reading an image file, you can do more on the page. Just press enter on the cursor key
to reach the pop-up menu, and refer to the functions in the table below.

Chapter 4: What You Can Do with eBook Reader
39
4.3 Playing Game
This part introduces the game page information and basic operations.
Game Screen

Chapter 4: What You Can Do with eBook Reader
40
1. Renew/Resolve
2. Cursor Key
3. Enter
Basic Button Operation while Playing Games
1. Renew/Resolve the Game > “Multimedia” button
Whenever you want to choose a new level or see the answer, you can also press this button.
2. Select the Plan Grid > Cursor key
Use cursor key to move to the target column.
3. Fill Out Numbers > Press “Enter”
You can press “Enter” to fill out the numbers. A number menu shows up on the up-right
corner of the page.

Chapter 4: What You Can Do with eBook Reader
41
How to Play the Game
In this game, you have to complete the grid by filling out the right numbers. The digits from 1 to
9 can only appear one time in each column, row, and each of the nine 3× 3 boxes. Please refer to
the next section to learn how to start a new game.
1. On the plan grid, press ENTER to open the number menu.
2. Select Pencil to mark the possible numbers;
select pen to confirm the number;
select Erase to refill the number;
select “Menu” to restart the game.
3. You can always press the “Multimedia Button” on the left side of the device to reach “NEW
GAME” menu.

Chapter 4: What You Can Do with eBook Reader
42
4.4 Listening to Music
This part introduces the audio page information and basic operations.
Music Screen

Chapter 4: What You Can Do with eBook Reader
43
4. Volume Adjust Button
1. Music Button
2. Cursor Key
3. Enter
Basic Button Operation while Listening to Music
1. Enter Music List > “Music” button
You can always reach the music list by pressing the “Multimedia Button”.
2. Select File/Fast-Forward or Rewind > Cursor key
Use the cursor key to select file. While playing music, long-pressing these buttons to rewind
and fast-forward the playing song.
3. Play a Song > Press “Enter”
Press “Enter” to start playing the song you have selected.
4. Volume Adjustment > “+” or “–” buttons
Easily adjust the volume by pressing the “+/–” buttons.

Appendix
44
BACK VIEW
PUSH!
Appendix
Appendix A: Reset
Reset eBook Reader by using a small pin or clip, the contents stored inside are not affected by
resetting, and no information is erased.

Appendix
45
Appendix B: Cleaning and Safety
CLEANING
Before cleaning, please power off and disconnect cables from system and AC outlet. After finish
of cleaning, please make sure that the monitor is completely dry before you reconnect cables and
power it on. Please do not use any liquid or spray cleaners directly on surface of screen or case.
Please use a soft, clean, lint-free cloth with cleaners to clear your monitor.
1. Screen
Please use a soft, clean, lint-free cloth to remove dust and dirt from the screen. For
fingerprints & smudges, please use a soft cloth with cleaners.
2. Case
Please clean the case with a soft cloth slightly moistened with a mild detergent solution.
Please rinse the cloth with clear water, wring it dry, and wipe the case to remove any
detergent residue.
SAFETY
1. To reduce risk of electric shock, please follow all safety notices, never open case of
products by yourself, and turn off power before cleaning.
2. The products are equipped with a power adapter. (The type of power adapter may be
different according to different countries.) The power adapter plug only fit into a safety
ground outlet. Do not attempt to fit the plug into an outlet that has not been configured
for this purpose. Please only use power adapter that comes with the products. Using an
unauthorized power adapter may invalidate the warranty of the products.
3. Please do not insert or block any object inside four edges of the screen.
4. Please do not pour liquid into or onto products and wash with a wet cloth. If the products
become wet, please do not turn on or attempt to repair by yourself. Please ask a
qualified service technician to check it for you before you turn on the power again.
5. Please use products under suitable environment written in specification and protect
products working away from extremely bad environment.
6. Please keep the products away from bumps and drops.
7. Please keep the products away from dust, sand, and dirt.

Preface
ii
FCC Certifications
This Equipment has been tested and found to comply with the limits for a Class B digital device,
pursuant to part 15 of the FCC Rules. These limits are designed to provide reasonable protection
against harmful interference when the equipment is operated in a commercial environment. This
equipment generates, uses, and can radiate radio frequency energy and, if not installed and used
in accordance with the instruction manual, may cause harmful interference to radio
communications.
Operation of this equipment in a residential area is likely to cause harmful interference in which
case the user will be required to correct the interference at his own expense.
This device complies with Part 15 of the FCC Rules. Operation is subject to the following two
conditions: (1) this device may not cause harmful interference, and (2) this device must accept
any interference received; including interference that may cause undesired operation.
CE Mark Warning
This equipment complies with the requirements relating to electromagnetic compatibility, EN
55022 Class B for ITE, the essential protection requirement of Council Directive 89/336/EEC on
the approximation of the laws of the Member States relating to electromagnetic compatibility.
Company has an on-going policy of upgrading its products and it may be possible that information
in this document is not up-to-date. Please check with your local distributors for the latest
information. No part of this document can be copied or reproduced in any form without written
consent from the company.
Trademarks:
All trade names and trademarks are the properties of their respective companies.
Copyright © 2009, All Rights Reserved.
This product contains Adobe® Reader® Mobile software under license from Adobe Systems
Incorporated, Copyright© 1995-2009 Adobe Systems Incorporated. All rights reserved. Adobe
and Reader are trademarks of Adobe System Incorporated.
Contains Reader® Mobile technology by Adobe System Incorporated.
 Loading...