


Swedx SDS40K8-01, SDS50K8-01, SDS58K8-01, SDS65K8-01, SDS75K8-01 operation manual
...Your Digital Signage Partner
User’s Guide SDS40K8-01 SDS50K8-01 SDS58K8-01 SDS65K8-01 SDS75K8-01
MX-40K8-01 MX-50K8-01 MX-58K8-01 MX-65K8-01 MX-75K8-01
UMX-470101 UMX-550101 SUMX-550101
SWL-28K8 SWL-40K8 SWL-50K8 SWL-58K8
SWLT-28K8 SWLT-40K8 SWLT-50K8 SWLT-58K8

|
|
|
|
|
SWEDX Matrix Video Walls |
|
SWEDX Direct |
|
SWEDX Lamina |
|
|
|
|
|
SWEDX offers a wide range of LED-TVs and digital signage products and its accessories. For more information please
visit www.swedx.com
Digital Signage Screens |
SWEDX V |

INDEX |
Page |
Introduction |
4 |
Safety precaution |
4 |
Basic operation |
5 |
Contents |
6 |
Inputs |
6 |
SWL/SWLT specific information |
7 |
Remote Control For SDS/SWL/SWLT |
8 |
Remote control buttons (FR4) |
9 |
Remote control buttons (FR) |
10 |
Main Operations |
11 |
Volume Control |
11 |
OSD Menu Operations |
11 |
OSD Menu Structure: |
11 |
Picture Menu |
12 |
Sound Menu |
13 |
Time Menu |
14 |
Settings Menu |
15 |
Media Player 1/2 |
17 |
Supported Formats and Codes |
18 |
Wall mount assembly |
19 |
Troubleshooting |
20 |
Warranty and Service |
21 |
How to get service |
22 |
Limitation of liability |
22 |
Design and specifications are subject to change without notice.
03

Introduction
Thank you for choosing SWEDX Digital Signage products. Please read this manual thoroughly before operating the product. Make sure the display was not damaged in transit. Should the product be damaged, please contact your dealer and do not install it. Check that you have all the accessories according to the model.
Safety precaution
•Do not place the product on unstable places, from which it may fell off
•Do not expose the product to extreme temperature and humid environment
•Avoid subjecting the product to direct sunlit or other heat sources
•Do not put the product into any liquid
•Do not put anything inside the product, or place water container on top of the it
•In thunder rainy days (especially with lightening), please unplug the power and antenna cables
•Do not step on the power cable, or tangle them together
•Avoid overload of the exterior electric outlet to prevent fire hazard of electric shock
•Clean the product with dry and soft fabric
•lf your product is broken, do not repair it by yourself, but contact the maintenance personnel
•lf the remote control is left unused for a longtime, please take the batteries out and store them in dry places
•Avoid dropping the remote control
•lf the product is installed for exhibition purpose, please do not place the overheated part on the ground or carpet to prevent accident
•The apparatus shall not be exposed to dripping or splashing and that no object filled with liquids, such as vases, shall be placed on the apparatus
•Where the MAINS plug or an appliance coupler is used as a disconnect device, the disconnect device shall remain readily operable
•Battery shall not be exposed to excessive heat such as sunshine, fire or the like
•Excessive sound pressure from earphones and headphone can cause hearing loss
Please install the product at proper position, such as wall or ceiling. Please install it under the guidance of professional staff.
This device complies with Part 15 of the FCC
Rules. Operation is subject to the following two conditions:
1.This device may not cause harmful interference
2.This device must accept any interference received, including interference that may cause undesired operation
Please disconnect the power cord if this equipment will not be used for a long time.
Precautions When Displaying a Still Image
A still image may cause permanent damage to the screen
•Do not display a still image on the screen for more than 2 hours as it can cause screen image retention. This image retention is also known as "screen burn". To avoid such image retention, reduce the degree of brightness and contrast of the screen when displaying a still image
•Watching the screen in 4:3 format for a long period of time may leave traces of borders displayed on the left, right and center of the screen caused by the difference of light emission on the screen. Playing a DVD or a game console may cause a similar effect to the screen. Damages caused by the above effect are not covered by the Warranty.
•Displaying still images from Video games and PC for longer than a certain period of time may produce partial after-images. To prevent this effect, reduce the ‘brightness’ and
‘contrast’ when displaying still images
WARNING
To prevent the spread of fire, keep candles or other open flames away from this product at all times
04

Basic operation
•Use AC 100-240V 50~60 Hz power outlet for the product power supply
•lf the screen of the product is not on, please press the power button on the remote control or on the product
•lf you want to shut off the product temporary, please press the power button on the remote control or on the product
•lf you want to shut off the product completely, please disconnect the power cable
•In Component and AV modes the product will shut off if there is no signal input for 30 minutes
•ln PC-RGB and HDMI modes the product will enter idle state if there is no signal input after
30 seconds
•ln Media Player 1/2 modes the product will remain On if there is no signal input
•The setting and tuning of picture and sound will be saved when the product is shut off, which will be working in the pre-shut off state when the product is turned on again
•lf PC signal source is used, please first set the resolution of the PC display card as the following modes:
For HDMI 1/2/3 (3840x2160 @ 60Hz)
For PC (1920 x 1080 @ 60Hz)
•lf there is progressive output of the signal used by the user, signal source with progressive output is recommended
Preparation
•Put the product on a stable surface
•Do not fix the product with others fixations than those provided or suggested by the manufacturer
•If you have a wall mount, check that it is steady.
•Do not place any material on the product.
•Do not block or cover the ventilation openings on the product
•The product must be plugged with a tension source of 110-240 volts and 50~60 Hz
•Power cord and cables must be properly routed and protected to prevent from stepping on them
•Keep the power cord away from any heat
source. Possible fire hazard
Heating sources and humidity
•Keep the product dry and away from humidity
•Keep the product away from heat sources
Cleaning and maintenance
•Unplug the product before cleaning it. Do not use solvents or liquids to clean the product
•Only clean the product with a soft and dry fabric
•In case of troubleshooting, do not use spare parts other than those suggested by the manufacturer. Using inadequate spare parts can lead to electric shocks, short-circuits fire
or others incidents. Please contact a technical authorized by SWEDX
Departure in holidays
•Unplug the product during lightning storms or when unused for long periods of time
WARNING
RISK OF ELECTRIC SHOCK
DO NOT OPEN
CAUTION:
TO REDUCE THE RISK OF ELECTRIC SHOCK, DO NOT
REMOVE COVER(OR BACK). REFER SERVICING TO
QUALIFIED SERVICE PERSONNEL
WARNING:
TO REDUCE THE RISK OF FIRE OR ELECTRIC SHOCK, DO NOT EXPOSE THIS APPARATUS TO RAIN OR MOISTURE
05

Contents |
4. AV |
Included items: |
Input for AV (Audio/Video) sources |
|
|
|
|
5. IR* |
|
|
|
|
Input for external infrared receiver. See Matrix |
|
|
Notice!/ |
|
function |
|
|
Information |
|
|
AAA |
AAA |
|
|
6. RS232 OUT* |
|
|
Output for RS232 signal. See Matrix function |
||
|
|
|
|
6. RS232 IN* |
2 x AAA Battery |
Notice |
AC Cable |
Input for RS232 signal. See Matrix function |
|
|
|
|
|
8. LED |
|
|
|
|
LED indicator for power status |
|
|
|
|
9. On/OFF |
|
|
|
|
Key to power the product On/Off |
|
|
|
|
10. Remote Pairing |
|
|
|
|
Key to pair the remote control with the product |
Remote Control |
LED Screen |
IR Cable* |
11. POWER INPUT |
|
|
|
|
*MX/UMX only |
Input for 100-240 V power 50~60Hz |
|
CAUTION |
12. MEDIA PLAYER 1 |
|
|
Input for USB Media Player 1/Firmware |
||
Danger of explosion if battery is incorrectly |
|||
upgrade |
|||
replaced. Replace only with the same or |
|||
13. MEDIA PLAYER 2 |
|||
AAA |
equivalent type |
||
|
Input for USB Media Player 2 |
||
AAA Battery |
|||
14. HDMI1 |
|||
|
|
Input for HDMI1 (Ver. 2.0). Supports maximum |
|
|
CAUTION |
resolution 3840x2160 @ 60 Hz |
|
The batteries shall not be exposed to |
15. HDMI2 (ARC) |
||
excessive heat such as sunshine, fire or the like |
Input for HDMI2 (Ver. 2.0). Supports maximum |
||
AAA |
|
resolution 3840x2160 @ 60 Hz |
|
AAA Battery |
HDMI2 supports ARC (Audio Return Channel) |
||
16. HDMI3 / MHL |
|||
|
|
||
Inputs |
|
Input for HDMI3 (Ver. 2.0). Supports maximum |
|
|
resolution 3840x2160 @ 36 Hz. |
||
1. PC |
|
HDMI3 supports MHL (Mobile High-definition |
|
|
Link) |
||
Input for PC (VGA) sources |
17. COAXIAL |
||
2. PC AUDIO |
|
Output for digital audio signal (Coaxial) |
|
Input for PC audio when PC (Personal |
|
||
Computer) is connected |
* Inputs 5, 6 and 7 are available only in MX/UMX |
||
3. COMPONENT |
|
series |
|
Input for Component (YPBPR) sources. Supports maximum resolution 1080p @ 60 Hz
*Component/YPBPR and AV shares the same audio input
-2 |
|
|
|
|
2.4GHz |
POWER INPUT |
K8-UHD |
|
PC |
IR RS232 OUT RS232 IN |
|
REMOTE |
|
DS- |
PC |
AUDIO COMPONENT AV |
LED |
ON/OFF PAIRING |
AC 100-240 V ~ 50/60 Hz |
1 |
2 |
3 |
4 |
5 |
6 |
7 |
8 |
9 |
10 |
11 |
-1 |
|
|
USB MEDIA PLAYER |
|
|
HDMI |
|
|
|
|
DS-K8-UHD |
|
|
1 |
2 |
|
1 |
2 / ARC |
3 / MHL |
COAXIAL |
|
|
|
|
12 |
13 |
|
14 |
15 |
16 |
|
17 |
06
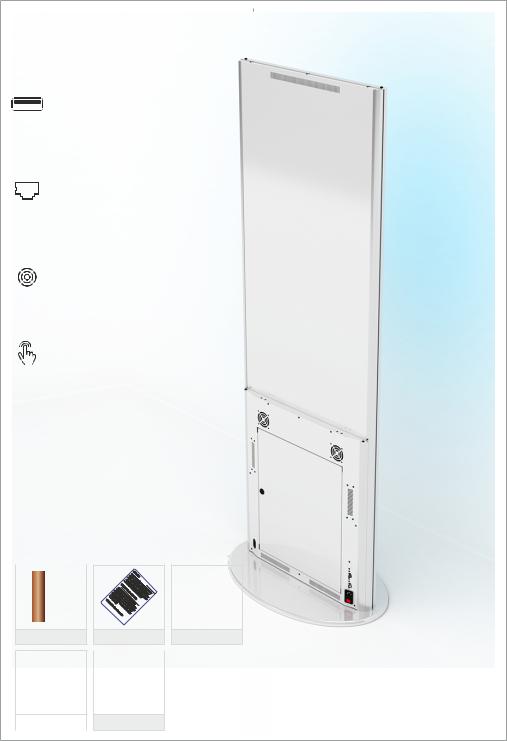
SWL/SWLT specific information
The SWL/SWLT series are equipped with external inputs to provide easy access.
The external inputs are
1.USB external input. It can be connected to Media Player 1 or 2. It can also be connected to a media player such as Mini PC or Android box
2.RJ45 input. It could be connected to a Mini PC or Android box to access the network in case WiFi is not available or LAN connection is preferred.
The SWL/SWLT series are also equipped with cooling fans. The fans can be controller in the OSD menu.
The SWLT (Touch) series are equipped with a Touch overlay. The connection interface is USB 2.0. The Touch USB cable must be connected to a media player such as Mini PC or Android box etc which supports touch function.
|
|
1 |
|
SWL/SWLT Contents |
|
||
Included items for SWL/SWLT series: |
|||
|
|
Notice!/ |
|
|
|
Information |
|
AAA |
AAA |
|
|
2 x AAA Battery |
Notice |
AC Cable |
|
Remote Control |
Lamina with Base |
Screws+Tool |
|
07

Remote Control for SDS/SWL/SWLT-series (FR4)
The remote control is based on both 2.4 GHz and
Infrared.
The remote control is equipped with LED indicators. The RED indicator states that the remote is in Infrared mode and the BLUE indicator is for 2.4 GHz mode. Recent products from SWEDX uses 2.4 GHz receivers.
The 2.4 GHz technology allows the remote to control the TV without targeting it because the receiver is built inside the TV. Each SWEDX TV has a pre-configured remote control meaning that if you have several SWEDX TVs then the remote control for one of the TVs will function only with that particular TV and not with the other TVs.
To switch between Infrared and 2.4 GHz mode press and hold the
buttons for 5 seconds. The Red LED will flash 3 times and switch from the current mode to the other one.
To pair the remote with the TV follow the steps below
1.Connect the product (e.g screen) to power outlet
2.Make sure that the remote is in 2.4 GHz mode
3.Press and hold the
buttons on the remote control simultaneously for about 5 seconds. The BLUE LED will flash 5 times indicating that the remote is now paired with the TV.
Recent 2.4 GHz based products from SWEDX are equipped with a pairing key in order to avoid pairing more than one product when more than one SWEDX products is close by. A On/Off key is also available in recent SWEDX products.
If your product is equipped with paring key please press and hold the paring key for 2 second when the Blue LED light is flashing after pressing
On/Off Key 
Pairing Key 
The cemote control “FR4” is included in the SDS-series (digital signage screens). For the MX/UMX-series the included remote control is model “FR” (see page 9)
-2 |
|
|
|
|
2.4GHz |
|
POWER INPUT |
K8-UHD |
|
PC |
|
|
REMOTE |
|
|
DS- |
PC |
AUDIO COPMONENT AV |
IR RS232 OUT RS232 IN |
LED |
ON/OFF PAIRING |
AC |
Hz |
Design and specifications are subject to change without notice.
08
 Loading...