

Page 1
1
For use with Swann 720p POE NVRs
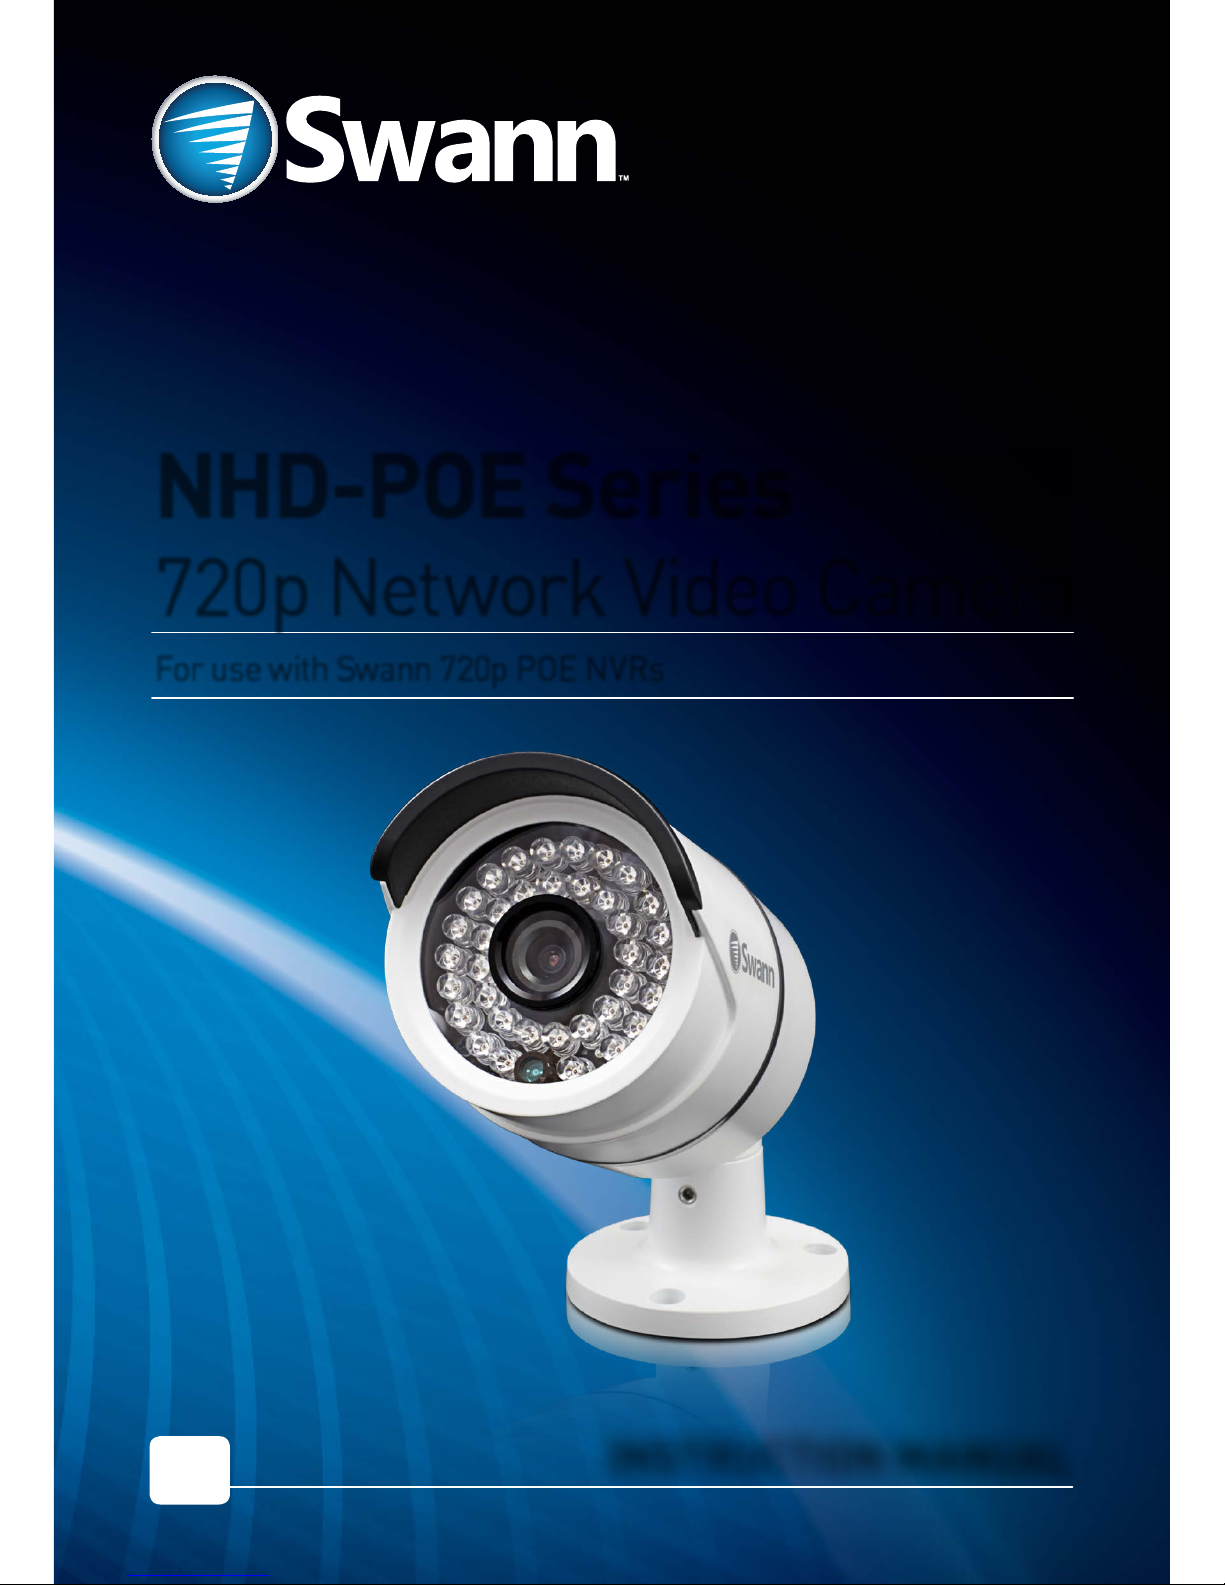
NHD-POE Series
720p Network Video Camera
INSTRUCTION MANUAL
EN
Page 2
2
3
Before You Begin
Congratulations on your purchase of this Swann 720p Network Video
Camera with Power Over Ethernet. You’ve made a fine choice for keeping
a watchful eye over your home or business. The NHD-POE cameras
deliver brilliant and amazingly clear high definition images and videos in
both day and nighttime conditions even in complete darkness. Designed
in an elegant, unobtrusive weatherproof casing with an integrated
3-axis mounting bracket, the NHD camera is versatile enough to be
installed on walls and ceilings - indoors or outdoors and will be an
excellent addition to your Swann POE NVR monitoring solution.
Introduction
Limited Warranty Terms & Conditions
Swann Co mmunications w arrants this pr oduct against d efects in work manship and mater ial for a
period o f one (1) ye ar from its origi nal purchase date. You mu st present your r eceipt as proof of date
of purchas e for warrant y validation. A ny unit which pro ves defective d uring the stated p eriod will be
repaire d without charg e for parts or l abor or replaced a t the sole discreti on of Swann. The end u ser
is respo nsible for all frei ght charges incur red to send the pro duct to Swann’s repair ce nters. The end
user is re sponsible for all s hipping costs inc urred when ship ping from and to any co untry other than
the countr y of origin.
The war ranty does no t cover any incident al, accidental or co nsequential dama ges arising fr om the use
of or the inab ility to use this pr oduct. Any cos ts associated w ith the fitting o r removal of this pr oduct
by a trade sman or other pers on or any other cost s associated wi th its use are the re sponsibilit y of the
end user. This w arranty app lies to the origina l purchaser of the pr oduct only and is no t transferab le to
any third p arty. Unautho rized end user or thi rd party mo difications to any c omponent or evid ence of
misuse or a buse of the device w ill render all war ranties void .
By law s ome countries do no t allow limitatio ns on certain excl usions in this war ranty. Where
applic able by local law s, regulation s and legal right s will take precede nce.
For Australia: Our goods co me with guarante es which cannot be e xcluded under Aus tralian
Consume r Law. You are entitled to a r eplacement or ref und for a major failu re and for compens ation
for any other r easonably fore seeable loss o r damage. You are also en titled to have the goo ds repaired
or repla ced if the goods fai l to be of acceptable qua lity and the fail ure does not amount to m ajor
failure.
FCC Verification
NOTE: This equipment has been tested and found to comply with the limits for Class B digital device,
pursuan t to part 15 of the FC C Rules. The se limits ar e designed to p rovide rea sonable pr otection aga inst
harmful i nterferenc e in a residential i nstallati on. This equipm ent generates , uses and can r adiate radio
frequen cy energy an d, if not install ed and used in accor dance with the in struction s, may cause har mful
interfe rence to radio or te levision rece ption, which ca n be determined by t urning the equip ment off and
on, the use r is encouraged to tr y to correct t he interference b y one or more of the foll owing measure s:
• Reorient o r relocate the rec eiving antenna
• Increas e the separation b etween the equi pment and the recei ver
• Connec t the equipment into an o utlet on a circuit dif ferent from that t o which the receiv er is
connected
• Consult t he dealer or an exper ienced radio/ TV techni cian for help
These de vices comp ly with par t 15 of the FCC R ules. Ope ration i s subject t o the follo wing two c ondition s:
• These de vices may not cau se harmful inter ference, and
• These de vices must accep t any interferenc e received, incl uding interfer ence that may cause
undesired operation.
Important Note:
All jurisdictions have specific laws and regulations relating to the use of c ameras. Before using any
camer a for any purpo se, it is the buy er’s responsi bility to be a ware of all app licable la ws and regul ations
that prohi bit or limit the use of c ameras and to comp ly with the applic able laws and re gulations.
WARNING
Modifications not approved by the party responsible for compliance could void user’s authorit y to
operate the equipment.
IMPORTANT SAFET Y INSTRUCTIONS
• Make sure pr oduct is fixed cor rectly and st able if fastened in p lace.
• Do not oper ate if wires and ter minals are exp osed.
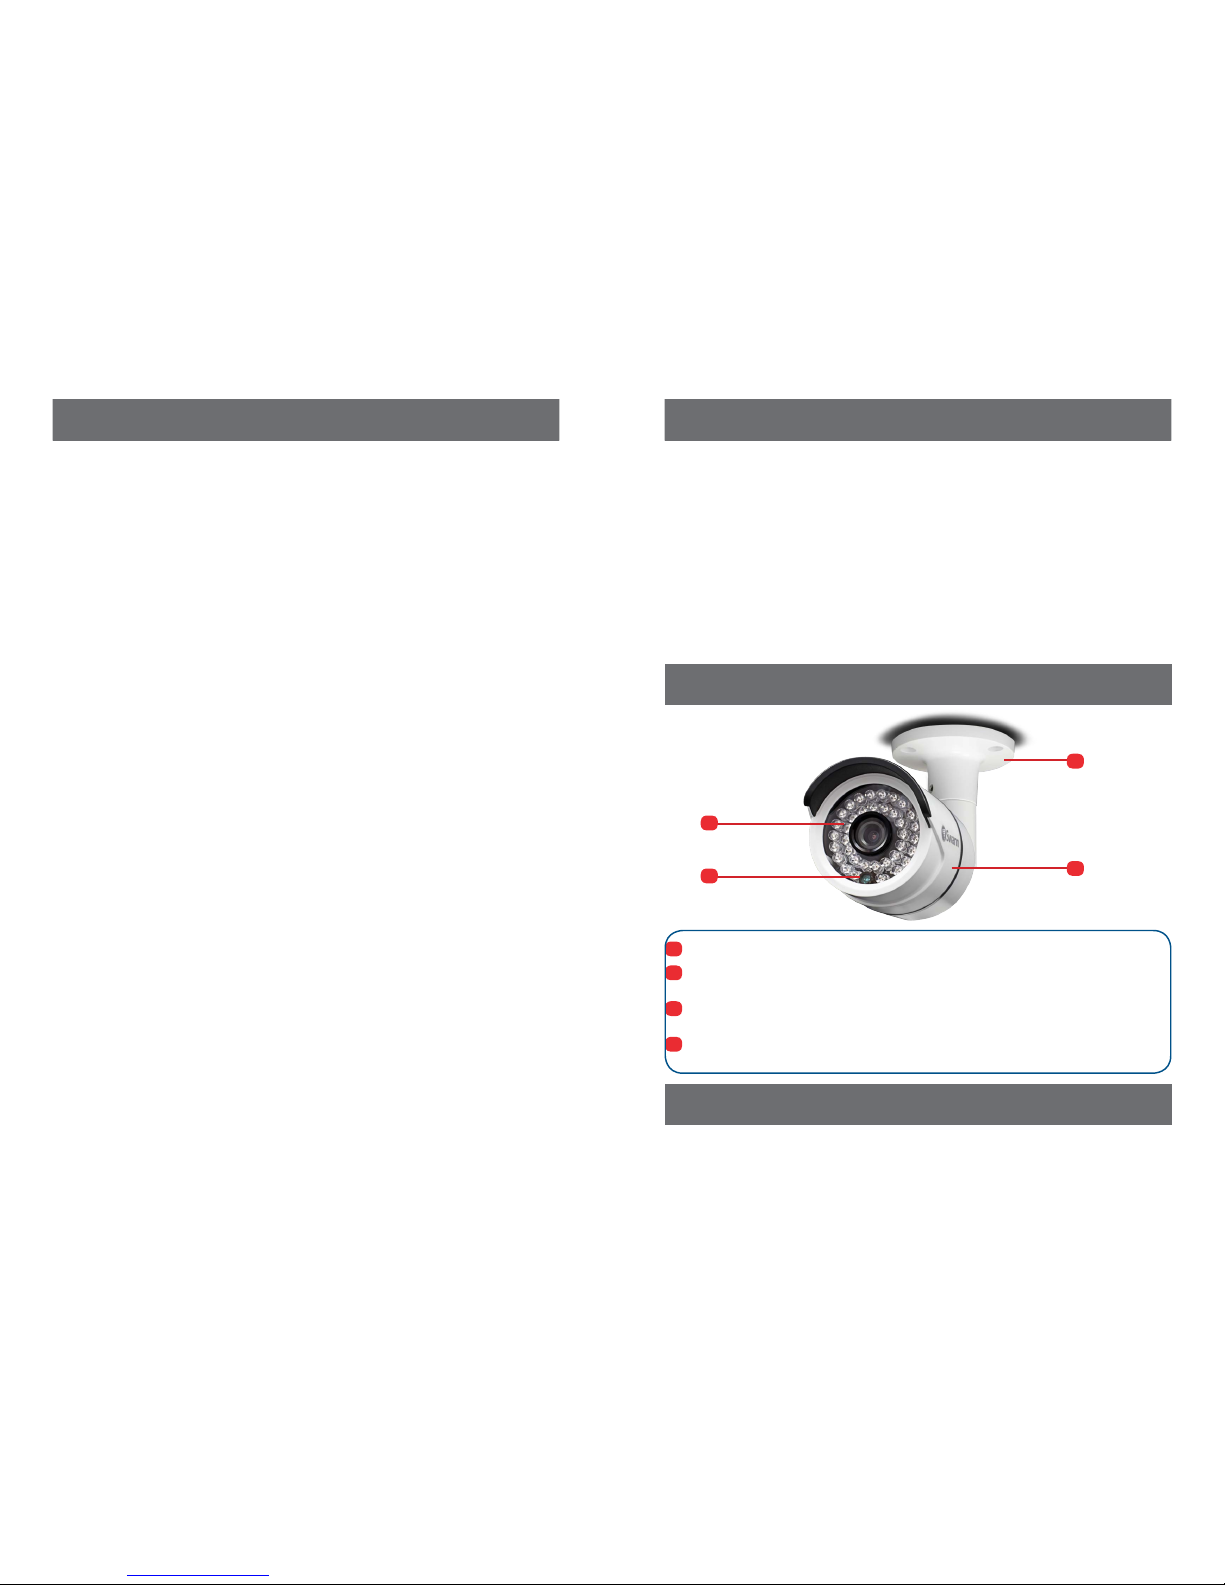
Layout of the Camera
1
Mounting Bracket - Allows the camera to installed either on a wall or ceiling.
2
Camera Housing - Contains the camera, associated circuitr y and electronic
components.
3
IR LEDs - These infrared LEDs are used by the camera to illuminate targeted areas
when in complete or near-total darkness.
4
Illumination Sensor - Detects the amount of incoming light and turns on the IR LEDs
for night vision when necessary.
1
2
3
4
Quick Reference
Default Camera Account Configuration
Username: admin
Password: 123 4 5
Page 3

4
5
Connection Guide Installation
Connecting the Camera Choosing a Location
The camer a is very flexible, and can be installed practically anywhere. Some of the things
you’ll have to consider when choosing a loc ation are:
• What you want to monitor, and where you’ll get the be st view of it.
• How you’re going to connect the camera to your monitoring system. Remember that
cables and connections should be kept out of the weather.
• How to keep the camera out of harm’s way.
Tips & Tricks
• Try to place the camera in a position that a potential security threat will find it difficult
to avoid detec tion. A strategy which is often ef fective is to monitor entr ances and exits after all, a securit y threat has to get in somewhere.
• Ensure the camera is located close enough to what you want to monitor to capture the
required details. For example, if you wish to capture the details of a face, the camera
may need to be located within fifteen feet (about 5m) of the subject. This is also true if
trying to read printed information - such as a vehicle’s registration plate.
• Install the camera where it’s out of reach or not easily accessible by vandals. For
example, under the eaves of a roof or high up in protected corners of a wall. The higher
the camera is mounted, the harder it’ll be for vandal s to interfere with it.
• Typically, the best view is obtained approximately 7ft (2m) to 10ft (3m) high, looking
slightly downwards.
• While the camera is s ealed, robust and ab le to handle the weather, long-ter m exposure
to direct sunlight (particularly UV) and moisture will eventually cause a degradation in
perfor mance, so if it’s going to be installed outdoors, make sure it’s in a sheltered spot.
• The camera’s night vision will give well-exposed images if the area is dark. However, if
there’s a bright light s ource in the camera’s vie w (a streetlight, car he adlights or similar )
then it might not engage night vision mode.
Mounting Instructions
The camer a can be mounted onto a flat sur face using screws. The surface must have
sufficient strength to hold the camera. Materials such as hardwood, brick or masonry are
good options, and we’ve included all the gear you’ll need to mount it there (except the tools
- sorr y, you’ll still need your own drill). You can mount the camera onto a metal surf ace, but
you’ll need to supply your own mounting hardware.
To mount the camera:
• Position the camera in the location you want to mount it, and mark the screw holes
on the surface to position the screws. Then, using appropriate screws for the surface
you’re fixing the camera to, screw the camera into place.
• If you’re mounting to a wooden sur face, then screw the camera direc tly to the surface.
• If you’re mounting to a masonry surface (bricks, concrete or similar) then you’ll need to
use the included wall plugs.
IMP ORTAN T!
When connecting network cables:
• When plugging or unplugging the network cable, hold the plug portion of the cable.
When unplugging, do not pull on the network cable but unplug while pressing down on
the lock.
• Never place strain of any kind on the network cable connection. It’s designed to clip into
place to prevent slippage, but it won’t support any weight and can be easily broken by a
sharp tug. Exercise caution.
• Ensure that cables are sheltered from moisture, weather and sunlight. The network
cable connection was designed and intended for indoor use with computer networking
- while it’s ideal for handling the massive data loads that network cameras require, it’s
not weatherproof.
• If you install the camera outside of your home, we highly recommend using waterproof
tape to wrap the cable connection area between the camera’s Network (LAN) port and
the extension cable’s Ethernet plug. Use as much as is necessar y for the layer of tape
to protect the connection. This will help prevent water or moistuire from leaking into
the cable which can cause the network cable connection to degrade over time or stop
working.
1. Connect the camera’s Network (LAN)
port to the extension cable’s Ethernet
plug. Then connect the other end of
the Ethernet extension cable to any
available POE Network Camera port
on the back of your POE NVR.
POE: This camera uses Power Over
Ethernet. This technology allows the
camera to be directly powered over
the LAN cable fr om the NVR itself.
Note: If for some reason you cannot
use POE you will need to use a 12volt
2amp DC (Center Pin Positive) PSU
(not supplied) connected to the
camera’s DC Power Socket.
Reset button
DC Power Socket (Optional)
Page 4

6
7
Installation
Camera Configuration
Troubleshooting
Camera Configuration
Adjusting the Camera Angle
Use the supplied L-wrench to loosen the hex screws on the
stand:
• To tilt up and down, loosen the screw indicated by
1
.
• To rotate left and right, loosen the two screws indicated by
2
.
• To adjust orientation, loosen screws indicated by
3
(hidden behind the lens hood). This enables you to spin the
camera so no matter what direction the camera is facing,
your images will be oriented correctly.
Remember to tighten the screws back securely to lock the
camera’s position in place af ter you’ve finished adjusting the
viewing angle of the camera.
Viewing the Camera on your Swann NVR
• After you’ve connecte d the camera to your S wann NVR, the c amera will be au tomatically
detected and assigned an IP address when you turn on your NVR. If the camera is not
detected, check that you have the Ethernet cable inserted cor rectly.
• Provided if all net work connections have been correctly set up, the camera should
automatically appear on-screen shortly after being plugged in. Camer as are assigned
to the first available channel by your NVR in this case, irregardless of which Net work
Camera port that it was connected to. You can still, however, display the camera on a
different channel via the NVR Menu -> IP Camera -> Edit menu. Please consult your
NVR’s user manual for an expl anation on how to assign cameras to av ailable channels.
• If you want to remove the camera from your NVR display, you can either physically
disconnect the camer a from your N VR or go to the NVR Menu -> IP Camera -> Edit
menu to manually remove it from your NVR display. Please consult your NVR’s user
manual for an explanation on how to remove cameras from channel s.
3
1
2
Q: The NVR is not detecting the camera.
A: Ensure that the connection between the camera and NVR is direct - i.e. no hubs,
switches, adapters or other devices. Ensure you’re using only the supplied cable. Ensure
that all cables are properly connec ted and secure. If this doesn’t work, tr y using a different
channel on the N VR - reboot the system between connections to ensure a proper IP
address refresh. If this doesn’t work, then tr y a different networ k cable - there may be a
breakage.
Q: I can’t see anything at night!
A: There are a few possible solutions to this problem. Here are some of the most common.
• If the image is mostly black, then this may indicate that the night vision isn’t turning on.
A bright light source somewhere in the picture can fool the light sensor into thinking
it’s still daytime - try re-aiming the camera.
• If the image is mostly white, then this indic ates that the IR light from the night vision is
bouncing back into the lens.
• At night, the infrared light the camer a uses to see in the dark can ‘bounce back’ off a
reflective surface (such as gl ass, water, spider webs, some ceramics and so on) and
effectively blind the camera. If you want to see outside, then the camer a itself needs to
be outside!
Adjusting the Camera Settings
• On the NVR Menu screen, click Display, select camera and then click Camera
Parameter Set button to displ ay the Camera Parameter Setting window. On this
window, you c an customize how the camer a captures images according to the
environment where it is installed. The settings which are available for you to configure
are as follows: Anti-flicker, Exposure Mode, Contextual, Day/Night, Backlight, Mirroring
and Rotation.
• Please consult the user manual included with your NVR to learn more about what
setting does.
Viewing the Camera on SwannView Link PC Software
• If your PC connects to the same loc al network as the camera and has SwannView L ink
software inst alled, you can access the camera v ia its IP address using SwannView
Link. If you don’t know what the c amera’s IP address is, go to your NVR’s IP Camera
menu to find out.
• To log on to the camera v ia SwannView Link: In Connect Mode, select IP Address,
enter the IP addre ss in the IP Address box and then enter the camera’s username and
password. The def ault user name and password are admin and 12 345.
• When you’re finished, click Login. The camera’s live video feed will appear on the
SwannView Link interface. SwannView Link provides a quick and easy way for you to
configure many aspect s of the camera as well as create and manage user accounts for
access to the camera.
Resetting the Camera
• If you’ve changed the Admin account’s pas sword on your camer a and forgotten it, you
can always use the Reset button to default the camer a’s Admin pas sword back to its
factory default.
• To reset the camer a: Unplug the camera’s LA N connector from the ex tension cable,
then press and hold the Reset button and plug the L AN connector back into the
extension cable (while still holding down the Reset button), wait a couple of seconds
then release the button and the camer as settings will be reset to factory default.
Page 5

8
Helpdesk / Technical Support Details
Swann Technical Support
All Countries E-mail: tech@swann.com
Telephone Helpdesk
USA Toll Free 1-800-627-2799
USA Exchange & Repairs 1-800-627-2799 (Option 1)
(M-F, 9am-5pm US PT)
AUSTRALIA 1300 138 324
NEW ZEALAND Toll Free 0800 479 266
UK 0203 027 0979
© Swann Communications 2013
MPOECAM171213E
 Loading...