

Swann HD Pro-Series, dvr8-4600, 4600 series Instruction Manual
1
PRO-SERIES HD
Digital Video Recorder
INSTRUCTION MANUAL

2
Important Information
FCC Verification
This equipment has been tested and found to comply with the limits for
Class B digital device, pursuant to part 15 of the FCC Rules. These limits
are designed to provide reasonable protection against harmful interference in a residential installation. This equipment generates, uses and
can radiate radio frequency energy and, if not installed and used in accordance with the instructions, may cause harmful interference to radio
or television reception, which can be determined by turning the equipment off and on, the user is encouraged to try to correct the interference
by one or more of the following measures:
• Reorient or relocate the receiving antenna
• Increase the separation between the equipment and the receiver
• Connect the equipment into an outlet on a circuit different from that
to which the receiver is connected
• Consult the dealer or an experienced radio/TV technician for help
These devices comply with part 15 of the FCC Rules. Operation is subject to the following two conditions:
• These devices may not cause harmful interference
• These devices must accept any interference received, including interference that may cause undesired operation
Important Notice - All jurisdictions have specific laws and regulations
relating to the use of cameras. Before using any camera for any purpose, it is the buyer’s responsibility to be aware of all applicable laws
and regulations that prohibit or limit the use of cameras and to comply
with the applicable laws and regulations.
FCC Regulation (for USA): Prohibition against eavesdropping
Except for the operations of law enforcement officers conducted under
lawful authority, no person shall use, either directly or indirectly, a device operated pursuant to the provisions of this Part for the purpose
of overhearing or recording the private conversations of others unless
such use is authorized by all of the parties engaging in the conversation.
Warning - Changes or modifications made to this device not approved
expressly by the party responsible for compliance could void the user’s
authority to operate the equipment.
Important Safety Instructions
• Only use the supplied power adapter
• Do not operate if wires and terminals are exposed
• Do not cover vents on the side of the device and allow for adequate
ventilation
Default Password Information
To ensure your privacy, this device supports password protection.
The default all-access username is admin, the default password is
12345.
To ensure your ongoing privacy, we strongly recommend setting a new
password as soon as possible. Choose something that you’ll remember,
but that others would be unlikely to guess.
Important Notice - Do not lose or forget your password. To ensure that
your DVR has the best security possible, password recovery has been
designed to be a complicated and time consuming process. Only a select
number of staff at Swann Helpdesk/Technical Support can assist. Password retrieval can take several days, which means you will not be able
to access your DVR during this time.

3
Contents
Important Information 2
Contents 3
Live View 5
Chapter 1: Menu 6
Menu Layout 7
Chapter 2: Camera Configuration 8
Display: Camera 9
Creating a Privacy Mask 10
Recording: Encode 11
Alarm: Motion 12
Motion Detection 13
Motion Detection Schedule 14
Motion Detection Tips 15
Alarm: Video Loss 16
Video Loss Schedule 17
Device: PTZ 18
Controlling a PTZ Camera 19
Creating a Preset 20
Creating a Patrol 21
Chapter 3: Recording Configuration 22
Recording: Encode 23
Recording: Option 24
Recording: Schedule 25
Chapter 4: Playback & Backup 26
Search: Playback 27
The Playback Interface 28
Search: Event 30
Search: Backup 31
Chapter 5: System Configuration 32
System: General 33
System: User 34
System Maintenance 35
Alarm: Exception 36
Device: HDD 37
Display: Output 38
Network: General 39
Network: Advanced 40
Chapter 6: System Status 41
Search: Log Search 42
Network: Status 43
Device: S.M.A.R.T 44
System: System Information 45

4
Contents (cont.)
Warranty Information 46
Helpdesk & Technical Support 47
5
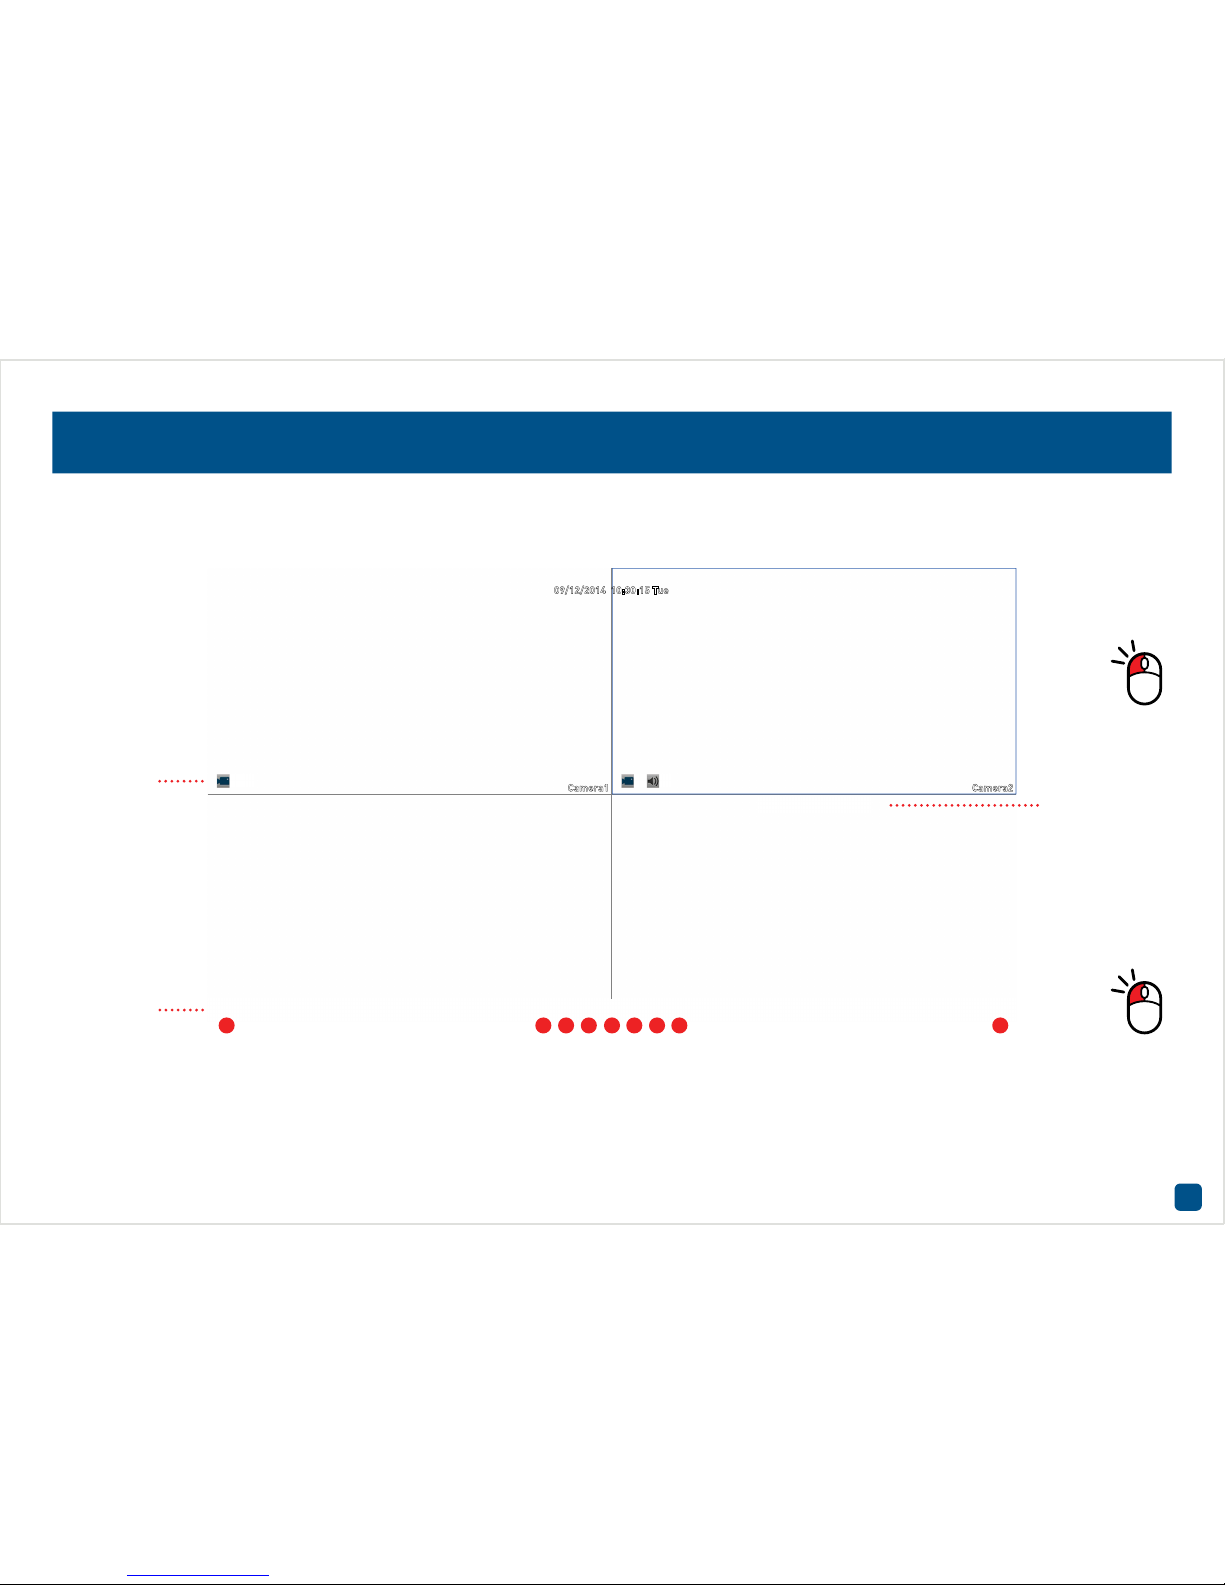
Live View
Live View is the default display mode for the DVR. Each camera connected will be displayed on-screen. You can check the status or operation of your
DVR and cameras using the icons and Menu Bar on the Live View screen. Right-click the mouse to access the Menu Bar.
1. Opens the Menu.
2. Click to view a single camera.
3. Click to view four cameras.
4. Click to view eight cameras.
5. Click to view nine cameras.
6. Click to view the next screen in
single or four camera view.
7. Click to enable PIP mode.
8. Click to manually record the
selected camera.
9. Click to access the Setup Wiz-
ard.
Double-click a
live video channel to view full
screen.
Menu Bar
1 2
3 4
5 6
7 8
9
Camera1 Camera2
09/12/2014 10:30:15 Tue
Status Icons
Camera Toolbar
Click & drag a
live video channel to reposition
it.

6
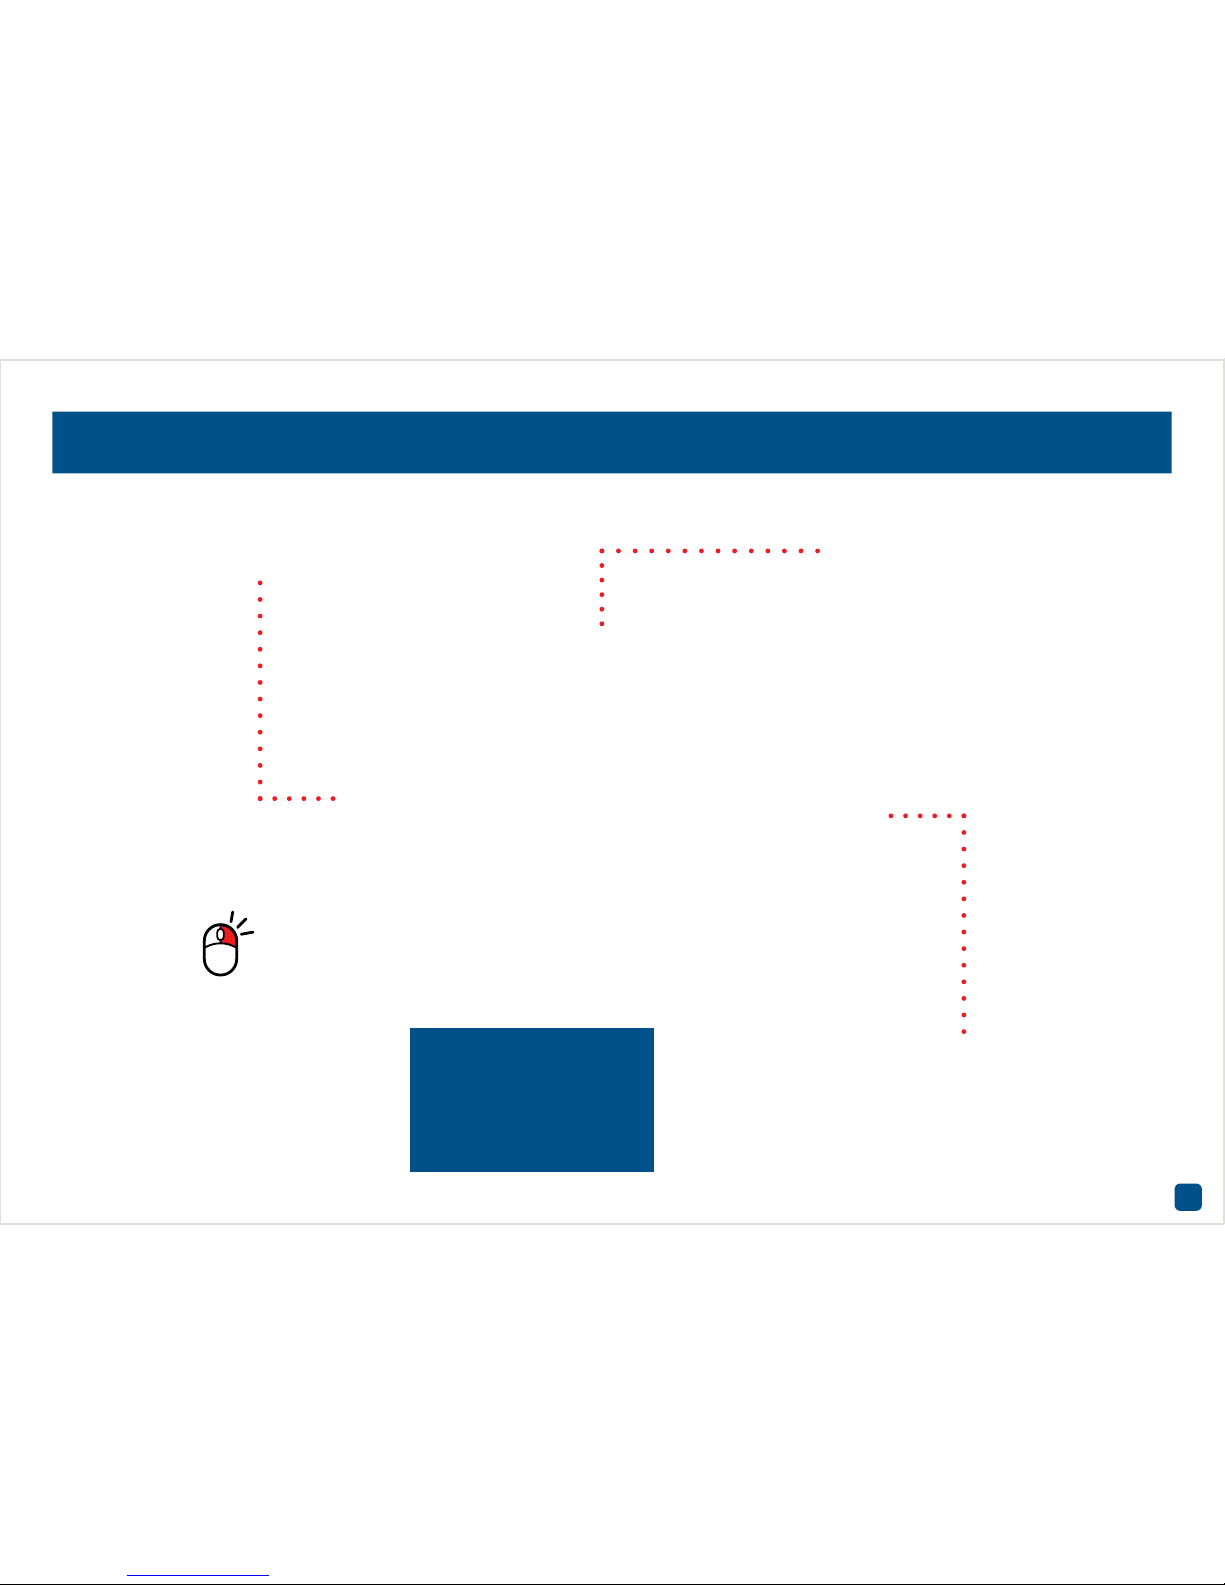
Menu
The Menu is where you control
the various actions and options
that are available on the DVR.
You can also access previously recorded video for playback
and to export to a USB storage
device such as a flash drive.
To maintain system integrity, a
firmware upgrade can be performed when available and access to the shutdown menu to
restart or safely turn off the
DVR.
6
7
Menu Layout
The various actions and options
that are available, are categorised
on the left-hand side of the Menu.
Clicking each category will reveal a
number of tabs or sub-categories
that can be changed from their default value.
Some options may have additional
menus that can be accessed.
To exit or access the
previous menu, rightclick the mouse.
To shutdown, reboot or lock
the DVR, click the “Shut Down”
button. To ensure the integrity
of your data and recordings,
always select “Shutdown”
when powering off the DVR.

8
Camera Configuration
The majority of the camera configuration options available are
in the “Display”, “Recording”,
“Alarm” and “Device” menus
that are accessible from the
Menu. You can change the resolution and bitrate settings as
well as the image settings for
brightness and contrast. The
DVR has several controls for
motion detection and video loss
and the ability to create one or
more privacy masks.
8

9
Display: Camera
Camera No.: Select a camera that you would like to configure.
Camera Name: Select a name for the camera you’ve selected. It can be
up to 16 characters in length.
Display Camera Name: Leave this enabled if you would like to display
the camera name on the Live View screen, otherwise click to disable.
Record Date: It’s recommended to leave this enabled as it creates an
inseparable record of exactly when the footage was captured.
OSD Display Position: Click the “Set” button to change the position of
the camera name on the Live View screen. Use the mouse to reposition
the camera name. Right-click the mouse then click “Save” to exit.
Image Settings: This gives you access to the image adjustment tools.
Click the “Set” button to change then click “OK” when finished.
Brightness: This changes how light the image appears to be.
Contrast: This increases the difference between the blackest black and
the whitest white in the image.
Saturation: This alters how much colour is displayed in the image. The
higher the saturation, the more bright and vivid colours will appear.
Hue: This changes the colour mix of the image.
Mask: Click the checkbox to enable then click “Area Settings” to create
one or more privacy masks - see page 10 for more information.
• Click the “Default” button to revert back to default settings.
• Use the “Copy to” button to apply all settings to the other cameras.
• Don’t forget to click “Apply” to save settings.
• Right-click the mouse to exit the Menu.
The configuration options available allow
you to name each camera relevant to where it
has been installed as
well as the ability to
adjust image settings
such as brightness
and contrast.
10
Creating a Privacy Mask
1. Using the mouse, click & drag to select the area that you want to
create a privacy mask for (as shown above). Up to four masks can be
created.
2. To delete a mask, move the arrow within the mask, right-click the
mouse to access the sub-menu (as shown above) then click “Delete
Area”. Click “Delete All” to delete all masks. Click “Save” to save your
mask or click “Cancel” to exit.
• Click the “Default” button to revert back to default settings.
• Use the “Copy to” button to apply all settings to the other cameras.
• Don’t forget to click “Apply” to save settings.
• Right-click the mouse to exit the Menu.
A privacy mask can be
used if you want to obscure part of your image for privacy. You can
also use this option to
minimize false triggers for motion detection. You can define up
to four areas per camera to mask. Any area
obscured by a mask
won’t be shown live or
recorded.

11
Recording: Encode
Camera No.: Select a camera that you would like to configure.
Encoding Parameters: Select which parameter that you would like to
configure, main stream or sub stream. By default, the SwannView Link
app and Windows software utilises the sub stream parameter to display
an image from the DVR to your mobile device or computer.
Record Audio: See page 19 for more information.
Resolution: The resolution is 720P for main stream. If your DVR came
with the PRO-735 camera, change this to 960H. For sub stream the resolution is Q720p (Q960H for PRO-735) and cannot be changed.
Please note, the video inputs are matched in pairs (input 1 & 2, input 3
& 4, etc.), for example, if you have a 720p camera connected to input 1,
you must also have a 720p camera connected to input 2. This DVR does
not support different resolution cameras connected to a matched pair.
Frame Rate(fps): The default frame rate is 25fps for main stream and
4fps for sub stream. Change the sub stream frame rate if you’re having
issues streaming to your mobile device or computer.
Max. BitRate(Kbps): The default bitrate is 3072Kbps for main stream
and 128Kbps for sub stream. Change the sub stream bitrate if you’re
having issues streaming to your mobile device or computer. By lowering
the quality, you reduce the amount of data that is required.
• Click the “Default” button to revert back to default settings.
• Use the “Copy to” button to apply all settings to the other cameras.
• Don’t forget to click “Apply” to save settings.
• Right-click the mouse to exit the Menu.
The encode function
allows you to change
the resolution and bitrate for each camera
connected. By default
the main stream resolution is “720P (1280
x 720)” at 25fps which
fits in with the capabilities of the provided cameras. The sub
stream resolution is
“Q720p (320 x 180)”.

12
Alarm: Motion
Channel: Select a camera that you would like to configure.
Enable: Motion detection is enabled by default.
Motion Detection: Click the “Set” button to change the default motion
detection area - see page 13 for more information.
Schedule: Click the “Set” button to change the default motion detection
alarm schedule - see page 14 for more information.
Action: Click the “Set” button to enable an audio warning, to send an
email and to trigger other cameras when motion is detected.
• Click the “Default” button to revert back to default settings.
• Use the “Copy to” button to apply all settings to the other cameras.
• Don’t forget to click “Apply” to save settings.
• Right-click the mouse to exit the Menu.
Whether you’re waiting
for an expected event,
hoping you don’t spot
an unwelcome visitor,
or just curious about
what happens when
you’re not around, motion detection can be
configured to alert you
and record video only
when it detects motion. Motion detection
is enabled by default.
13
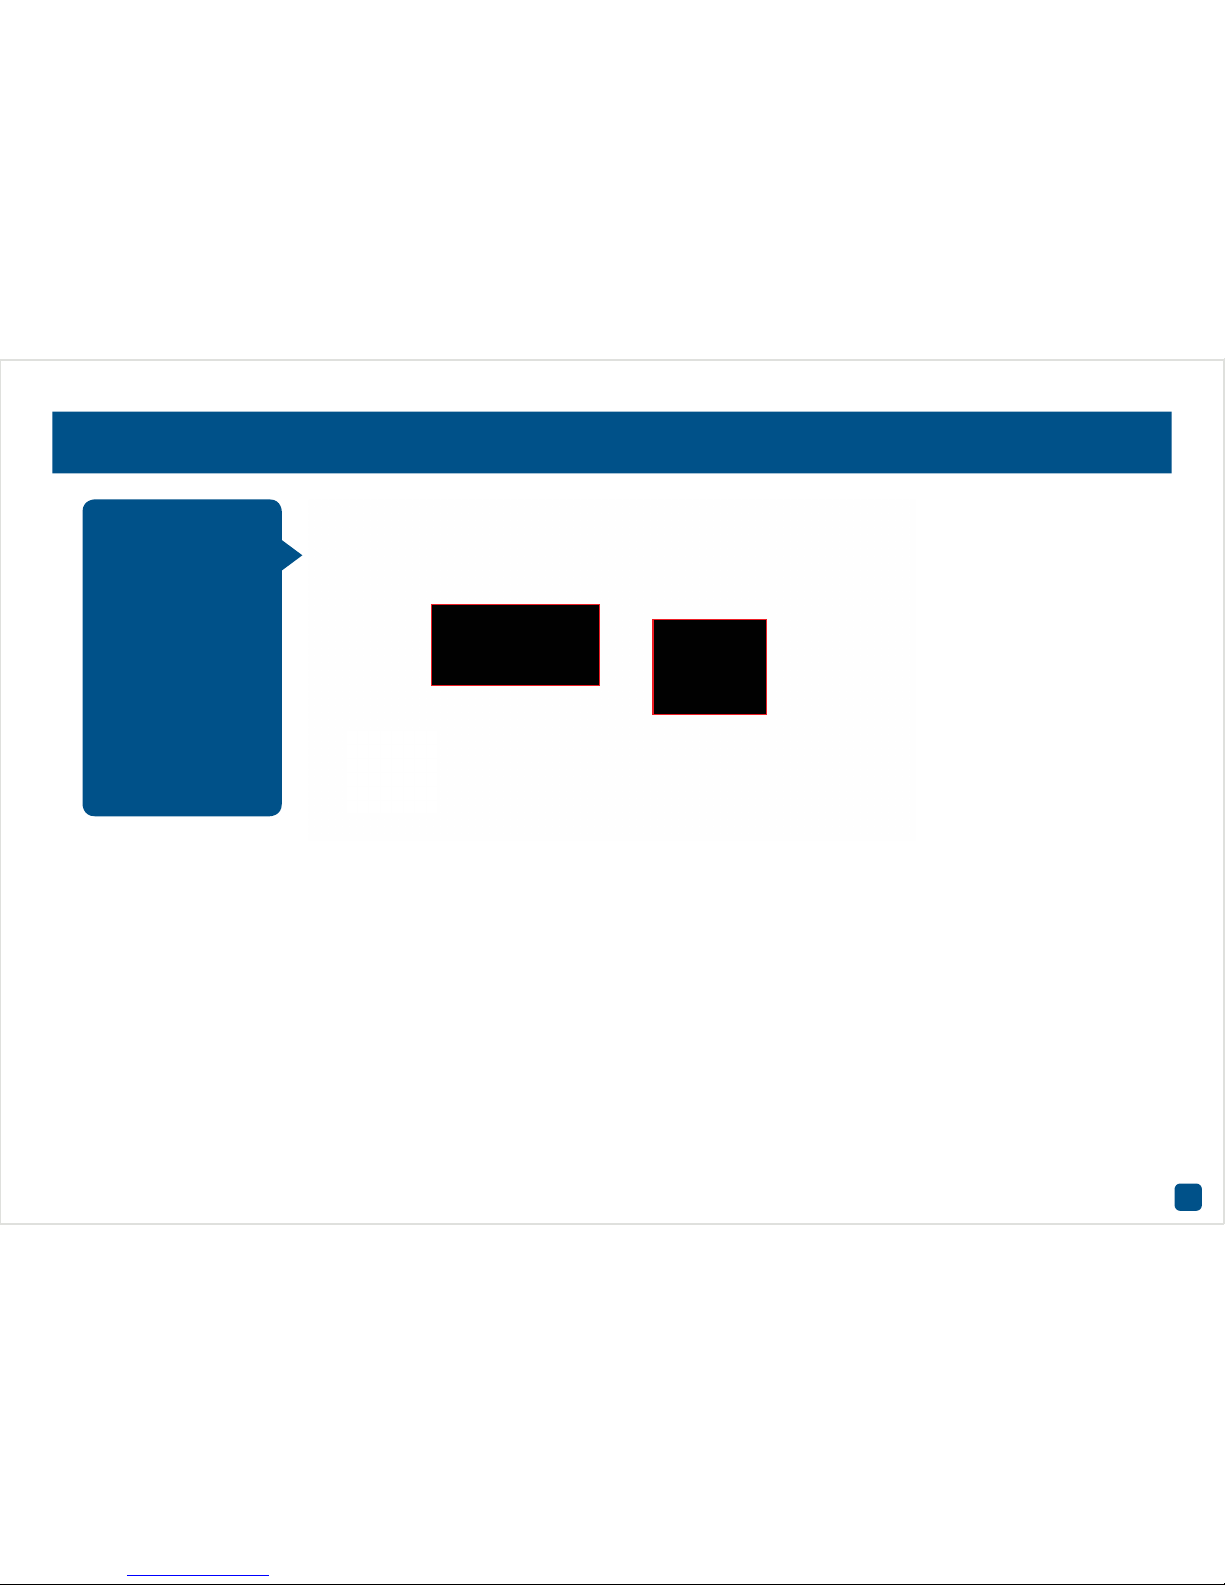
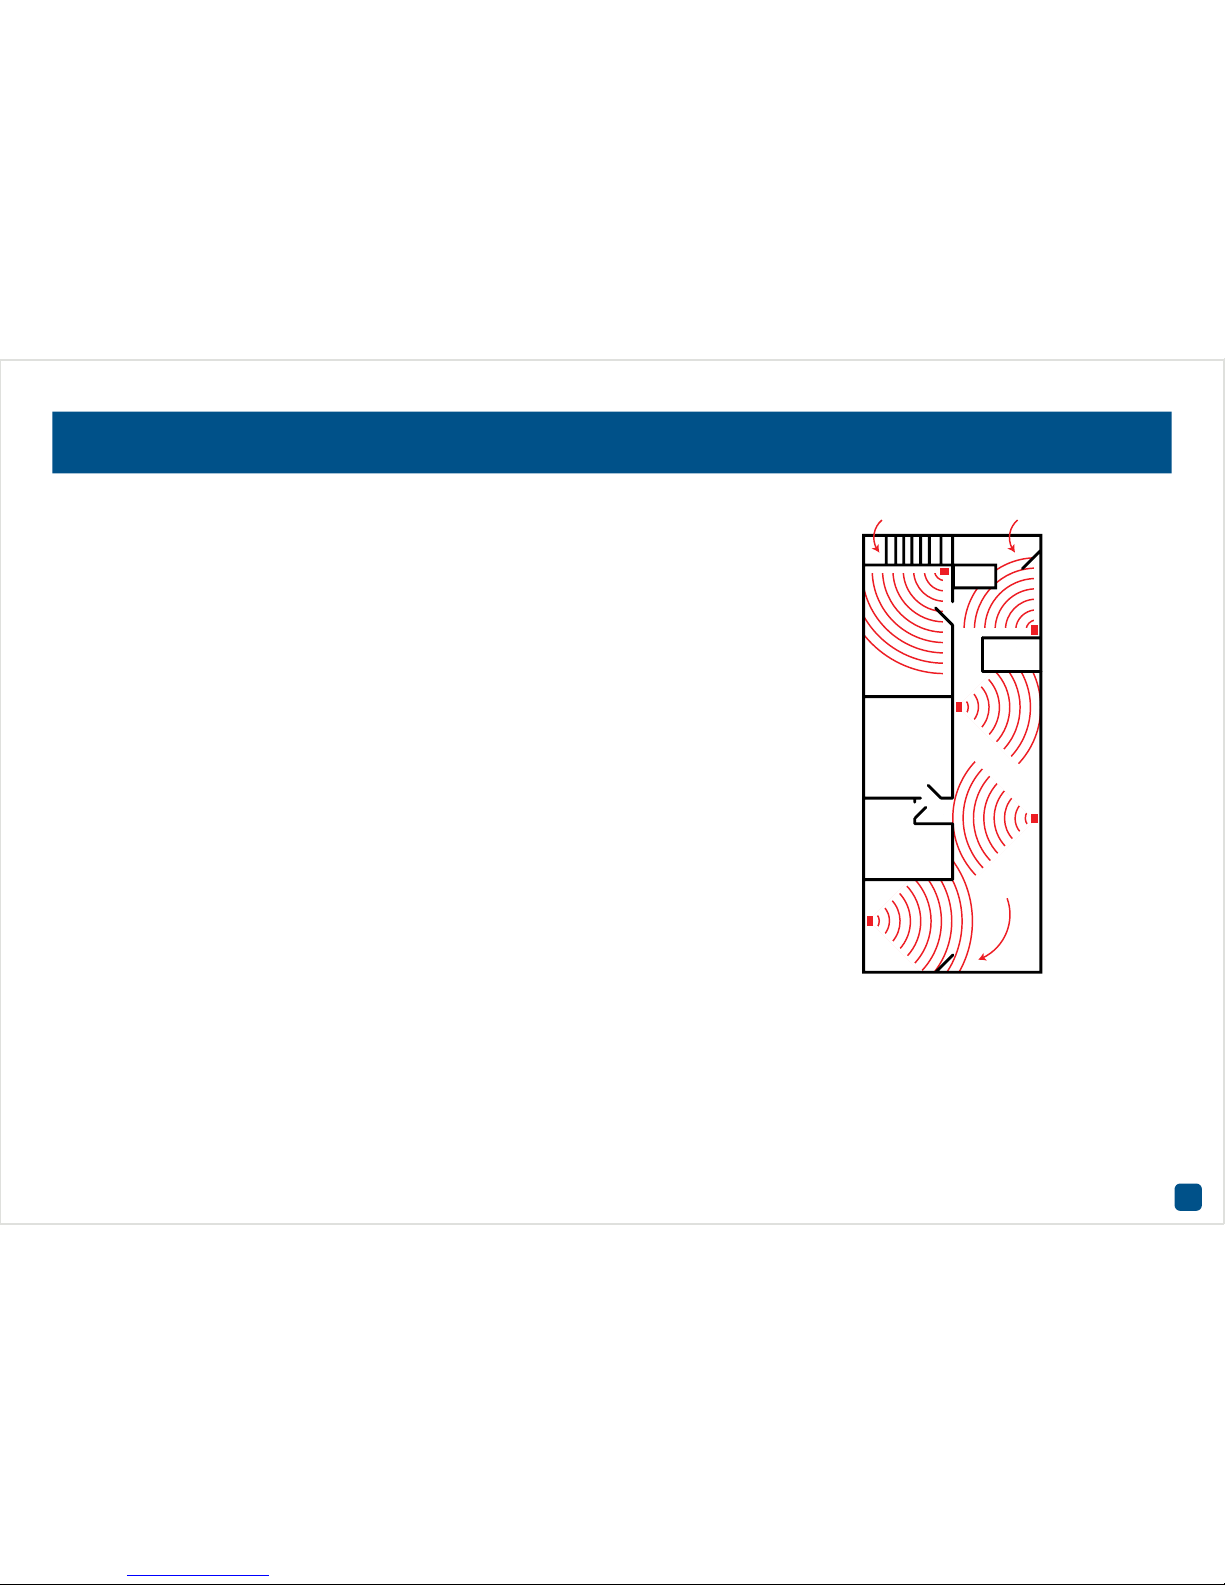
Motion Detection
Motion detection is an essential part of your security system. It’s the
main method that detects when someone is in your home when they
shouldn’t be. When motion has been detected by one or more cameras,
a signal is sent to your DVR, alerting you to a potential threat in your
home. It does this in several ways such as activating an audio warning
using its internal buzzer, sending an email and sending an alert to your
smartphone or tablet. You can also configure your DVR so it triggers the
other cameras to start recording.
Motion detection is the default recording mode for the DVR. The entire
view of the camera is enabled to detect motion however you can select
certain areas if you wish. In the above example, a motion detection zone
has been setup for the windows and dining room entrance. Movement
outside of these zones will not be detected.
1. Right-click the mouse to access the sub-menu then click “Delete All”.
2. Click and drag to select the area that you want to create a zone for.
Multiple zones can be created. The same action also applies if you want
to delete a zone that has been created.
3. You can adjust the sensitivity level (see above) if required.
4. Right-click the mouse to access the sub-menu then click “Save” to
save any changes that you have made. To revert back to default settings
click “Add to All” or click “Cancel” to exit.
• Click the “Default” button to revert back to default settings.
• Use the “Copy to” button to apply all settings to the other cameras.
• Don’t forget to click “Apply” to save settings.
• Right-click the mouse to exit the Menu.
Using the “Sensitivity” function, you can
change the motion sensitivity level for each
time period available. The level is controlled
by a slider, allowing you to set a value between 0 and 50. The lower the number, the
more sensitive the motion detection will be.

14
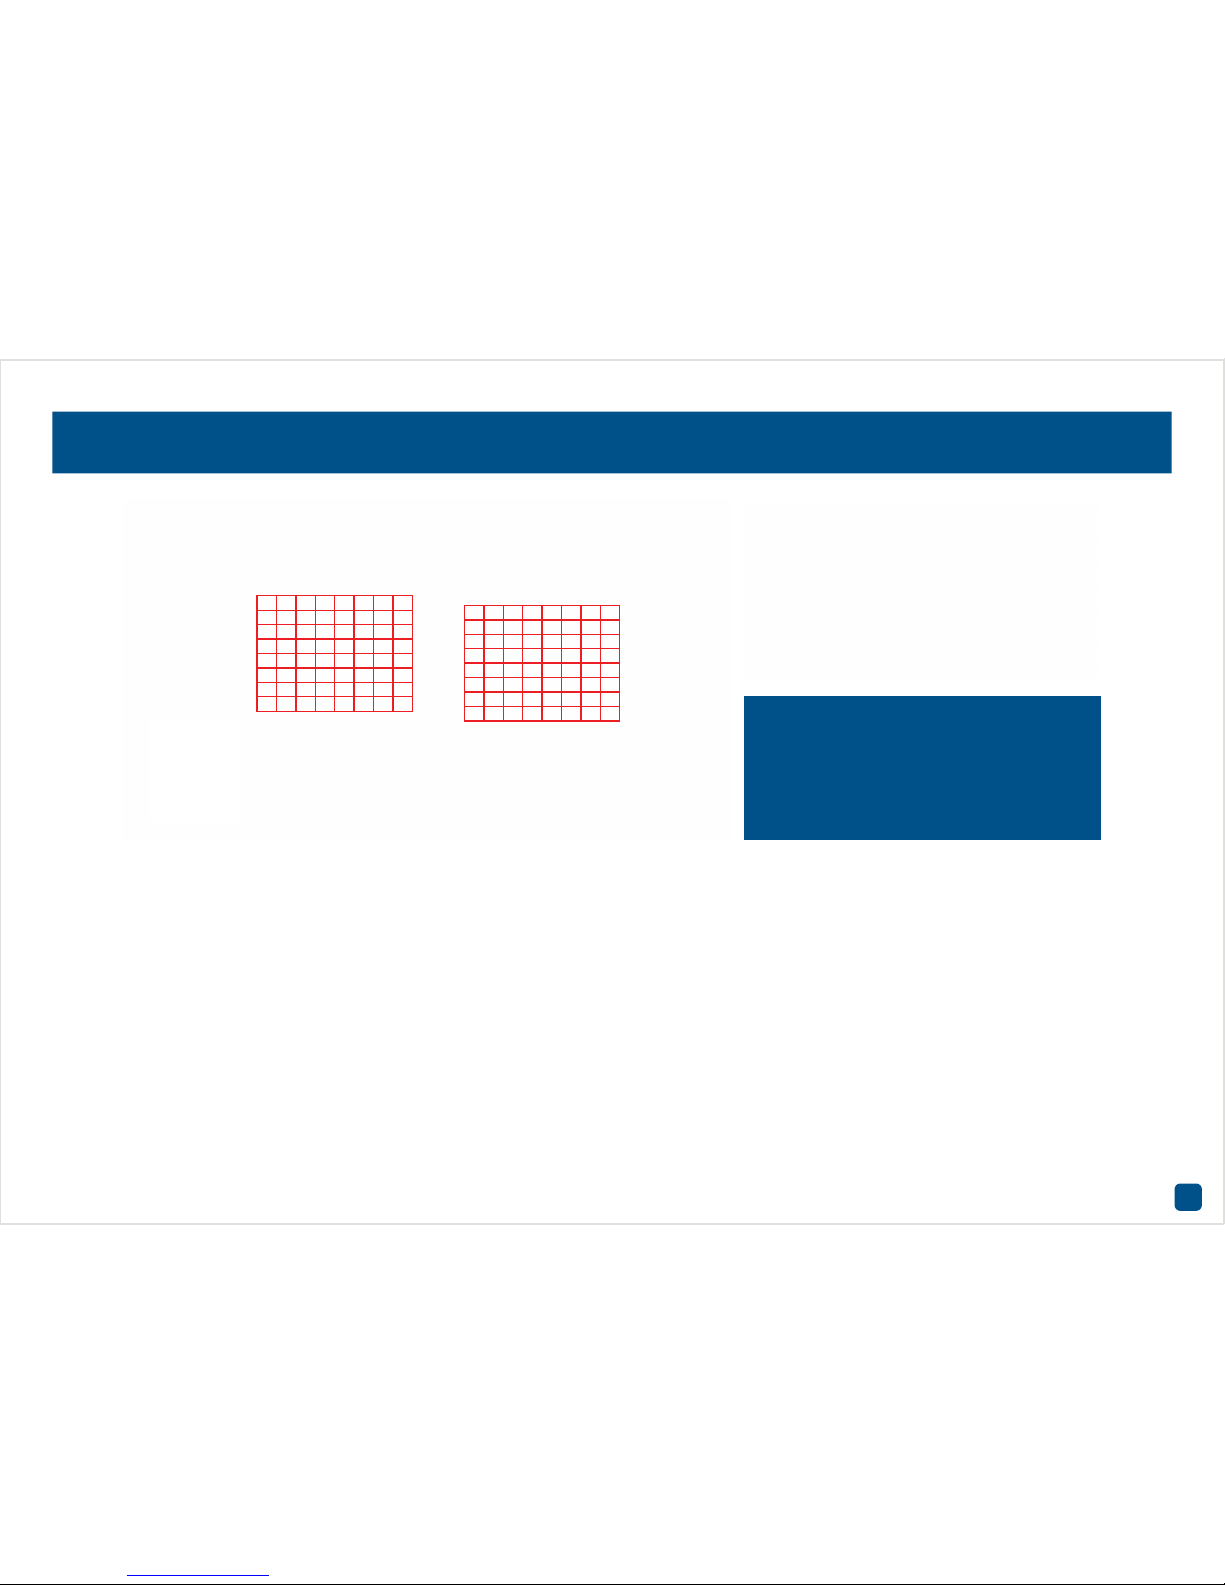
Motion Detection Schedule
In the above example, a schedule has been created for 06:00 a.m. to
06:00 p.m. Sunday to Saturday. Using the mouse, click on a particular
square or section to change.
• Click the “Default” button to revert back to default settings.
• Don’t forget to click “Apply” to save settings.
• Click “Cancel” to exit.
• Right-click the mouse to exit the Menu.
By default, a motion detection alarm schedule
has been enabled for
each connected camera. You can however
change the schedule
according to what fits
in with your needs. The
schedule is presented
as a 24 hour 7 days a
week grid and is colour
coded to represent the
event type.
15
Motion Detection Tips
Placement of the cameras
1. Keep cameras 10 - 15 feet (3 - 4 metres) away from heating vents, where the sunlight shines in, and
radiators. If a camera detects a swift change in motion, even that of a cloud passing quickly over direct
sunlight shining into your living room, motion detection could be activated.
2. Place cameras in areas where people have to walk through, like the stairwell, main hallway or entry
door. That way, an intruder will activate motion detection regardless of where they are headed. Intruders
usually go right for the master bedroom, so put a camera near that room or other rooms where you have
valuables, like the study.
3. Walk through your house and assess where intruders are most likely to enter, and what path they would
take. Most burglars enter the home through a front or back door, so it’s advisable to place the cameras
near those areas.
4. When installing cameras outside, it’s important to keep your front and backyard well-lit for ideal night
vision and motion detection. It’s common for intruders to enter a home through an unlocked garage or by
using a garage door opener in an unlocked car located in the driveway.
Avoiding False Triggers
1. A flag or foliage that is blown by the wind - Angle the camera so wind-blown objects are out of the
camera’s view.
2. Pets moving in front of the camera - Lower the sensitivity level and/or point the camera into areas that
are not particular high-traffic for your pets.
3. Vehicles moving in the background - Angle the camera so as to avoid movement in the background.
4. Moving air from a heater or air conditioner - Angle the camera away from heater and air conditioner
sources.
5. Movement reflected off smooth surfaces such as glass - Lower the sensitivity level and/or avoid pointing
the camera directly at glass surfaces.
Bedroom Backdoor
Hallways
Frontdoor
 Loading...